[ES/EN] Habemus mortadella

Hola #Hivers ya estoy de regreso
Se acuerdan que no hace mucho, por aquí les contaba sobre mis equipos para hacer embutidos?
¡Pues adivinen qué!
Ya los probé, hice mi primera mortadella y traigo toda la intención de contarles mis logros y tribulaciones.
Como siempre les digo, esto no es una receta, es un storytime de como le hice para cocinar algo que me gusta y disfruto hacer.
vamos con la carnita... Literalmente😅.
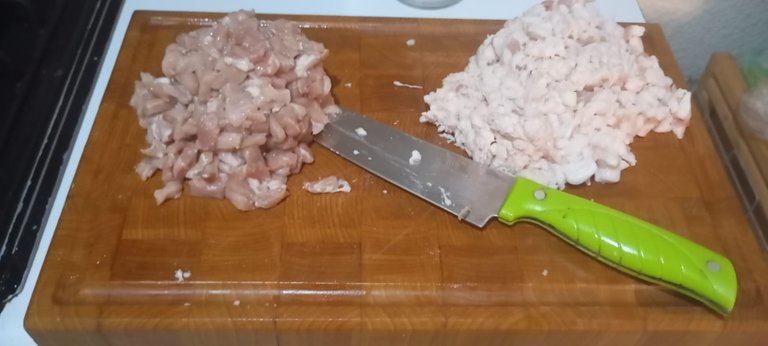
En esta oportunidad vamos a necesitar 480g (poco más de una lb) de carne de cerdo, la receta original recomienda pierna o paleta, pero yo creo que casi cualquier carne de cerdo sirve, pronto verán por qué.
En muchas ocasiones van a encontrar que les recomiendan que se muela previamente la carne en un molino manual (máquina de moler casera). Pero yo he encontrado que si se corta la carte en porciones bien pequeñas también funciona sin problemas.
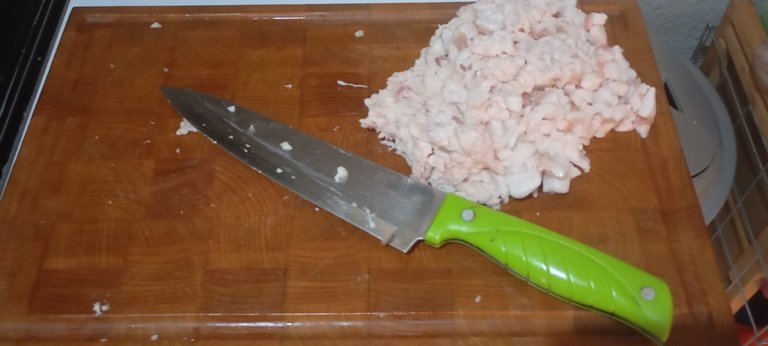
También vamos a utilizar 335g (unas 9 oz aproximadamente) de manteca de cerdo cruda. Esta es un poco más problemática, como pueden ver en la imagen de arriba también la preparo para procesar cortándola en trozos pequeños, pero la manteca, si no se muele, a la hora de procesar no se deshace completamente. Entonces ahí si es cuestión de gustos de cada quién, si prefieres que la masa quede completamente uniforme, recomiendo molerla previamente. Si, (como yo) no te importa encontrarte pequeños pedazos de grasa en el producto final, puedes seguir como yo le hago.
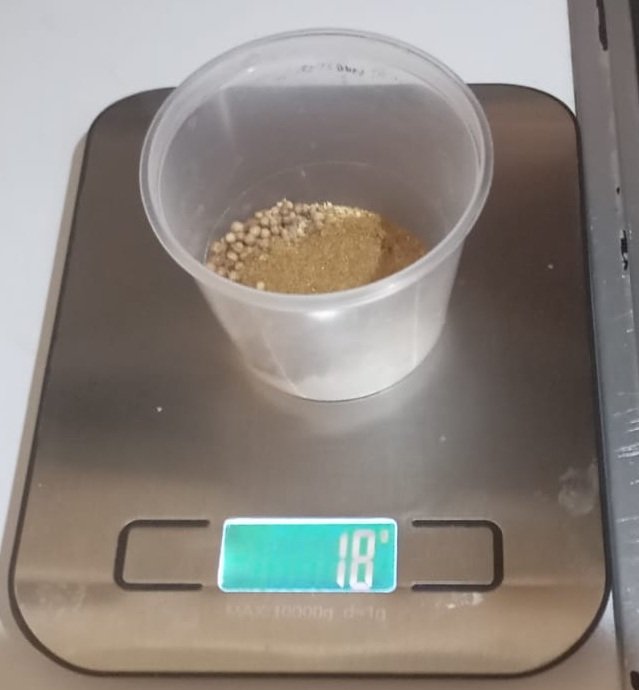
Además vamos a necesitar 2 dientes (grandes) de ajo fresco pelado y una mezcla de 18 g de condimentos secos, en esta mezcla pongo a gusto, laurel, comino, pimienta, semillas de cilantro y si gustas puedes ponerle un poco de nuez moscada. A mi no me gusta esta última así que se la eliminé. Adicionalmente vamos a ponerle 10g (es parte de los 18g) de sal fina. Yo recomiendo batir o moler las especias secas antes de unirlas a la mezcla. Si alguno de estos ingredientes no los tienes o no te gustan, no pasa nada, haz como yo, elimina, sustituye, experimenta y crea tu propio sabor.
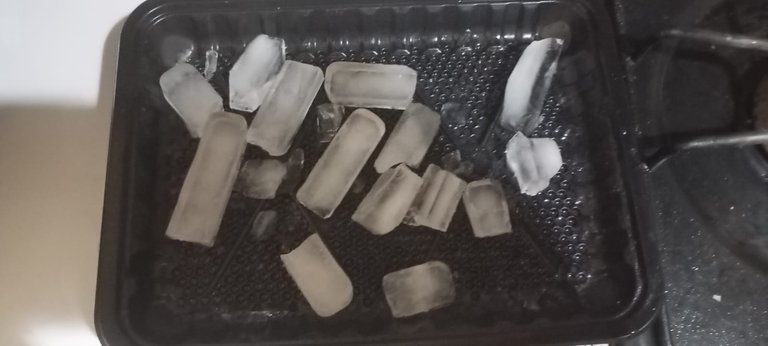
Otro ingrediente muy importante es el hielo, este ayuda a emulsionar la carne y mantener la mezcla fresca. En este caso vamos a utilizar 280 g (7 oz aproximadamente) de hielo. Además vamos a utilizar 70 g de Leche en polvo, 30 ml de vino seco (o vino blanco de cocina) y colorante comestible rojo. Adicionalemnte puedes agregar otros 120 gramos de alimento para dar variedad y textura al embutido. Lo más recomendado para una mortadella es usar grasa de cerdo cruda cortada en cubos pequeños. Pero a mi la verdad no me gusta, así que en sustitución uso carne de cerdo tenderizada, aceitunas, pistachos o nueces. Es cuestión de probar los ingredientes que te llamen la atención, yo por ejemplo tengo pensado usar champiñones la próxima vez. Pero bueno esta vez no le puse nada porque quería probar como funcionaba la embutidora.
Ahora sí, vamos con la preparación.
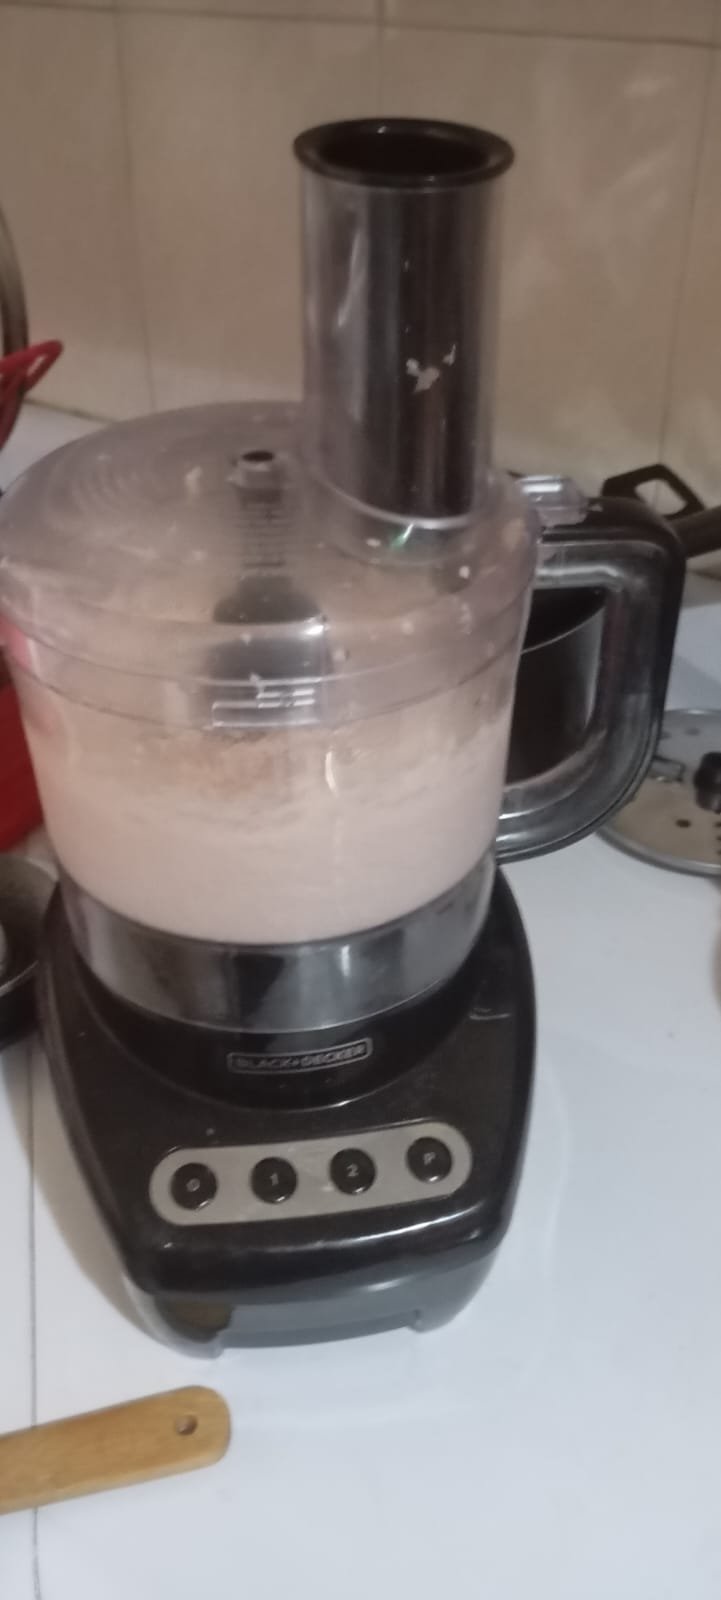
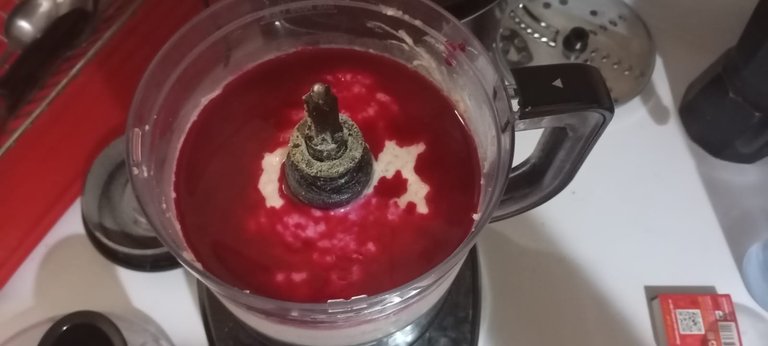
Necesitas una procesadora, algo que tenga bastante potencia y suficiente volumen para procesar toda la masa y que genere una emulsión de carne. Pones en tu procesadora la carne de cerdo ya cortada y los dientes de ajo y comienzas a procesar, poco a poco vaz poniendo cubitos de hielo. Agrega el hielo de a poco (si tus cubos son grades o medianos recomiendo romperlos para que disminuyas el riesgo de dañar la procesadora) y verás como la masa va tomando una apariencia gelatinosa. Así debe verse 👇
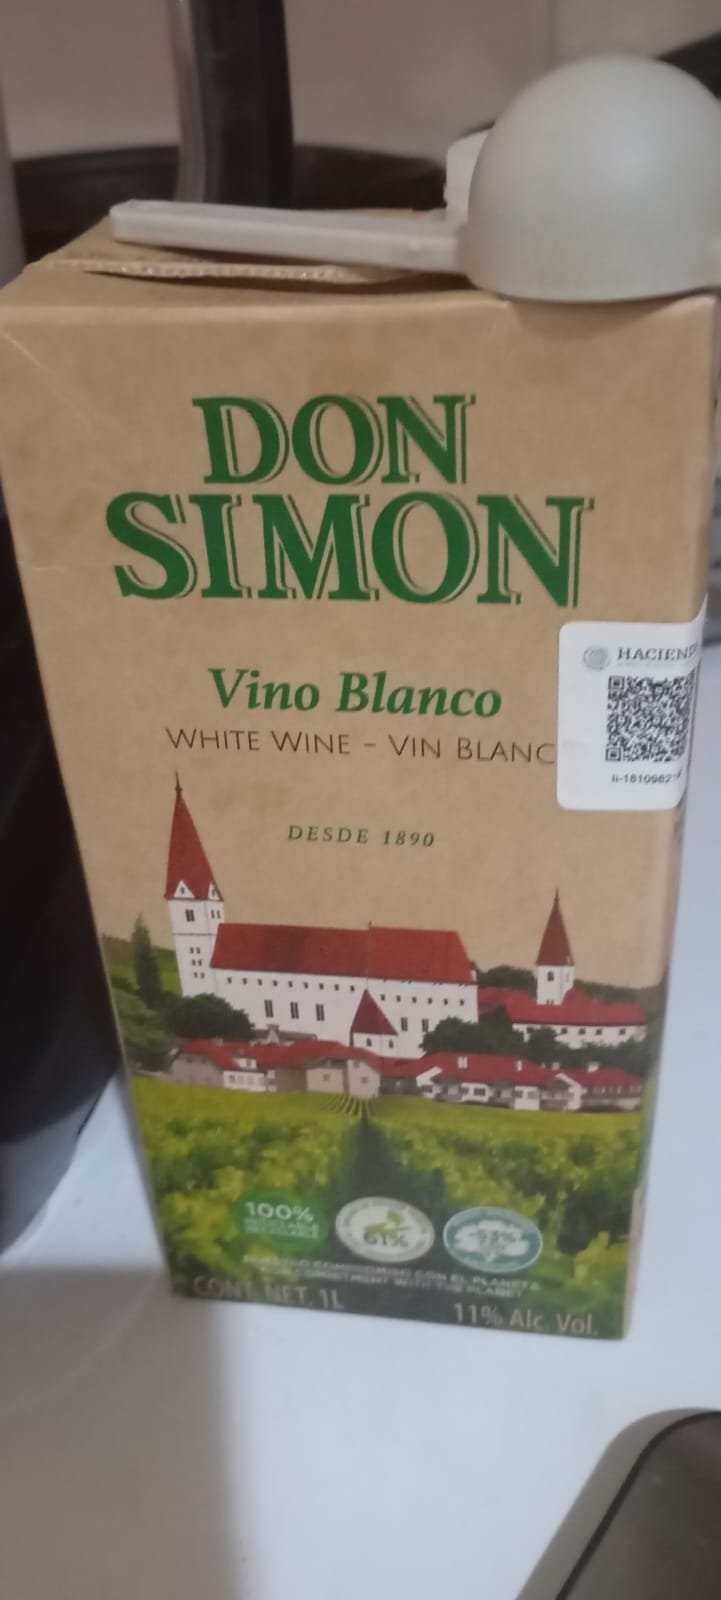
Ya que tengas la emulsión completa entonces pon la mezcla de condimentos secos, el vino blanco (yo usé este 👇, pero puedes usar el que prefieras) y mezcla todo nuevamente en la procesadora.
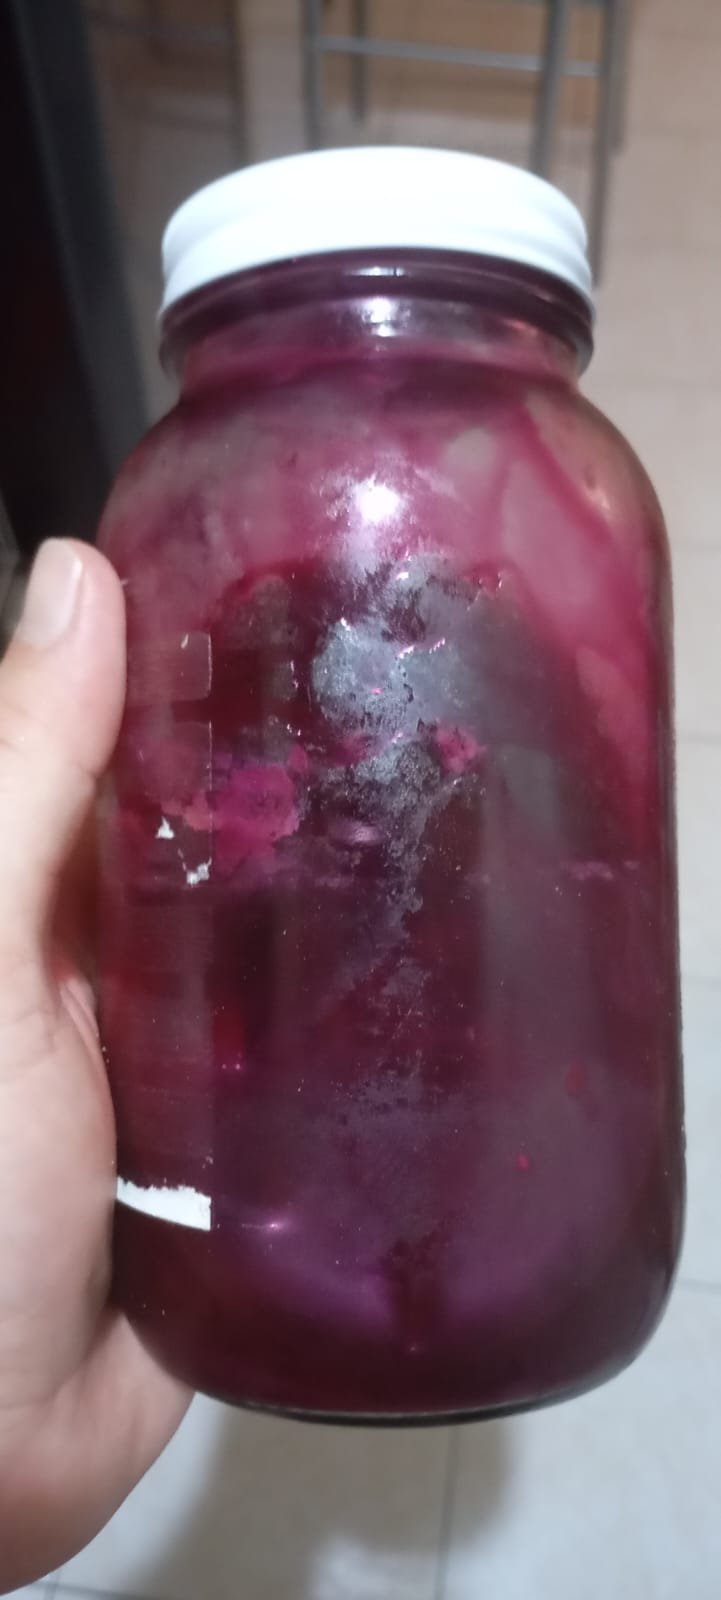
Y lo siguiente es poner el colorante, en esta ocasión yo usé jugo de remolacha (betabel) porque no me encantan los colorantes industriales, pero lo cierto es que no logré el efecto que buscaba. La verdad es que este paso es solamente estético así que no es imprescindible, dado que no afecta el sabor o la textura de la mezcla.
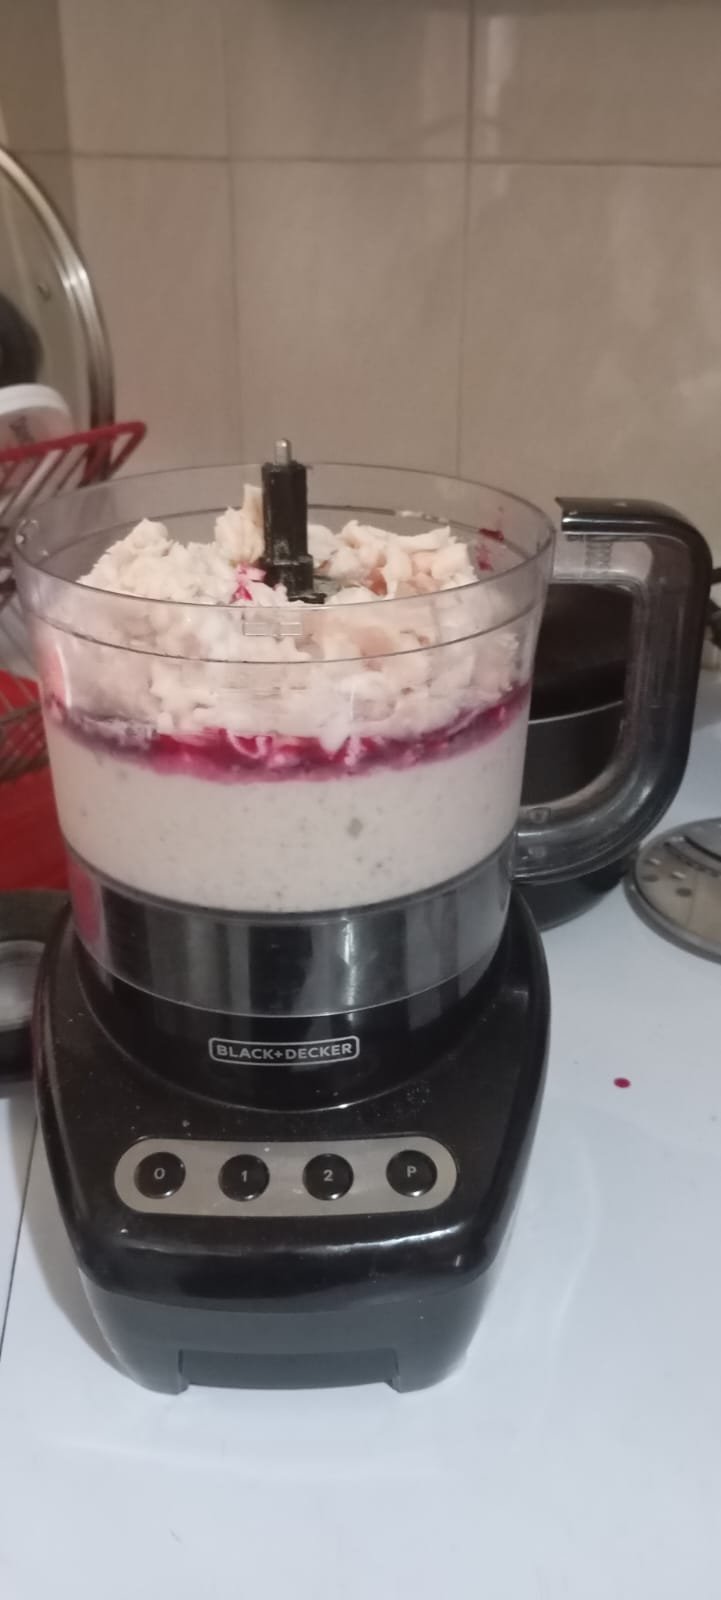
En este paso además agregamos la manteca cruda y procesamos nuevamente todo, tienes la opción acá de agregar la leche en polvo de una vez o puedes esperar a procesar la grasa y poner la leche luego y mezclar. En cualquier caso si recomiendo procesar bastante y a la más alta velocidad en este paso para que la masa se homogenice bien. Otra cosa, yo ya en este paso no le pongo hielo, pero si te demoras o vives en un lugar más cálido recomiendo que reserves parte del hielo para esta etapa.

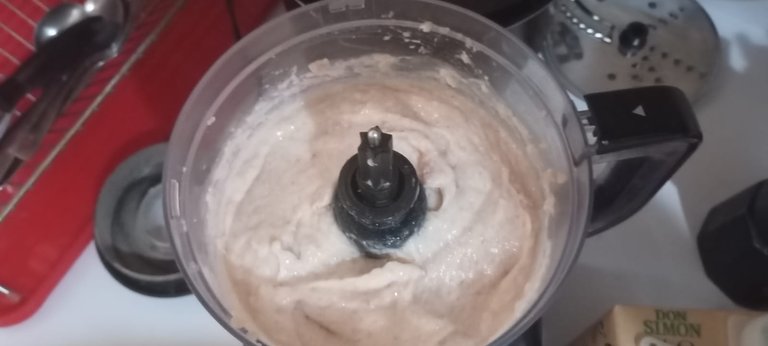
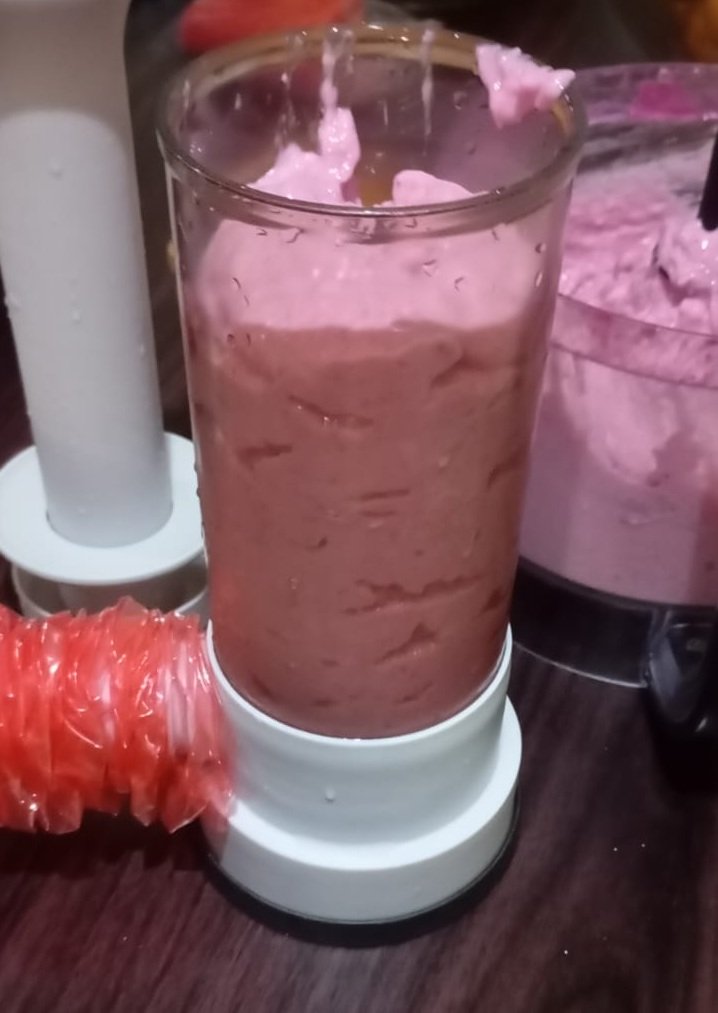
Y ya mezclada la masa con el clorante se debe ver así 👇 más o menos. La consistencia debe ser pegajosa y homogenea. Si decides incluir ya sea cubos de grasa, carne tenderizada o cualquier otra alternativa el momento de hacerlo es en este paso. Así que ten presente que si lo que vas a agregar lleva algún tipo de procesamiento o preparación debe estar lista para este momento.

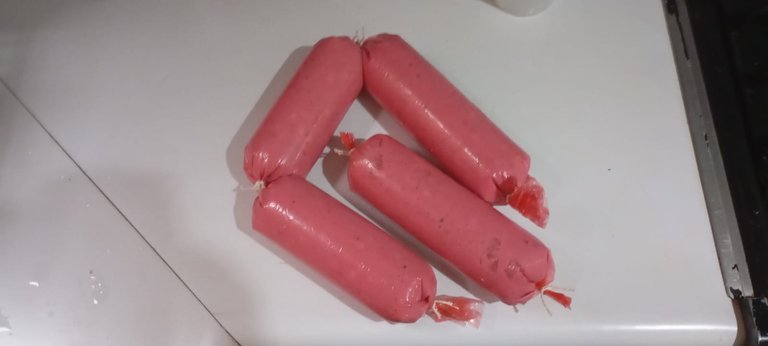
Y listo llegó el momento de embutir, para embutir escogí la punta más gruesa que traía el embutidor, rellené el cilíndro y ajusté la tripa. Ya ajustada la tripa amarré la punta libre y comenzámos el proceso de embutido.
Ciertamente mi preocupación con la embutidora demostró ser acertada. Como el émbolo y el cilindro no ajustan bien parte de la masa se regresa. Lo que hace un poco más incómodo el proceso, pero la verdad es que funciona, yo le doy un 7/10 a la embutidora. Ya ando pensando una forma para intentar solucionar ese problema. Si funciona publico un DIY para contarles. Finalmente obtuve mis embutidos, ya solo resta la cocción.
Antes de cocinar el embutido, recomiendo pinchar la tripa en los sitios donde quedó atrapado aire, para eliminar las burbujas.
La cocción la haremos en agua caliente entre 70 y 80°C, el agua no debe hervir. Yo preparé una olla con agua hasta más o menos la mitad y la puse a fuego alto. Cuando el agua fue a romper hervor, así 👇. Entonces bajé el fuego al mínimo.

Como pueden ver puse una parrilla metálica para evitar que el embutido se pegue al fondo del recipiente y así limitar la posibilidad de que se queme. Sobre la parrilla coloqué mi embutidos.
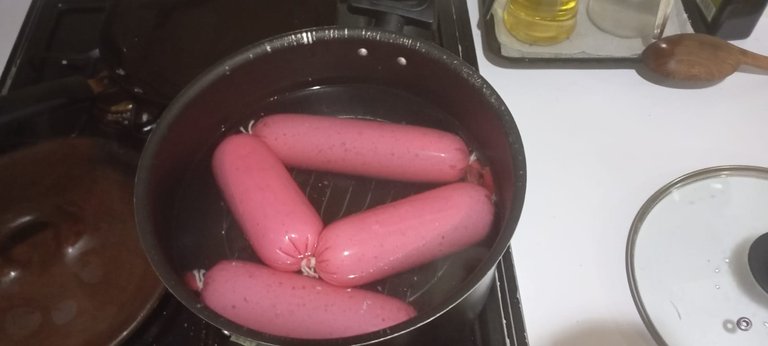
Como flotan y necesitamos que estén completamente sumergidos utilicé una tapa de barro pesada para garantizar la cocción correcta.
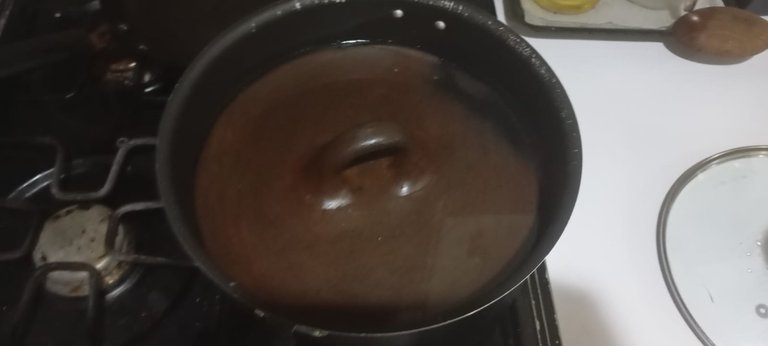
Y ahora solo resta esperar, en mi caso una hora de cocción lenta. Lo recomendado es una hora de cocción por cada kg de masa. En mi caso fue poco más de 1kg, quedó como 1.2kg así que decidí dejarlo una hora, como pueden ver la tripa no es tán gruesa así que confié que iba a quedar correctamente cocinada, y no me falló el instinto.

Una vez cocida la masa, se deja que se refresque naturalmnte y se pone en el refrigerador por unas 8h. Es lo que hago yo, otra alternativa es preparar un recipiente de agua con hielo y ponerlo directamente del agua caliente al agua helada.
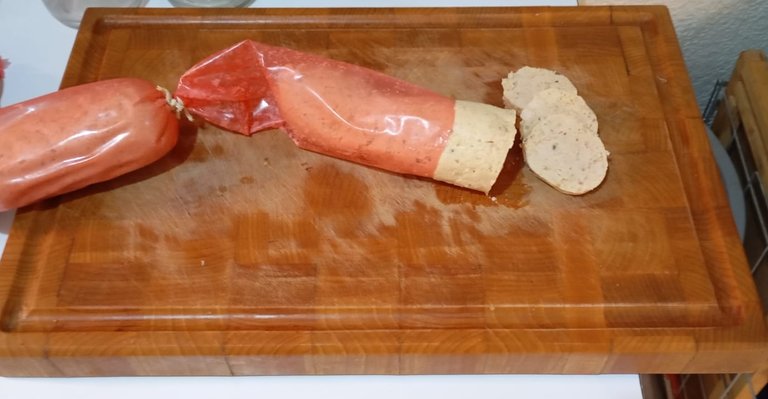
En cualquier caso, debería quedar algo así 👆, listo ya tienes un fiambre que puedes comer frio o a la plancha, queda muy bueno en desayunos o meriendas, con pan o galletas.
Esto es todo por hoy, espero les haya gustado la publicación, y si se animan a intentarlo y tiene alguna duda sientanse libres de preguntar.

Disclaimers
Texto por @gornat
Imagenes tomadas por @gornat con un Xiaomi POCO
Separadores de Idioma diseñados por @gornat en Canva con recursos gratuitos de la página
Separador de @ecency tomado del canal de recursos del Discord
Traducido con ayuda de Deepl

Hello #Hivers, I'm back.
Remember not long ago when I told you here about my sausage-making equipment?
Well, guess what!
I tried it out, made my first mortadella, and I'm eager to tell you about my achievements and tribulations.
As I always say, this isn't a recipe, it's a story time about how I went about cooking something I like and enjoy doing.
Let's get to the meat... Literally😅.
This time we're going to need 480g (just over a pound) of pork. The original recipe recommends leg or shoulder, but I think almost any pork will do, and you'll soon see why.
In many cases, you'll find that people recommend grinding the meat beforehand in a manual grinder (homemade grinding machine). But I've found that if you cut the meat into very small pieces, it also works fine.
We will also use 335g (approximately 9 oz) of raw lard. This is a little more problematic, as you can see in the image above, I also prepare it for processing by cutting it into small pieces, but if the lard is not ground, it will not melt completely when processed. So it's a matter of personal preference. If you prefer the dough to be completely uniform, I recommend grinding it beforehand. If, like me, you don't mind finding small pieces of fat in the final product, you can follow my method.
We will also need two large cloves of fresh peeled garlic and a mixture of 18 g of dried spices. I add bay leaves, cumin, pepper, coriander seeds, and you can put a little nutmeg to taste. I don't like nutmeg, so I left it out. We will also add 10 g (these are part of the 18g) of fine salt. I recommend blending or grinding the dried spices before adding them to the mixture. If you don't have any of these ingredients or don't like them, don't worry, just do what I do: leave them out, substitute them, experiment, and create your own flavor.
Another very important ingredient is ice, which helps emulsify the meat and keep the mixture fresh. In this case, we will use 280 g (approximately 7 oz) of ice. We will also use 70 g of powdered milk, 30 ml of dry wine (or white cooking wine), and red food coloring. You can also add another 120 grams of food to give the sausage variety and texture. The most recommended ingredient for mortadella is raw pork fat cut into small cubes. But I don't really like it, so instead I use tenderized pork, olives, pistachios, or walnuts. It's a matter of trying out the ingredients that appeal to you. For example, I plan to use mushrooms next time. But this time, I didn't add anything because I wanted to test how the sausage maker worked.
Now let's get started with the preparation.
You will need a food processor that is powerful enough and has sufficient capacity to process all the meat and create a meat emulsion. Place the chopped pork and garlic cloves in the food processor and begin to process, gradually adding ice cubes. Add the ice slowly (if your cubes are large or medium-sized, I recommend breaking them up to reduce the risk of damaging the food processor) and you will see how the mixture takes on a gelatinous appearance. This is how it should look 👇
Once you have the emulsion ready, add the dry seasoning mixture, white wine (I used this one 👇, but you can use whichever you prefer) and blend everything again in the food processor.
The next step is to add the coloring. This time, I used beet juice because I'm not a fan of industrial food coloring, but I didn't achieve the effect I was looking for. The truth is that this step is purely aesthetic, so it's not essential, as it doesn't affect the flavor or texture of the mixture.
In this step, we also add the raw lard and process everything again. You have the option here to add the powdered milk all at once, or you can wait to process the fat and then add the milk and mix. In any case, I recommend processing quite a bit and at the highest speed in this step so that the dough is well homogenized. Another thing: I don't add ice at this stage, but if you're taking your time or live in a warmer place, I recommend reserving some of the ice for this stage.
Once the dough has been mixed with the bleaching agent, it should look something like this 👇. The consistency should be sticky and smooth. If you decide to include cubes of fat, tenderized meat, or any other alternative, now is the time to do so. Keep in mind that if what you are going to add requires any kind of processing or preparation, it must be ready at this point.
And then it was time to stuff the sausage. I chose the thickest tip that came with the stuffer, filled the cylinder, and adjusted the casing. Once the casing was adjusted, I tied the free end and we began the stuffing process.
My concerns about the sausage stuffer certainly proved to be justified. Since the plunger and cylinder don't fit together properly, some of the mixture comes back out. This makes the process a little more awkward, but the truth is that it works. I give the sausage stuffer a 7/10. I'm already thinking of a way to try to solve this problem. If it works, I'll post a DIY guide to let you know. Finally, I got my sausages, now all that's left is to cook them.
Before cooking the sausage, I recommend pricking the casing in places where air has been trapped to remove any bubbles.
Cook in hot water between 70 and 80°C. The water should not boil. I filled a pot about halfway with water and put it on high heat. When the water was about to boil, like this 👇, I turned the heat down to low.
As you can see, I placed a metal rack to prevent the sausage from sticking to the bottom of the container and thus limit the possibility of it burning. I placed my sausages on the rack.
Since they float and we need them to be completely submerged, I used a heavy clay lid to ensure proper cooking.
And now all that remains is to wait, in my case an hour of slow cooking. The recommendation is one hour of cooking for every kilogram of meat. In my case, it was a little over 1 kg, ending up at about 1.2 kg, so I decided to leave it for an hour. As you can see, the casing isn't very thick, so I trusted that it would cook properly, and my instincts didn't fail me.
Once the dough is cooked, let it cool naturally and place it in the refrigerator for about 8 hours. That's what I do, but another alternative is to prepare a container of ice water and place it directly from the hot water into the ice water.
In any case, it should look something like this 👆. There you go, you now have a cold cut that you can eat cold or grilled. It's delicious for breakfast or a snack, with bread or crackers.
That's all for today. I hope you enjoyed the post, and if you decide to give it a try and have any questions, feel free to ask.
Disclaimers
Text by @gornat
Images taken by @gornat with a Xiaomi POCO
Language separators designed by @gornat on Canva with free resources from the website
Separator by @ecency taken from the Discord resource channel
Translated with the help of Deepl
Esa receta luce muy bien.
Gracias, el resultado sabe bien también.
Anímate e inténtalo
$wine
Thank you for your support.
¡Yo tengo esa misma báscula digital, Gornat! Mañana le tomo foto es que van a ser las 3 y me quiero ir a dormir. ¿La tripa que se usa ya no es natural, verdad? ¡Excelente se ve esa mortadela! !PIZZA !BBH !HUESO !DIY
!PIZZA
!LUV
Hola @cpol, gracias por pasarte, la báscula me ha salido bastante buena. Espero a ti también. La tripa que usé es plástica, si hay natural, pero es mucho más cara y más difícil de manejar. Yo recomiendo la de celulosa, es una solución Intermedia, no es completamente natural pero está hecha de un polímero natural.
$wine
¡Sí es una báscula muy buena la verdad! Ya me ha estado dando problemillas, pero no sé qué podrá ser, si es que se le metió humedad o algo, pero me ha salido muy buena, tiene como 8 años ya, creo. Acá la tienes:
¡Muy interesante! ¿La de celulosa se puede comer? ¡Excelente de verdad!
!PIZZA !BBH !HUESO !DIY
Pos si se parece mucho a la mía
me das buenas esperanzas con eso de que tiene como 8 años.
La tripa de celulosa no se puede comer es más o menos como comer papel por ahí
$wine
$PIZZA slices delivered:
@cpol(1/20) tipped @gornat (x2)
Come get MOONed!