Starting My Food Business by Making Miso Peacefully (+ Recipe) / 一年のはじめの味噌の仕込み
January, with its cold temperatures, is the perfect time to make miso that will ferment over a long period. Preparing miso at the start of the year, knowing that it will be ready to enjoy in autumn, feels like an act of trust in the future—a kind of investment, in a way. It’s similar to planting flower bulbs in autumn and waiting for them to bloom in spring.
I made this year’s batch in a friend’s kitchen. While I could prepare enough for my family at home, I make some kilos of extra to share with friends or sell at the market. This year, I plan to take more time to rest on weekends and spend time with my family, so I’ll be attending fewer markets and events. With that in mind, I prepared about 10 kg of miso—enough for about 75 jars, divided into 100g and 200g portions.
Since I’ve used my friend’s kitchen before for events and helping out, it felt familiar and comfortable. My friend is a good builder who set up the professional kitchen just by herself. Everything went smoothly, and I enjoyed taking breaks to chat with her.

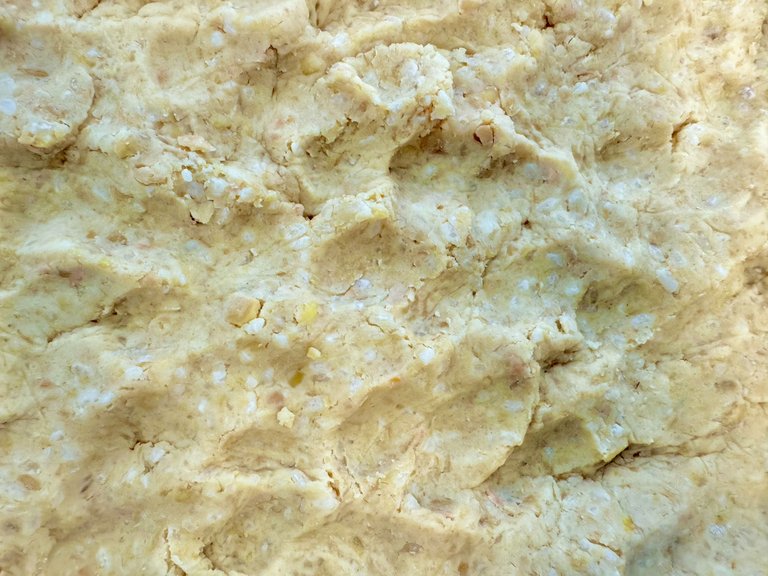
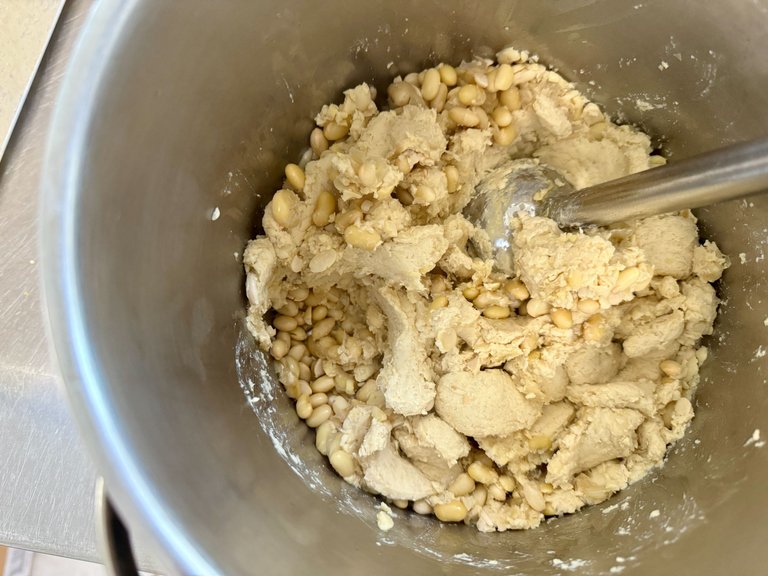
After years of making miso, the process has become second nature. I soaked the soybeans overnight, then cooked them in a pressure cooker, blended them into a paste, mixed in the koji and salt, and packed everything into containers. There’s something peaceful and meditative about working in the kitchen filled with the scent of cooked soybeans.
After spending half the day in my friend’s kitchen, the miso base was complete.
Since I started driving again last year, I’ve gained a lot of freedom—I can now transport my cooking equipment, make miso in my friend’s kitchen, and drive home with the heavy container of miso. On my way back, I felt a quiet sense of joy, realizing how much more flexibility I have now. I’m still very grateful for the large kitchen I’ve used over the years and will continue to rely on, but I also love the idea of supporting friend’s businesses and keeping money circulating. Once the miso is ready, I’ll bring some as a thank-you gift.
In autumn, I plan to return to the same kitchen to make Kyoto-style white miso for the New Year—Kyoto is my second home, after all. By then, I hope to have learned how to make my own koji in a large scale. That’s a one of the goals of the year ☺️
Cooking is wonderful. Being able to turn something you love into part of your livelihood is wonderful too.
Happy cooking 🫘
Bonus: Simple Miso Recipe
I have no plans to become a miso maker, so no secret. I’ll share my simple Miso recipe. When I visited a miso manufacturer Marukawa Miso in Hokuriku, I received a small booklet about how to make Miso. Over the years, I adjusted it to the easy-to-remember ratio.
Ingredients
- 500g dried soybeans
- 600g fresh koji
- 250g salt
Instructions
- Soak the soybeans overnight.
- Cook in a large pot for 2–3 hours, skimming off any foam (or pressure cook for 25 minutes).
- While the soybeans cook, mix the salt and koji well.
- Once the soybeans are soft, mash them carefully (they will be hot!).
- When the mixture has cooled to about body temperature, combine everything thoroughly.
- Pack tightly into sterilized containers, making sure to remove any air pockets.
- Sprinkle a little salt on the surface and cover with plastic wrap.
- Store in a cool, dark place and wait until autumn!
This time, I cooked the soybeans in a pressure cooker, but if you have a large enough pot, cooking them all at once over 2–3 hours is also a good option.
寒い一月は長期間発酵させるお味噌を仕込むのに良い時期です。一年の初めの月に、秋に開けて味わえるお味噌を仕込むのは、将来を信じているというか、未来への投資というか、なんとも幸せな気分になります。秋に球根を植えて春に咲いた花を楽しむのと似ているかもしれません。
先日、今年の分を友人のキッチンを借りて作ってきました。家族で使う分は家でも仕込めるのですが、ちょっとだけ多めに作って、友人に分けたり、マーケットで売ったりするためです。今年は週末はきちんと体を休ませて、家族と過ごせるように、マーケットに出店する回数を少なくする予定で、10キロほど仕込みました。100gと200gの瓶に入れるので75本分くらいです。
友人のキッチンは、以前イベントで使ったり、友人の手伝いをしに来たりしたこともあり、居心地良くすいすい、ゆったり作業をできました。空き時間に友人と話すことができたのもよかったです。
何年もやっているので作業は慣れたものです。前日に浸水していた大豆を圧力鍋で茹でて、ブレンダーでペーストにして、麹と塩を混ぜて容器に詰めていきます。私はこの大豆の匂いに包まれたキッチンでの静かで淡々とした作業がとても好きです。
午後半日友人のキッチンで作業して、無事味噌のもとが仕上がりました。去年車を運転できるようになり、調理道具を持って友人のキッチンに行って、重い味噌と共に帰ってくるといったことができるようになり、自由度が広がったなあとうれしさをじわじわ味わいながら車で帰ってきました。これまでお世話になっていて、これからもお世話になる大きなキッチンにもとても感謝しているのですが、こうして身近な友人のサービスを利用してお金を回せるっていいなと思いました。お味噌ができたらお礼に持っていこう。
秋には同じキッチンで年末用に私の第二のふるさとの京都の白味噌を仕込む予定です ☺️ そのころには自分で麹を作れるようになっているといいな・・・と夢見つつ。
料理っていいですね。好きなことが生計の一部になるっていいですね!
Happy cooking 🫘
おまけ
お味噌屋さんになろうとしているわけではないので、作り方を簡単に書いておきます。以前、北陸のお味噌屋さんマルカワ味噌を見学した時に小冊子をいただいて、その作り方から覚えやすい分量になりました。
材料
- 乾燥大豆 500g
- 生麹 600g
- 塩 250g
作り方
- 大豆を一晩浸水させる
- 大きな鍋で2−3時間灰汁をとりながら茹でる(または圧力鍋で25分加圧する)
- 茹でている間に塩と麹をよく混ぜておく
- 大豆が茹だったら火傷に気をつけてつぶす
- 人肌くらいの温度になったらすべてをよく混ぜる
- 煮沸消毒した容器に空気が入らないように詰める
- 表面に軽く塩を振ってラップで表面を覆う
- 冷暗所に保管して秋を待ちましょう!
今回は圧力鍋で豆を蒸しましたが、量が多くて大鍋がある場合は、2−3時間集中してまとめて茹でるのも手かなと思いました。
tell me when you sell something for BTC or other crypto.
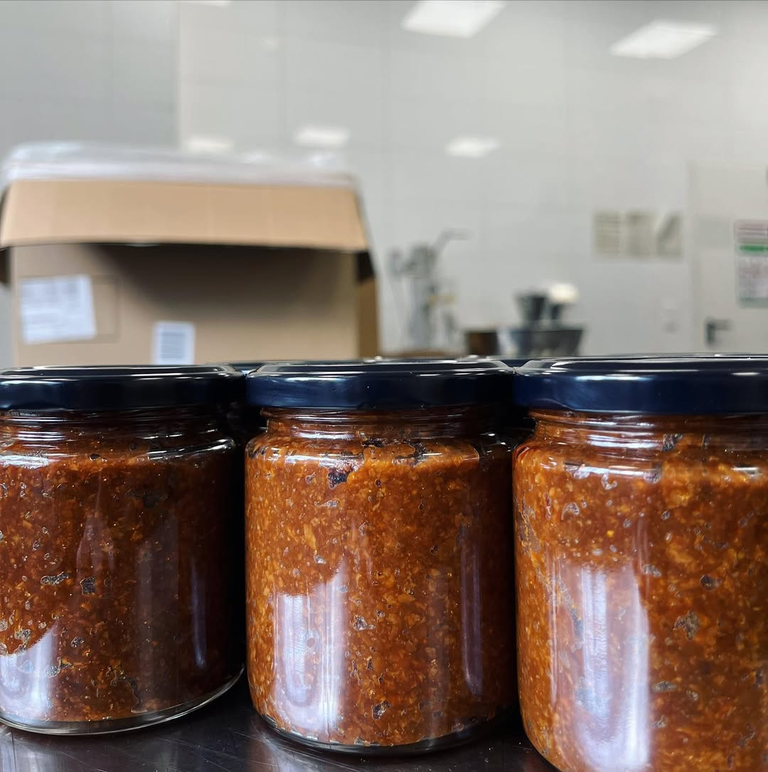
If you eat spicy, maybe I can do the experiment to send you my chilli sauces 😂
I'll be back to market on Spring 😊
By the way @pupiko , chat bot I develop is also a new Hive user in Leipzig 😁
By the way, does anyone need "Bitcoin for Local Business" flyer? I translated the WoS version from English to German and printed out. I'm happy to share at the Stammtisch at Uptown Cafe :) I haven't there for looooong though.