She Wants A Beaded Basket Bag With Bigger Base
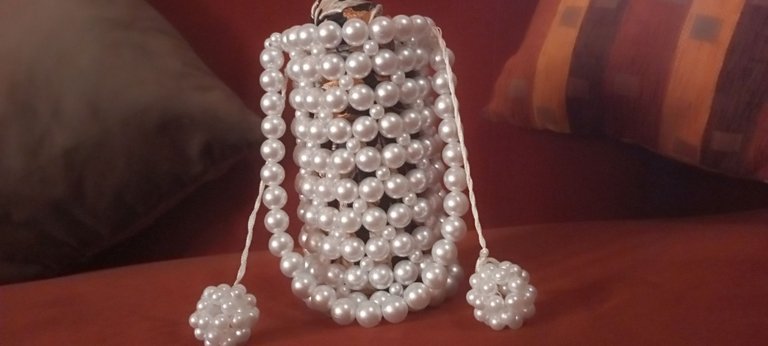
Getting a new client for my crafts is sweet, but getting a returning client for what I do is another level of sweetness. It not only tells that they value what they are getting, but it also shows that they want more. This is why, when I create, I pour all my heart and thoughts into it.

Hello, guys, welcome 🤗. It's lovely to have you with me today while I share with you the tutorial of a new basket-beaded bag I made for a returning client of mine. She asked that I make the bag for her sister, and she wanted the base of the bag to be a bit wider compared to the one I made here. Kindly follow me and see how I make that happen.
Production time: 6-7 hours
Materials used:
I used size 14 pearl beads, size 8 pearl beads, scissors, and size 0.7 fishline.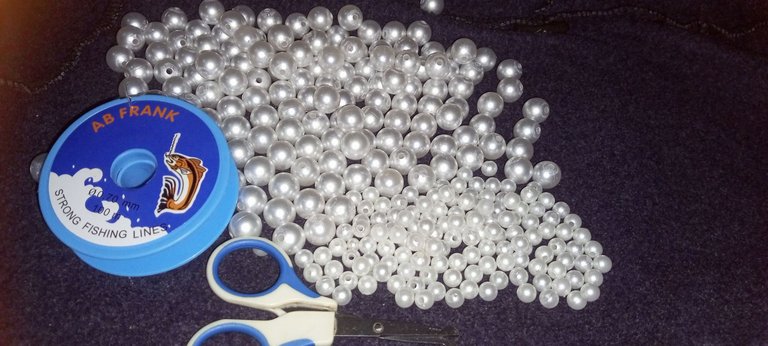
Step-by-step process:
Making this basket bag is simple and involves straightforward steps. Even a beginner can do it. So come with me, and let me walk you through the process.
Step 1:
I put six size 14 beads on a 120 cm fishline and then crossed both fishlines with the sixth bead.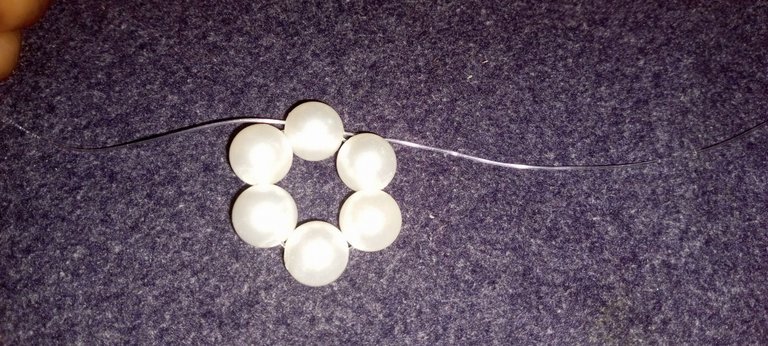
Step 2:
I put one size 14 bead through the two fish lines at once and inserted it into the middle of the previous six beads, then let my fish line come out on one of the six beads.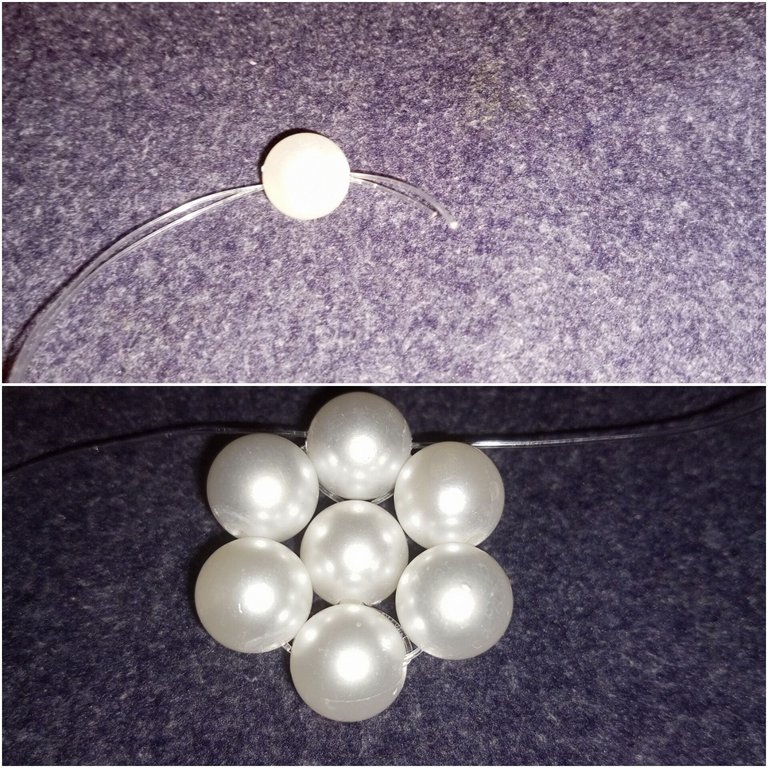
Step 3:
Here, I added one size 8, one size 14, one size 8, one size 14, and crossed both fish lines with one size 8 bead.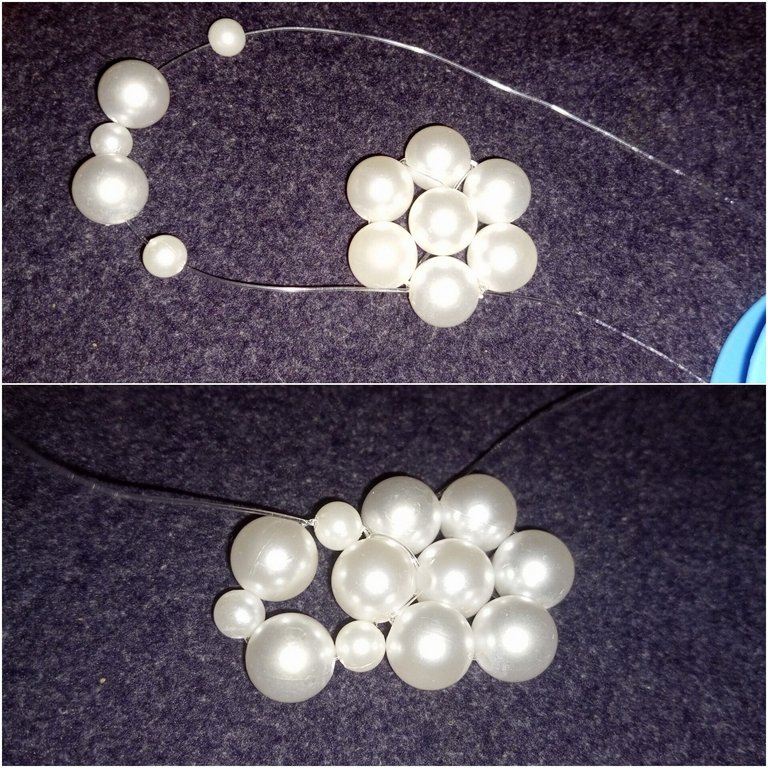
Step 4:
I passed my right fishline through the next size 14 beads, and I added one size 8, one size 14, one size 8, and one size 14, and crossed both fishlines with one size 8 bead.
Step 5:
I passed my right fishline through the next size 14 beads, and I added one size 14, one size 8, and one size 14, and crossed both fishlines with one size 8 bead.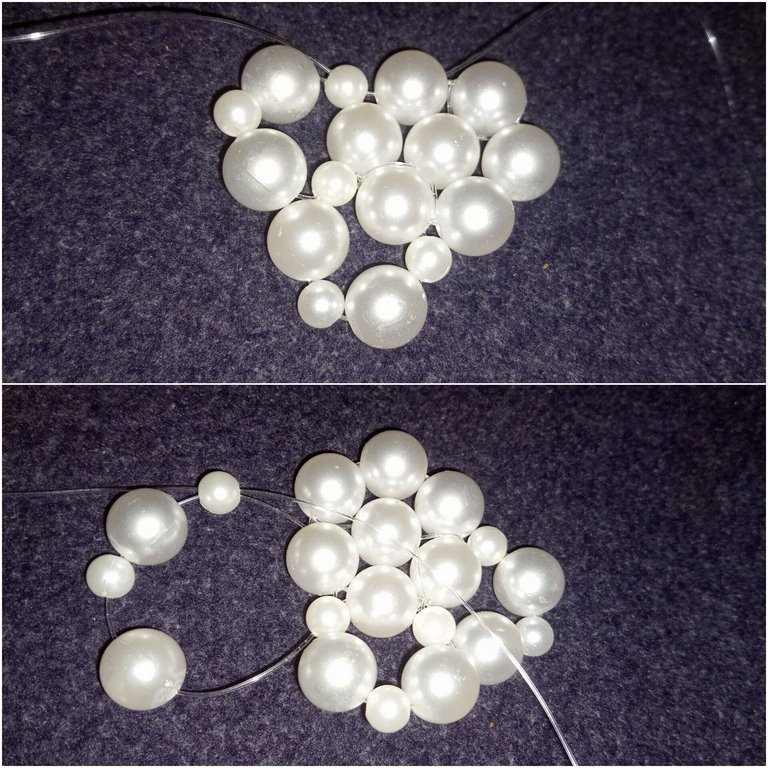
Step 6:
I passed my left fishline through the next size 14 beads, and I added one size 8, one size 14, one size 8, and one size 14, and crossed both fishlines with one size 8 bead.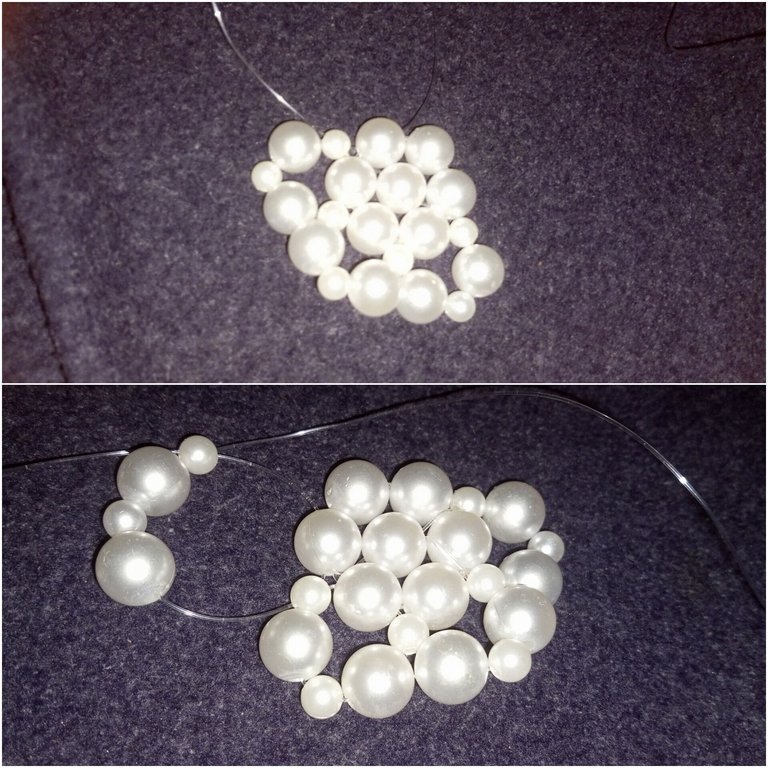
Step 7:
I passed my right fishline through the next size 14 beads, and I added one size 14, one size 8, and one size 14, and crossed both fishlines with one size 8 bead. To complete this line, I let my right fishline through the next size 14 and size 8 bead and then put size 14 and size 8 on my left fishline and crossed both fishlines with the size 14 bead.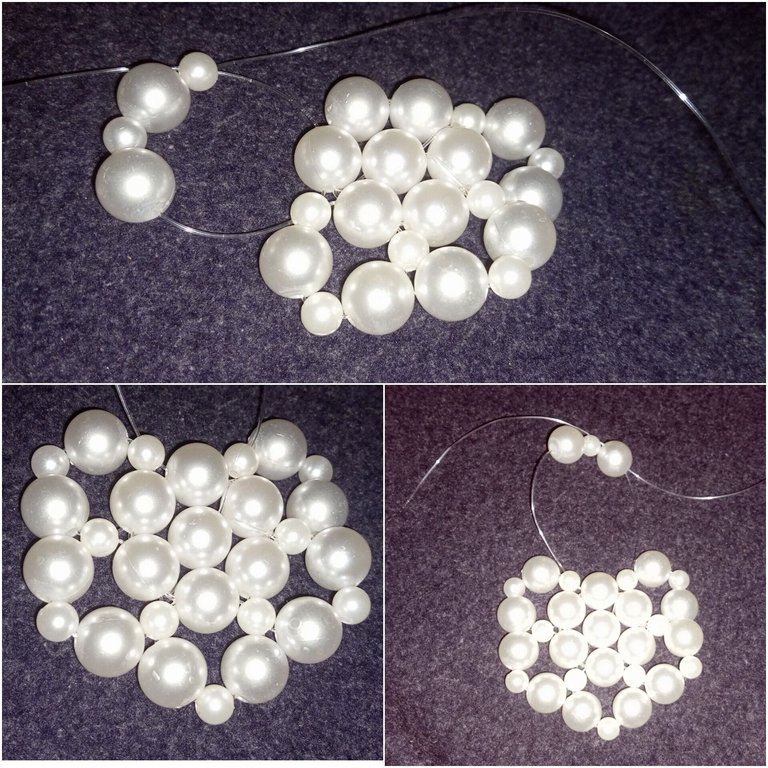
Step 8:
Here I started a new line to expand the base of the bag. I passed my right fishline through the next size 4 bead, put one size 8 and two size 14, and crossed both fishlines with one size 8 bead.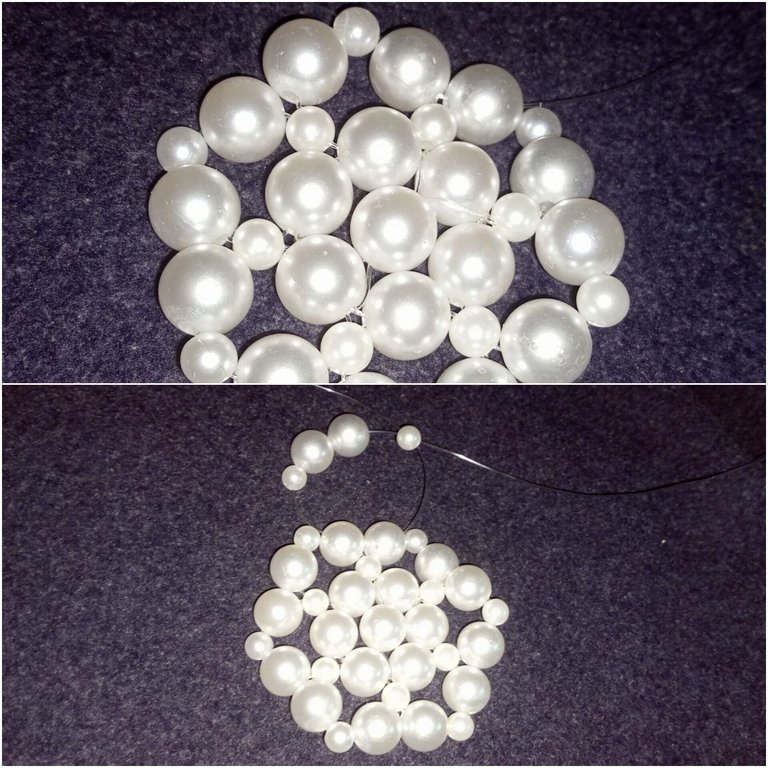
Step 9:
I passed my right fishline through the next size 8 bead, put one size 14 on the left fishline, and crossed both fishlines with one size 8 bead.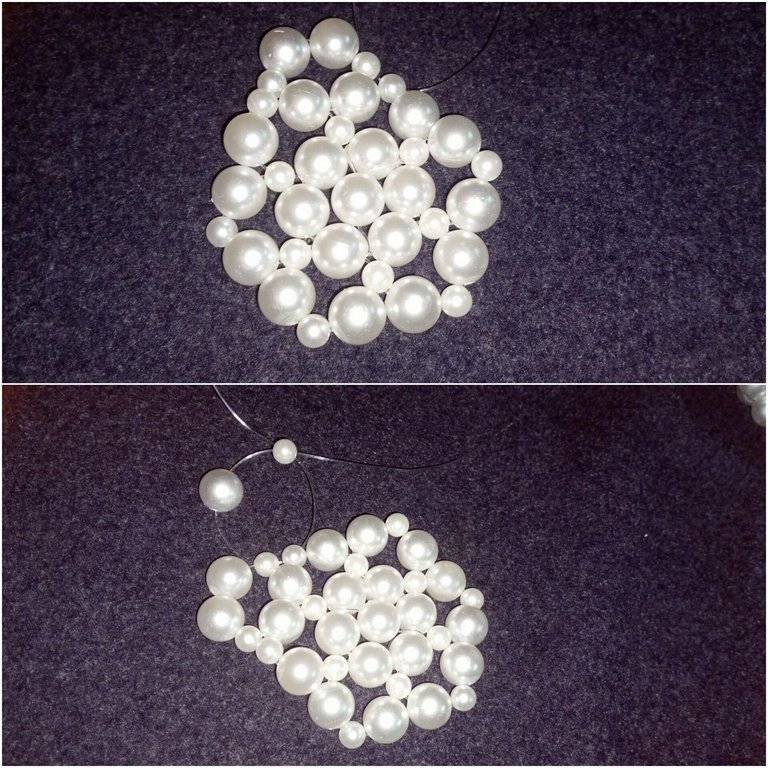
Step 10:
I let my right fishline through the next two size 14 beads, put two size 14 beads on the left fishline, and crossed both fishlines with one size 8 bead.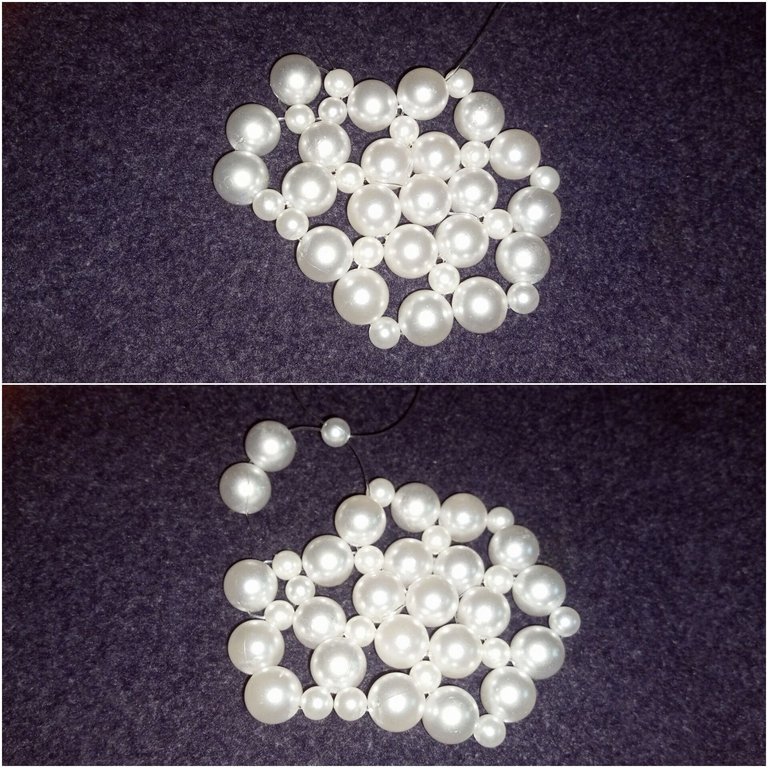
Step 11:
I passed my right fishline through the next size 8 bead, put one size 14 on the left fishline, and crossed both fishlines with one size 8 bead.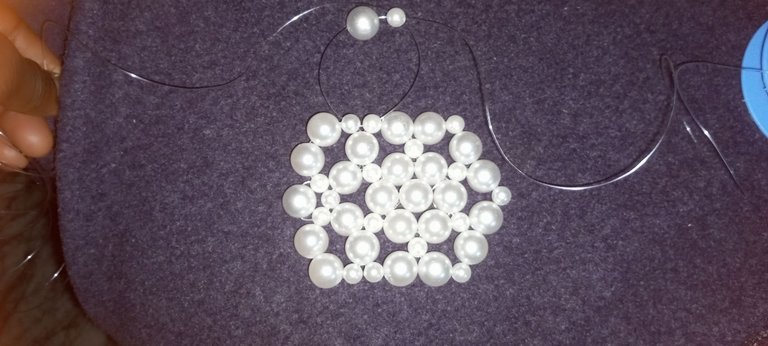
Step 12:
I let my right fishline through the next two size 14 beads, put two size 14 beads on the left fishline, and crossed both fishlines with one size 8 bead.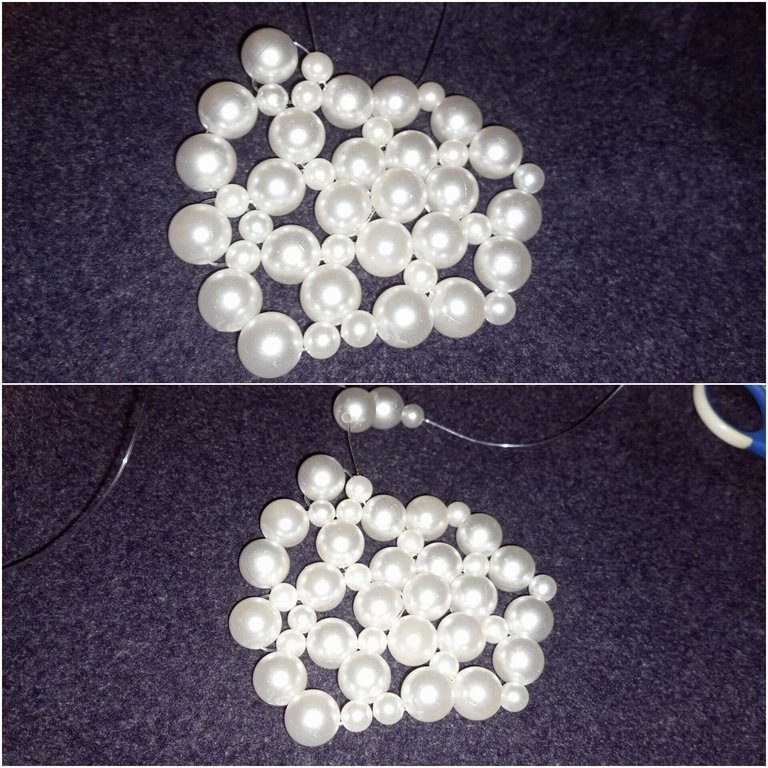
Step 13:
I passed my right fishline through the next size 8 bead, put one size 14 on the left fishline, and crossed both fishlines with one size 8 bead.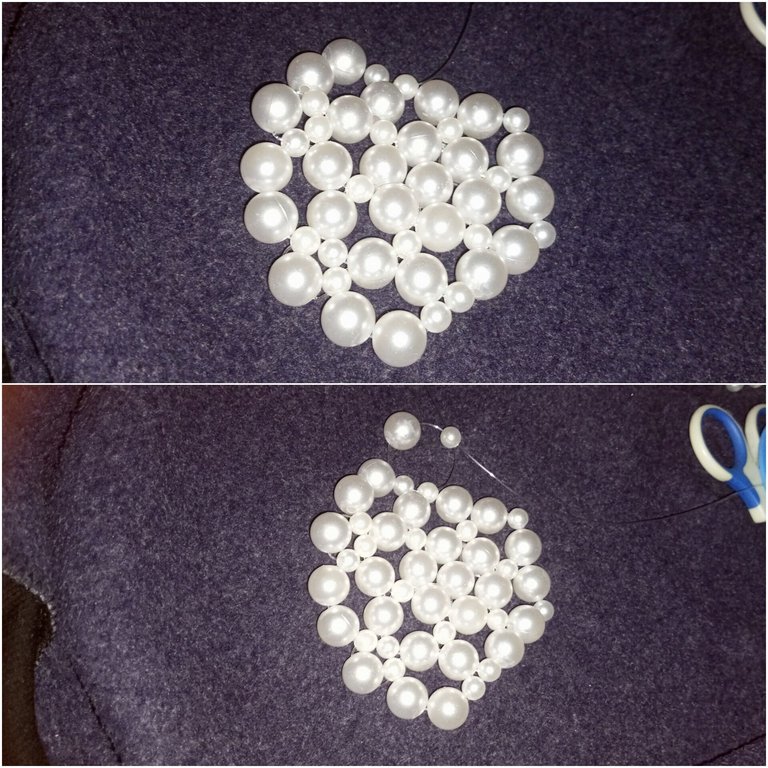
Step 14:
I let my right fishline through the next two size 14 beads, put two size 14 beads on the left fishline, and crossed both fishlines with one size 8 bead.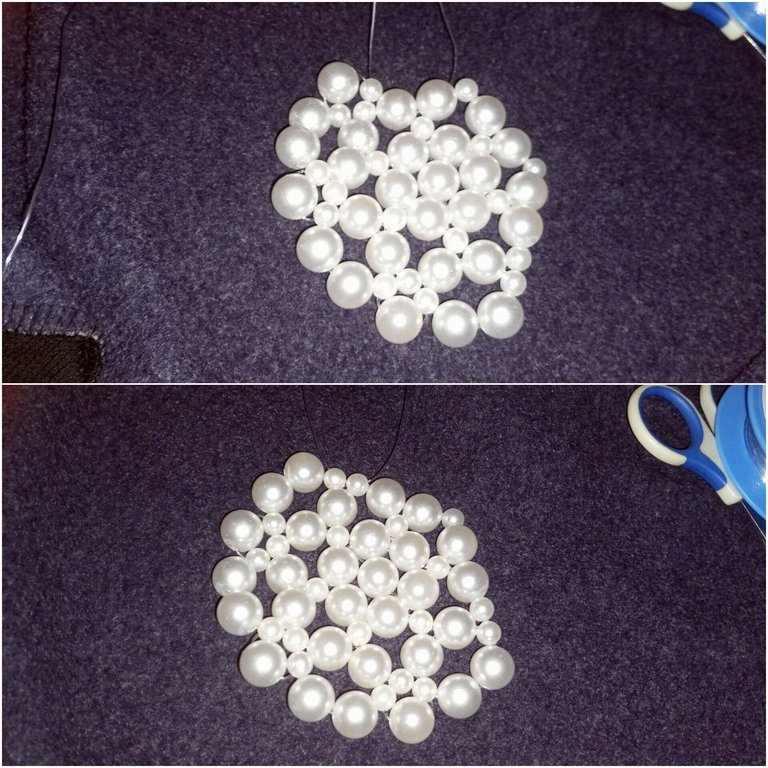
Step 15:
I passed my right fishline through the next size 8 bead, put one size 14 on the left fishline, and crossed both fishlines with one size 8 bead.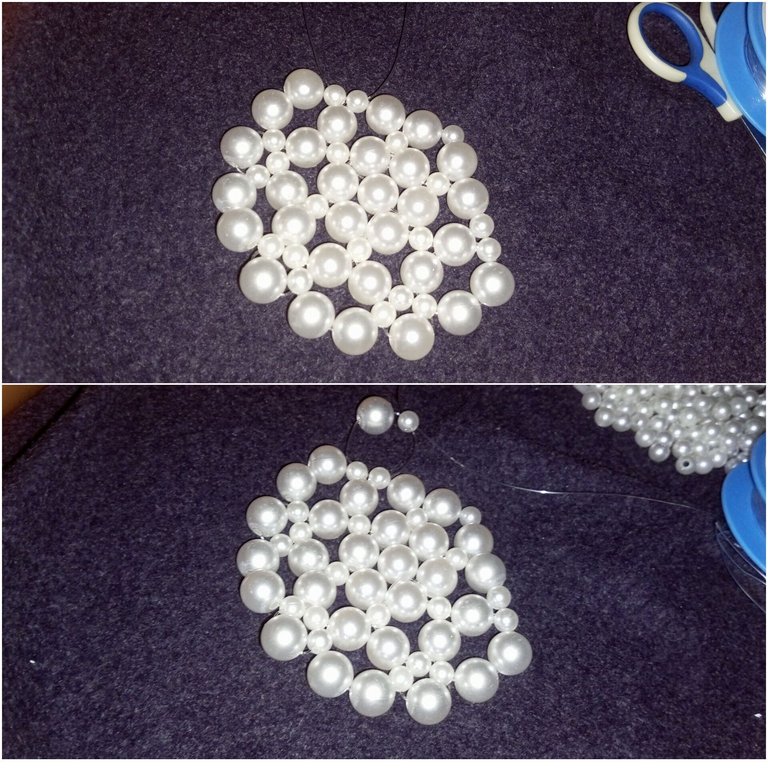
Step 16:
I let my right fishline through the next two size 14 beads, put two size 14 beads on the left fishline, and crossed both fishlines with one size 8 bead.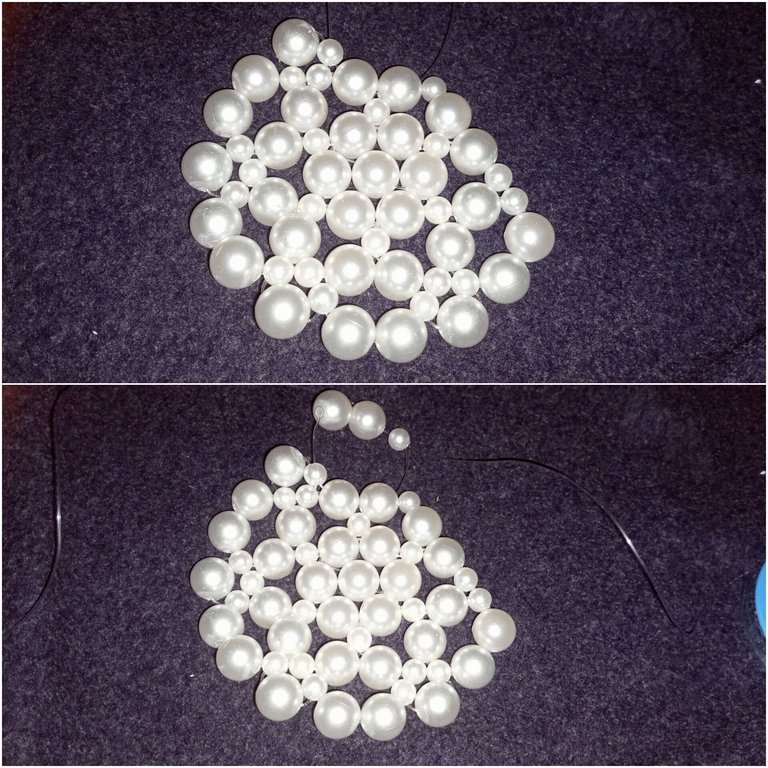
Step 17:
I passed my right fishline through the next size 8 bead, put one size 14 on the left fishline, and crossed both fishlines with one size 8 bead. I proceeded to let my right fishline through the next two size 14 beads, put two size 14 beads on the left fishline, and crossed both fishlines with one size 8 bead.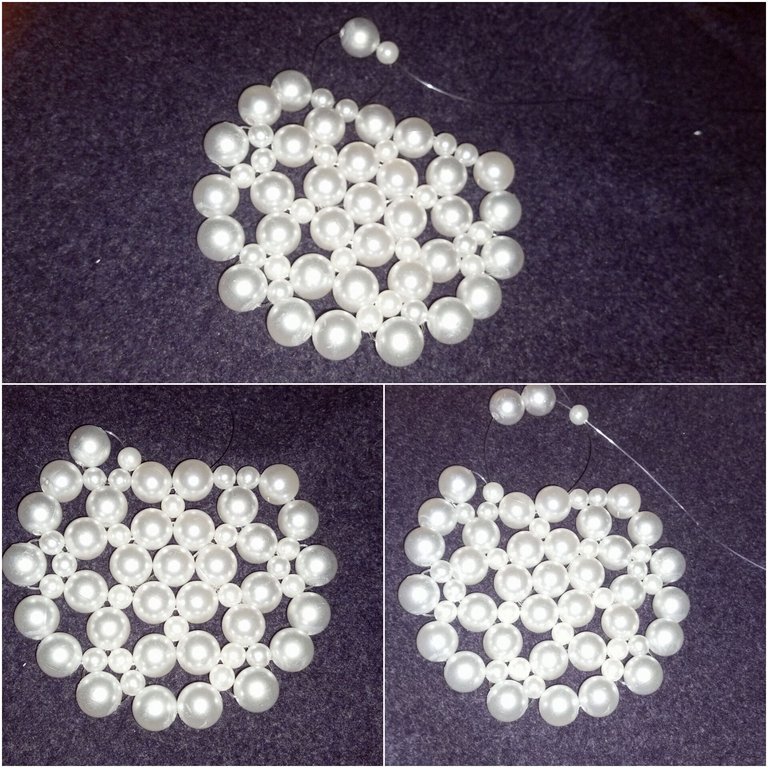
Step 18:
To complete the base of the bag, I let my right fishline through the next two size 8 beads, then crossed both fishlines with size 14 beads. And now I have completed the base of the bag.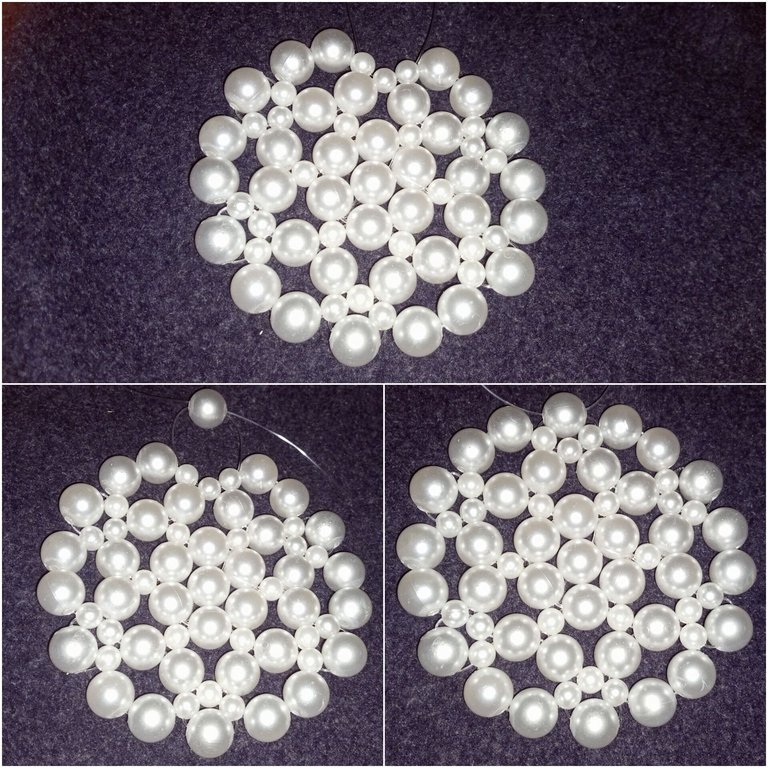
Step 19:
I simply start to build the body of the bag by letting my right fishline come out of the next size 14 bead, putting in a size 8, two size 14 beads, and crossing both fishlines with one size 8 bead.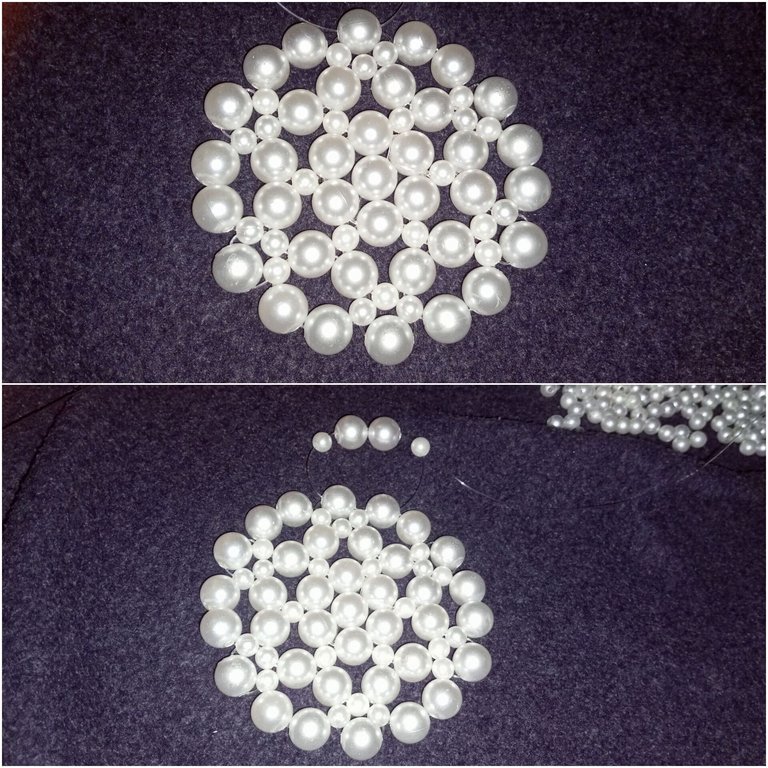
Step 20:
I let my right fish line through the next two sizes, 14 beads. Put 2 size 14 beads on the left fishline across both fishlines with one size 8 bead.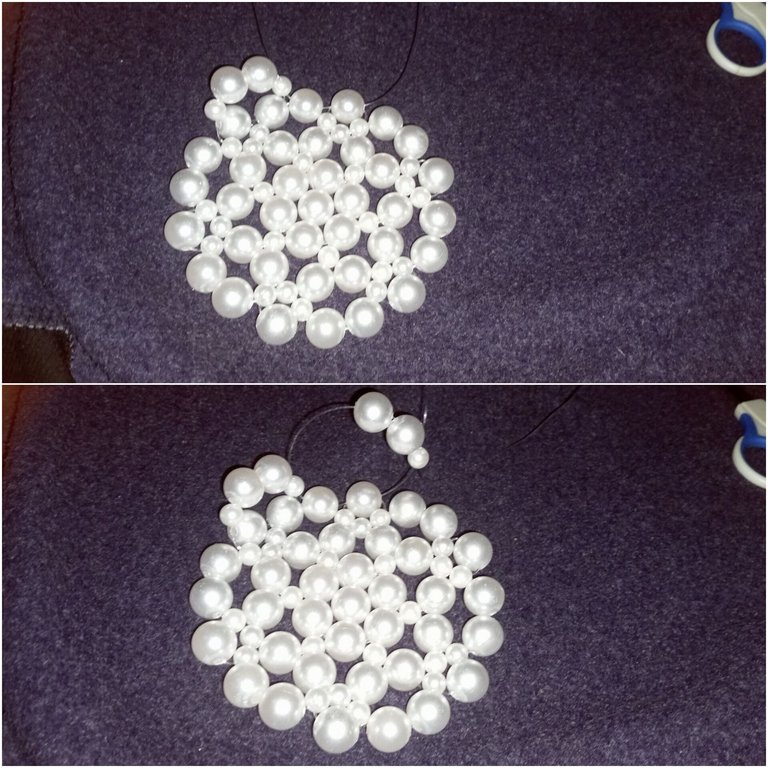
Step 21:
I continue to step 20 above until I reach one step to complete this cycle, and to end the cycle, I let my fishline through the next two sizes, 14 beads and one size 8 bead, and then cross both fishlines with two sizes, 1 bead.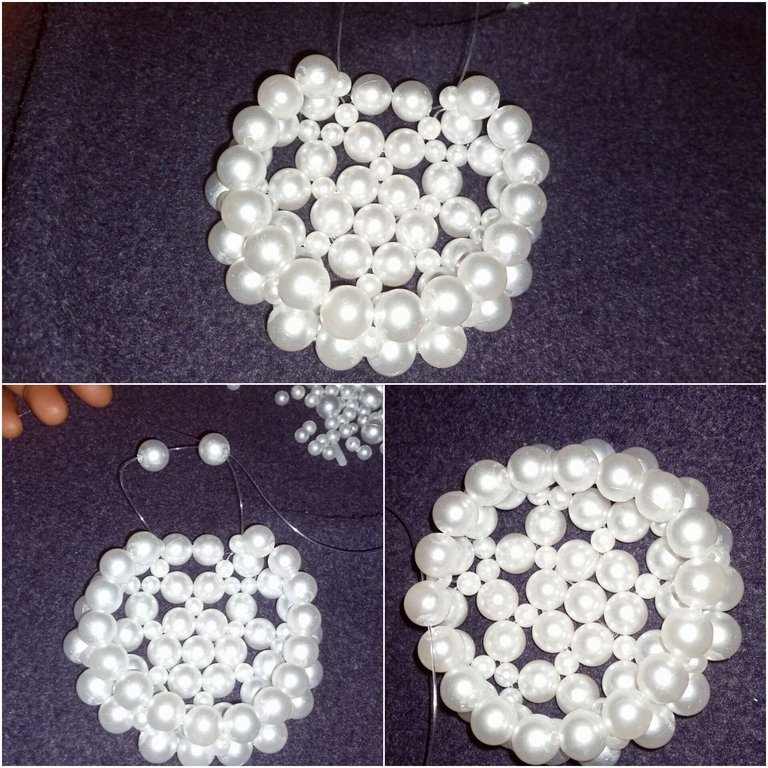
Step 22:
I continued to repeat steps 20 and 21 above until I made ten cycles on top of the base of the bag, and that gave me the desired size of the bag.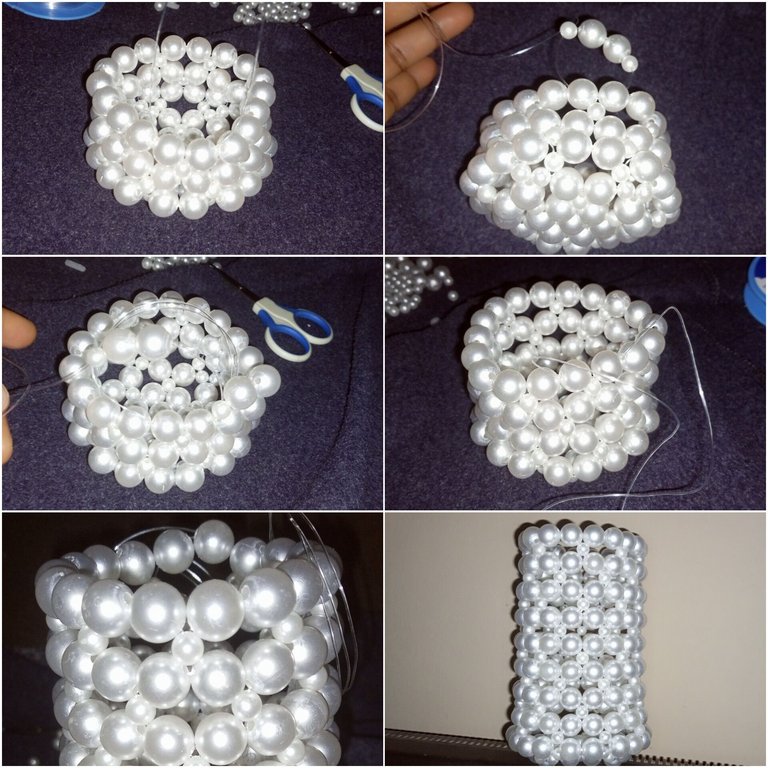 I just went ahead and attached the handle, and our bag is ready. 😍
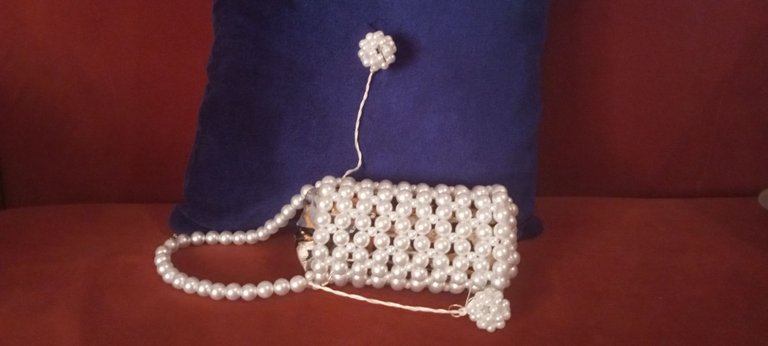
Guys, what do you think?

She will be picking it up tomorrow and I can't wait to see her reaction when she sees her bag.

Thank you! Thank you!! For your time and support, do have a great week ahead.
All images are mine @funshee😍❣️
This is very beautiful, it shows that she really enjoyed your work. The previous bag is also beautiful. Well done 👍, you keep getting better 😉
Thank you so much, Sis, I enjoy beading so I guess I will continue to be better at it hehe. !LUV
@ozd, @funshee(3/5) sent you LUV. | tools | discord | community | HiveWiki | <>< daily
As usual dear, your work is very beautiful, your talent is becoming more and more prominent day by day.
Thank you! Thank you!! I'm so happy to read your comment 😊🙏.
Congratulations @funshee! You have completed the following achievement on the Hive blockchain And have been rewarded with New badge(s)
Your next target is to reach 13500 replies.
You can view your badges on your board and compare yourself to others in the Ranking
If you no longer want to receive notifications, reply to this comment with the word
STOPThank you so much HB
That's great @funshee! We're thrilled with your commitment to Hive! Let's go for this new goal!
It is stylish, beautiful, and elegant. It looks amazing. It shows your skills. You did a great job! Well done!
Thank you so much 😊🙏 !LUV
@diyhub, @funshee(1/5) sent you LUV. | tools | discord | community | HiveWiki | <>< daily
It was excellent.
You always know what to do to surprise us.
I wonder what you will do next.
Thank you very much, Neblomax; I'm ever grateful for your support 😊🙏.
I have a few things in mind for the #diy March contest, maybe fish🤔 or some other sea creatures.
@funshee, I paid out 0.035 HIVE and 0.005 HBD to reward 5 comments in this discussion thread.