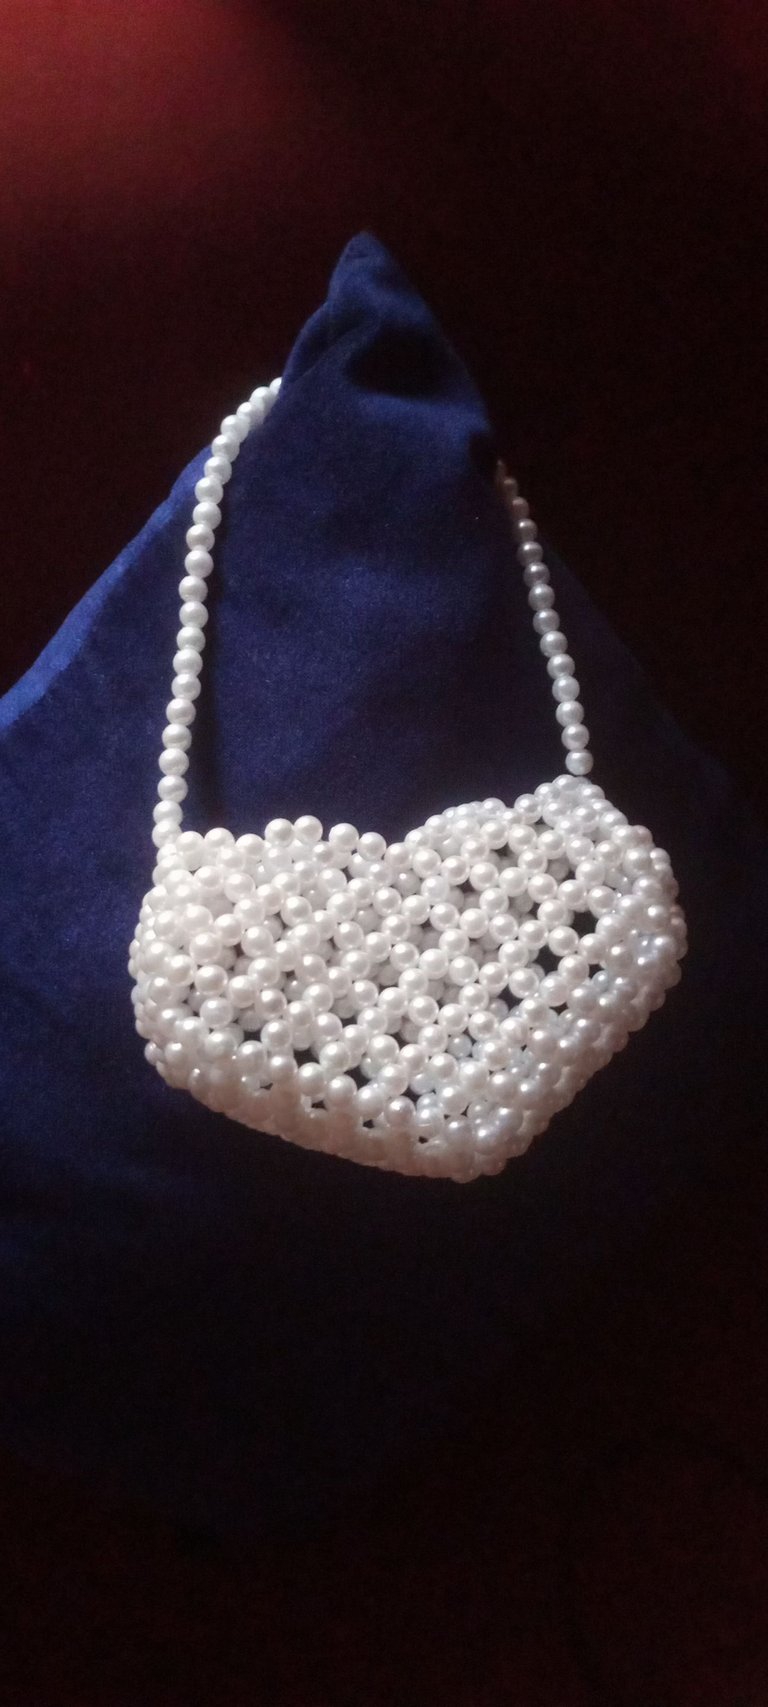
Let's Make A Beautiful Heart Shape Bag || DIY Community February Contest
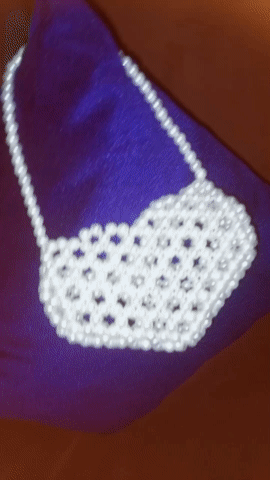
Early this month, a client asked that I bead a heart-shaped bag for her mom; her mom's birthday happened to be on February 14; what a lovely day to be born. She was very particular about her mom's favorite color, so I got to work and make this beautiful white heart-shaped bag for her dearest Mom.
Valentine's Day might be over, but the February contest in the #DIY Community is still ongoing; this is my humble participation, and you are welcome to join in the fun.
Without further ado, come along and let me show you the step-by-step process.
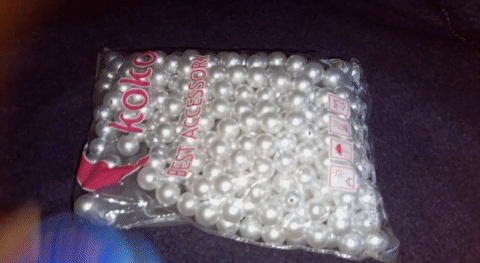
Material used:
To make the bag, I used one pack and a half, size 14 pearls beads, 0.7 fishline, and scissors.
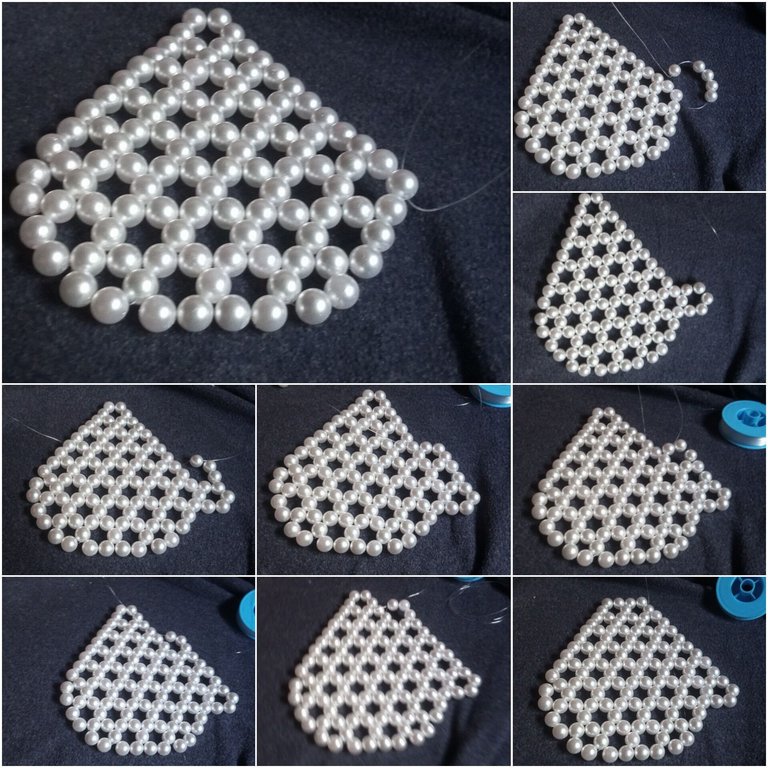
Step-by-step process
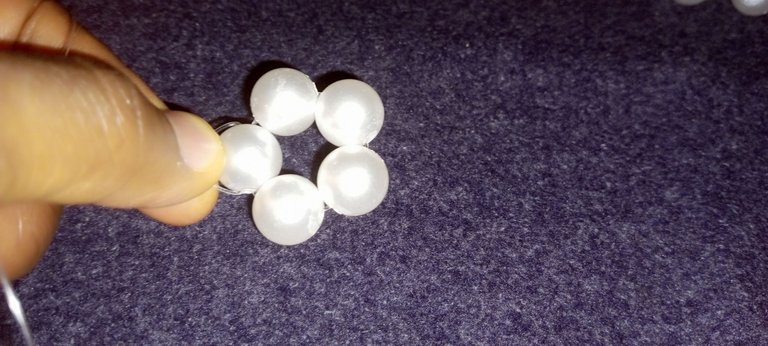
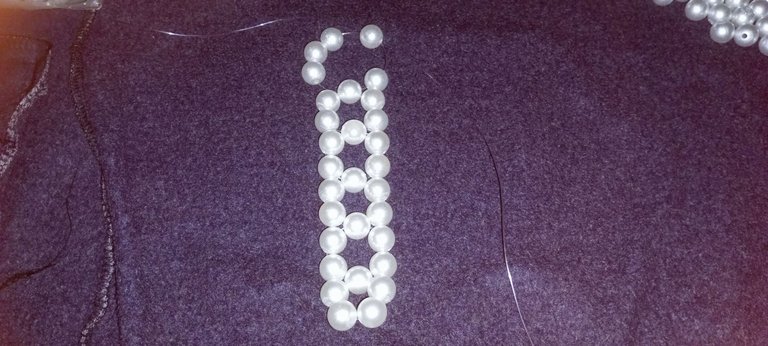
step 1:
I cut out a 100cm fishline, put 5 beads on it, and crossed both sides with the fifth bead.
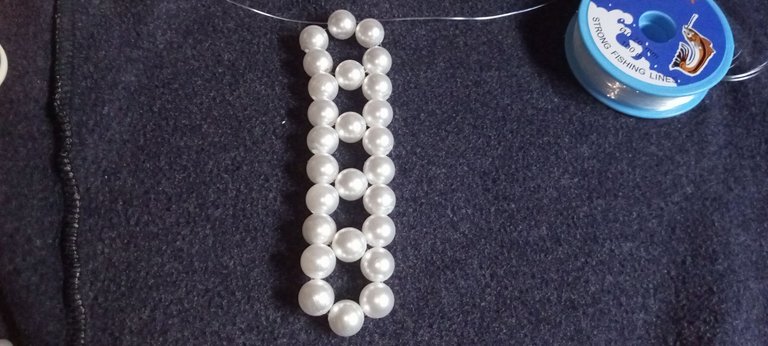
Step 2:
I put two beads on the left fishline, and two beads on the right fishline and crossed both fishlines with one bead.
I repeated this three more times to have five rings of beads.
Step 3:
I'm this step l, I wanted to turn my fishlines, so I put three beads on the left fishline, one bead on the right fishline, and crossed both fishlines with one bead.
Step 4:
Here I put five beads on the left fishline and crossed both fishlines with the fifth bead.
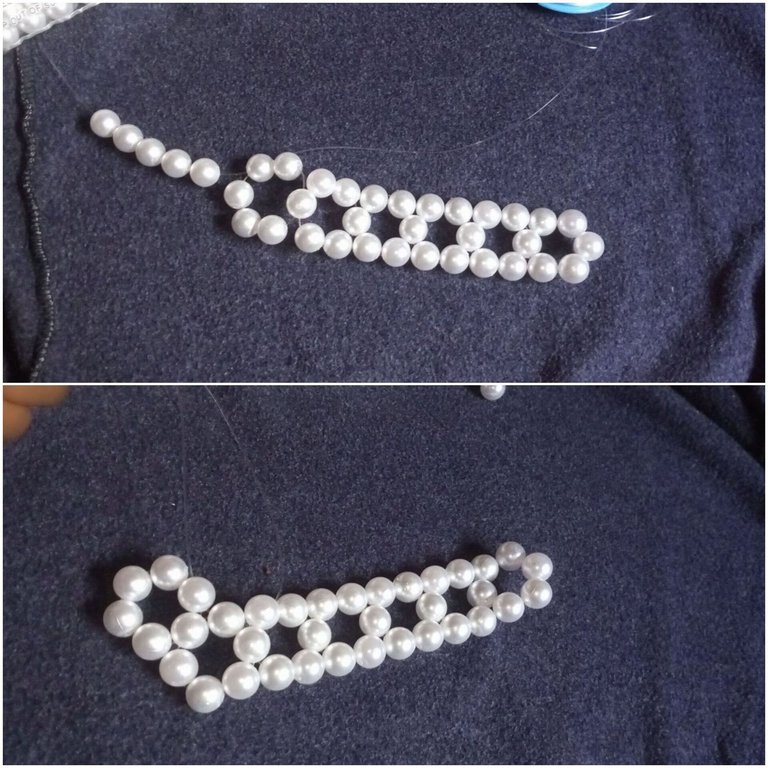
Step 5:
I passed the right fishline through the next two beads, put three beads on the left fishline, and crossed both fishlines with the third bead.
Step 6:
I passed the right fishline through the next two Beads, put three beads on the left fishline, and crossed both fishlines with the third bead
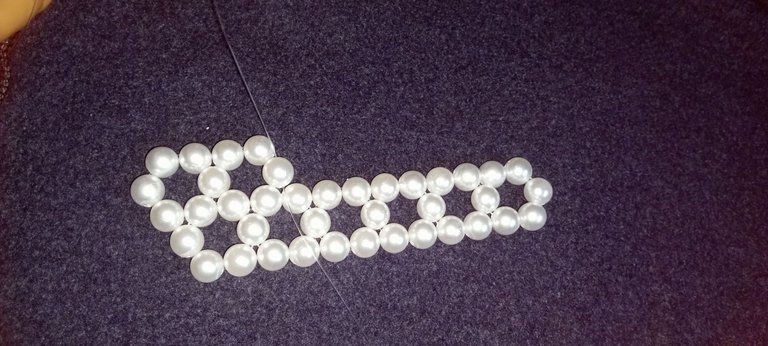
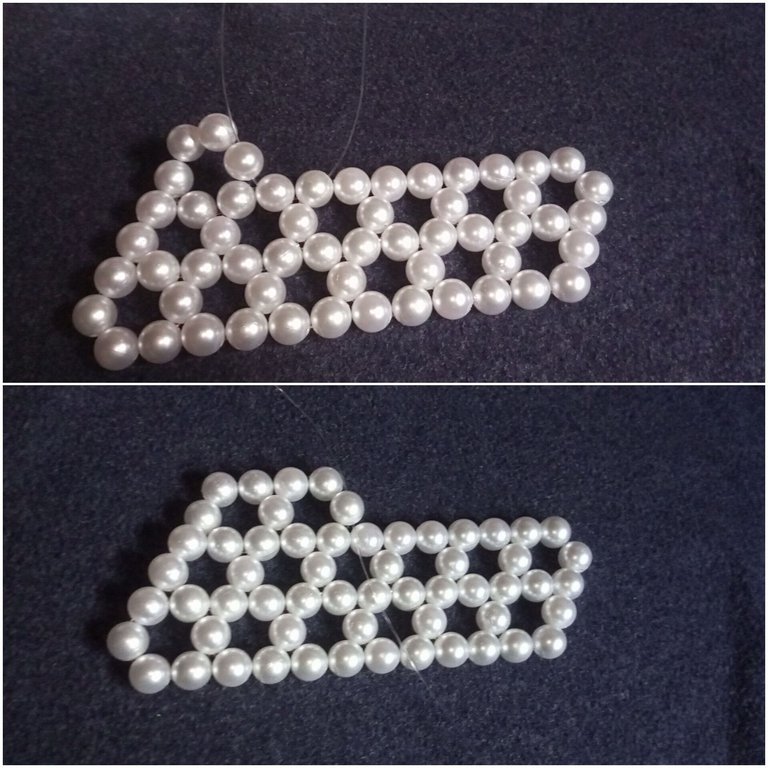
Step 7:
Step 8:
Step 9:
Here I passed the right fishline through the next two beads, put three beads on the same right fishline, and crossed both fishlines with the third bead
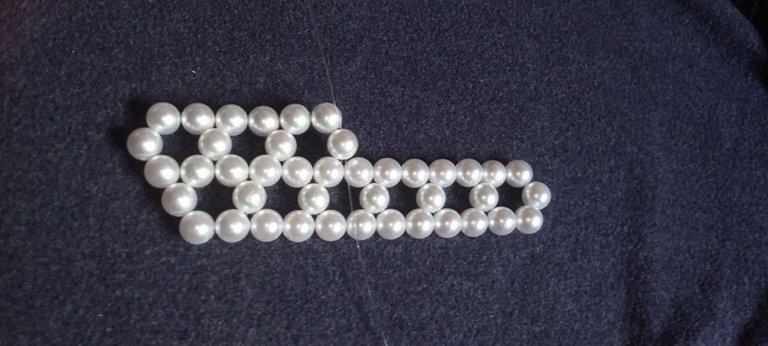
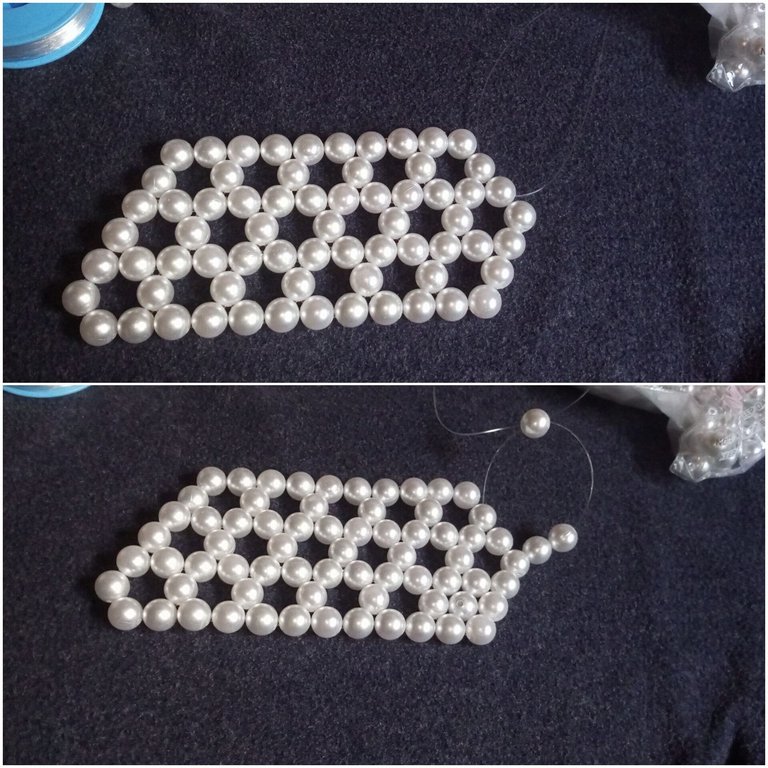
Step 10:
To start a new line I put my right fishline into the next bead, put four beads on the left fishline, and crossed both fishlines with the fourth bead.
Step 11:
I passed my right fishline through the next two beads, put three beads on the left fishline, and crossed both fishlines with the third bead.
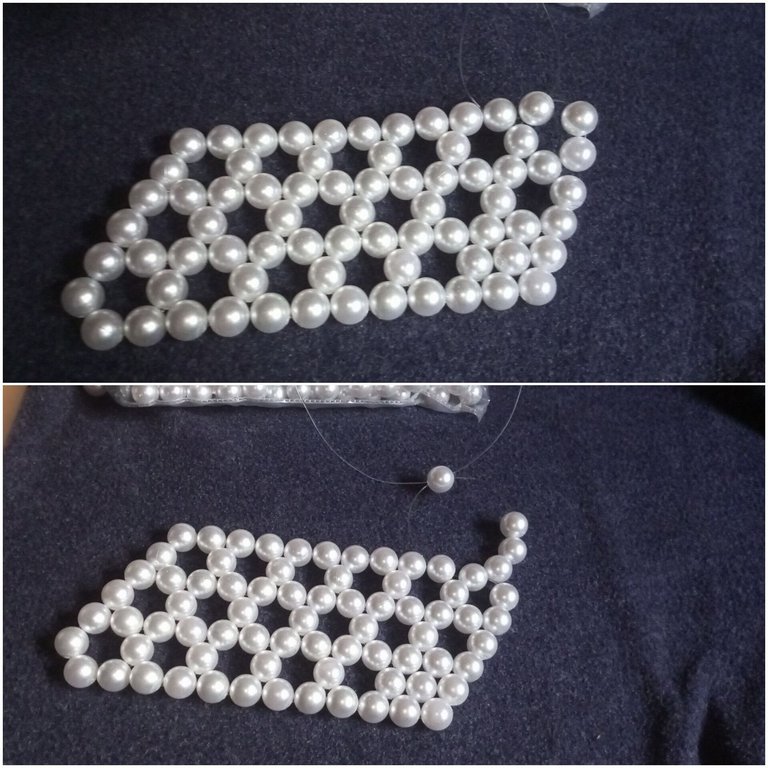
Step 12:
I passed my right fishline through the next two beads, put three beads on the same right fishline, and crossed both fishlines with the third bead.
Step 13:
I passed my right fishline through the next two beads, put four beads on the left fishline, and crossed both fishlines with the fourth bead.
Step 14:
I passed my right fishline through the next two beads, put three beads on the left fishline, and crossed both fishlines with the third bead.
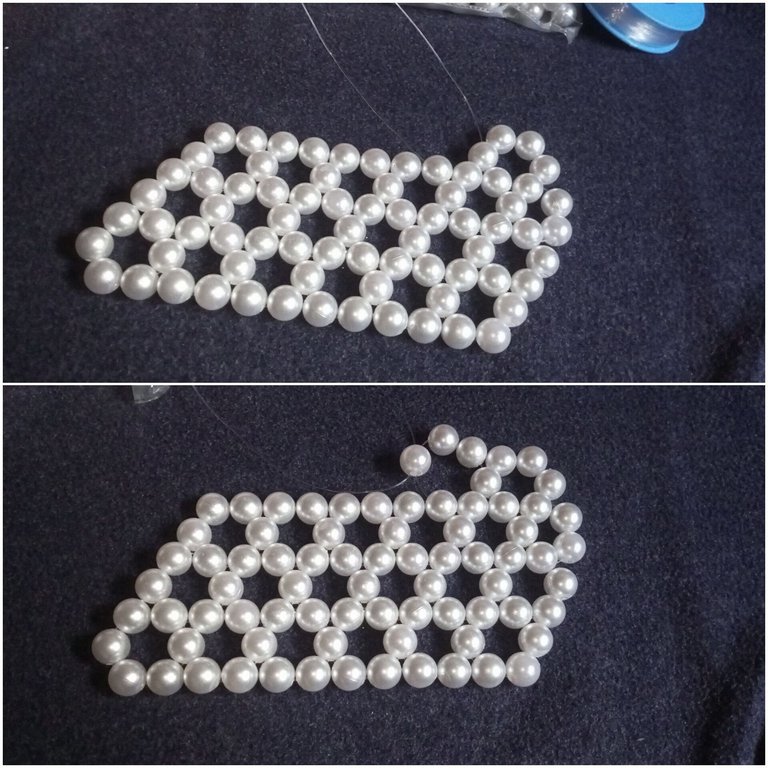
Step 15:
I passed my right fishline through the next two beads, put three beads on the left fishline, and crossed both fishlines with the third bead.

Step 16:
I passed my right fishline through the next two beads, put three beads on the right fishline, and crossed both fishlines with the third bead.
Step 17:
I passed my right fishline through the next bead, put four beads on the left fishline, and crossed both fishlines with the third bead.
Step 18:
I passed my right fishline through the next two beads, put three beads on the left fishline, and crossed both fishlines with the third bead.
Step 19:
I passed my right fishline through the next two beads, put three beads on the right fishline, and crossed both fishlines with the third bead.
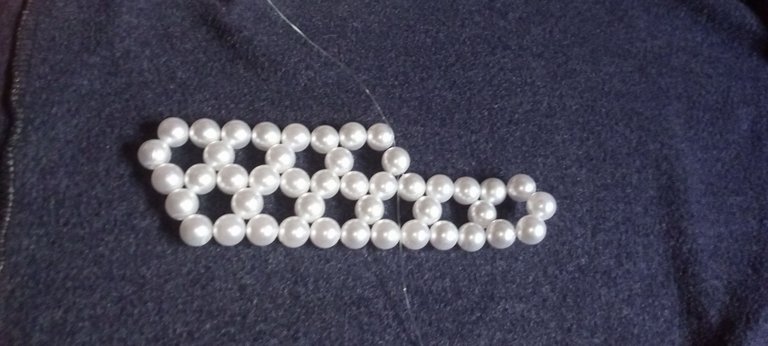
Step 20:
In the next three steps, I wanted to reduce the number of beads, so I passed my right fishline through the next bead, put three beads on the left fishline, and crossed both fishlines with the third bead.
Step 21:
I passed my fishline through the next two beads, put three beads on the left fishline, and crossed both fishlines with the third bead
Step 22:
I passed my right fishline through the next two beads, put two beads on any of the fishlines, and then tied the knots, making sure the work was secured and trimmed off the excess fishlines.
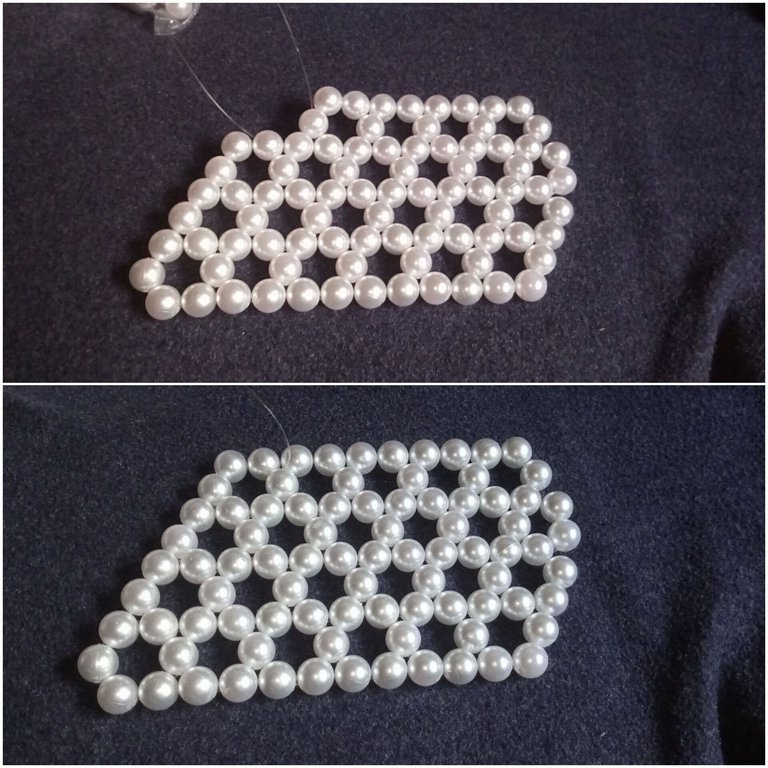
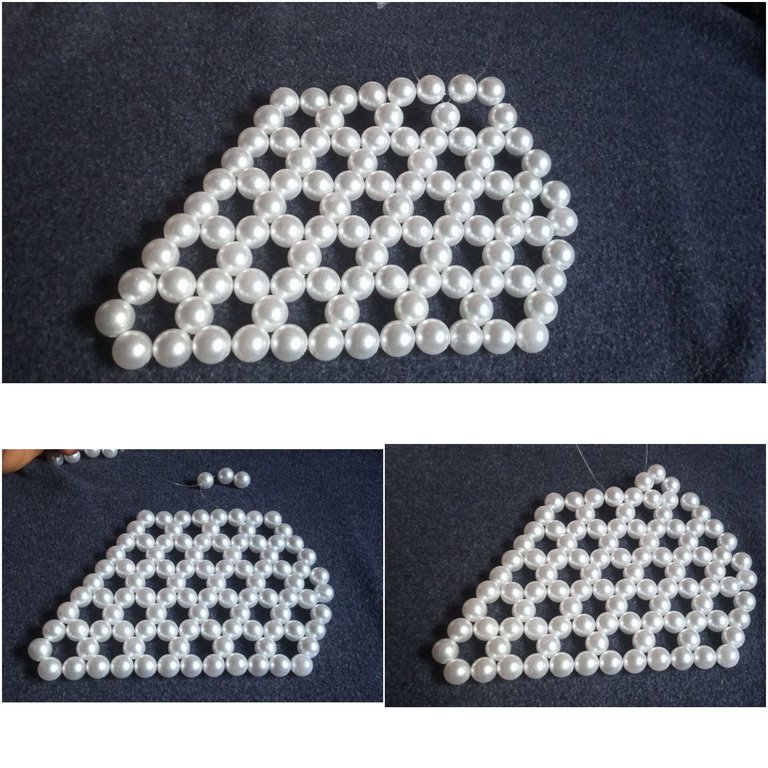
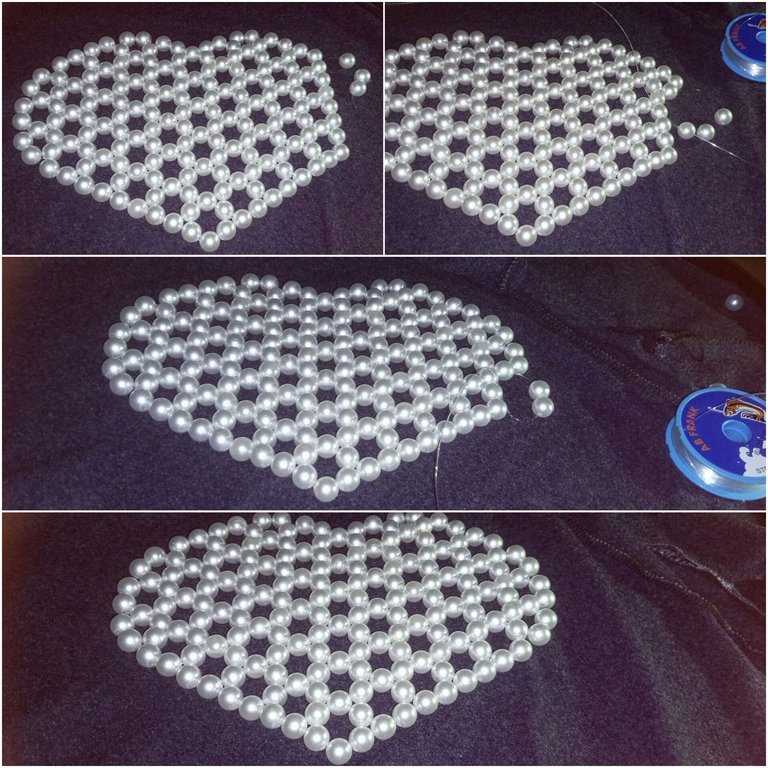
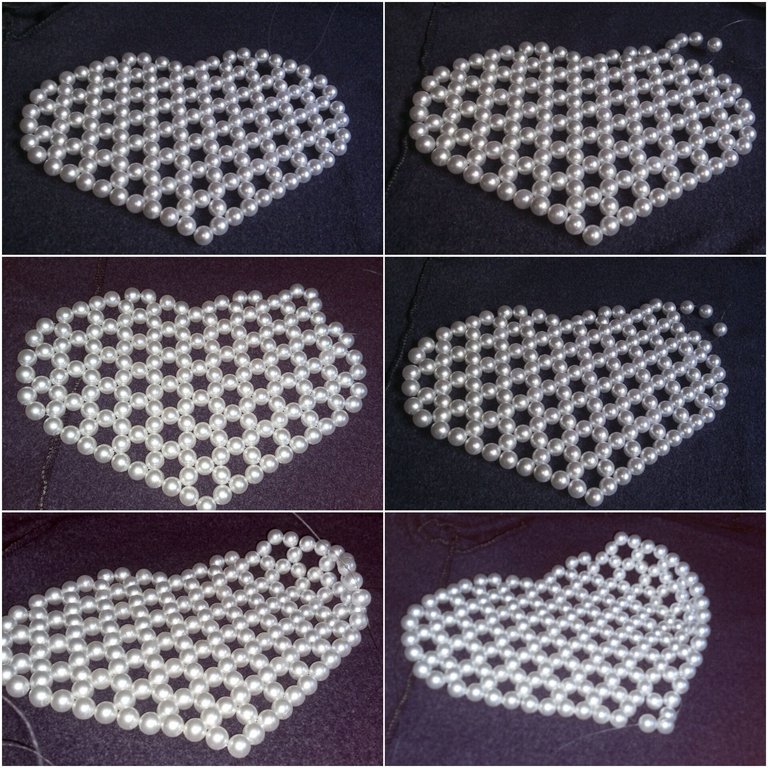
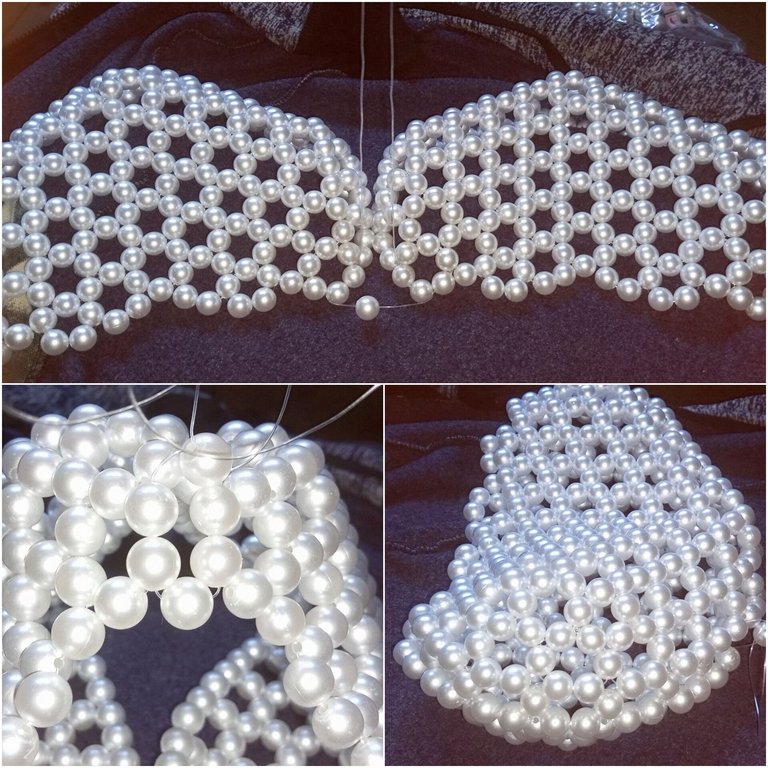
Now I have a quarter of the heart ❤️
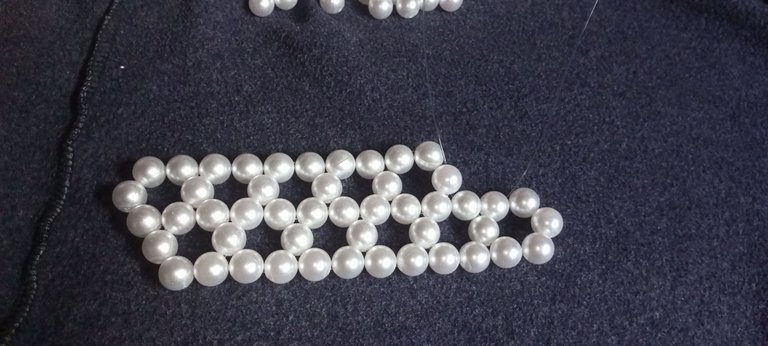
I followed all the steps above to make the second quarter of the heart. And herein
Step 23: Is the first row
Step 24: Second row
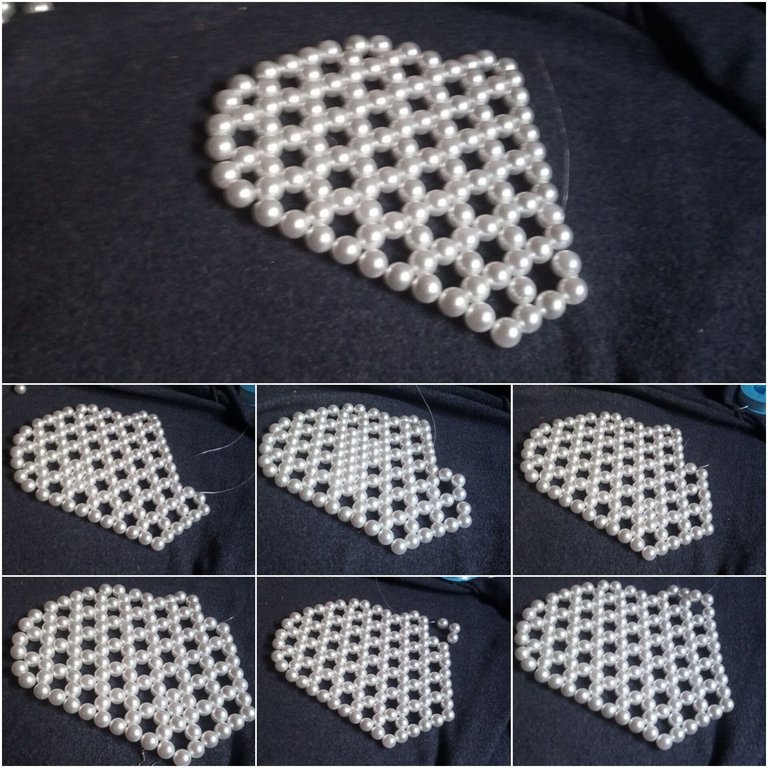
Step 25: Third row
Step 26: Fourth row
Step 27: Fift row
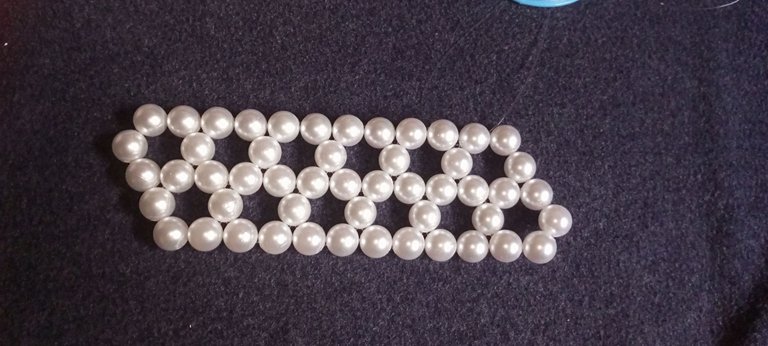
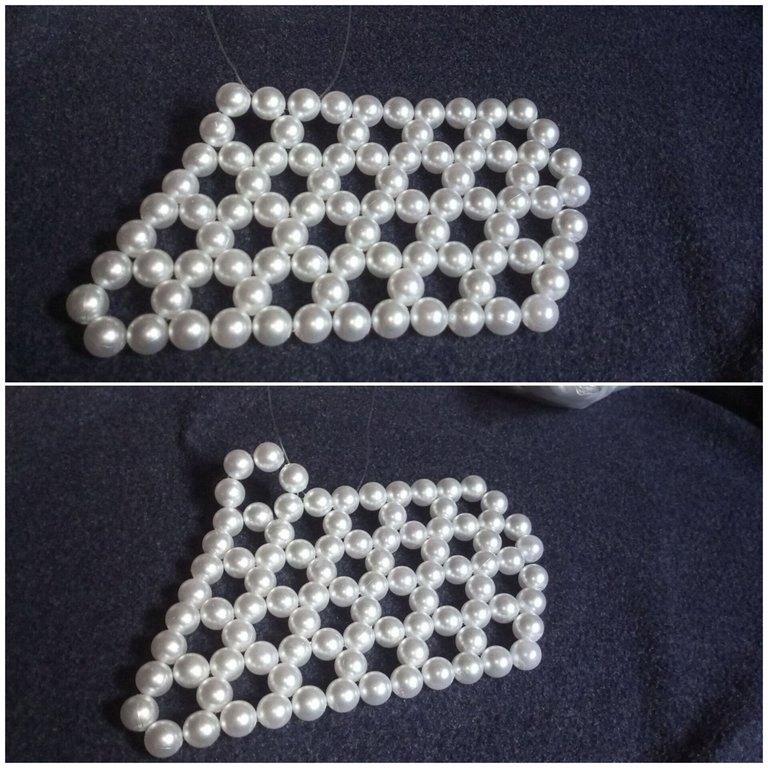
Step 28:
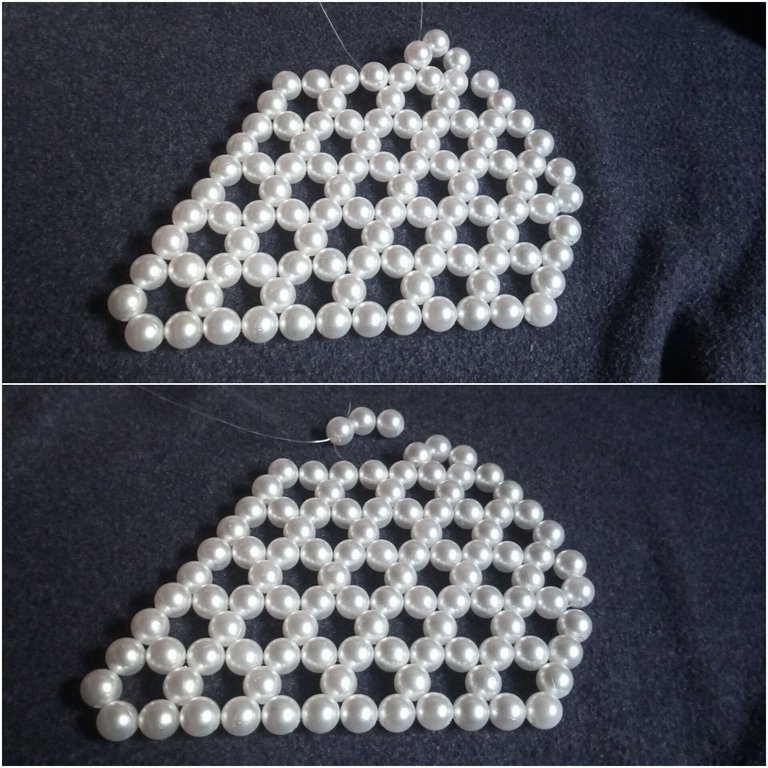
Now I have half part of the heart ❤️ I just went ahead and made another quarter

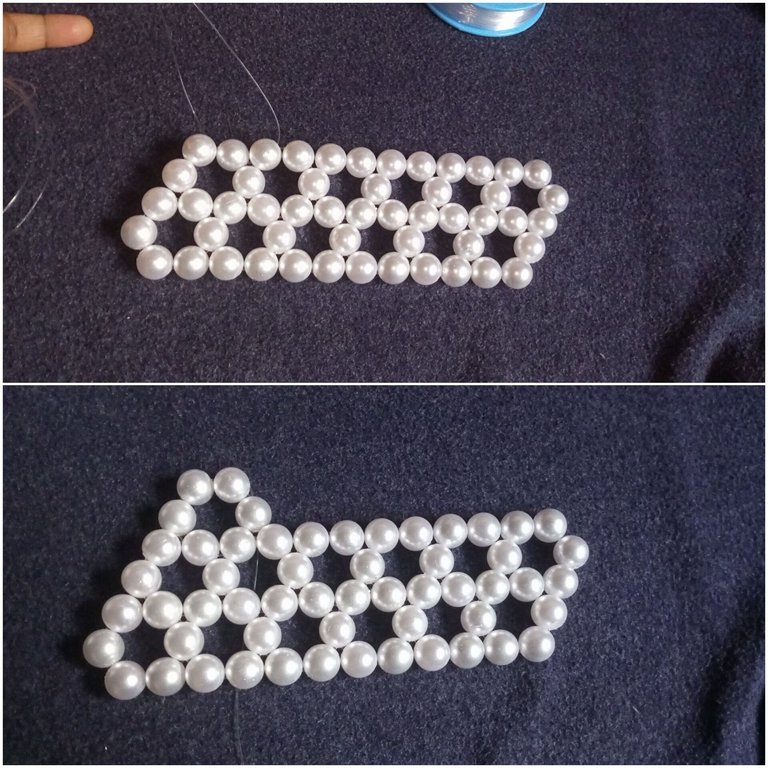
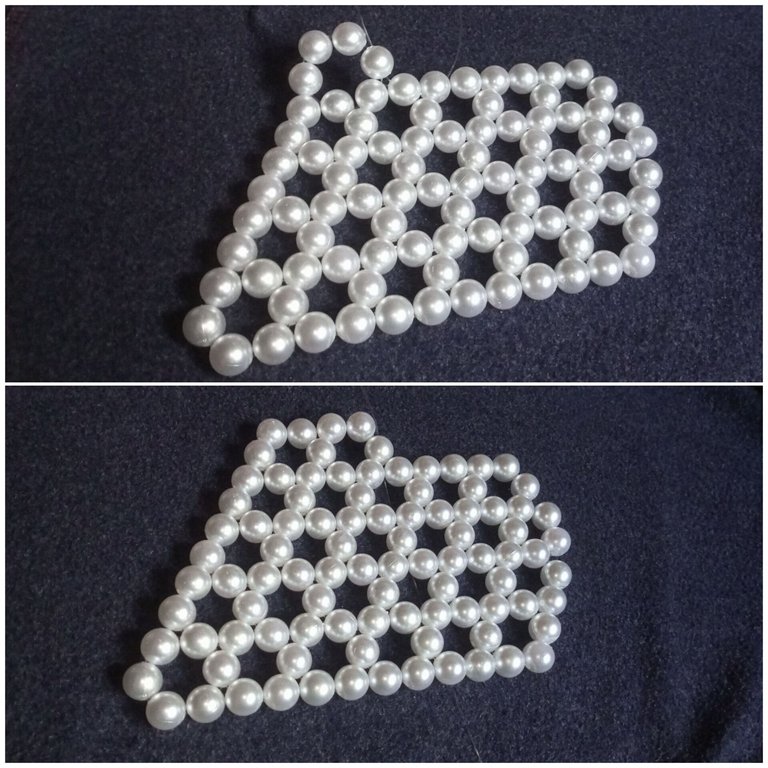
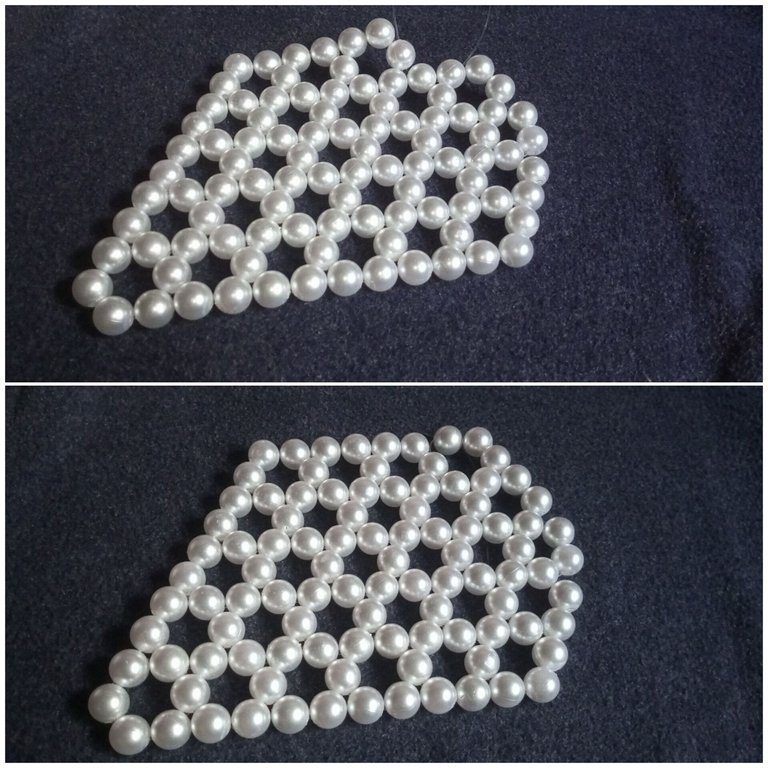
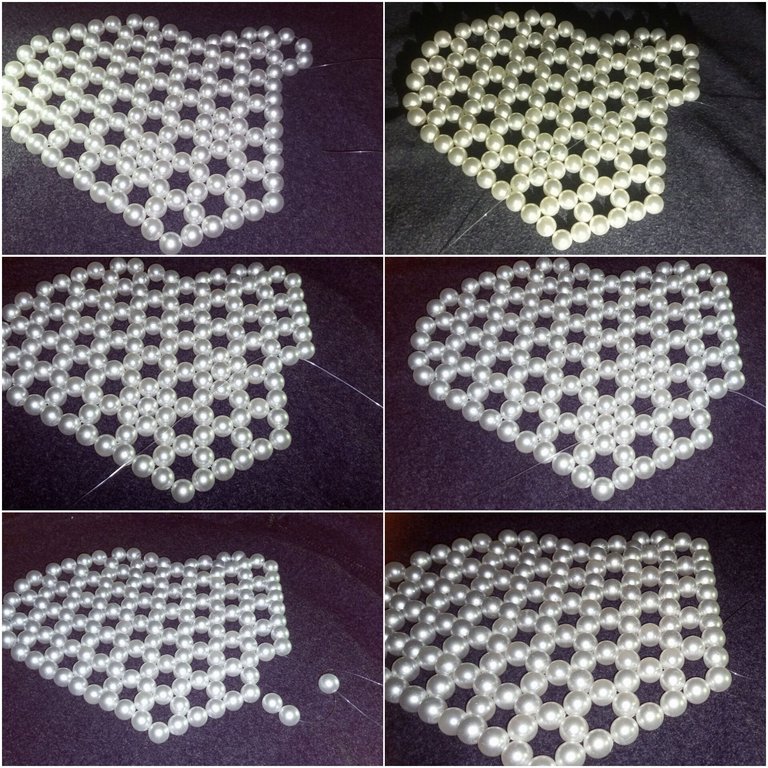
Step 29:
And the other half part of the heart.
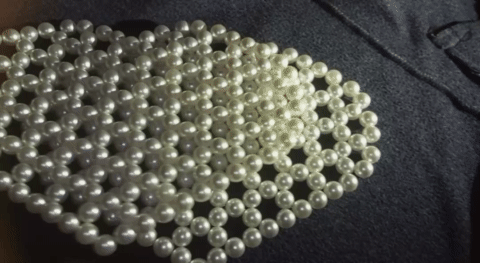
Step 30:
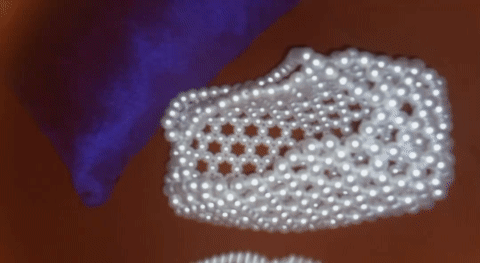
It's time to join the two beautiful hearts and to achieve that; I first build a row of beads around each heart.
Counting from the middle, I ignored 6 beads, then cut and inserted 70cm on the seventh and eighth beads, then put four beads on the left fishline and crossed both lines with the fourth bead. I continued to put three beads on the left fishline crossed with the third bead until I got to the other side.
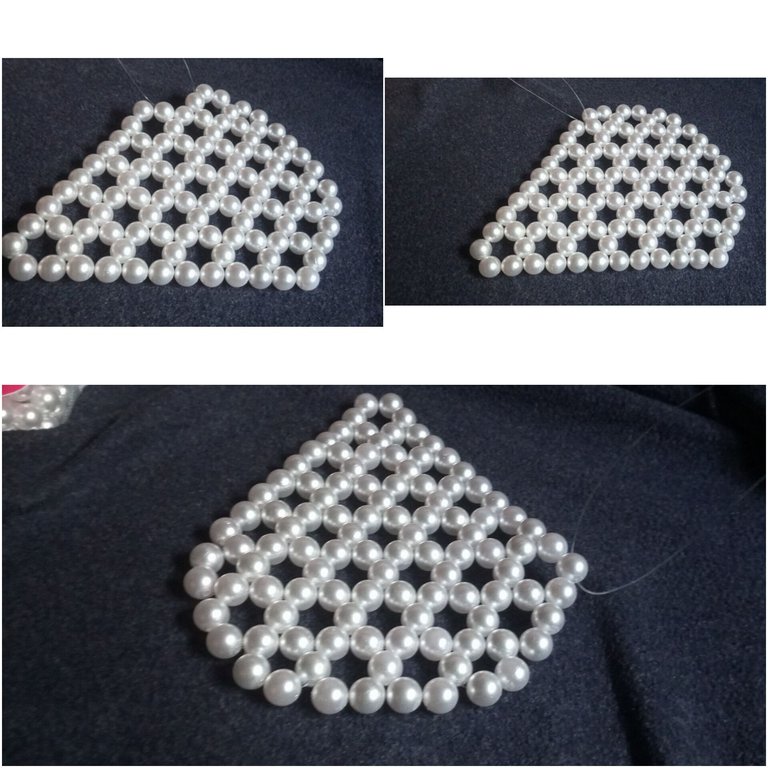
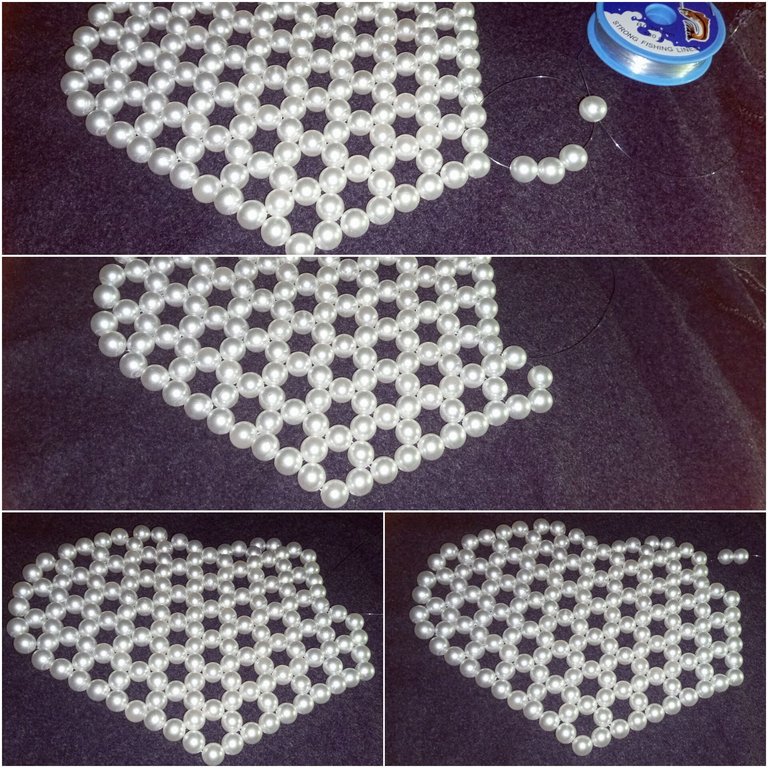
Step 31:
I just went ahead and joined the two hearts by ignoring the first bead, putting my fishline into the next two beads, and then crossing both fishlines with one bead.
Step 32:
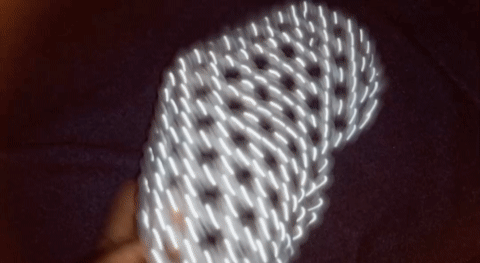
I continue to repeat step 31 until I have my beautiful heart. Then, I took a little fishline and beads to add the handle.

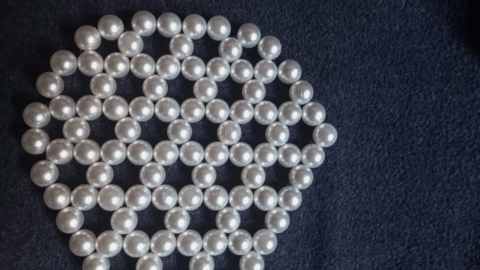
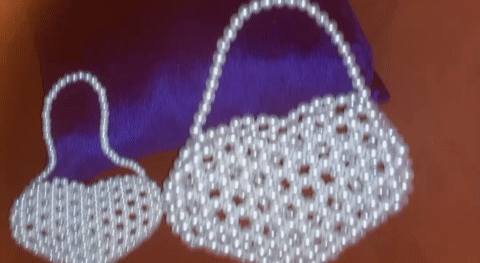
I made the big size for my client and the small size for my God's daughter, whose birthday is on the 28th of February.
It took me over a week to perfect this heart shape. I had to lose the bag many times to redo it, but once I figured it out, it took just four hours to make the second bag.
This is another project of mine, I enjoyed making so much. I love this bag a lot and I think I will be making one for myself. I hope that you enjoyed it and love it as well.
What do you think about this bag? All your suggestions, and questions, are welcome 🤗
Thank you so very much for your time and support, do have a great day.
All images are mine.@funshee❣️😊🙏
que genial está muy cuchi el diseño
how cool the design is very cute
Gracias 🙏🥰 I'm very happy you like it.
I love this, it's so beautiful ❤️
Thank you very much 🙏🥰 Ozd
I just imagined my baby girl rocking this bag, with a nice dress and nice white bead necklace to match the bag.. this is so creative kudos 👍
Hehe, it will look great on the Princess ❣️.
Thank you very much, Sis, for your support always.
unique and interesting👍
Thank you very much 🙏🥰
You're welcome♥️
Wow!! This is super creative!! You are so talented friend, we wish you all the best in your future endeavors. Well done.
Thank you so very much for DIY; I always have fun when it comes to beadwork and I'm glad this one came out beautifully.
Aww it is so beautiful
Thank you very much 🥰🙏
https://bsky.app/profile/did:plc:rag2mftdy2alo7rtmyttmpk4/post/3liuo5xoxmh2d
https://bsky.app/profile/did:plc:rag2mftdy2alo7rtmyttmpk4/post/3liuo5xoxmh2d
The rewards earned on this comment will go to the author of the blog post.
It's so beautiful and classy, I love the colour of bead as well
Thank you very much Kachy ❣️!LUV
@kachy2022, @funshee(1/5) sent you LUV. | tools | discord | community | HiveWiki | <>< daily
❣As always, you exceed expectations @funshee. ❣
❣You have so much potential and creativity, you literally can do anything you want.❣
Thank you so much, for cheering me on always. 🙏😊
I believe we all can do anything if we put our mind and effort into it. !LUV
@neblomax, @funshee(3/5) sent you LUV. | tools | discord | community | HiveWiki | <>< daily
Wow, this is a very creative and super talented work I have ever seen, it's quite a beauty and I love it. Nicely done and kudos to you.
Thank you a lot, Eberechy; I so much appreciate your support.
I most confess this is very beautiful 🥰, you did an amazing job ma'am
Thank you very much J, I'm glad you love it.
@funshee, I paid out 0.236 HIVE and 0.063 HBD to reward 10 comments in this discussion thread.