Making Flowers for my Cardigan (En-Tr)
English
Türkçe bölüm için lütfen buraya tıklayın.
Hello everyone!!!
I hope you are well or are trying to be well. I'm almost fine. I found out that Guns N' Roses is coming to Istanbul on the 2nd of June. I always wanted to go to a concert of this band. It was one of my dreams, but I just can't afford it. They are coming to my city all over Turkiye but I can't buy a ticket again because I think 6000 TL is a very high price for a single ticket. Also, it should not be forgotten that there is limited visibility. Anyway. Today, our dreams have become dust.
Today I want to talk to you about the flower I knitted with my broken dreams 😂 Not long ago, I deserved to make something like a cardigan for myself and I'm still working on it. These things really take a lot of time and I was very busy last week.
Now I wanted to do something that would lift my spirits a little and not make me work too hard. Flowers...

In 5 minutes you can easily finish one of them and you probably already know it. I also think they look great over a black cardigan. We have already seen this model for a while. It has been very popular lately and I said that I can do it myself until I buy it. I've been saying this word to myself a lot lately. I can do it.
Of course you can use the colours you want and like. For example, a flower where the leaves are blue and the middle part is white or black would look very nice. I also think pink and lilac tones. It all depends on your style.
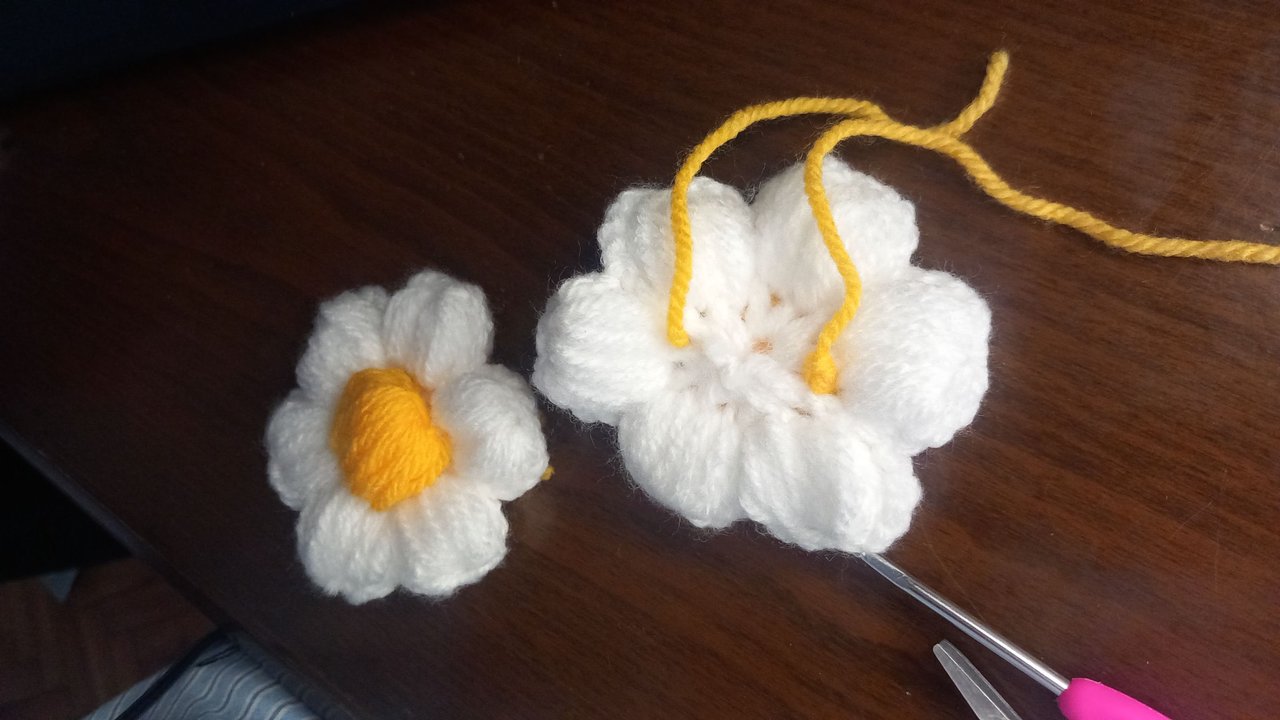
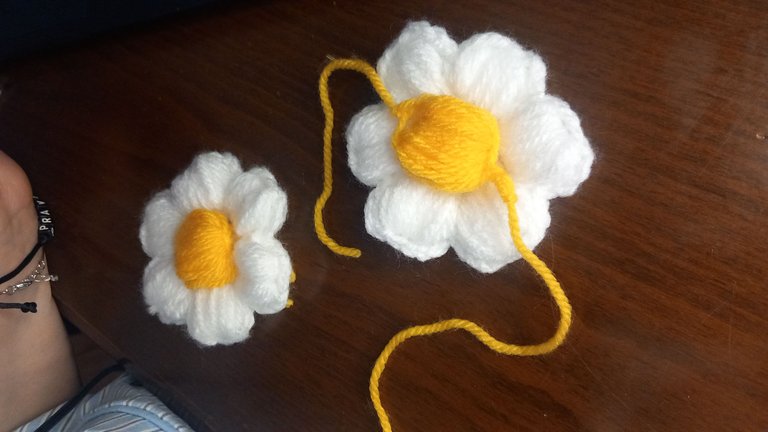
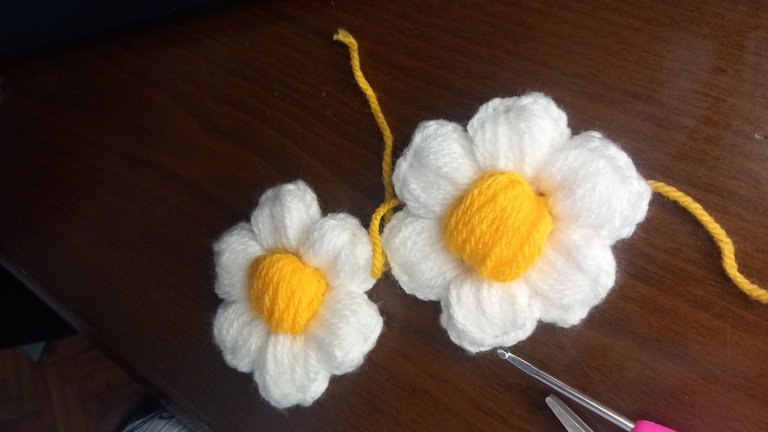
As you can see in the photo above, I used yellow and white to show you. My crochets are 3 and 3.5 mm. You also need a pair of scissors.

Leaf Centre


We take the ball you want the leaves to be and pull 5 chains. While doing this, we use our 3 mm crochet, we will use 3 mm for the leaves and 3.5 mm for the middle part. Afterwards, we wrap the yarn around the crochet once and enter the first chain and pull a double crochet Then, after making 3 more chains, we wrap the yarn around the crochet once and pass it through the round formed and pull a double crochet again. It is only necessary to remember that one chain is required after each crochet so that it provides us with the space we will need later. We continue this until there are 12 in the ring.
In the meantime, you can make a magic ring rather than this 5-chain ring. I did it with a chain because I was a little confused here. I still have problems with my magic rings and I still don't feel like doing it, if you agree.
Although these works take up space in the photos, they are quite simple and easy. Of course, if possible, do not make as crooked as me while doing this. I guess it's the side effect of doing more than one job at the same time.
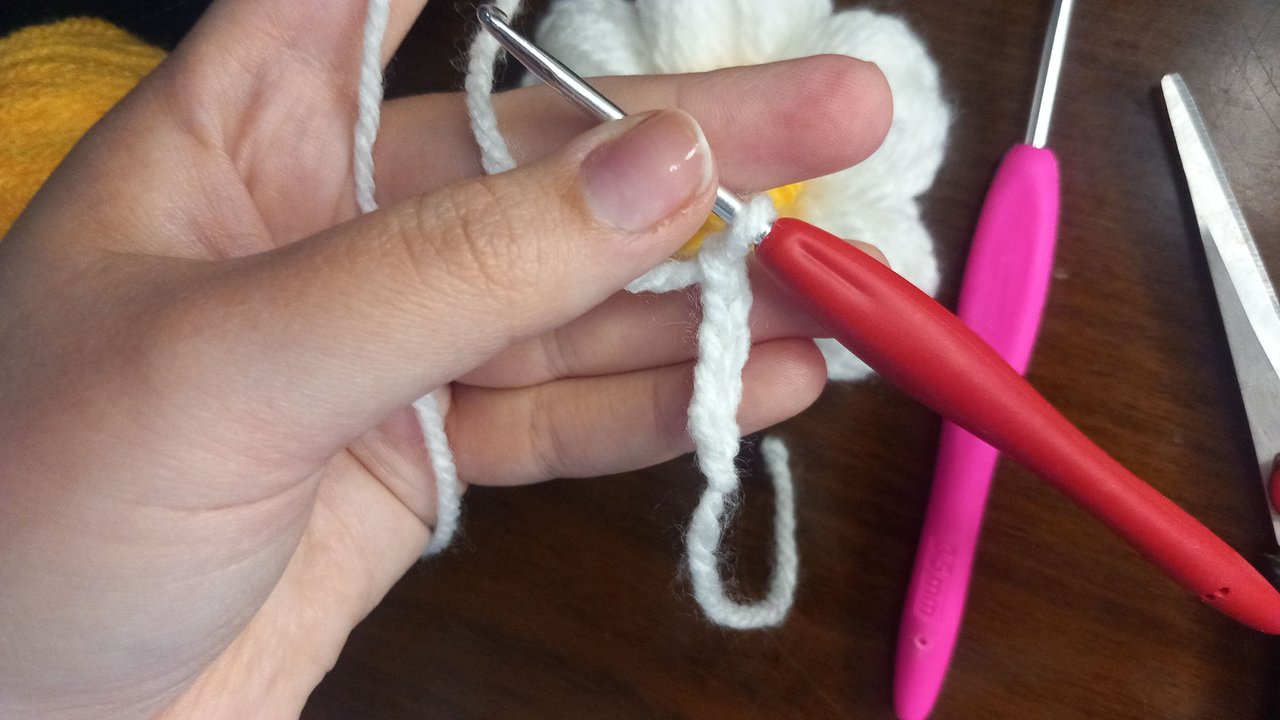
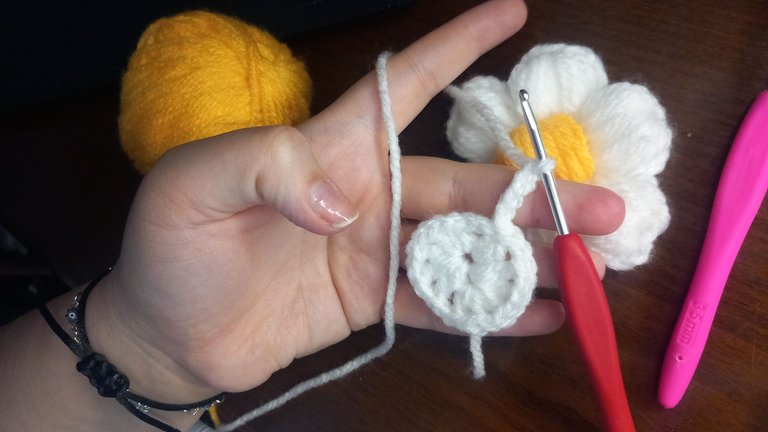
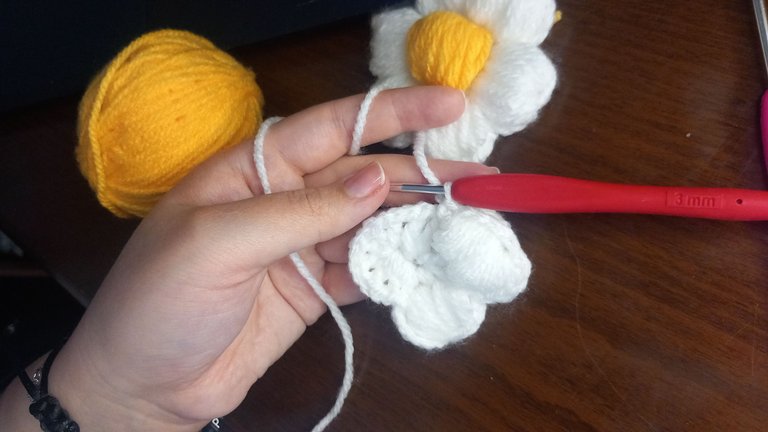
Leaves


After finishing the 12 drawn around like the magic ring, we go up 3 chains. This will be something like a lock that will hold our leaves together. After 3 chains, we wrap the rope 6 times through the gap of the crochet in the size of the chains. I mean, just after the chain, wrap the yarn once, then pass the crochet through the first gap at the bottom and pull the string. This yarn you pull should be the size of 3 chains. It is already more obvious what I mean in the photo.
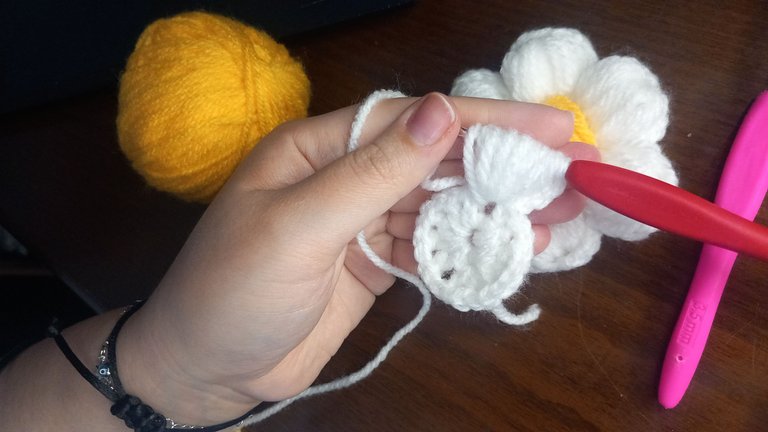
After 6 times in the same gap, we continue 6 times in the next gap. Do not let go of the yarn and stick to your height as much as possible. You can notice that mine is shorter in length. You pay attention to yourself.
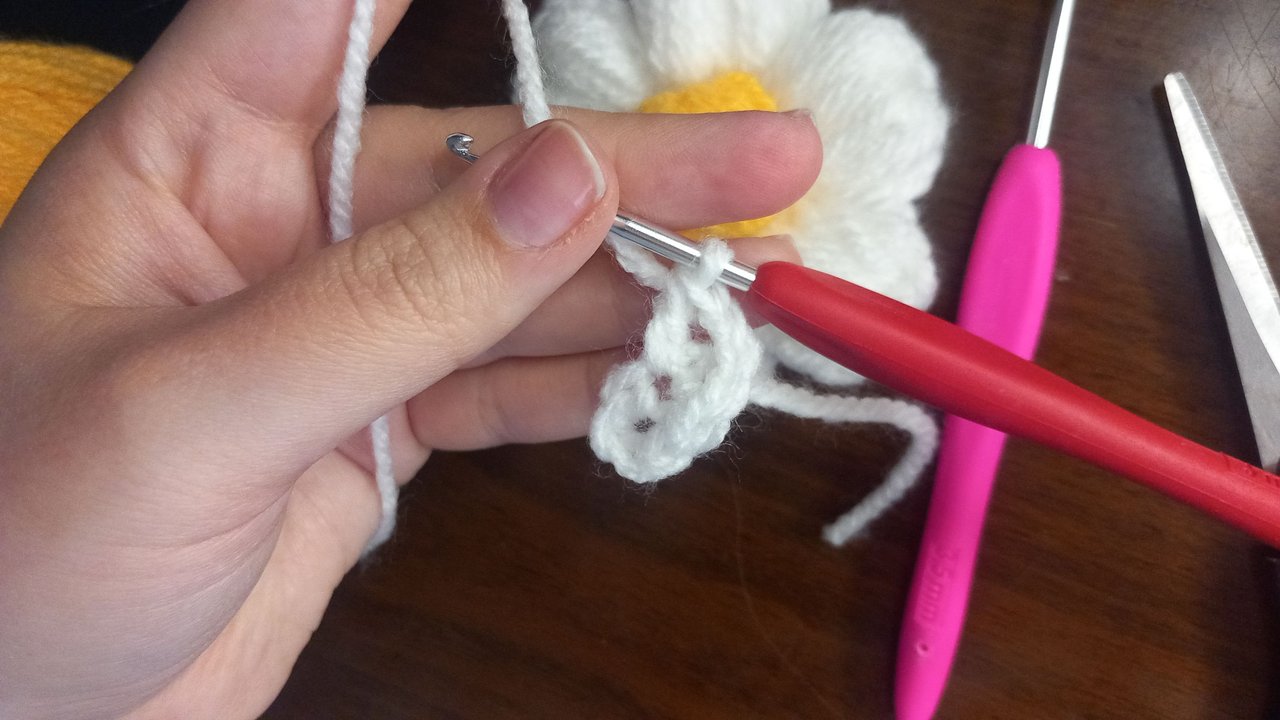
When there are a total of 12 loops in 2 different spaces, we pass the yarn under the formed loops and gather them together. Then we tighten it completely with a chain and pull 4 more chains and we like it with a chain in the same gap. This part is actually hard to do and hard to explain. I think you can understand that I am in pain.
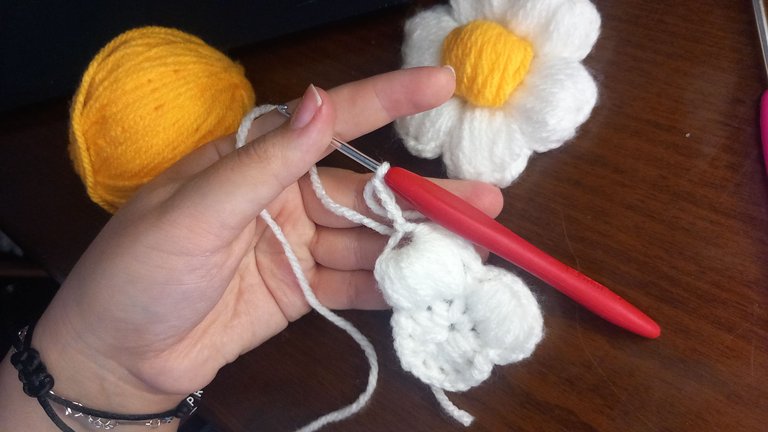
In addition, when you continue this order until there are 6 leaves, do not miss the gap of the chain part standing close to the ring, your work is not over. I will show how to tie the last part below.


When you get to the end, we tighten the rings with a chain once and then we pull 3 chains. We now connect these 3 chains to the second chain from the root of the first leaf. For this, I recommend tying it without twisting the yarn in the crochet because when I did it, I realised that it is very large and easily visible to the eye.
Now that this part is finished, we can easily start the middle part. By the way, since the threads I used were thick, I did not need to go over the numbers I told you, but if you use thinner threads, you may need more. For example, you can thread 8-9 rings into a gap instead of 6.
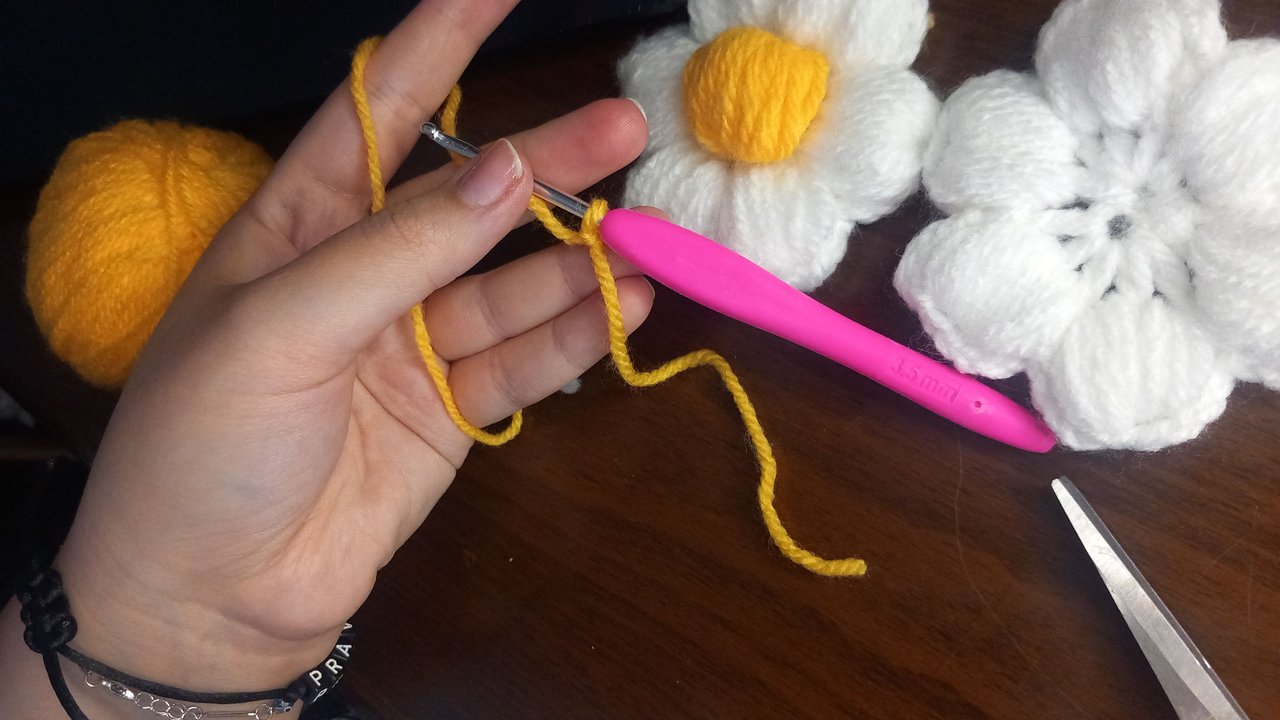
Yellow Section


I've tried to describe as much as I can up to this point, I've tried to describe what I can do and write as simply as I can, but I don't know what to do here.
Firstly, I took my 3.5 mm crochet instead of 3 mm. The reason for this is to help it to be a little more fluffy, after all, the middle part needs to be separated a little from the others. After making one chain tightly, you need to make the second chain a little longer. A single chain should be about 1 cm long. We will use this chain just like the threads on the leaves.
After the wide chain, we pull one more tight chain and start making a ring like leaves. Wrap the yarn around the crochet once and pass it through the long chain. If you put two of the 3 yarns to the left of the crochet, that is, under two yarns, it will be stronger. It is enough to do this 12 times at the same point.
After 12 rings are finished, we pull the yarn from the bottom like the others and bind it at the top. Then we pull 2 more chains and the middle part of the flower is complete. When you cut the yarn, I advise you to leave extra yarn. It is necessary for it to merge with the leaves and to tie it elsewhere if you need it.
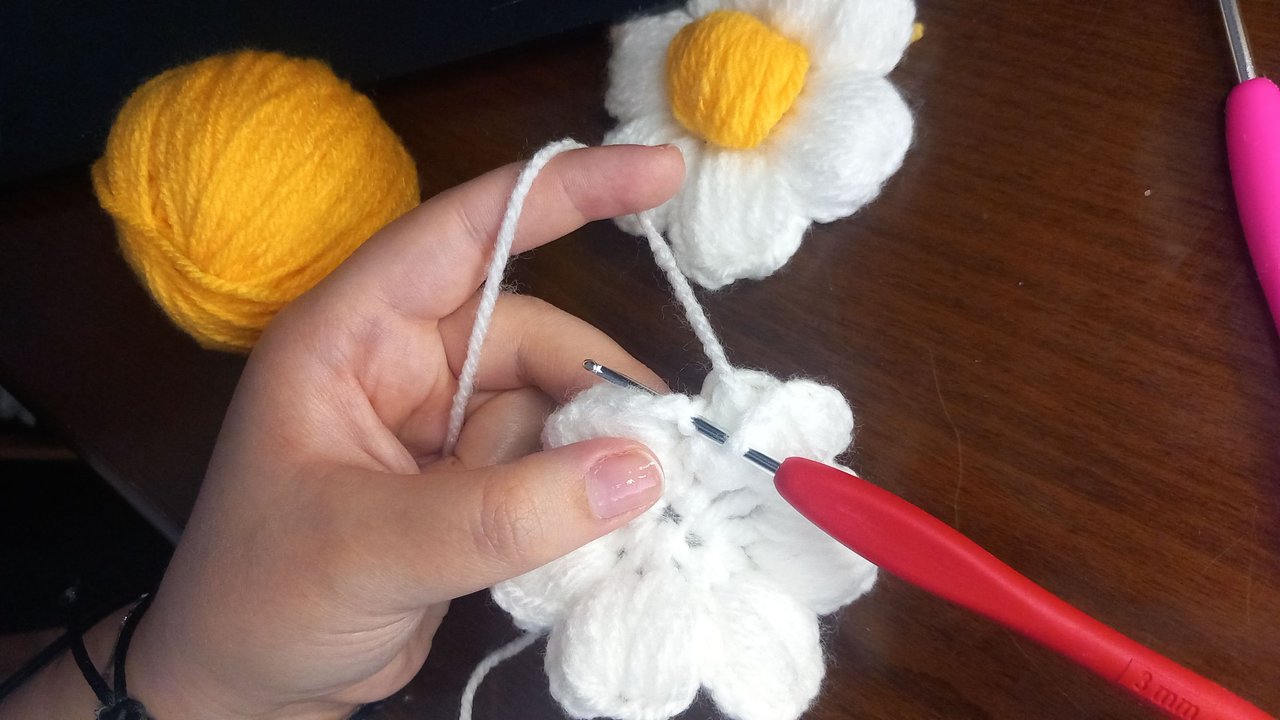
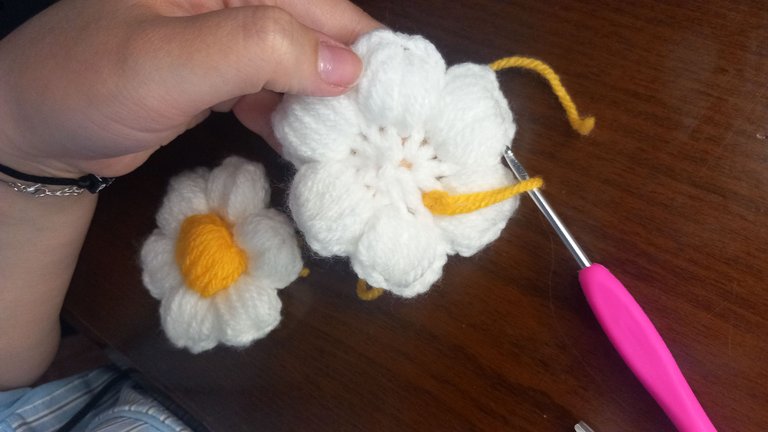
Merging


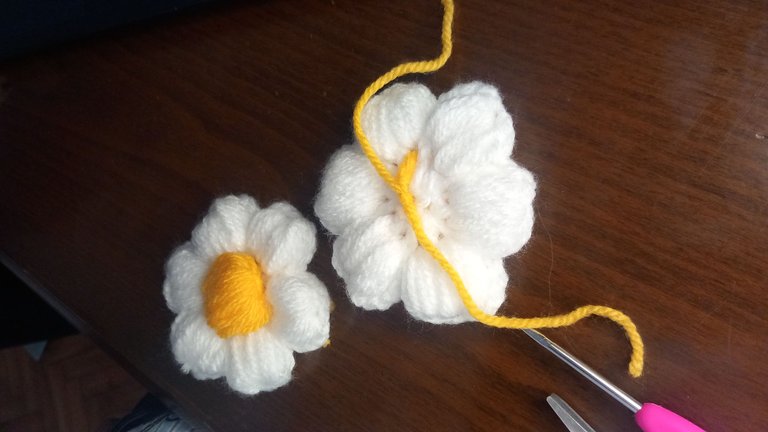
This step is the easiest. It meant a complete rest for my hands that were tired of tugging. I placed the yellow part we made where I wanted the white leaves to come on. Then, with the help of the crochet, I pulled the threads out of the gaps on the other side. This process is really easy. Immediately afterwards, I tied those two yarns together by throwing a blind knot.
At this point, you can cut the extra yarn if you want or leave it. I preferred to leave it. This will help me when it's time to add it to my cardigan.
End

This is also finished here. As I said at the beginning, it is a very simple project that you can finish in 5 minutes. It is also something that you can easily add to your bag or outfit. I think it can even be used for buckles. I hope this will be useful to you one day. I felt better while I was doing it. See you later. Take care of yourself, stay in health and love, and please remember that;
You are the only one of you.

Herkese merhabaaa!!!
Umarım iyisinizdir ya da iyi olmaya çalışıyorsunuzdur. Ben iyi sayılırım. Öğrendim ki Guns N' Roses İstanbul'a geliyormuş 2 Haziran'da. Bu grubun bir konserine gitmeyi çok istiyordum hep. Hayallerimden biriydi ama maddi durumum el vermiyordu. Onlar bütün Türkiye'de benim şehrime geliyorlar ama ben yine bir bilet alamıyorum çünkü tek bir bilet için en az 6000 TL bence çok yüksek bir fiyat. Ayrıca kısıtlı görüş olduğunu da unutmamak gerekiyor. Neyse. Bugün de hayallerimiz tuz oldu.
Bugün sizlerle kırılan hayallerim ile birlikte ördüğüm çiçekten bahsetmek istiyorum 😂 Kısa zaman önce kendime hırka benzeri bir şey yapmayı hak bilmiştim ve bunun için hâlâ çalışıyorum. Bu tarz şeyler gerçekten çok zaman alıyor ve ben geçtiğimiz hafta çok yoğundum.
Şimdi ise moralimi biraz yerine getirebilecek, beni çok uğraştırmayacak bir şey yapmak istedim. Çiçekler...

5 dakikada bir tanesini rahatlıkla bitirebileceğiniz ve büyük ihtimallede çoktan bildiğiniz bir şey ile geldim. Ayrıca bence siyah bir hırkanın üzerine de harika dururlar. Bu modeli zaten bir süredir görüyoruz. Son zamanlarda oldukça popüler ve bende dedim ki satın alana kadar kendim yapabilirim. Son zamanlarda bu sözü çok söyler oldum kendime. Ben yaparım.
İstediğiniz ve beğendiğiniz renkleri elbette kullanabilirsiniz. Mesela yaprakların mavi ve orta kısmının beyaz veya siyah olduğu bir çiçek de çok güzel durur. Ayrıca bence pempe ve lila tonları da. Bu tamamen sizin tarzınıza bağlı.
Yukarıdaki fotoğrafta da görebileceğiniz gibi size gösterebilmek için ben sarı ve beyaz kullandım. Tığlarım 3 ve 3,5 mm. Ayrıca bir makasa da ihtiyacınız var.
Yaprak Ortası


Yaprakların olmasını istediğiniz yumağı alıp 5 zincir çekiyoruz. Bunu yaparken 3 mm'lik tığımızı kullanıyoruz, yapraklar için 3 mm ve orta kısım için 3,5 mm kullanacağız. Sonrasında ise ipi bir kere tığa dolayıp ilk zincire girip bir ikili trabzan çekiyoruz. Sonrasında ise 3 zincir daha çektikten sonra bir kere ipi tığa dolayıp oluşan yuvarlaktan geçiriyoruz ve ikili trabzan çekiyoruz yine. Sadece unutmamak gerekiyor ki her trabzan sonrasında bir adet zincir gerekiyor ki bize sonra ihtiyacımız olacak alanı sağlasın. Bunu halkada 12 tane oluncaya kadar devam ediyoruz.
Bu sırada açıkçası bu 5'li zincir halkasından ziyade sihirli halka da yapabilirsiniz. Benim burada biraz kafam karıştığı için zincirle yaptım. Hâlâ sihirli halkalarımda problem var ve hâliyle de yapasım gelmiyor hak verirseniz ki.
Bu işler her ne kadar fotoğraflarda yer kaplasa da oldukça basit ve kolay. Tabii bunu yaparken benim kadar yamuk yapmayın mümkünse. Aynı zamanda birden fazla işi yapmanın yan etkisi sanırım.
Yapraklar


Sihirli halkanın etrafına çekilen 12 tane bittikten sonra 3 zincir yukarı çıkıyoruz. Bu bizim yapraklarımızı bir arada tutacak kilit gibi şeyler olacak. 3 zincirin ardından zincirlerin boyutunda trabzanların boşluğundan 6 kere ipi dolaştırıyoruz. Demek istediğim zincirin hemen ardından ipi bir kere dolayın, ardından ilk alttaki ilk boşluktan tığı geçirin ve ip çekin. Bu çektiğiniz ip 3 zincirin boyutunda olmalı. Zaten fotoğrafta ne demek istediğim daha belirgindir.
6 kere aynı boşluğa yaptıktan sonra yine 6 kere bir sonraki boşluğa devam ediyoruz. Aman sakın bırakmayın ipi ve olabildiğince yüksekliğinize sadık kalın. Benimkinde fark edebilirsinizki boyu kısalmış. Siz kendinizde dikkat edersiniz.
2 farklı boşlukta toplamda 12 tane döngü olduğunda ipi oluşan halkaların altından geçirip bir araya topluyoruz. Ardından bir zincir ile tamamen sıkılaştırıp4 zincir daha çekiyoruz ve aynı boşluğa bir zincir ile beğlıyoruz. Bu kısım aslında yapması da anlatması da zor kısım. Benim acı içinde olduğumu anlayabilirsiniz sanırım.
Ayrıca bu düzeni 6 yaprak olacak kadar devam ettirince ki halkadaki yakın duran zincir kısmının boşluğunu kaçırmayın, işiniz bitmiyor. Son kısmı bağlamayı aşağıda göstereceğim.


En sonuna geldiğinizde bir kere zincirle halkaları sıkılaştırdıktan sonra 3 zincir çekiyoruz. Bu 3 zinciri artık vardığımız ilk yaprığın kökten ikinci zincirine bağlıyoruz. Bunun için tığda ip çevirmeden bağlamayı tavsiye ederim çünkü yaptığımda fark ettim ki çok büyük ve gözle rahatlıkla görülebilir oluyor.
Bu kısım da bittiğine göre rahatlıkla orta kısmına başlayabiliriz. Bu arada benim kullandığım ipler kalın olduğu için size söylediğim sayıların üzerine çıkmama gerek kalmadı fakat eğer daha ince ip kullanacaksanız daha fazlasına ihtiyacınız olabilir. Mesela bir boşluğa 6 yerine 8-9 adet halka geçirebilirsiniz.
Sarı Kısım


Bu kısma kadar anlatabildiğim kadarıyla anlatmaya çalıştım. Biraz yapabildiklerimi betimlemeye ve elimden geldiğince sade bir şekilde yazmaya çalıştım fakat burada ne yacağımı bilmiyorum.
İlk önce elime 3 mm yerine 3,5 mm'lik tığımı aldım. Bunun sebebi ise biraz daha kabarık olmasına yardım etmek, sonuçta orta kısmının diğerlerinden biraz ayrılması gerekiyor. Bir zinciri sıkı bir şekilde yaptıktan sonra ikinci zinciri biraz uzun tutmak gerekiyor. Tek bir zincir yaklaşık 1 cm uzunluğunda olmalı. Bu zinciri aynı yapraklardaki geçirme yerleri gibi kullacağız.
Geniş zincirden sonra bir tane daha sıkı zincir çekip yapraklar gibi halka yapmaya başlıyoruz. İpi tığa bir kere dolayıp uzun zincirden geçiriyoruz. Eğer 3 ipten ikisini tığın solunda kalacak şekilde yani iki ipin altına sokarsanız daha sağlam olur. Bunu aynı noktaya 12 kere yapmak yeterli olur.
12 halka bittikten sonra ise diğerleri gibi altından ip çekip üst kısmında bilerştiriyoruz. Sonrasında ise 2 zincir daha çekiyoruz ve çiçeğin orta kısmı tamam. İpi kestiğinizde size tavsiyem fazladan ip bırakmanız. Bu yapraklar ile birleşmesi ve ihtiyacını olursada başka yere bağlamanız için gerekli.
Birleştirme

Bu adım en kolayı. Çekiştirmekten yorulan ellerim için tam bir dinlenme demekti bu. Yaptığımız sarı kısmı beyaz yaprakların üzere gelmesini istediğim yere yerleştirdim. Sonrasında ise tığ yardımı ile oradaki boşluklardan ipleri diğer tarafa çıkardım. Bu işlem gerçekten de kolay. Hemen ardından ise o iki ipi birbirine kördüğüm atarak bağladım.
Bu noktada fazladan ipi isterseniz kesin isterseniz ise kalsın. Ben bırakmayı tercih ettim. Bu hırkama ekleme zamanı geldiğinde bana yardımcı olacak.
Bitiş

Bu da burada bitti. Başta dediğim gibi oldukça basit ve 5 dakikada biterebileceğiniz bir proje. Ayrıca ister çantanıza isterseniz de kıyafetinize kolaylıkla ekleyebileceğiniz bir şey. Hatta bence tokalara da kullanılır. Umarım bu bir gün işinize yarar. Ben yaparken kendimi daha iyi hissettim. Sonra görüşmek üzere. Kendinize dikkat edin, sağlık ve sevgiyle kalın ve lütfen unutmayın ki;
Bu dünyada sizden başka bir tane daha yok.

All of my content is written in Turkish first and then with the help of translators and dictionaries below translated in English.
https://www.seslisozluk.net P.S. If you know English AND Turkish, I do that too... If you see a translation discrepancy that was on purpose. I did think this is as proper as I could do. Because there are many differences between these languages.
Not: Hem Türkçe hem de İngilizce biliyorsanız, ben de biliyorum... Eğer çeviri farklılığı görürseniz bunun bilinçli olduğunu bilin lütfen. Bunu yapabileceğim en uygun şekilde yaptığımı düşünüyorum. Çünkü bu iki dil arasında çok fazla fark var.
https://www.deepl.com/translator
This post has been manually curated by @bhattg from Indiaunited community. Join us on our Discord Server.
Do you know that you can earn a passive income by delegating to @indiaunited. We share more than 100 % of the curation rewards with the delegators in the form of IUC tokens. HP delegators and IUC token holders also get upto 20% additional vote weight.
Here are some handy links for delegations: 100HP, 250HP, 500HP, 1000HP.
100% of the rewards from this comment goes to the curator for their manual curation efforts. Please encourage the curator @bhattg by upvoting this comment and support the community by voting the posts made by @indiaunited..
This post received an extra 1.26% vote for delegating HP / holding IUC tokens.
We are glad that making flowers for your cardigan could uplift your spirit. Your flowers look good, well done and thanks for sharing.
selected by @ibbtammy
Thank you so much! I try my best.
Nice crochet art 🧶 @bemier, what a nice job, very nice.
Greetings from cuba 🇨🇺 and happy Thursday !!!!! 🙏🏻😊
Thank you. Every now and then I make something good 😂
Greetings form Türkiye and happy Friday!!!
Congratulations @bemier! You have completed the following achievement on the Hive blockchain And have been rewarded with New badge(s)
Your next target is to reach 3750 replies.
You can view your badges on your board and compare yourself to others in the Ranking
If you no longer want to receive notifications, reply to this comment with the word
STOPThat is a pretty flower, and it is amazing you can make them so quickly! 🌼
Thank you so much!! I try my best to those things. You should see the (not so) progress on cardigan 😂
$PIZZA slices delivered:
@thekittygirl(1/5) tipped @bemier
Come get MOONed!
These flowers look so cute. I think they will look especially beautiful on knitted bags.
Probably. Maybe I should buy some yarns to make bags. I need black one maybe it will be good.
Ladies make knitting look easy but I am telling you that thing is hard. I remember when I tried knitting for the first time, I gave up after 30 minutes.
Same here 😂 It took me awhile to adjust. I have a condition too that I couldn't and cannot use my hands efficiently but it is helping a lot.
I'm glad it's helping
your knitting skills are amazing. the details of the crown are so neat and I love the colors it looks so sweet.
Que bonita flor. Admiro a toda la gente que teje y hace este tipo de técnicas. Saludos!
I like your cute flower crochet by using white and yellow color! its delightful! @bemier great job