Theorosa Nightshade Accessory Set Quilling Technique [Eng-Esp]

Hello everyone... ✨
Hello to my dear Hivers and the dear community of artists,#Jewelry as always very pleased and excited to be here again, showing you my work made with love and especially for you.
Greetings to the Splinterlands community, and everyone who lives there, I'm here to join the Splinterlands Social Media Challenge!
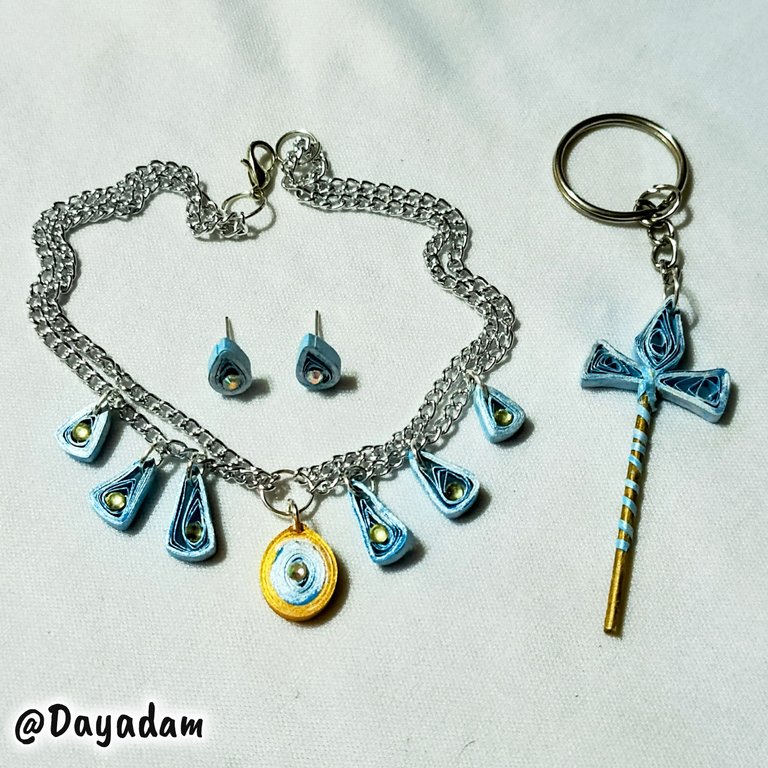
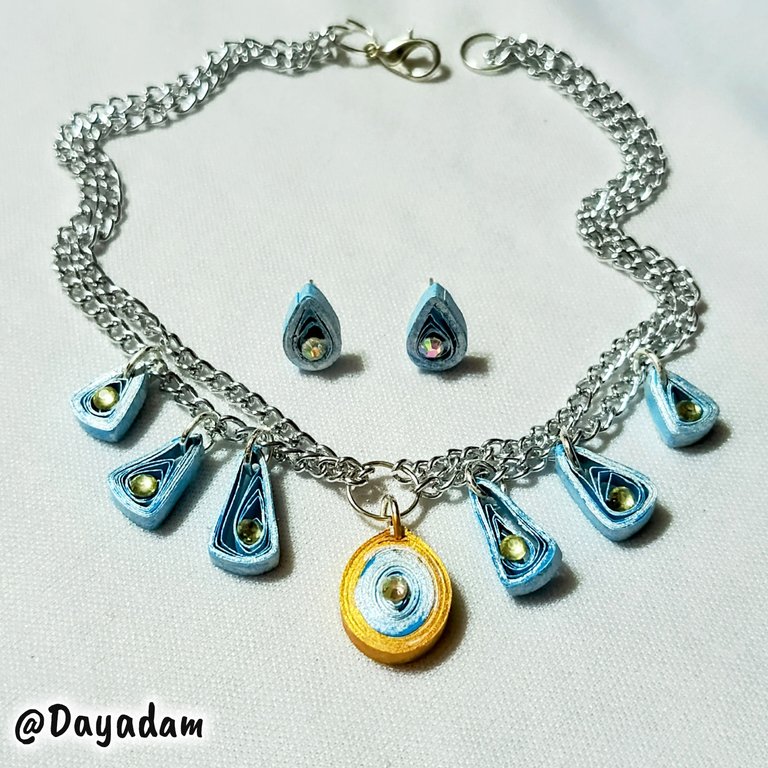
For today I bring you a new artwork, I wanted to make a set of accessories, tendrils and pendant with necklace inspired by elements of the card, Theorosa Nightshade in the quilling technique.
If you want to know more about the game, I leave you my reference link to enter it and navigate through this wonderful world: https://splinterlands.com?ref=dayadam
Hoping you like my work, without further ado, I leave you with my creative process.
Let's start:😃

Hola a Todos...✨
Hola a mis queridos Hivers y a la querida comunidad de artistas #Jewelry, como siempre muy complacida y emocionada de encontrarme por acá nuevamente, mostrándole mi trabajo hecho con mucho amor y especialmente para ustedes.
Un saludo para la comunidad de Splinterlands, y todos los que hacen vida por allí, estoy por acá para unirme al reto Splinterlands Social Media Challenge!
Para hoy les traigo un nuevo trabajo de arte, quise realizar un set de accesorios, zarcillos y dije con collar inspirado en elementos de la carta, Theorosa Nightshade en la técnica de quilling.
Si quieren saber más con respecto al juego les dejo mi enlace de referencia para que ingresen en él, y naveguen por este maravilloso mundo: https://splinterlands.com?ref=dayadam
Esperando les guste mi trabajo, sin más preámbulos, les dejo mi proceso creativo.
Comencemos:😃
 |
 |

• Cintas para quilling.
• Pintura metalizada color oro y perlada.
• Argollas de bisutería.
• Bases para zarcillos.
• Cadena de bisuteria.
• Cristales de bisuteria.
• Pega blanca extra fuerte (de carpintería).
• Tijera.
• Pincel.
• Alicate.
- Ribbons for quilling.
- Gold and pearlized metallic paint.
- Jewelry earrings.
- Bases for tendrils.
- Costume jewelry chain.
- Costume jewelry crystals.
- Extra strong white glue (carpentry).
- Scissors.
- Brush.
- Pliers.

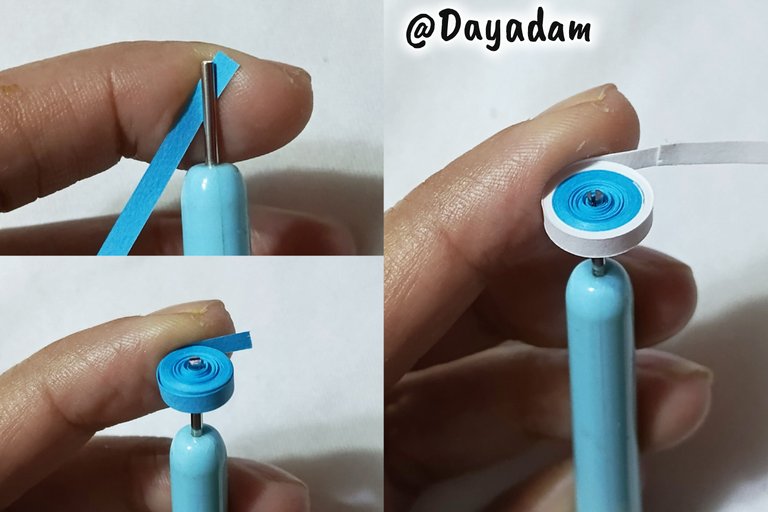
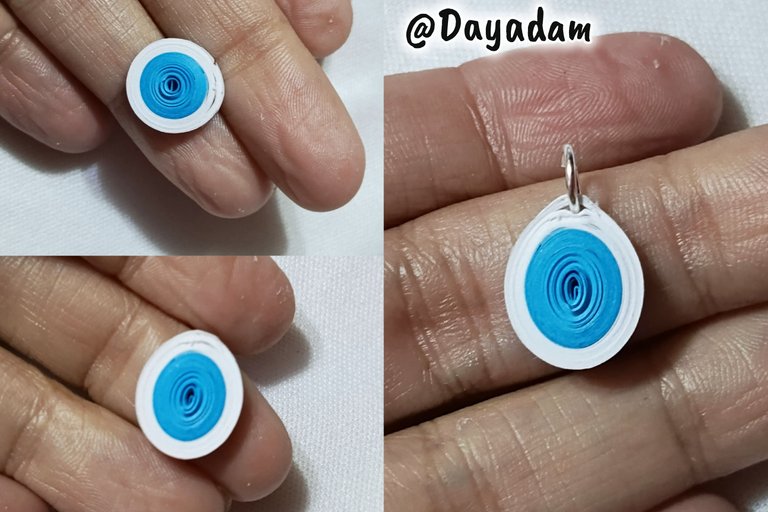
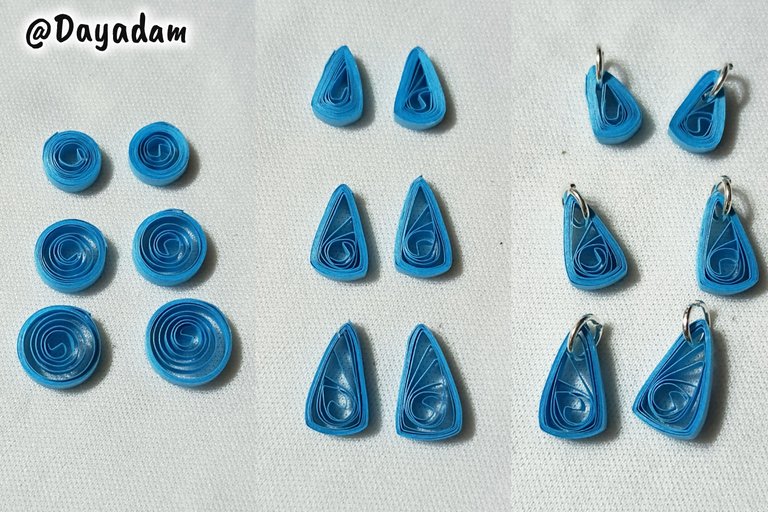
- We start by taking 3 mm wide blue quilling tape, with the needle we roll until we reach the end of the tape, we seal it with white glue, then we continue adding a piece of white tape 3 mm wide we will roll around the previous circle until we get a small strip, we seal it with glue, we take out the needle and we will press a little until we get an oval. To finish with this piece I proceeded to place a small costume jewelry ring at the top.
- We continue making 6 blue open circles with 3 mm wide tape, as you can see I made 2 circles of each size in a descending order, these circles are molded in the shape of a triangle, each one I placed a costume jewelry ring at the top.

• Comenzamos tomando cinta para quilling, de 3 mm de ancho de color azul, con la aguja enrollamos hasta llegar al final de la cinta, lo sellamos con pega blanca, luego seguimos añadiendo un trozo de cinta de color blanco de 3 mm de ancho vamos a enrollar alrededor del círculo anterior hasta conseguir una pequeña franja, sellamos con pega, sacamos de la aguja y vamos a presionar un poco hasta conseguir un óvalo. Para finalizar con esta pieza procedí a colocar una pequeña argolla de bisutería en la parte de arriba.
• Proseguimos realizando 6 círculos abiertos de color azul con cinta de 3 mm de ancho, como podrán observar hice 2 círculos de cada tamaño en un orden descendente, estos círculos los molde en forma de triángulo, a cada uno le coloqué una argolla de bisutería en la parte de arriba.
 |  |  |
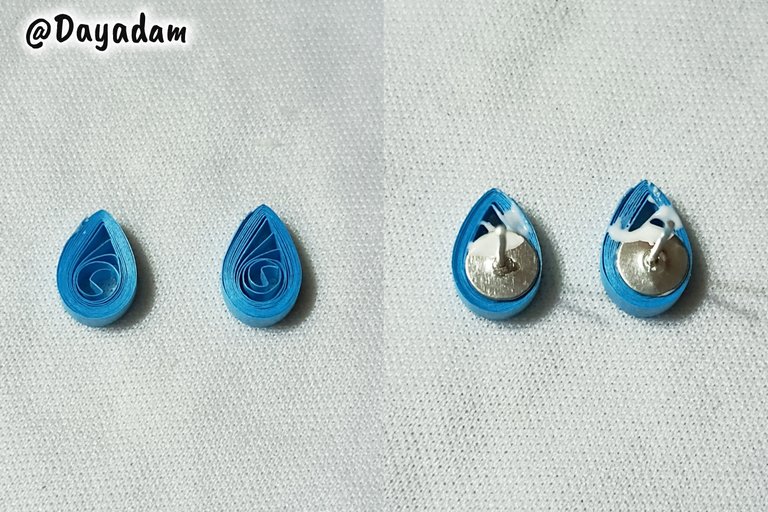
- I carried out 2 more open circles, which I molded into a drop shape, on the back I glued a fixed tendril base on each of them with extra strong white glue, let dry very well.
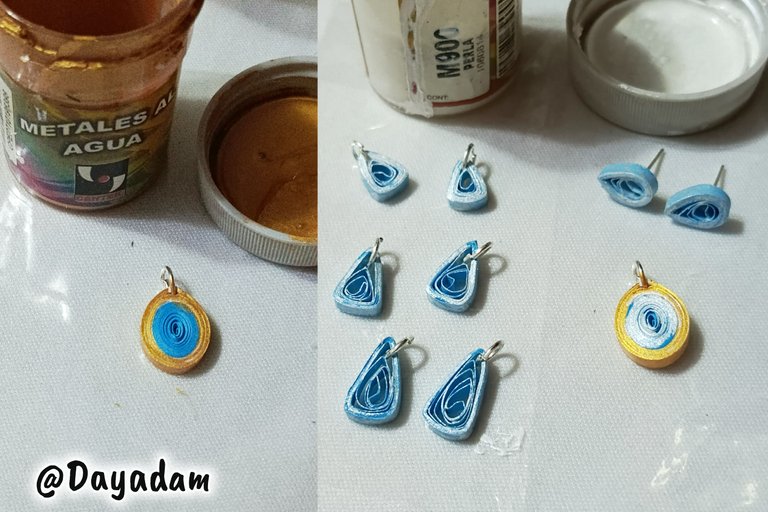
- I proceeded to place all the pieces on a plastic surface, Hello balada I applied gold colored paint on the outside edge on the inside pearl colored paint, the rest of the pieces I applied pearl colored paint.
• Llevé a cabo 2 círculos abiertos más, los cuales moldee en forma de gota, por la parte de atrás pegué una base para zarcillos fija en cada uno de ellos con pega blanca extra fuerte, deje secar muy bien.
• Procedí a colocar todas las piezas sobre una superficie plástica, Hello balada le apliqué pintura color oro por el borde de afuera en la parte interna pintura color perlada, al resto de las piezas le apliqué pintura color perlada.
 |  |
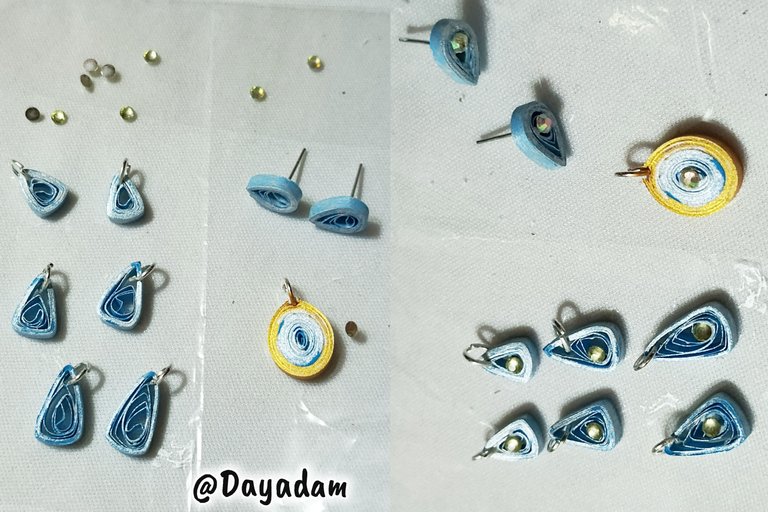
- Decorate all the pieces by attaching a costume jewelry crystal to each one.
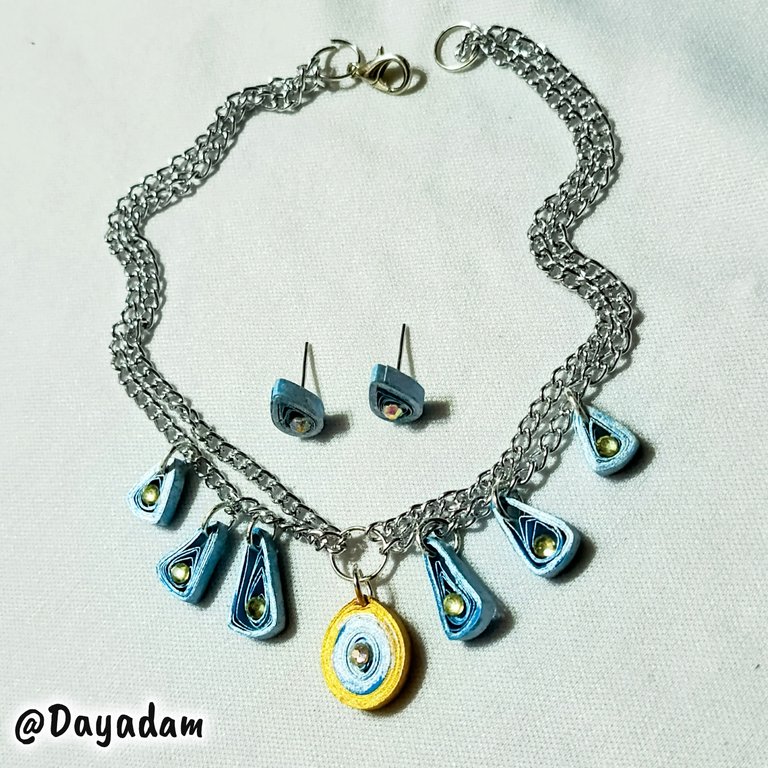
- I took a piece of costume jewelry chain to which I placed a ring in the center, I placed each of the pieces as you can see in the image, to form a beautiful necklace with charms around it and the oval in the center.
- This way we have ready this set of accessories, earrings and necklace with charms, inspired by elements of the character of the letter “Theorosa Nightshade ”.
• Decore todas las piezas colocándole un cristal de bisutería a cada uno.
• Tomé un trozo de cadena de bisutería a la cual le coloqué una argolla en el centro, fui colocando cada una de las piezas tal y como pueden ver en la imagen, para formar un bonito collar con dijes a su alrededor y el ovalado en el centro.
• De esta manera tenemos listo este set de accesorios, zarcillos y collar con dijes, inspirados en elementos del personaje de la carta "Theorosa Nightshade".
 |  |

 |
 |
 |
 |

What did you think, did you like it?
I hope you did, I hope you liked my explanation, procedure and photos, I made them with love for you.
"Let out that muse that inspires you, and let your imagination fly".
Thank you all, see you next time.
¿Que les pareció, les gustó?
Espero que sí, que les haya gustado mi explicación, procedimiento y fotos, los hice con mucho cariño por y para ustedes.
"Deja salir esa musa que te inspira, y deja volar tu imaginación".
Gracias a todos, nos vemos en la próxima.
Banner y separador hecho por mí en Canva

Thanks for the support @splinterboost ✨
Thank you so much for supporting my work @melinda010100 and @ecency 💖
Thanks for sharing! - @alokkumar121

Thanks for the support @steemmonsters ✨
We don't have the words to describe your creativity really. That's incomparable. You are doing perfect In this. We need to learn these techniques from only you.
Thank you so much for your kind words and appreciation for my work.
Greetings ✨
Your quilling work is lovely, you don’t fail to blow our minds with your beautiful designs. Great work and keep up the good work.
selected by @ibbtammy
Thank you so much for your assessment and appreciation of my work so beautifully. 💖
Que belleza, gracias por compartir.