Doodles Splinterlands: Sturgis Birds in a few doodles [Eng-Esp]
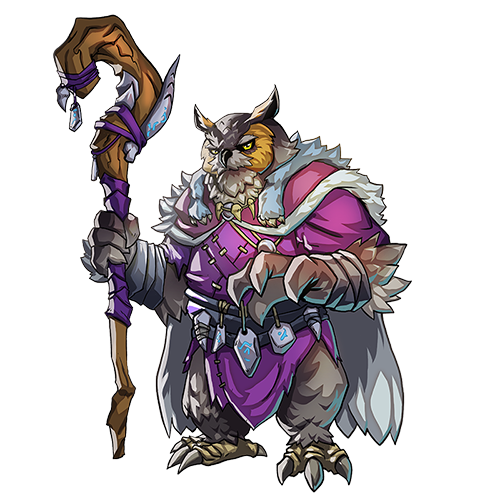
Greetings, fellow craft lovers! Welcome back to my workshop @bricolajedc. This time, we're going to make some fan art of the Aves Sturgis card with just a few doodles. Join me and I'll show you my creative process.
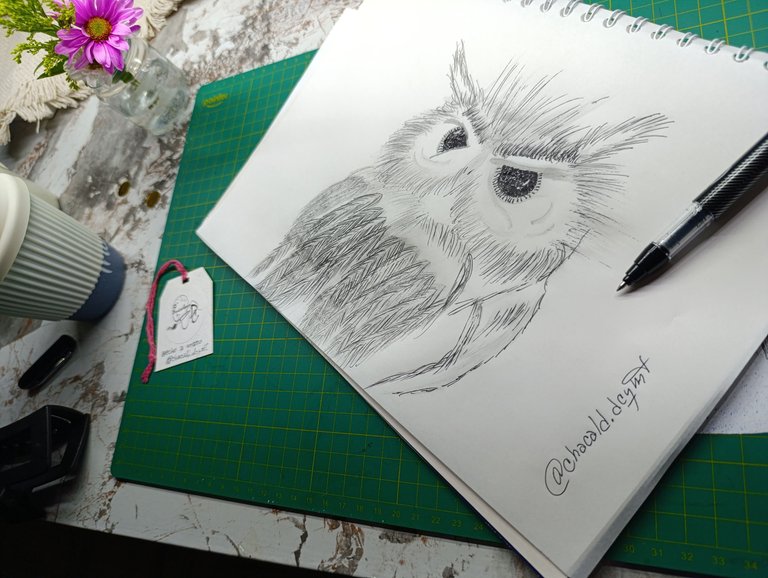
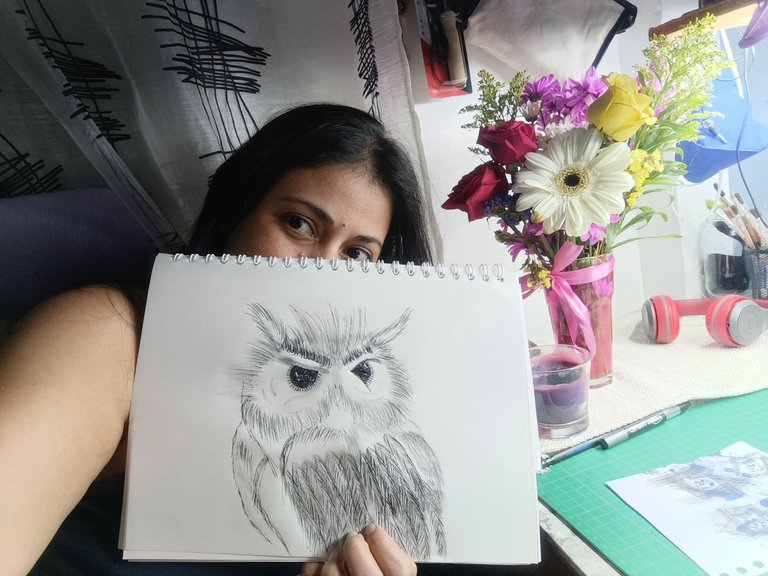
An owl with a dark, mesmerizing gaze and majestic feathers. This creation began as a simple doodle and ended up being a piece that brings together several strokes and patience to achieve the small details, such as the eyes.
Materials used
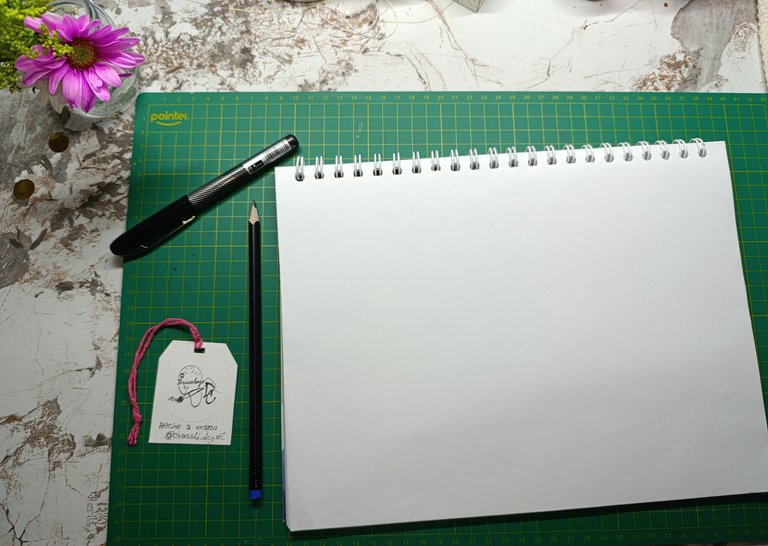
For this project, I didn't need any expensive tools, just these basic materials which, when used well, can give you satisfactory results:
- HB2 pencil
- Gel pen with a 0.5 mm tip
- White opaline card
Creative process
The choice of an owl was no accident. In Splinterlands, nocturnal creatures have always caught my attention because they convey mystery and wisdom. Before starting, I took a few minutes to look at references and capture the essence of the feathers, eyes, and characteristic posture of these animals. My intention was to let myself be carried away by the pencil, without worrying too much about perfection at the beginning, creating a free sketch that would serve as a basis.
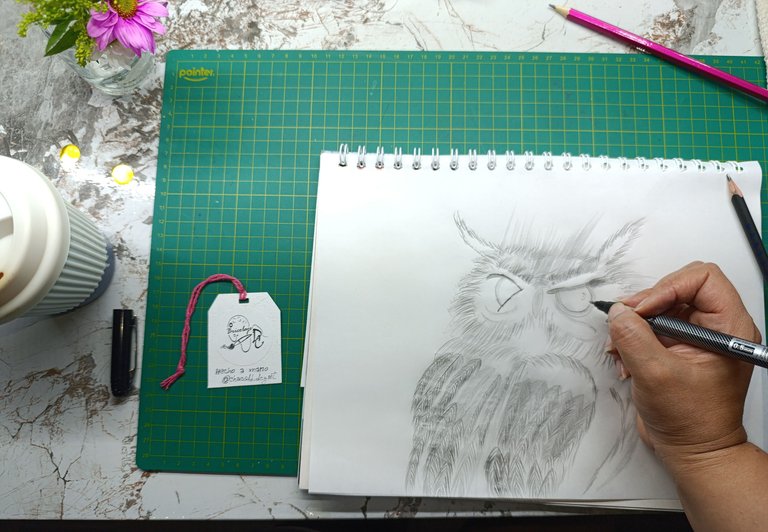
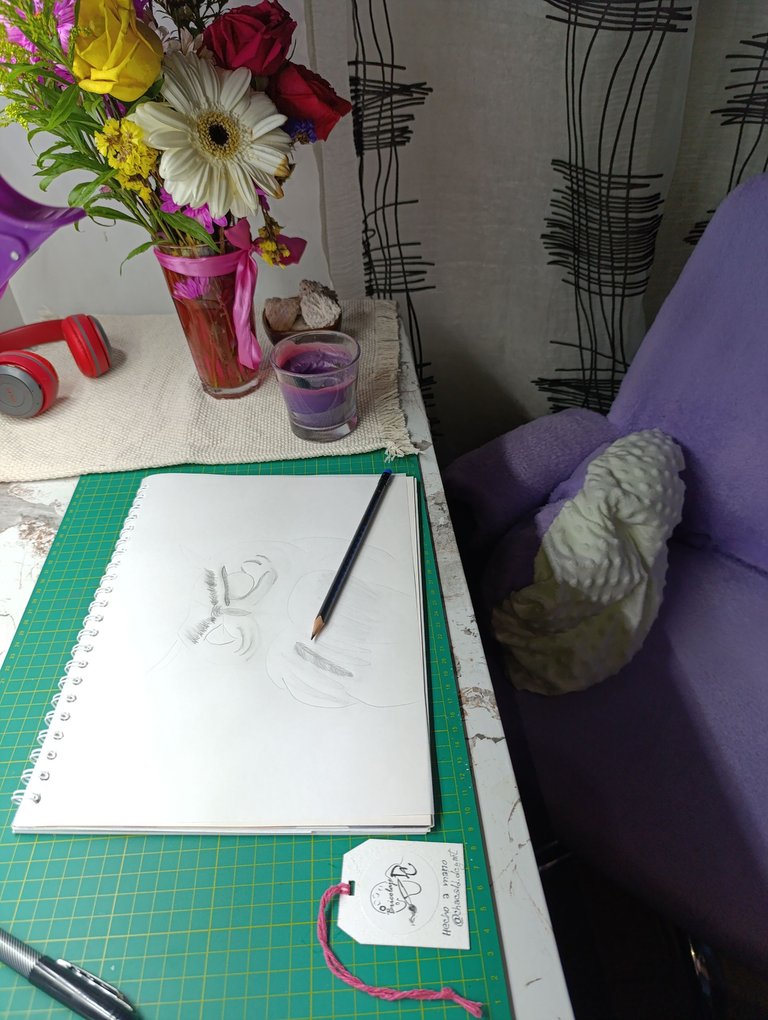
With the Opaline cardboard well lit by the light from my workshop table, I began to draw very soft lines with the HB2 pencil. I made a cross to mark the center of the owl's head so I could start from its beak.
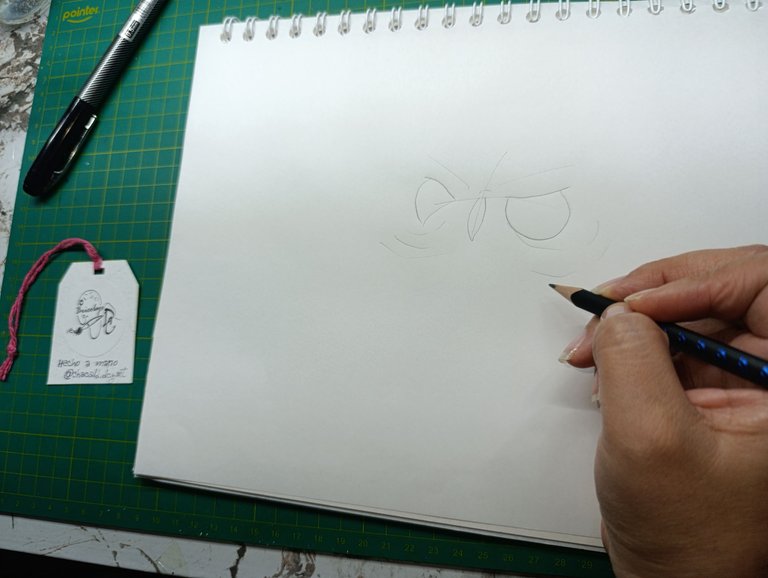
I wasn't looking for exact details; after all, these are just doodles. I was more interested in forming the general silhouette of the owl. I marked the eyes, then a few loose lines for the round head. Elongated ovals for the feathers. And some elongated triangles for the ears.
Then I shaded with the pencil in the areas that needed depth, such as the eye sockets and feathers. I started with the outline of the eyes, holding the pencil at an angle. When the shading was done, I focused on adding volume to the plumage using only the pencil.
Marking each feather was the most fun part. The secret is to press lightly at first and then intensify the stroke in the areas you want to highlight. Remember that these are freehand doodles that come together to form a drawing.
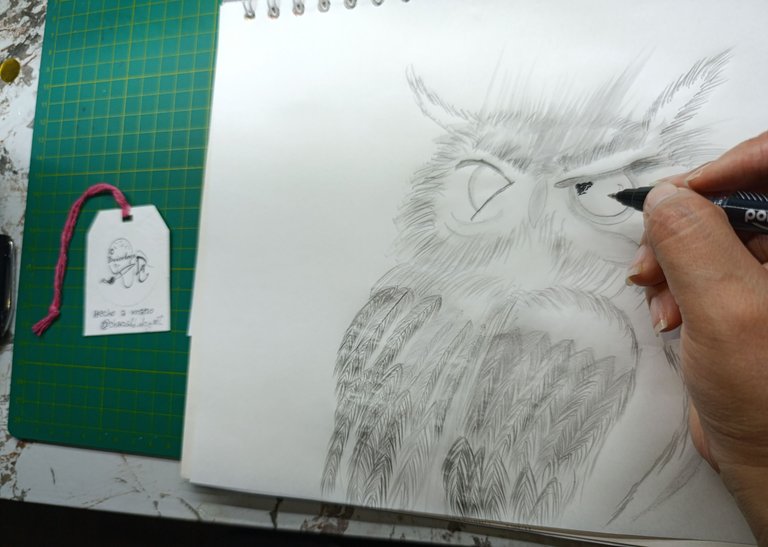
I added the final details with a gel pen. Once I was satisfied with the shading, I brought out the pen. I have been using this type of pen for my doodles for many years and am very familiar with using ink in a 0.5 mm nib.
If you tilt the pen and make soft strokes, you can achieve a line that seems to disappear as the stroke progresses.
This step is magical because, by applying ink over graphite, you achieve a powerful contrast. I used the pen to highlight the most important contours.
I achieved the brightness of the eyes by making dots. One dot next to another until the eye took on depth. I didn't forget the light reflecting off the owl's pupil.
I highlighted the surface feathers of the wings with light strokes. These fine lines made the owl stand out and take shape.
I didn't want to ink the entire drawing; my intention was to give it that final touch that makes all the difference and follows the same pattern as all my doodles.
Creating this owl inspired by Splinterlands was an experience that reminded me why I love owls. They are majestic birds with artistic plumage. Recreating it in doodles was amazing.
This is the first time I've done this type of project, and I loved it.
If you feel inspired to try your hand at doodling, remember that you don't need expensive materials; the most valuable things are your creativity and your desire to experiment. See you next time. Bye!
Garabateando Splinterlands: Aves Sturgis en pocos garabatos
¡Saludos amigos amantes de las artes manuales! Sean bienvenidos una vez más a mi taller @bricolajedc. En esta oportunidad vamos a elaborar un fan art de la carta Aves Sturgis con pocos garabatos. Acompáñame y les muestro mi proceso creativo.
Un búho con mirada oscura e hipnotizante y plumas majestuosas. Esta creación comenzó como un simple garabato y terminó siendo una pieza que junta varios trazos, paciencia para logras los pequeños detalles, como los ojos.
Materiales utilizados
Para este proyecto no necesité herramientas costosas, únicamente estos materiales básicos que, bien usados, pueden darte resultados satisfactorios:
- Lápiz HB2
- Bolígrafo de gel con punta de 0.5 milímetros
- Cartulina Opalina de color blanco
Proceso creativo
La elección de un búho no fue casualidad. En Splinterlands siempre me han llamado la atención las criaturas nocturnas, porque transmiten misterio y sabiduría. Antes de empezar, me tomé unos minutos para observar referencias y captar la esencia de las plumas, los ojos y la postura característica de estos animales. Mi intención era dejarme llevar por el lápiz, sin preocuparme demasiado por la perfección al inicio, creando un garabato libre que sirviera de base.
Con la cartulina Opalina bien iluminada por la luz de la mesa de trabajo de mi taller, comencé a trazar líneas muy suaves con el lápiz HB2. Hice una cruz para tomar la referencia de la mitad de la cada del búho y así partir desde su pico.
No buscaba detalles exactos, al fin de cuentas son garabatos. Buscaba más bien formar la silueta general del búho. Marqué los ojos, luego unas líneas sueltas para la cabeza redonda. Ovalos alargados para las plumas. Y unos triángulos alargados para las orejas.
Luego hice un sombreado con el lápiz en las partes que necesitaban profundidad como las ojeras y las plumas. Empecé por el contorno de los ojos, con el lápiz totalmente inclinado. Cuando estuvo listo el sombreado, me dediqué a dar volumen únicamente con el lápiz al plumaje.
Marcar pluma por pluma fue lo que me pareció más divertido. El secreto está en presionar ligeramente al inicio y luego intensificar el trazo en las zonas que quieres destacar. Recordando que son garabatos libres que se juntan para formar un dibujo.
Los detalles finales los logré con el bolígrafo de gel. Una vez satisfecha con el sombreado, entró en juego el bolígrafo, tengo muchos años utilizando este tipo de bolígrafo para mis garabatos y estoy muy familiarizada con el uso de la tinta en una punta 0.5 milímetros.
Si se inclina el bolígrafo dando trazos suaves, puedes lograr una línea que parece que se desaparece a medida que avanza el trazo.
Este paso es mágico porque, al aplicar tinta sobre grafito, logras un contraste poderoso. Usé el bolígrafo para resaltar los contornos más importantes.
El brillo de los ojos, pude lograrlo haciendo puntos. Un punto junto al otro hasta que el ojo tomó profundidad. Sin olvidarme de la luz que se refleja la pupila del búho.
Las plumas superficiales de las alas las las resalte con unos trazos ligeros. Estas líneas finas hicieron que el búho se destacara y tomara forma.
No quise entintar todo el dibujo, mi intención fue darle ese toque final que marca la diferencia y sigue el mismo patrón de todos mis garabatos.
Crear este búho inspirado en Splinterlands fue una experiencia que me recordó por qué amo los búhos, son aves majestuosas con un plumaje artístico. Recrearla entre garabatos fue asombroso.
Es la primera vez que hago este tipo de proyecto y me encantó.
Si te animas a trazar tus propios garabatos, recuerda que no necesitas materiales costosos; lo más valioso es tu creatividad y las ganas de experimentar. Nos vemos en una próxima oportunidad. Chao!
If you are not yet playing Splinterlands go here and join the adventure.
Si todavía no estás jugando Splinterlands entra aquí y únete a la aventura.
Original content by the author.
Resources: App: Canva / Giphy / Inshot
📷 Redmi 13 note pro Smartphone
Translated with Deepl.com
✿ All Rights Reserved || © @chacald.dcymt 2025✿
💌 Discord: chacald.dcymt#3549
X: @chacald1
Reddit: chacald
Follow us on Instagram
_
Contenido original del autor.
Recursos: App: Canva / Giphy / Inshot
📷 Redmi 13 note pro Smartphone
Traducido con Deepl.com
✿ Todos los Derechos Reservados || © @chacald.dcymt 2025✿
💌 Discord: chacald.dcymt#3549
X: @chacald1
Reddit: chacald

Tienda virtual @bricolajedc
Síguenos en Instagram
Thank you for your support
https://www.reddit.com/r/drawing/comments/1maa5v8/sturgis_birds_in_a_few_doodles/
This post has been shared on Reddit by @chacald.dcymt through the HivePosh initiative.
¡Felicidades! Esta publicación obtuvo upvote y fue compartido por @la-colmena, un proyecto de Curación Manual para la comunidad hispana de Hive que cuenta con el respaldo de @curie.
Si te gusta el trabajo que hacemos, te invitamos a darle tu voto a este comentario y a votar como testigo por La Colmena.
Si quieres saber más sobre nuestro proyecto, te invitamos a acompañarnos en nuestro servidor de Discord.
A nice doodle hehe, beautiful art, I would love to be able to draw like this, but I feel that I still lack practice, there I go, slowly but surely, I really like to draw, this is something I have discovered recently, and well, I hope to continue learning.
Epa, I take this opportunity to invite you to our community Creative Papercraft, so you can share with us your paper art, greetings.
Thanks for sharing! - @clove71
