Plastic welding and recycling [Eng+Spa]
English

Image's Source - Fuente de la Imagen
Greetings to the Hive DIY community, as always hoping and wishing that you are doing your best, working and developing more creative ideas to share.
I had been wanting to experiment with plastic welding for some time, I have seen plastic welding with infrared, with conventional resistances, with high frequency sound (remember that heat is the result of the strong movement of the molecules). I haven't gotten that far in my workshop yet, I hope to be able to later.
So finally, I finally got a useful object to dedicate time to and made of plastic to practice welding, it is a fairly simple recycling job, but it helps me practice, I hope to later be able to do more complex repairs on plastic objects.
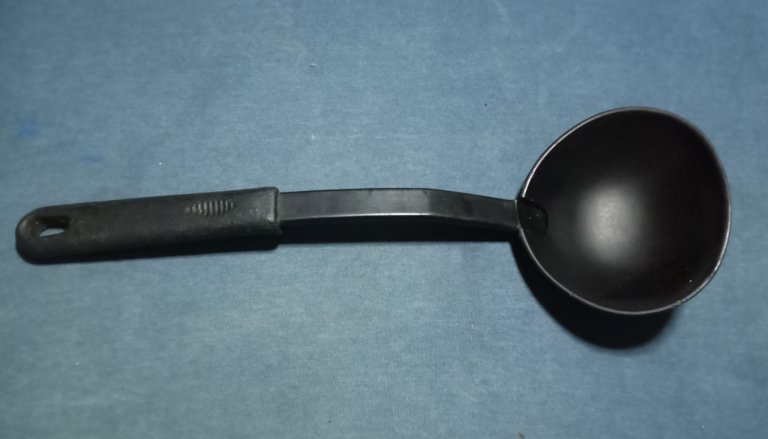
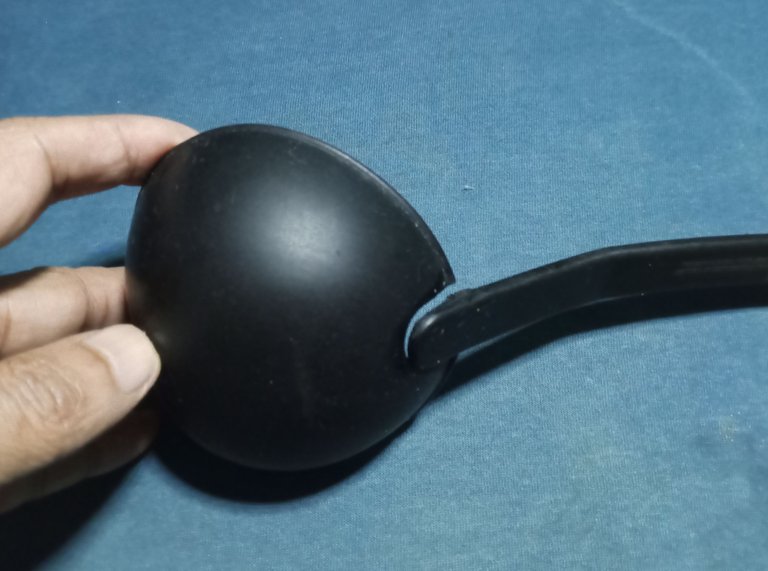
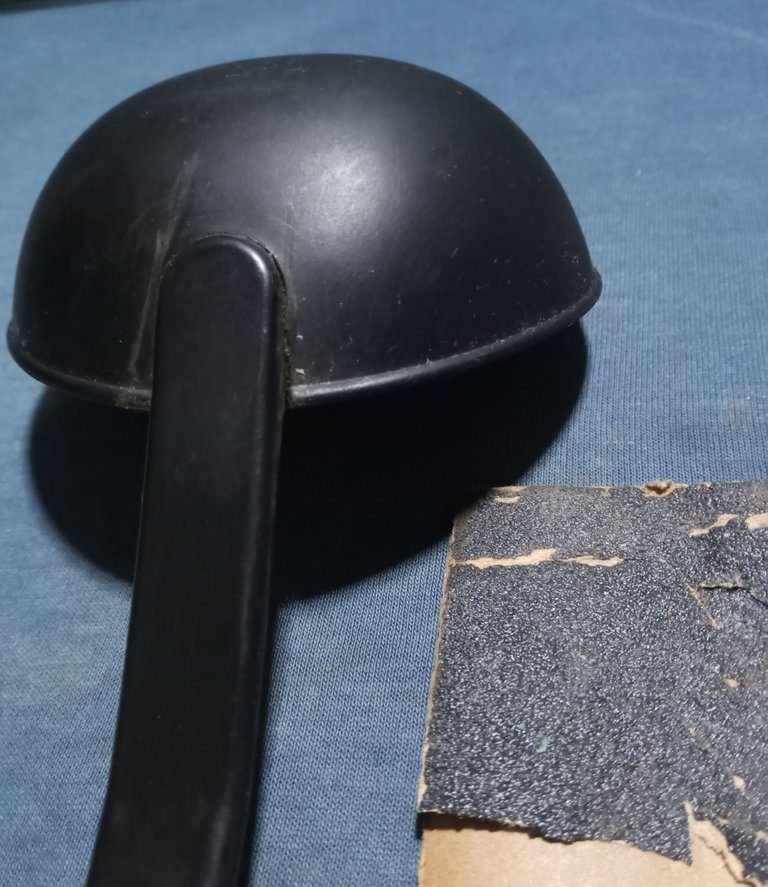
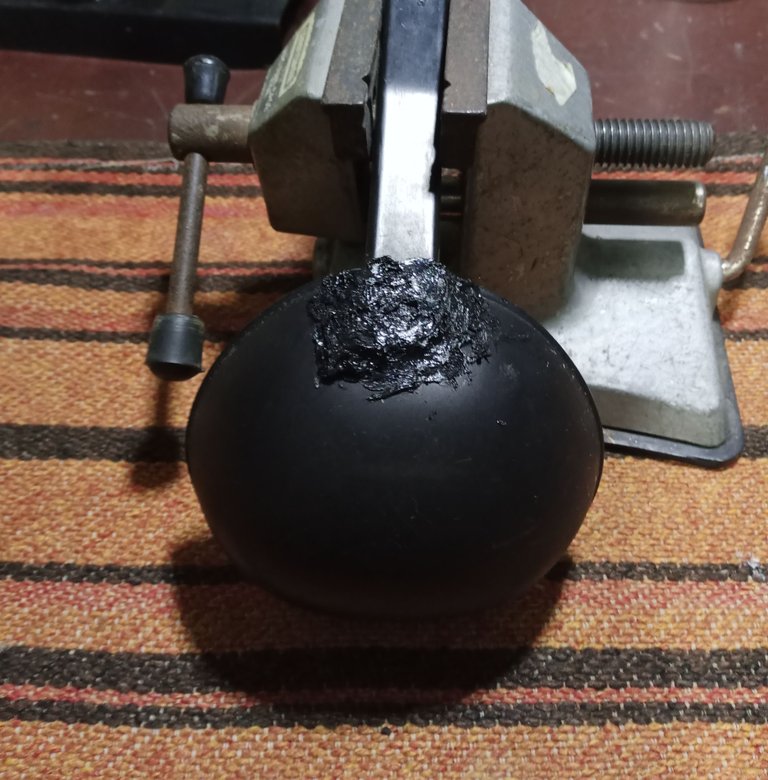
This soup ladle suffered a crack at the junction of the cup and the handle that holds it. It is going to be a somewhat difficult repair, because it is not a flat surface and it is the first time I have attempted this procedure.
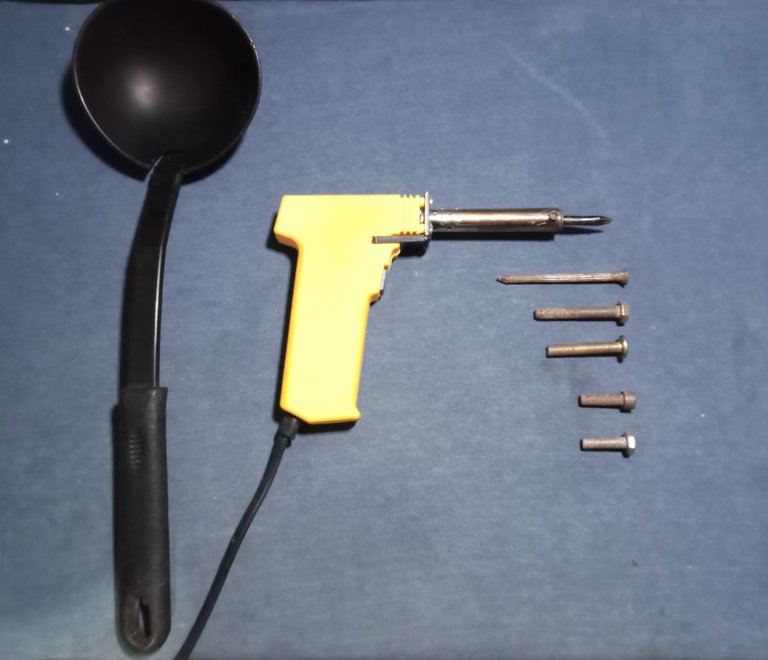
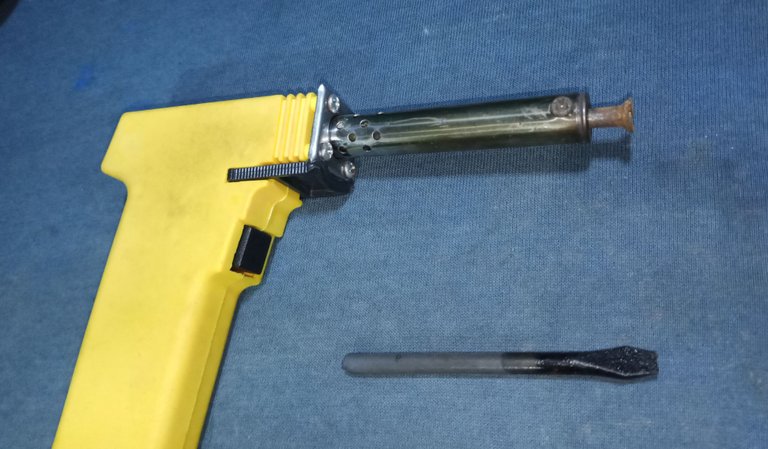
I have to replace the tip of my soldering iron with a screw or a nail, if I use the soldering iron tip on plastic it is sure to end up damaging the varnish on the soldering tip, and it doesn't make sense because of how cheap a nail or screw is. , against the cost of a soldering iron tip.
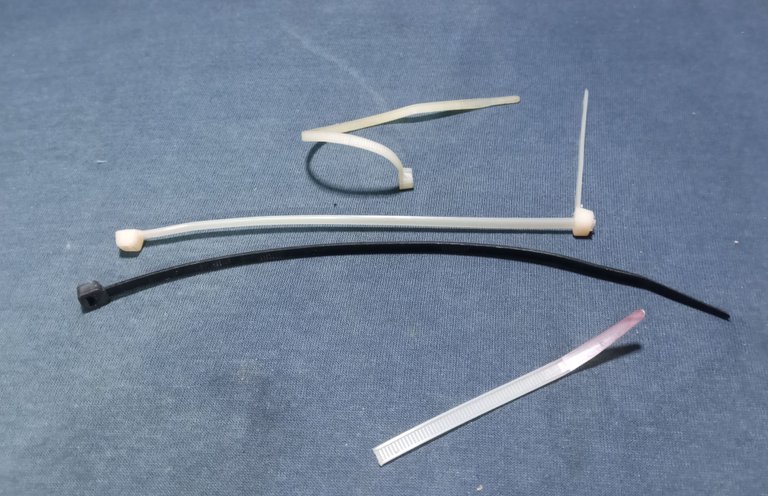
As a filling element I could use plastic from an oil bottle, but I didn't think it would look good because of the rigidity of the material.
Finally, I used plastic ties and recycled pieces of plastic ties as joining material, the material has more flexibility, and I'm sure it will look better in the end.
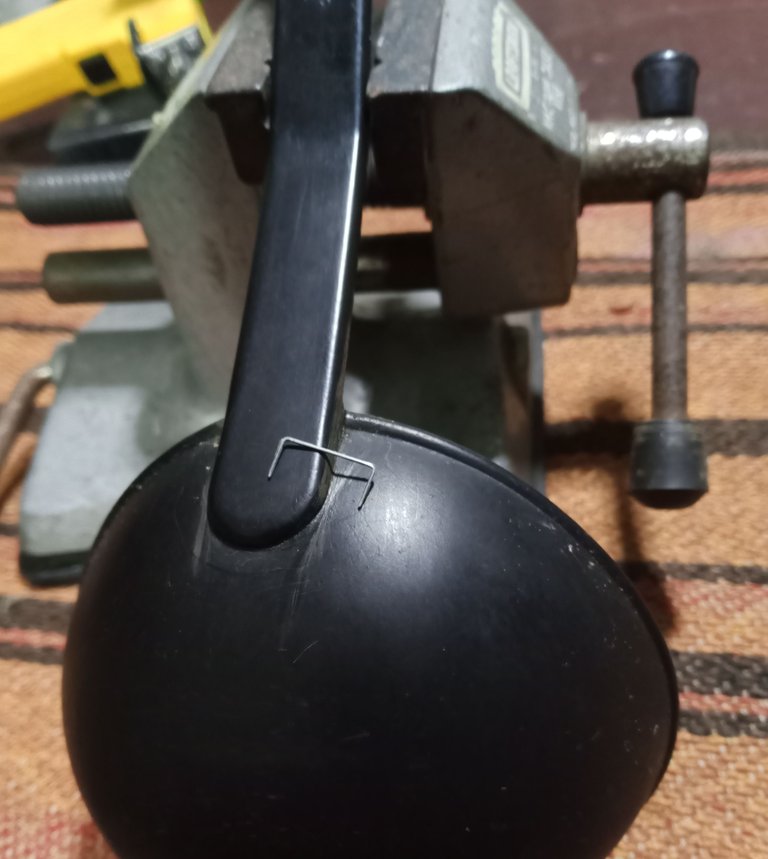
As with all welding, prepare the material by sanding the points that I am going to join.
Use a couple of staples to embed inside the plastic using the heat of the soldering iron and make the joint hold well, of course I shaped the staple so that it would fit better.

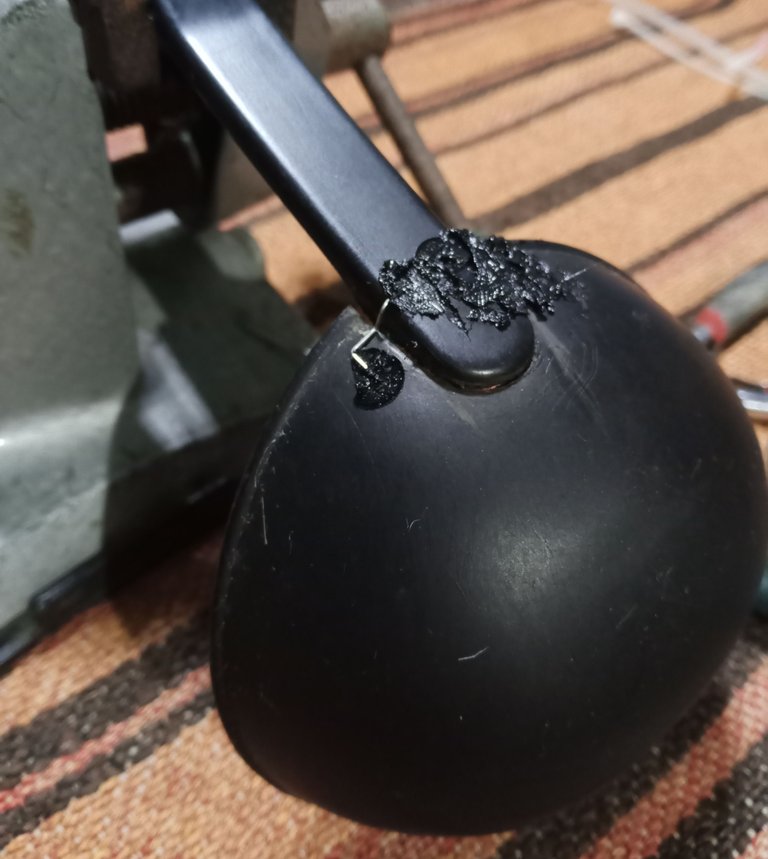
Patiently, I melted the plastic of the clamp, along the entire edge of the joint.

After placing all the joining material, I had to give it a better look, I could use a hot spatula or take advantage of the hot air station and melt the material to improve the finish.
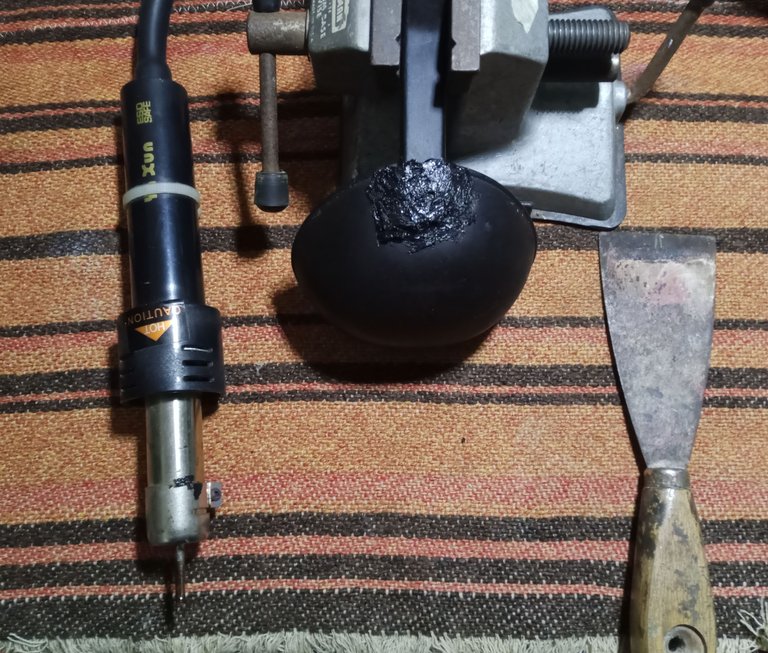
As always, the first time you do something it takes some effort and in my case it was the same, I ended up giving a better finish to the plastic with the heat of the hot air welder.
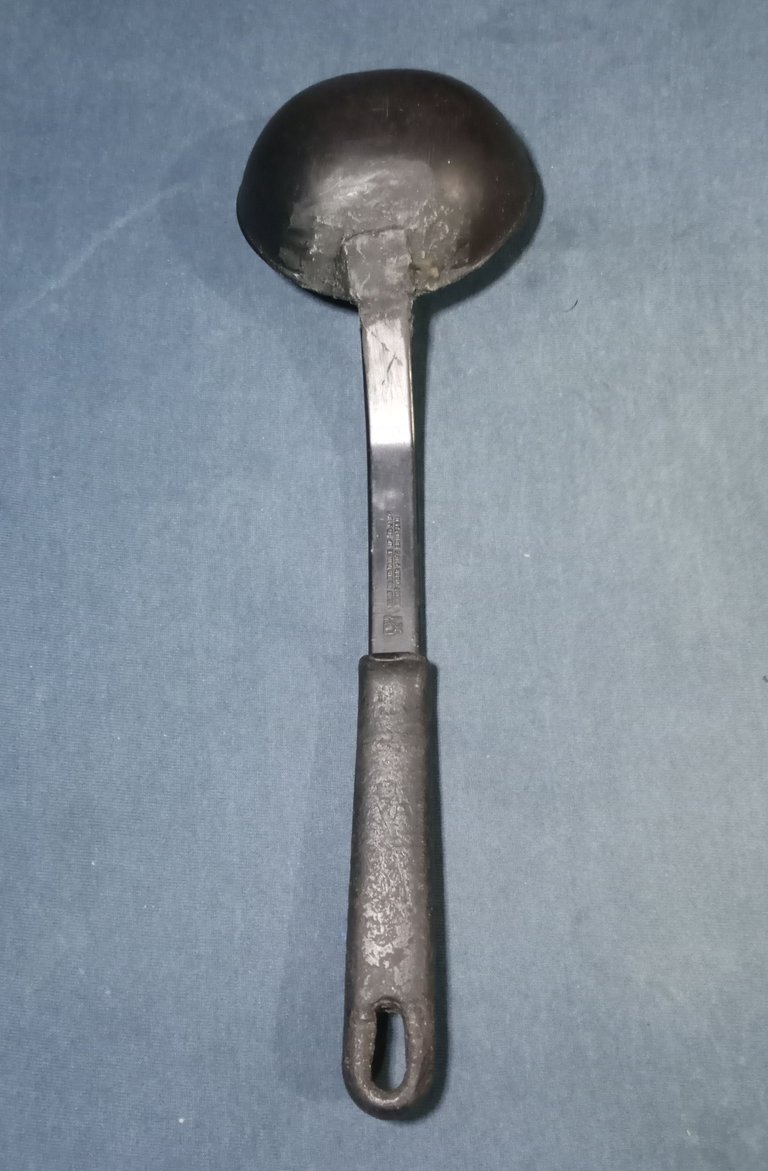
The first time I welded plastic, it was better to start with a flat joint, it's easier, but I'm happy with it. Welding plastic gives me many possibilities when I do restorations and repairs of artifacts.
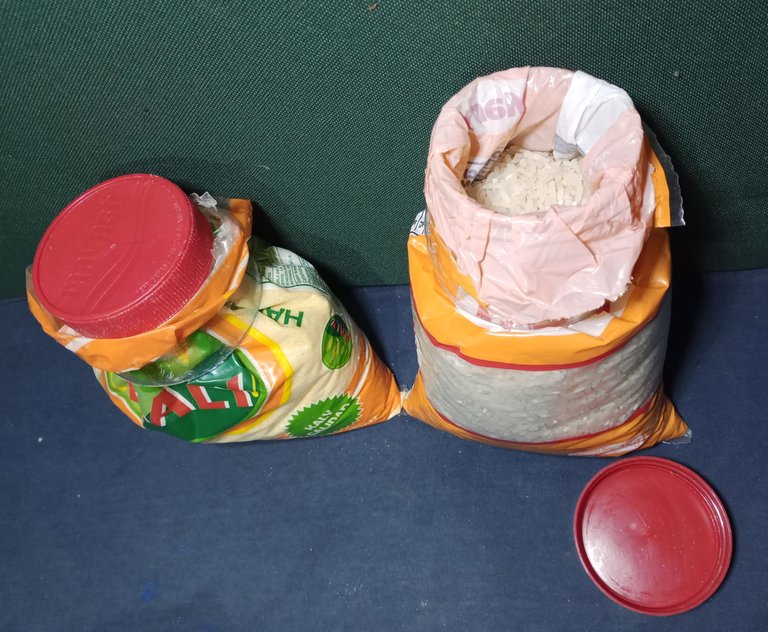
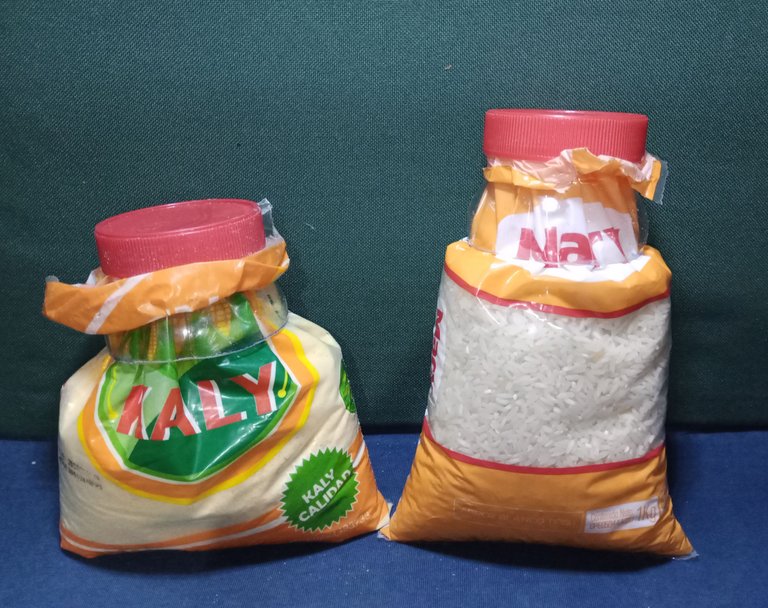
Since I was into the trend of recycling plastic for the kitchen, I did something very simple, which I'm sure you already know. I put lids on the flour and rice packages.
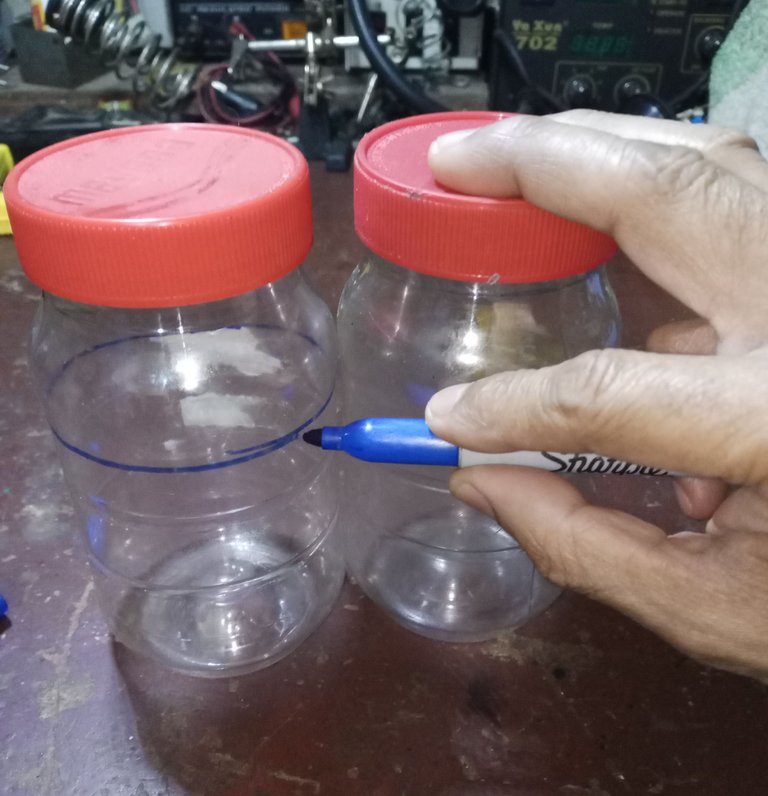
I used two plastic mayonnaise jars, I used the old trick of leaning on one with a marker and rotating the other to mark the cutting line at the height I wanted.
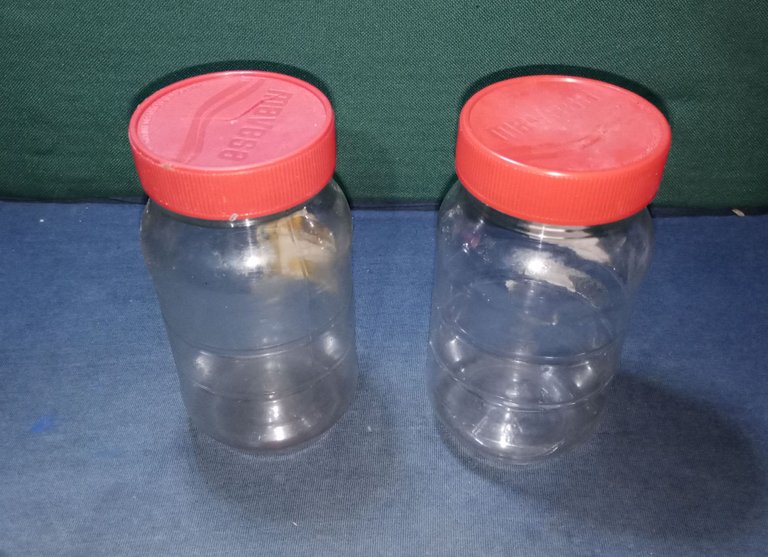
It is a very easy recycling trick for the kitchen, quite useful, and I have the leftover plastic parts to solder more things or to use in some other workshop work.
Well, it's been a simple recycling post.
Thank you very much for stopping by and reading me.
Have an excellent week.
Peace.
As always, I recommend that you take basic instruction when using tools, the soldering iron can hurt you if you are not careful when using it, always use safety implements when you can, since hot plastic can hurt you.
I have used Google translator for the English language
Images unless noted are screenshots of my work in the workshop.
Español
Image's Source - Fuente de la Imagen
Saludos a la comunidad de DIY de Hive, como siempre esperando y deseando que estén lo mejor posible, trabajando y desarrollando más ideas creativas para compartir.
Tenía ya algo de tiempo queriendo experimentar con la soldadura de plástico, he visto soldadura en plástico con infrarrojos, con resistencias convencionales, con sonido a alta frecuencia (recordemos que el calor es resultado del fuerte movimiento de las moléculas). Aún no llego a tanto en mi taller, más adelante espero poder.
Así que finalmente, conseguí finalmente un objeto útil al que dedicarle tiempo y hecho de plástico para practicar soldaduras, es un trabajo de reciclaje bastante sencillo, pero me sirve para ir practicando, espero poder ir haciendo luego reparaciones más complejas sobre objetos plásticos.
Este cucharón de sopas, sufrió una rajadura en la unión de la taza con el mango de sostenerlo, va a ser una reparación un poco difícil, porque no es una superficie plana y es la primera vez que intento este procedimiento.
Tengo que reemplazar la punta de mi soldador por un tornillo o un clavo, si uso la punta del soldador en plástico es seguro que terminara dañándose el barniz de la punta de soldar, y no tiene sentido por lo económico que es un clavo o un tornillo, contra el costo de una punta de soldador.
Como elemento de relleno podía usar plástico de una botella de aceite, pero me pareció que no quedaría bien por lo rígido del material.
Use al final abrazaderas plásticas y trozos reciclados de abrazadera plástica como material de unión, el material tiene más flexibilidad, y estoy seguro de que quedara mejor al final.
Como en toda soldadura, prepare el material lijando en los puntos que voy a unir.
Utilice un par de grapas para incrustar dentro del plástico usando el calor del soldador y hacer que se soporte bien la unión, claro que le di forma a la grapa para que quedara mejor.
Pacientemente, fui derritiendo el plástico de la abrazadera, por todo el borde de la unión
Después de colocar todo el material de unión, tenía que darle mejor aspecto, podía usar una espátula caliente o aprovechar la estación de aire caliente e ir derritiendo el material para mejorar el acabado.
Como siempre, la primera vez que haces algo te cuesta algo de esfuerzo y mi caso fue igual, termine dando una mejor terminación al plástico con el calor de la soldadora de aire caliente.
La primera vez que soldó plástico, era mejor comenzar con una unión plana, es más sencillo, pero estoy conforme. Soldar plástico, me va dando muchas posibilidades cuando hago restauraciones y reparaciones de artefactos.
Como estaba en la onda de reciclar plástico para la cocina, hice algo muy sencillo, que de seguro ya conozcan. Le coloqué tapas a los empaques de la harina y al arroz.
Use dos frascos plásticos de mayonesa, me valí del viejo truco de apoyarme en uno con un marcador y hacer girar el otro para señalar la línea de corte a la altura que quería.
Es un truco de reciclaje para la cocina muy fácil, bastante útil, y me quedan las partes de plástico sobrantes para soldar más cosas o para aprovechar en algún otro trabajo de taller.
Bueno, ha sido una publicación de reciclaje sencilla.
Muchas gracias por pasar y leerme.
Que tengan una excelente semana.
Paz.
Como siempre, les recomiendo que se tomen una instrucción básica cuando usen herramientas, el soldador puede lastimar si no tienen cuidado al usarlo, usen siempre que puedan implementos de seguridad, ya que el plástico caliente puede hacer daño.
He usado el traductor de Google para el idioma Inglés
Las imágenes a menos que se indiquen son capturas de mi trabajo en el taller.
Yay! 🤗
Your content has been boosted with Ecency Points, by @soltecno.
Use Ecency daily to boost your growth on platform!
Support Ecency
Vote for new Proposal
Delegate HP and earn more
Thank you very much for your support, may you all be well and have a peaceful end of the week.
It does look easy, because you're good at wielding the equipments, but it would take some work for a newbie.
Nicely done though.
It's true, it takes some knowledge, working with tools requires basic preparation.
Thanks for stopping by and commenting.
Congratulations @soltecno! You have completed the following achievement on the Hive blockchain And have been rewarded with New badge(s)
Your next target is to reach 200 posts.
You can view your badges on your board and compare yourself to others in the Ranking
If you no longer want to receive notifications, reply to this comment with the word
STOPTo support your work, I also upvoted your post!
That's great. I didn't realize there were so many posts.
Thanks for stopping by and letting us know.
Have a great end to the week.
Thank you for your kind words @soltecno. Keep up the great work and you'll reach your next goal in no time. Have a wonderful end to the week as well!
La idea con las bolsas está genial. Es una forma de regular el uso de ciertas cosas si no se tienen pinzas para cerrar.
Sí, no tengo suficientes pinzas, las tapas me han servido bien.
Gracias por pasar y comentar.
!BEER
View or trade
BEER.Hey @soltecno, here is a little bit of
BEERfrom @nupulse for you. Enjoy it!We love your support by voting @detlev.witness on HIVE .
Excelentes las ideas que muestras, muy creativas, casualmente tengo un cucharón parecido a ese que se partió por el mango, tendré que repararlo, ya por lo menos me llevo una idea de cómo hacerlo. Saludos
Muchas gracias por las palabras de apoyo, tan pronto mejore mi brazo, podre hacer trabajos un poco más complejos.
Que tengas una buena semana.
Gran idea y buena practica, claramente no es lo más estetico del mundo ¿Pero a quien le importa? Lograste evitar tirar algo que podias reparar y sigue siendo util, eso es lo que interesa. Por mi ambito de trabajo en la impresion 3D conozco una herramienta que calienta una pieza de metal y se encarga de unir piezas plasticas, tipo grapas pero es una herramienta cara y pensado para cosas más grandes.
Saludos amigo, gracias por pasar y comentar la publicación. Es más bien algo de la práctica, el soldar plástico es algo que suelo necesitar cuando restauro artefactos y juguetes con partes plásticos.
Con más práctica ya iré mejorando la técnica, y es cierto que debía haber comenzado con una pieza más fácil, una pieza plana y sin contornos. Pero hice mi mejor esfuerzo y quedo bastante resistente.