Repurposed Hardwood and New Closets
Do you remember a few months ago when I pulled up all of the hardwood in our old dining room and kitchen with the plan to repurpose it someplace else? Well now I'm going to show you what I did with said hardwood.
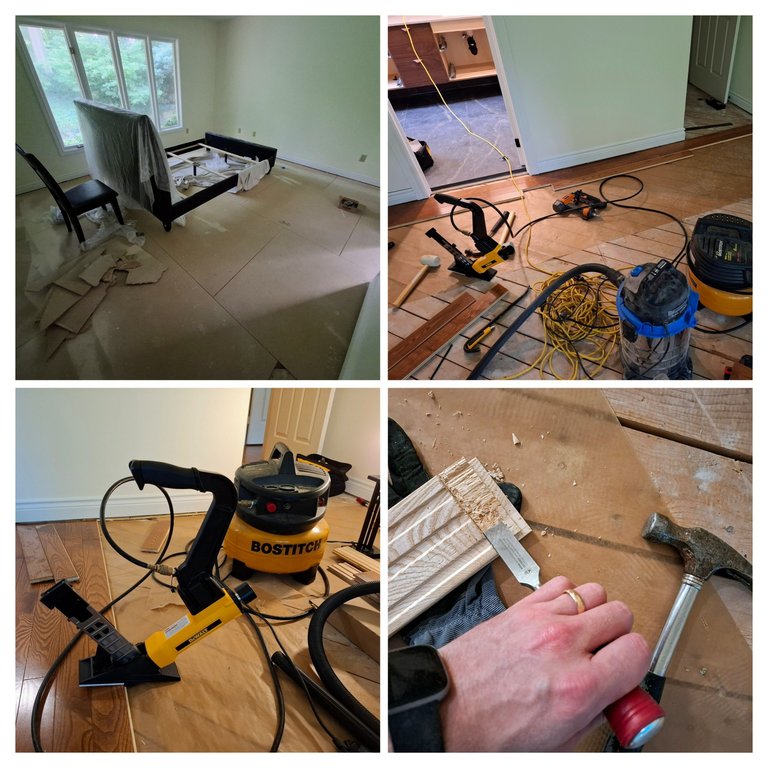
It was originally installed by the previous owners in 2020 so it's still very new and would have been a tremendous shame to waste it. We had to tear it up for our existing renovation but it felt wrong to me to just throw it away, so I decided to repurpose it in our bedroom. The carpet that we had in there was getting pretty old and it had stains on it from the previous owners. I also have an allergy to dust mites and carpet tends to aggravate it a little more than wood since it traps pet hair and dust and is all around a lot harder to clean.

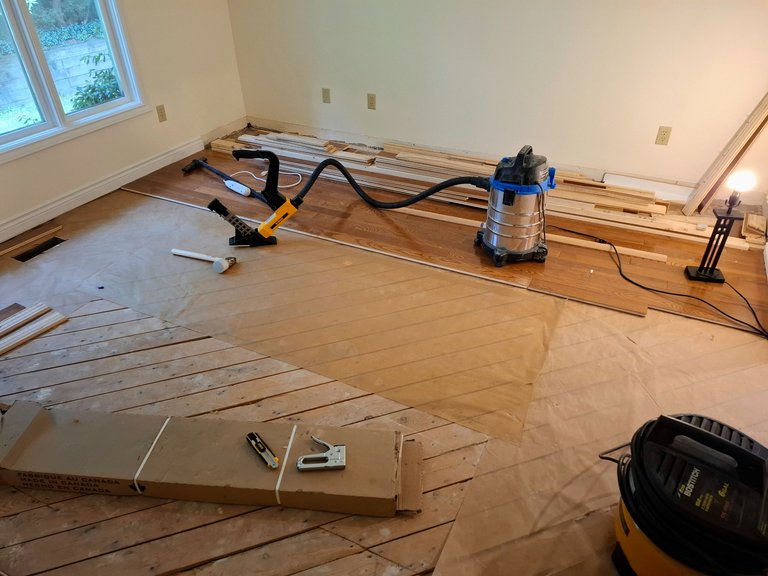
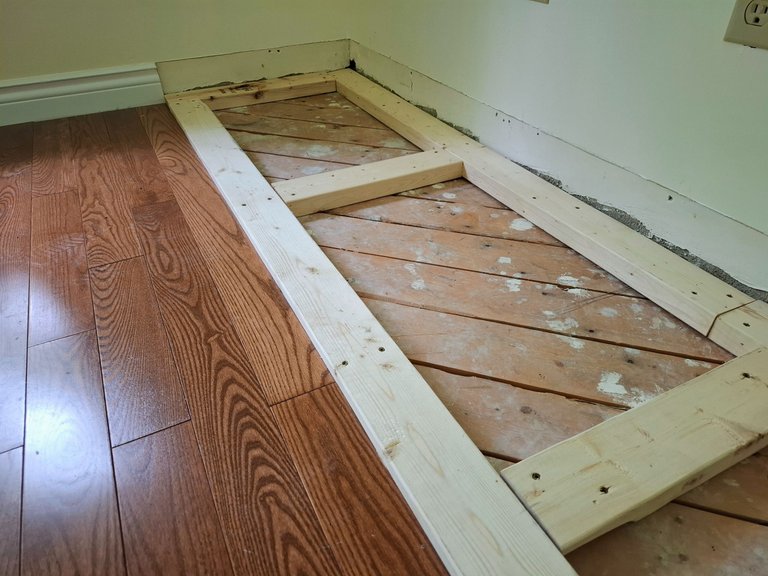
So we ripped up the old carpet and tossed it in the construction bin while it was on site and then I began the process of installing the floors. I ripped up the subfloor and the thousands of staples in it with the help of my wife. I did this because the existing floors don't have a subfloor under them and I wanted the floors to be level with each other.
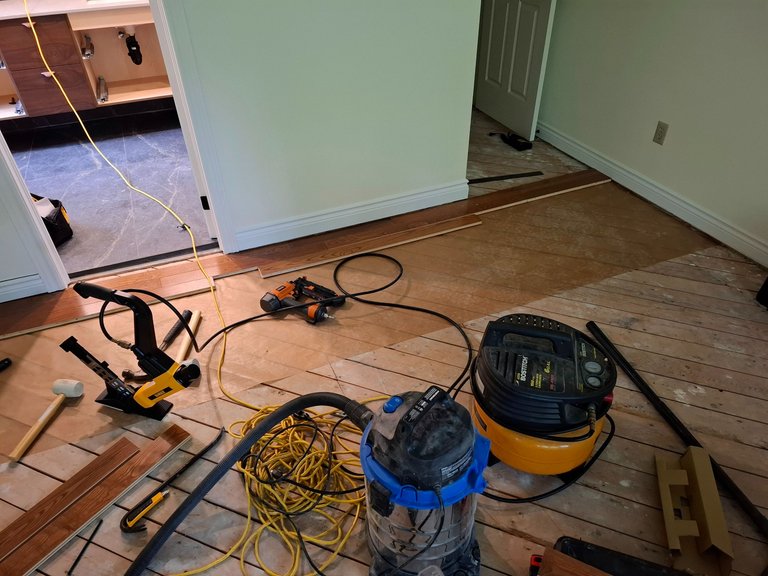
This was my first time installing hardwood floors and the wood is the old school tongue and groove type so every board had to be nailed down with a special floor nailer. Some hardwood is engineered and just snaps together, so it's a little easier to install than this type.
My dad was helping me with this project and I wanted the boards running vertically with the room so we spent a lot of time laying the first few boards out and measuring everything so that we wouldn't end up with a odd size board in the end. We spent a bunch of time trying to get the starting boards square as well. After a few rows the boards started to bow out and some pretty big gaps started to form. We ended up pulling everything up again and starting over. By that time I was too mentally exhausted to spend a lot of time planning things out again so we shifted to laying the boards horizontally and starting from a different end of the room. Everything was pretty smooth sailing from then on.
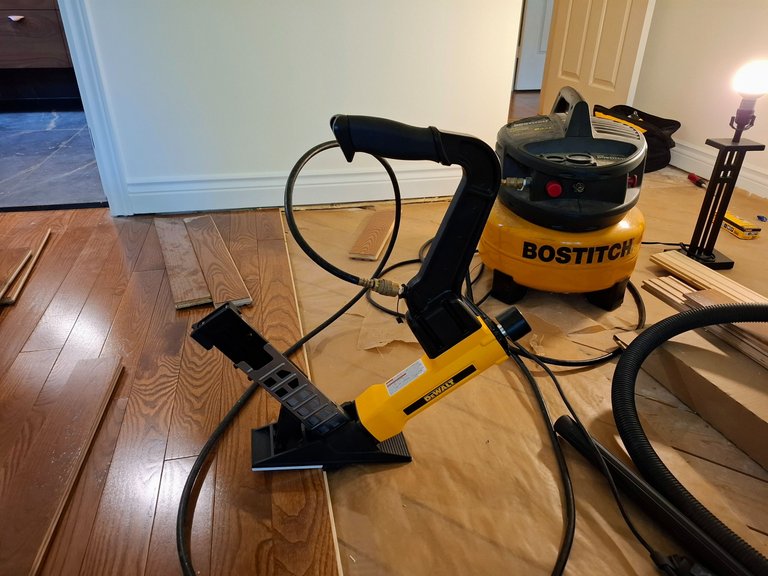
One super frustrating part was dealing with the floor nailer. I bought it specifically for this job and since it's such a specialized tool that is only good for this one type of job it was a pretty big expense considering I'll probably never use it again. When I took it out of the box at home I noticed that the air compressor connection piece was missing. Some asshole had previously bought the tool and removed the part and then brought the tool back to the store. I had to spend a few hours going back to Home Depot to return it and try to get the part I needed. They didn't have any other nailer in stock so I couldn't swap it out and I couldn't buy the part separately. Luckily they agreed to remove the part from the display nailer and just give it to me. It worked out in the end but it cost me a lot of time that day. We didn't start laying boards until about 11am and after the screw up mentioned previously it was like 2pm before we started making any progress.
Needless to say we didn't get a whole lot accomplished that day - maybe only about 1/5 of the room completed.
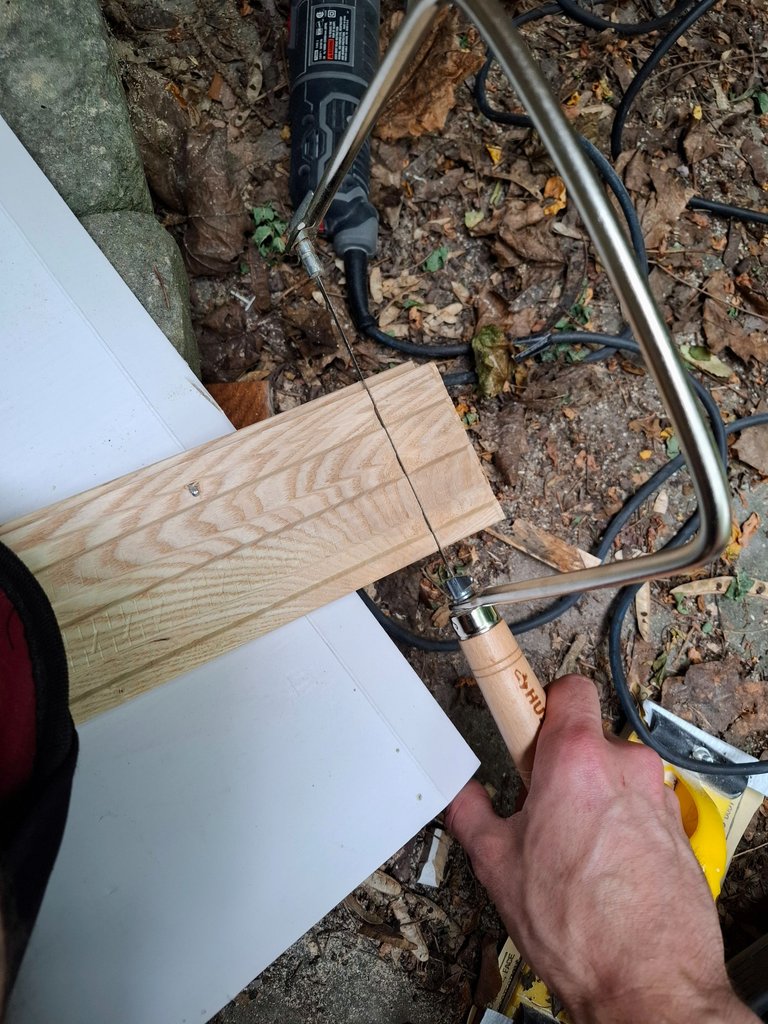
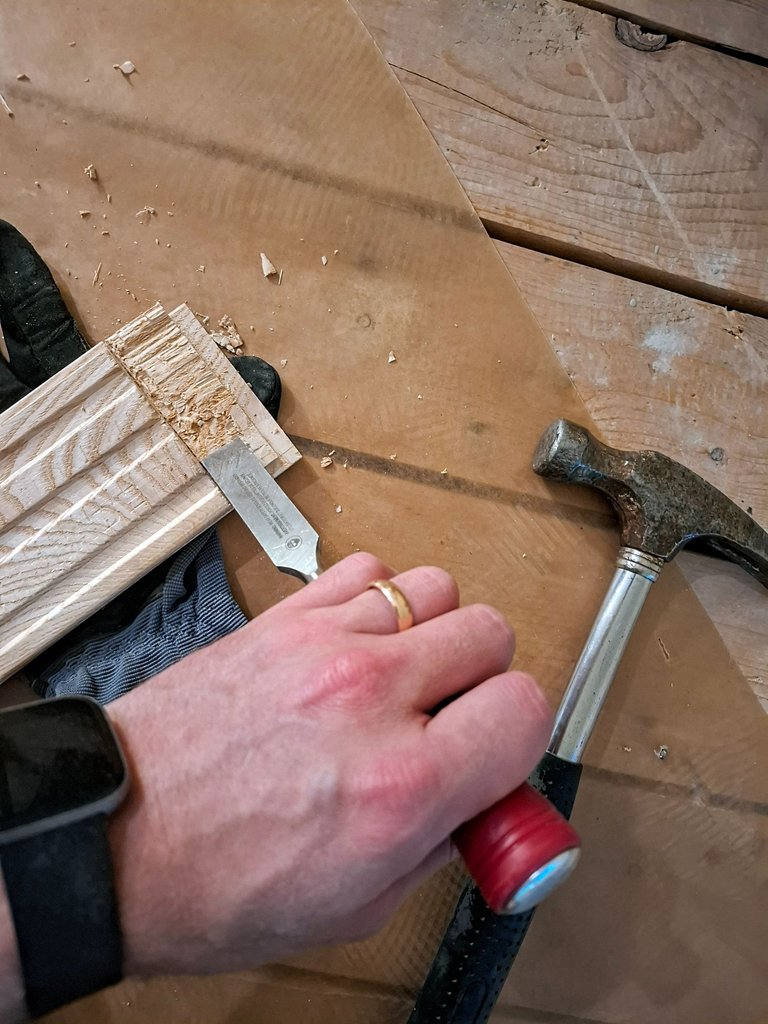
Another slow section was the part where the floor transitions from hardwood to the tile in the bathroom. Each of those boards needed to be carved out on the ends to fit levely.
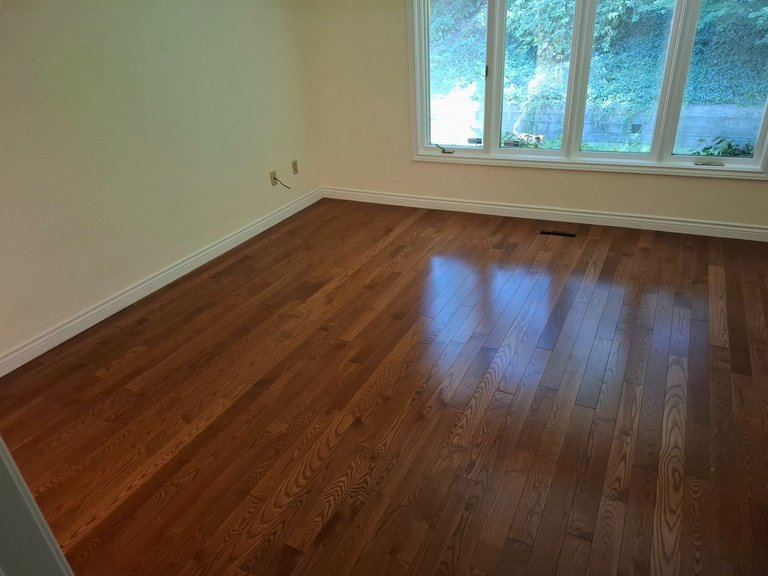
I originally believed that I would get the entire job done in a single weekend but it actually took me a lot longer then I anticipated (like all jobs I do). I spent all of the first Saturday just pulling up the subfloor and staples with my wife, then I spent a half day on Sunday messing around with the equipment so all in all it took me two full weekends to finish everything. Here is how it turned out.
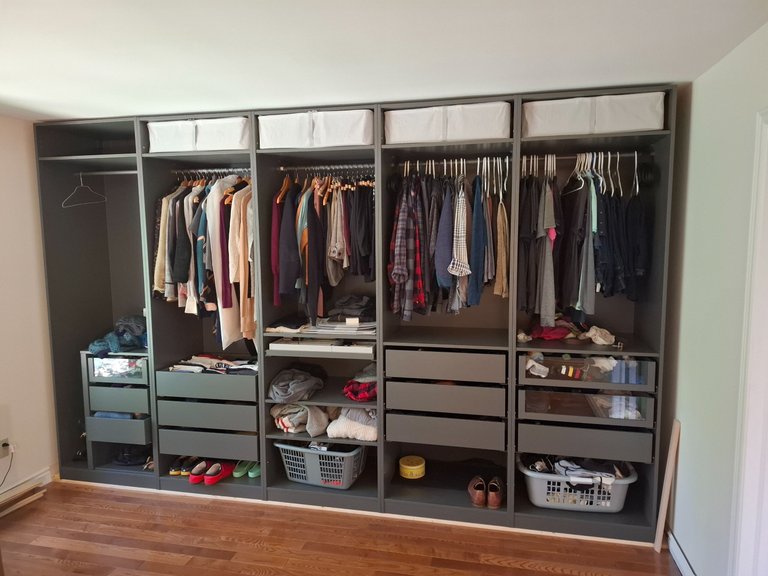
The next phase was to install some built in closets.
During our renovation we expanded our ensuite bathroom by combining it with our walk in closet but that left us without a place to store our clothes. The solution was to install some wall to wall closets. Let's speed this process up a bit with a gif.
The next phase will be to install custom doors on the cabinets. I attempted to do this last weekend but I didn't really know what I was doing and made quite a few mistakes, especially with the stain. They turned out looking pretty bad in my opinion and I felt sick to my stomach thinking I'd have to live with them forever. We decided that I would repurpose those panels in our laundry room and attempt the doors one more time in the near future. That won't be until September at the earliest though. For now we will just have open closets.
Wow! Awesome DIY project!
I have always just left the flooring to the experts with the tools and the knees. ;) Those results speak for themselves and you will get a sense of accomplishment whenever you walk into that room.
I've been trying to do more and more projects myself lately. I like the sense of accomplishment and it gives me something to do. it saves a lot of money as well. We needed to save money where we could after our main home renovation. 😆
You had a good project and kudos to your father for helping you out in some parts
Well done!
Thanks! It's always good to have a 2nd pair of hands
This post has been manually curated by @steemflow from Indiaunited community. Join us on our Discord Server.
Do you know that you can earn a passive income by delegating to @indiaunited. We share more than 100 % of the curation rewards with the delegators in the form of IUC tokens. HP delegators and IUC token holders also get upto 20% additional vote weight.
Here are some handy links for delegations: 100HP, 250HP, 500HP, 1000HP.
100% of the rewards from this comment goes to the curator for their manual curation efforts. Please encourage the curator @steemflow by upvoting this comment and support the community by voting the posts made by @indiaunited.
Thanks folks!
It turned out very well, and the built-in closets are cool even without the doors.
Hahahah, I believe you will do it better in the next attempt ;)
Haha yeah it was a weird feeling - exactly like buyers remorse feels 😆
I hope it's better next time 🤞
How great is your wood chisel, I have seen videos of the wonderful things they do with them and they have an incredible edge, this house has never looked more beautiful thanks to your great work.
I don't use the chisel very often but it is a very handy tool.
Thanks. Glad you like it 😁
Job well done with or without doors. Kudos
Thanks! I appreciate it
you're welcome
Congratulations @leaky20! You received a personal badge!
Wait until the end of Power Up Day to find out the size of your Power-Bee.
May the Hive Power be with you!
You can view your badges on your board and compare yourself to others in the Ranking
Check out our last posts:
Congratulations @leaky20! You received a personal badge!
Participate in the next Power Up Day and try to power-up more HIVE to get a bigger Power-Bee.
May the Hive Power be with you!
You can view your badges on your board and compare yourself to others in the Ranking
Check out our last posts: