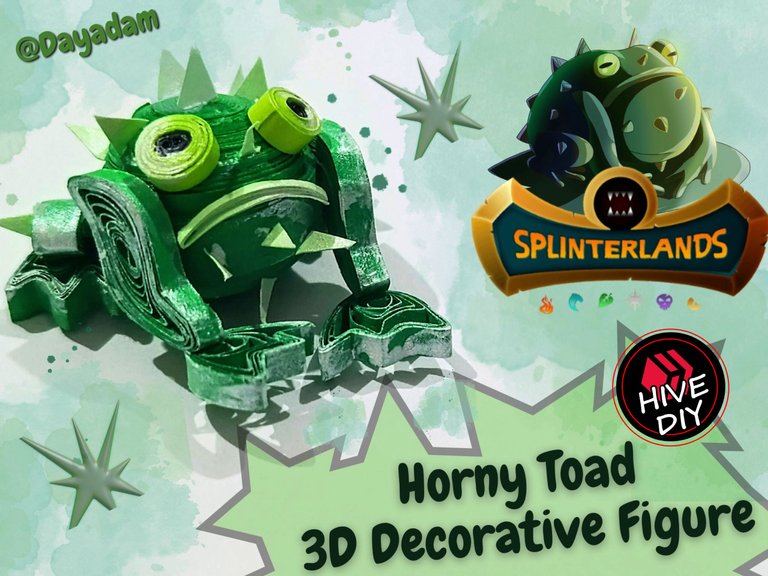
Horny Toad in 3D Decorative Figure Quilling Technique [Eng-Esp]
Hello everyone... ✨
Hello to my dear Hivers and the dear community of artists #HiveDIY, as always very pleased and excited to be here again, showing you my work made with love and especially for you.
Greetings to the Splinterlands community, and everyone who lives there, I'm here to join the Splinterlands Art Contest
Today I am with you again to show you my art, I love every week to go through this wonderful world of magic, color, and lots of Splinterlands characters to look for new elements or characters to build different crafts such as jewelry, accessories, 3D figures and other things that motivate me, inspire me and activate my creativity and thus be able to create for you.
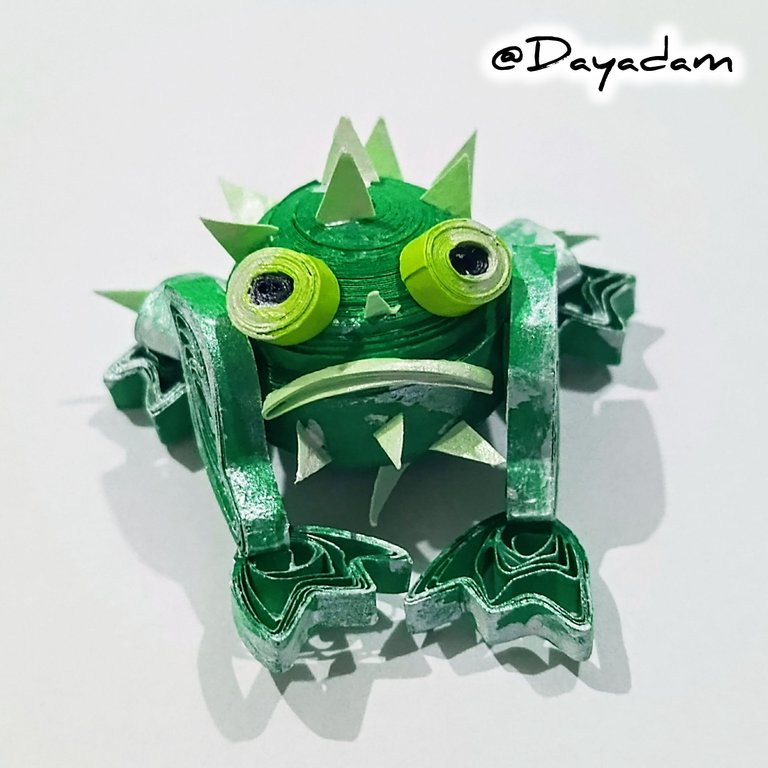
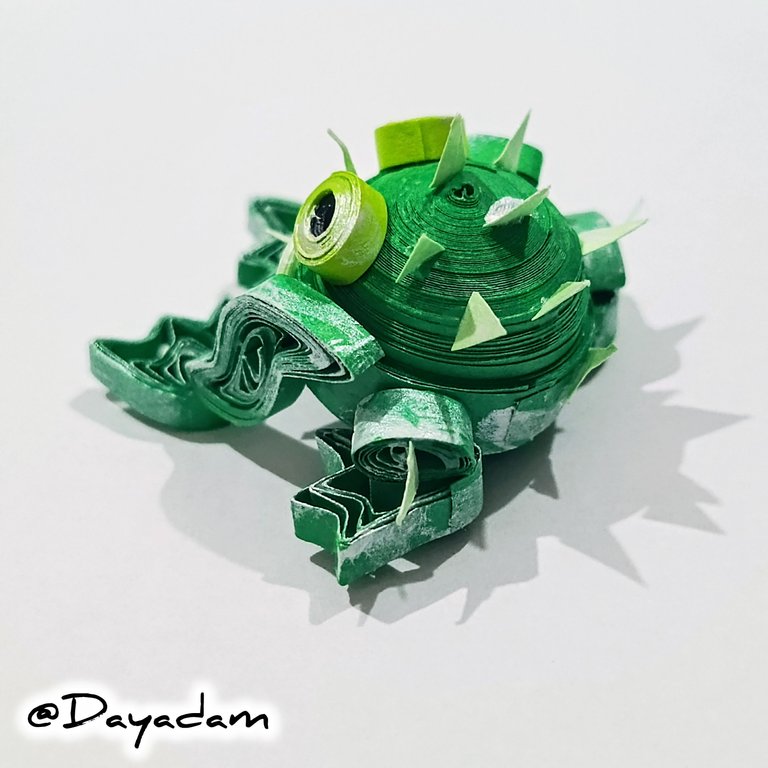
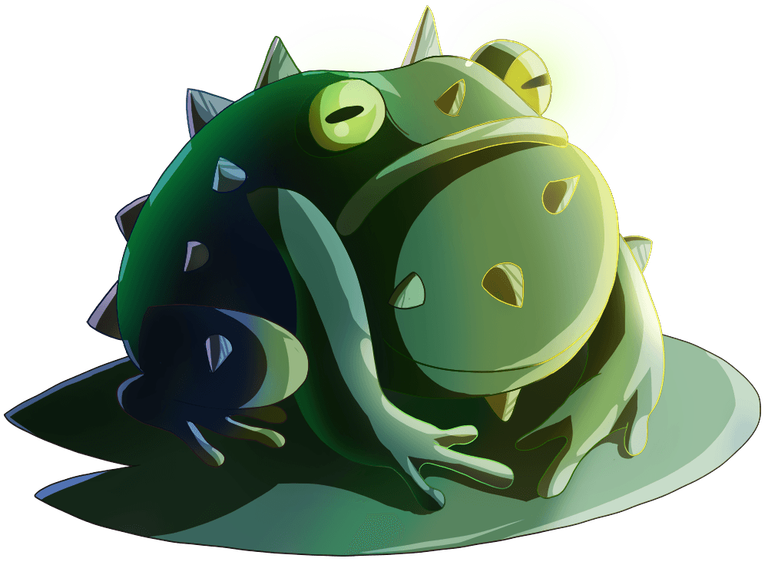
Today I bring you a new work of art. I made a decorative 3D figure inspired by the card, Horny Toad, using the quilling technique.
If you want to know more about the game, I leave you my reference link to enter it and navigate through this wonderful world: https://splinterlands.com?ref=dayadam
Hoping you like my work, without further ado, I leave you with my creative process.
Let's start:😃

Hola a Todos...✨
Hola a mis queridos Hivers y a la querida comunidad de artistas #HiveDIY, como siempre muy complacida y emocionada de encontrarme por acá nuevamente, mostrándole mi trabajo hecho con mucho amor y especialmente para ustedes.
Un saludo para la comunidad de Splinterlands, y todos los que hacen vida por allí, estoy por acá para unirme al Splinterlands Art Contest.
Hoy estoy con ustedes nuevamente para mostrarles mi arte, me encanta semana a semana pasar por ese maravilloso mundo de magia, color, y muchísimos personajes de Splinterlands para buscar nuevos elementos o personajes para construir diversas manualidades bien sean bisutería, accesorios, figuras en 3D entre otras cosas que me motiven, inspiren y activen mi creatividad y de esa manera poder crear para ustedes.
Para hoy les traigo un nuevo trabajo de arte, realice una figura decorativa en 3D inspirada en la carta, Horny Toad en la técnica de quilling.
Si quieren saber más con respecto al juego les dejo mi enlace de referencia para que ingresen en él, y naveguen por este maravilloso mundo: https://splinterlands.com?ref=dayadam
Esperando les guste mi trabajo, sin más preámbulos, les dejo mi proceso creativo.
Comencemos:😃
 |
 |
 |

• Cintas para quilling.
• Aguja para quilling.
• Plantilla para moldear círculos.
• Pintura color perlada.
• Pega blanca extra fuerte (de carpintería).
• Tijera.
• Quilling strips.
• Quilling needle.
• Template for molding circles.
• Pearl-colored paint.
• Extra-strong white glue (carpentry glue).
• Scissors.

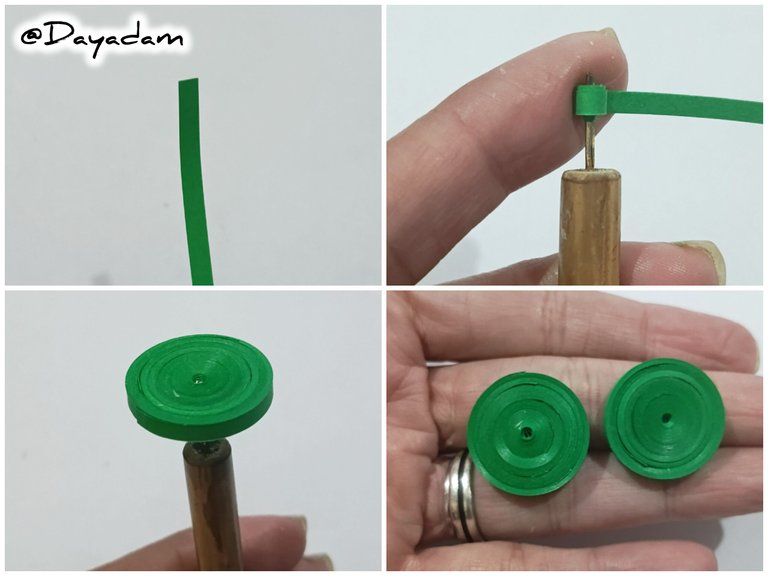
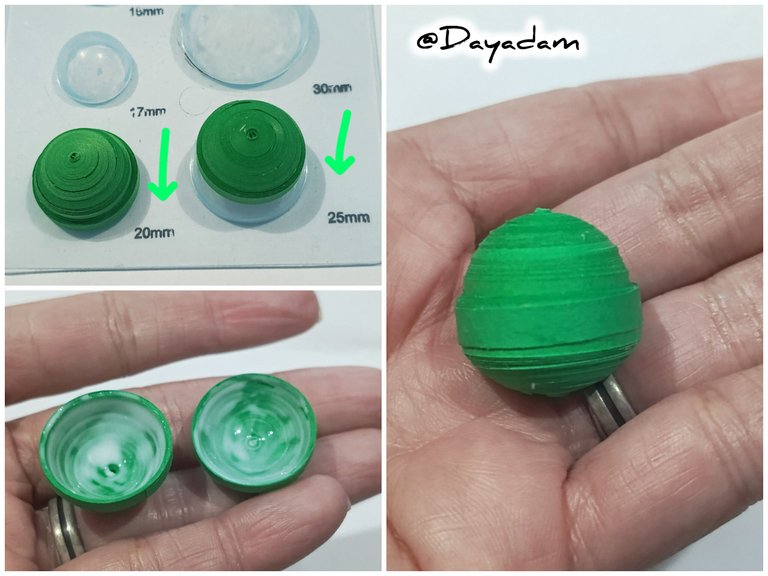
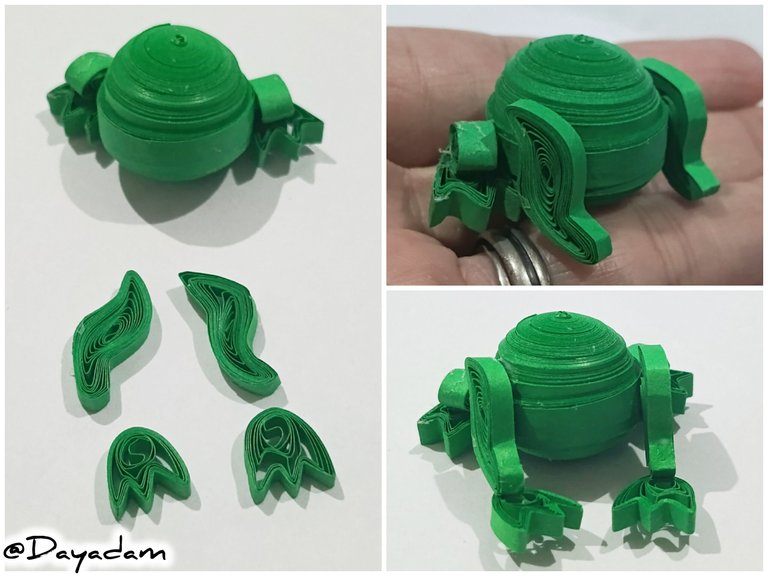
• Start by taking a 3 mm wide green quilling strip. Using the quilling needle, roll up all the strips until you reach the end, seal with extra-strong white glue, and remove from the needle to form a closed circle. You will need two identical circles.
• Shape the circles using a circle template, one measuring 20 mm and the other measuring 25 mm. Apply extra-strong white glue to the inside, then join the two circles together by wrapping a 4 mm wide strip of the same green color around them.
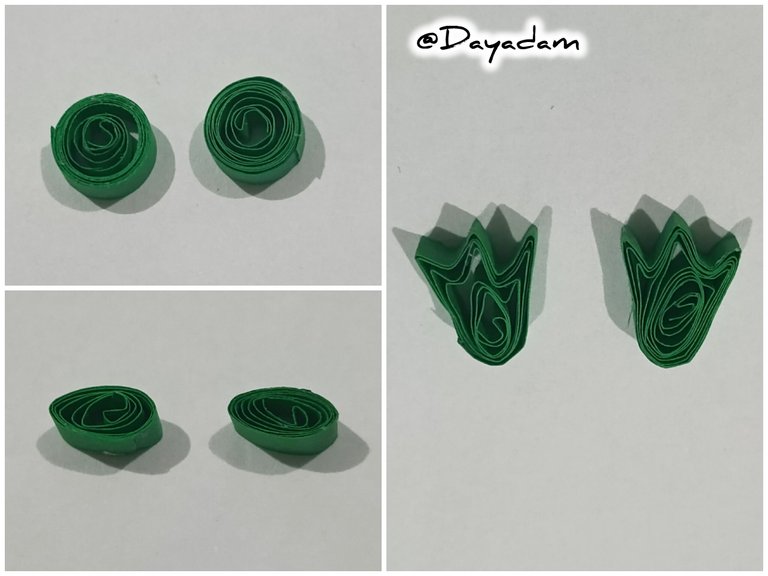
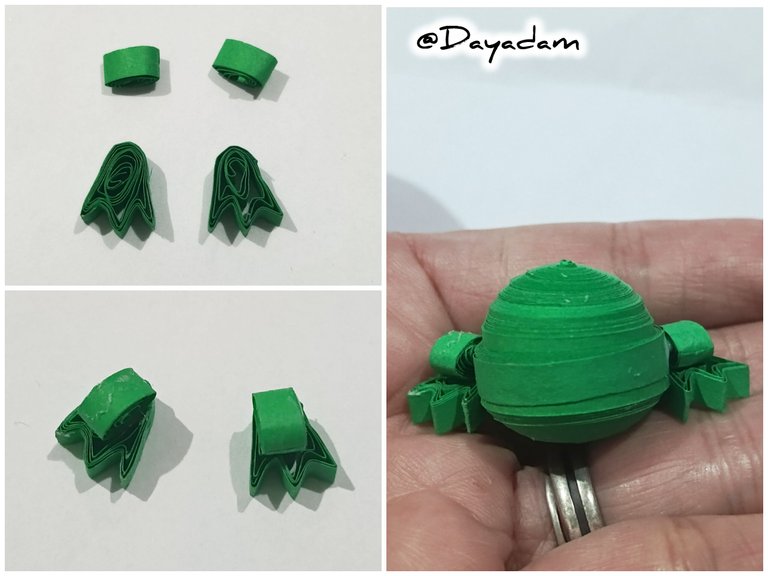
• To make the hind legs, make four open circles, two with 3 mm wide tape and two with 5 mm wide tape. Shape the two wider ones into a flat shape and the other two into a pointed shape to form the legs, as shown in the image. Join both pieces with glue and stick them to the round body you made earlier.

• Comenzamos tomando cinta para quilling de color verde de 3 mm de ancho, con la aguja para quilling, enrollamos todas las cintas hasta llegar al final de la misma sellamos con pega blanca extra fuerte y sacamos de la aguja, para formar un círculo cerrado. Necesitaremos 2 círculos iguales.
• Moldee los círculos en una plantilla para moldear círculos, uno lo haremos en la medida 20 mm y el otro en la medida número 25 mm, aplicaremos pega blanca extra fuerte por la parte interna, luego procedemos a unir ambos círculos pasando una cinta de 4 mm de ancho del mismo color verde alrededor.
• Para realizar las patas traseras procedemos a realizar cuatro círculos abiertos 2 con cinta de 3 mm de ancho y dos con cinta de 5 mm de ancho, los dos más anchos los moldearemos de forma aplanada, los restantes en forma puntiaguda para formar las patas tal y como pueden ver en la imagen, unimos ambas piezas con pega y las pegamos del cuerpo redondo que hice con anterioridad.
 |  |
 |  |
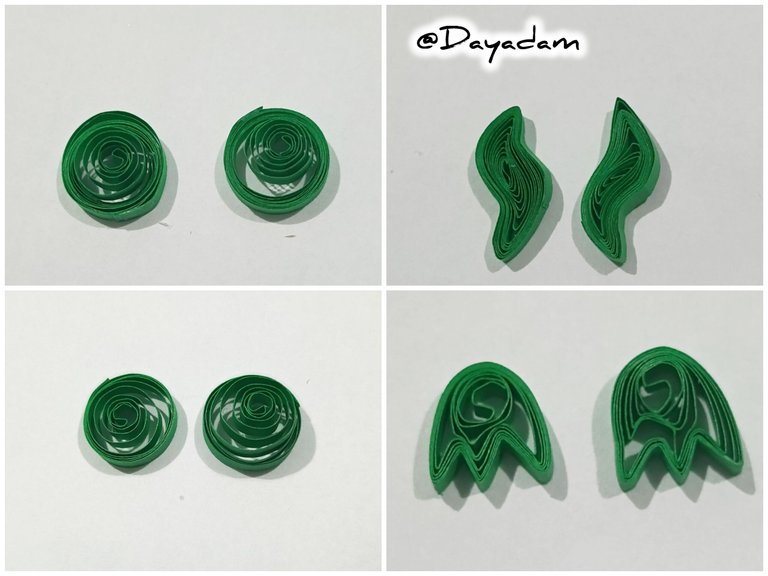
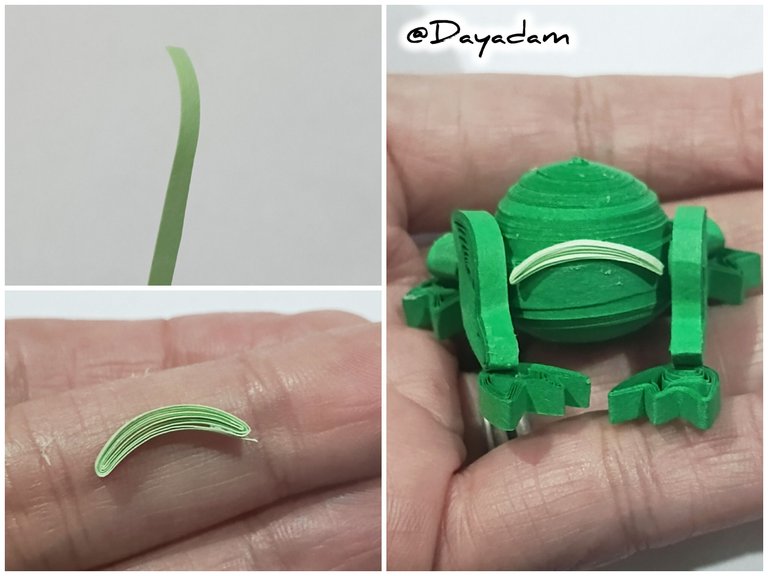
• To make the front legs, we will make four open circles with 3 mm wide green tape. We will shape them as you can see in the image and attach them harmoniously to the character's body.
• We will make the mouth with light green tape, 1 mm wide, folding it and then shaping it into a half-moon. We will attach it in the indicated place.
• Para realizar las patas delanteras realizaremos cuatro círculos abiertos con cinta verde de 3 mm de ancho, moldeamos las mismas cómo pueden ver en la imagen, pegaremos de manera armónica al cuerpo del personaje.
• La boca la realizaremos con cinta verde claro, de un milímetros de ancho, haciendo dobleces con la misma y luego moldeando en forma de media luna. Pegamos en el sitio indicado.
 |  |  |
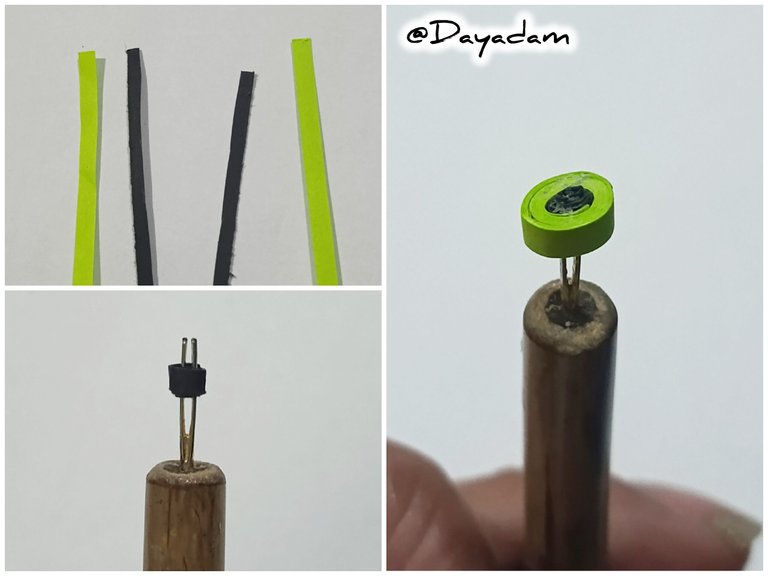
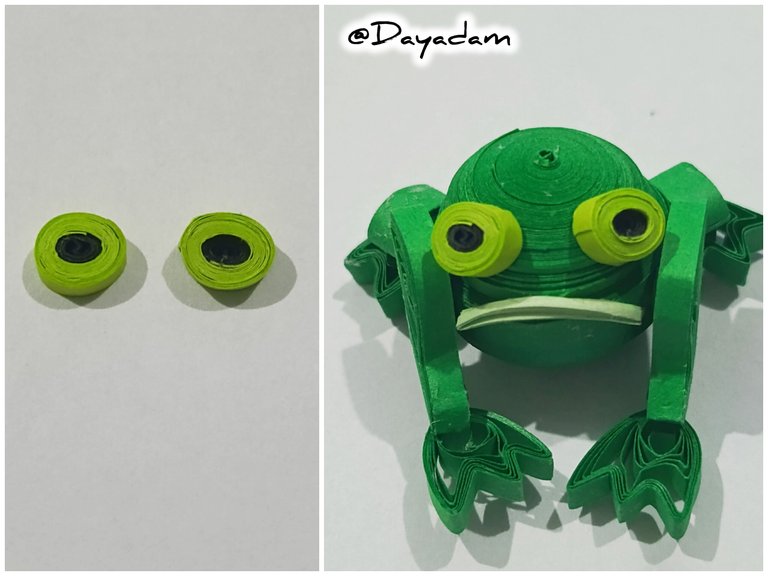
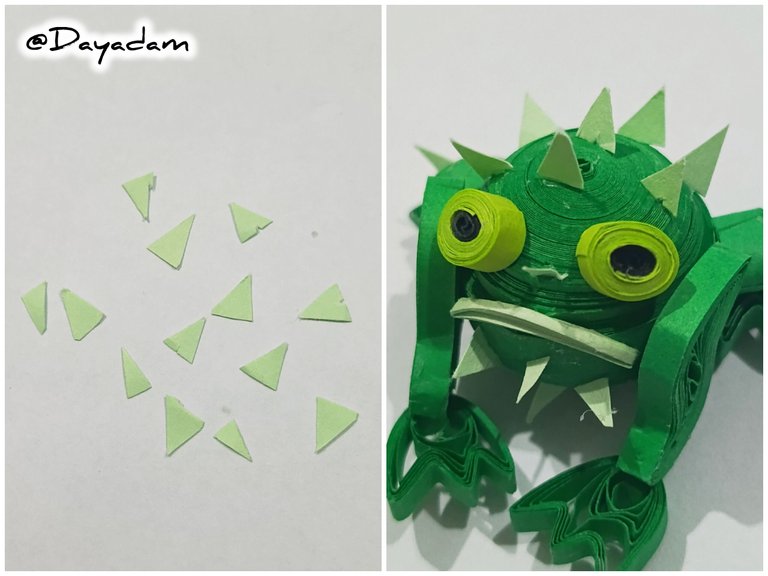
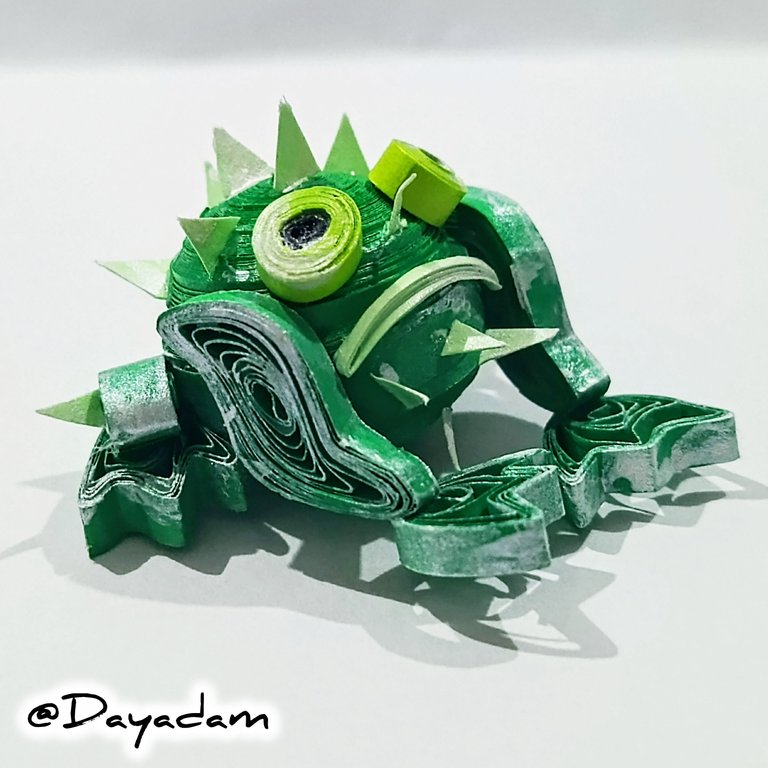
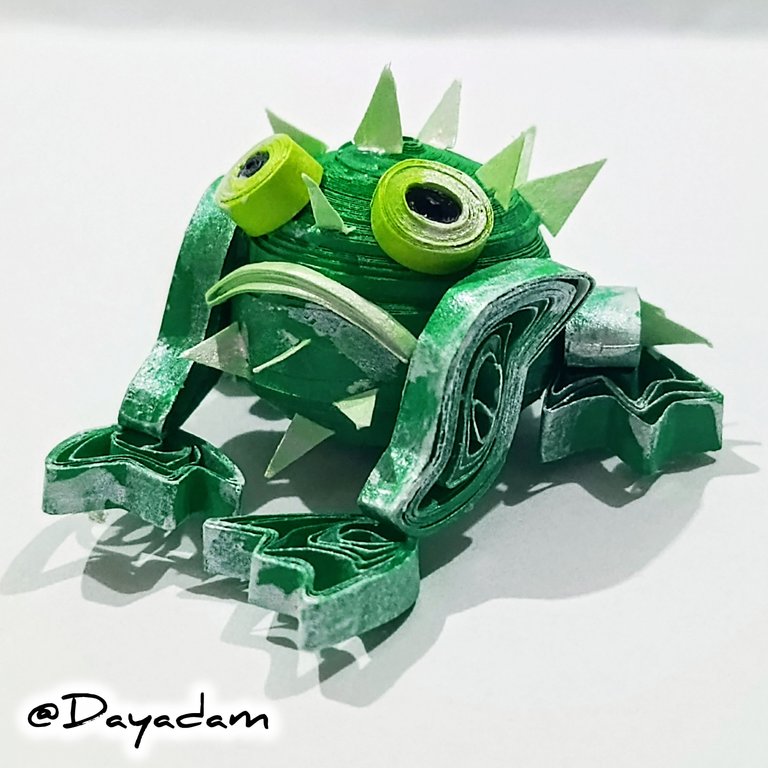
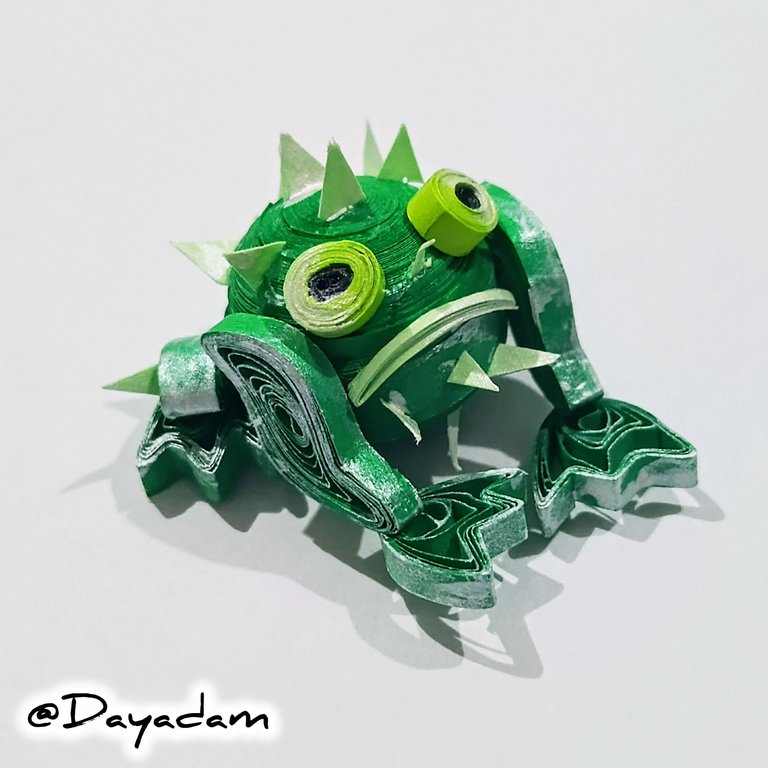
• I made the eyes using 3 mm wide black and apple green ribbon, forming a closed circle that I began with the black ribbon and finished with the green. I then glued them onto the character's face.
• I made some small flat spikes with light green tape, cutting out triangles with scissors, which I glued to various places on the character's body.
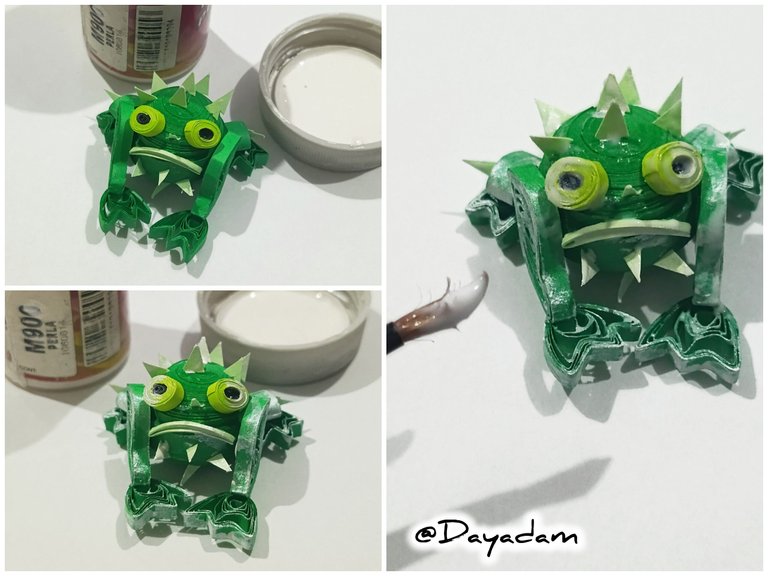
• I used a brush to make some small lights with pearl-colored paint.
• Finally, I applied a coat of extra-strong white glue to harden and protect the piece.
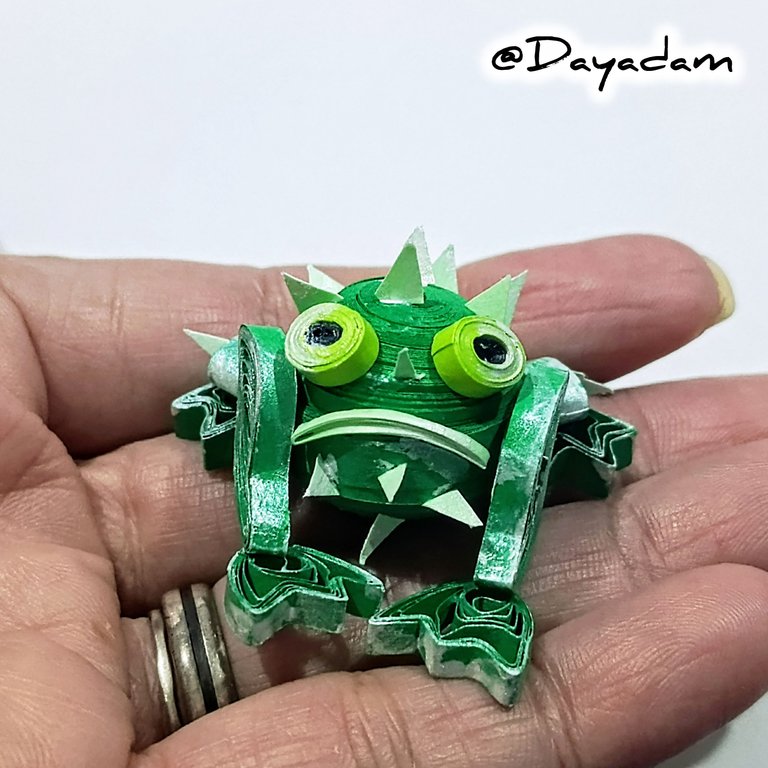
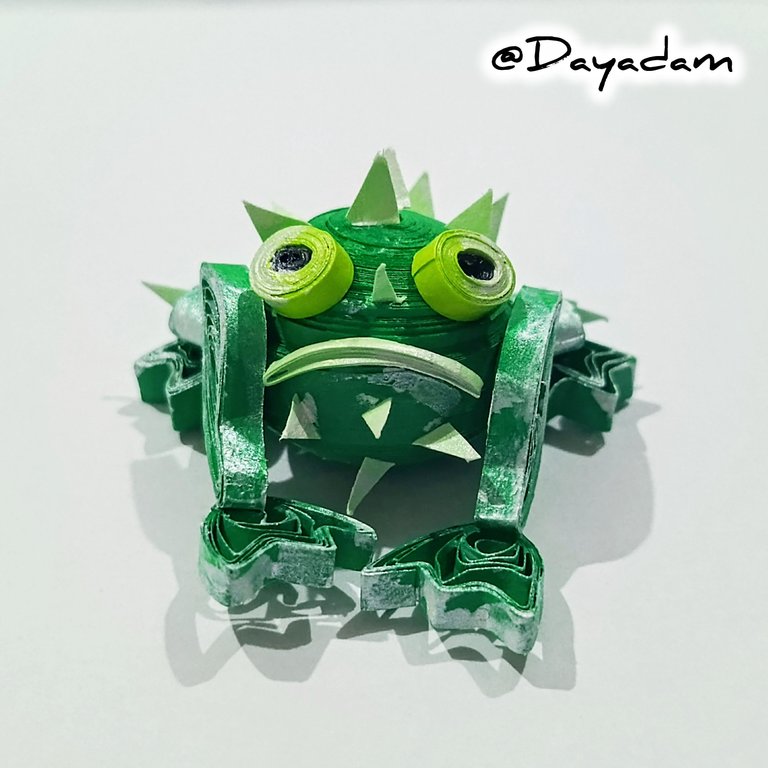
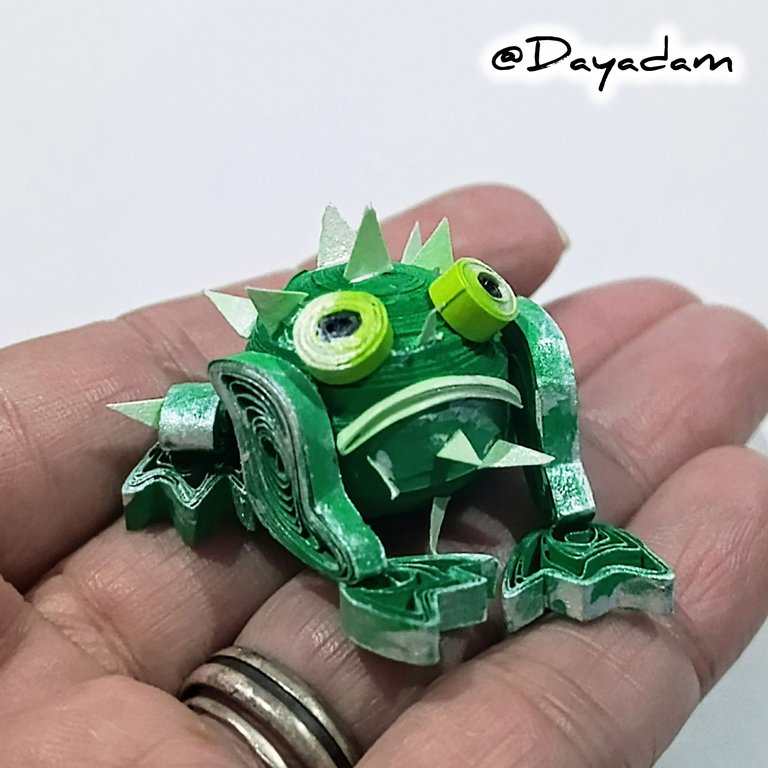
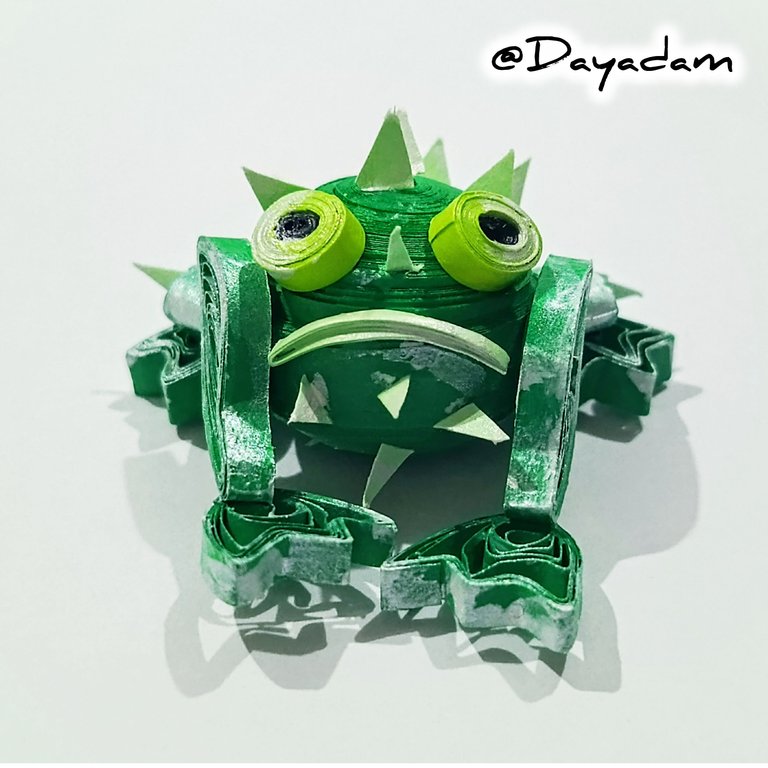
• And now we have our 3D decorative figure, inspired by the character from the “Horny Toad” card.
• Realicé los ojos con cintas de color negro y de color verde manzana de 3 mm de ancho, realizando un círculo cerrado el cual comencé a elaborar con la cinta negra hasta finalizar con la verde. Procedí a pegar en la cara de personaje.
• Llevé a cabo unos pequeños picos planos con cinta de color verde claro, recortando con una tijera unos triángulos, los cuales pegué en varios sitios del cuerpo del personaje.
• Realice con un pincel unas pequeñas luces con pinturas de color perlado.
• Para finalizar, apliqué una capa de pega blanca extra fuerte para endurecer y proteger la pieza realizada.
• De esta manera tenemos listo esta figura decorativa en 3D, inspirada en el personaje de la carta "Horny Toad".
 |  |
 |  |

|  |
 |
 |
 |  |
 |  |
 |
 |
What did you think, did you like it?
I hope you did, I hope you liked my explanation, procedure and photos, I made them with love for you.
"Let out that muse that inspires you, and let your imagination fly".
Thank you all, see you next time.
¿Que les pareció, les gustó?
Espero que sí, que les haya gustado mi explicación, procedimiento y fotos, los hice con mucho cariño por y para ustedes.
"Deja salir esa musa que te inspira, y deja volar tu imaginación".
Gracias a todos, nos vemos en la próxima.

Banner y separador hecho por mí en Canva
Thanks for the support ✨
Te quedo genial @dayadam, yo quiero en estos días hacerlo también en foami clay. Pero aún no tengo la idea.
Saludos amiga y lindo Domingo!!
!HOPE
Muchas gracias. Espero verlo pronto.
Saludos...
@dayadam me encantan cómo quedan esas piezas, felicitaciones y gracias por compartir.
Muchísimas gracias mi corazón por tus palabras, un placer que te haya gustado.
Greetings
Amazing artwork.
The use of quilling strips and pearl-colored paint adds a touch of elegance to the project. What inspired you to choose this particular design?
Thanks for sharing your creativity!
Thank you very much for your words a pleasure that you liked my work in the technique I use with strips of paper, it is called quilling technique.
I was inspired by a letter from the game hive splinterlands, in my post you can see the image from which I was inspired and the link to the source of it.
Thanks for visiting my blog. Welcome to my blog.
Thank you
Have a great week
🙏
Sending you some Ecency curation votes!
Thank you for the support ✨
My pleasure!
!PIZZA
Qué gracioso ver como lograste la postura, esta técnica la dominas al 100% para poder recrear esas posturas en los personajes.
Realmente yo misma quedé impresionada con el resultado final, nunca pensé que me iba a quedar tan semejante y hasta en la fotografía con una postura similar.
Gracias por tu visita mi corazón, y por tus palabras hacia mi trabajo.
Saludos...
!LADY
Saludos @dayadam, encantada con tu trabajo, en general los sapos me dan miedo, pero este se ve simpático. ❤️
Feiz inicio de mes!
Gracias mi linda, yo comparto tu sentimiento les tengo terror y asco, pero este marca la diferencia jajaja. Saludos.
Thanks for sharing! - @cieliss

Thanks for the support ✨
$PIZZA slices delivered:
@melinda010100(2/15) tipped @dayadam
Come get MOONed!
https://www.reddit.com/r/papercraft/comments/1qhs5gb/i_made_a_paper_toad_sculpture_using_the_quilling/
This post has been shared on Reddit by @dayadam through the HivePosh initiative.