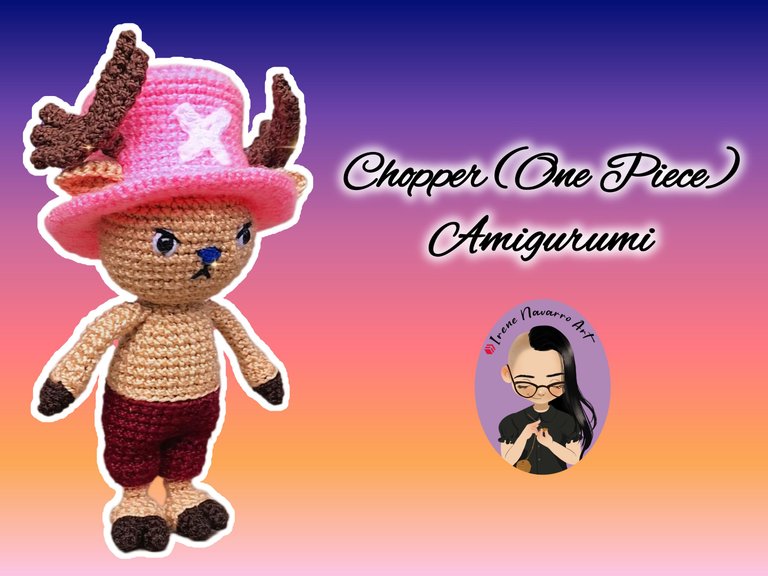
Amigurumi Chopper (One piece)
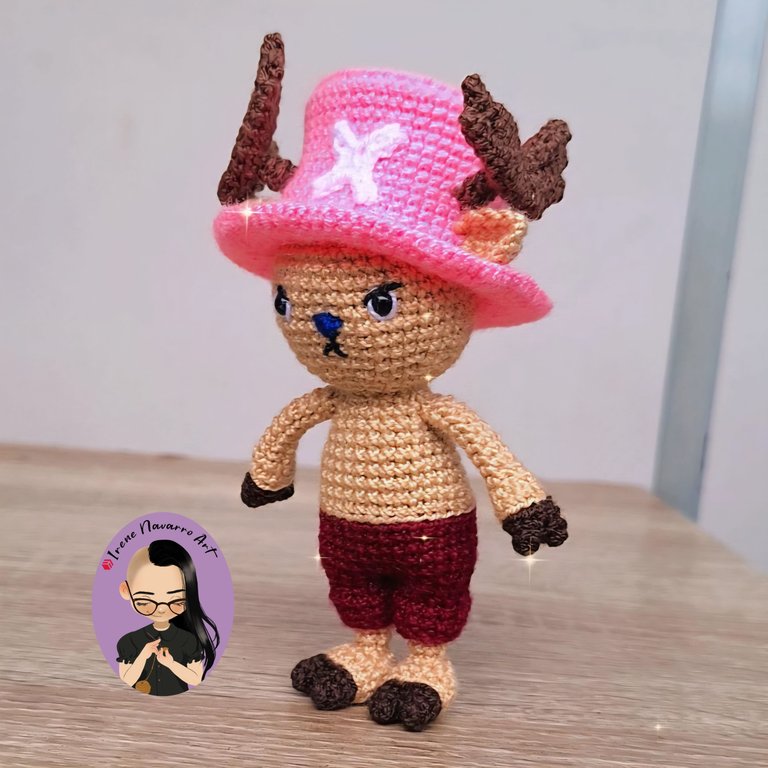
Saludos querida comunidad, como siempre feliz de compartir de nuevo un proyecto de ganchillo con ustedes, este es el séptimo amigurumi que hago dedicado a One Pice, pues en toda tripulación pirata de haber un médico y este pequeño venadito con su tierna apariencia ocupa este puesto, se trata de Tony Tony Chopper quien se unió a Luffy y a los demás para aventurarse en la gran ruta marítima. Como siempre le puse mucho amor y cariño a la elaboración y espero a ustedes les guste ver el proceso 😊
Greetings dear community, as always happy to share a crochet project with you again, this is the seventh amigurumi I make dedicated to One Piece, because in every pirate crew there must be a doctor and this little deer with his tender appearance occupies this position, it is about Tony Tony Chopper who joined Luffy and the others to venture on the great sea route. As always I put a lot of love and affection into the elaboration and I hope you enjoy seeing the process 😊
Proceso / Process
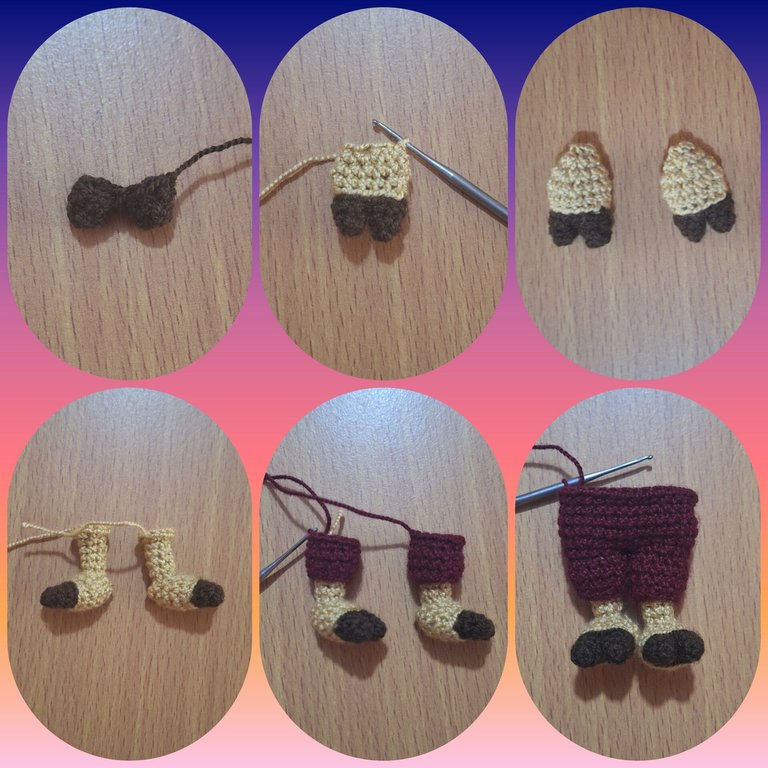
Comencé con los pies de Chopper usando hilo acrílico marrón oscuro y ganchillo de 1.25mm haciendo 4 puntos bajos en un anillo luego una hilera con dos aumentos, hice dos partes iguales y las uní con una hilera de puntos bajos, luego cambié a hilo beige hice dos hileras de puntos bajos, luego dos hileras con 3 disminuciones para cerrar, de este modo obtuve el pie.
Levanté 6 puntadas e hice cuatro hileras de puntos bajos para hacer la pierna, luego 6 aumentos. Aparte hice 12 cadenas con hilo Vinotinto y las cerré de forma circular, hice 3 hileras de puntos bajos, uní esta parte a la pierna con una hilera de puntos bajos. Hice dos piernas iguales y las uní con una hilera de puntos bajos, luego hice una hilera de 6 aumentos, seguida de cuatro hileras sin aumentos.
I started with Chopper's feet using dark brown acrylic yarn and a 1.25mm crochet hook, making 4 single crochet stitches in a ring, then a row with two increases. I made two identical pieces and joined them with a row of single crochet stitches. Then I switched to beige yarn and made two rows of single crochet stitches, then two rows with three decreases to close off the foot.
I picked up 6 stitches and made four rows of single crochet stitches to make the leg, then made six increases. I also made 12 chains with burgundy yarn and closed them in a circular motion. I made three rows of single crochet stitches, joining this piece to the leg with a row of single crochet stitches. I made two identical legs and joined them with a row of single crochet stitches, then made a row of six increases, followed by four rows without increases.

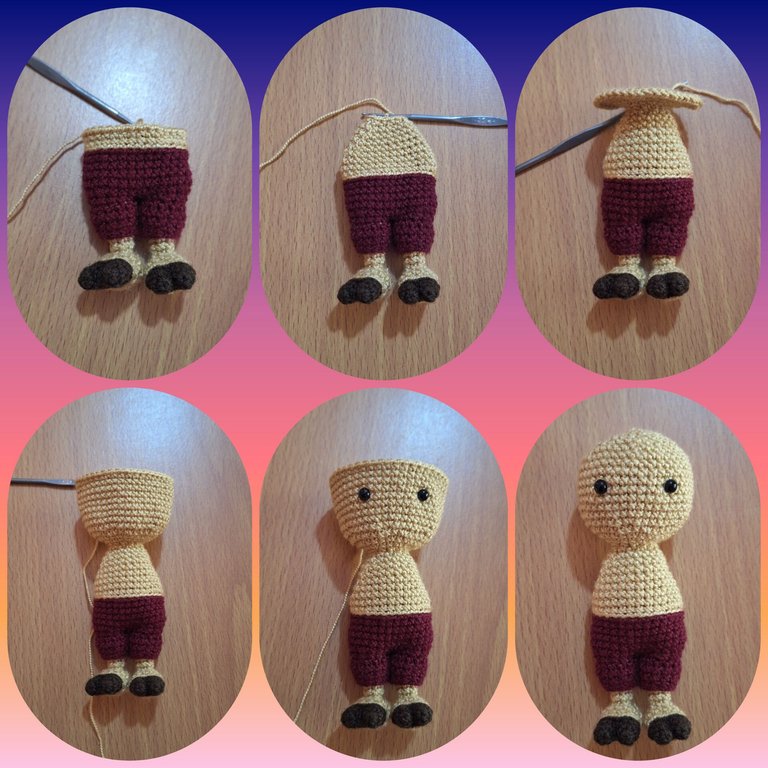
Cambié a hilo beige para hacer el torso, hice dos hileras de 30 puntos bajos, hice seis hileras de 2 disminuciones hasta obtener 18 puntadas, hice una hilera de 6 disminuciones para obtener 12 puntadas. Para la cabeza hice 6 aumentos por seis hileras hasta obtener 42 puntadas, hice ocho hileras de puntos bajos, coloqué los ojos de plástico, luego hice 6 disminuciones hasta cerrar.
I switched to beige yarn for the torso, making two rows of 30 single crochet stitches, six rows of 2 decreases for 18 stitches, one row of 6 decreases for 12 stitches. For the head, I made 6 increases for six rows for 42 stitches, eight rows of single crochet stitches, added the googly eyes, then made 6 decreases until cast on.
Para los brazos con hilo marrón oscuro hice 4 puntos bajos en un anillo, luego aparte hice los mismo, uní ambas partes por una hilera de puntos bajos, hice una hilera de 2 aumentos, cambié a hilo beige, hice una hilera de puntos bajos y luego una hilera de 4 disminuciones para obtener 6 puntadas, hice ocho hileras de 6 puntos bajos para alcanzar la longitud del brazo deseada. Hice dos brazos iguales y los cosí a ambos lados del cuerpo. Con hilo negro, blanco y azul bordé los detalles de la cara.
Con hilo rosado hice en sombrero, empecé con 8 puntos bajos en un anillo, una hilera con 8 aumentos, una hilera sin aumentos, dos hileras con 8 aumentos, una hilera sin aumentos, una hilera de 8 aumentos para obtener el círculo de 48 puntadas, seguí con doce hileras de 48 puntos bajos, luego hice la solapa del sombrero haciendo una hilera con 12 aumentos, una hilera sin aumentos, una hilera con 12 aumentos, una hilera sin aumentos, terminando con una hilera de 12 aumentos para obtener 84 puntadas.
For the arms, I made 4 single crochet stitches in a ring with dark brown yarn. Then, separately, I made the same stitches. I joined both sections with a row of single crochet stitches, made a row of 2 increases, switched to beige yarn, made a row of single crochet stitches, then a row of 4 decreases to get 6 stitches. I made eight rows of 6 single crochet stitches to achieve the desired arm length. I made two identical arms and sewed them to either side of the body. I embroidered the details of the face with black, white, and blue yarn.
With pink yarn I made the hat, I started with 8 single crochet in a ring, one row with 8 increases, one row without increases, two rows with 8 increases, one row without increases, one row of 8 increases to obtain the circle of 48 stitches, I continued with twelve rows of 48 single crochet, then I made the flap of the hat making one row with 12 increases, one row without increases, one row with 12 increases, one row without increases, finishing with a row of 12 increases to obtain 84 stitches.
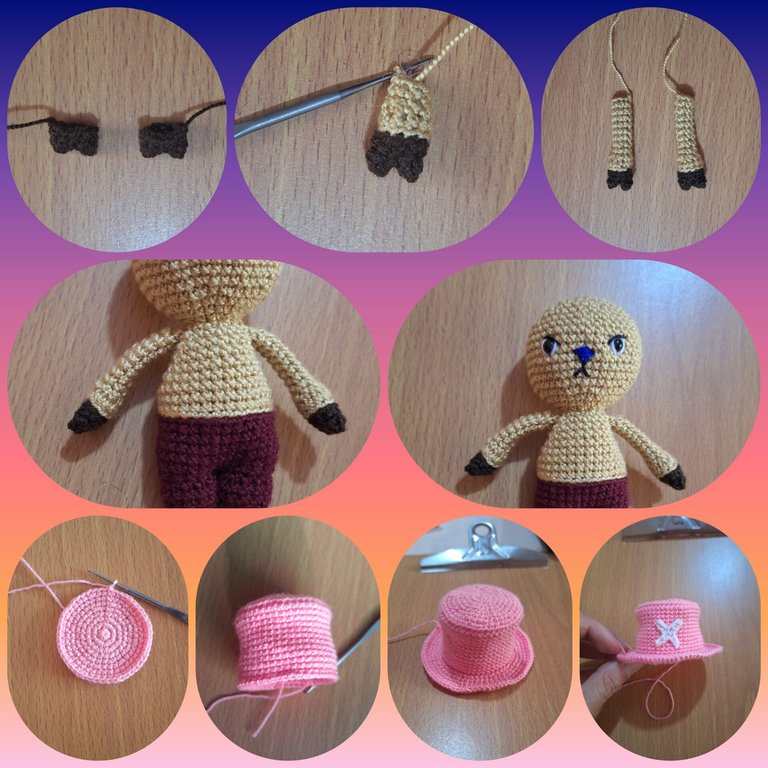
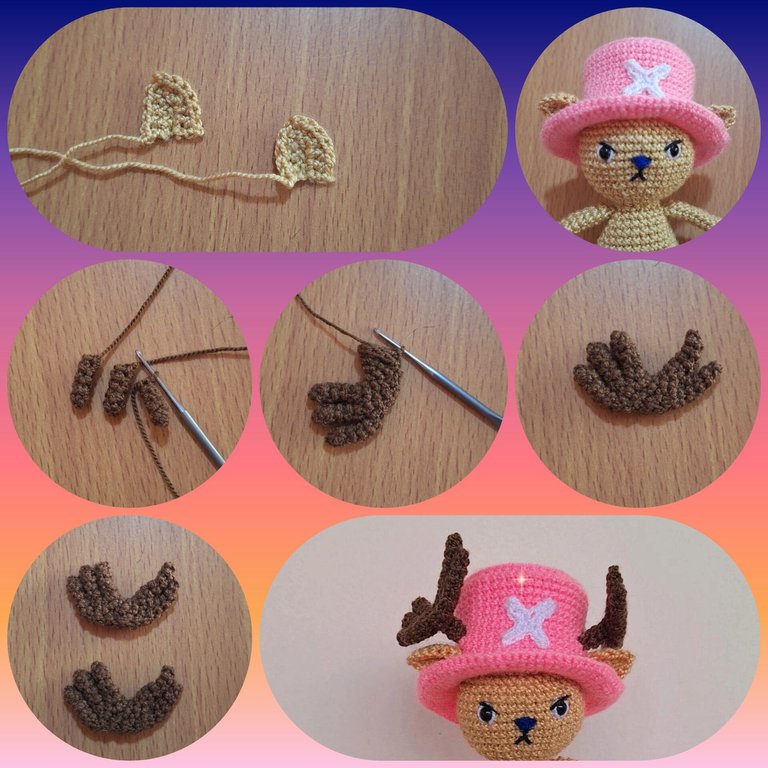
Para las orejas con hilo beige empecé con una base de 3 cadenas sobre las cuales hice dos hileras con 2 aumentos en un solo de los extremos para formar la punta de la oreja, hice dos iguales y las cosí al sombreo a ambos lados de la cabeza. Con un hilo marrón un poco mas claro que el usado para los pies hice astas de Chopper.
For the ears, I started with a base of 3 chains, over which I made two rows with two increases at only one end to form the tip of the ear. I made two identical ones and sewed them to the shading on both sides of the head. Using a brown thread a little lighter than the one used for the feet, I made Chopper's antlers.
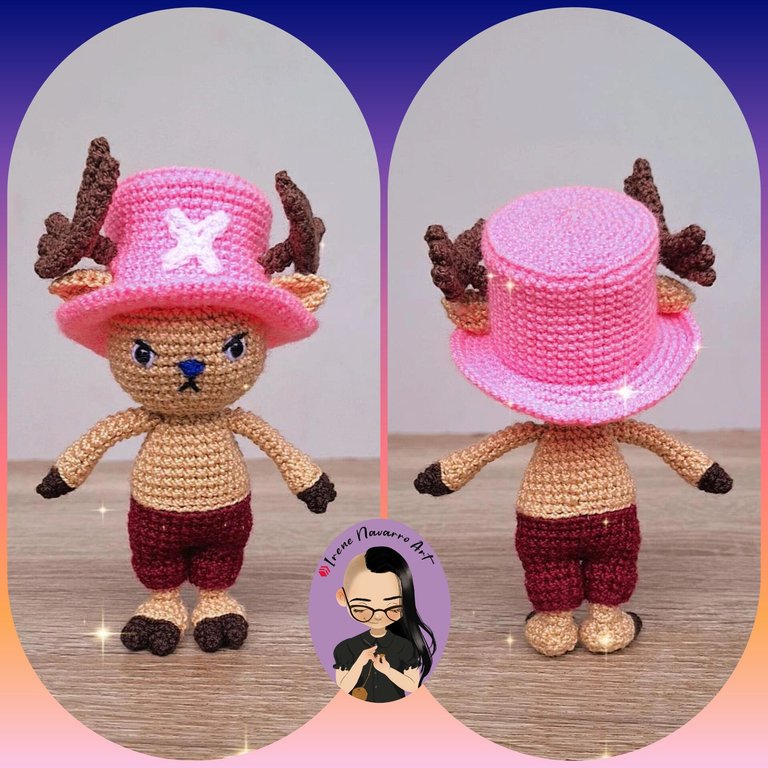
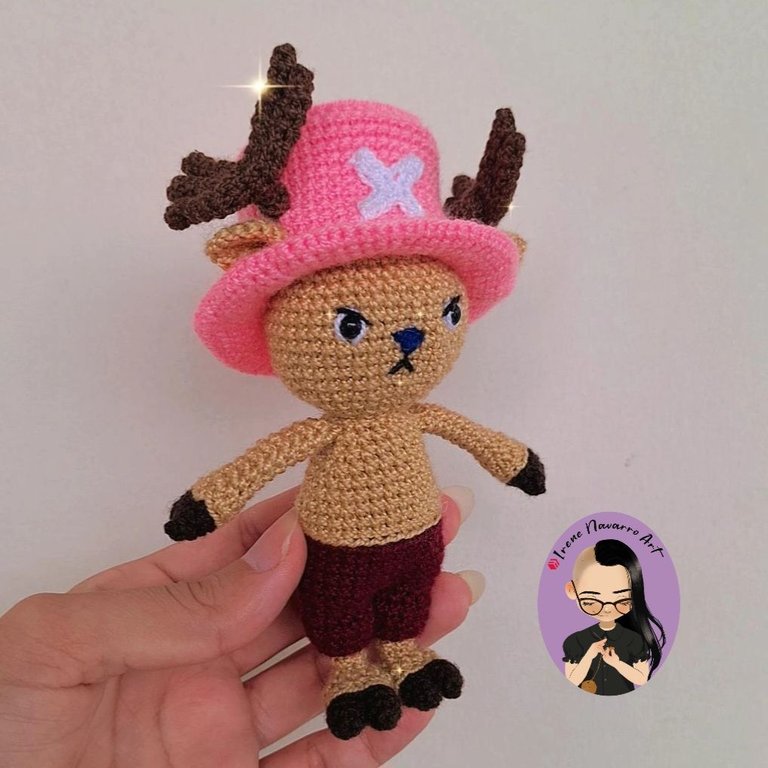
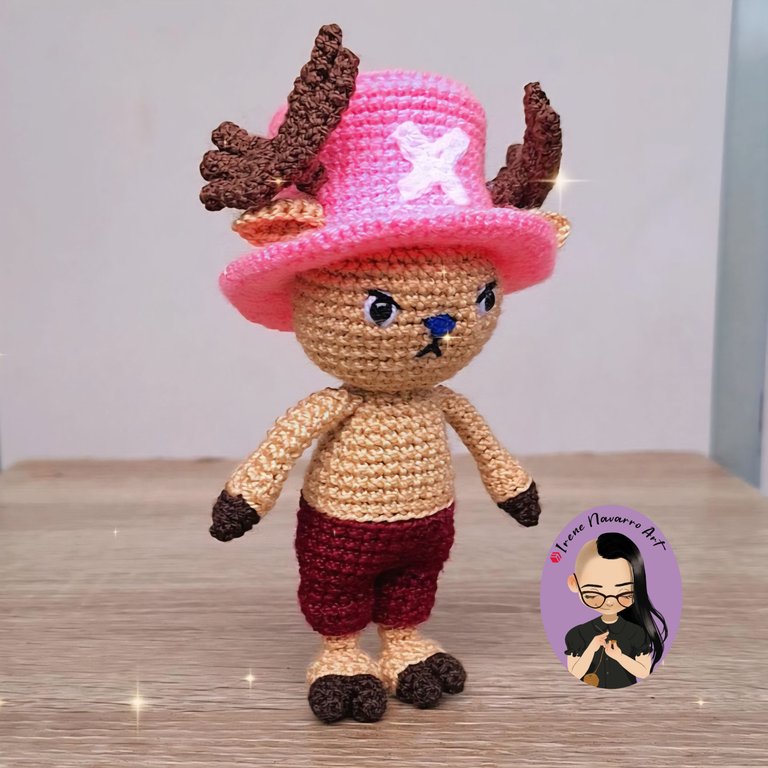
Resultado / Result
Imágenes tomadas con dispositivo Samsung A54. Portada editada en Inshot
Pictures taken with Samsung A54 device. Cover edited in Inshot

Espero les haya gustado. Les invito a leer mis próximas publicaciones y siempre estaré dispuesta a responder sus preguntas y comentarios, también pueden seguirme y contactarme en cualquiera de mis redes sociales. ¡Muchas gracias!
I hope you liked it. I invite you to read my next publications and I will always be willing to answer your questions and comments, you can also follow me and contact me on any of my social networks. Thank you!
Facebook
Twitter
Instagram
Ko-Fi
Discord: irenenavarroart#0361
Posted Using INLEO
As always, fascinating work. This amigurumi fan art turned out great. Thank you for sharing your good work. Success and blessings. 💖
selected by @dayadam
Thank you very much 🥰
Thank you 😊
Cute
Thank you 😊
Hermoso trabajo como siempre, dominas perfectamente el crochet 👌🏾♥️
Muchas gracias por el apoyo. Saludos ☺️
Congratulations @irenenavarroart! You have completed the following achievement on the Hive blockchain And have been rewarded with New badge(s)
Your next target is to reach 300000 upvotes.
You can view your badges on your board and compare yourself to others in the Ranking
If you no longer want to receive notifications, reply to this comment with the word
STOPThis is really neat and beautiful
Thank you very much ☺️
Que adorable!! 😍
Gracias 💜
Guao, cada personaje me sorprende más, realmente tomas la esencia del personaje, allí Chopper tiene cara molesto, como cuando le dicen que es un tanuki (mapache japones). Me encantó cada detalle y esto me hace esperar los últimos personajes que faltan. Dios bendiga tu talento.
Ay amiga yo le puse ojitos de bravura porque así se veía más guerrero jeje. Tus comentarios me alegran la vida, de verdad me hace feliz que estés pendiente de este reto de hacer a los nakamas 💜
Quedó perfecto! Se ve súper tierno tu amigurumi de Chopper ✨
Muchísimas gracias 😊