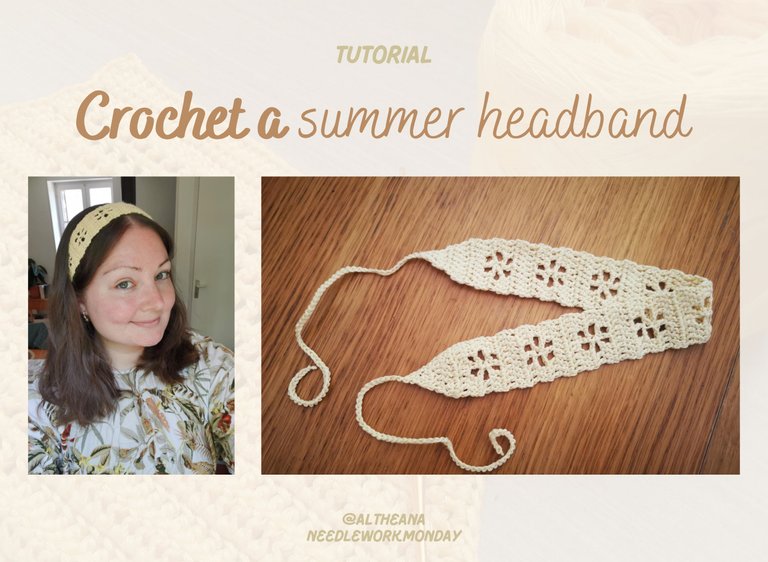
Tutorial: Crochet a summer headband // Tutoriel : Un bandeau d'été ajouré au crochet [EN/FR]
Hello friends and crochet lovers! I hope you're all doing well today 😁
Right now, I'm looking for quick crochet projects that don't require a lot of yarn. I'm looking for profitable products with a view to opening a small online store to sell some of my creations. 🧶
And I found a super quick and cute project: a hairband, an ideal accessory for summer (and not just for summer, by the way)!
I spotted several pretty patterns, and I'm going to share with you the creation process I followed for each one! Here's the first one, a small openwork headband with a "flower" motif 🌸
I find it very bohemian, very rustic, and it suits me so well!
It's a quick and easy project that's completely accessible to beginners. Here's the link to the tutorial on YouTube, and now here's my written tutorial 👇
Materials
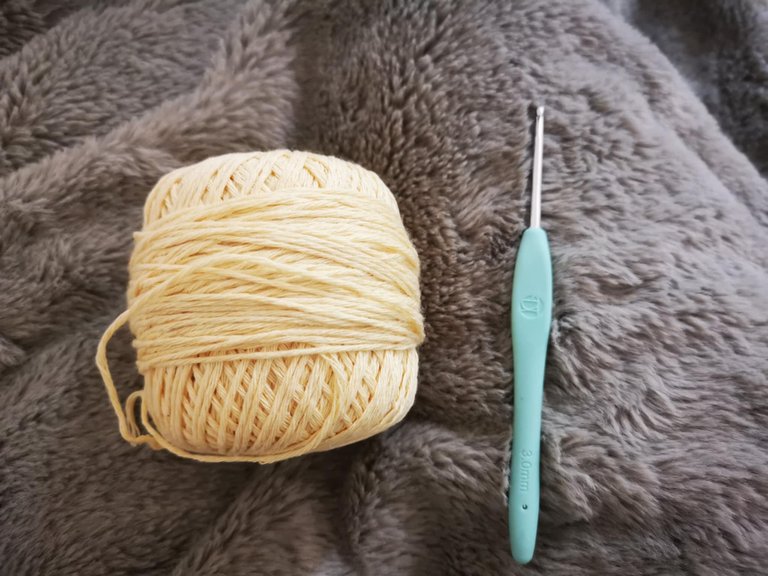
To make this little headband, you'll need:
- 1 ball of cotton or other comfortable material;
- 1 3mm crochet hook.
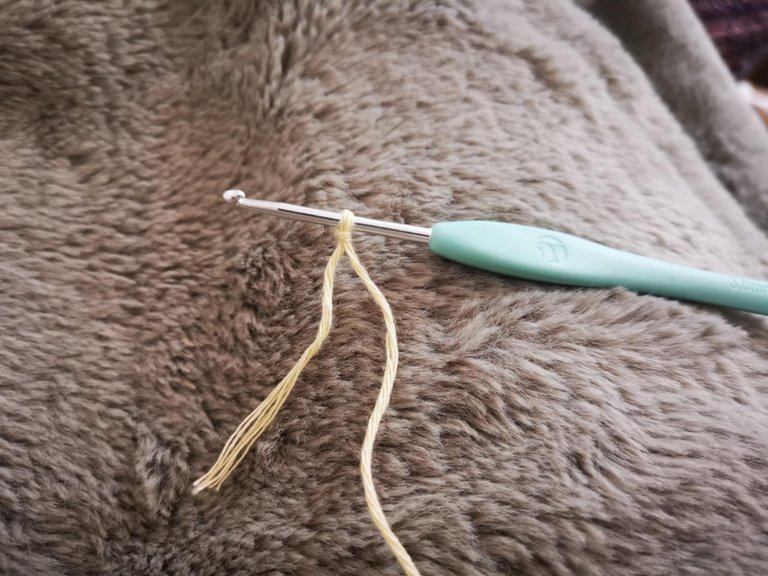
Steps to follow
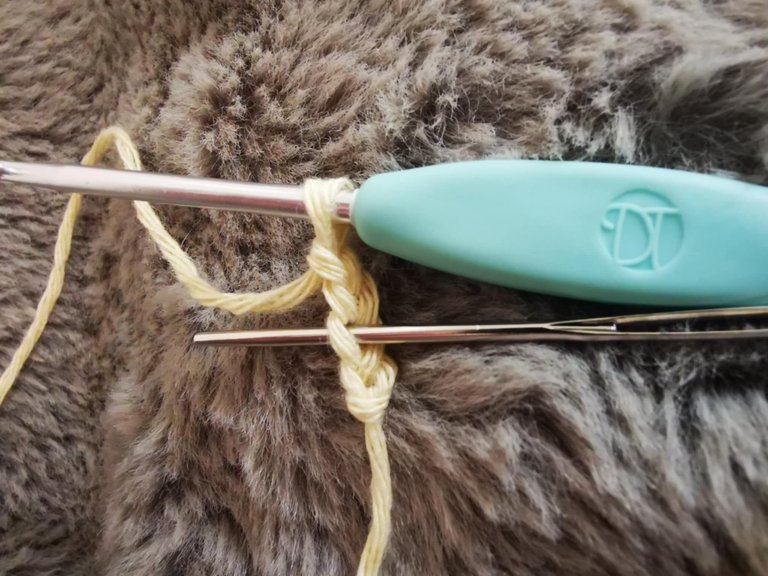
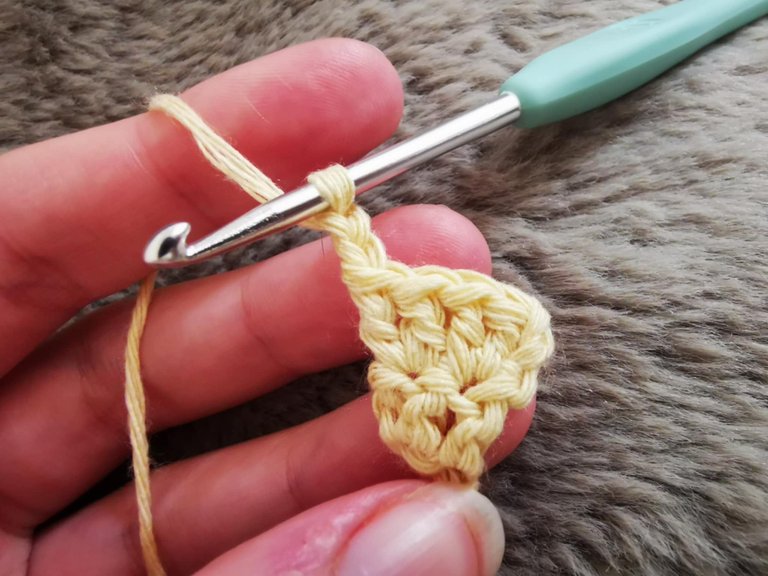
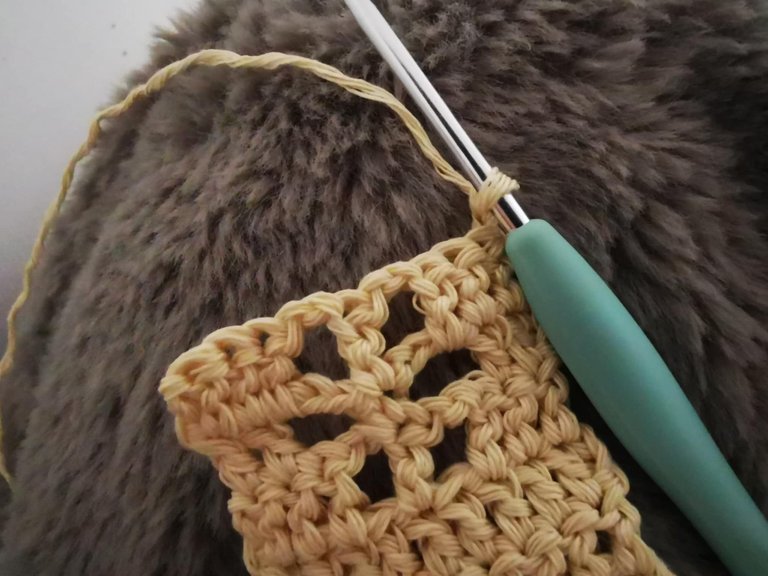
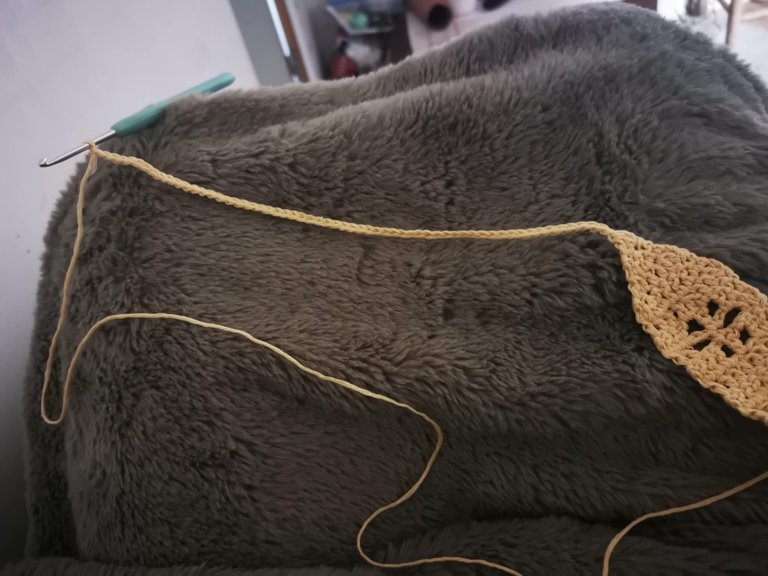
To begin this project, you'll simply make a slip knot:
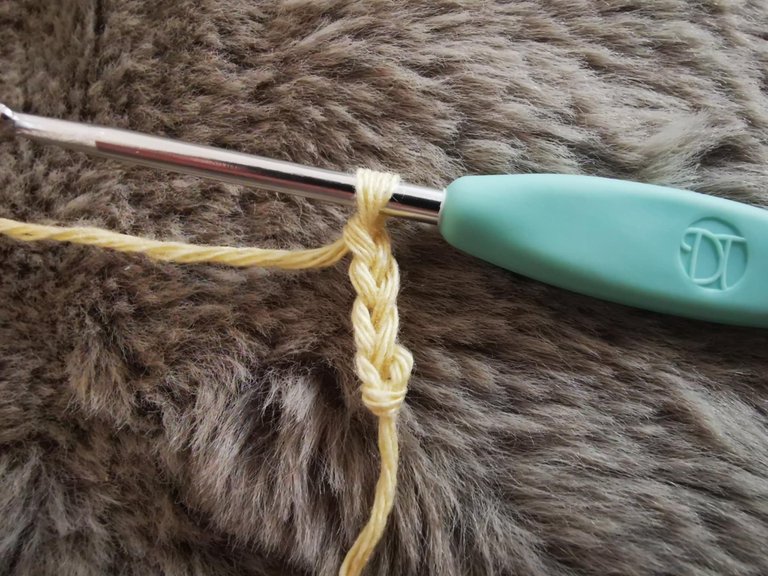
Next, you'll cast on 4 chain stitches:
Then, in the third stitch from the hook (the one where I placed my yarn needle to show you), you'll make 1 double crochet:
And then, you'll make another double crochet in the next stitch.
Your first row is complete!
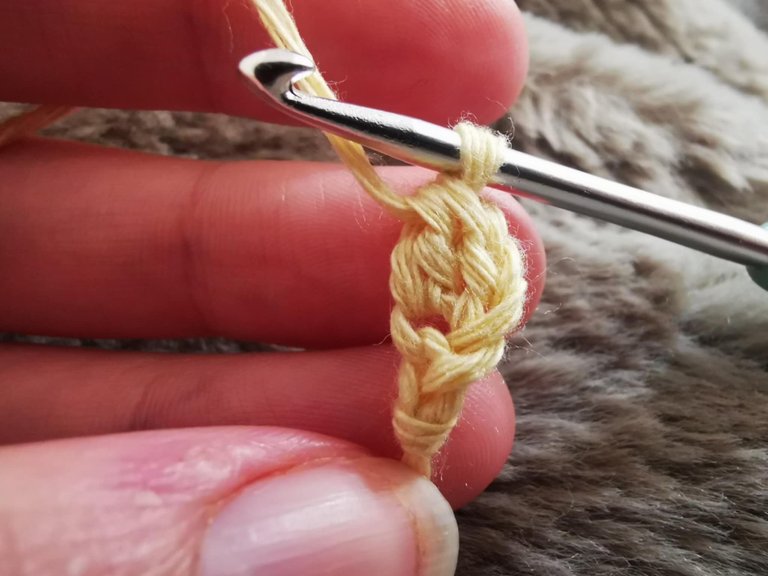
Now you need to cast on 2 chain stitches, then turn your project:
For this second row, you need to make 2 increases (2 double crochets in the same stitch):

Then, you need to cast on 2 chain stitches and turn the project:
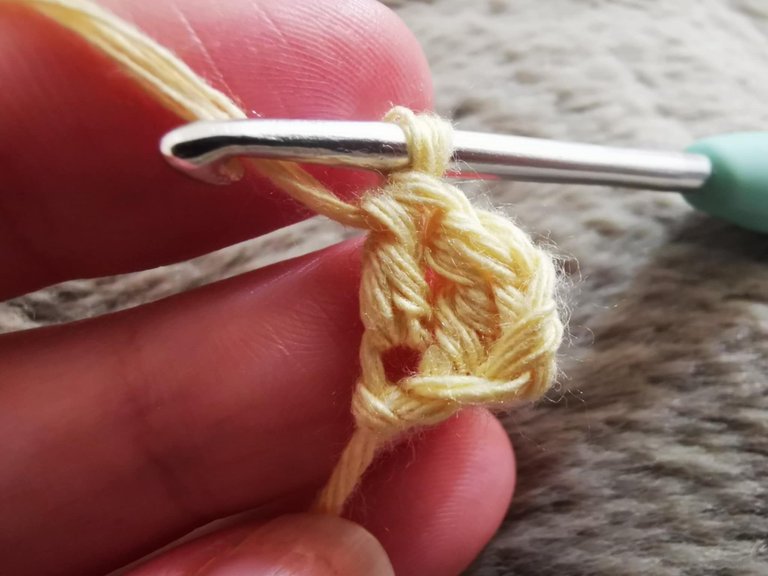
For row 3, you need to make:
- 1 increase (2 double crochets in the same stitch),
- 2 individual double crochets,
- 1 increase.
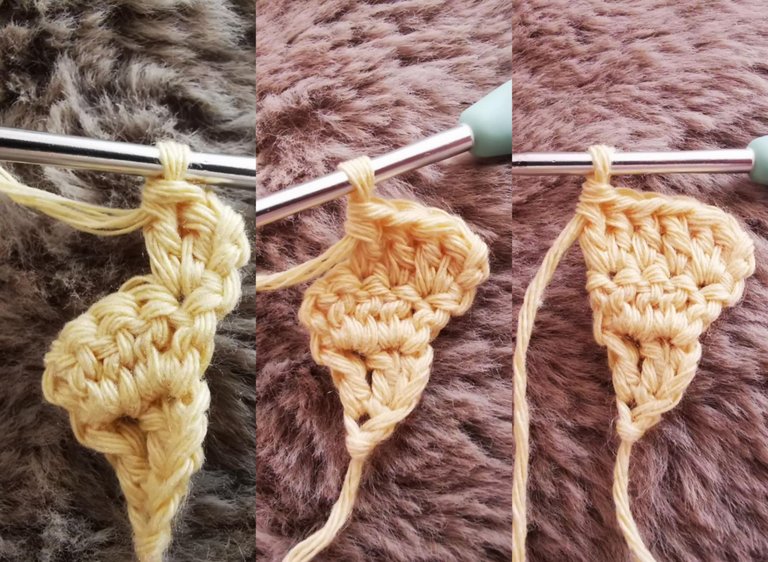
Then, you need to cast on 2 chain stitches before turning the project.

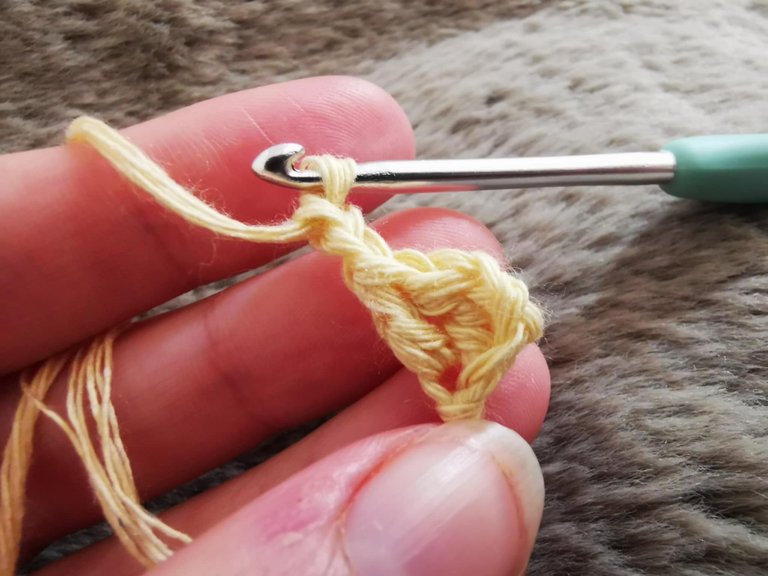
For row 4, you need to make:
- 1 increase,
- 4 individual double crochets,
- 1 increase.

Then cast on 2 chain stitches before turning the project.
For row 5, you need to make:
- 3 double crochets,
- 1 increase,
- 4 double crochets.

Then cast on 2 chain stitches before turning the project.
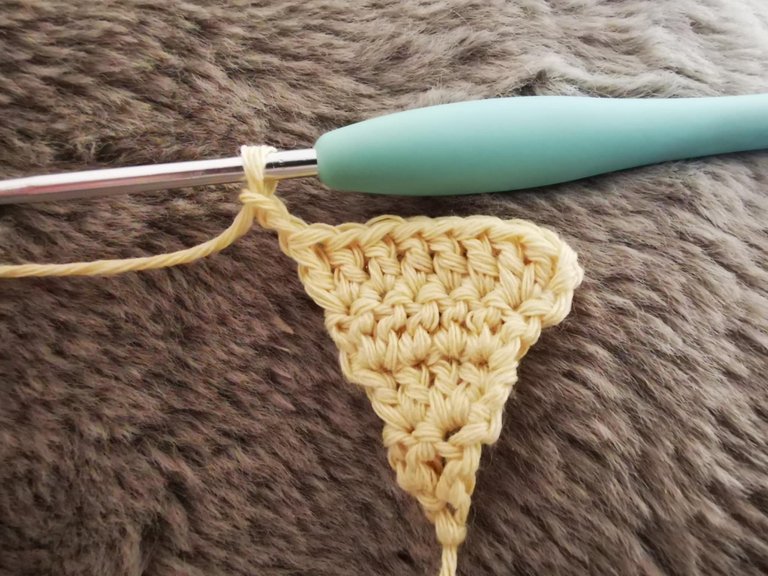
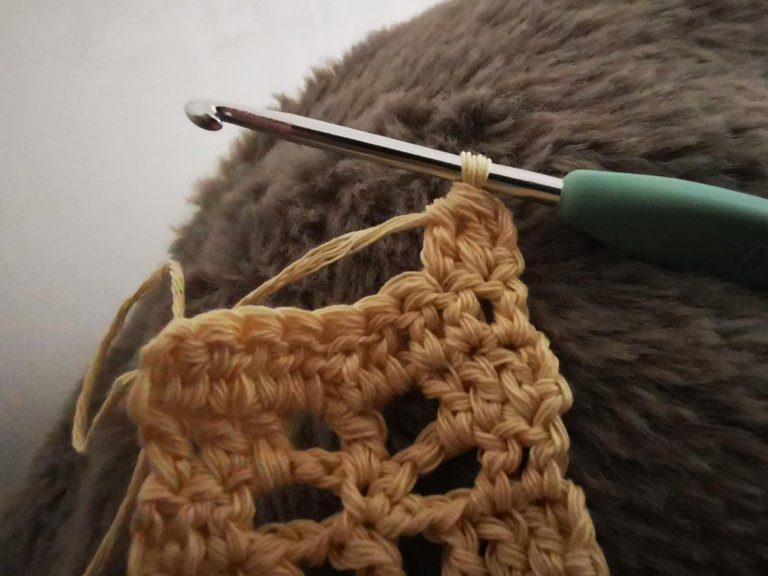
For row 6, we will begin creating the pattern. To do this, you need to do:
- 3 double crochets,
- 2 chain stitches,
- Skip one stitch and make 1 double crochet;
- 2 chain stitches,
- Skip one stitch and make 1 double crochet;
- 2 double crochets.


Don't forget to cast on 2 chain stitches before turning the project.
For row 7, you need to do:
- 2 double crochets;
- 3 chain stitches;
- 1 single crochet in the center of the middle double crochet,
- 3 chain stitches;
- 2 double crochets.

Cast on 2 chain stitches before turning the project.

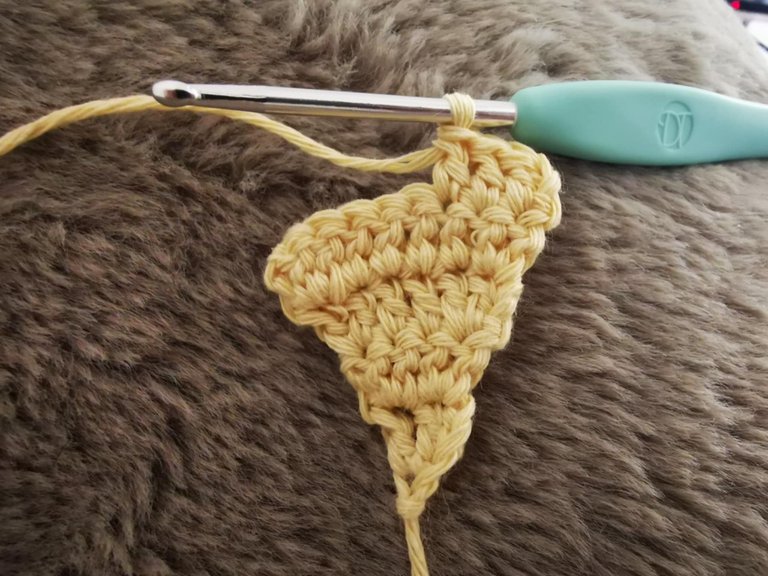
For row 8, you need to do:
- 2 classic double crochets,
- 1 double crochet in the motif space;
- 2 chain stitches;
- 1 double crochet in the center of the single crochet from the previous row;
- 2 chain stitches;
- 1 double crochet in the motif space;
- 2 double crochet.
Remember to cast on 2 chain stitches before turning your project.
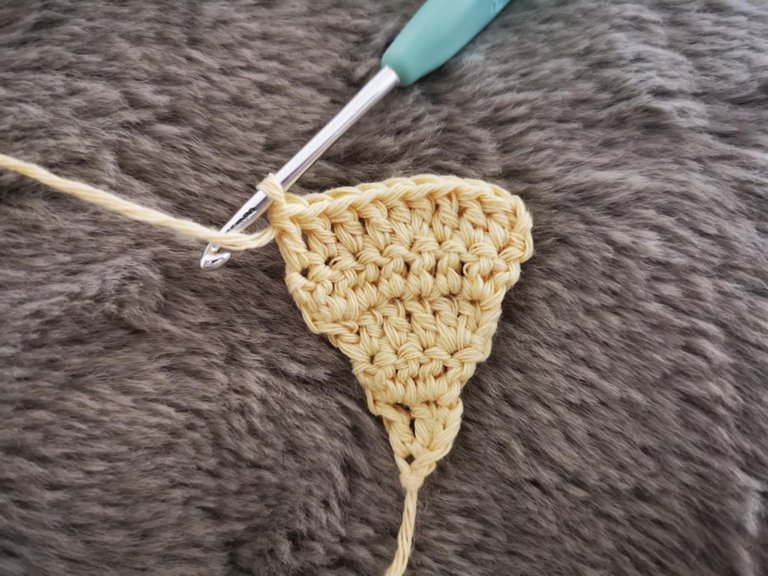
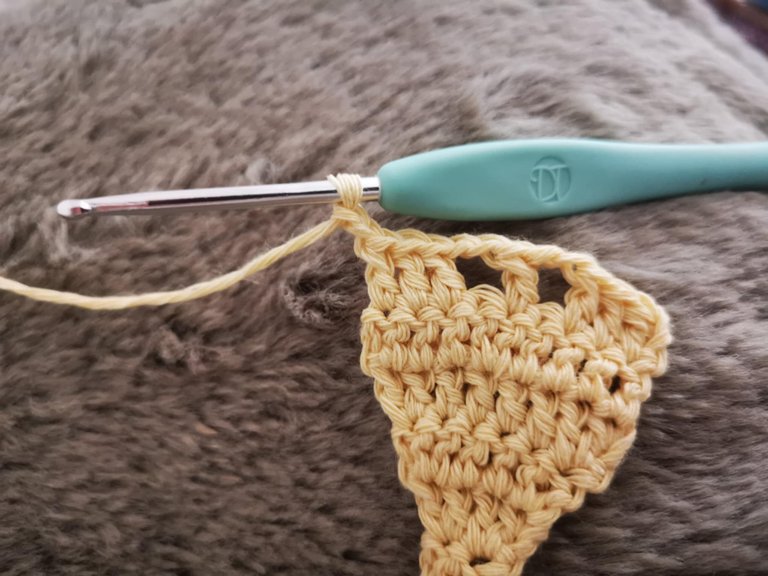
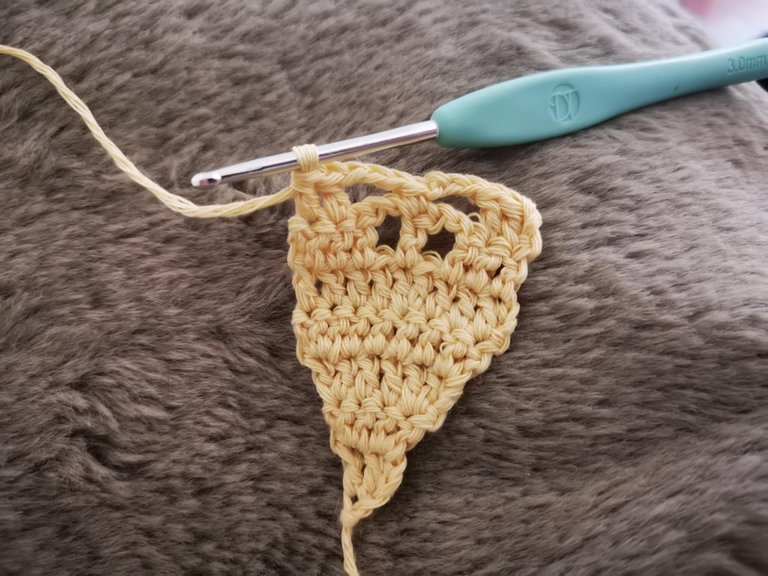
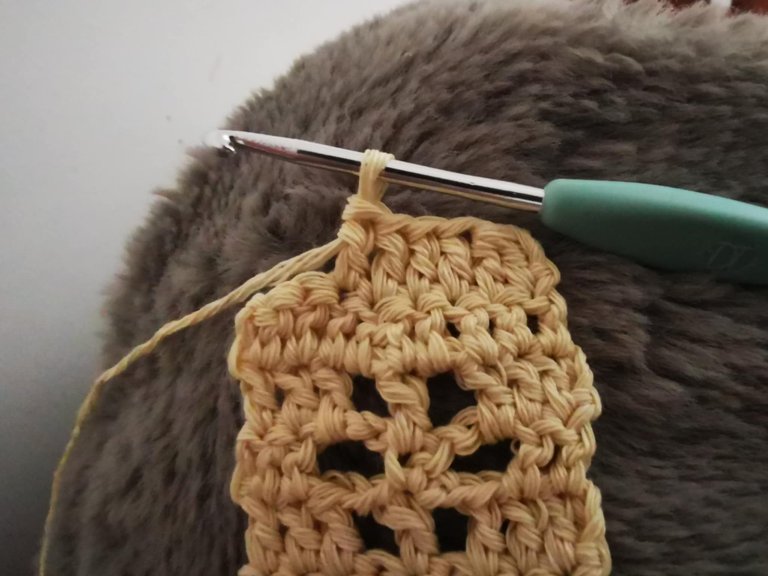
For row 9, you need to work:
- 3 classic single crochets;
- 1 double crochet in the motif space;
- 1 double crochet in the center;
- 1 double crochet in the motif space;
- 3 classic double crochets.
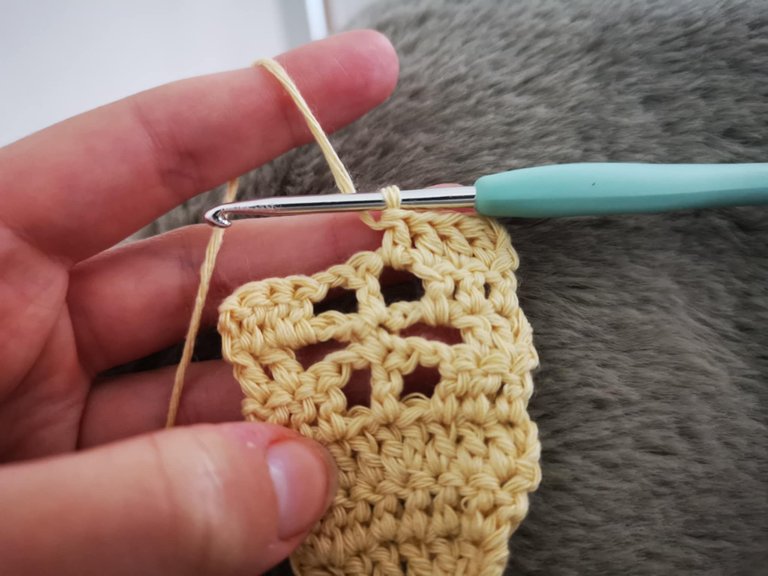

And cast on 2 chain stitches before turning your project.
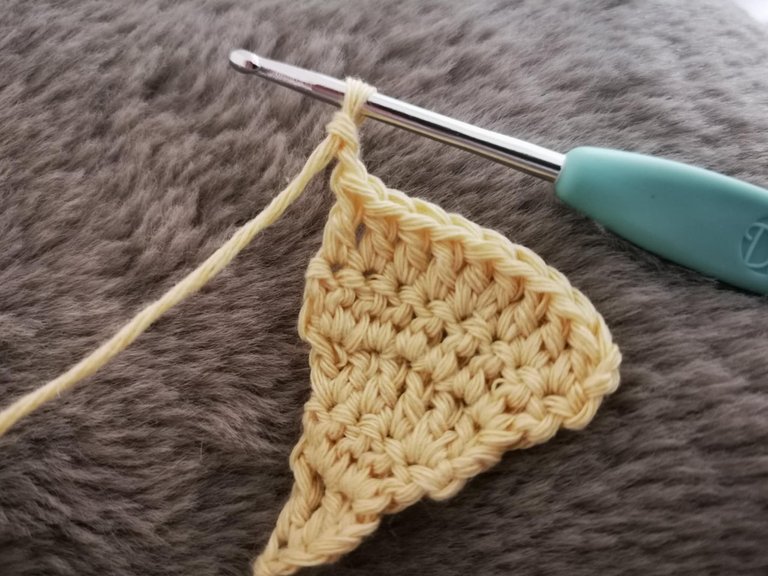
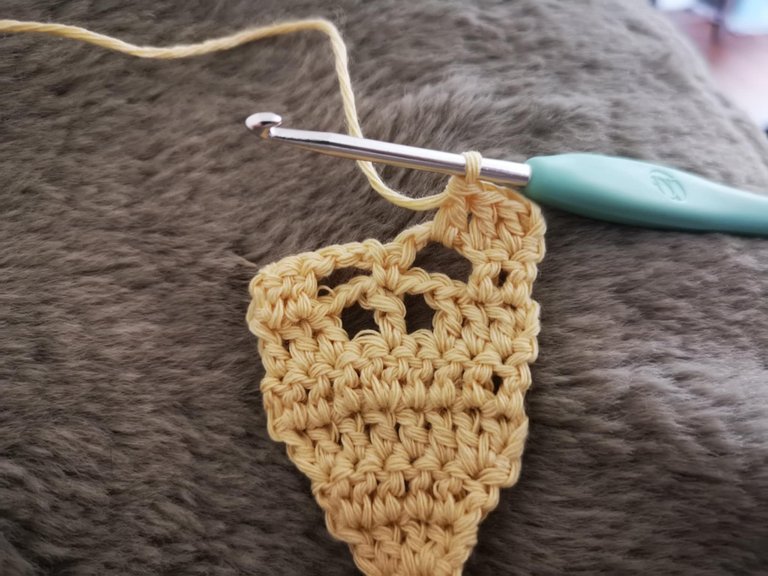
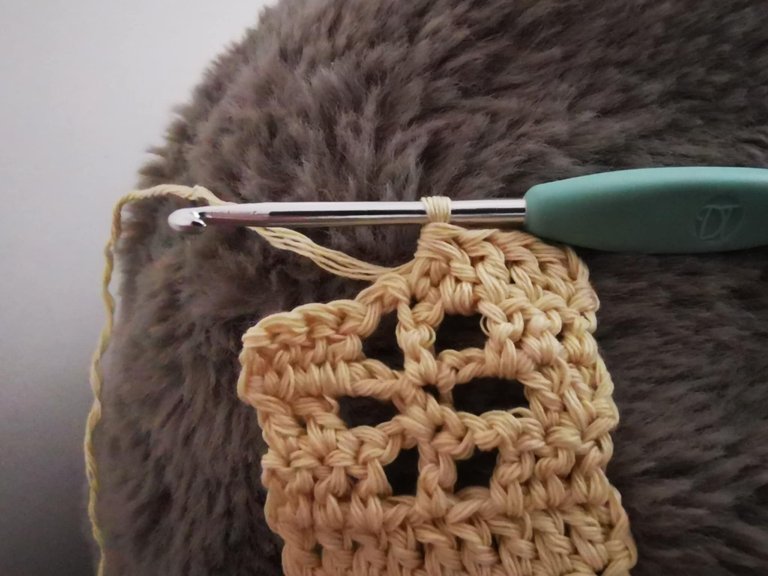
For row 10, you need to work:
- 9 single crochets.

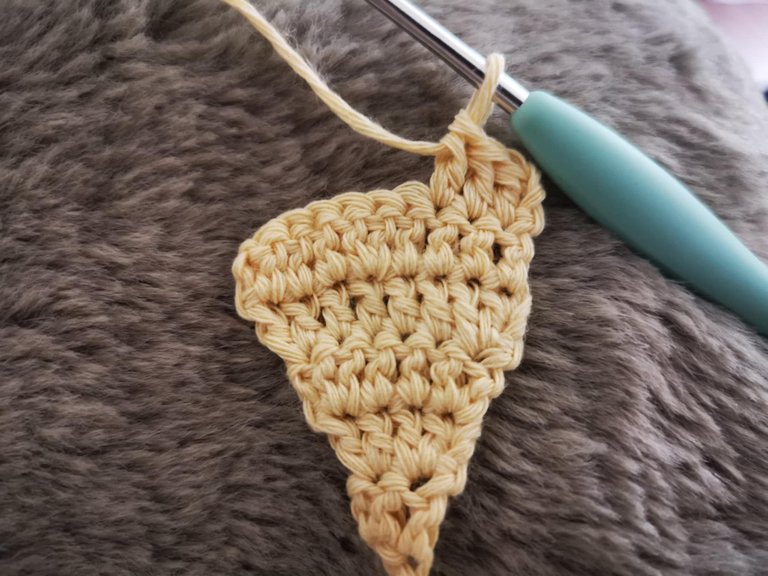
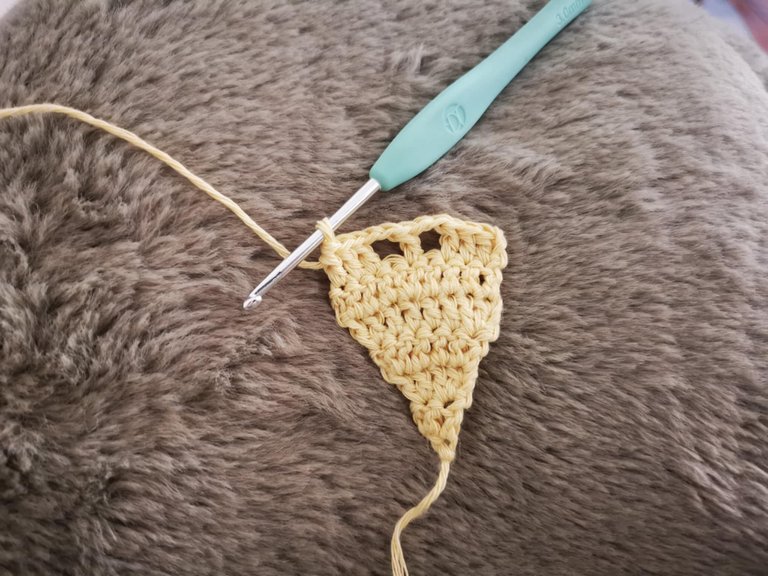
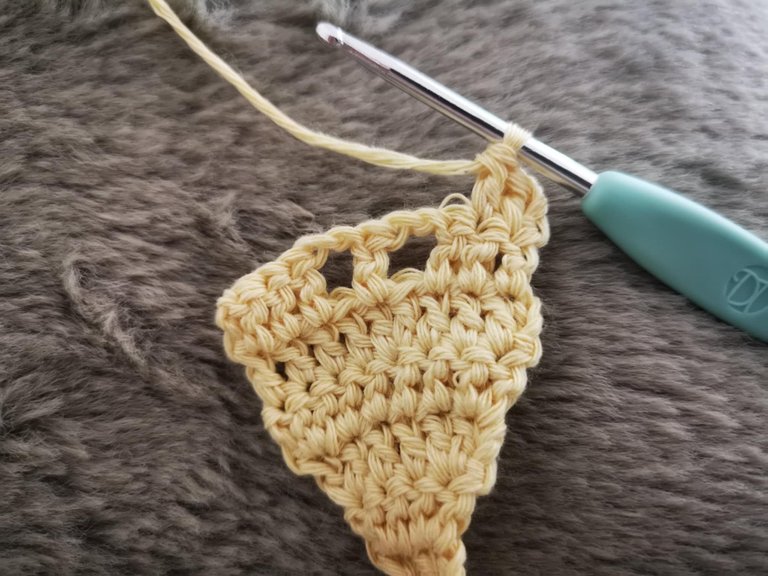
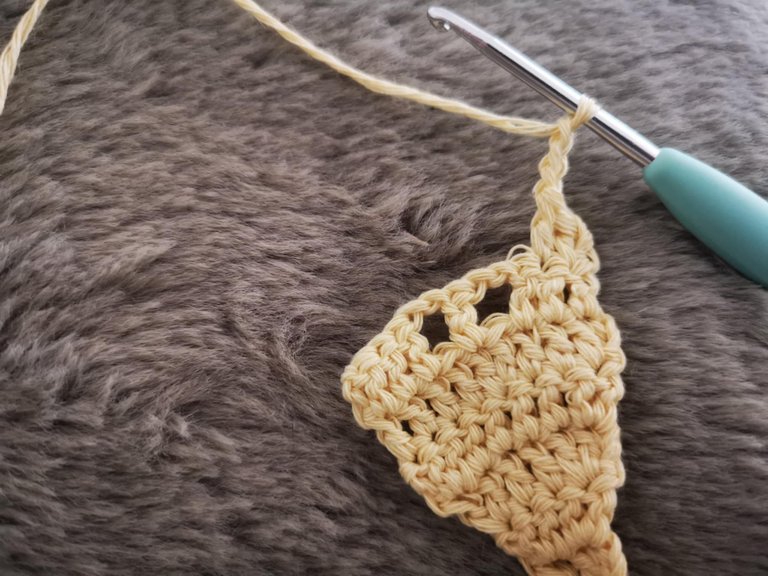
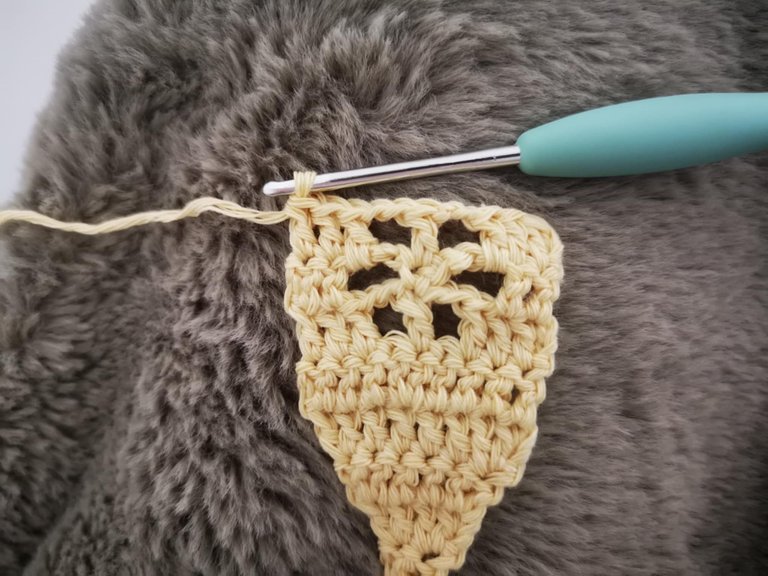
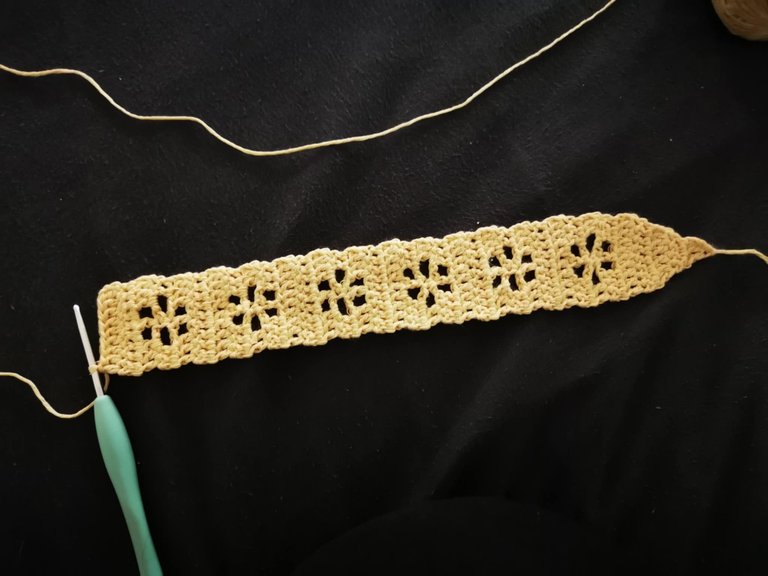
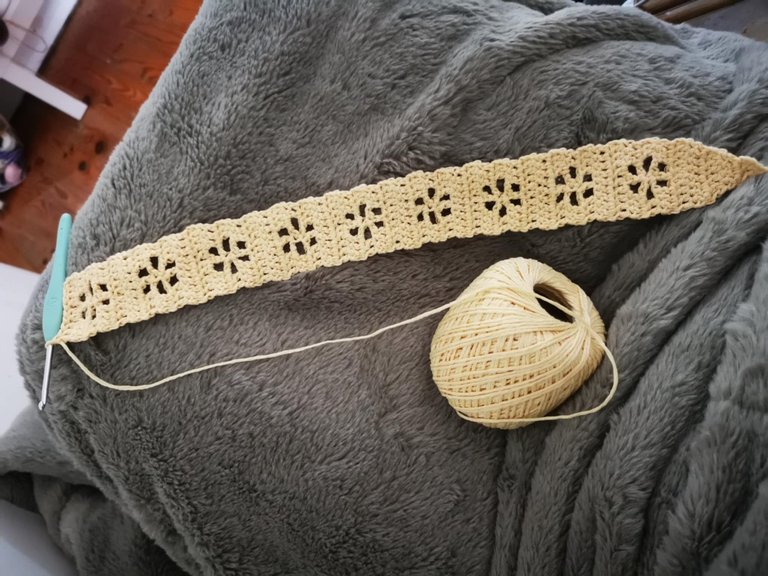
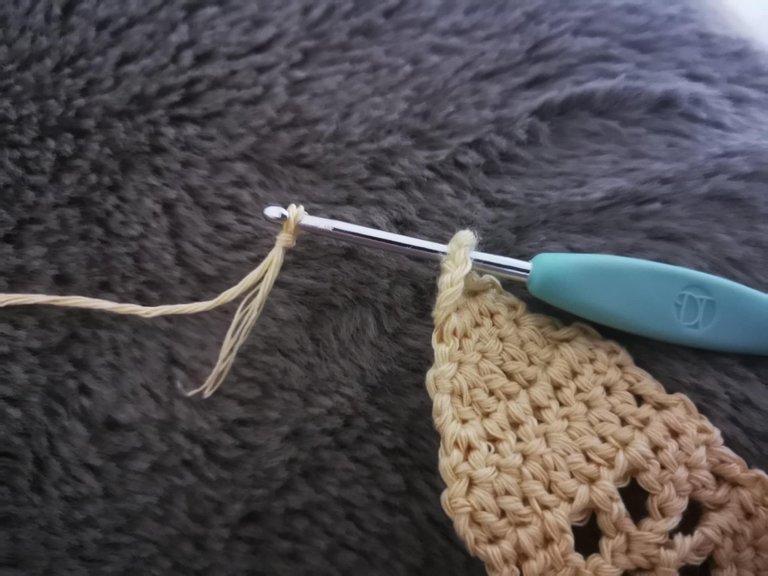
You have completed your first motif. And to continue the headband, you will simply need to repeat this motif. For this headband, I made 9 motifs.

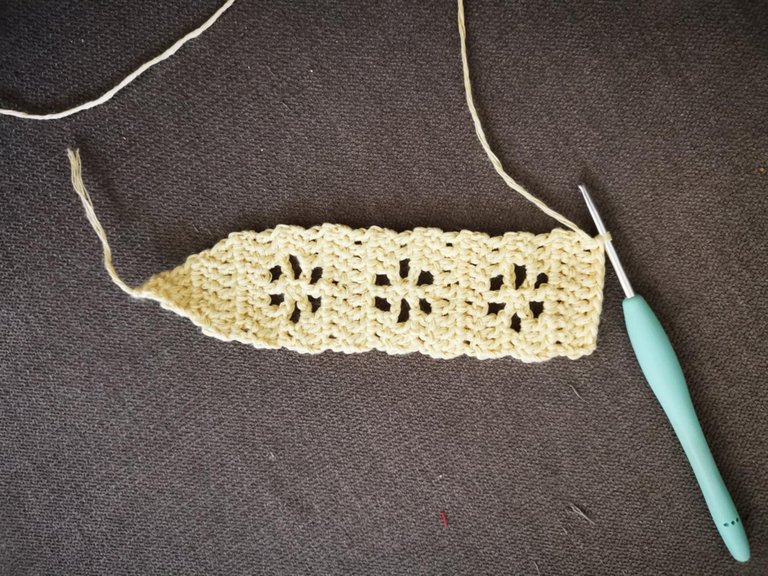
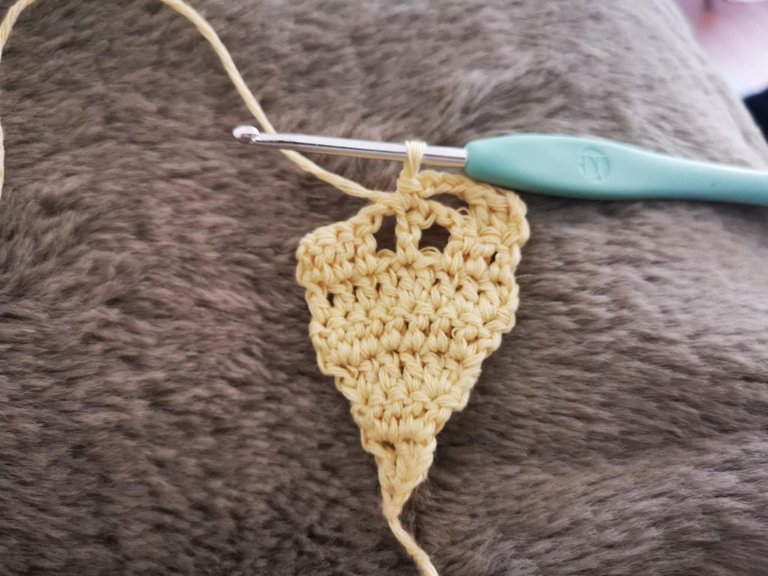
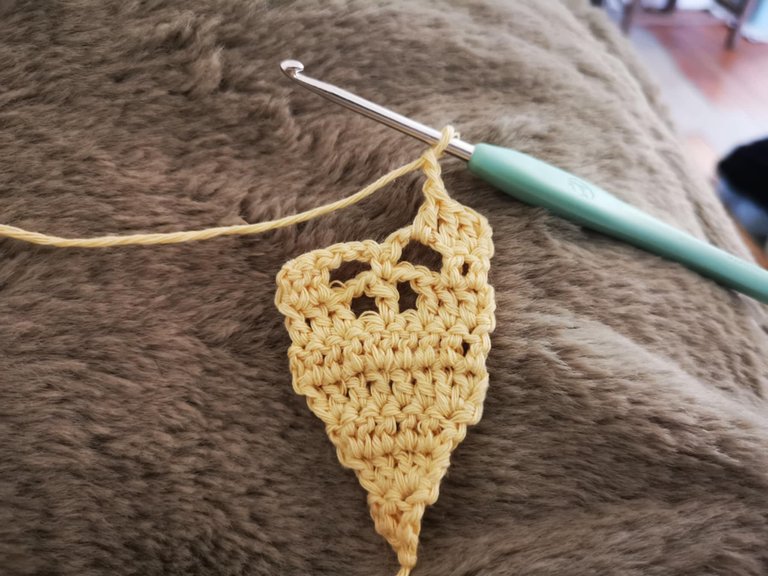
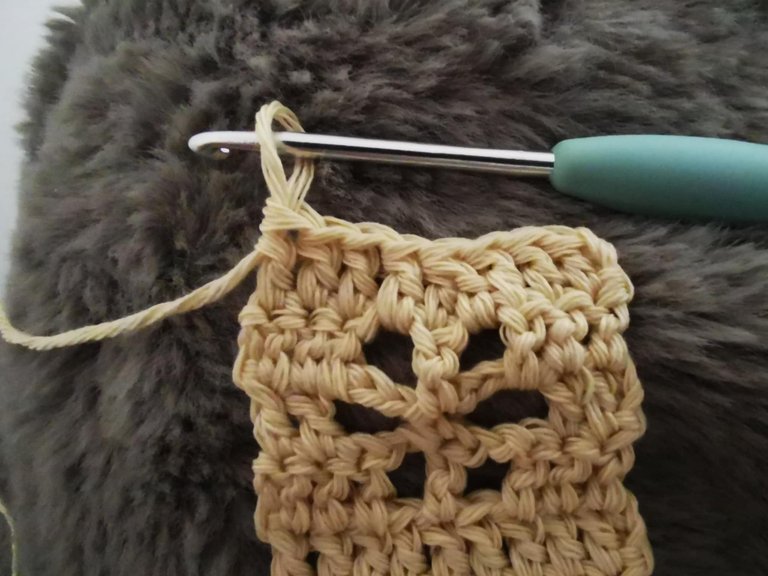
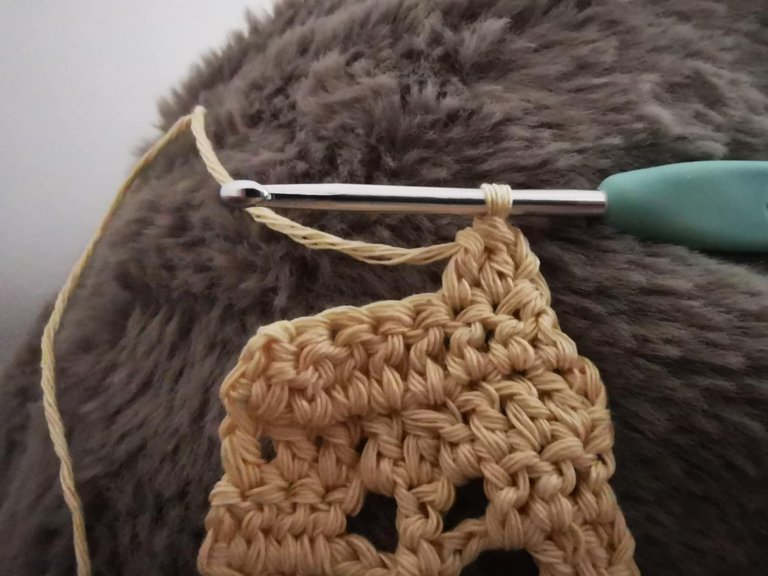
The last motif is a little different, as it stops just after the motif (as shown in the photo) and we will begin the decreases. From here, you need to make:
- 3 double crochets,
- 1 decrease (so 2 double crochets together: the one in the motif space and the one in the center);
- 1 double crochet in the motif space;
- 3 classic double crochets.

Then cast on 2 chain stitches and turn the project.
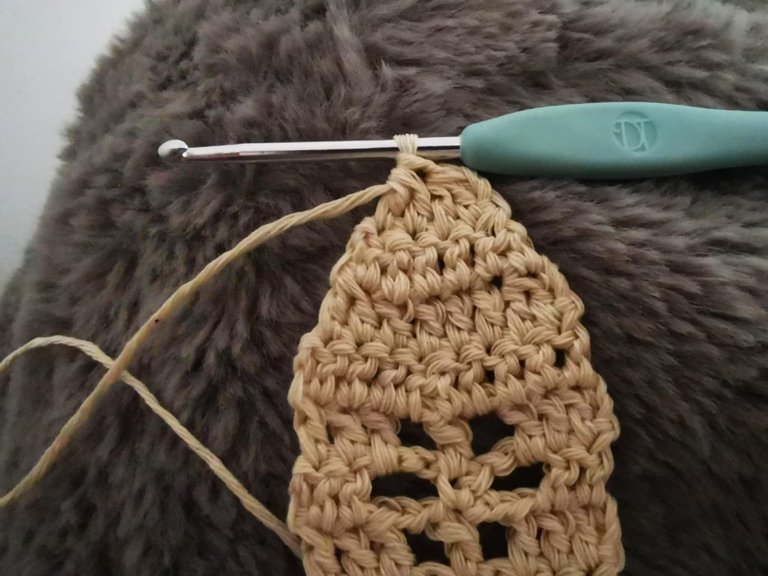
For the next row, you need to make:
- 1 decrease;
- 4 classic double crochets;
- 1 decrease.

Then cast on 2 chain stitches before turning the project.
For the next row, you need to make:
- 1 decrease;
- 2 classic double crochets;
- 1 decrease.

And cast on 2 chain stitches before turning the project.
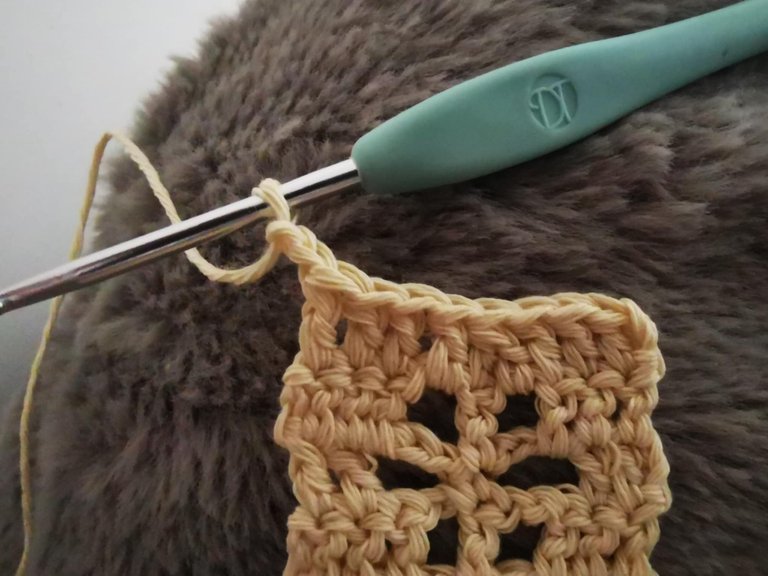
For the next row, you need to make:
- 2 decreases.

Next, to finish this side, cast on a chain of 60 stitches. Once this is done, simply chain one more stitch and cut the yarn. To ensure the chain doesn't unravel, I recommend burning the end with a lighter.
For the other side, make a slip knot and attach the yarn to the end of the headband. Then, cast on a chain of 60 stitches before cutting the yarn.
And there you have it, the headband is finished! 😊
Here's the result:

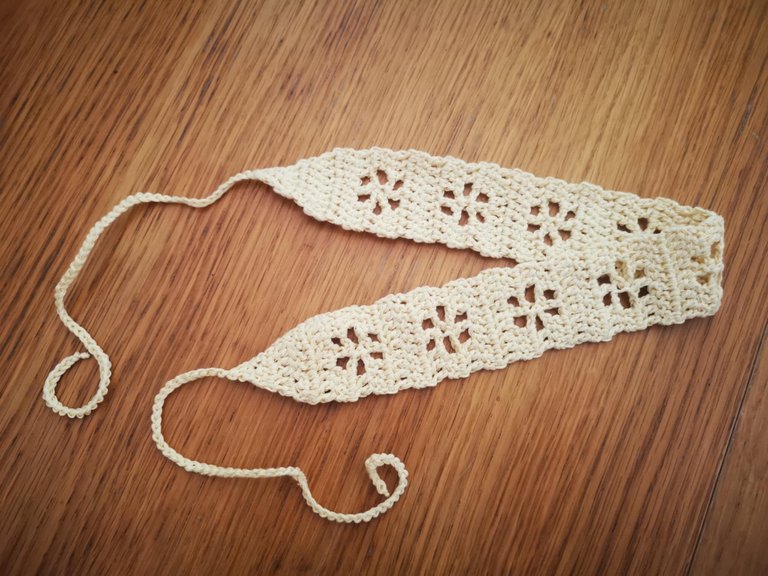
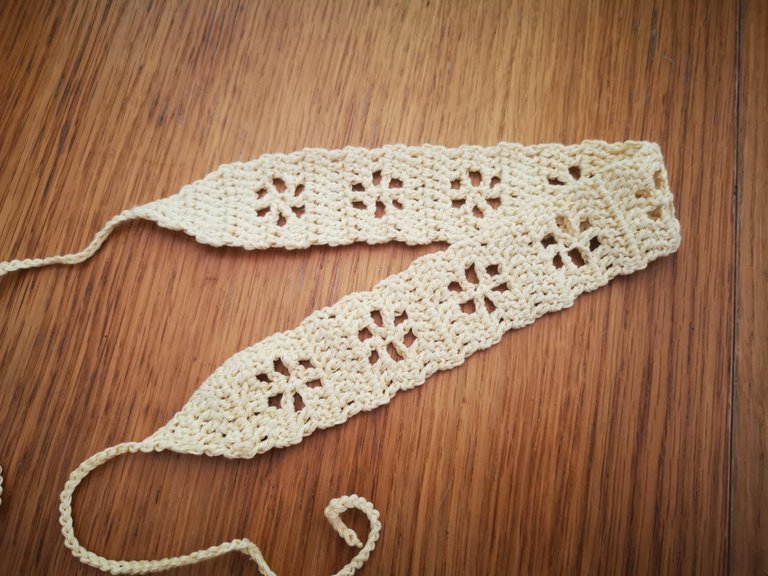
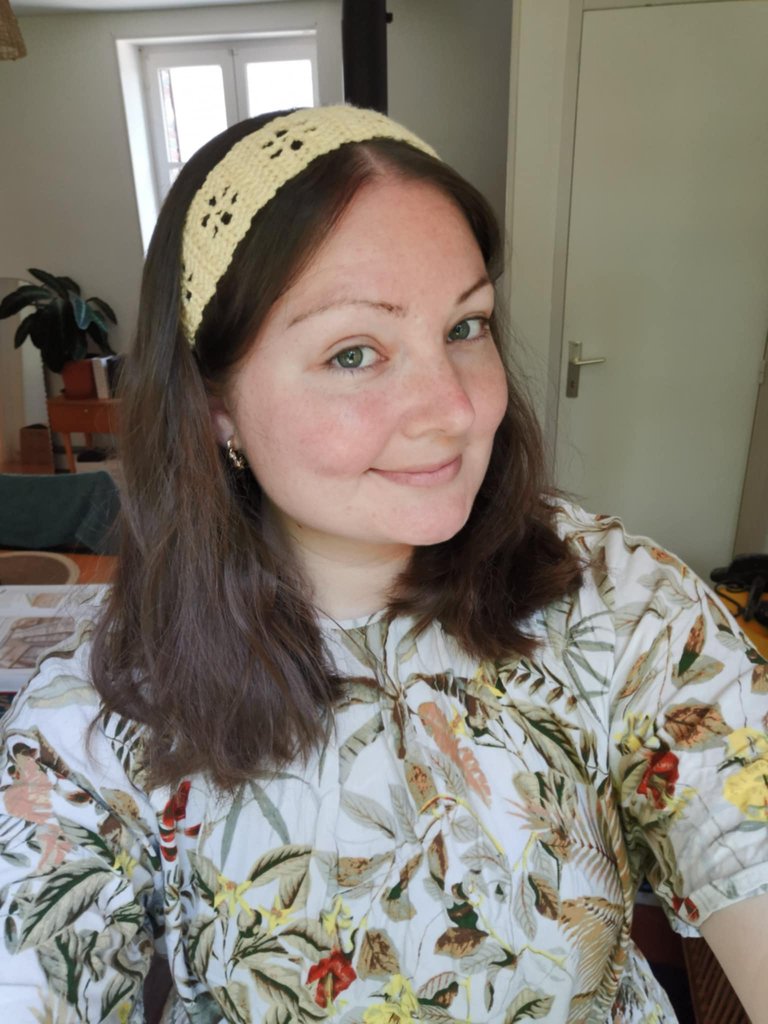
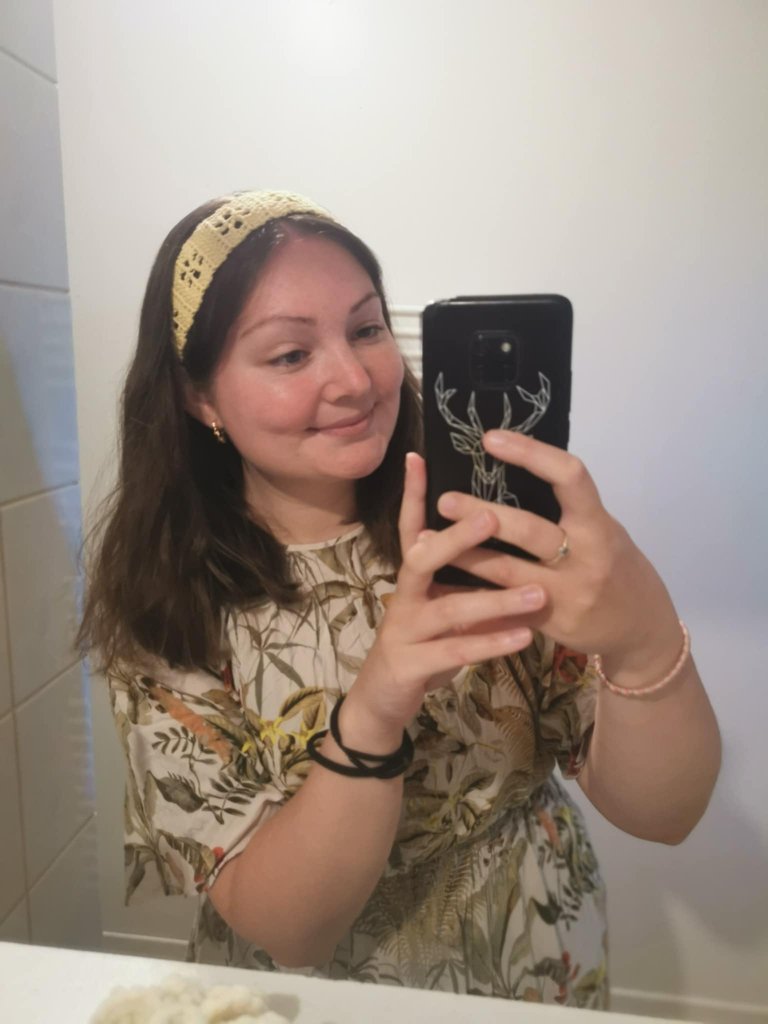
I love how it looks when worn; I think it's really cute! 🌸
I think I'll make more of these, in other colors, to sell on my online store. And maybe I'll participate in one or more craft markets, since it's the season! 😁
Anyway, I hope you enjoyed this little tutorial! And if my explanations aren't clear enough, feel free to ask any questions in the comments.
See you soon,
Johanna
PS: I used Google Translate to translate the English part.

Hello les amis et les crochet lovers ! J’espère que vous allez tous très bien aujourd’hui 😁
En ce moment, je suis à la recherche de projets crochet rapide à réaliser et qui ne sont pas gourmands en fil. Je cherche des produits rentables en vue d’ouvrir une petite boutique en ligne pour vendre certaines de mes créations. 🧶
Et j’ai trouvé un super projet rapide et trop mignon : le bandeau pour cheveux, un accessoire idéal pour l’été (et pas seulement pour l’été d’ailleurs) !
J’ai repéré plusieurs modèles assez sympathiques et je vais vous partager le processus de création que j’ai suivi pour chacun ! Voici le premier, un petit bandeau ajouré avec un motif de “fleur” 🌸
Je le trouve très bohème, très champêtre et il me correspond tellement !
C’est un petit projet rapide à réaliser, qui est totalement accessible aux débutants. Voici le lien du tutoriel sur Youtube et voici maintenant mon tutoriel écrit 👇
Le matériel
Pour réaliser ce petit bandeau, vous allez avoir besoin de :
- 1 pelote de coton ou autre matière agréable à porter ;
- 1 crochet 3mm.
Les étapes de fabrication
Pour commencer ce projet, vous allez simplement faire un nœud coulant :
Ensuite, vous allez monter 4 mailles en l’air :
Puis, dans la troisième maille en partant du crochet (celle où j’ai placé mon aiguille à laine pour vous montrer), vous allez faire 1 bride :
Et ensuite, vous allez faire une autre bride dans la maille suivante.
Votre premier rang est terminé !
Il faut maintenant monter 2 mailles en l’air, puis tourner votre projet :
Pour ce rang 2, il faut faire 2 augmentations (2 brides dans la même maille) :
Puis, il faut monter 2 mailles en l’air et tourner le projet :
Pour le rang 3, il faut faire :
- 1 augmentation donc 2 brides dans la même maille,
- 2 brides individuelles,
- 1 augmentation.
Ensuite, il faut monter 2 mailles en l’air avant de tourner le projet.
Pour le rang 4, il faut faire :
- 1 augmentation,
- 4 brides individuelles,
- 1 augmentation.
Puis monter 2 mailles en l’air avant de tourner le projet.
Pour le rang 5, il faut faire :
- 3 brides individuelles,
- 1 augmentation,
- 4 brides individuelles.
Puis monter 2 mailles en l’air avant de tourner le projet.
Pour le rang 6, on va commencer à créer le motif. Pour cela, il faut faire :
- 3 brides individuelles,
- 2 mailles en l’air,
- Sauter une maille et faire 1 bride ;
- 2 mailles en l’air,
- Sauter une maille et faire 1 bride ;
- 2 brides individuelles.
Il ne faut pas oublier de monter 2 mailles en l’air avant de tourner le projet.
Pour le rang 7, il faut faire :
- 2 brides individuelles ;
- 3 mailles en l’air ;
- 1 maille serrée dans le centre de la bride du milieu,
- 3 mailles en l’air ;
- 2 brides individuelles.
Il faut monter 2 mailles en l’air avant de tourner le projet.
Pour le rang 8, il faut faire :
- 2 brides individuelles classiques,
- 1 bride individuelle dans l’espace du motif ;
- 2 mailles en l’air ;
- 1 bride dans le centre de la maille serrée du rang précédent ;
- 2 mailles en l’air ;
- 1 bride dans l’espace du motif ;
- 2 brides individuelles.
N’oubliez pas de monter 2 mailles en l’air avant de tourner votre projet.
Pour le rang 9, il faut faire :
- 3 brides individuelles classiques ;
- 1 bride dans l’espace du motif ;
- 1 bride dans le centre ;
- 1 bride dans l’espace du motif ;
- 3 brides individuelles classiques.
Et monter 2 mailles en l’air avant de tourner le projet.
Pour le rang 10, il faut faire :
- 9 brides individuelles.
Vous avez terminé votre premier motif. Et pour continuer le bandeau, il va simplement falloir répéter ce motif. Pour ce bandeau, j'ai fait 9 motifs.
Le dernier motif est un peu différent, car il s’arrête juste après le motif (comme sur la photo) et nous allons commencer les diminutions. À partir d’ici, il faut faire :
- 3 brides individuelles,
- 1 diminution (donc 2 brides ensemble : celle dans l’espace du motif et celle dans le centre) ;
- 1 bride dans l’espace du motif ;
- 3 brides individuelles classiques.
Il faut ensuite monter 2 mailles en l’air et tourner le projet.
Pour le rang suivant, il faut faire :
- 1 diminution ;
- 4 brides individuelles classiques ;
- 1 diminution.
Puis monter 2 mailles en l’air avant de tourner le projet.
Pour le rang suivant, il faut faire :
- 1 diminution ;
- 2 brides individuelles classiques ;
- 1 diminution.
Et monter 2 mailles en l’air avant de tourner le projet.
Pour le rang suivant, il faut faire :
- 2 diminutions.
Ensuite, pour terminer ce côté, il faut monter une chaînette de 60 mailles en l’air. Une fois que c’est fait, il suffit de faire une maille en l’air de plus et de couper le fil. Pour être sûr que la chaînette ne se défasse pas, je vous conseille de brûler le bout avec un briquet.
Pour l’autre côté, vous devez faire un nœud coulant et attacher le fil à l'extrémité du bandeau. Puis, il faut monter une chaînette de 60 mailles en l’air avant de couper le fil.
Et voilà, le bandeau est terminé ! 😊
Voici le résultat :
J’adore le rendu une fois porté, je trouve que c’est très mignon ! 🌸
Je pense que j’en ferais d’autres, dans d’autres coloris pour les mettre en vente sur ma boutique en ligne. Et peut-être que je vais participer à un ou plusieurs marchés artisanaux, puisque c’est la saison ! 😁
Bref, j’espère que ce petit tutoriel vous a plu ! Et si jamais mes explications ne sont pas assez claires, n’hésitez pas à poser vos questions en commentaire.
À bientôt,
Johanna
PS : J’ai utilisé Google Traduction pour traduire la partie en anglais.
This headband turned out so lovely and light, perfect for summer. Great process for people looking to make similar head band
selected by @stevenson7
Thank you very much for all the compliments. That's very kind, thank you. Have a nice day. 😁
Thank you for sharing the process, my sister might find this helpful as she loves crocheting
You're welcome, I'm glad this tutorial can be useful to someone! Thank you for your comment 😁
This design is beautiful and above all very elegant.
Thank you so much! 😁
Darling, I loved this headband with that flower detail that looks so pretty.🌼❤️
Thank you so much, I'm glad you like it! 🥰
👍
!BEER
!BBH
🙏🙏🙏
!BBH
View or trade
BEER.Hey @altheana, here is a little bit of
BEERfrom @eii for you. Enjoy it!Learn how to earn FREE BEER each day by staking your
BEER.!BBH
Your post has been manually reviewed for curation by the Principality of Bastion.
Principality of Bastion - Our Leit Motiv? Let's Grow Together.
Principality's site | Minava NFT Market | Discord | Our Twitch Channel
You may TRAIL this account (or @hive-143869) if you like the curation we do, or join our discord to know more about what we do.
🙏🙏🙏
!BBH
Amazing and mind blowing. This head band just blew my mind. That looking really cute and fantastic on you.