A great tool that facilitates the action of adding Blockchain Networks in Metamask (Chainlist).
Do you remember those times when it was complicated to add a new network to our Metamask, actually it is not that it was complicated, but on the internet there were many pages that showed how to do it but not all of them were reliable sources.
So what was complicated here was to find the right data if you wanted to add the Binance Smart Chain network or the Polygon network or any other network you wanted to use in your extension, but now you can do it with just a couple of clicks and from a 100% reliable site, so stay tuned to this post I will explain (How to use Chainlist to add networks in Metamask).

Image created in Bing AI - Edited in Canva
Table of contents for this article:
♦️ Why was Chainlist created?
♦️ What problem does Chainlist solve?
♦️ How to add networks to Metamask using Chainlist?
But before going into details, let's talk a little bit about why Chainlist was created and what problem it solves, because if someone here has not heard about this page, they will not understand what this article is about, so let's start by explaining what it is and why it was created.

Image created in Bing AI - Edited in Canva
Why was Chainlist created?
Chainlist was created to help users connect to EVM (Ethereum Virtual Machine) networks more efficiently and not as rudimentary as it was before. Before Chainlist, users had to manually enter network details to connect to different blockchain networks through Metamask, which was a tedious and error-prone process.
What problem does Chainlist solve?
So having this small description we can already understand why Chainlist was created, it was created as a tool to automate this type of actions and make them more efficient and secure with just a couple of clicks.
Chainlist solves the problem of having to manually enter the network details in Metamask. On this page I'm talking about we can log in and find a list of the networks we can add to our Metamask wallet, allowing us users to easily select and add the desired network to Metamask. This not only saves time, but also reduces the chance of errors when entering network details.
Now that we understand the value of Chainlist, let's see how we can use it to add networks to Metamask, as this is the main point of this article, and you will see how easy it is to use.
Image created in Bing AI - Edited in Canva
How to add networks to Metamask using Chainlist?
This is very easy, the first thing you have to do is go to your browser of choice and search for the word (Chainlist) or you can access directly to the official link by clicking here.
Once you are on this page you will find a very intuitive user interface and easy to understand at first glance, it is not complicated at all, and this is what I like about Chainlist.
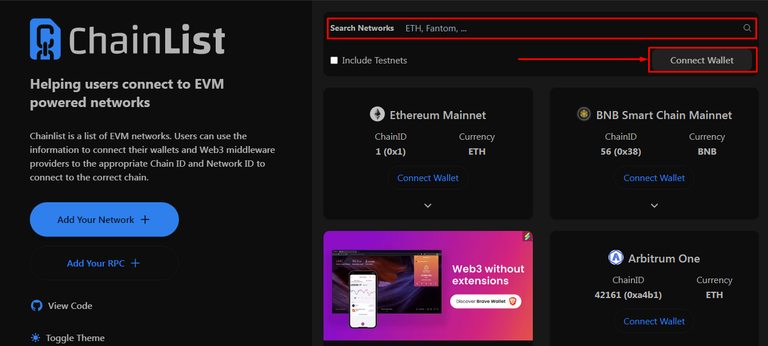
The first thing you will see are some blockchains like Binance Smart Chain, Ethereum, Manta and many more, or you can also make use of the search engine to write which is the network you want to add and so you look for it in a faster and more effective way.


But before adding the network you want, it is important to link our Metamask account, because that way the network will be added to your account.
For this example I will create a completely new Metamask wallet to explain step by step what you have to do, in case you already have a Metamask wallet you don't need to do the process shown below.
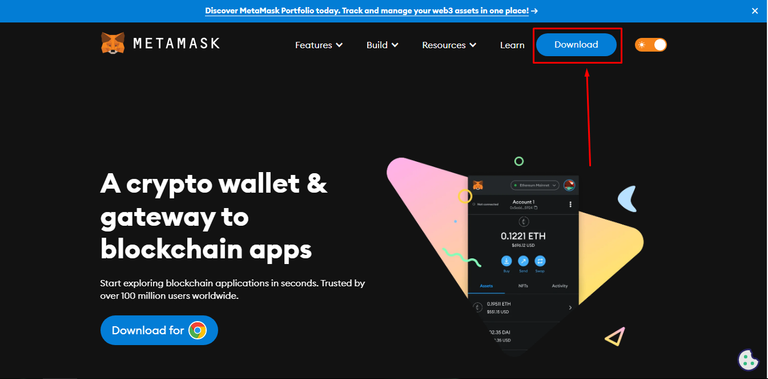
To download Metamask in your web browser you can go to their official website by clicking here.
Once you are there you select the device or operating system you will install it on, in my case I will install it on Chrome but you are free to choose the option that best suits your devices.
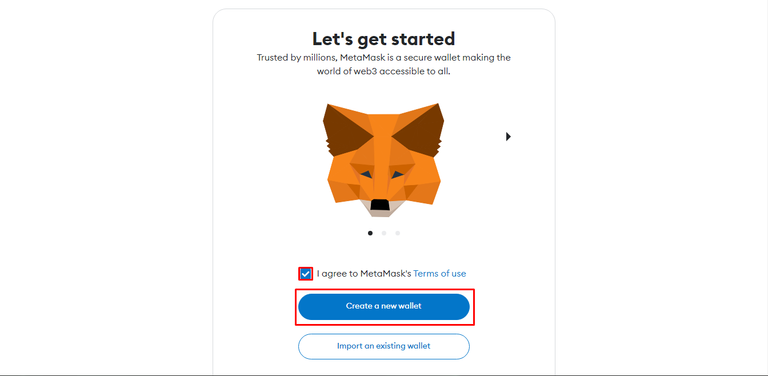
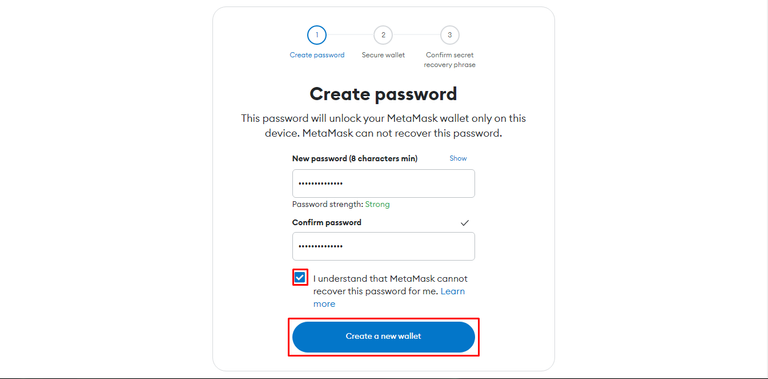
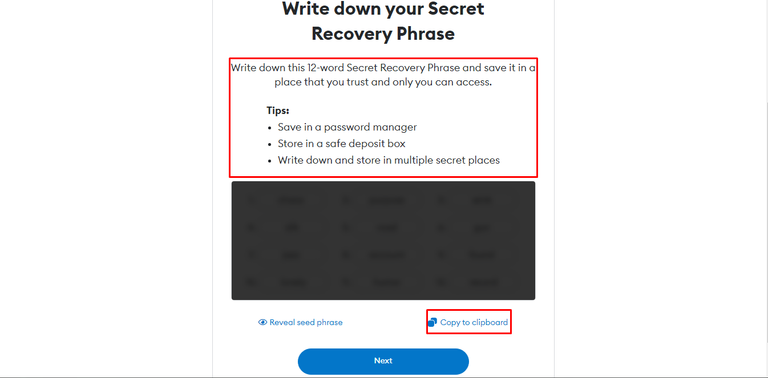
Once you have installed the Metamask wallet, proceed to create an account, where I remind you to save your security words very well, because if you lose them you can not recover the funds added in that wallet created, it is important not to share these words with anyone, because your funds are at stake and can be lost.
Follow the steps that you will be required and at the end of everything you will have your wallet created and you will be ready to continue to the Chainlist page to add the different Blockchin networks,
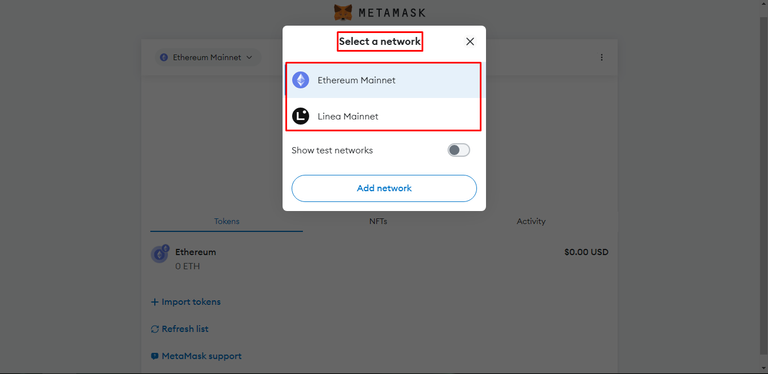
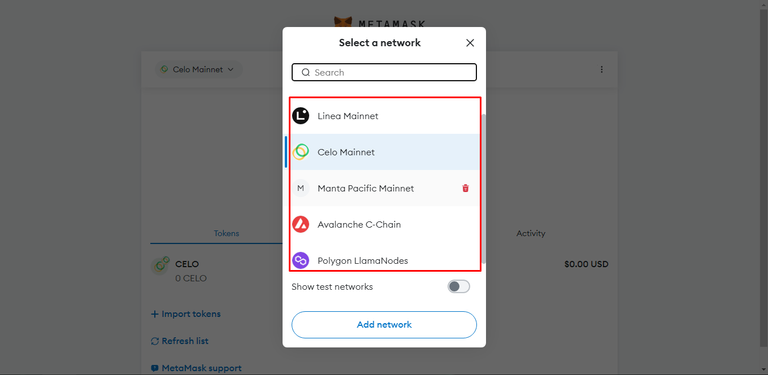
As you can see in the image below, it shows that you only have available the Ethereum network, as this is how this wallet comes by default, but now it is time to add the other networks and thus be able to freely enjoy the other options in the different networks, let's see how to add them very easily with chainlist.
There is very little left to finish this article, so here is the easiest and does not take you anything.
You have to connect your Metamask wallet with the Chainlist page, and that way you are giving permissions to quickly and automatically add the networks you want, just click on Connect wallet and confirm the popup window that will show you the Metamask extension, you can also read what is the request being made or what are the permissions that are being granted by connecting this website with your wallet.
Once you do that you are ready to add your favorite networks with just a couple of clicks and in a secure way...

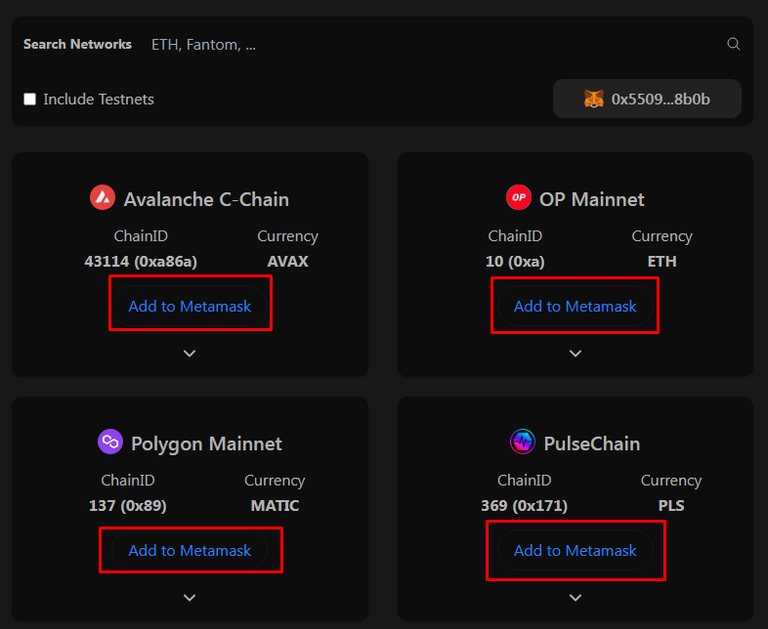
Just click on add to Metamask and it will automatically load all the data of the network you are selecting and will ask you to confirm to add it.
Do you think it was easy? the truth is that it may seem a somewhat slow process, but it is not, because once you connect your wallet is super easy to add new networks, I hope this information is very useful, and that you save in your favorites list this website for when you need it.
Maybe for some this is information without much relevance, but it does help a lot, and I hope you take it into account.
Thank you all for reading my content and I hope you have a great day, remember to leave a comment with your opinion or suggestions, so we can interact with each other.
Happy day to all....

Follow me on Twitter.
English is not my native language, so I have used Hive Translator.
Posted Using InLeo Alpha