Tocó hacer una camisa loca / It was time to make a crazy shirt 😜 [ESP/ENG]
(Edited)
ESPAÑOL
Saludos comunidad de @hivediy…

Espero se encuentren bien, ¿adivinen a quién le tocó nuevamente hacer la tarea de su sobrino? Pues sí, aquí su servidora vengo esta semana a mostrarle todo el proceso que conllevó esta franela loca y si que me encantó el resultado, con solo materiales a la mano y un poco de creatividad se puede lograr cosas muy ingeniosas.

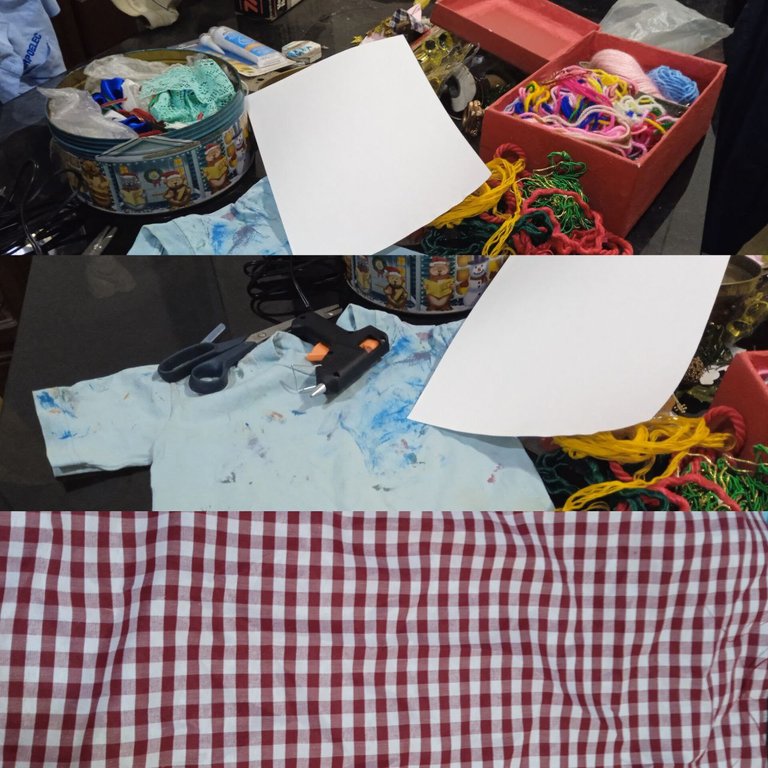
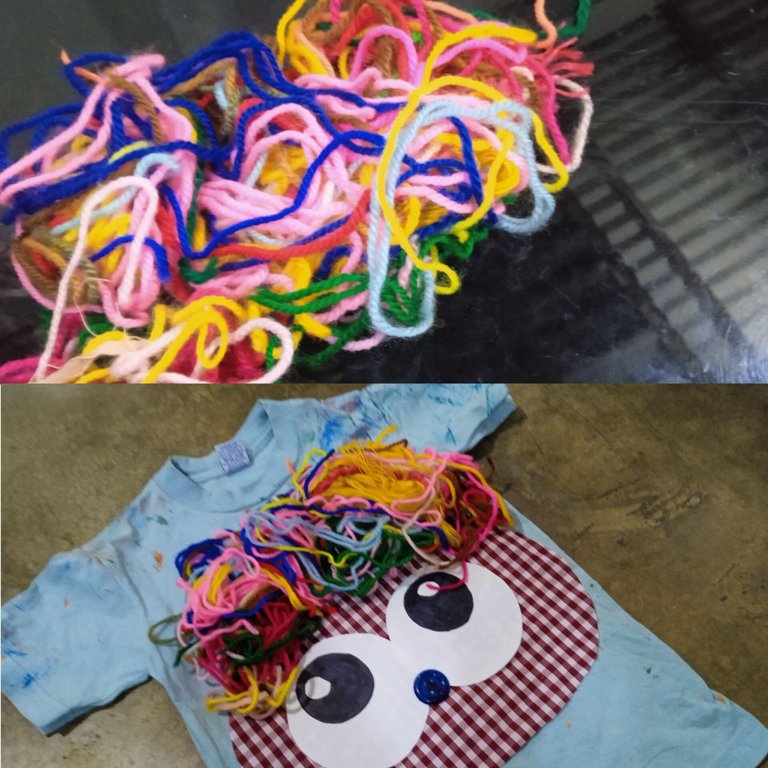
• Hilos de cualquier grosor, también estambres.
• Tijeras.
• Silicón en barra y frio.
• Hoja blanca.
• Marcadores, si son acrílicos, mejor.
• Globos pequeños.
• Tela de cualquier motivo y color, que no sea el mismo estilo que la franela.
• Botones.

PASO 1:
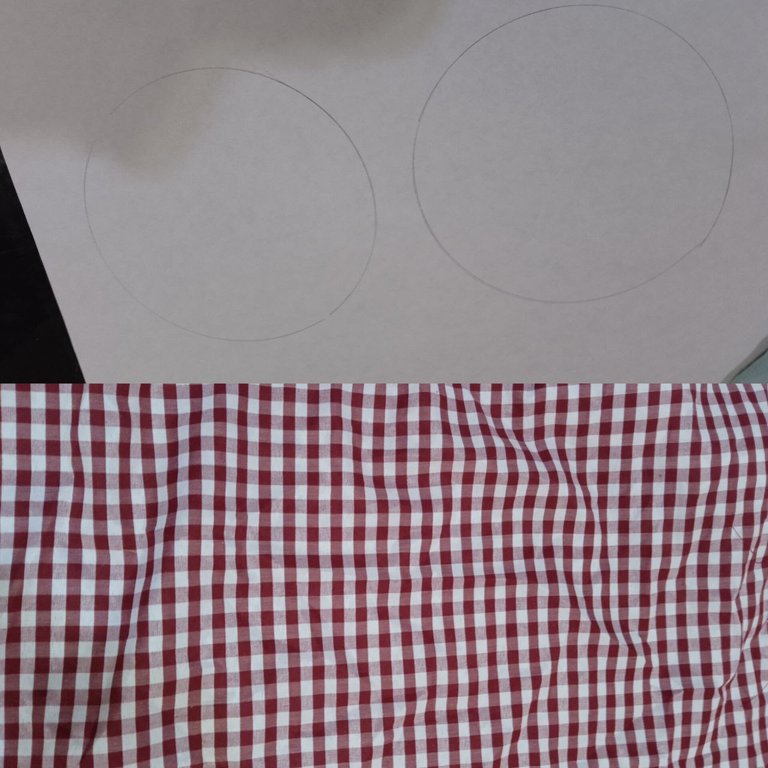
Hacer la figura de la franela (si van hacer como un personaje, por ello es mejor siempre tener idea de lo que quieren hacer previamente)
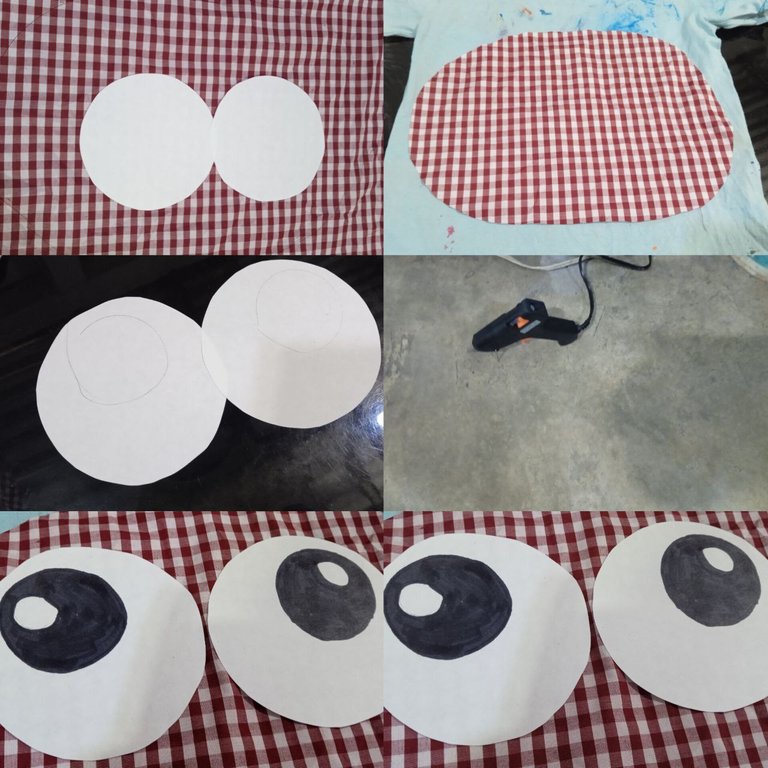
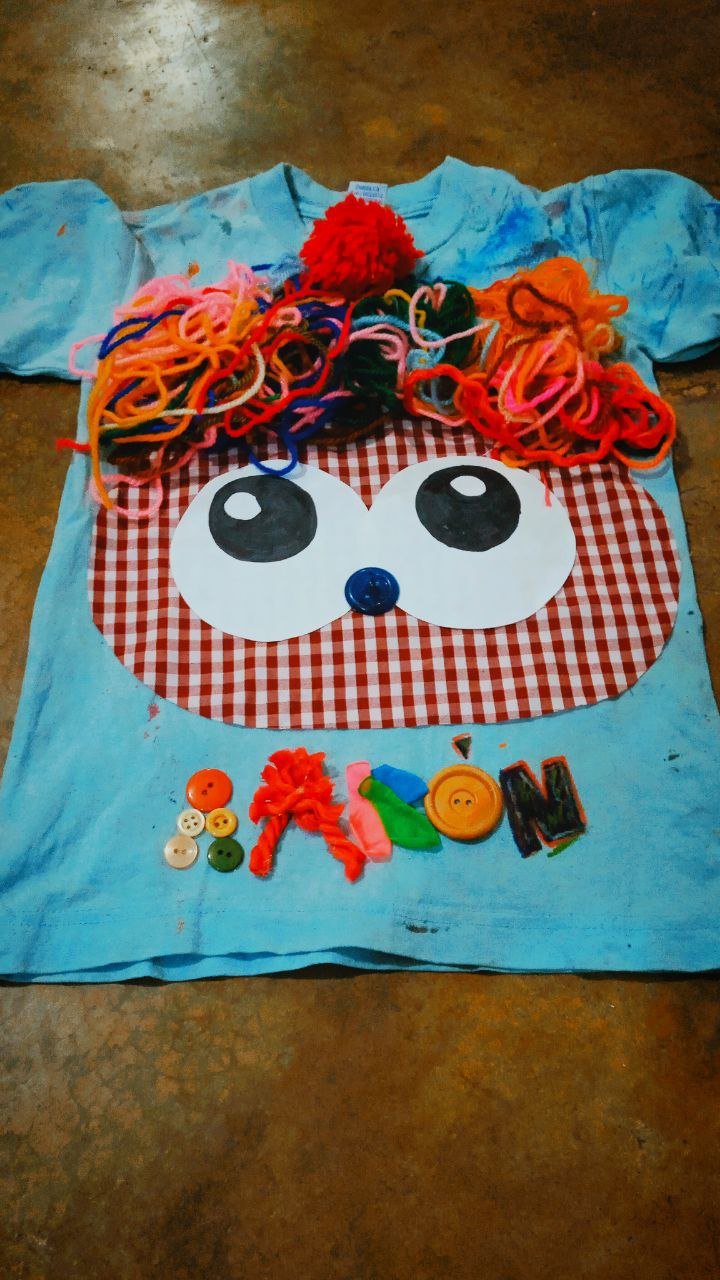
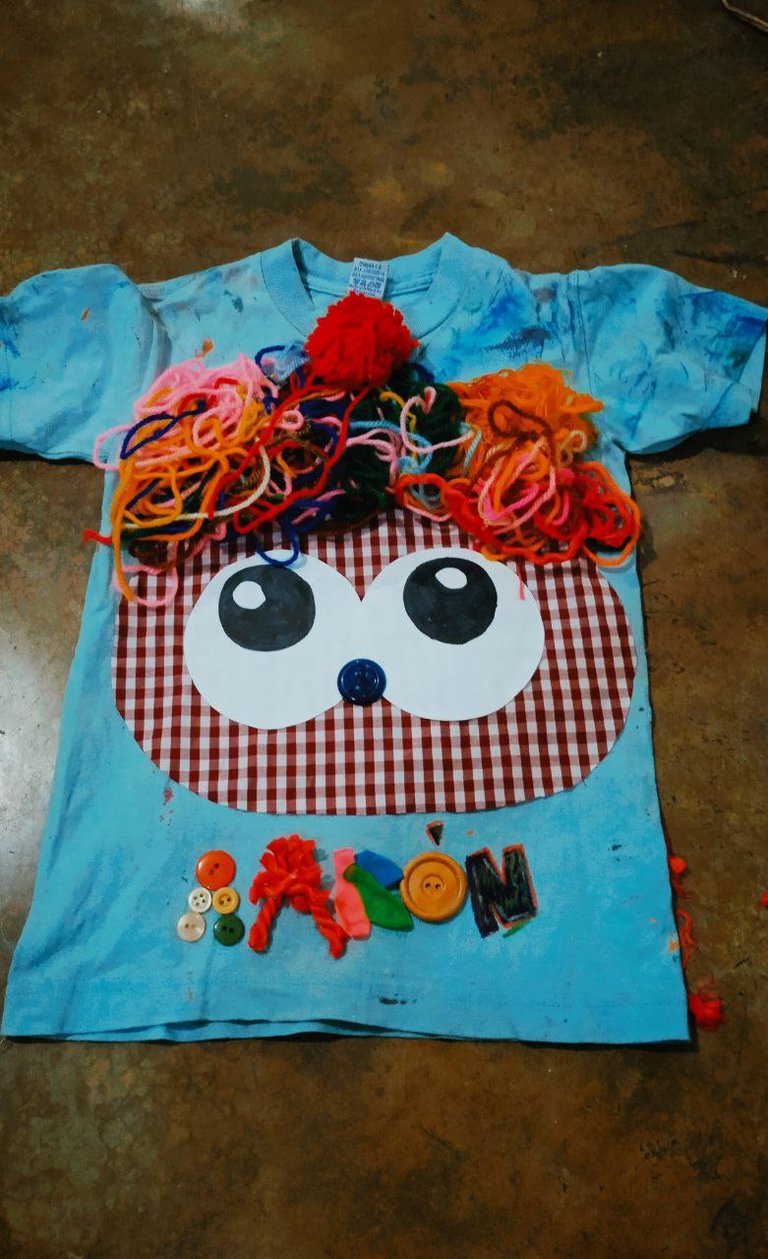
Como quería realizar un tipo de monstruo, lo que pensé primero fue en una cara, por lo que inicié con los ojos, tomé una hoja en blanco y con la ayuda de un objeto de base redonda tracé dos círculos. Antes de detallar los ojos, procedí a formar la cara, para ello usé una tela cuadriculada roja que tenia y le dibujo un ovalo grande, donde entrara los ojos, para así ser cortada posteriormente.
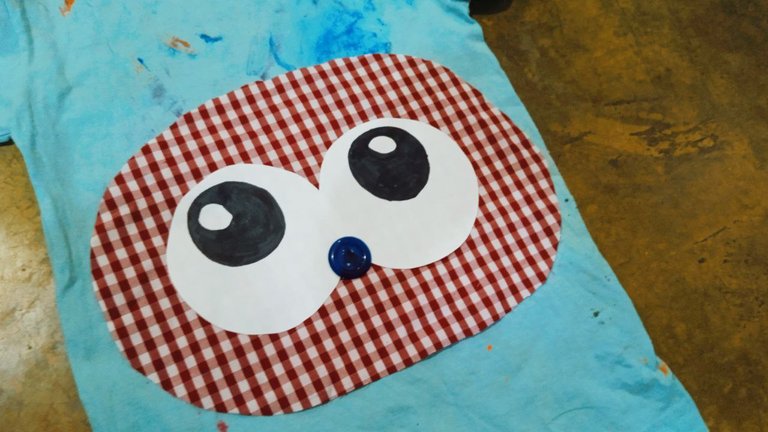
Le pinté las pupilas a los ojos y lo acomodé en la tela, como tenia un botón azul, esa seria su naricita. Puse a calentar la pistola de silicón y pegué estas primeras piezas.
PASO 2:
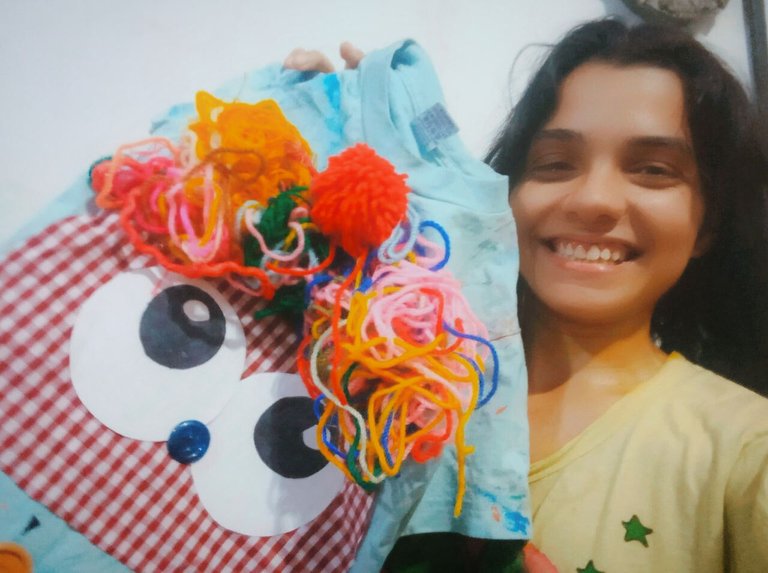
Elaborando el cabello loco.
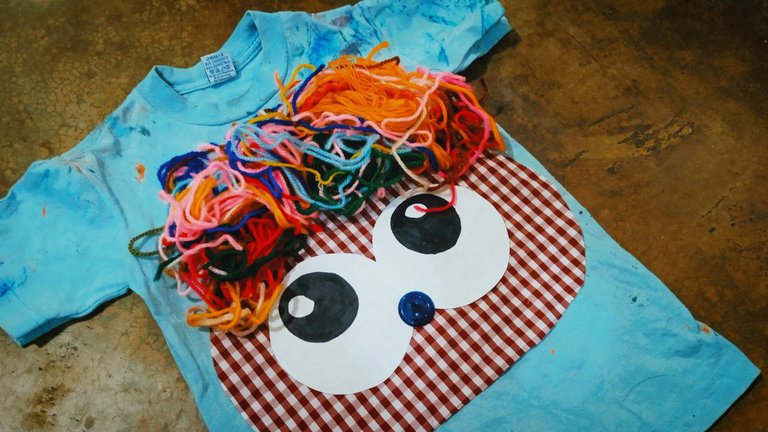
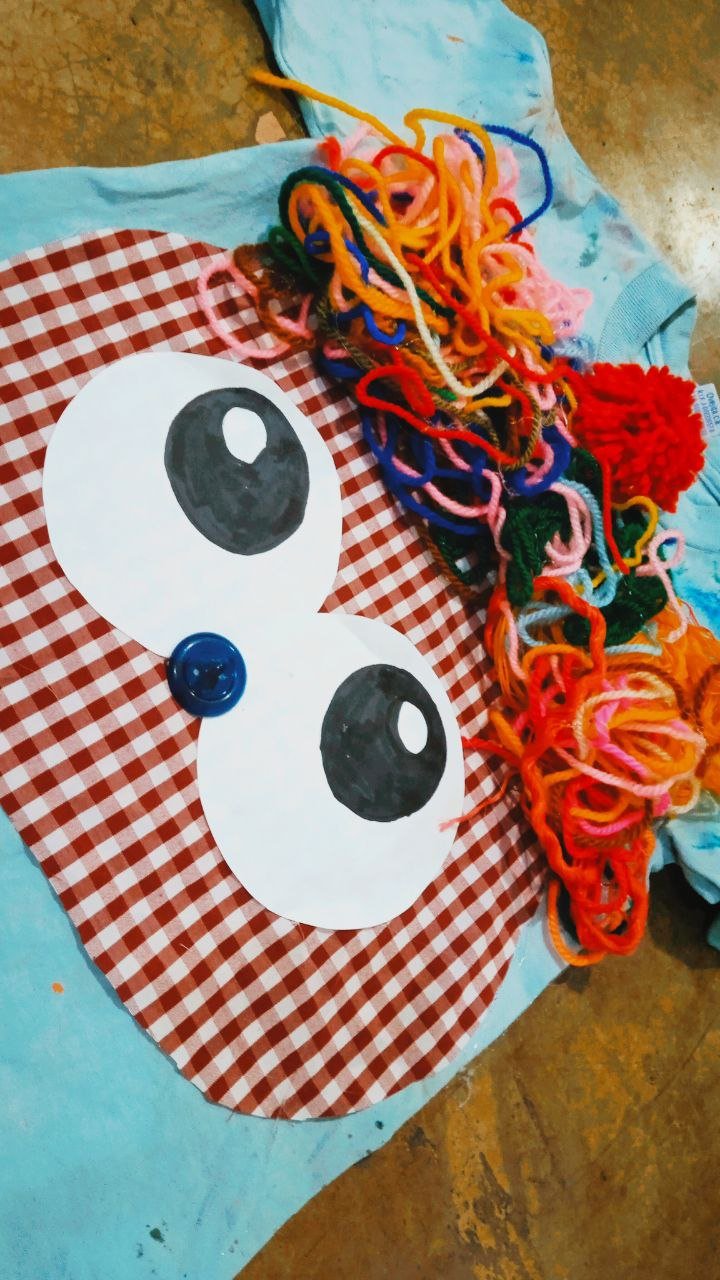
Aquí agarré diferentes hilos, estambres de distintos colores y unas cuerdas que tenía por ahí y empecé a pegarlo, echando pega caliente en todas partes, no sabría si funcionaria así y se adherían bien todo esto, pero al final resultó. Como me conseguí esta boca de estambre, se la pegué en el medio para que adornara.
PASO 3:
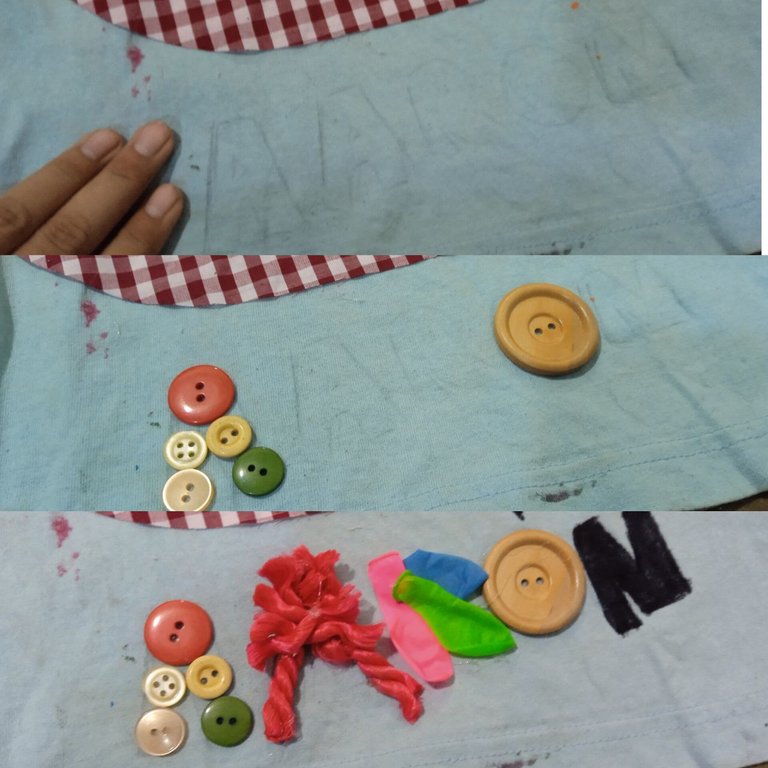
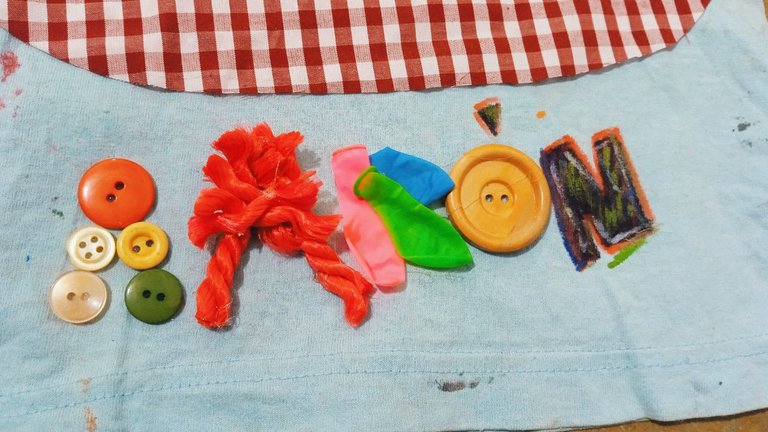
Poniendo el nombre en distintos materiales.
Aquí yo sentía que faltaba algo, pues se me ocurrió poner el nombre de mi sobrino, pero no solo escrito con marcador, sino usando diferentes materiales. Para la primera A, usé botones que la formaban, luego a la siguiente A el cordón rojo; para la R, unos globos sin inflar, a la O un solo botón grande y la N si pintada con marcadores acrílicos.
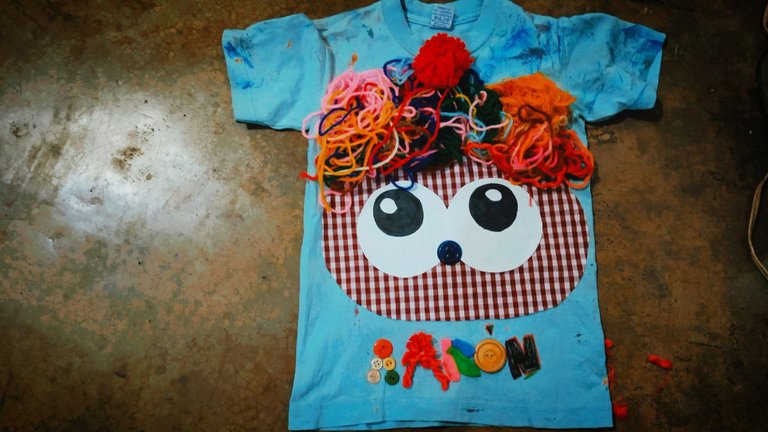
PASO 4:
Resultado final
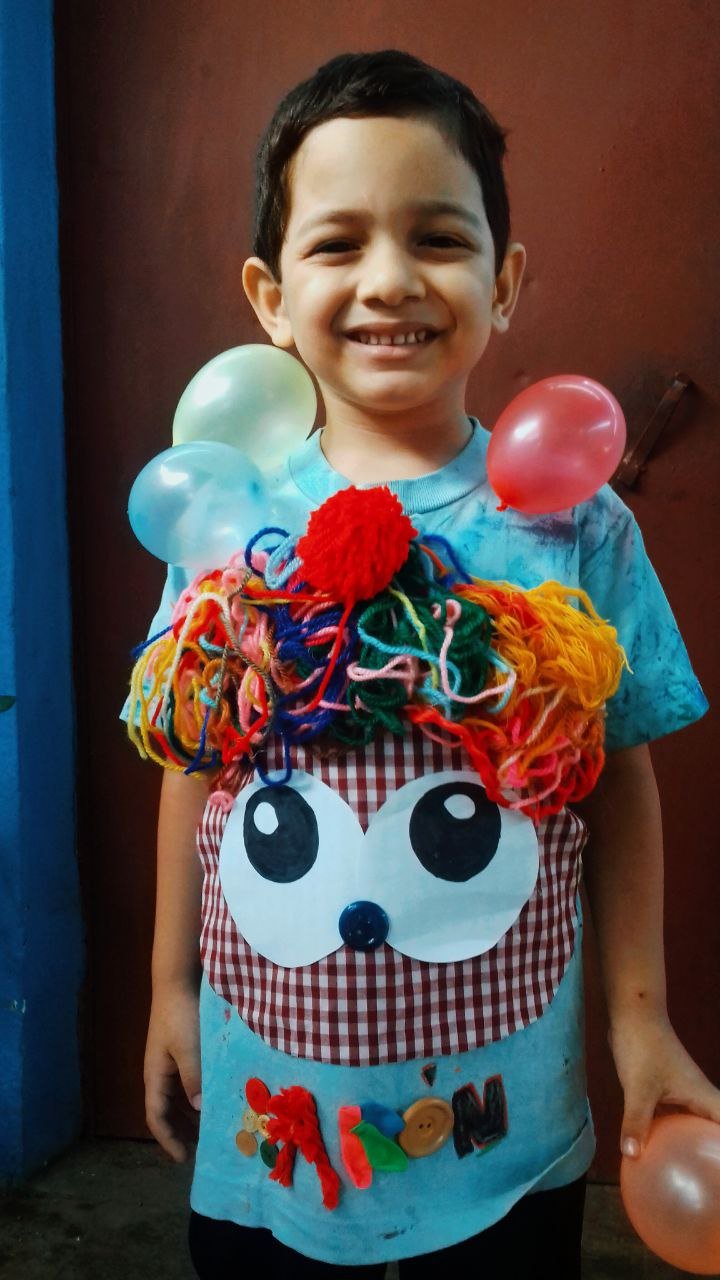
Pero, aquí no terminaba todo, porque como a mi sobrino le gusta los globos, espere al día siguiente que se la pusiera y le pegué tres globos en la parte de arriba, tenia que ser lo más loco que podría ser, así que no estaba mal la idea, lo único es que toda la mañana estuvo pendiente de que no se le reventara, pero para nada, porque la camisa volvió toda espelucada, sin algunos botones ni globos 🤣. Aun así, me encantó como quedó y a ¿ustedes?


Gracias por leer mi post. Espero que les haya gustado. Estaré atenta a responder sus comentarios. Pueden visitar mi blog, seguir mis contenidos y redes sociales.
FACEBOOK / INSTAGRAM / TWITTER
ENGLISH
Greetings @hivediy community…

I hope you are well, guess who had to do your nephew's homework again? Well yes, here I come this week to show you the whole process involved in this crazy flannel and I really loved the result, with only materials at hand and a little creativity you can achieve very ingenious things.
- Threads of any thickness, also stamens.
- Scissors.
- Silicone stick and cold.
- White sheet.
- Markers, if they are acrylic, better.
- Small balloons.
- Fabric of any pattern and color, not the same style as the flannel.
- Buttons.
STEP 1:
Make the figure of the flannel (if you are going to make it as a character, so it is always better to have an idea of what you want to do beforehand)
As I wanted to make a kind of monster, what I thought first was a face, so I started with the eyes, I took a blank sheet and with the help of an object with a round base I traced two circles. Before detailing the eyes, I proceeded to form the face, for this I used a red grid fabric that I had and drew a large oval, where the eyes would enter, to be cut later.
I painted the pupils of the eyes and placed him on the fabric, as he had a blue button, that would be his little nose. I heated the silicone gun and glued these first pieces.
STEP 2:
Elaborating the crazy hair.
Here I grabbed different threads, stamens of different colors and some strings I had around and started to glue it, pouring hot glue everywhere, I didn't know if it would work this way and if it would adhere well, but in the end it worked. Since I got this yarn mouth, I glued it in the middle to decorate it.
STEP 3:
Putting the name on different materials.
Here I felt that something was missing, so I thought of putting my nephew's name, but not only written with marker, but using different materials. For the first A, I used buttons that formed it, then to the next A the red string; for the R, some uninflated balloons, to the O a single large button and the N if painted with acrylic markers.
STEP 4:
Final result
But, this was not the end of it, because as my nephew likes balloons, I waited the next day to put it on and I stuck three balloons on the top, it had to be as crazy as it could be, so it was not a bad idea, the only thing is that all morning he was waiting for it not to burst, but for nothing, because the shirt came back all spelled, without some buttons or balloons 🤣. Even so, I loved how it turned out and you?
Thank you for reading my post. I hope you liked it. I will be attentive to answer your comments. You can visit my blog, follow my content and social networks.
FACEBOOK / INSTAGRAM / TWITTER
Posted Using INLEO
0
0
0.000
Que ingeniosa! es una franela realmente loca, creativa y totalmente espectacular!
seguro llamo mucho la atención con su franela! gracias por compartir el bonito trabajo!
jajajajaja me encantó mucho esta camisa y su diseño, se ve que te divertiste bastante en el proce y el resultado quedó super original y divertido, me encantaron las fotos!
Una camisa loca, pero hermosa, única y divertida. Me da ideas para crear junto a mi niño. Gracias por compartir