[EN-ES] DIY Makeup organizer made with newspapers // Organizador de maquillaje hecho con periódicos.
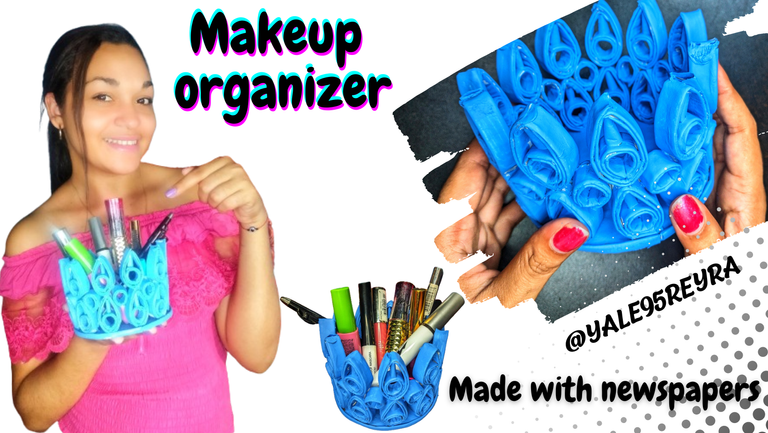
Hi hivers friends, I decided to make a makeup organizer because most of the time when I'm going to use any makeup I drop them, because I have a wooden box full of them, but I spend a lot of time looking for what I'm going to use. I keep the ones I use the most outside to make it easier to find them, but as I told you, they fall and collide with each other when I'm in a hurry, which is almost always. Then I came up with the idea of creating something where I can accommodate the ones I use the most, at least have them grouped in the same place to avoid clutter.
I had the idea, then I would have to look for the material to do it with. I found several old newspapers and gazettes that I didn't even remember existed and I took them to give them a new use. They would stop being trash to become a nice recycled paper makeup organizer in the shape of a basket. Soon I will show you how I did it step by step.
Hola amigos hivers, decidí hacer un organizador de maquillaje porque la mayoría de las veces cuando voy a utilizar cualquier maquillaje se me caen, pues tengo una caja de madera repleta, pero me demoro mucho buscando lo que voy a utilizar. Los que más uso los tengo afuera para facilitar la búsqueda, pero como les dije, caen y chocan unos con otros cuando estoy apurada, que es casi siempre. Entonces se me ocurrió la idea de crear algo donde pueda acomodar estos que más utilizo, por lo menos tenerlos agrupados en un mismo lugar para evitar regueros.
La idea la tenía, entonces debería buscar con que material lo haría. Encontré varios periódicos y gacetas viejas que ya ni se acordaban que existían y las tomé para darle un nuevo uso. Dejarían de ser basura para convertirse en un lindo organizador de maquillaje de papel reciclado en forma de cesta. En breve les muestro como lo hice paso a paso.
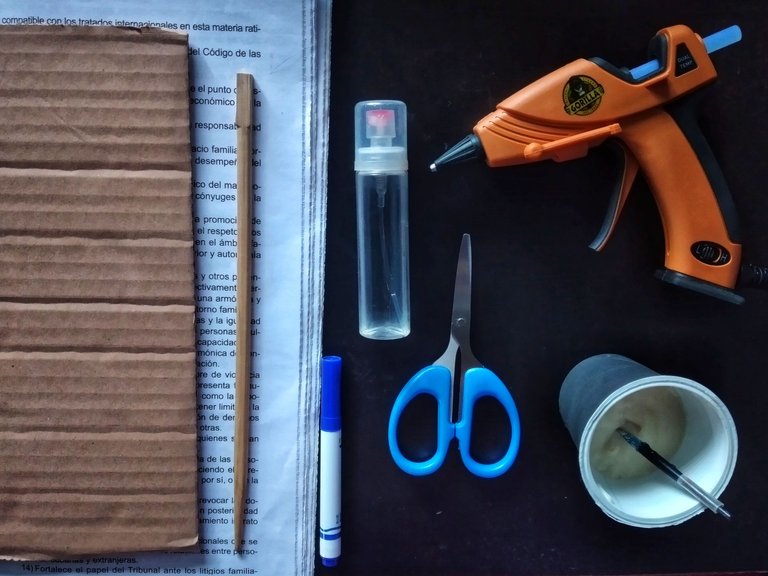
Materials // Materiales
- Recycled paper - Papel reciclado
- Cardboard - Cartón
- Toothpick - Palillo
- Silicone gun - Pistola de silicona
- Paper glue - Pegamento para papel
- Scissors - Tijera
- Pencil or marker - Lápiz o marcador
- Medium container to give circular shape - Recipiente mediano para dar forma circular
Step by step // Paso a paso
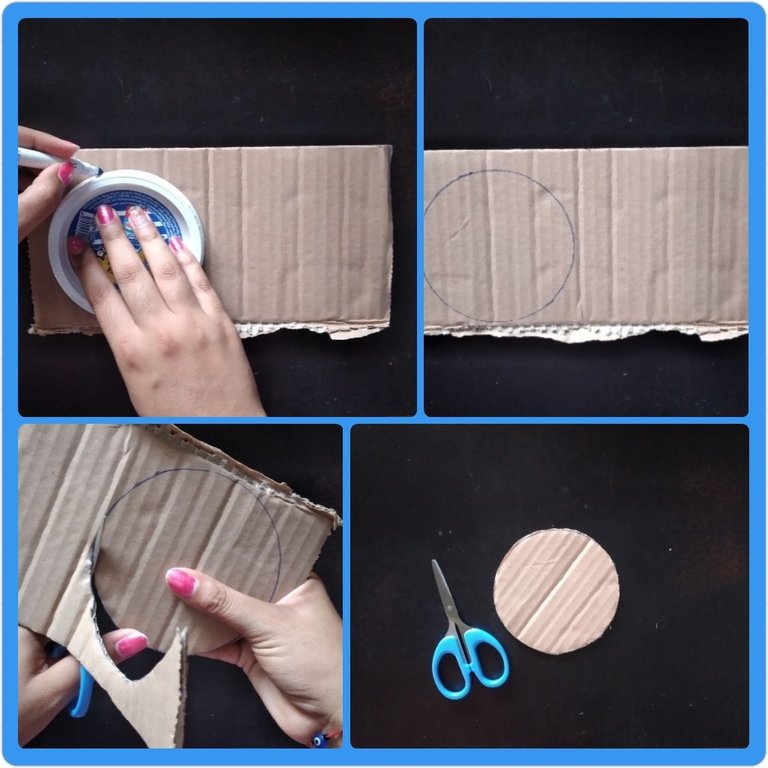
First, take a piece of cardboard and make a circle on it and cut it out, this will be the base of the basket.
Primeramente, tomar un pedazo de cartón y hacer un círculo en él y recortar, esta será la base de la cesta.
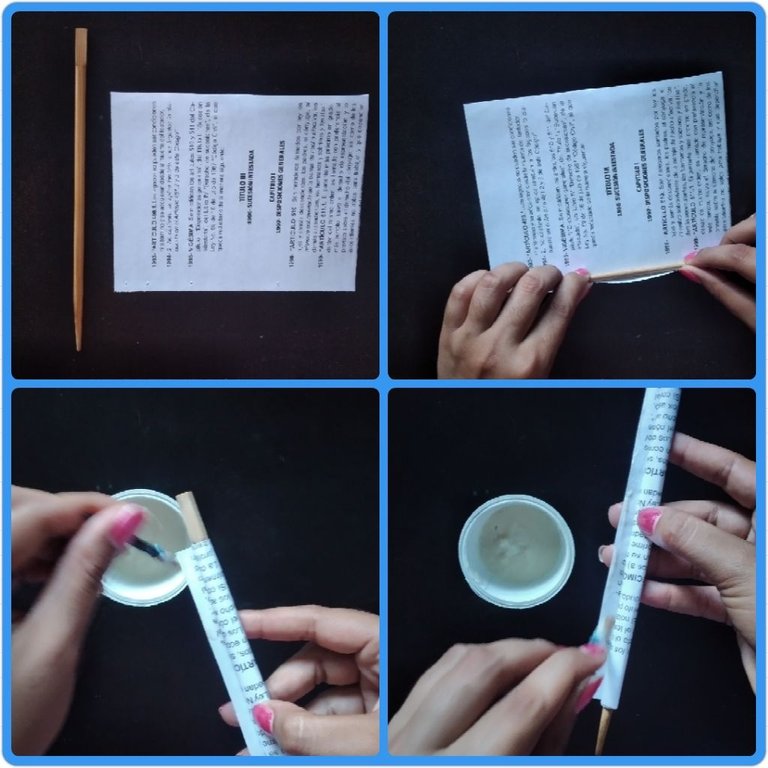
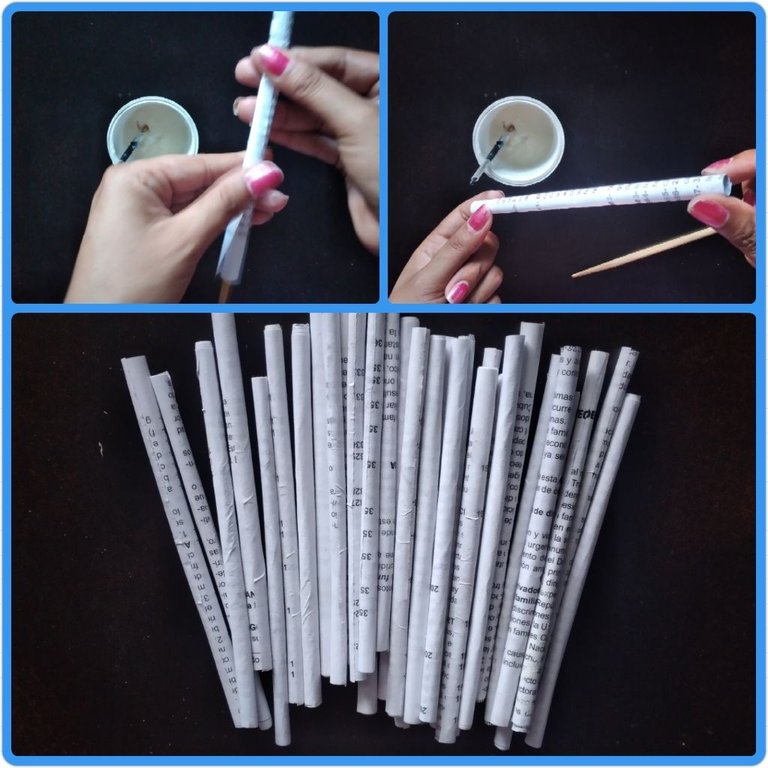
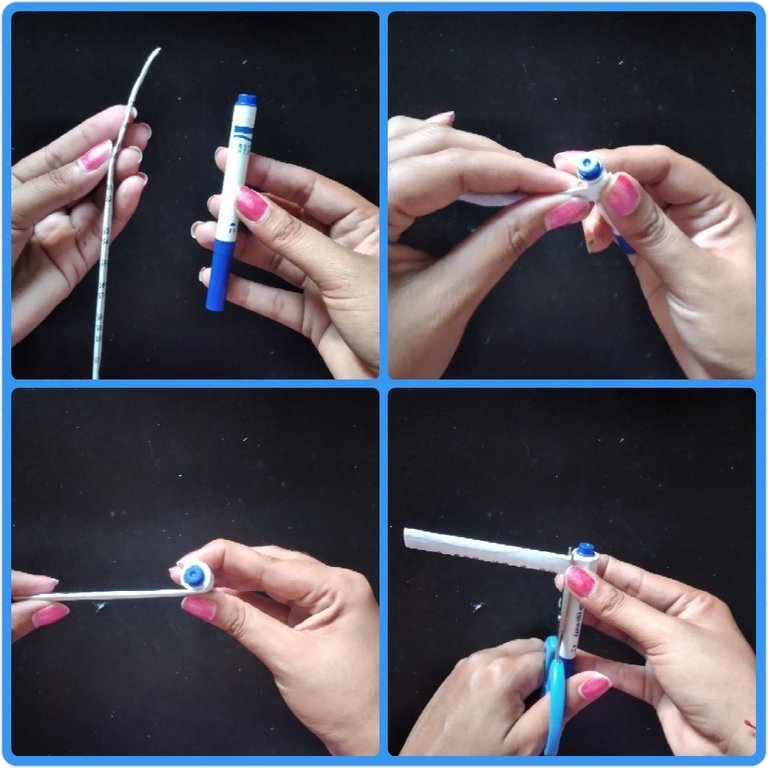
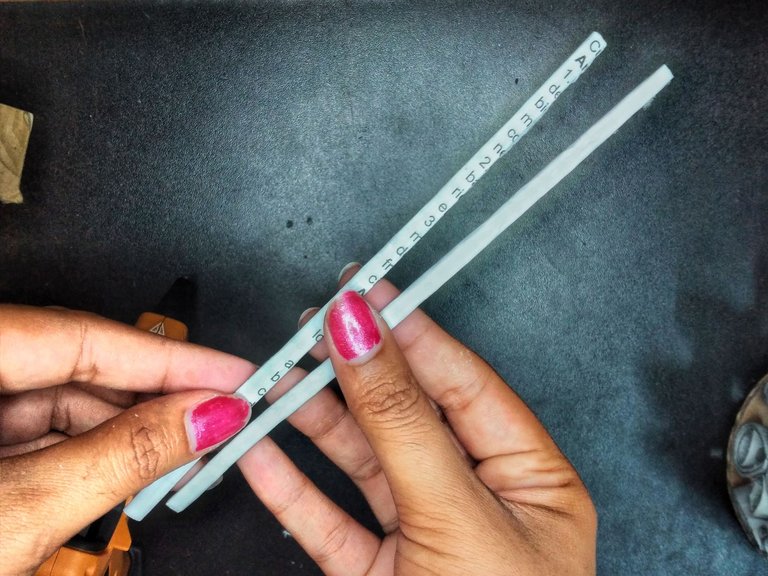
Cut out the recycled paper, I used a size of 15x18 cm, you can do it with a larger size to make it bigger. Take the toothpick and wrap the paper around it, glue at the end so that it is in the shape of a tube. I used 39 paper tubes.
Recortar el papel reciclado, yo utilicé una medida de 15x18 cm, puedes hacerlo con una medida mayor para que te quede más grande. Tomar el palillo y envolver el papel alrededor, en el extremo pegar para que quede en forma de tubo. Utilicé 39 tubos de papel.
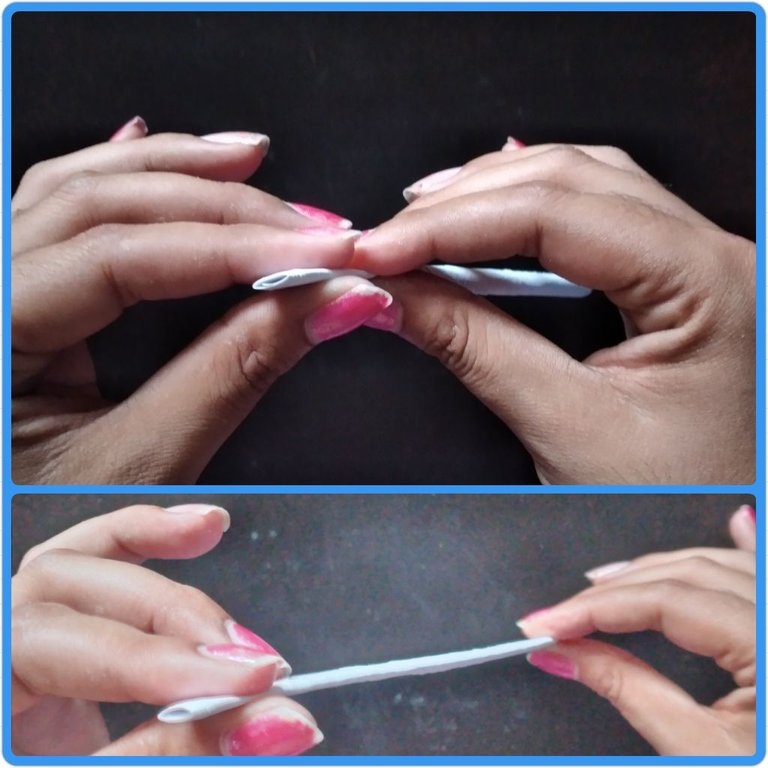
Take the formed tubes and crush them in this way.
Tomar los tubos formados y aplastar de esta forma.
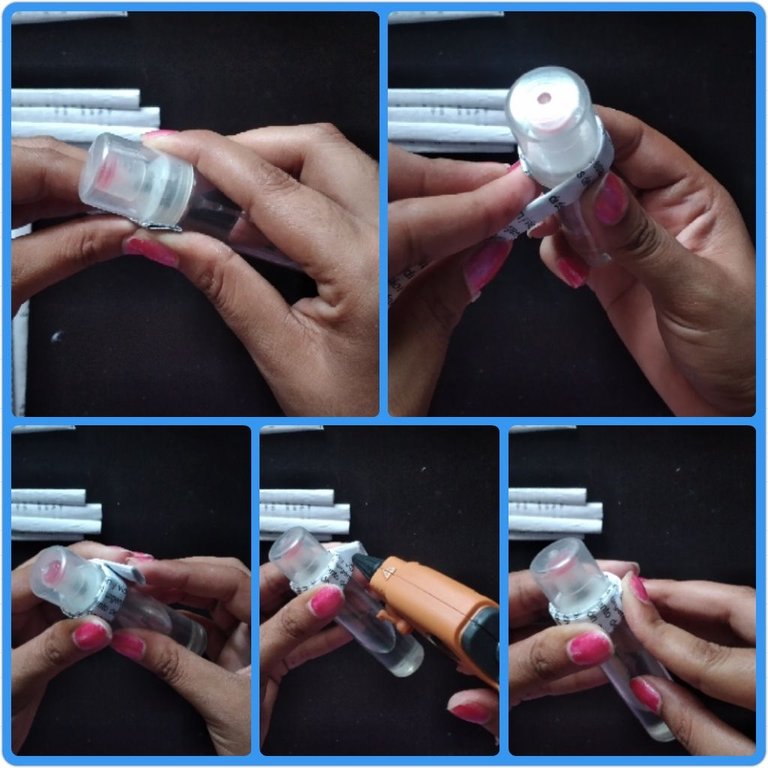
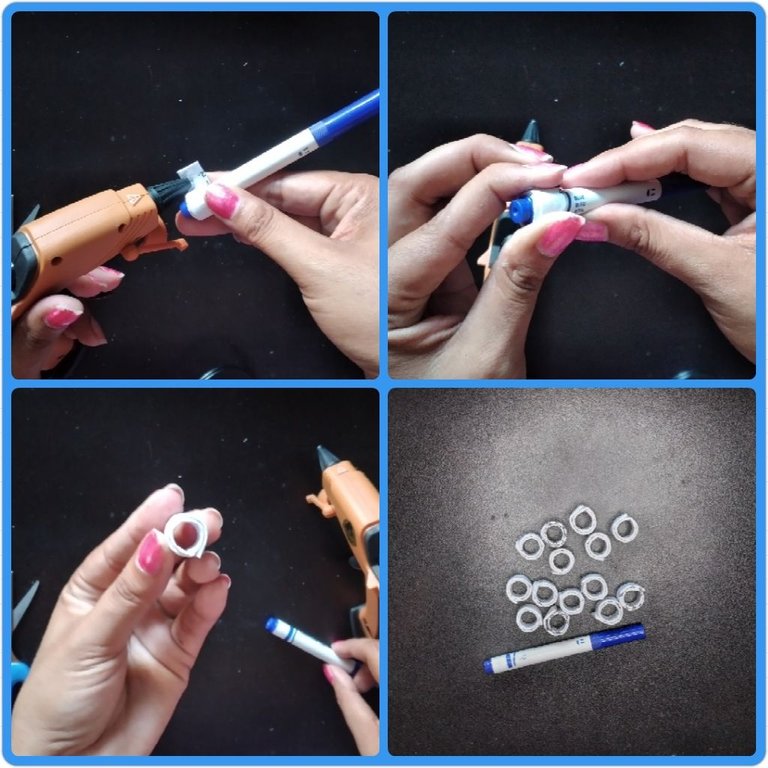
The flattened tubes are screwed into the container or knob in a circular shape until they form a circle, glue the tip with silicone to make it more reinforced, otherwise use a good glue.
Al recipiente o pomo en forma circular se le van enroscando los tubos aplastados hasta formar un círculo, pegar la punta con silicona para que quede más reforzado, de lo contrario utilizar un buen pegamento.
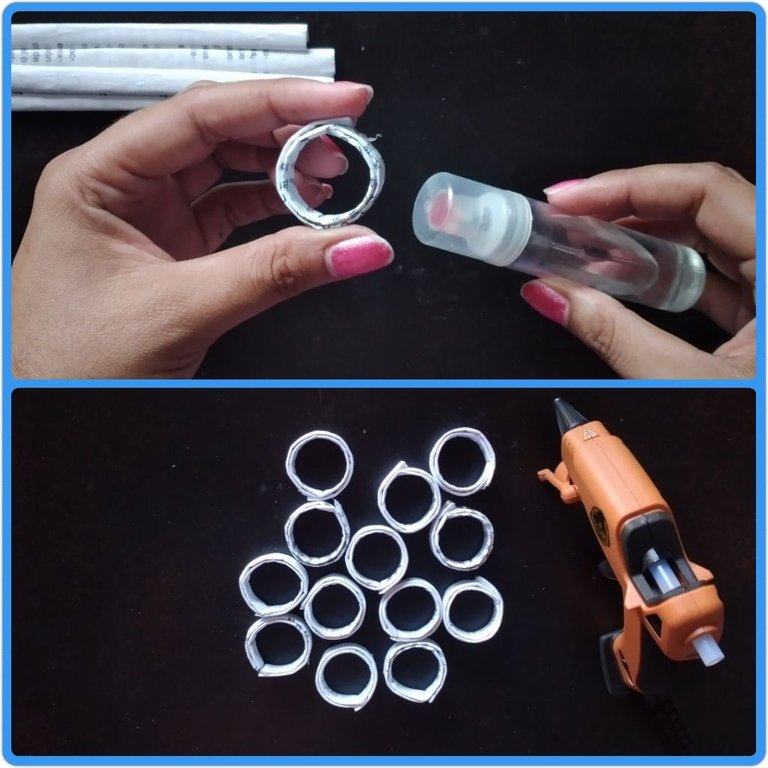
To make these circles I used 22 tubes, forming 22 large circles.
Para realizar estos círculos utilicé 22 tubos, formando 22 círculos grandes.
Take the pencil or marker and do the same procedure to make smaller circles by cutting the tubes in half.
Tomar el lápiz o marcador y hacer el mismo procedimiento para que queden círculos más pequeños, para ello corte los tubos a la mitad.
For the small circles I used the rest of the flattened tubes, that is, 17 tubes, remember that you must cut it in half, so it would be 34 small circles.
Para los círculos pequeños utilicé el resto de los tubos aplanados, o sea, 17 tubos, recuerda que debes picarlo por la mitad, entonces serían 34 círculos pequeños.
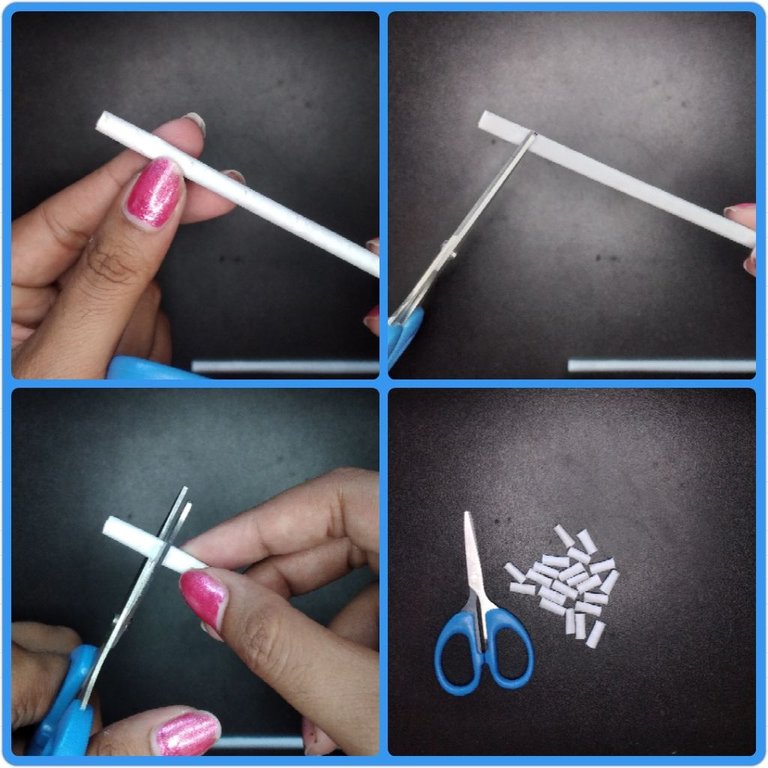
Hacer dos tubos más finos y picarlos en porciones de 1 cm.
Hacer dos tubos más finos y picarlos en porciones de 1 cm.
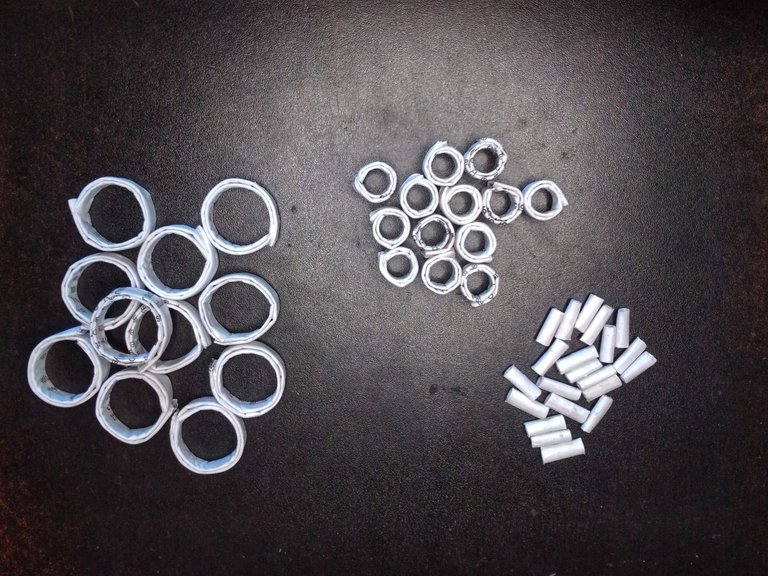
With all the elements to be used ready, we can start assembling the figures.
Con todos los elementos a utilizar listos, ya podemos comenzar a armar las figuras.
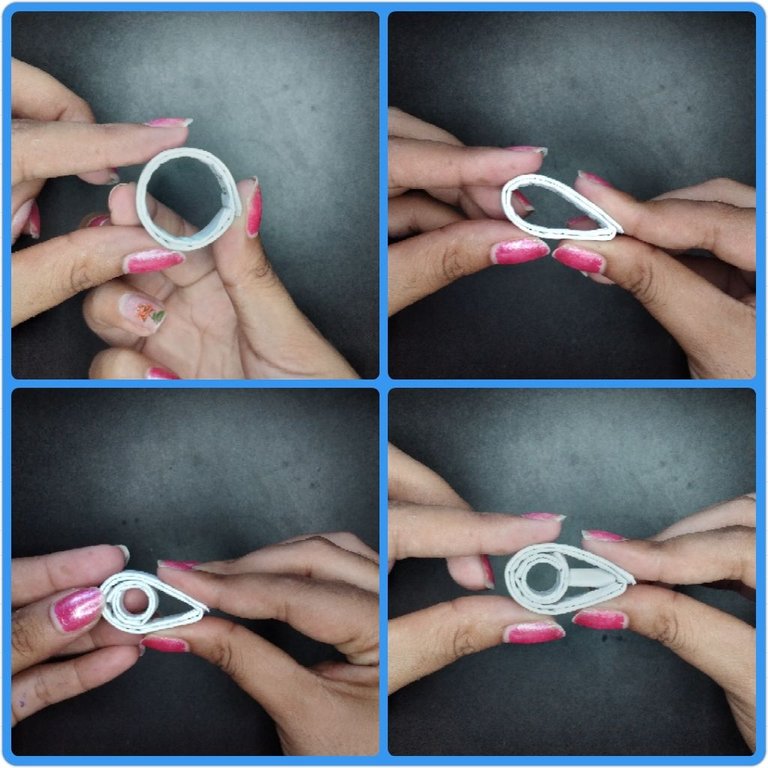
Take the large circle and flatten it into a teardrop shape, place the small circle and a small paper tube inside until this design is achieved.
Tomar el círculo grande y aplastarlo dándole la forma como de lágrima, colocar dentro el círculo pequeño y un tubito de papel hasta lograr este diseño.
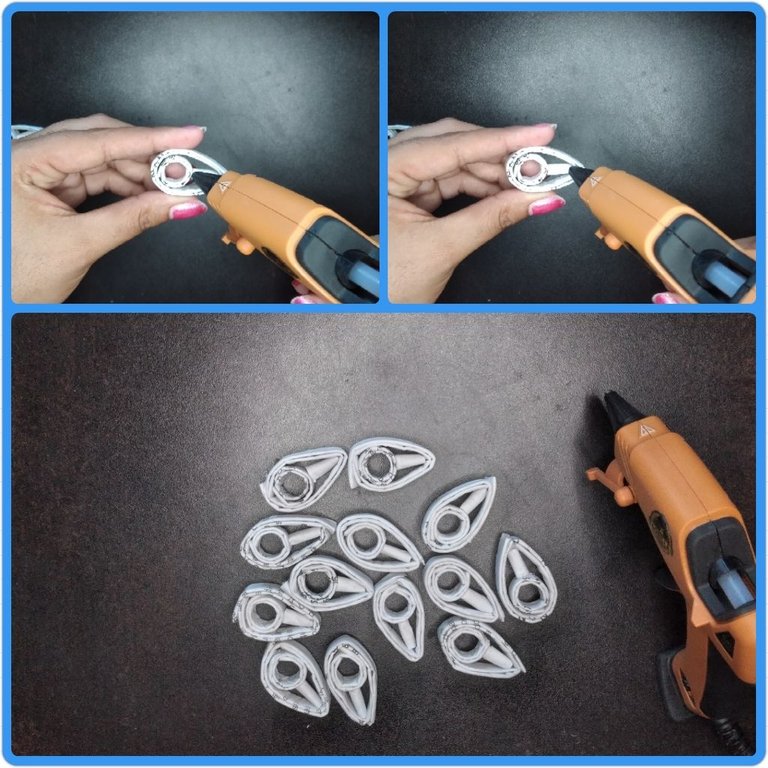
If it does not fit tightly, reinforce with silicone or glue. I made 22 figures with this design.
Si no queda bien ajustado reforzar con silicona o pegamento. Realicé 22 figuras con este diseño.
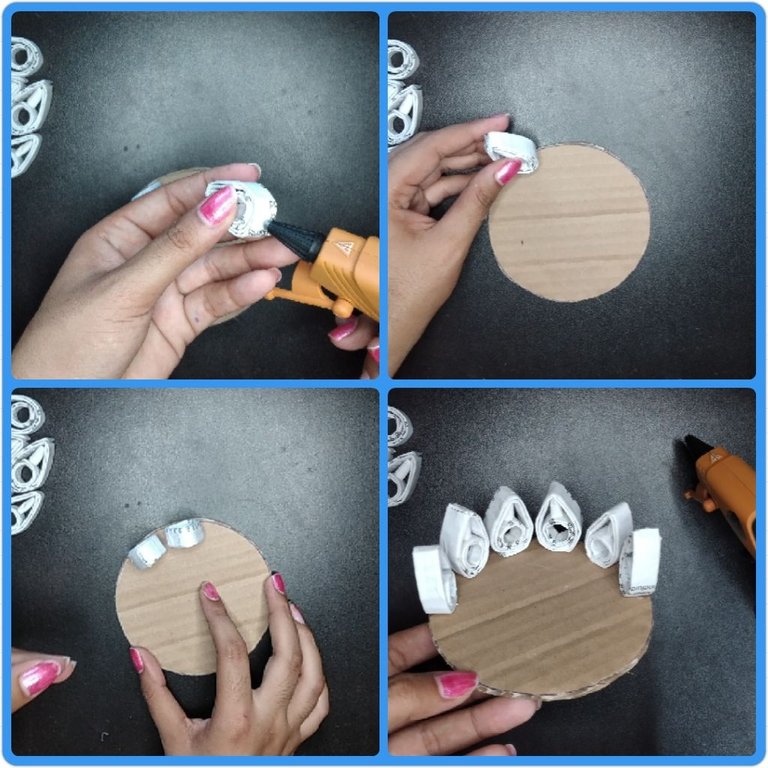
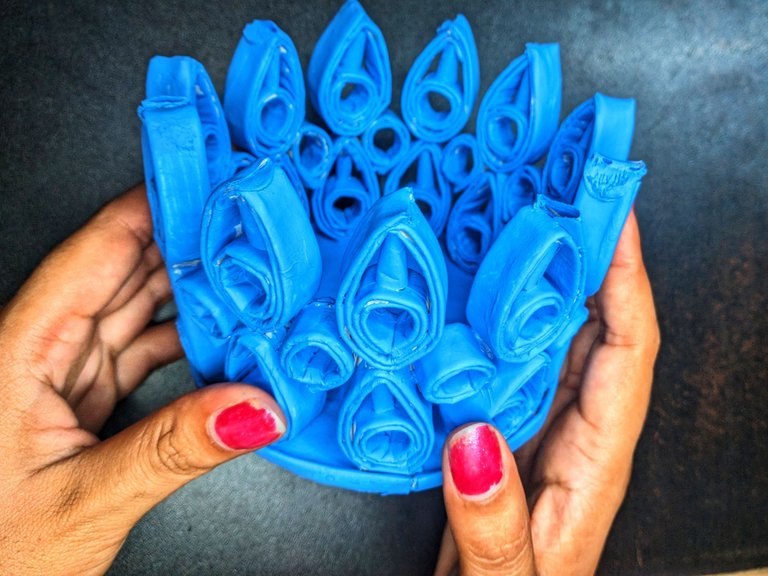
Take the base and start placing the figures side by side, you can glue them together or leave spaces between them as I did.
Tomar la base y comenzar a colocar las figuras una al lado de otra, puedes pegarlas juntas o dejarle espacios entre ellas como yo lo hice.
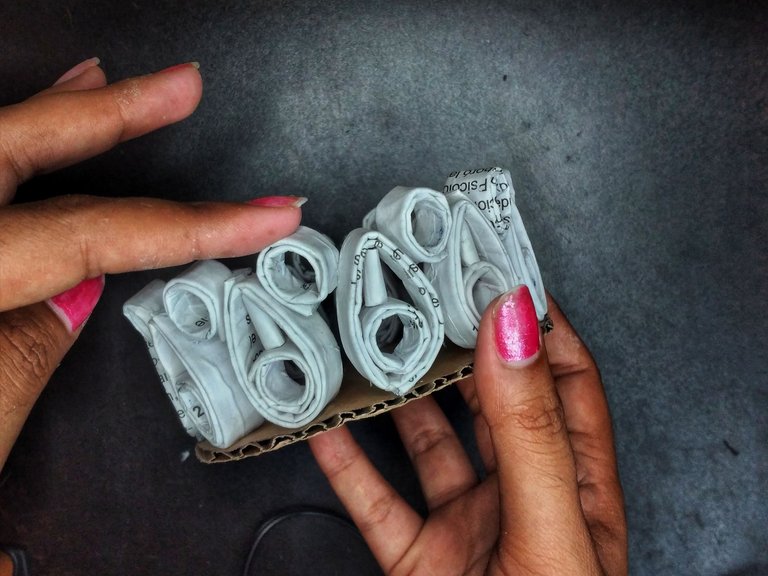
Place small circles between the previous figures until they look like this.
Colocar círculos pequeños entre las figuras anteriores hasta quedar de esta forma.
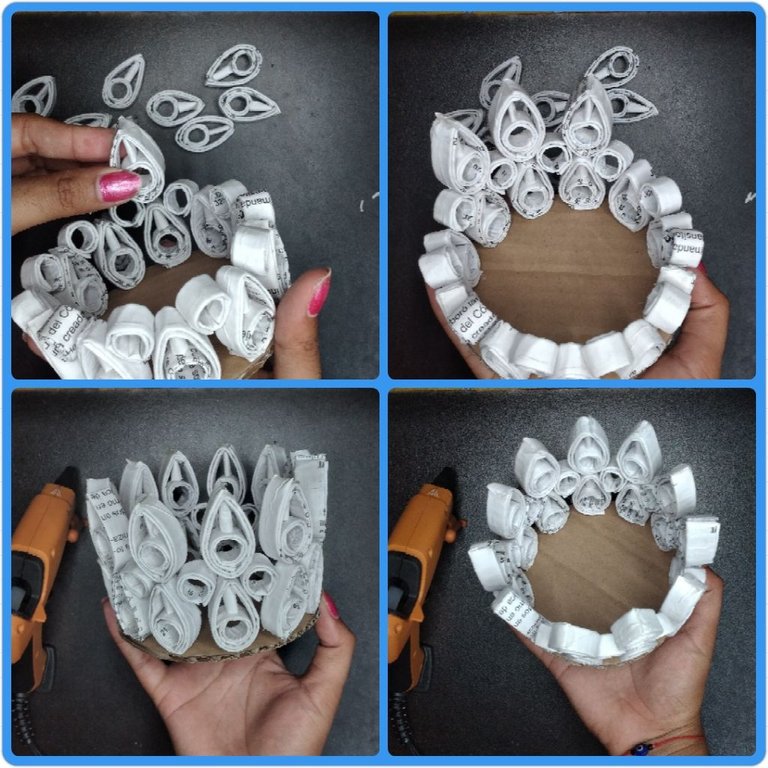
The remaining figures, placed on top of the others, were left in the upper part 11 as well as in the lower part.
Las figuras restantes colocarlas encima de las otras, me quedaron en la parte superior 11 al igual que en la parte inferior.
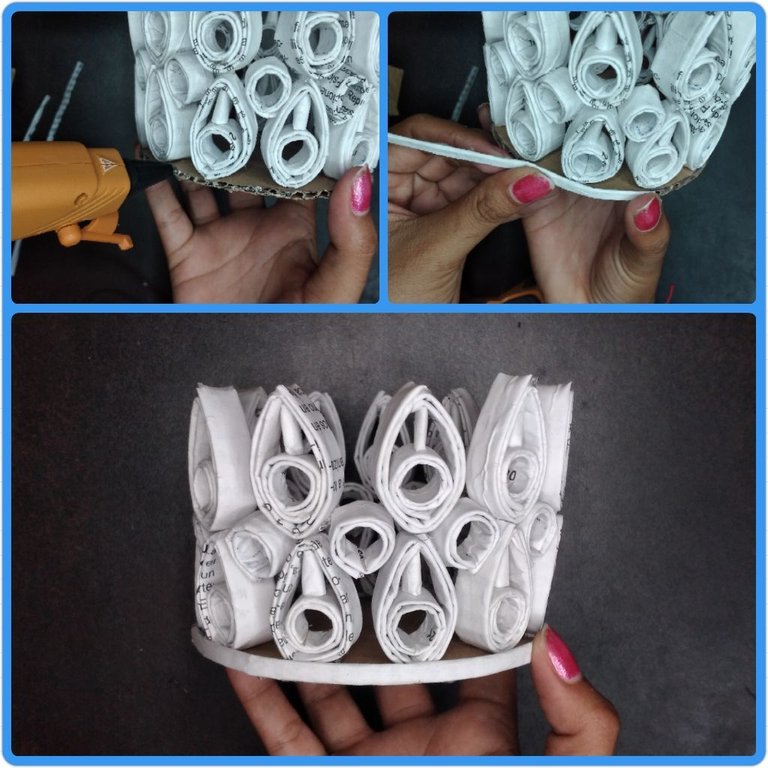
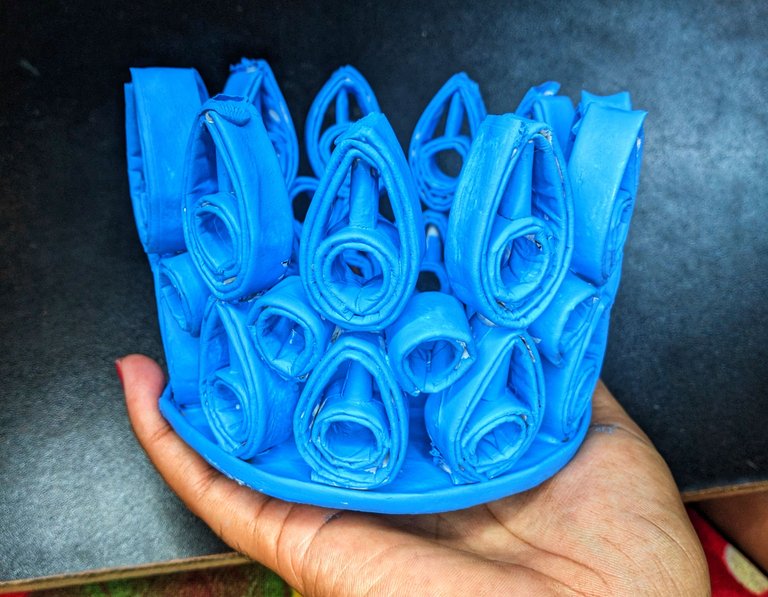
To give it a more aesthetic touch, I made two strips to cover the cardboard base and glued it with silicone.
Para darle un toque más estético hice dos tirillas para cubrir el cartón de la base y la pegué con silicona.
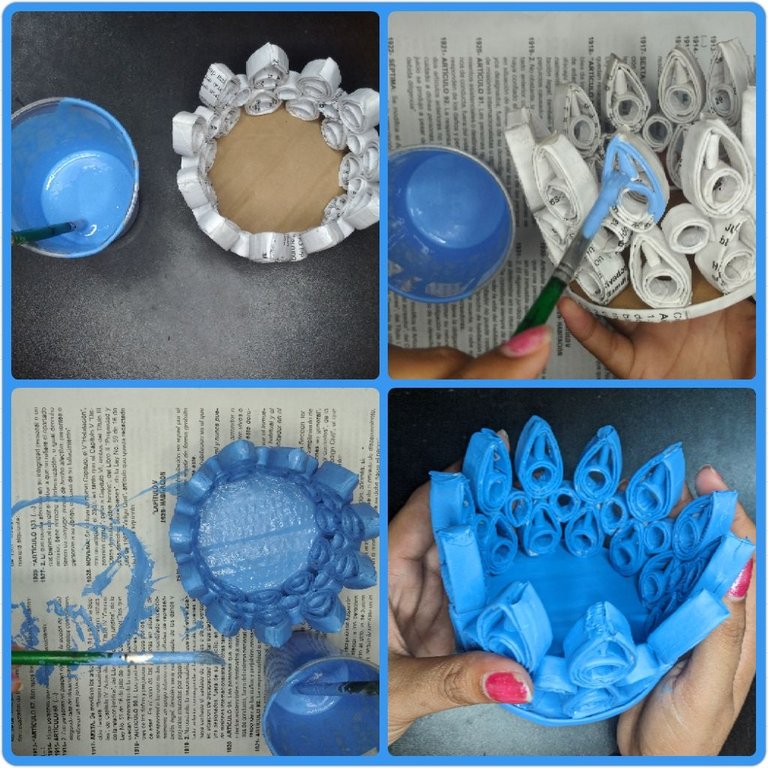
Finally, paint in the color of your choice and let it dry.
Por último, pintar del color que más le guste y dejar secar.
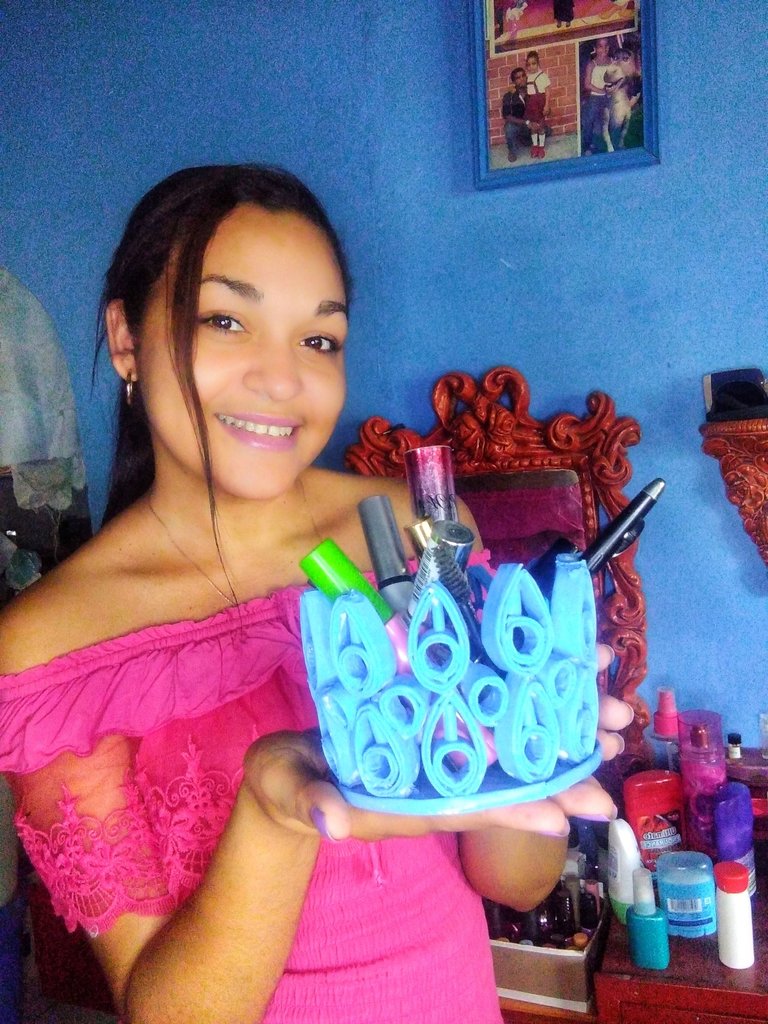
The recycled paper basket, my makeup organizer, is ready. It's amazing how from anything we don't use, something new is born that helps us to make our life easier. That's why I want to remind you of the importance of recycling. I'm happy with my new organizer, I no longer drop things jjj. It can not only be a makeup organizer, you can use it any way you want, even make it bigger and use it as a centerpiece or anything you can think of. Tell me in the comments what you would use it for and what you think of my creation. I will gladly read them, best regards to all.
Ya está lista la cesta de papel reciclado, mi organizador de maquillaje. Es impresionante como de cualquier cosa que no utilizamos, nace algo nuevo que nos ayuda a hacer nuestra vida más fácil. Por eso les quiero recordar la importancia del reciclaje. Estoy feliz con mi nuevo organizador, ya no se me caen las cosas jjj. No solo puede ser un organizador de maquillaje, pueden darle el uso que quieran, incluso hacerla más grande y utilizarlo como un centro de mesa o cualquier cosa que se les ocurra. Cuéntame en los comentarios para que la utilizarías y qué opinas de mi creación. Con mucho gusto los leeré, un saludo a todos.

Cover made in Canva
English is not my native language, translated by DeepL
https://twitter.com/hivediy47901/status/1734410315142414592
Me encanta. Quiero uno para mi 🤗
Lleva tiempo hacerlo 😅 lo voy a pensar 😂😘
¡Felicidades! Esta publicación obtuvo upvote y fue compartido por @la-colmena, un proyecto de Curación Manual para la comunidad hispana de Hive que cuenta con el respaldo de @curie.
Si te gusta el trabajo que hacemos, te invitamos a darle tu voto a este comentario y a votar como testigo por La Colmena.
Si quieres saber más sobre nuestro proyecto, te invitamos a acompañarnos en nuestro servidor de Discord.
Muchas gracias por el apoyo.
Quedó precioso 💙
Gracias 😉
Queda precioso! Y el color que has elegido es espectacular
Gracias, si me encantó como quedó ese color 😍
Congratulations @yale95reyra! You have completed the following achievement on the Hive blockchain And have been rewarded with New badge(s)
Your next target is to reach 900 upvotes.
You can view your badges on your board and compare yourself to others in the Ranking
If you no longer want to receive notifications, reply to this comment with the word
STOPCheck out our last posts: