The Journey of a Hivean–Task14: Owning/Creating A Community.
~ Introduction ~
On the Hive blockchain, communities are more than just social groups; they are structured spaces where specific types of contents live and thrive. Each community acts as a themed-hub, allowing users to publish, curate and discover posts related to a particular topic or interest. Whether it's DIY tutorials,Comedy, photography, crypto analysis or creative writing, Hive communities help keep contents organised and easy to find for readers looking for something specific.

Hello and welcome to this tutorial post. Having been here for 35 full moons, I thought to give back to the blockchain by sharing a stepwise process on how to seamlessly create/own a community on Hive using Peakd. There are numerous ways to create a community on Hive but for the purpose of this tutorial, I will stick to the above mentioned frontend. For the representation of this post, I used mobile but the steps are basically the same on desktop.
This post covers:
- How to create a community using Peakd.
- How to Edit Community Settings using Peakd.
- How to appoint an administrator for the community using Peakd.
- How to appoint a moderator using Peakd.
- Role Permissions of the Members in a Community.
- Conclusion.
~ How To Create A Community Using Peakd on Mobile ~
Creating a community using the Peakd front is very easy and straightforward. Below are the steps to follow:
Step One
Open your Hive keychain app on your mobile device, input your pin and authenticate. If you do not already have Hive Keychain, check here for a mini tutorial on how to install it either for desktop or mobile.
Step Two

Once you're logged into the creator account (the account you wish to use in creating the community), tap on the browser icon and this redirects you to the browser.
Step Three
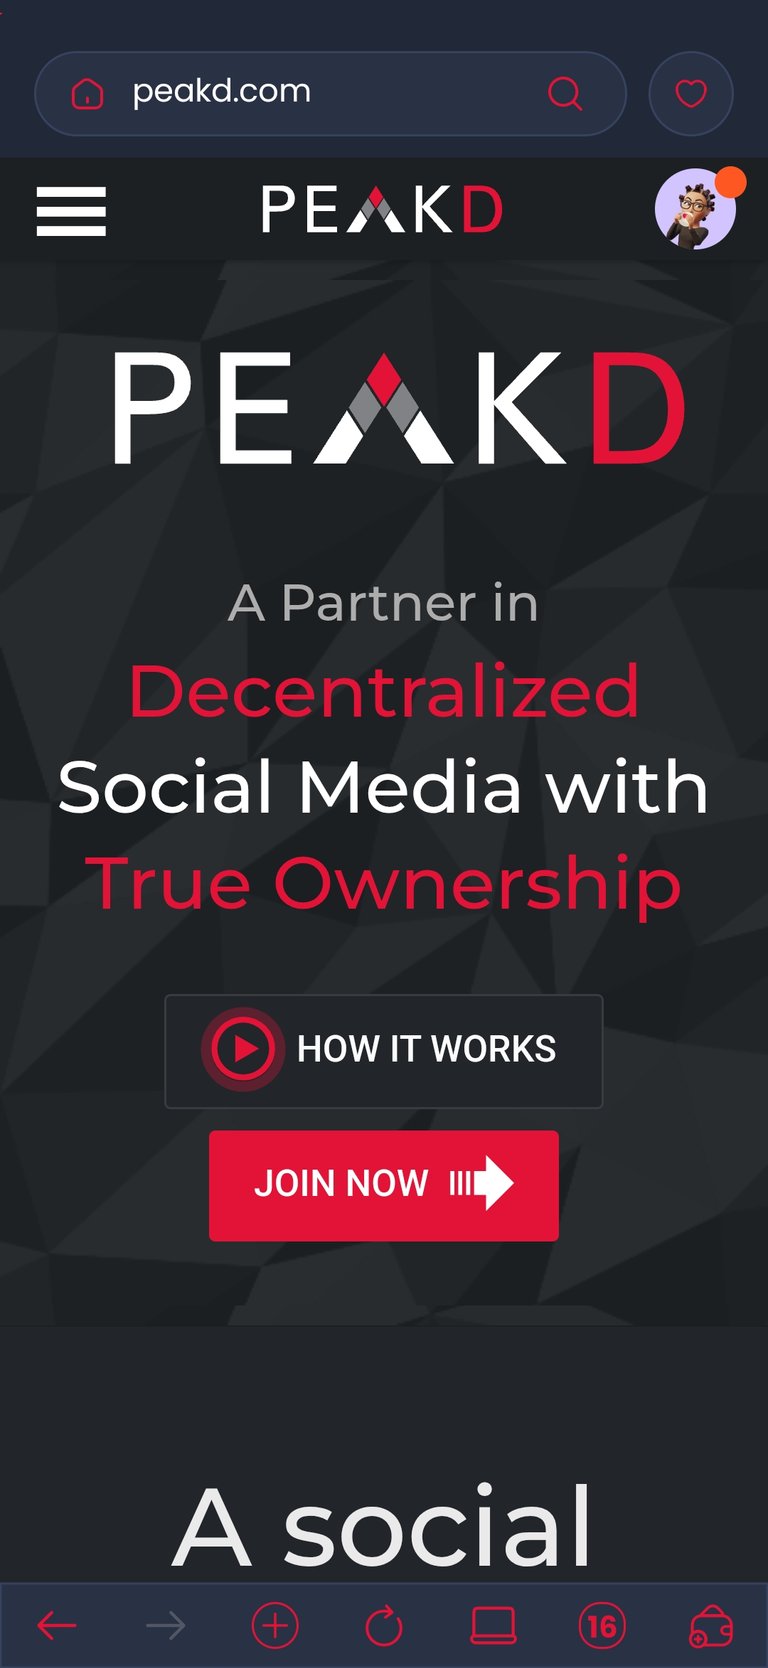
On the browser, input the URL "peakd.com" and this takes you directly to the 'my following' page of the creator account or a homepage.
Step Four


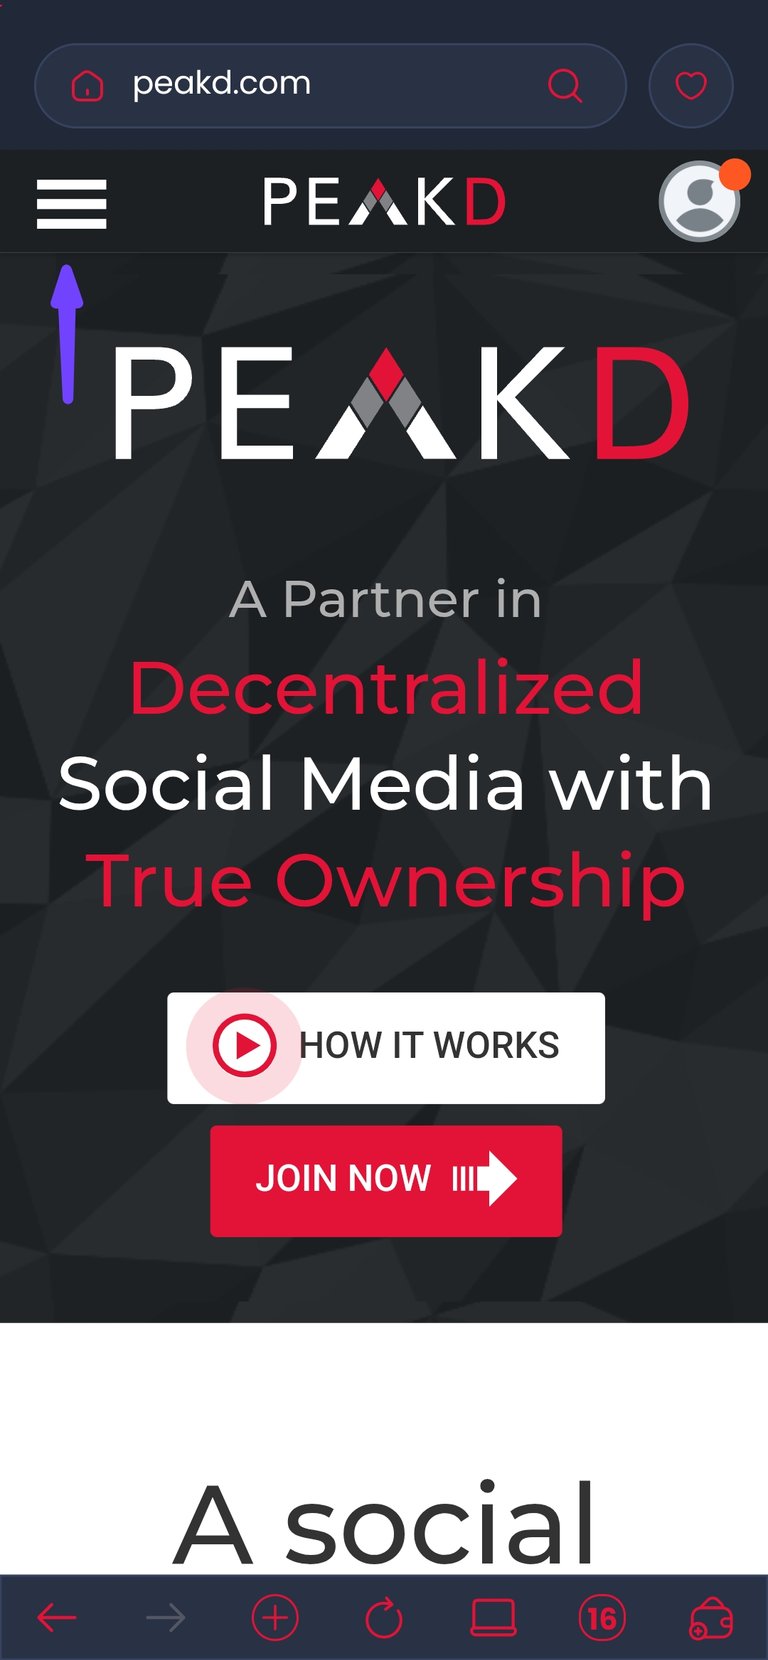
Click on the three horizontal lines at the top left corner of this page and a list of options will appear. Click on communities and this redirects you to another page.
Step Five
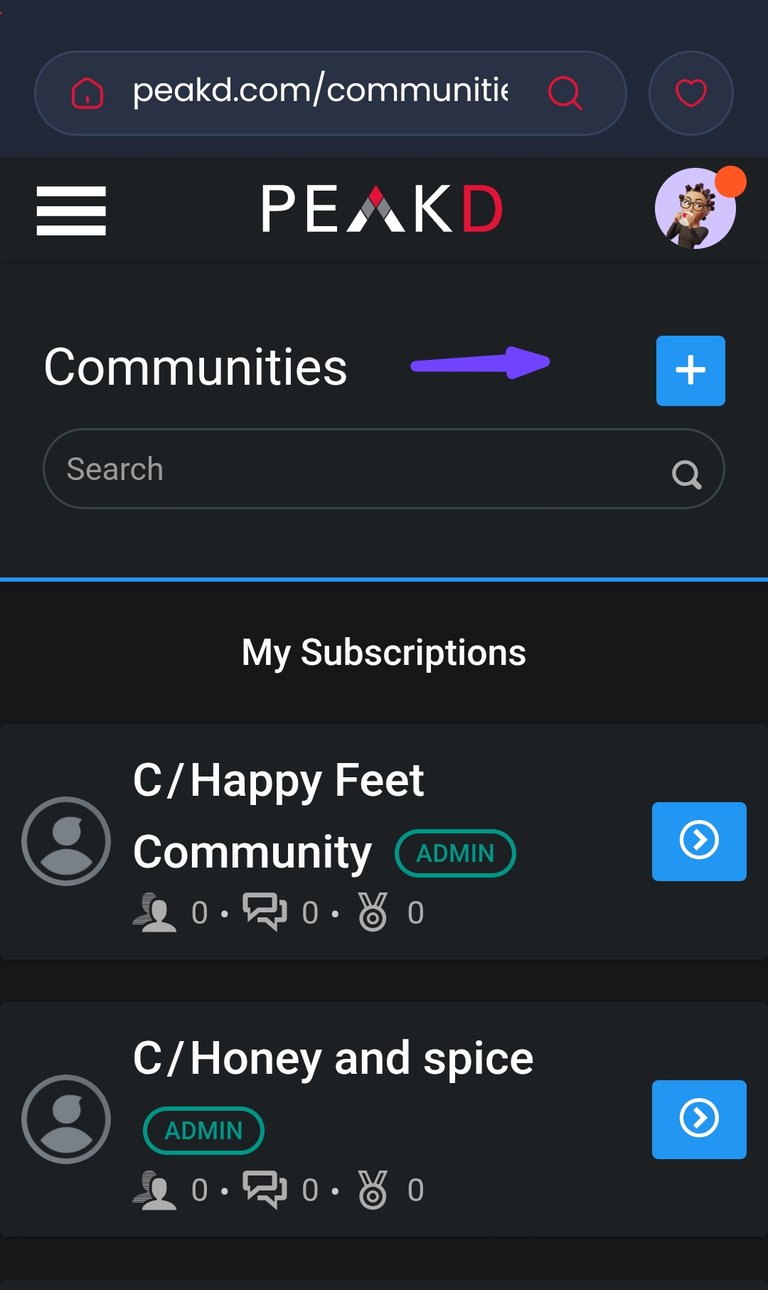
Click on the plus sign (+) on the top right corner of this page and another interface will pop up.
Step Six
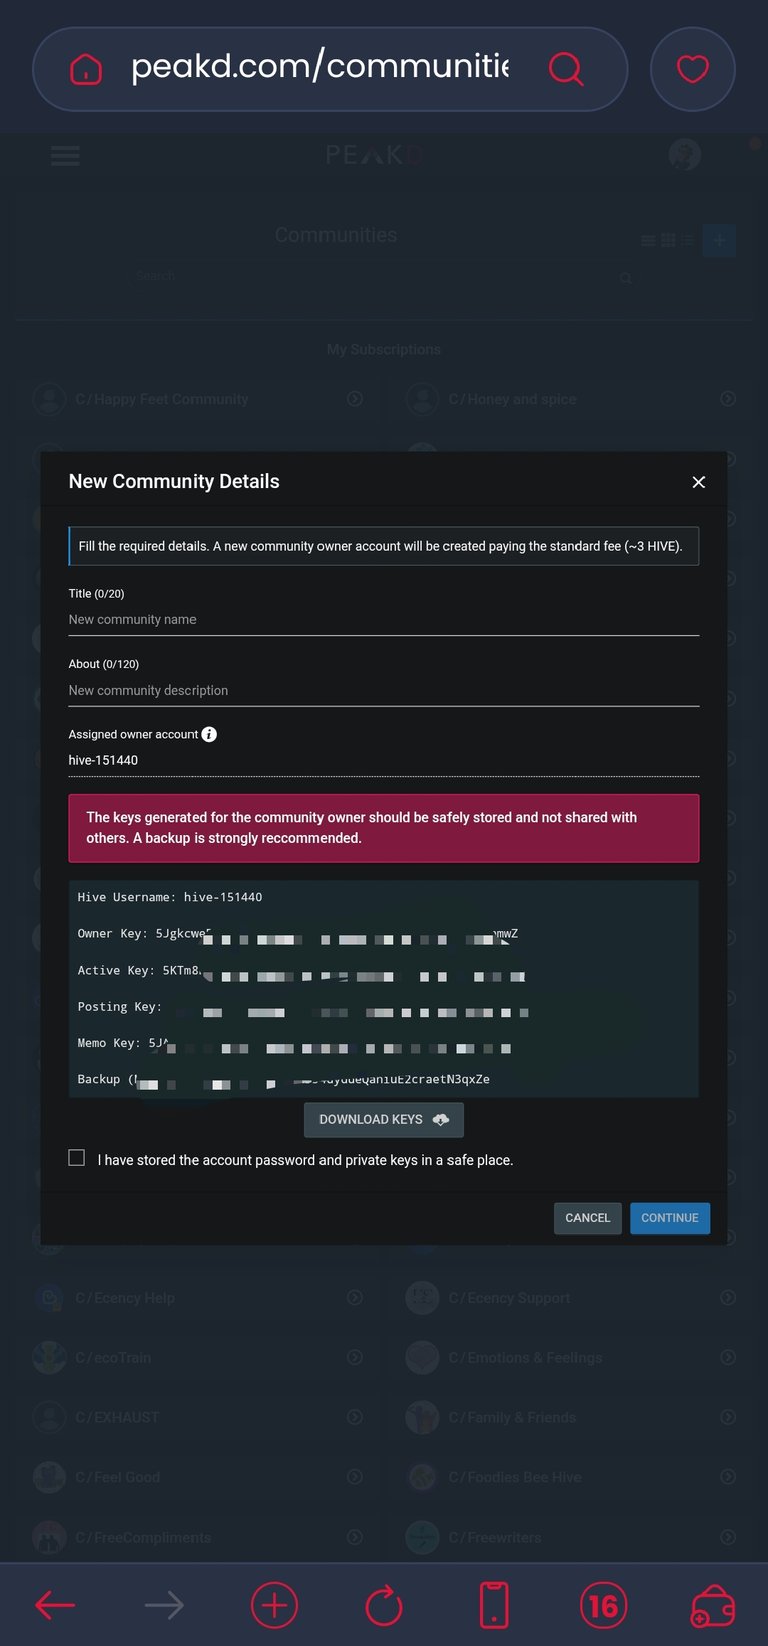
This is the time to fill in important information about the community you want to create. This includes the community's title and a brief description. Here, the community owner account username (more on this later) and the community keys will be automatically generated. Copy this username and private keys and save them someplace very safe. DO NOT share your private keys with anyone. A backup is strongly recommended because if these keys are lost, then one loses access to the community.
Step Seven
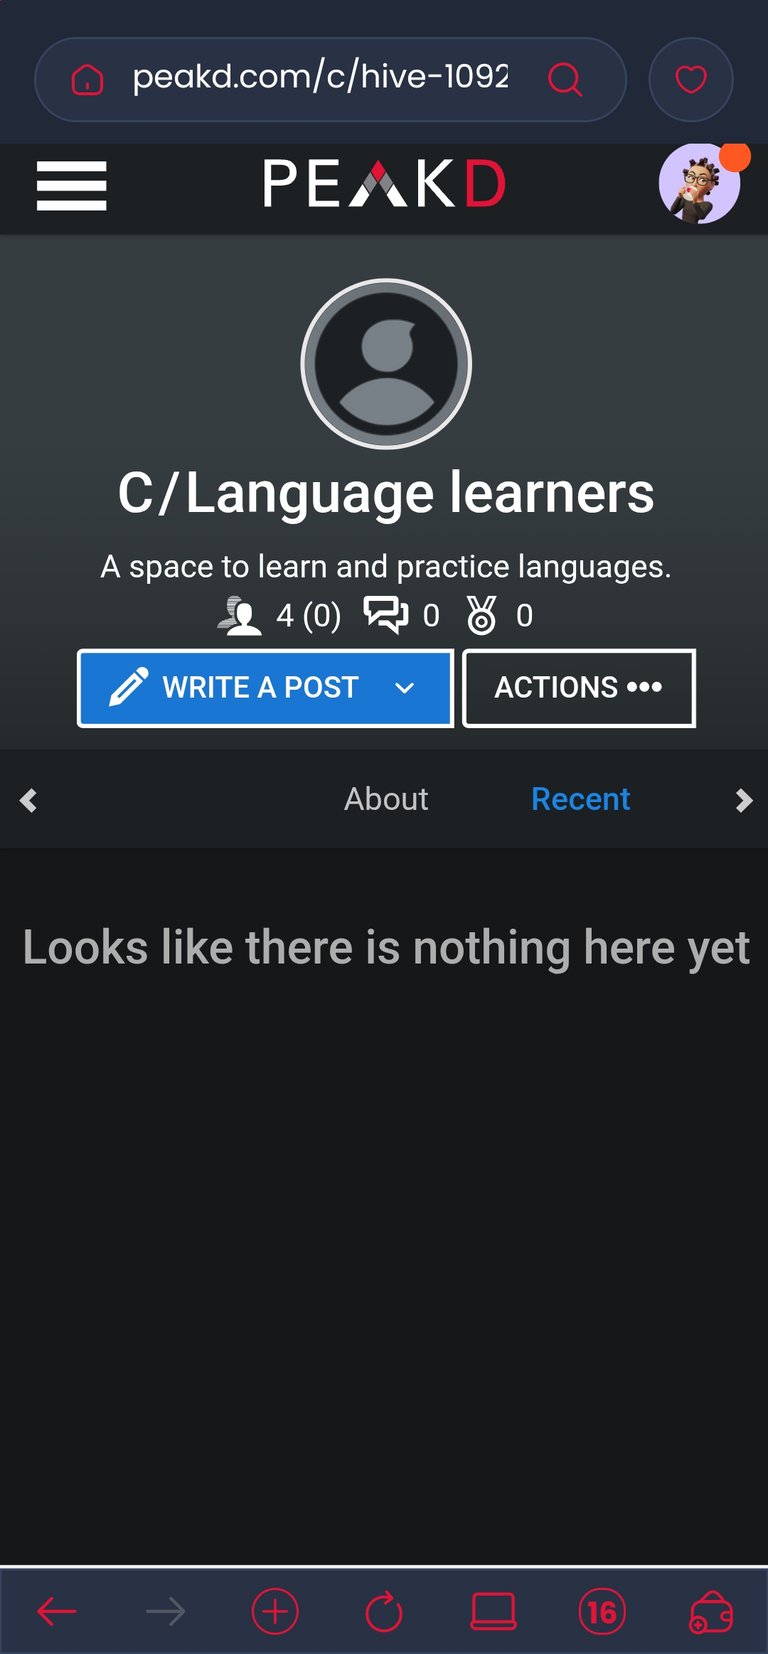
After the 3 HIVES have been deducted from your wallet and the transaction has been successfully signed, you will be redirected to the community you just created. If you are not redirected, tap on the three horizontal lines at the top left corner, click on communities and your community should be the first community to appear there with you as an administrator.
Congratulations! You've successfully created a community.
But the task does not end here. You have to set up the community: insert an image that relates to the community as your profile and set up your team members.
~ How To Edit Community Settings using Peakd ~

To do this, click on "about" on the community's home page and you will be taken to a page where you can fill in all the information you want about your community.
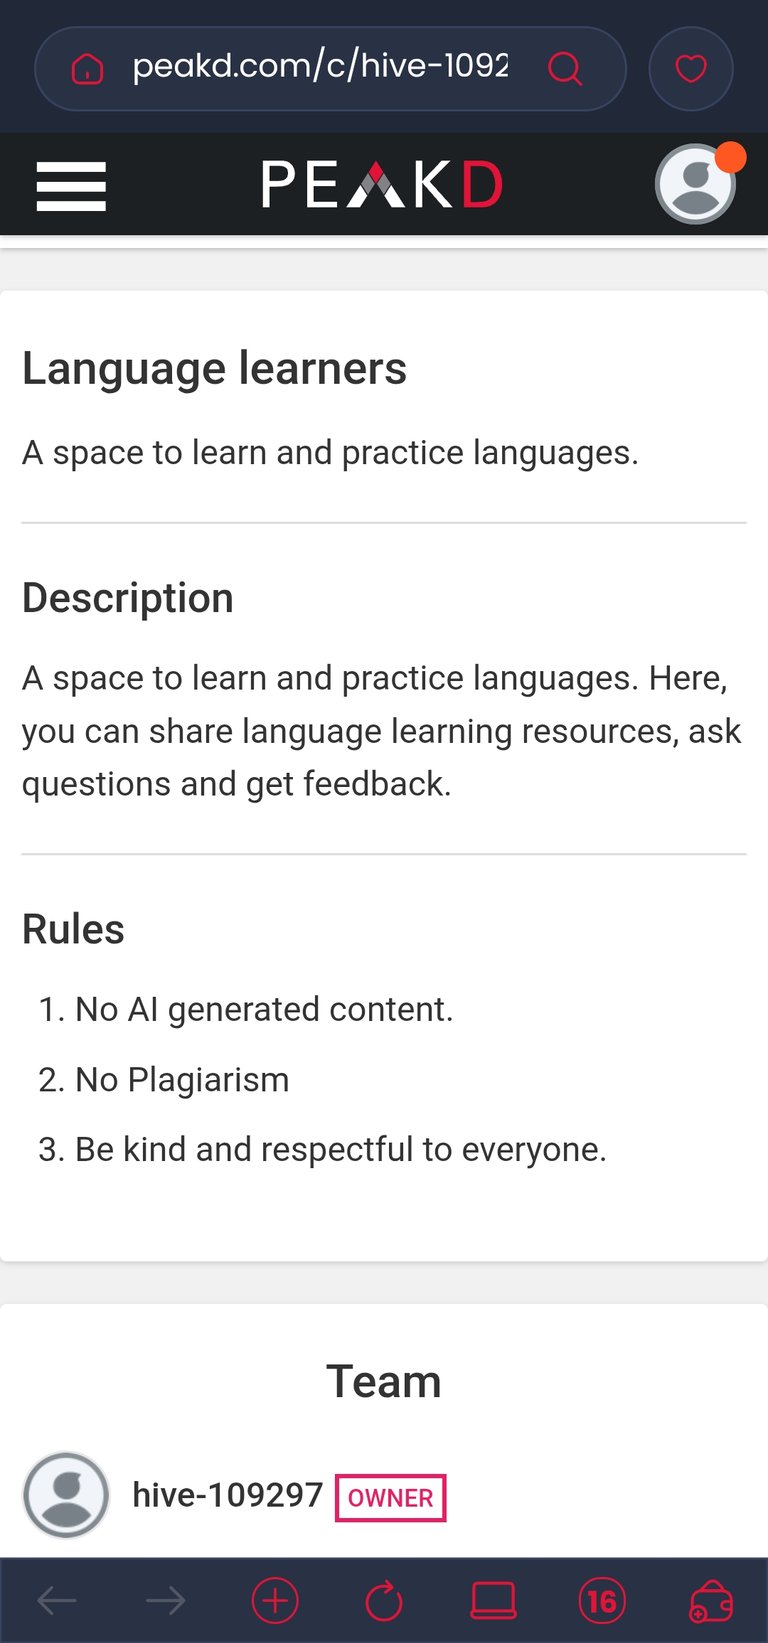
This is where your community branding begins. You can fill in the description, community rules, insert images and basically edit every other thing. Remember to save the changes once you are done making them.
~ How to Appoint an Administrator for the Community using Peakd ~
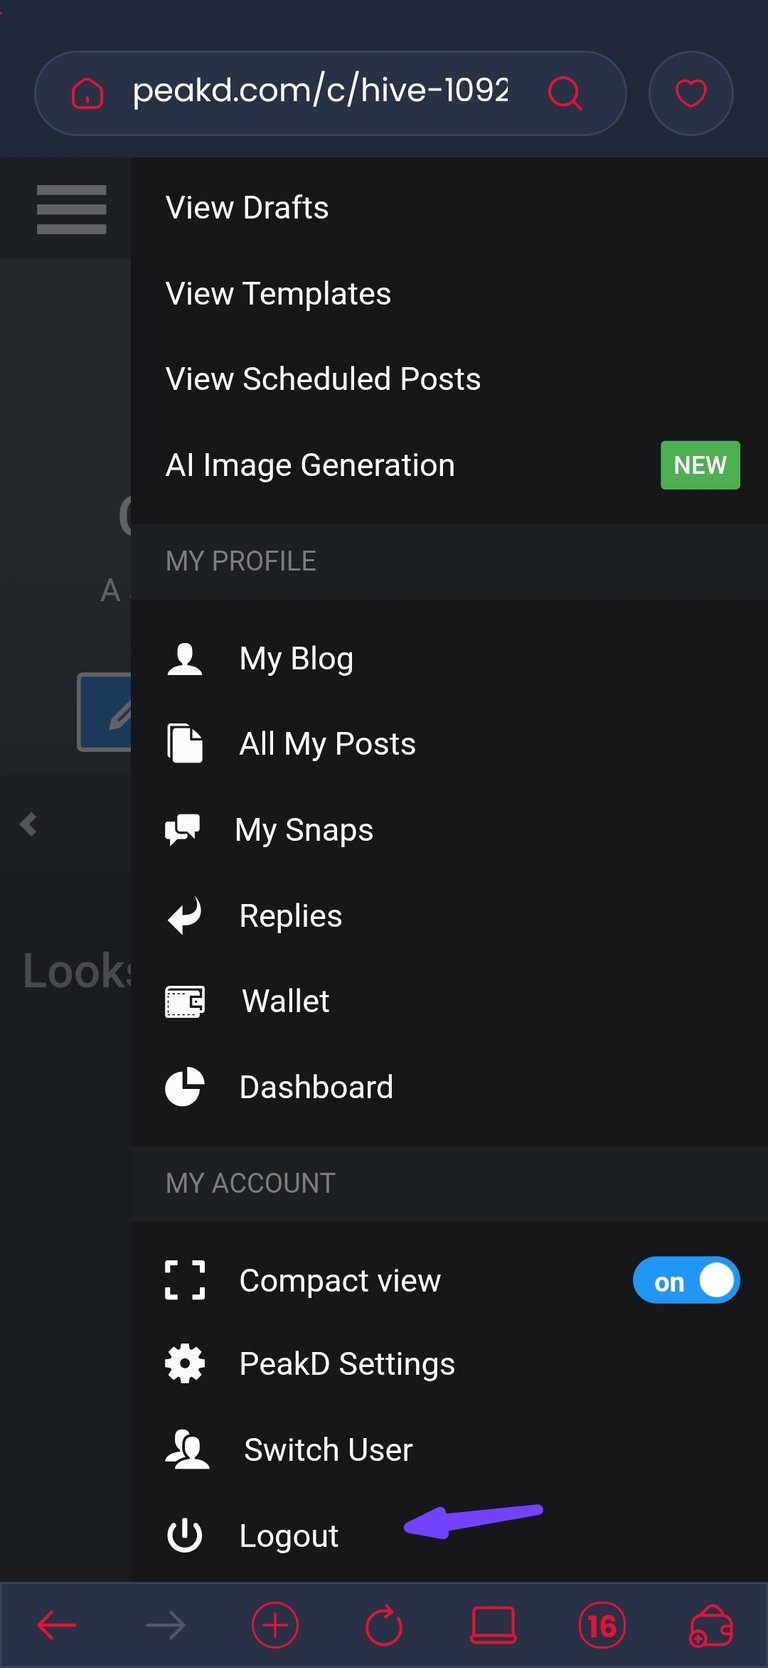
In order to appoint an ADMIN, you must log into the creator account using the keys that were generated during the creation of the community. Simply put, log out of the creator account and log into the owner account using the username that begins with hive-00000.
This is because the creator account has limited access to the community's settings and can't appoint an ADMIN. The owner account on the flip side has express access and can make all major modifications.
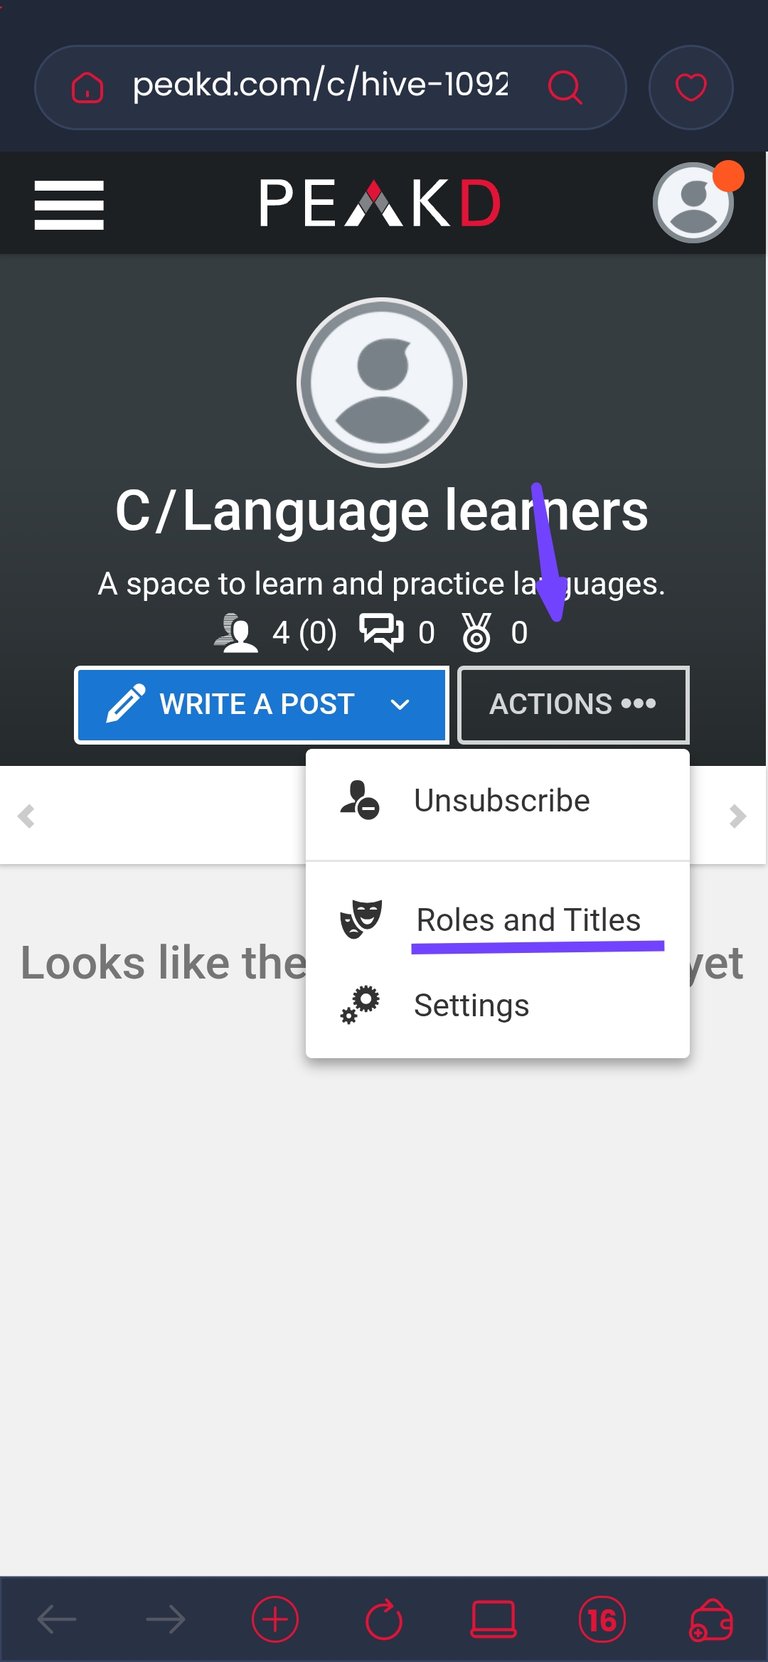
Once you are logged into the owner account, navigate to the community's homepage. On the homepage, tap on "Actions···" and a list of possible actions will appear. Tap on "Roles and Titles" and this redirects you to another page.
On the next page, you can edit roles. Note, you can only assign roles to users who are subscribed to the community.
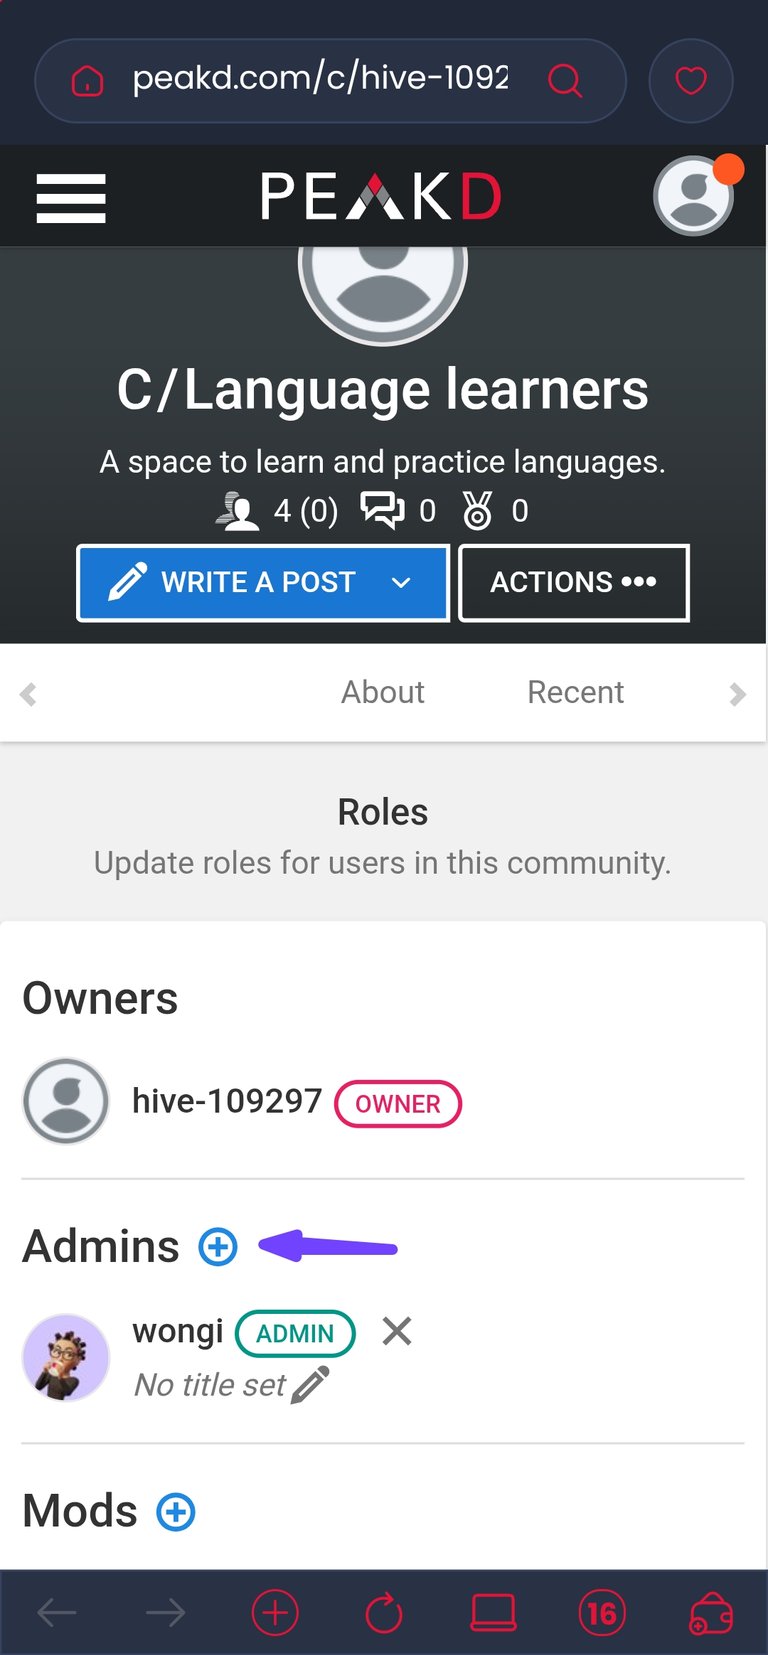

For ADMINS, tap on the plus sign (+) right beside the ADMIN role and this brings up an interface where you can type in the username of the individual you wish to assign this role to. Once the correct username has been inputted, save the change and the role is immediately updated.
~ How To Appoint A Moderator on Peakd ~
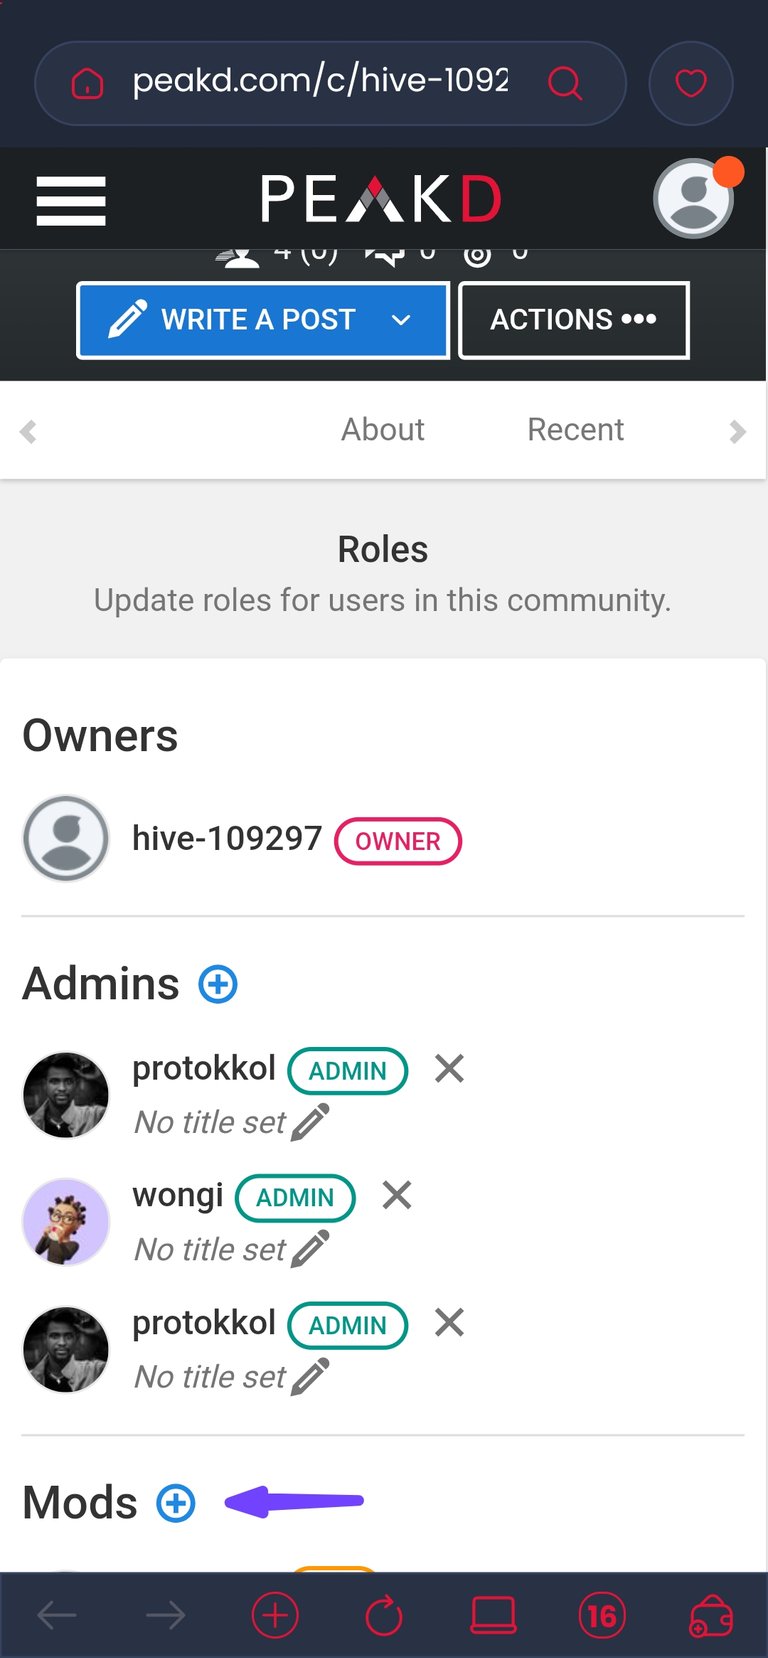

This pretty much follows the same pattern as appointing an ADMIN. Tap on the plus sign (+) right beside the moderator role and an interface will pop up. Type in the correct username of the individual you wish to assign the role of a moderator and save. The change is effected immediately.
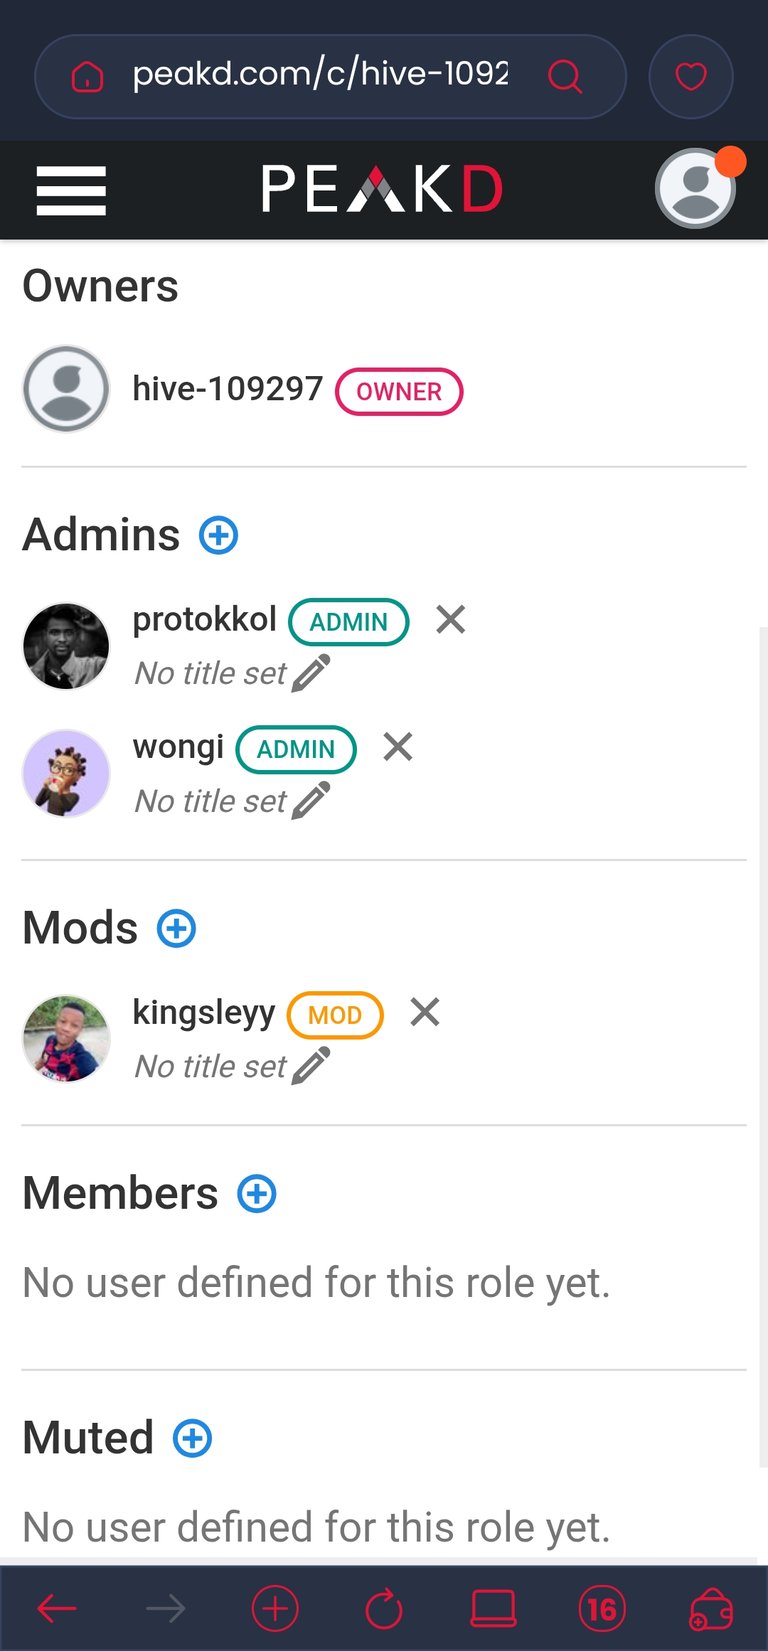
~ Role Permissions Of The Members In A Community. ~
These role permissions apply to all communities irrespective of which frontend the community was created with.
- Owner: assign ADMINS.
- Administrators: assign moderators and edit settings.
- Moderator: mute users, pin posts and set user titles.
- Member: listed on the leadership team.
- Guest: default role. They can create posts and engage with other users.
- Muted:publications from these users are automatically muted.
Now, you've successfully created and customized your community, earning you the title of a community owner. Enjoy your milestone and get ready to grow and nurture your community.
~ Conclusion ~
A list of hiveans have been asked to write out detailed tutorials for a massive idea by @starkerz and his team. This post is my contribution to the idea. You can find more information about this idea and the tasks here. If you feel inclined to take up a task, reply to the post and offer to assist.
Upon completion, the posts will be compiled into a permanent, single collection. To avoid generating rewards from the same post twice, that account will be set to burn the earnings.
I am open to feedback and corrections. If you spot any errors or areas that need clarificaion, do tell. Your feedback is greatly appreciated.
I would also like to say a big thank you to @ravenmus1c for creating the thumbnail for this post. She did an amazing job.
Images used are personal screenshots except stated otherwise.
LIEBE🤍
▶️ 3Speak
Great post! And thanks for the shoutout! =)
You are most welcome :)
Insightful and neatly presented.
Excellent work, Wongi❤️
Thank you dear✨
This is a great tutorial, and will be of great help to anyone who wants to create community.
Good job, Wongi. 👍
!BBH
Thank you very much luchyl✨
Wow! Wongi this is so nice. I never knew this was how to create a community.
You did an amazing job !Lady, well done🥰🥰🥰
I'm glad I could be of some help😊
What a wonderful post! Well done!
Thank you ✨
This is very insightful.....Never knew how to create a community myself
You make it very detailed. Thanks for sharing
It is a pleasure.
Congratulations @wongi! You have completed the following achievement on the Hive blockchain And have been rewarded with New badge(s)
Your next target is to reach 17500 replies.
You can view your badges on your board and compare yourself to others in the Ranking
If you no longer want to receive notifications, reply to this comment with the word
STOPI just learned how to create a community all thanks to you.
You are most welcome ✨
Very instructive video! And congrats to your well-deseverd earnings! 👍
(I noticed just now that it is already a little bit older, but great post anyway!)
Yes yes, it's a bit old. Thank you for going through it😊