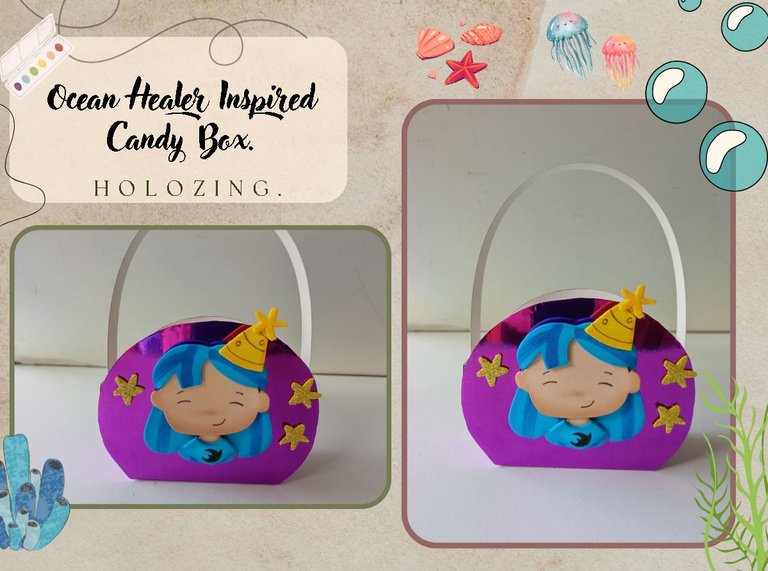
[Esp/Eng] ✨Ocean Healer Inspired Candy Box✨
🔸Sin más que añadir, a continuación los dejo con el paso a paso:
✨Good afternoon, holozing friends!✨ As always, I'm happy to stop by again to share a lovely candy box idea inspired by the ocean healer. It's been a while since I've shared a pretty candy box with you, and to avoid a plain or simple box, I wanted the base to be like a cardboard basket or bag this time. Also, to create a nice color combination, I wanted to use purple metallic cardstock, because with the blue colors of the forest healer, it looked beautiful and enhances this lovely creation even more.
🔸Without more to add, then I leave you with the step by step:
♥️ESPERO QUE TE GUSTE,
¡Empecemos!
♥️I HOPE YOU LIKE IT,
Let's start!

✂️ MATERIALES | ✂️ MATERIALS
- Cartulina metalizada morada.
- Foami escarchado dorado.
- Foami azul.
- Foami amarillo.
- Foami crema.
- Pinturas y marcadores.
- Pegamento.
- Tijeras.
- Regla.
- Hoja blanca.
- Lápiz.
- Purple metallic cardstock.
- Gold frosted foam.
- Blue foam.
- Yellow foam.
- Cream foam.
- Paints and markers.
- Glue.
- Scissors.
- Ruler.
- White paper.
- Pencil.
✨ PROCEDIMIENTO | ✨ PROCESS
✨ PASO 1:
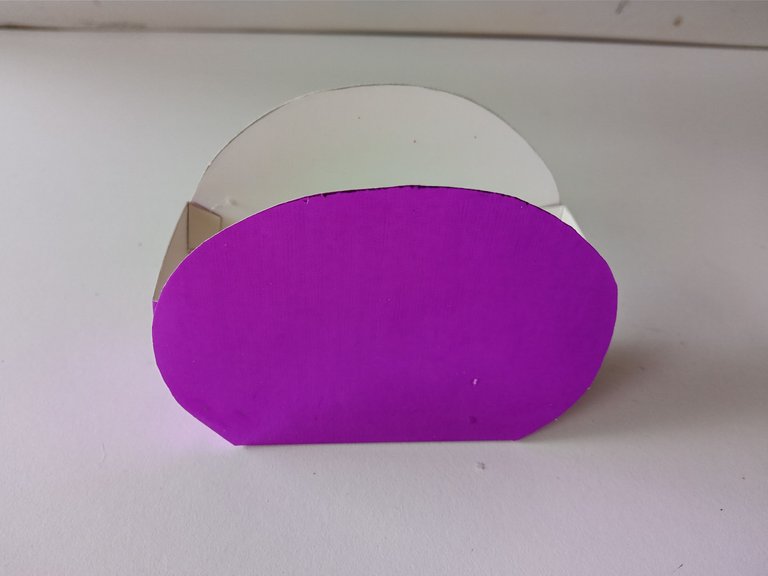
Lo primero que hice fue dibujar el diseño del dulcero que quería en una hoja blanca y luego lo pasé a la cartulina metalizada morada, para que, en caso de que no me gustara el tamaño, pudiera dibujar otro patrón en la hoja y no gastar de la cartulina. Las medidas fueron las siguientes:
✨Base: 7 cm x 4 cm.
✨Paredes principales en forma ovalada de 10 cm x 7.5 cm.
✨Paredes laterales: 5.5 cm x 4 cm.
✨pestañas en paredes laterales de 1 cm.
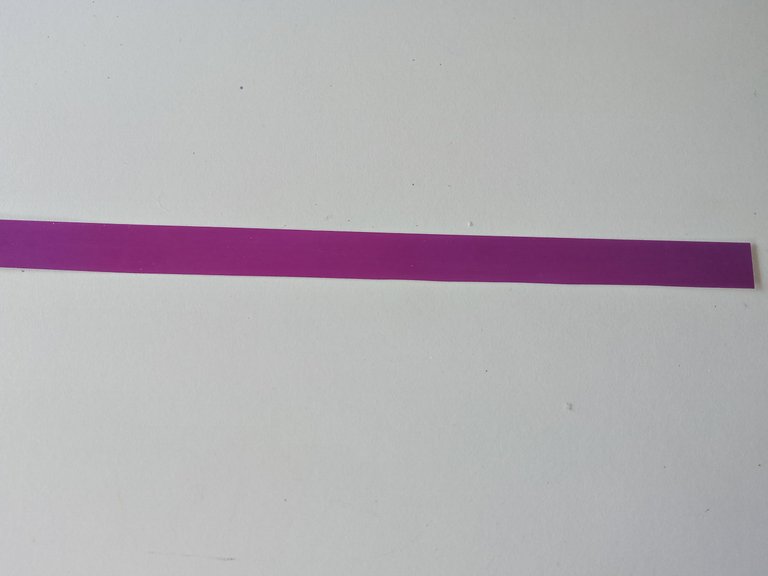
✨Agarradero: tira de 16 cm x 1 cm.
✨ STEP 1:
The first thing I did was draw the design of the candy dish I wanted on a white sheet of paper and then transfer it to the purple metallic cardstock. This way, if I didn't like the size, I could draw another pattern on the sheet of paper and save the extra cardboard. The measurements were as follows:
✨Base: 7 cm x 4 cm.
✨Oval-shaped main walls: 10 cm x 7.5 cm.
✨Side walls: 5.5 cm x 4 cm.
✨1 cm tabs on the side walls.
✨Handle: 16 cm x 1 cm strip.

✨ PASO 2:
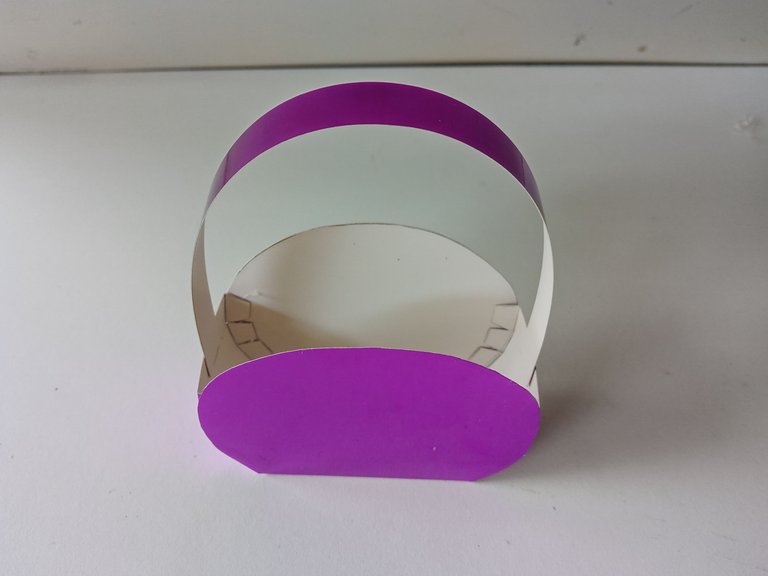
Seguidamente, le di la forma al dulcero, doblando las paredes y las pestañas. Al tener lista la forma, comencé a pegar y, en el caso de la agarradera, que en este caso es la tira de cartulina metalizada morada, la pegué por dentro de las paredes laterales.
✨ STEP 2:
Next, I shaped the candy dish by folding the walls and tabs. Once I had the shape ready, I started gluing. For the handle, which in this case is the purple metallic cardstock strip, I glued it inside the side walls.
✨ PASO 3:
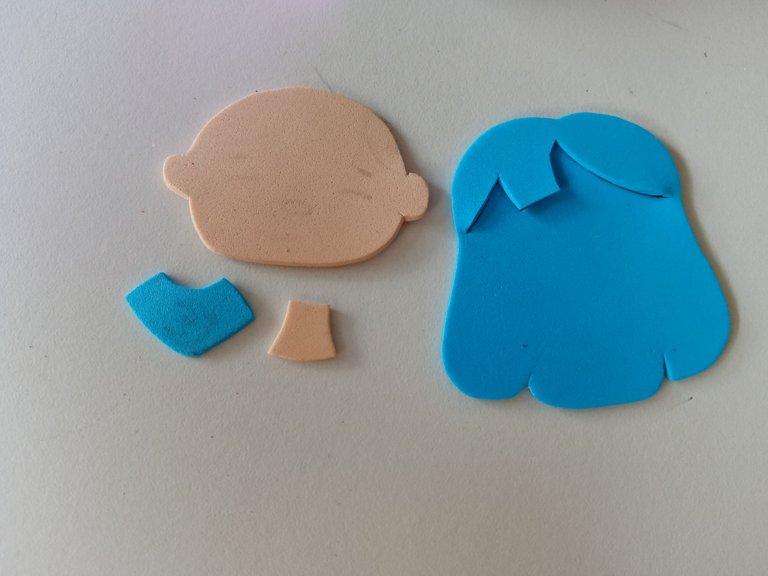
Al estar la base del dulcero lista, comencé dibujando en una hoja blanca lo que tenía en mente para la decoración, que en este caso era la Sanadora del océano y un par de decoraciones extras, como estrellas de mar y un gorro de cumpleaños para que hiciera juego con la temática. Al tener listo el diseño, transferí a los colores correspondientes de foami, como explico a continuación:
✨Cabeza: 4.5 cm x 3 cm en foami crema.
✨Cuello: 1.5 cm x 1 cm en foami crema.
✨Cabello: 5 cm x 4.5 cm en foami azul.
✨Ropa: 2 cm x 1 cm en foami azul.
✨Gorro de cumpleaños: 1.5 cm x 2.5 cm y 1 cm en foami amarillo.
✨Estrellas de mar: 1.5 cm en foami escarchado dorado.
✨ STEP 3:
Once the base of the candy dish was ready, I started by drawing on a blank sheet of paper what I had in mind for the decoration, which in this case was the Ocean Healer and a couple of extra decorations, like starfish and a birthday hat to match the theme. Once I had the design ready, I transferred it to the corresponding colors of foam, as explained below:
✨Head: 4.5 cm x 3 cm in cream foam.
✨Neck: 1.5 cm x 1 cm in cream foam.
✨Hair: 5 cm x 4.5 cm in blue foam.
✨Clothes: 2 cm x 1 cm in blue foam.
✨Birthday hat: 1.5 cm x 2.5 cm and 1 cm in yellow foam.
✨Starfish: 1.5 cm in gold frosted foam.

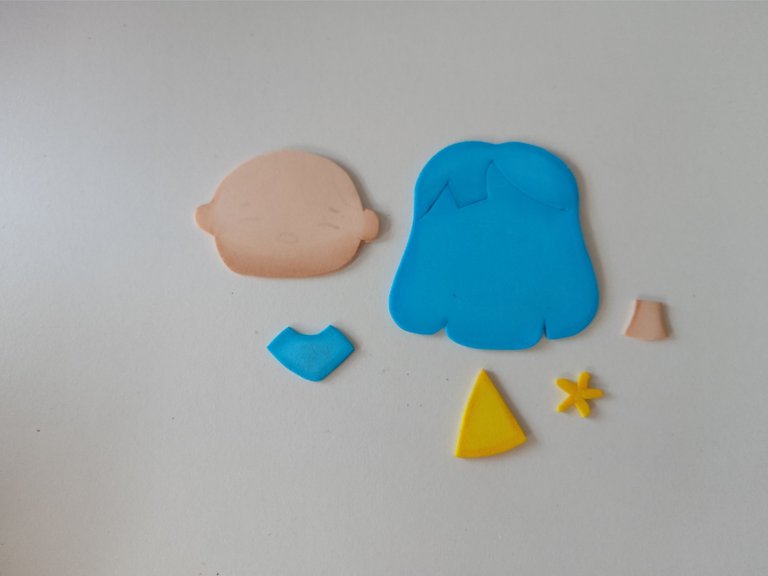
✨ PASO 4:
Al estar listas y recortadas todas las piezas, es momento de dar color a los bordes con pinturas o marcadores. En mi caso, utilicé un tono más oscuro de azul para el cabello y la ropa. Mientras que, para la cabeza y cuello, utilicé un marrón. Por último, para el gorro, utilicé un tono naranja. Al estar secas las piezas, es momento de dar detalles específicos, como ojos, cejas, boca, gorro, ropa y cabello.
✨ STEP 4:
Once all the pieces are ready and cut out, it's time to color the edges with paints or markers. In my case, I used a darker shade of blue for the hair and clothing, while for the head and neck, I used brown. Finally, for the hat, I used an orange shade. Once the pieces are dry, it's time to add specific details, such as eyes, eyebrows, mouth, hat, clothing, and hair.

✨ PASO 5:
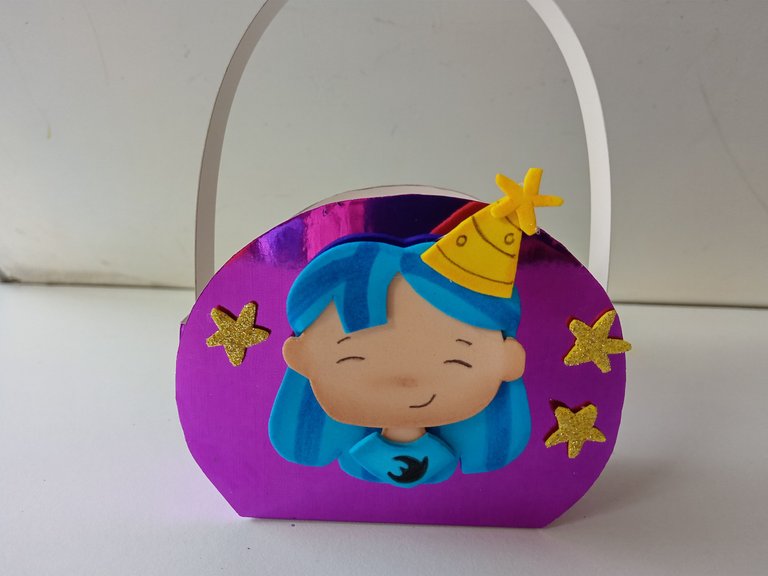
Al estar secas todas las piezas, es momento de comenzar a pegar. Y como siempre, yo comencé pegando la cabeza junto con el cuello, el cabello, seguido de la ropa y, finalmente, el gorro. Al estar armada la Sanadora, pegué en medio de una de las paredes principales del dulcero y las estrellas de mar a los lados de la Sanadora del océano.
✨ STEP 5:
Once all the pieces are dry, it's time to start gluing. As always, I started by gluing the head along with the neck, hair, followed by the clothing, and finally, the hat. Once the Healer was assembled, I glued it in the middle of one of the main walls of the candy dish and the starfish on the sides of the Ocean Healer.

❤️ Hasta la próxima publicación.
❤️ Until the next post.

Todas las fotografías son de mi propiedad.
Separador y Fotos editadas en Canva
All photographs are my property.
Photos edited in Canva
Posted Using INLEO
You definitely made a cute Ocean Healer You achieved a tenderness in this character, ideal to replicate in various crafts for girls. It turned out beautiful. I congratulate you.
Muchas gracias, amiga! Me alegra que te haya gustado la idea que tuve para la sanadora del océano. Saludos 💕😊
¡Enhorabuena!
✅ Has hecho un buen trabajo, por lo cual tu publicación ha sido valorada y ha recibido el apoyo de parte de CHESS BROTHERS ♔ 💪
♟ Te invitamos a usar nuestra etiqueta #chessbrothers y a que aprendas más sobre nosotros.
♟♟ También puedes contactarnos en nuestro servidor de Discord y promocionar allí tus publicaciones.
♟♟♟ Considera unirte a nuestro trail de curación para que trabajemos en equipo y recibas recompensas automáticamente.
♞♟ Echa un vistazo a nuestra cuenta @chessbrotherspro para que te informes sobre el proceso de curación llevado a diario por nuestro equipo.
🥇 Si quieres obtener ganancias con tu delegacion de HP y apoyar a nuestro proyecto, te invitamos a unirte al plan Master Investor. Aquí puedes aprender cómo hacerlo.
Cordialmente
El equipo de CHESS BROTHERS
Muchas gracias por el apoyo amigos 💕