New Greenhouse Built on the Run A Muck Homestead Farm!
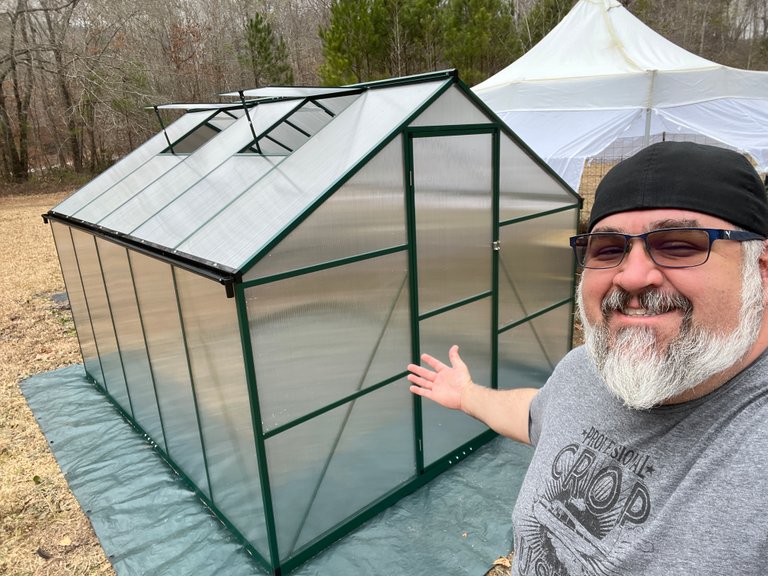
I feel accomplished! Finally got the greenhouse I have been wanting for the @run-a-muck-farms homestead farm! The one I got last year was a bit on the cheap side I would say, certainly compared to this one! But look at it... Isn't it pretty? But it didn't come to the farm like this, it was a bit of a task to get the thing built, especially with the garbage instructions that came with it, lol.
Getting it all laid out

This greenhouse was purchased from Amazon, so there was 'some assembly required'. I would say so, lol. It came in 2 boxes. One had all of the framing and hardware, and the other carried all of the panels. So with the help of my mother we got everything all laid out so we could easily find what we needed.
Her job was to organize and find me parts based on the instructions and mine was to decipher those instructions and materialize the structure, lol. Bless her heart, she thought she was helping way more than she was, lol. But at least I am keeping her busy, she's been going a bit nuts since Dad passed and she retired, pretty much all at the same time, so I am putting her to work helping me, haha.
It all starts with a base
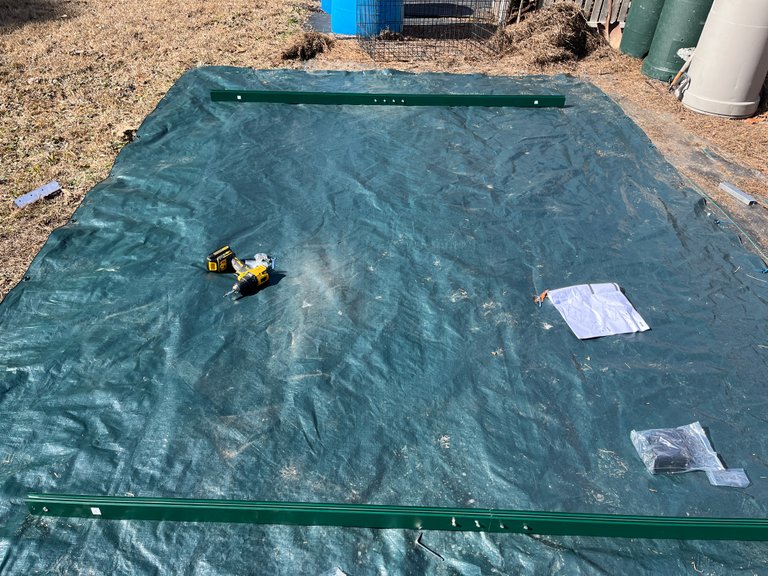
Started out getting the ground prepped. I tossed the old greenhouse out of the way and cleaned up some of the old pine straw I had as mulch, then laid out a tarp I had that was the perfect size for the job. Then got the first pieces and started to lay out and put the frame together.
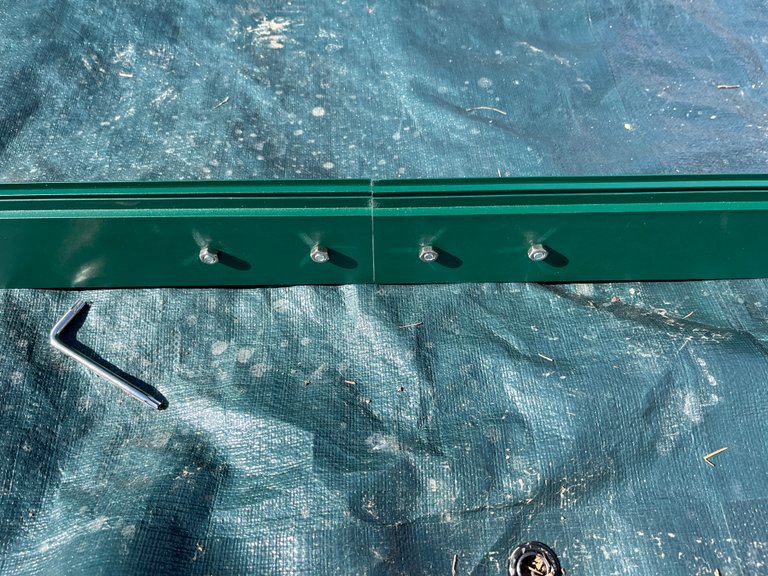
Once I got all the frame pieces put together the next step, which I didn't get any pictures of were to attach some corner angled pieces that ended up being spikes that I drove into the ground for security. They are pretty study too, so I have no fears about this thing collapsing or blowing away. I mean my cheap ass greenhouse withstood 2 hurricanes this year, so this one should be able to handle quite a bit, haha.
Then the walls started to raise
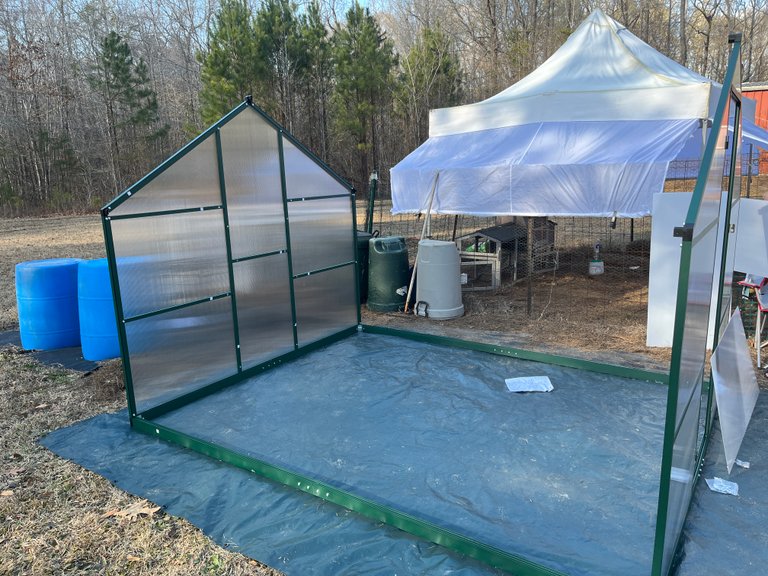
Once the frame got started, it was pretty easy to figure out how the first walls were going to start coming together. Mom, well, thought she was helping, and was busy peeling film off of the plastic wall panels, but that turned out to be the UV protection film... God love her, lol. But she found some rolls of that film tape, so I'll have another project one day in the next week or two, lol.
It didn't take a lot of time to get the rest of the walls up, but the roof part was a whole other story and a trip to Lowes for some M6 nuts that Mom had lost or we thought they didn't send enough of, well, she of course found them as I was pulling back in the driveway from wasting an hour of daylight, so a bit pissed off at that point, I just stopped for the night as it was getting too dark to work and read the instructions. So I came back to it not the next day, because that was drone day, but on Monday.
Back to work
So on Monday I got back at it getting the rest of the roof put on which once I figured it out, didn't take long at all. The biggest pain in the arse were the vent panels.
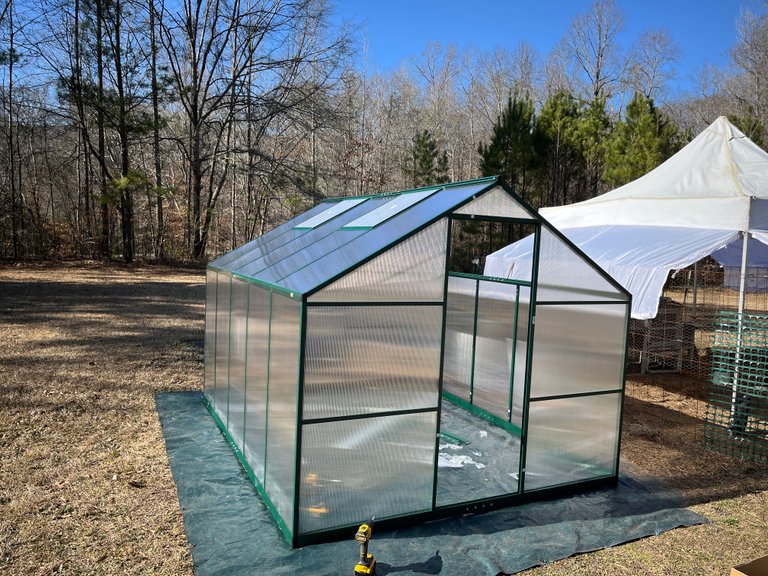
This was when it all started to feel like it was coming together. I got both sides of the roof panels all finished up and man, it is really looking nice!
Finishing touches
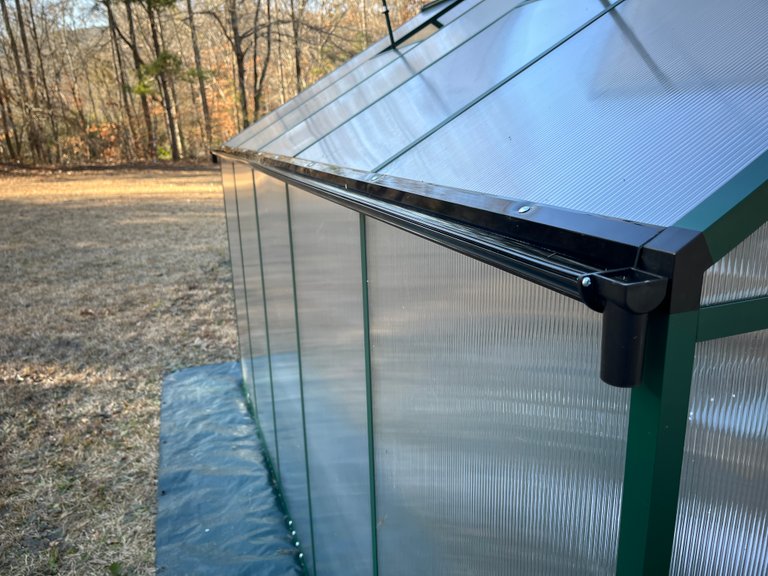
Once the roof was finished, I got the door put together pretty fast and then started on all of the little finishing touches. One of those pieces was the gutter system that I think is awesome. It tied the wall and roof panels together and sealed that part up nicely. They have little hose ends on each side, so I will be engineering a little rain catching system for sure!
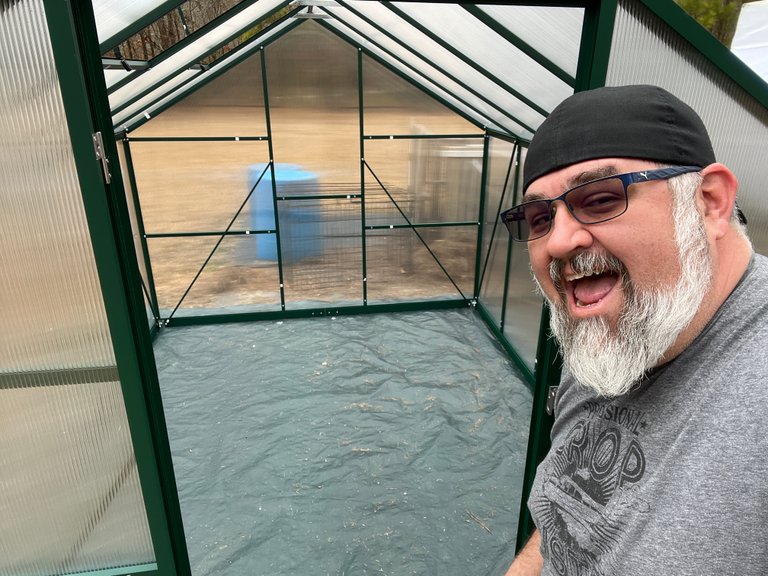
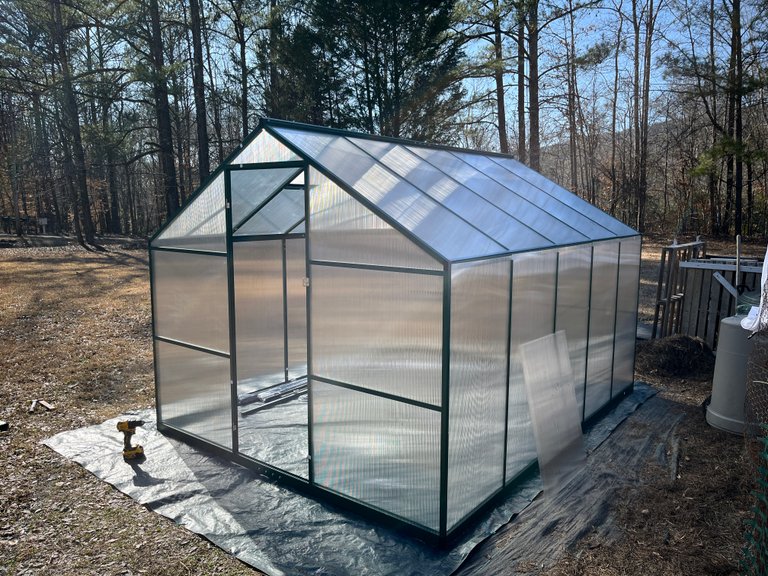
Once that was up, I got all of the inside bracing put up so it's all tied together and seriously not going anywhere! This thing is real nice and sturdy! I am really excited about what this greenhouse is going to allow me to grow here on the homestead! Now to get all my cool GroLogic Solutions 3D printed hydroponics gear and self watering pots in here and growing! It's time to get those early season seeds starting, and since I have this awesome space, I don't have to worry about frost and such!
I have also figured out a cool way to recycle my old greenhouse, but that will be a whole other post!
I am going to reblogging this post from the Run A Muck Farms account here on Hive as well as tagging it as a beneficiary in the post to start building up that account. I do plan on eventually building up that account as well. So if you only want to see homestead content like this from me, then go follow that account!
Until next time...
Be cool, be real, and always abide with you my dudes!

Posted Using INLEO
Congratulations @thelogicaldude! You have completed the following achievement on the Hive blockchain And have been rewarded with New badge(s)
Your next target is to reach 10000 replies.
You can view your badges on your board and compare yourself to others in the Ranking
If you no longer want to receive notifications, reply to this comment with the word
STOPCheck out our last posts:
Time to pop some beans
I am trying to avoid beans, lol. We'll probably end up growing some at some point though, lol.
Nice job ! It's the bigger brother of the one I put together last spring - basically the same thing but ours is only two side panels wide. It survived the windy winter we've just had really well, although the panels all got filled with condensation. Also yes, the vent windows are a pain in the a$$.
I'd definitely suggest putting some fine wire mesh into the gutter ends, they seem to act as natural debris-collectors for leaves, pine needles and whatever else blows around the garden.
I look forward to seeing posts about what you grow in it !
!BBH
Posted using The BBH Project
that makes a ton of sense… I will do that.