🎨 {26/05/25} ✦ 𝐓𝐮𝐭𝐨𝐫𝐢𝐚𝐥: ✨ 🛍 🪡 Learn how to REPAIR totebag handles in 10 MINUTES! 🪡 🛍 ✨ ✦ 🇪🇸 │ 🇺🇸
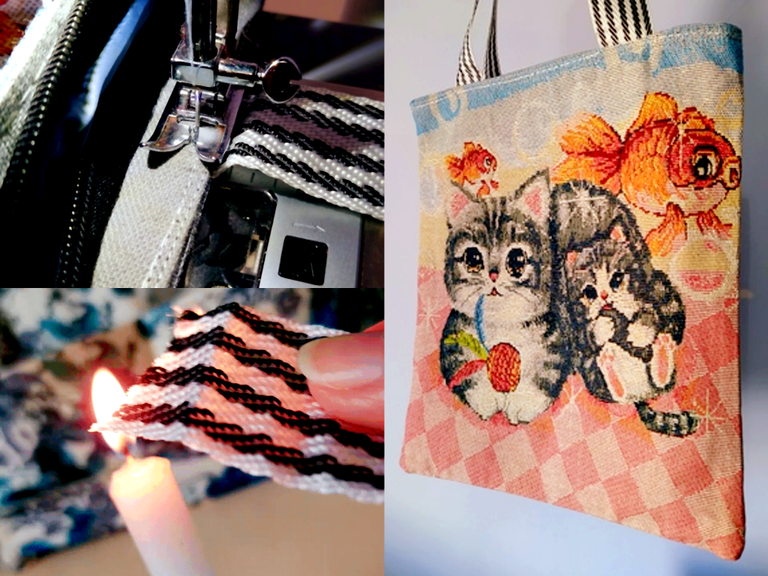
✦ Express and effective solutions for something that has probably happened to all of us! - Collage & Edition in FotoJet-Canvas, photo by @Tesmoforia ✦

🇪🇸 ~ Una vecina muy linda me escribió la semana pasada por esta pequeña emergencia:
Compró este tote de gatitos súper lindo PERO al llegar a casa y probarlo se rompió en el acto (ಠ_ಠ)
Este escenario no es extraño hoy, hay mucha mercancía "bonita e económica" por la ya conocida tendencia del fast-fashion, que no solo se queda en el sector de la moda sino tambien en la de accesorios.
🇺🇸 ~ A very cute neighbor wrote to me last week about this little emergency.
She bought a super cute kitten tote, but when she got home and tried it on, it broke instantly (ಠ_ಠ)
This scenario is not uncommon. There is a lot of "cute and cheap" merchandise because of the well-known fast-fashion trend, which extends beyond the fashion sector to the accessories sector.

✦ It makes me tender when someone who doesn't know you are a cosmaker asks you if you can fix something (let's pretend madness) ✦
Estos totebag por ejemplo son realmente lindos y siendo objetiva el material base NO es malo, pero veras, la costura es de un hilo de fibra extra económico y la costura es muy abierta, la combinación ideal para el desastre.
¿Te recomiendo entonces no invertir tu dinero en estas ofertas de totebags lindos en 3$?, ¡CLARO QUE NO!, compra todos los que quieras y aquí te enseñaré cómo reforzarlo para extender su tiempo de vida util 乁 (• ω • 乁)
⏳ Tiempo: ⭐/ 5.
🚀 Dificultad: ⭐/ 5.
🪙 Costo aproximado: ⭐/ 5.
These tote bags, for example, are really nice. Being objective, the base material is not bad. However, the stitching is made of cheap fiber thread, and the seam is very open—the ideal combination for disaster.
I recommend you then not to invest your money in these $3 totebag deals, OF COURSE NOT, buy as many as you want and here I'll show you how to reinforce it to extend its lifespan 乁 (• ω • 乁)
⏳ Time: ⭐/ 5.
🚀 Difficulty: ⭐/ 5.
🪙 Approximate cost: ⭐/ 5.

« 𝕋 𝕆 𝕆 𝕃 𝕊 • 𝔸 ℕ 𝔻 • 𝕄 𝔸 𝕋 𝔼 ℝ 𝕀 𝔸 𝕃 𝕊 »

✦ I owe you the photo of the materials because as the cover says this was an emergency mode project ✦
| 🇺🇸 ✦ The tools and materials you need to make this project are: Pen, pencil, fabric scissors, candle, lighter, sewing machine or regular needles, colored thread, seam ripper, ruler, small pins. |
|---|
| 🇪🇸 ✦ Las herramientas y materiales que necesitas para elaborar este proyecto son: Bolígrafo, lápiz, tijeras para tela, una vela, encendedor, maquina de coser o agujas regulares, hilos de colores, saca costura, regla, alfileres pequeños. |
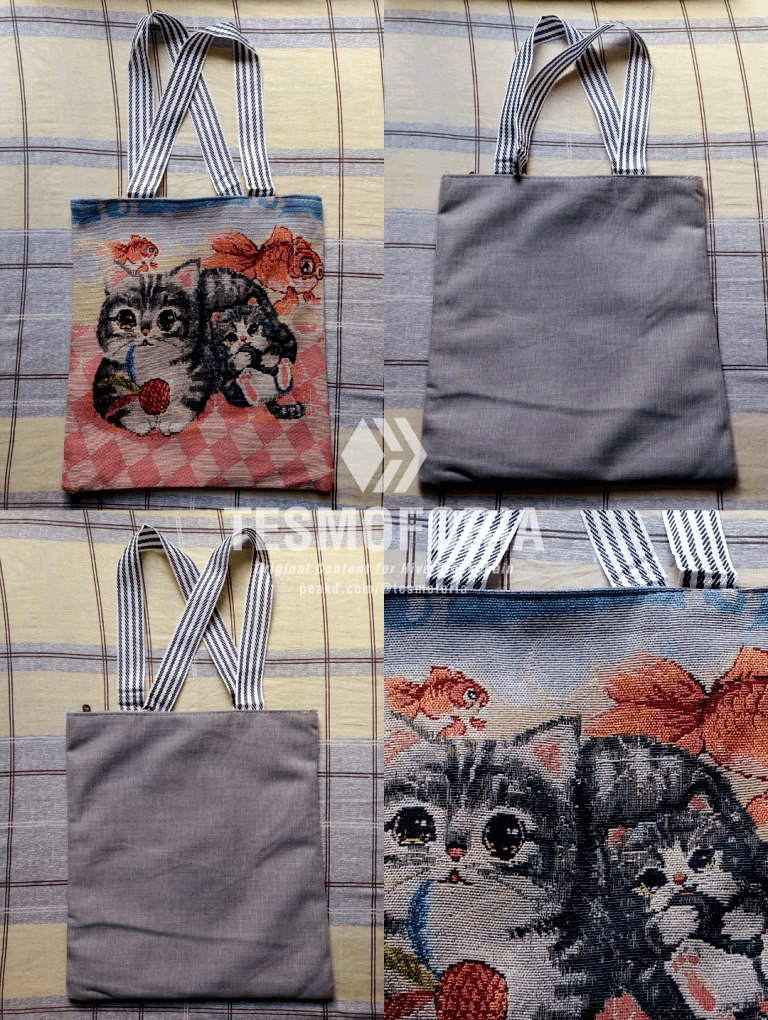
« "How to REPAIR totebag handles in 10 MINUTES!" »

✦ The measurements are standard so it is not a bag that you can put too much weight in ✦

✦ Obviously if you filled it with clothes it was bound to break, but we're going to fix that ✦

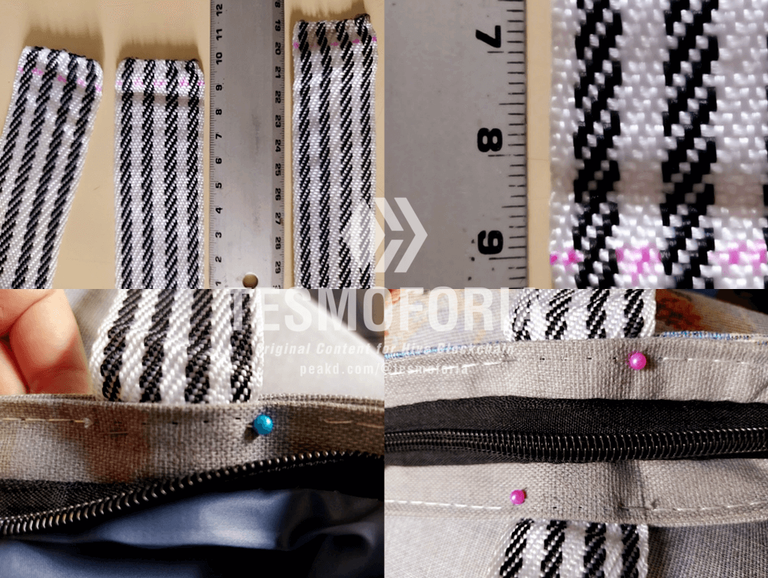
【 PASO 1 】 Revisa todo el bolso en busca de todos los daños. En este caso el material del aza se deshilacho asi que hay que hacer una instalación nueva completa (suena mas complicado de lo que es, tranquilo).
【 STEP 1 】 Check the entire bag for any damage. In this case, the material of the handle is frayed, so a complete new installation has to be done (it sounds more complicated than it is, don't worry).
✦ These marks will help you at the stage of the new installation of the handles ✦
✦ There is a lot of damage, a lot of cutting to be done ✦
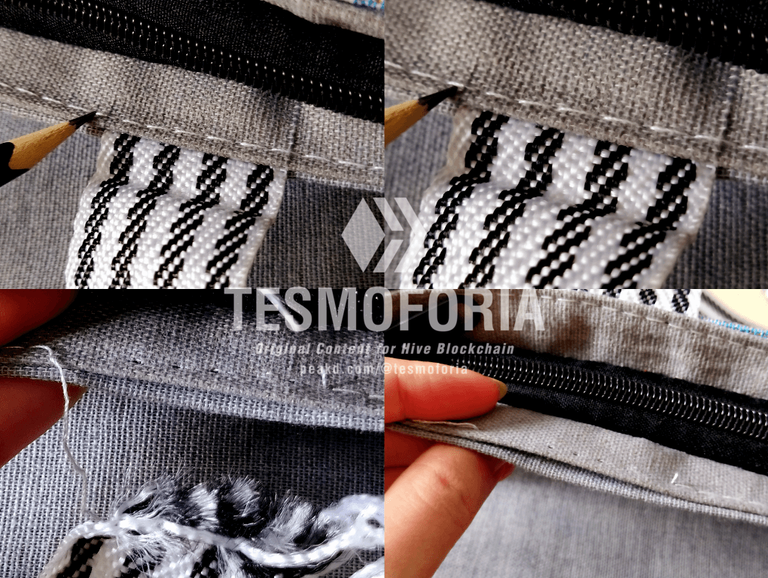
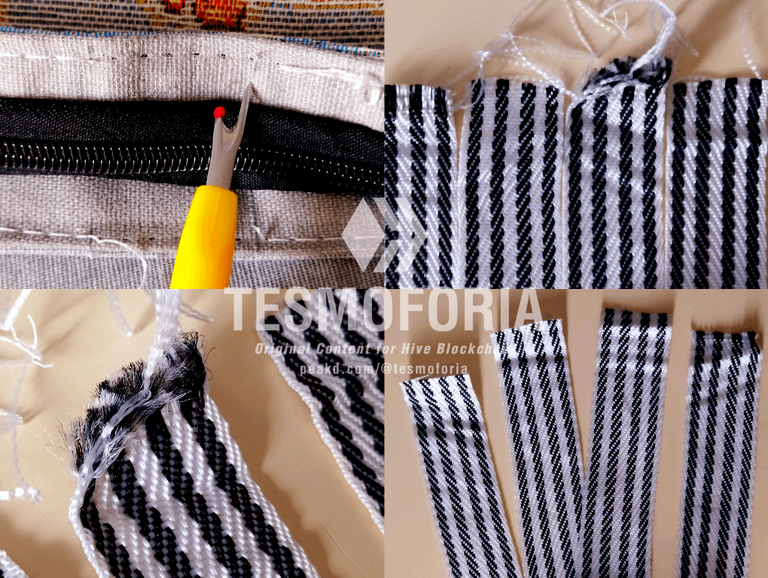
【 PASO 2 】 Marca con el lápiz el lado izquierdo y derecho de la entrada de cada agarradera. Busca el saca hilo y rompe con cuidado esas costuras sin pasarte, solo lo necesario para dejar salir las agarraderas. Examina el daño en las fibras y corta la parte deshilachada con un corte recto.
【 STEP 2 】 Mark with the pencil the left and right side of the entrance of each handle. Find the thread puller and carefully break those seams without going overboard, just enough to let the handles out. Examine the damage to the fibers and cut the frayed part with a straight cut.
✦ Pass slowly and several times to one side of the flame the ends of each handle until you notice that the material melts a little. BE VERY CAREFUL BECAUSE BURNT PLASTIC IS HOT AS HELL ✦
✦ When it cools, you will see that a fairly resistant “crust” forms ✦
【 PASO 3 】 Ubica la vela en un pequeño plato, enciéndela, y con ayuda de la flama sella los extremos de todas las agarraderas. Fíjate en el movimiento del gif como ejemplo y ten mucho cuidado, presta atención.
【 STEP 3 】 Place the candle on a small plate, light it, and with the help of the flame seal the ends of all the handles. Look at the movement of the gif as an example and be very careful, pay attention.
✦ You can make new straps with other material but this is a good way to recycle the original handles if you don't mind them being a little shorter ✦
✦ Bring the camera closer Mr. Director :3 ✦
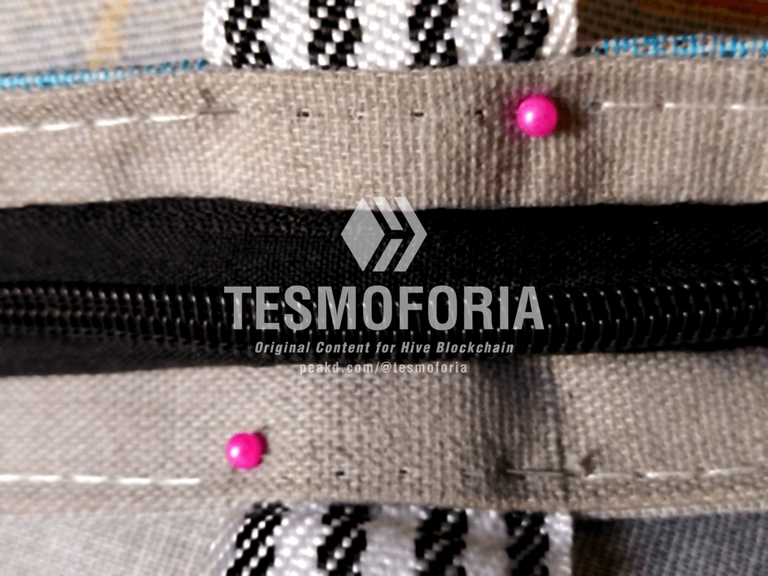
【 PASO 4 】 Marca un margen de 1 cm al final de cada agarradera, introduce esa sección en el bolso respetando las marcas de lápiz que hiciste, sujeta en su lugar con los alfileres.
【 STEP 4 】 Mark a 1 cm margin at the end of each handle, insert that section into the bag respecting the pencil marks you made, pin in place with the pins.
✦ We will reinforce with 3 new seams ✦
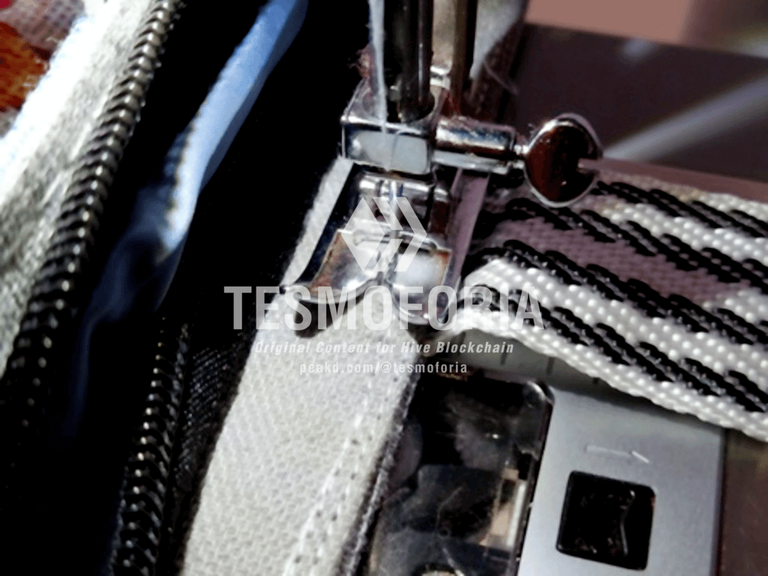
✦ Use a small stitch no larger than number 3 ✦
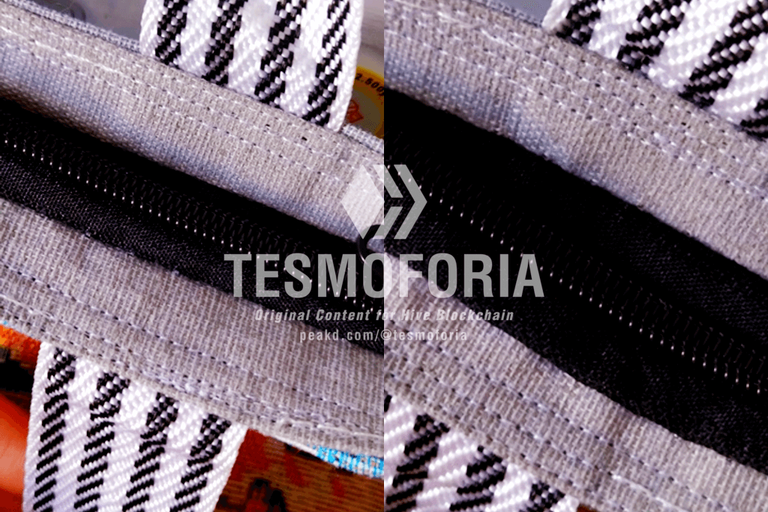
✦ Full repair ✦
✦ You can also make an extra seam in the shape of an X, but I didn't want to affect the kitten pattern ✦
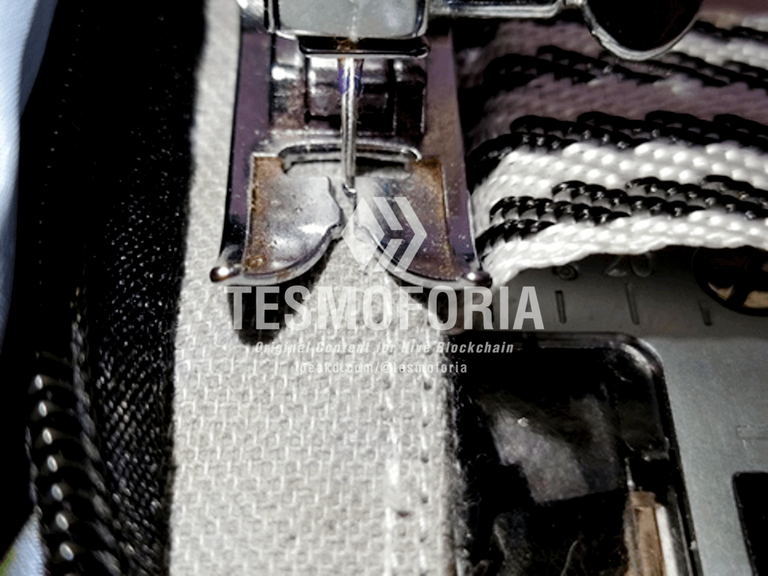
【 PASO 5 】 Lleva el bolso a la máquina de coser con una puntada recta número 2 o 2.5, recomiendo hacer de 2 a 3 costuras con una distancia de 0.5 cm.
【 STEP 5 】 Take the bag to the sewing machine with a straight stitch number 2 or 2.5, I recommend making 2 to 3 seams with a distance of 0.5 cm.
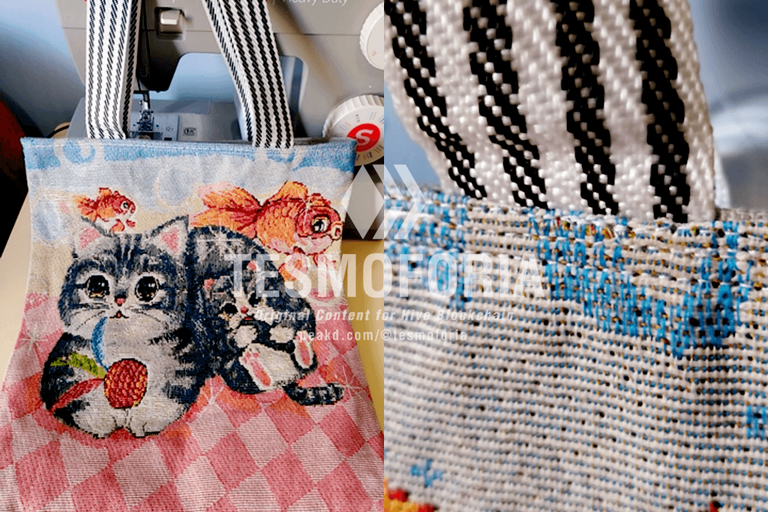
« Kitty shopping bag repaired in record time! »

✦ I would add some white lace and some bows, but it's not bad ✦
Lo que hace diferente este método de reparación comparándolo con otros es que al quemar los extremos de las agarraderas su fibra no volverá a deshilacharse, con el tiempo si las puntadas de seguridad seden, la parte de plastico derretiro funcionará como contención contra las costuras. ¿Es genial cierto? 💅 💖
What makes this repair method different from others is that by burning the ends of the handles, your fiber will not fray again. If the safety stitches come out over time, the melted plastic part will function as a containment against the seams. Great, right? 👌 💖


 |  |  |  |  |  |  |  |  |
|---|
✨ 🍓 All texts and images by @Tesmoforia 🍓 ✨
📸 Tools: Smartphone 📲 Snow 🎬 Remini 🌓 FotoJet 📐
🚨 ¡Please do not take, edit or republish my material without my permission! 🚨
💌 ¿Do you wish to contact me? Discord #tesmoforia 💌
🌙 Banner, signature and separators by Keili Lares - InstaLog
Posted Using INLEO
Sencillo y súper cute, justo como lo queremos muchas veces para ir a algún lado sin complicaciones y de seguro siempre destacará. Amo tus creaciones @tesmoforia