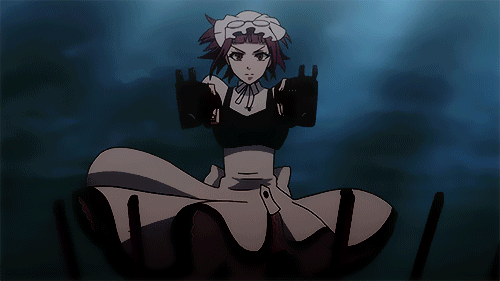
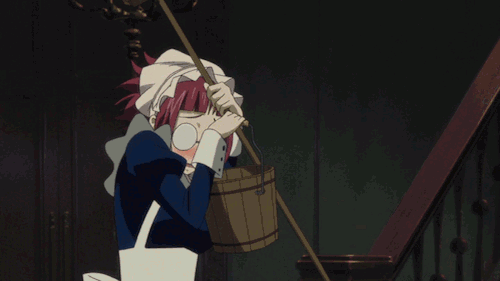
🧵 {14/09/24} ✦ [COSPLAY] 🕸 🌹 🌓 Mey-Rin「メイリン」Headdress from Kuroshitsuji 🌓 🌹 🕸 + "How to work on a Cosplay commission?" 👘 🪡 [TUTORIAL] ✦ 🇪🇸 │ 🇺🇸
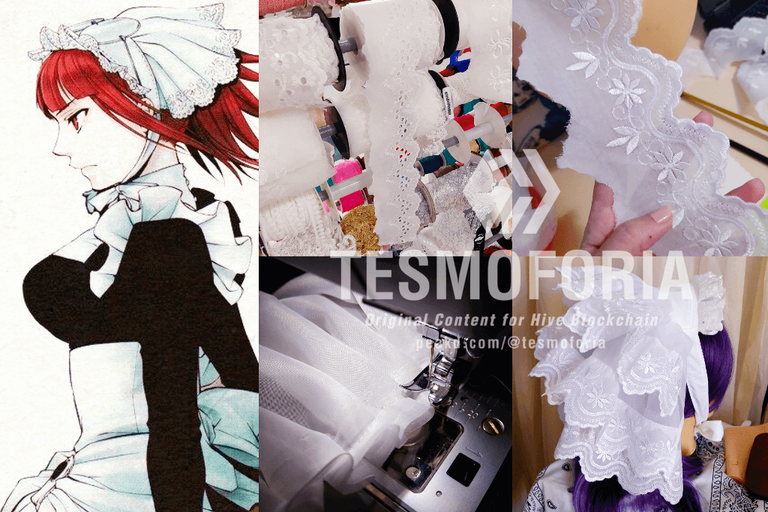
✦ Let's elevate the concept of a cosplay piece to be absolutely gorgeous! - Fuente - Collage & Edition in FotoJet, photos by @Tesmoforia ✦

🇪🇸 ~ ¿Qué es una comisión de Cosplay?, es cuando una persona encarga la fabricacion de una o más piezas de un traje Cosplay a un Cosmaker-Propmaker.
¿Es difícil trabajar comisiones de Cosplay?, ¡para mi sí!, aunque sé coser y sé fabricar props, mis niveles de stress se disparan porque no aceptare entregar algo menos que perfecto a la persona que me contrate.
Para mi es muy importante que la persona este feliz y satisfecha con su comisión, eso significa mantener una alta comunicación de calidad para comprender la visión del cliente, que la selección de material sea coherente y los tiempos, ¡respetar los tiempos de entrega es vital!.
Muchos Cosplayers que trabajan con marcas o manejan compromisos publicitarios comisionan sus trajes a artistas textiles o artistas plásticos, un atraso en la entrega de la indumentaria puede tener grandes repercusiones en la agenda/ruta de producción de todo un proyecto o una empresa.
Por temas de salud y tiempo (y la inestabilidad del servicio eléctrico y de agua en mi ciudad) no acepto comisiones de Cosplay, pero muy, muy de vez en cuando, acepto fabricar accesorios específicos de Cosplay.
🇺🇸 ~ What is a Cosplay commission?: It is when a person commissions a Cosmaker-Propmaker to make one or more pieces of a Cosplay costume.
Is it difficult to work on Cosplay commissions?: For me it is, even though I know how to sew and I know how to make props, my stress levels go through the roof because I will not accept to deliver something less than perfect to the person who hires me.
For me it is very important that the person is happy and satisfied with their commission, that means maintaining high quality communication to understand the client's vision, that material selection is consistent and timing, respecting delivery times is vital!
Many Cosplayers who work with brands or handle advertising engagements commission their costumes to textile artists or fine artists, a delay in the delivery of apparel can have major repercussions on the schedule/production route of an entire project or company.
Due to health and time issues (and the instability of electricity and water service in my city) I do not accept Cosplay commissions, but very, very occasionally, I do accept to make specific Cosplay accessories.
✦ This lovely Cosplayer from my city sent me references of what she wanted and asked so politely if I could make this for her, that I couldn't refuse! She really is my perfect type of customer because her attitude is A1! ✦

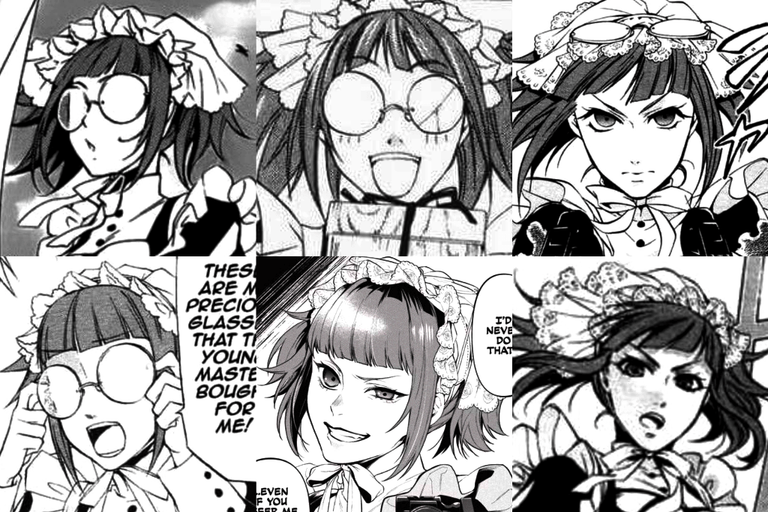
Sin embargo hace unos meses una compañera Cosplayer de mi estado me preguntó si podía fabricar un complemento para su Cosplay de Mey-Rin de la serie Kuroshitsuji.
Al ser algo tan puntual y sobre todo una pieza de diseño tan bonita fue muy difícil decir que no, pero por sobre todo, Tenshi es una señorita muy preciosa y educada, es la clase de personas con la que da gusto trabajar; la verdad sea dicha, tengo poca tolerancia con las personas groseras.
Ella me explicó lo que quería y concordamos en que la headdress de su versión de Mey-Rin debía hacer match con el material que había sido usado para el vestido, que la caída fuera en multicapas en una tela suave, y que fuera muy hermoso o dramático, pero sin sacrificar la elegancia.
However a few months ago a fellow Cosplayer from my state asked me if I could make an accessory for her Cosplay of Mey-Rin from the Kuroshitsuji series.
Being something so timely and above all such a beautiful piece of design was very difficult to say no, but above all, Tenshi is a very beautiful and polite lady, is the kind of people that is nice to work with; truth be told, I have little tolerance for rude people.
She explained to me what she wanted and we agreed that the headdress for her version of Mey-Rin should match the material that had been used for the dress, that the drape should be multi-layered in a soft fabric, and that it should be very beautiful or dramatic, but without sacrificing elegance.

« 𝕋 𝕆 𝕆 𝕃 𝕊 • 𝔸 ℕ 𝔻 • 𝕄 𝔸 𝕋 𝔼 ℝ 𝕀 𝔸 𝕃 𝕊 »
 |
|---|
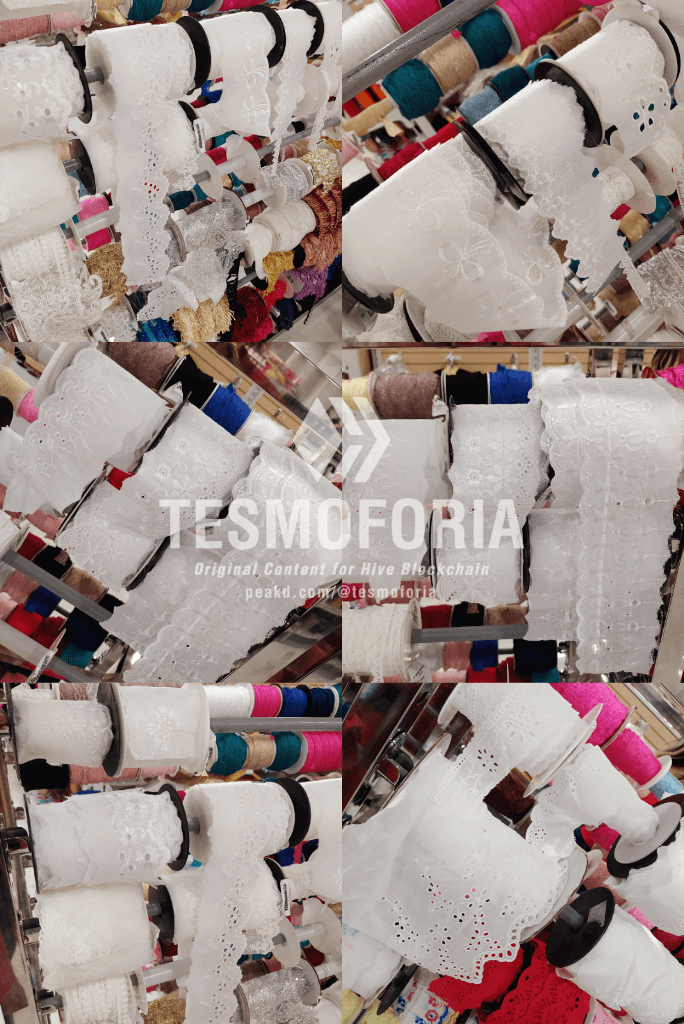
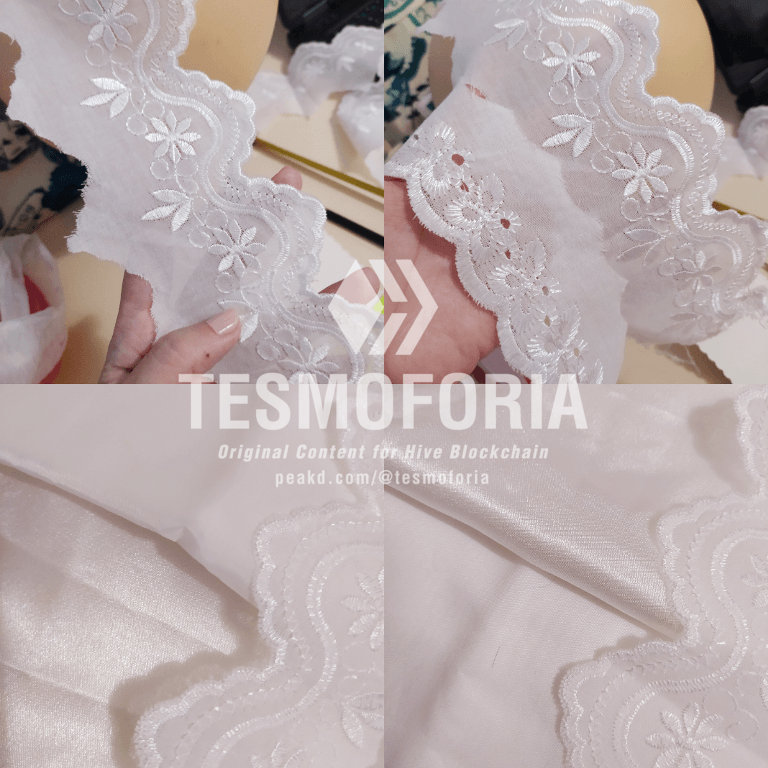
| 🇪🇸 ✦ Las herramientas y materiales que necesitas para elaborar este proyecto son: Hilo blanco, aguja regular, tul blanco semi traslucido, tijera, alfileres, pinzas de costura, plancha para ropa, tela blanca, papel para patronar, lápiz, cinta métrica, regla, máquina de coser, encaje bordado en hilo de diferentes anchos, pinzas de metal para cabello, cabeza de maniquí y peluca (opcional). |
| 🇺🇸 ✦ The tools and materials you need to make this project are: White thread, regular needle, white semi-translucent tulle, scissors, pins, sewing clothespins, clothes iron, white fabric, pattern paper, pencil, tape measure, ruler, sewing machine, embroidered lace in different widths of thread, metal hair clips, mannequin head and wig (optional). |
• ℂ 𝕆 𝕊 ℙ 𝕃 𝔸 𝕐 • 𝔸 ℂ ℂ 𝔼 𝕊 𝕊 𝕆 ℝ 𝕐 •
« 𝙼𝚊𝚒𝚍 𝙲𝚘𝚜𝚝𝚞𝚖𝚎 𝙷𝚎𝚊𝚍𝚍𝚛𝚎𝚜𝚜 𝚏𝚛𝚘𝚖 𝚝𝚑𝚎 𝙺𝚞𝚛𝚘𝚜𝚑𝚒𝚝𝚜𝚞𝚓𝚒 𝚜𝚎𝚛𝚒𝚎𝚜 »
 |  |  |
|---|
✦ This is a tutorial and recap of the creative process and interpretation of what this accessory looks like to me if it were real life, but with a little more glamour and drama -1 - 2 - 3 ✦


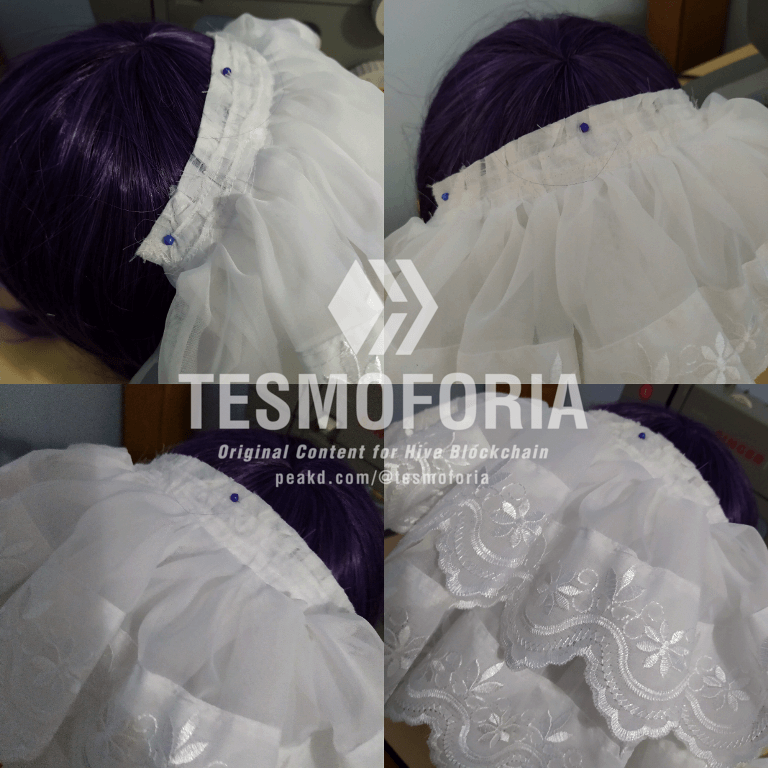
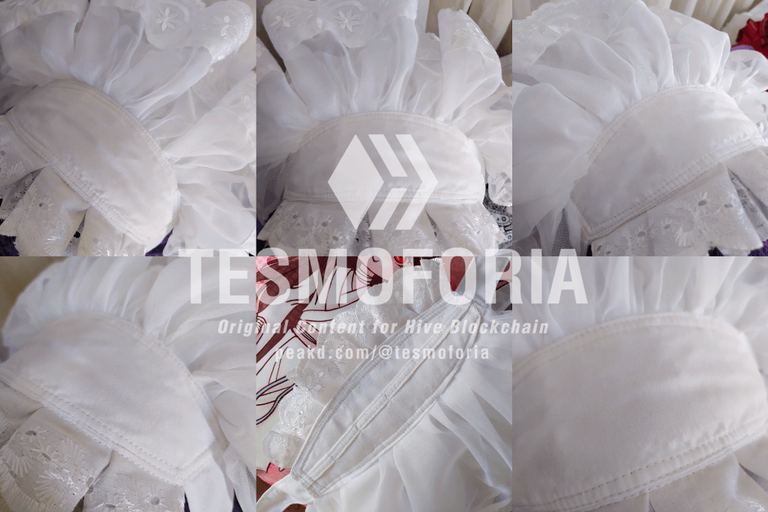
【 PASO 1 】 Primero vamos a elaborar la base de la headdress, que consiste en un ovalo largo que debe medir la distancia máxima de oreja a oreja del cliente, pero restando unos 10 cm aproximadamente si el caso es que la persona utilizará coletas en su peluca. En este caso el largo fue de 20 cm de largo y entre 5 y 7 cm en su parte más ancha. Considera incluir los cm de costura en el patrón.
【 STEP 1 】 First we are going to elaborate the base of the headdress, which consists of a long oval that should measure the maximum distance from ear to ear of the client, but subtracting about 10 cm approximately if the person will use pigtails in his wig In this case the length was 20 cm long and between 5 and 7 cm in its widest part.

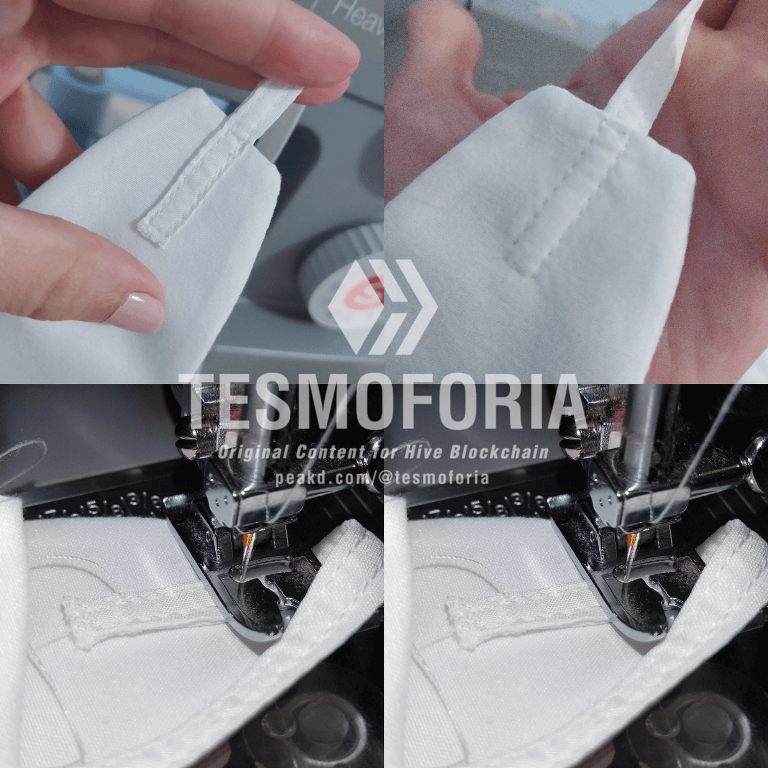
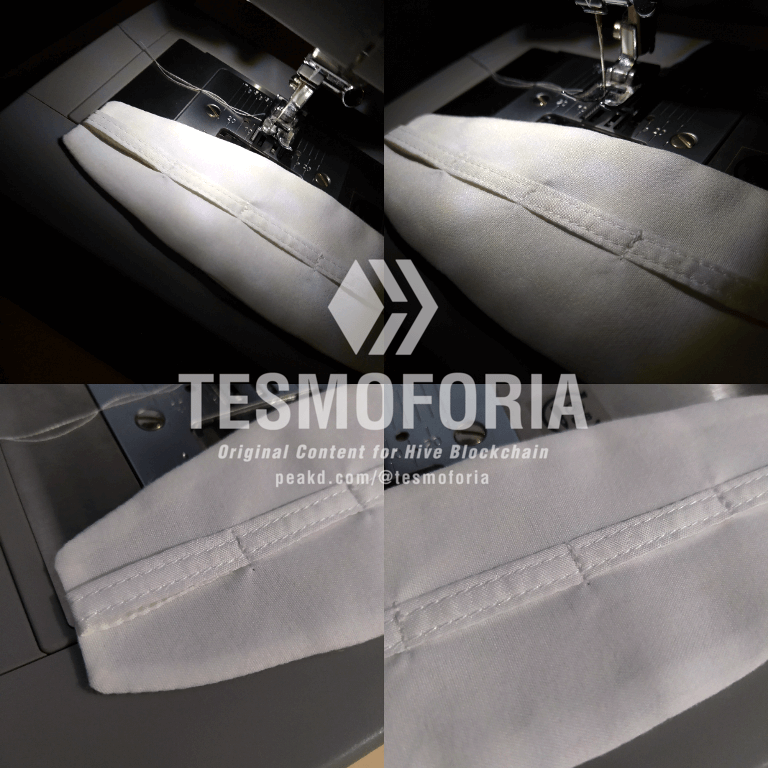
【 PASO 2 】 El siguiente paso es elaborar una tira de la misma tela, hacer doble costura sobre ella, y coserla sobre la primera base de tela que hemos hecho. Luego se cose sobre ella varias costuras de seguridad hasta obtener 6 casillas.
【 STEP 2 】 The next step is to make a strip of the same fabric, double stitch over it, and sew it over the first fabric base we have made. Then you sew over it several safety seams until you get 6 squares.
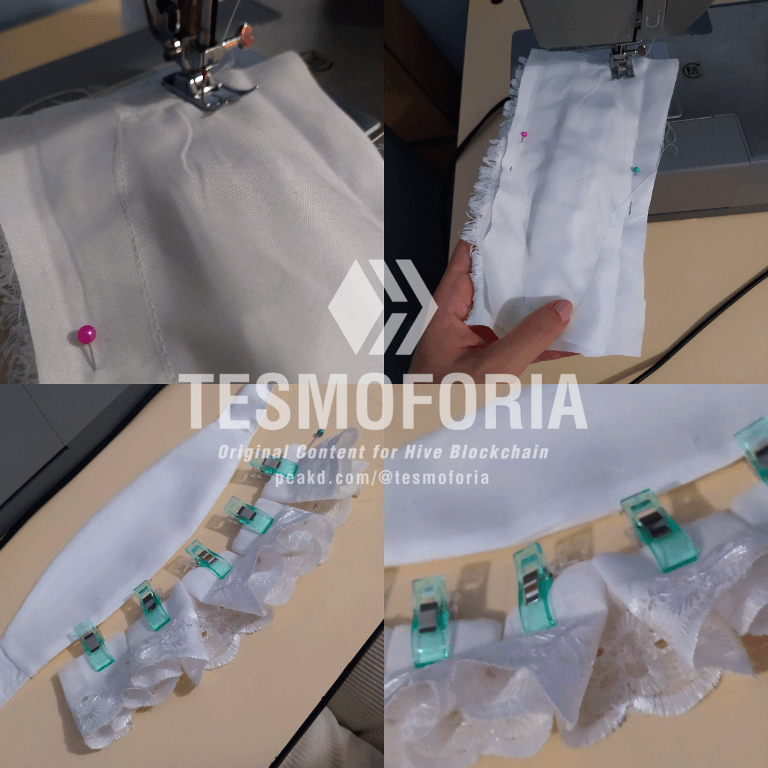
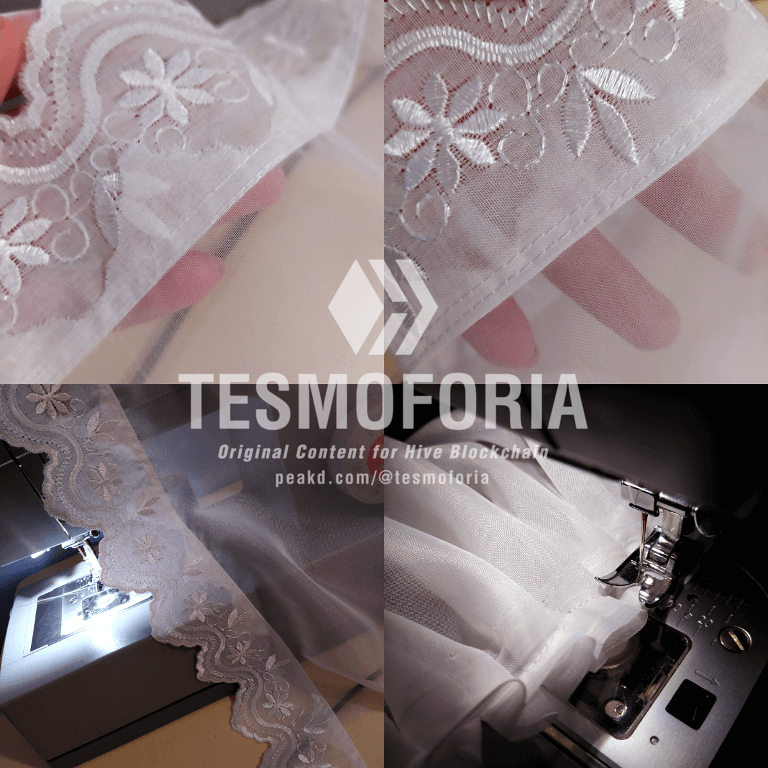
【 PASO 3 】 Vamos a elaborar en la misma tela una segunda base con el mismo principio del paso número 2, pero agregando cintas de no menos de 40 cm de largo en sus extremos. Luego voltea la pieza y plancha a alta temperatura. En base al largo de esta base antes de llegar a tocar las cintas de tela de los extremos, plisa la cinta de encaje que corresponde al frente de la headdress y sujeta con las pinzas de costura.
【 STEP 3 】 We are going to elaborate on the same fabric a second base with the same principle of step number 2, but adding ribbons of no less than 40 cm long at the ends. Then turn the piece over and iron at high temperature. Based on the length of this base before touching the fabric ribbons at the ends, pleat the lace ribbon that corresponds to the front of the headdress and fasten with the sewing clamps.
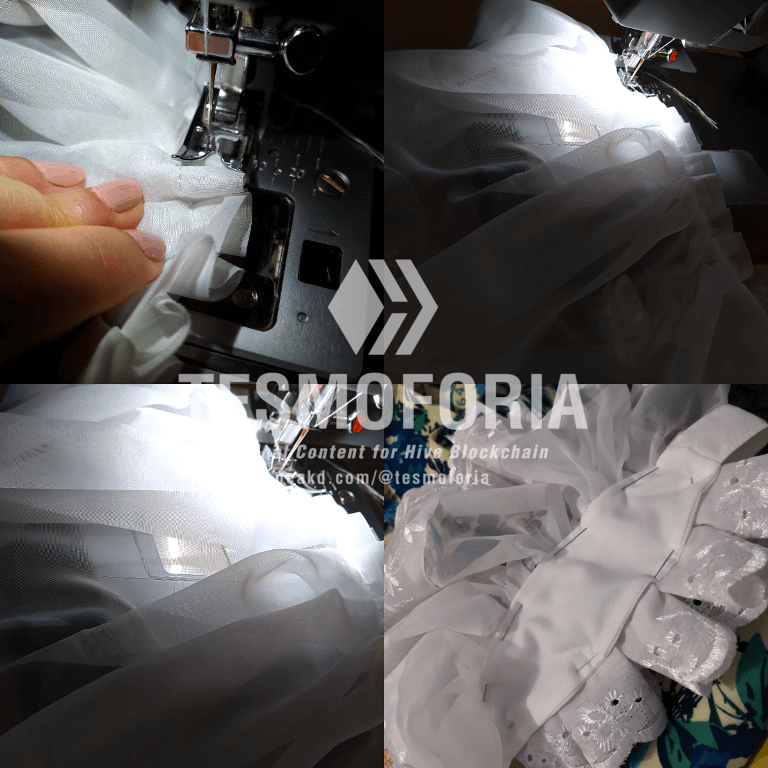

【 PASO 4 】 Para las capas de la parte posterior recorta 3 secciones de tela, de 5, 10, y 15 cm de ancho x no menos que 1.50 metros de largo. Cose a ellas el encaje de hilo decorado, y plisa con ayuda de la máquina de coser hasta obtener piezas de máximo 19 o 20 cm de largo (mira las imágenes de referencia). Coloca una sobre otra de la más pequeña a la más grande, y pruébalas en la cabeza de maniquí para comprobar que estén bien proporcionadas, si lo estan, únelas de forma permanente con costura n° 3.
【 STEP 4 】 For the layers of the back part cut out 3 sections of fabric, 5, 10, and 15 cm wide x no less than 1.50 meters long, sew the decorated thread lace to them, and flatten with the help of the sewing machine until you obtain pieces of maximum 19 or 20 cm long (see the reference images). Place one on top of the other from the smallest to the largest, and try them on the mannequin head to check that they are well proportioned, if they are, join them permanently with seam no. 3.
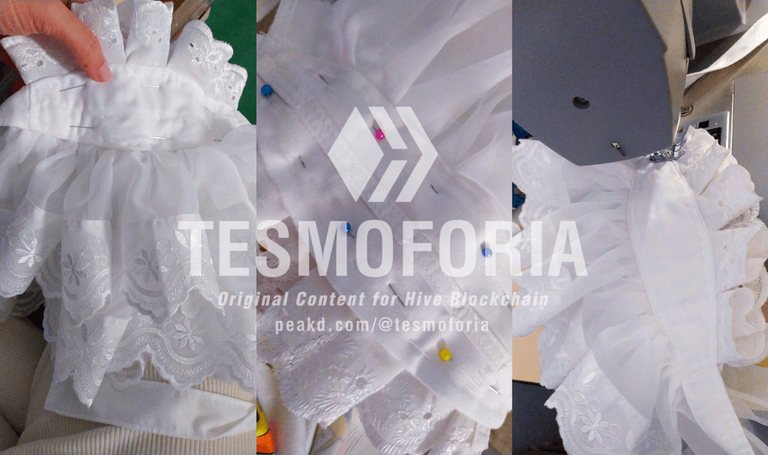
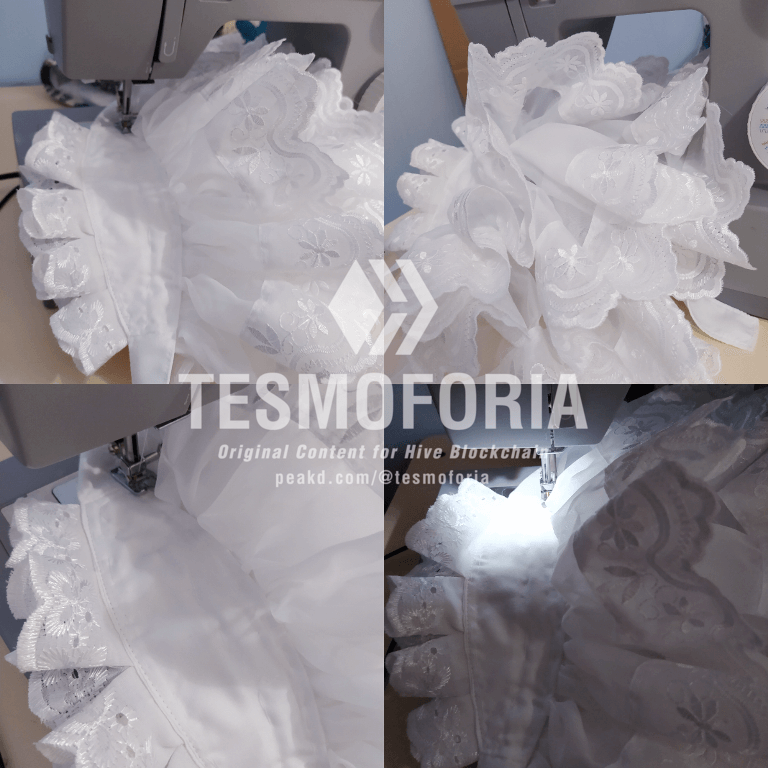
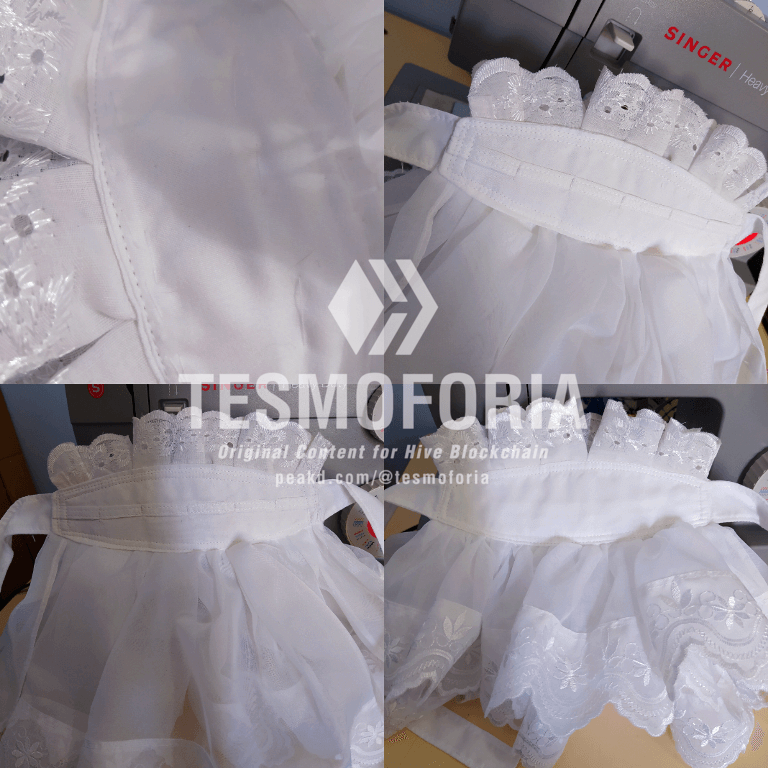
【 PASO 5 】 Une todo, literalmente, como si hicieras un emparedado. Encierra la pieza de encaje frontal que dejaste sujetada con las pinzas de costura en el paso n° 3, y la pieza de 3 capas que uniste en el paso n° 4 entre las 2 bases que de tela, centra y sujeta muy bien con los alfileres y lleva a la máquina de coser; cose 2 costuras en todo el margen interior de las bases de tela, lo más cercano que puedas al borde. ¡Y hemos terminado!.
【 STEP 5 】 Join everything together, literally, as if you were making a sandwich. Enclose the front lace piece you left pinned with the sewing clamps in step 3, and the 3-layer piece you joined in step 4 between the 2 fabric bases, center and pin very well and bring to the sewing machine; sew 2 seams all around the inside margin of the fabric bases, as close as you can to the edge. And we're done!.
« MAID COSPLAY HEADRESS TUTORIAL COMPLETED »
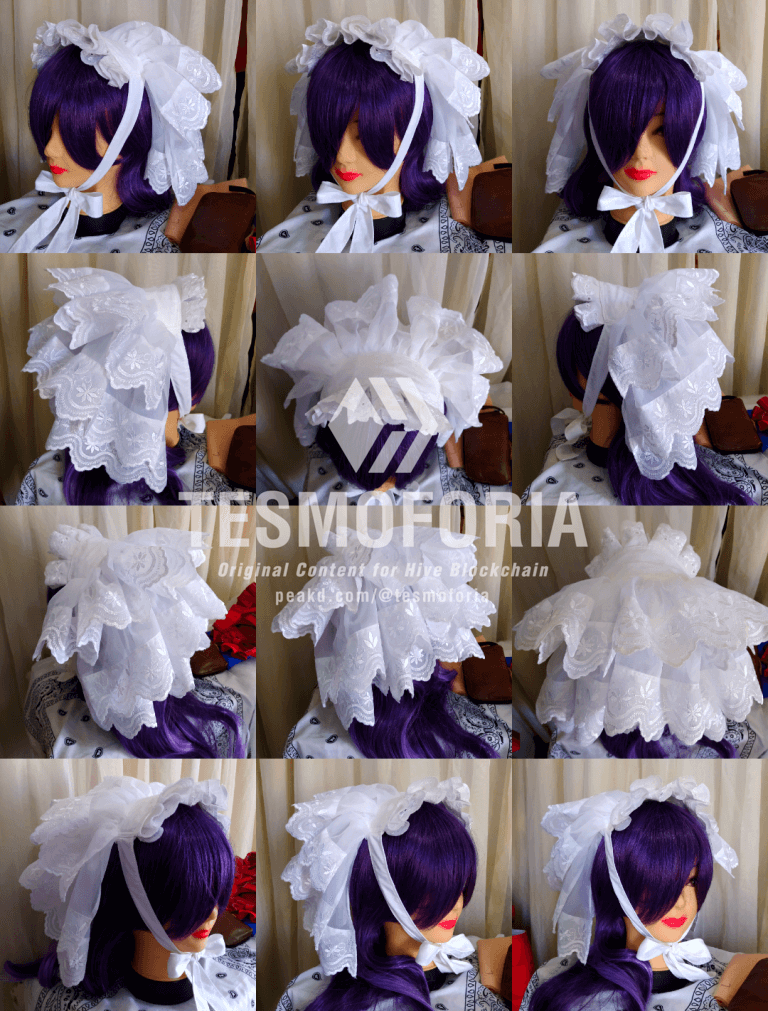
✦ General appearance from all perspectives ✦
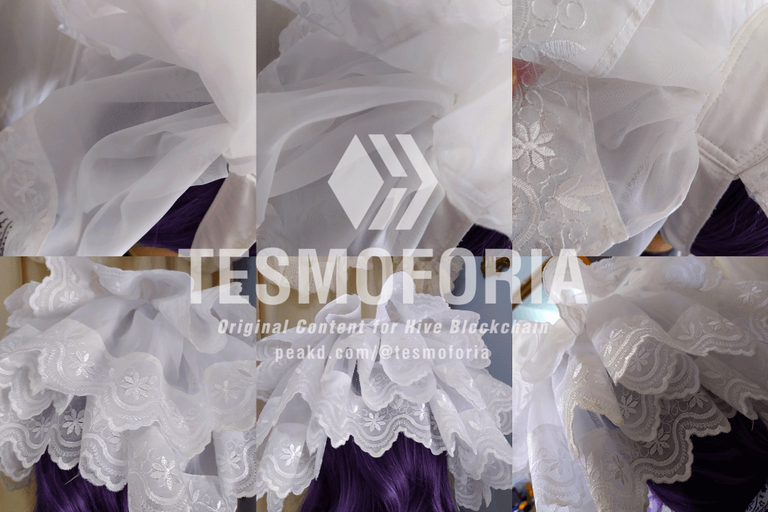
✦ Appearance of the three separate layers ✦
✦ ✨ Looks flawless ✨ ✦
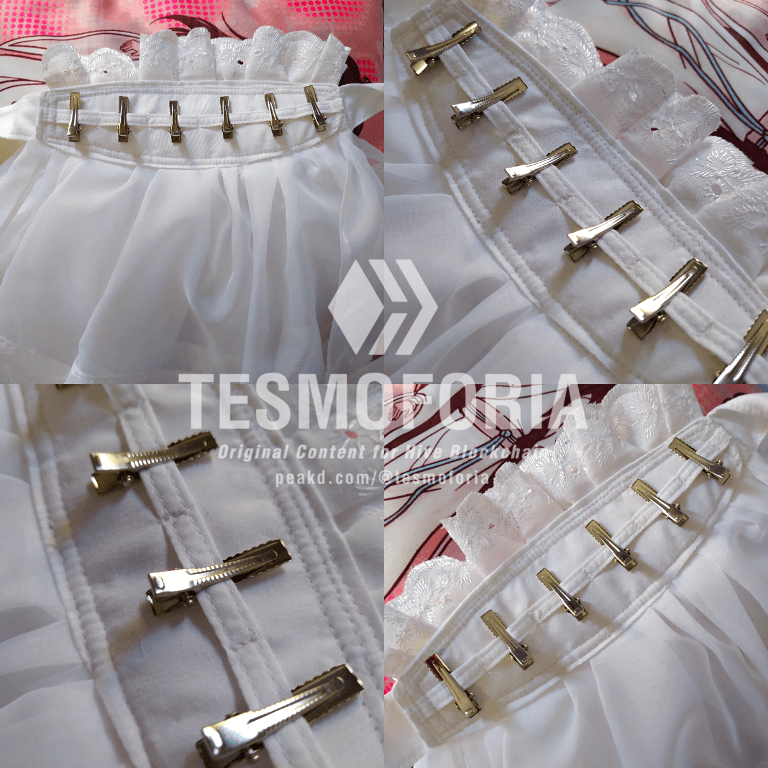
✦ Clamps are included in the cost of the accessory and are shipped with them in place ✦
« Happy ending for all »
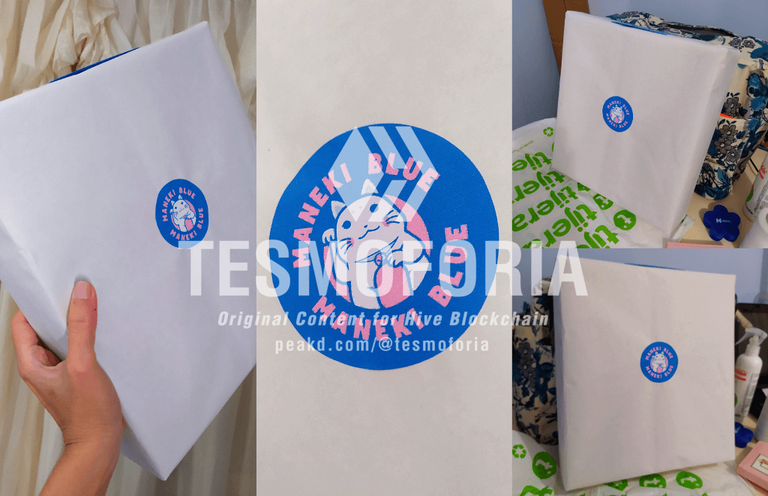
✦ I wrapped everything up with several security boxes and a few extra small gifts, Tenshi was a wonderful customer. By the way this is my store tag :3 ✦
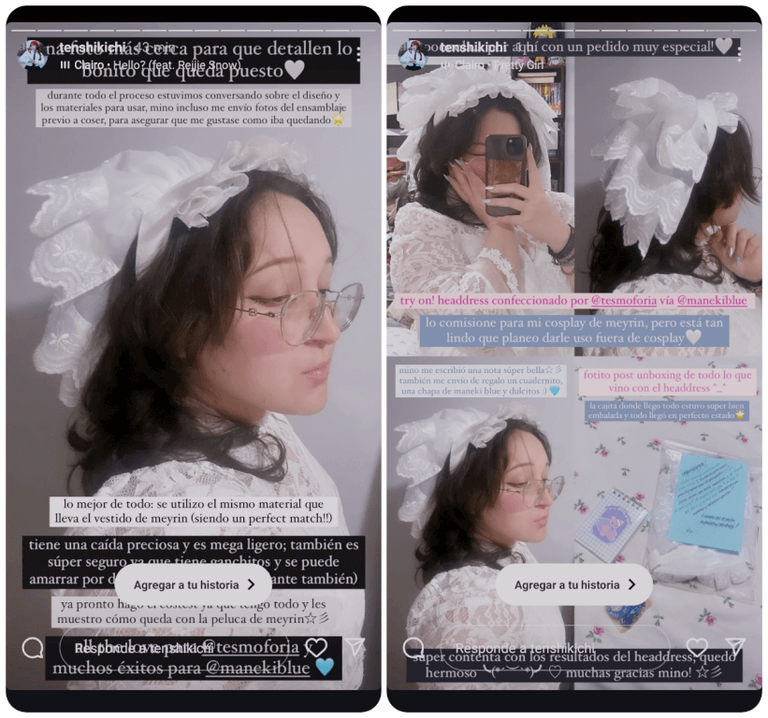
✦ Tenshi made some really cute instagram stories, her feedback was really adorable and I appreciate it with all my heart, she looks really beautiful! ✦


Espero hayas disfrutado este recorrido y si tienes alguna pregunta o comentario que quieras hacerme estaré feliz de leerte ('. • ω •.`) 👍
Este proyecto resulto muy bien y Tenshi me escribió cosas muy bonitas con sus impresiones del resultado de su comisión; felizmente anuncio que esta contenta con su headdress, y espero todo salga bien para ella y sus planes de Cosplay Grupal de Kuroshitsuji 🫂 💕
⏳ Tiempo: ⭐⭐⭐⭐/ 5
🚀 Dificultad: ⭐⭐⭐⭐/ 5
🪙 Costo aproximado: ⭐⭐⭐/ 5
I hope you enjoyed this tour and if you have any questions or comments you would like to ask me I will be happy to read them ('. • ω •.`) 👍
This project turned out very well and Tenshi wrote me very nice things with her impressions of the result of her commission; I happily announced that she is happy with her headdress, and I hope everything goes well for her and her Kuroshitsuji Group Cosplay plans 🫂 💕
⏳ Time: ⭐⭐⭐⭐/ 5
🚀 Difficulty: ⭐⭐⭐⭐/ 5
🪙 Approximate cost: ⭐⭐⭐/ 5

 |  |  |  |  |  |  |  |  |
|---|
✨ 🍓 All texts and images by @Tesmoforia 🍓 ✨
📸 Tools: Smartphone 📲 Snow 🎬 Remini 🌓 FotoJet 📐
🚨 ¡Please do not take, edit or republish my material without my permission! 🚨
💌 ¿Do you wish to contact me? Discord #tesmoforia 💌
🌙 Banner, signature and separators by Keili Lares
Posted Using InLeo Alpha
Definitely a wonderful job, happy and satisfied client....
Happy customer, happy cosmaker's heart 💖 👍
Definitivamente eres una maravilla, cada palabra de tu post, fotografías y proceso son espectaculares, este accesorio y complemento del cosplay me encanto, cuanto detalle y buen acabado.
Y así es, todo se debe hacer con tiempo, en estos momentos con tantas incidencias es mejor prevenir que lamentar. A mi tampoco me gusta entregar algo mal echo, no se si es una virtud o un defecto ser perfeccionista en ese sentido, jajajajja.
Tu amiga clienta se ve que quedo feliz, quedo hermosa con el atuendo completo.
!discovery 45
Tus comentarios son tan wholesome T______T muchisimas gracias Daya linda, se me han aguado los ojos mas de una vez leyéndote.
¡Creo que es una virtud!, entre sentir desidia o stress por el trabajo, creo que lo segundo nos ayuda a superarnos porque no somos conformes. De verdad muchas gracias por este comentario ;3; estoy re feliz aqui con mi tecito y mi podcast y estas palabras tan bonitas después de un día rudo -moquea en coquette- 🥲 💕 💕 💕
Your comments are so wholesome T______T thank you so much Daya cutie, my eyes have watered more than once reading you.
I think it's a virtue!, between feeling laziness or stress about work, I think the second one helps us to improve ourselves because we are not conformist. Thank you very much for this comment ;3; I'm really happy here with my tea and my podcast and these nice words after a hard day -cries in coquette- 🥲 💕 💕 💕 💕
Thank you for your support ! ! 💗
This post was shared and voted inside the discord by the curators team of discovery-it
Join our Community and follow our Curation Trail
Discovery-it is also a Witness, vote for us here
Delegate to us for passive income. Check our 80% fee-back Program
Thank you for your support dear ones! 💕
¡Felicidades! Esta publicación obtuvo upvote y fue compartido por @la-colmena, un proyecto de Curación Manual para la comunidad hispana de Hive que cuenta con el respaldo de @curie.
Si te gusta el trabajo que hacemos, te invitamos a darle tu voto a este comentario y a votar como testigo por La Colmena.
Si quieres saber más sobre nuestro proyecto, te invitamos a acompañarnos en nuestro servidor de Discord.
It is always a joy to read and receive these notifications, thank you so much for the support, I love you very much! 💘 💘 💘
Te felicito, excelente trabajo y dedicación, se ve muy prolijo, la verdad que me gustó mucho este bello tocado, feliz día, 😊
Muchísimas gracias Lismar, feliz día para ti también 🌼 🤍
Interesante post, tu dedicación da como resultado un hermoso trabajo, gracias por compartirlo con nosotros 😉 saludos!
Muchas gracias Mari ! ! 💞
Wow 😲 such a great design
Thank you Akdavv 😄