ENGLISH CONTENT
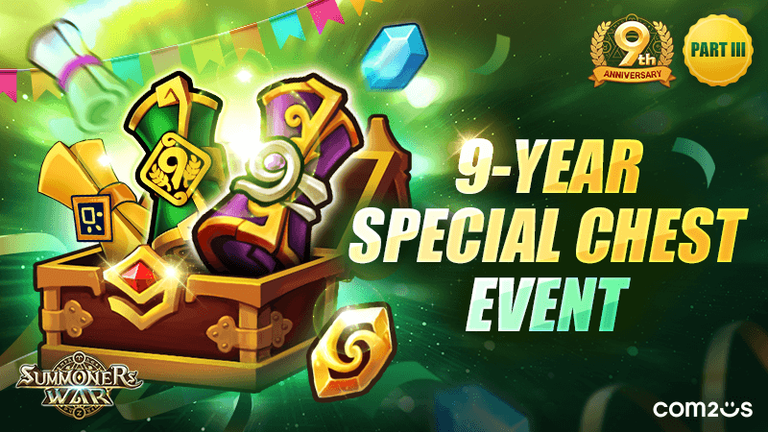
Hello to all the members of this community and craft lovers! Today I finally come to show you the process of the chest I made for the plushies that I made to give them to my boyfriend, based on the game Summoners War. It is an extremely easy project, which will surely give you ideas to make other types of chests 😌
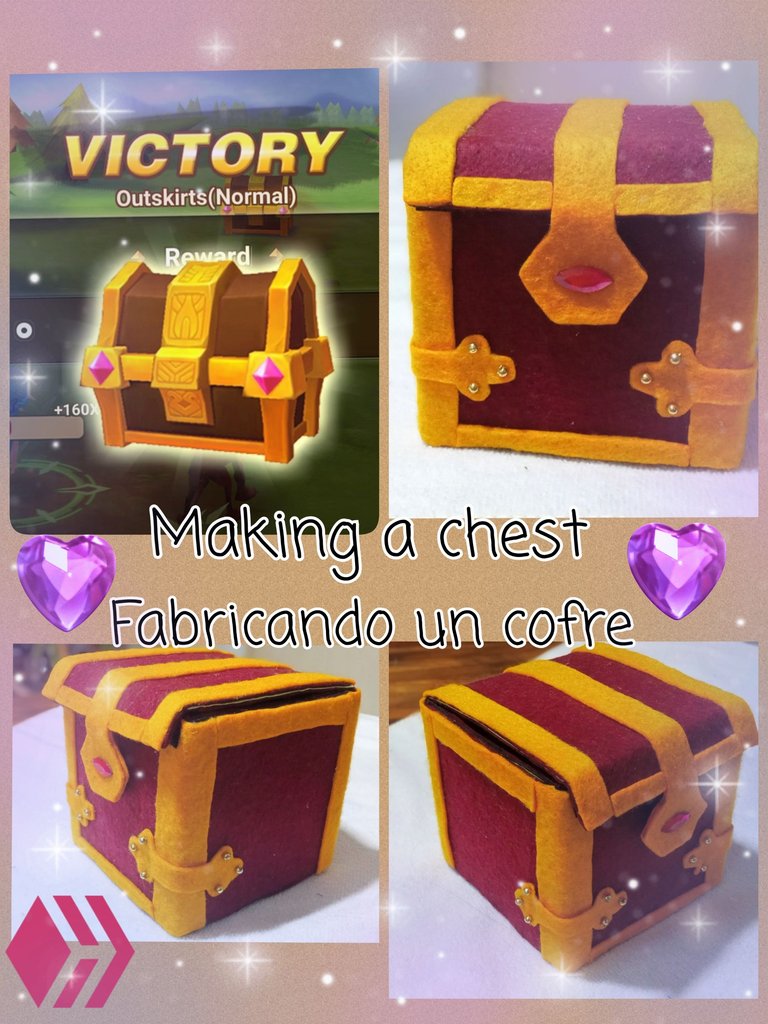
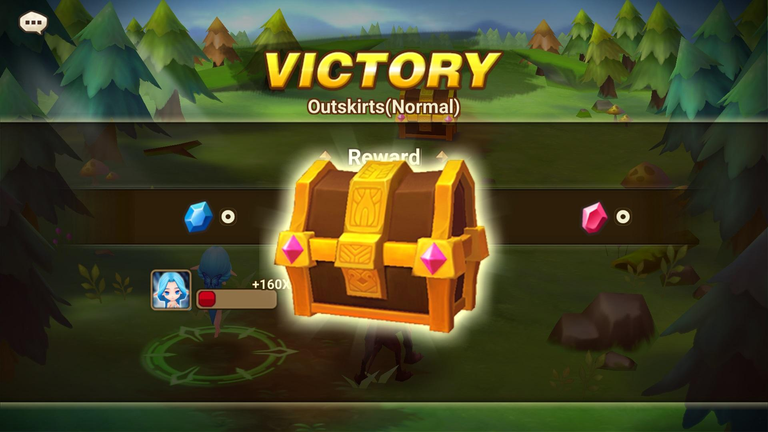
It all started because I needed to find a way to deliver plushies that still looked cute. So, after searching for images of the game, I came across some chests where you can acquire different items after a victory. It seemed perfect, and I wanted to give it a try.
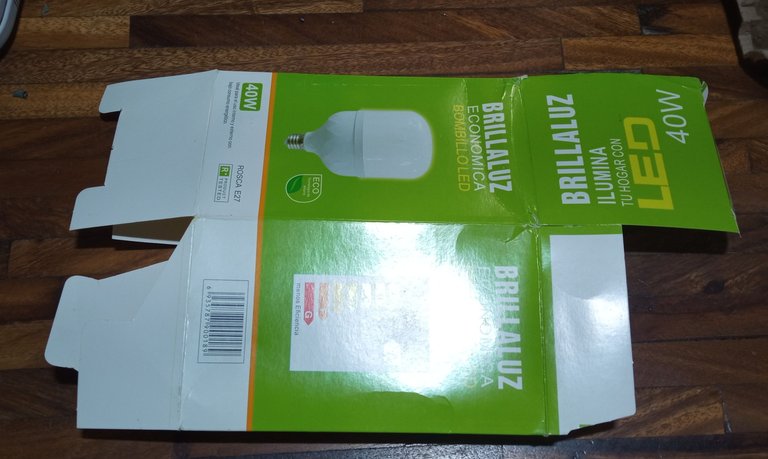
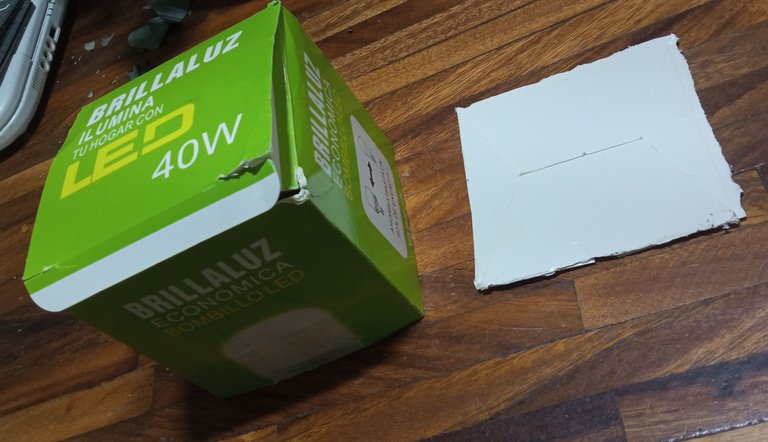
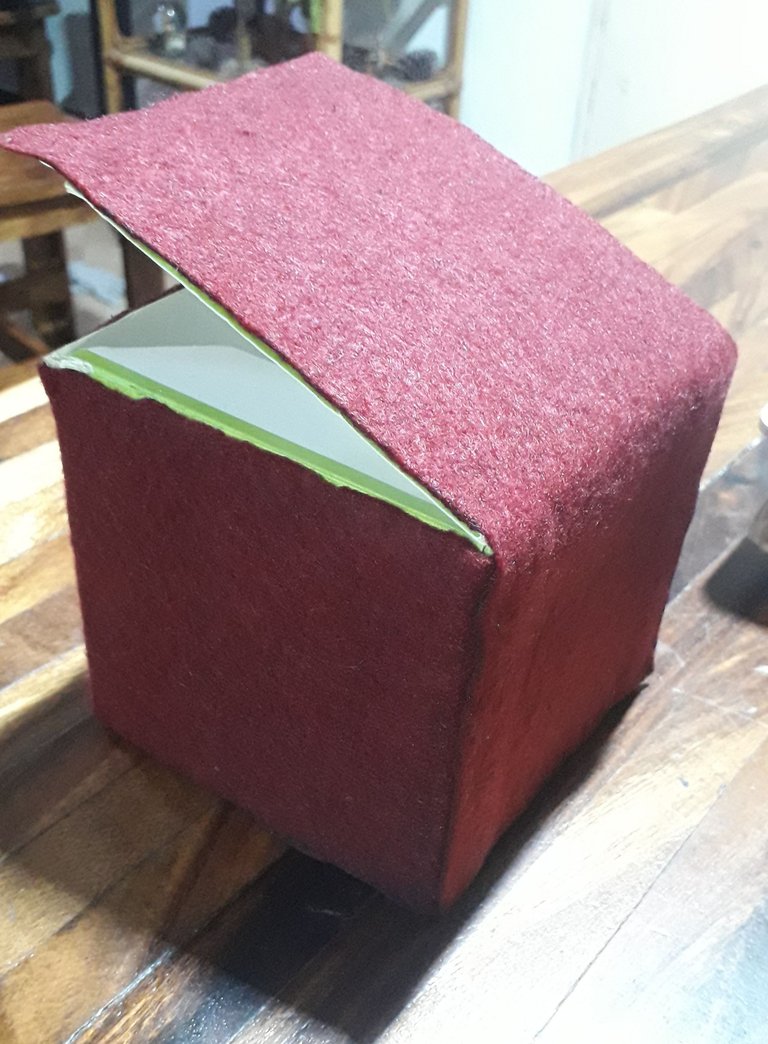
To make it, I had thought about buying cardboard, but coincidentally, my older brother (who knows I like recycling craft materials) had given me an empty light bulb box he had bought for his room. As soon as I saw it, I realized it was perfect for making the chest. Since the box was very tall, I cut it to the height of the stuffed animals, keeping the top and bottom parts.
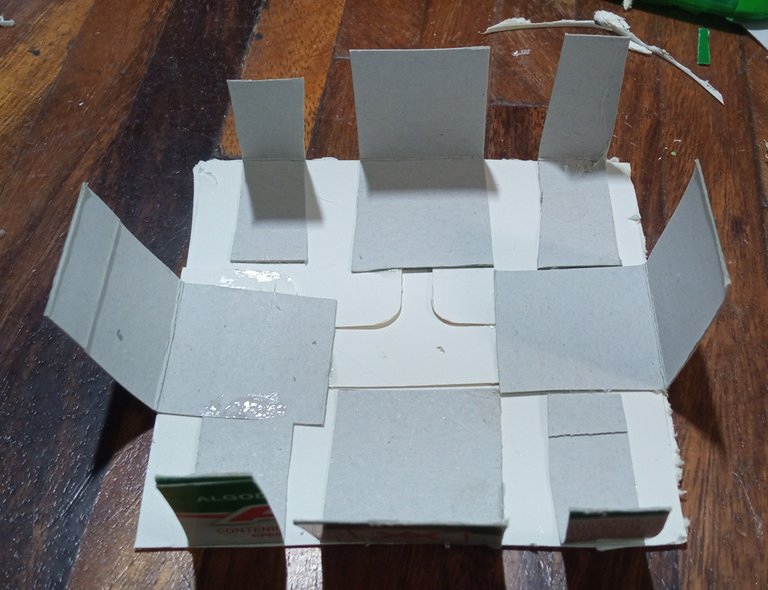
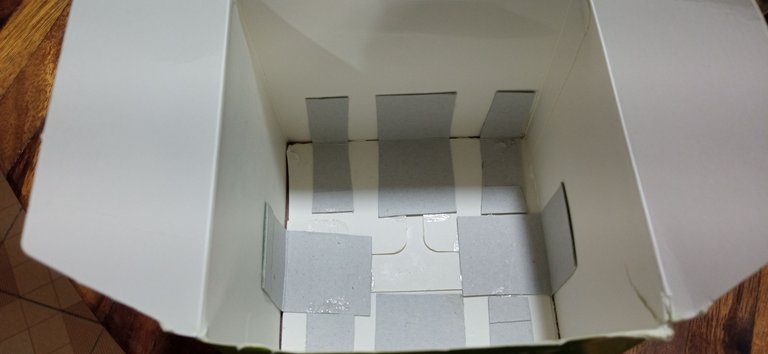
Since I needed a way to glue the base to the top of the box, I came up with the idea of using tabs made from scraps of cardboard from other boxes I had (I keep toothpaste and even medicine boxes for just these situations 😉). Then, using liquid silicone, I glued the tabs to the rest of the box and let it dry. This way, I had the base box that would be the chest, and what came next was the fun part. That's it: the decoration! 😍
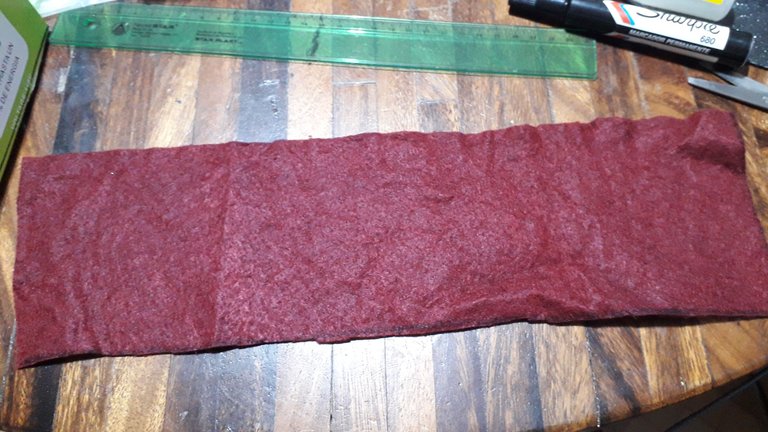
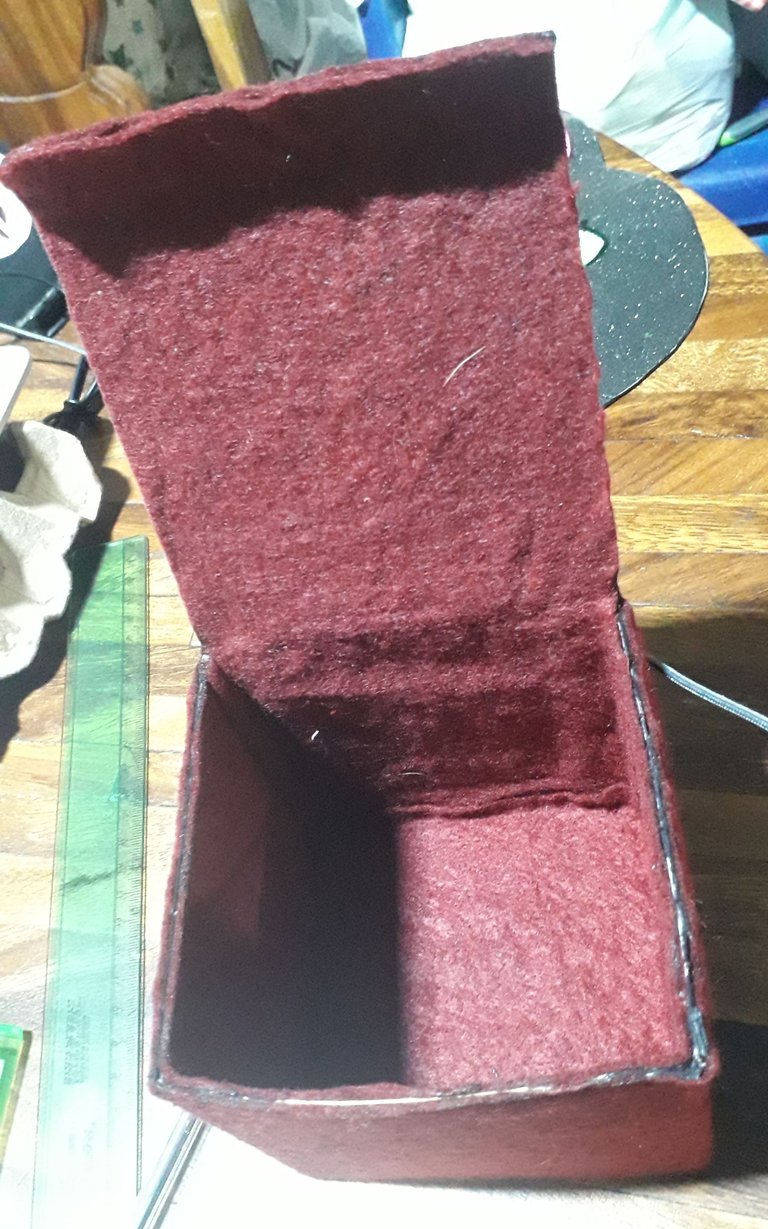
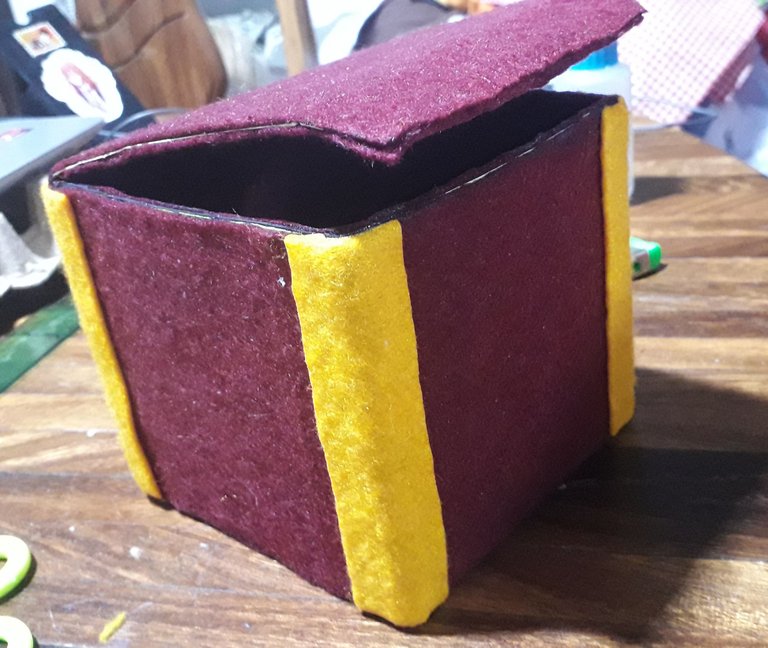
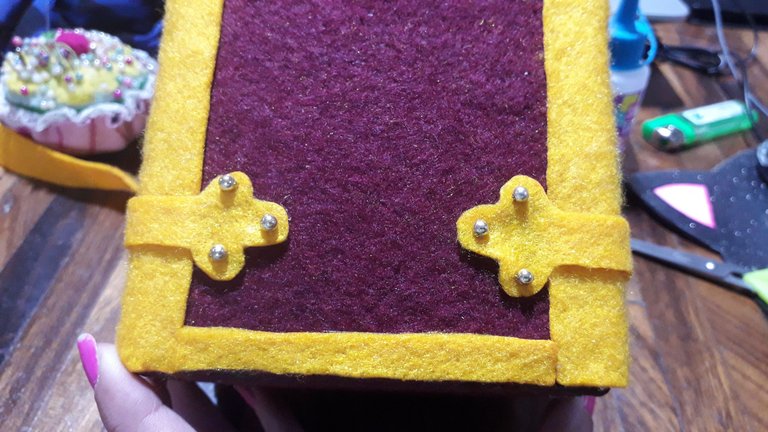
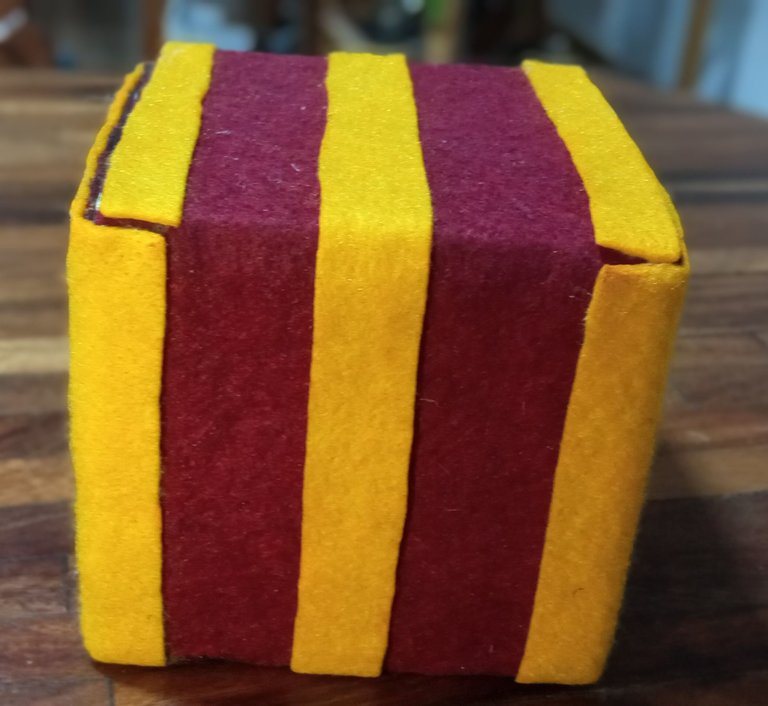
I thought the best material to line the chest would be felt, as it would give the cardboard greater durability. Since I didn't have any brown felt, I used some scraps of burgundy felt I had leftover from previous projects. I lined the box inside and out, gluing everything with liquid silicone and using a lighter to smooth the edges.
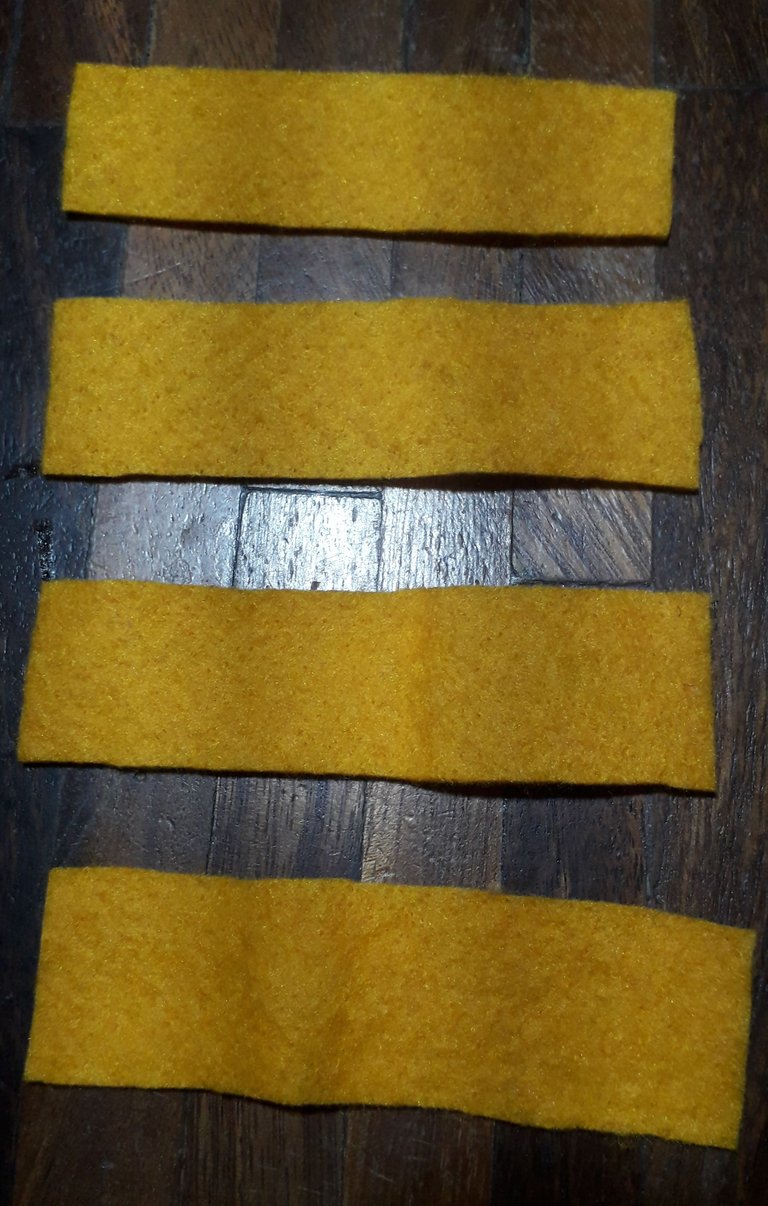
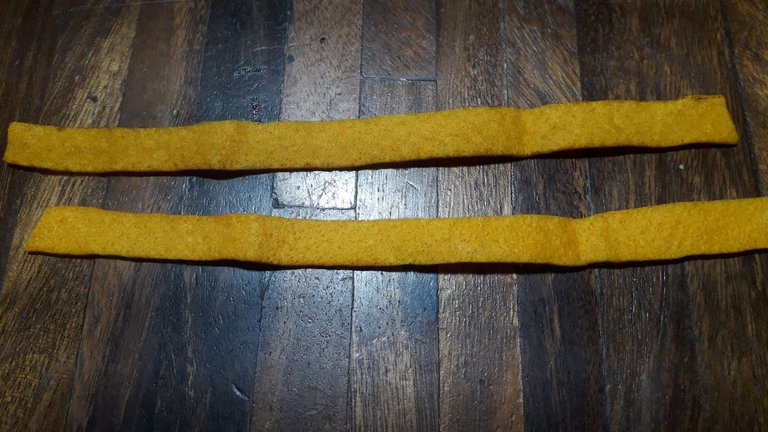
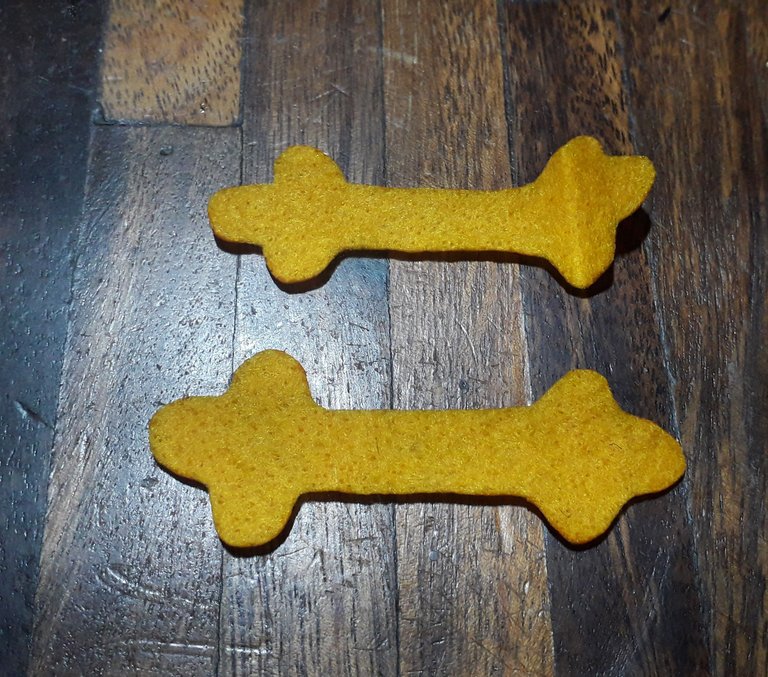
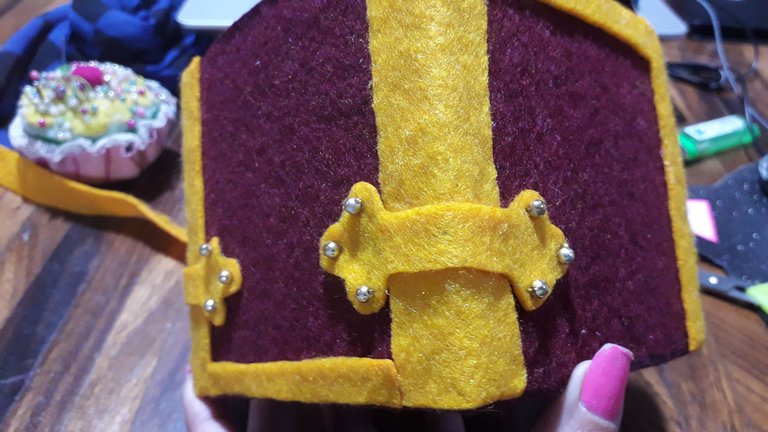
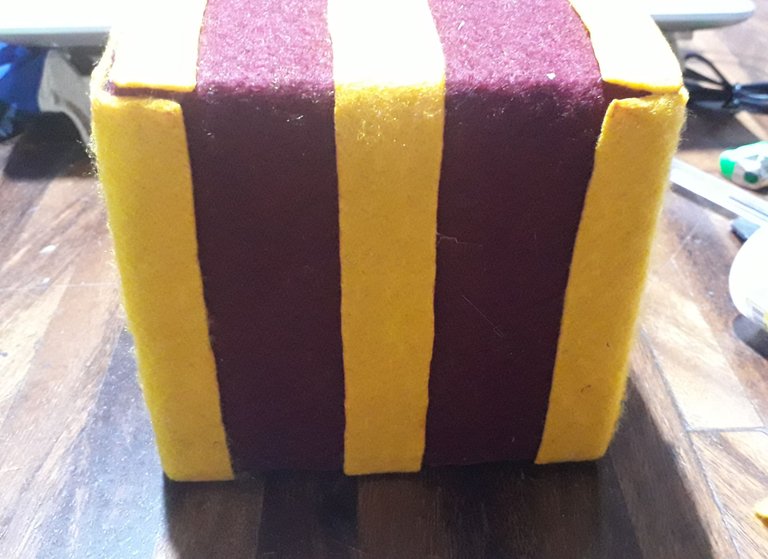
With the chest fully lined, it was time to take care of the details. Looking at the reference image, I cut some pieces of yellow felt and glued them down with liquid silicone.
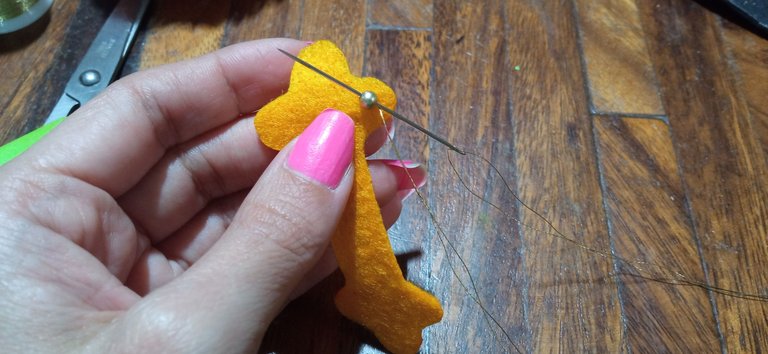
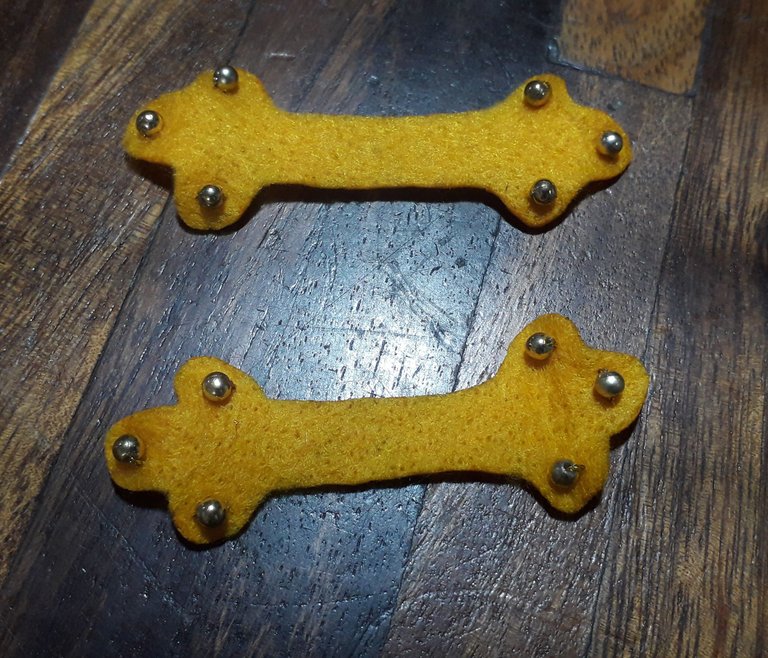
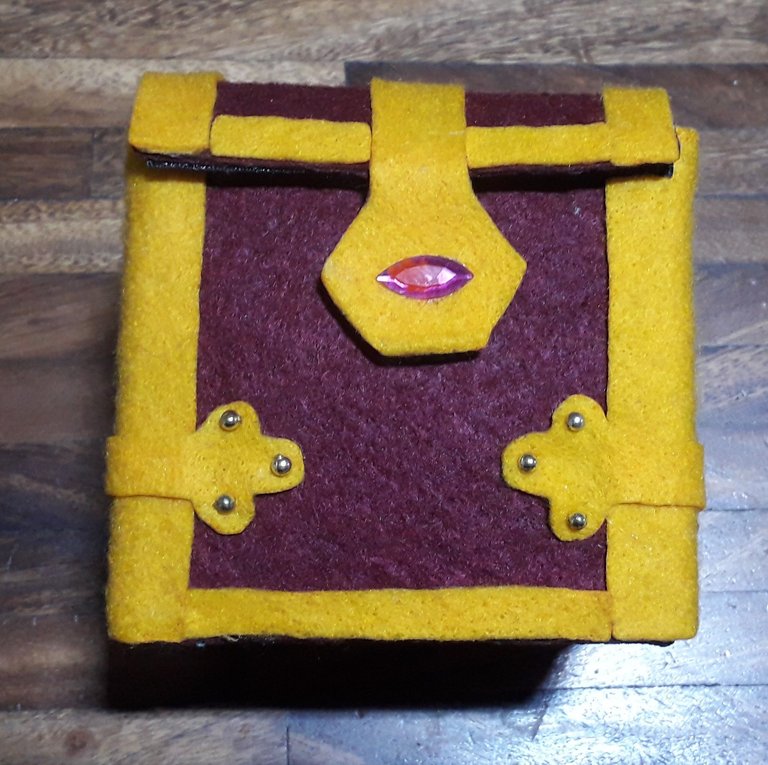
I really liked the chest, which has some kind of hinges, so I tried to recreate them with felt and, as nails or screws, I used some gold-colored beads, which I sewed by hand with thread of the same color.
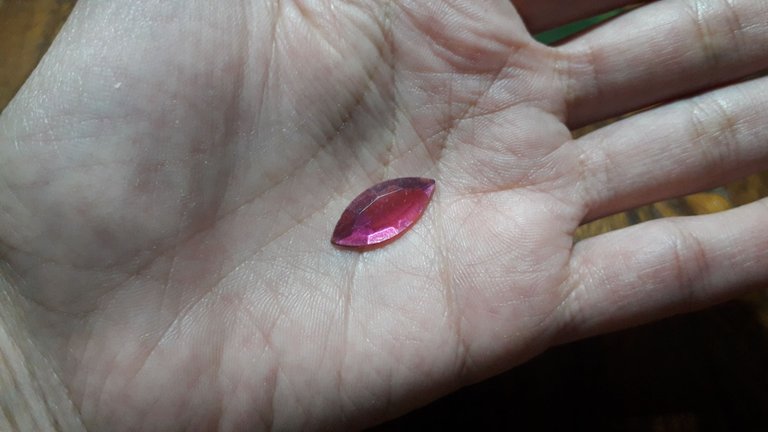
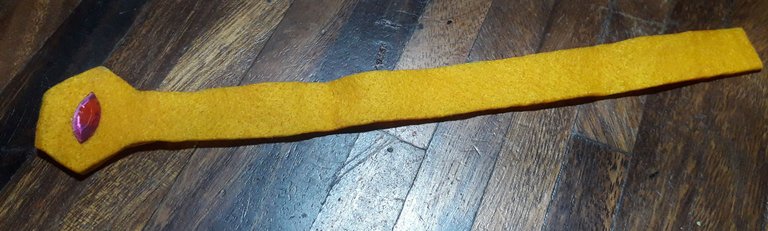
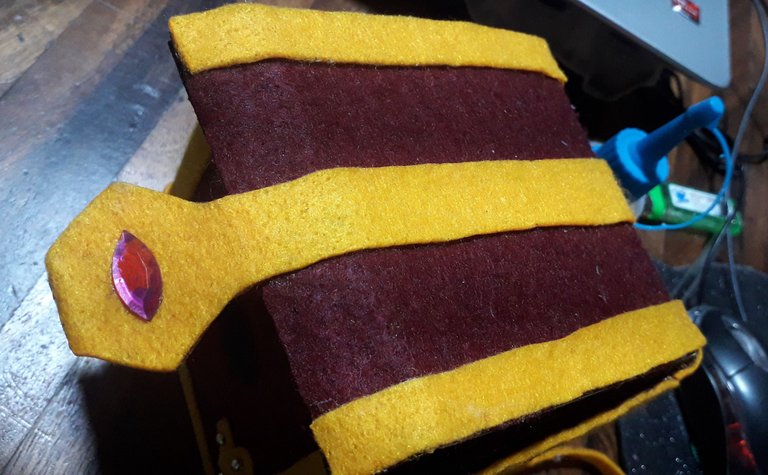
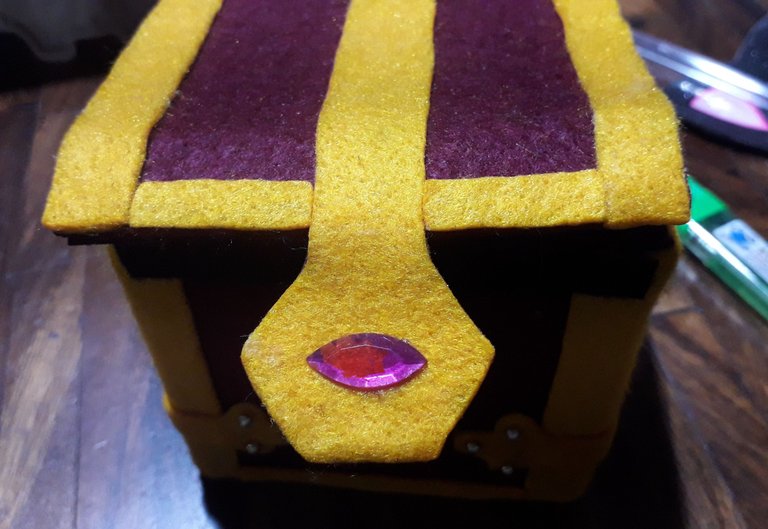
To close the chest, I cut a long piece of felt to which I glued a rhinestone that I found somewhere and picked up because I thought it was pretty 😉
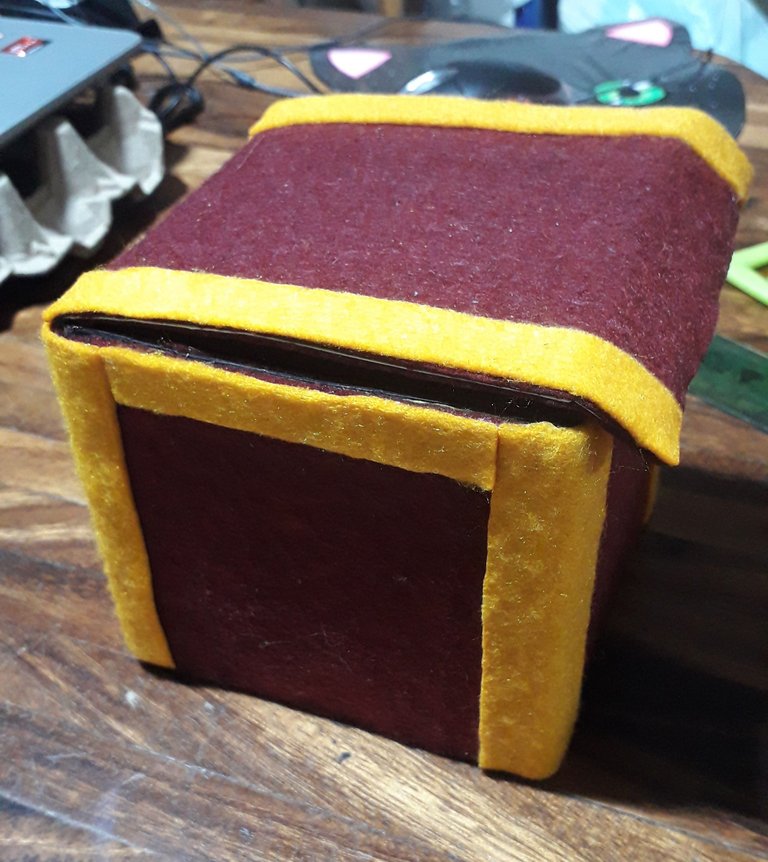
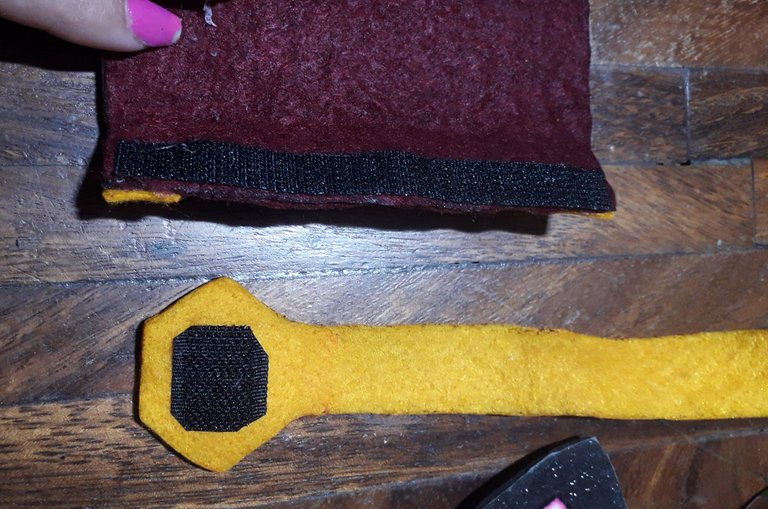
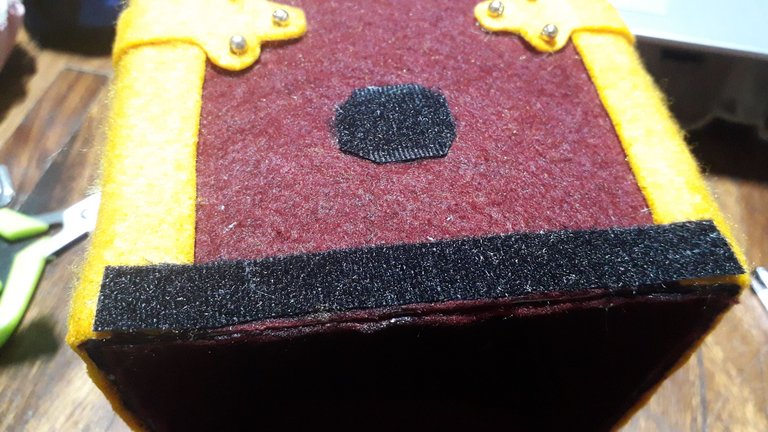
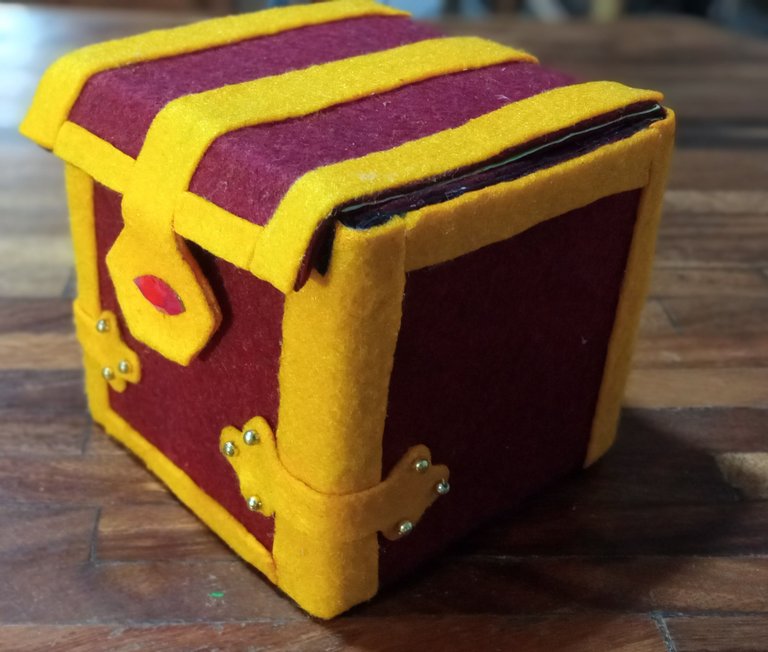
The question is... How would I make the chest open and close? Well, I opted for a magic lock or Velcro, placing a small piece of it on the flaps of the lid. It was necessary, because if I didn't do this, the lid would stay with the flap raised. I applied enough liquid silicone and applied a lot of pressure to ensure the glue was working properly. I also took the opportunity to glue the piece of felt to which I had attached the costume gem. Once it was dry, I tested opening and closing it several times and it was a complete success 👍
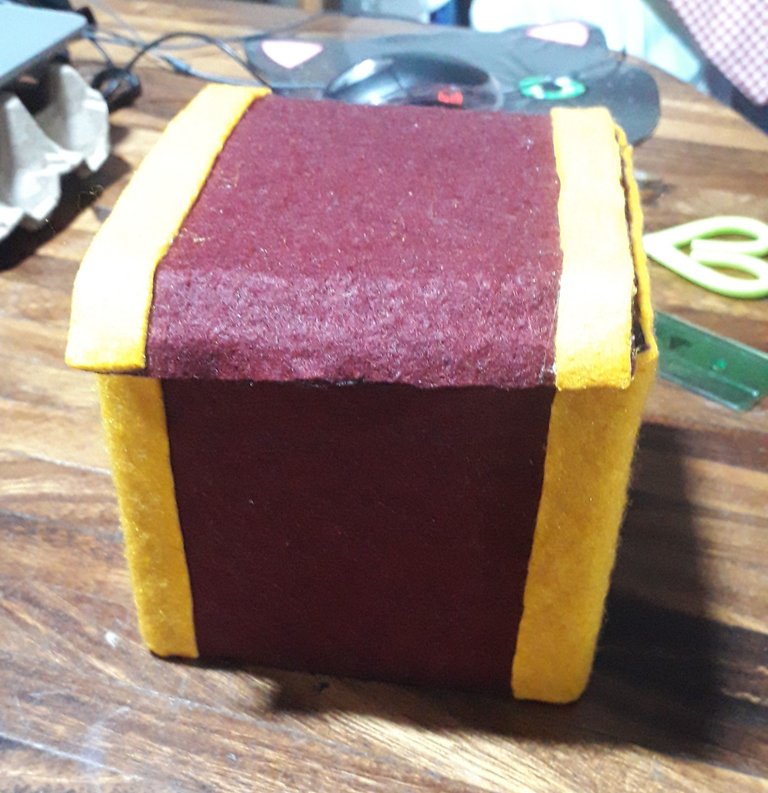
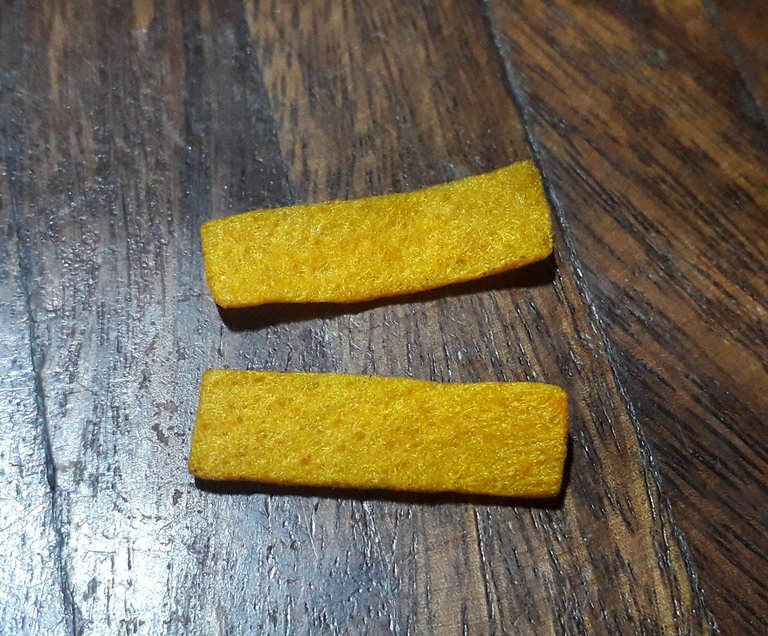
Finally, I added the final details to the edges with pieces of yellow felt, and the chest was ready.
It was a fun process that I completed in about two days. As you can see, I didn't use measurements, since I usually do improvised projects like these by eye, trying to square the pieces as I go along 😅
It's worth mentioning that my boyfriend really liked his gift 😊 If you want to see how I made the plushies, I invite you to visit the post where I show you the step by step ✨
Thank you so much for visiting my post. I hope you found it interesting.
💚 See you next time! 💚

CONTENIDO EN ESPAÑOL
¡Hola a todos los integrantes de esta comunidad y amantes de las manualidades! Hoy por fin vengo a mostrarles el proceso del cofre que hice para los peluches que realicé para regalárselos a mi novio, basados en el juego Summoners War. Se trata de un proyecto sumamente fácil, que seguramente les dará idea para hacer otro tipo de cofres 😌
Todo comenzó porque necesitaba encontrar un modo de entregar los peluches, pero que se viera bonito, así que luego de buscar imágenes sobre el juego, me encontré con unos cofres en donde se adquieren diferentes items luego de una victoria. Me pareció perfecto y quise intentarlo 😉
Para realizarlo, había pensado en comprar cartulina, pero casualmente mi hermano mayor (que sabe que me gusta reciclar material para manualidades), me había dado una caja vacía de un bombillo que había comprado para su habitación. En cuanto lo vi, me di cuenta que era perfecto para hacer el cofre. Como la caja era muy alta, corté la misma a la altura de los peluches, manteniendo la parte superior de la caja y la base.
Dado que necesitaba un modo de pegar la base a la parte superior de la caja, se me ocurrió hacerlo a través de unas pestañas hechas con trozos de cartulina de otras cajas que tenía (guardo las cajas de pasta dental y hasta las de medicinas para estos casos 😉). Luego, con silicón líquido pegué las pestañas al resto de la caja y dejé secar. De éste modo, ya tenía la caja base que sería el cofre y lo que venía, era la parte divertida. Así es ¡La decoración! 😍
Pensé que el mejor material para forrar el cofre, sería el fieltro, ya que le daría mayor dureza a la cartulina. Como no tenía fieltro color marrón, utilicé unos trozos de fieltro de color vinotinto que me sobraron de proyectos anteriores. Forré la caja por dentro y por fuera, pegando todo con silicón líquido y usando un encendedor para pulir los bordes.
Teniendo el cofre completamente forrado, era el momento de hacerme cargo de los detalles. Observando la imagen de referencia, corté algunos trocitos de fieltro amarillo y los pegué con silicón líquido.
Me gustó mucho el cofre que tiene unas especies de bisagras, así que intenté recrearlas con fieltro y a modo de clavos o tornillos, utilicé unas cuentas de color dorado, las cuales cosí a mano con un hilo del mismo tono.
Para cerrar el cofre, corté una pieza larga de fieltro a la cual le pegué una piedra de bisutería que me encontré en algún lugar y la recogí porque me pareció bonita 😉
La pregunta es... ¿Cómo haría para que el cofre pudiera abrirse y cerrarse? Pues, opté por utilizar cierre mágico o velcro, colocando un trocito en la solapas solapas de la tapa. Era necesario, ya que de no hacer esto, la tapa quedaba con la solapa levantada. Le coloqué suficiente silicón líquido e hice mucha presión para asegurarme que el pegamento, cumpliese bien su función. Aproveché de pegar también, el trozo de fieltro al cual le había colocado la piedra de bisutería. Al estar seco, hice la prueba de abrirlo y cerrarlo varias veces y fue todo un éxito 👍
Finalmente, hice los últimos detalles en los bodes con trocitos de fieltro amarillo y así, estuvo listo el cofre.
Fue un proceso divertido que hice en dos días más o menos. Como pudieron presenciar, no utilicé medidas, ya que proyectos improvisados como estos, suelo hacerlos al ojo por ciento y buscando de cuadrar las piezas a medida que vaya realizando la manualidad 😅
Cabe mencionar que a mi novio le gustó mucho su regalo 😊 Si desean ver como hice los peluches, los invito a visitar el post en donde les muestro el paso a paso ✨
Muchas gracias por haber visitado mi publicación. Espero que les haya parecido interesante.
💚 ¡Hasta una próxima oportunidad! 💚
 https://linktr.ee/sue_zoe


https://www.reddit.com/r/blogs/comments/1k7zacp/crafting_a_chest_based_on_the_game_summoners_war/
The rewards earned on this comment will go directly to the people( @suezoe ) sharing the post on Reddit as long as they are registered with @poshtoken. Sign up at https://hiveposh.com. Otherwise, rewards go to the author of the blog post.
It was a great idea, congratulations, you have done a splendid job very well done, your boyfriend will now have the stuffed animals well kept.
I loved it and the materials are great.
The creation process always seems fun to me, it's like putting together a puzzle without knowing how it will turn out in the end. And in this case, it was a nice result! 😊 hehe that's very important, the dust will stay away from the stuffed animals 😌 I'm glad you liked the result and the materials I used 😉 Thank you so much for visiting the post and for commenting 🤗💚
It's a real pleasure, I love your creativity and ingenuity, it's wonderful work.
😊✨🤗
Que nota amiga, ese cofre te quedó muy lindo y los colores están espectacular, ese vino tinto sirve para aguantar sucio.
Gracias por presentarlo a la comunidad.
Saludos
Me fascina hacer éste tipo de cosas y más sabiendo que alguien va a recibirlo 😌 No había pensado lo del color de ese modo 😮 pero tienes razón, hace años le regalé una cajita de color blanco y el polvo hizo lo suyo 😅 Muchas gracias a ti por visitar la publicación y por comentar ¡Feliz domingo! 🤗💚
This chest is such a creative tribute to Summoners War. The details are impressive. Amazing work 👏🏿
selected by @stevenson7
I'm very glad that you liked the result, I tried hard to make something nice with the materials I had 😚 Thank you very much for visiting my publication and for the support 🤗💚
Congratulations, your post has been curated by @dsc-r2cornell. You can use the tag #R2cornell. Also, find us on Discord
Felicitaciones, su publicación ha sido votada por @ dsc-r2cornell. Puedes usar el tag #R2cornell. También, nos puedes encontrar en Discord
te invitamos a unirte a nuestro TRAIL de Curación para poder SEGUIR atentos a tus post y darte like, te apoyaremos al valor de like que nos apoyes al unirte a nuestro Trail. Sabes que es un TRAIL de Curación?
Si no sabes te dejamos un Video Tutorial realizado por El Proyecto Aliento
Haz sido valorada por La HappyWhaleX 🤗
This post has been voted by the HappyWhaleX project.
You can support it by delegating HP, to improve every day.
You can also join the Trail of this account, to support more quality content.
Thank you very much.
The HappyWhaleX Team.
¡Felicitaciones!
Estás participando para optar a la mención especial que se efectuará el domingo 27 de abril del 2025 a las 8:00 pm (hora de Venezuela), gracias a la cual el autor del artículo seleccionado recibirá la cantidad de 1 HIVE transferida a su cuenta.
¡También has recibido 1 ENTROKEN! El token del PROYECTO ENTROPÍA impulsado por la plataforma Steem-Engine.
1. Invierte en el PROYECTO ENTROPÍA y recibe ganancias semanalmente. Entra aquí para más información.
2. Contáctanos en Discord: https://discord.gg/hkCjFeb
3. Suscríbete a nuestra COMUNIDAD y apoya al trail de @Entropia y así podrás ganar recompensas de curación de forma automática. Entra aquí para más información sobre nuestro trail.
4. Visita nuestro canal de Youtube.
Atentamente
El equipo de curación del PROYECTO ENTROPÍA
The transformation is amazing and I love what you did in every step. You are really talented and the result is stunning. Bravo
That's the fun part of crafts, seeing what you can do with the materials available, and when it comes to recycling, boxes will always be part of my weakness. They're an indispensable material! Thank you so much for visiting my post and for commenting. I'm really glad you liked it 😇💚