Cómo hice un llavero inspirado en Yoda.//How I made a Yoda-inspired keychain.(Esp)(Eng)
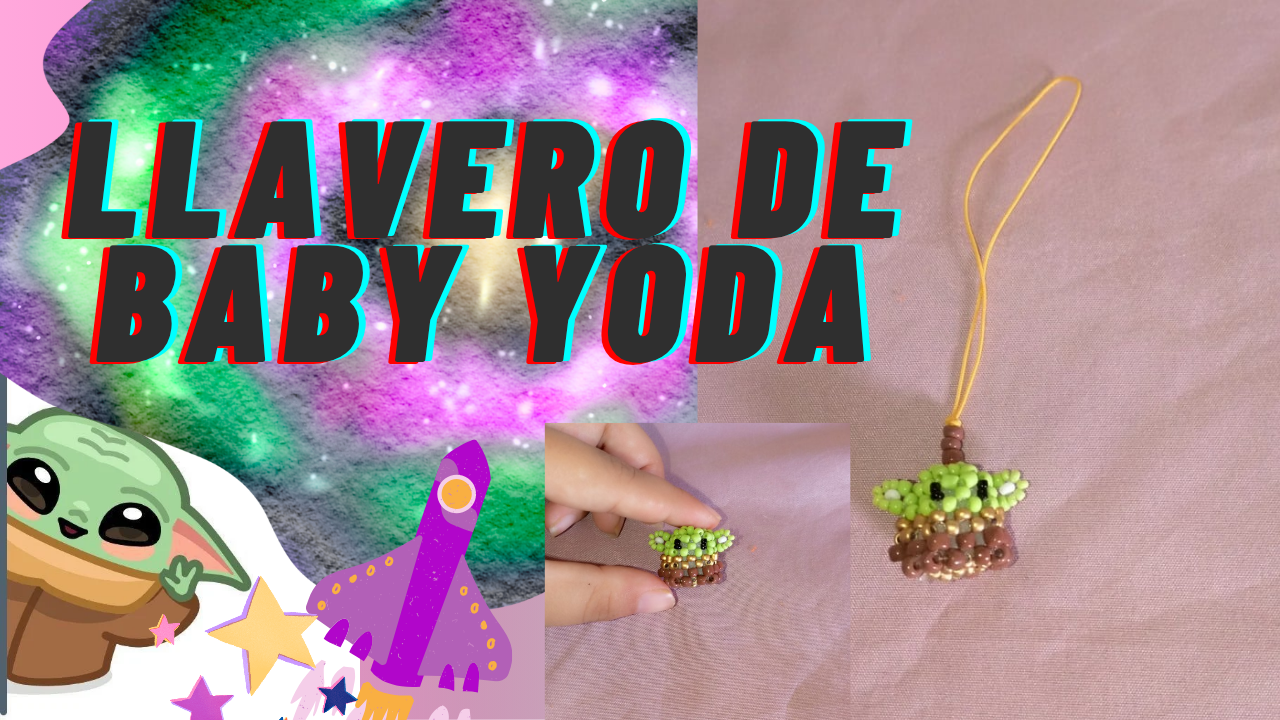
Have you ever seen Star Wars? If so, you'll love this tutorial! I've been working on creating a Baby Yoda keychain and I'm excited to share it with you. This adorable character has captured the attention of millions of fans around the world, and for good reason.

Hello everyone! I'm happy to be back here to show you the creation of this keychain. Ever since I saw the Star Wars movies, Baby Yoda immediately caught my attention. His cute appearance and mysterious wisdom make him one of the most endearing characters in the saga. Spending the whole afternoon working on it was worth it because I really like the result. One of the things I've been wanting to make is this type of keychain, which are basically little dolls made of beads and nylon. I thought it was so amazing 🫢 that I already want to make several. The idea of creating different characters or even variants of Baby Yoda excites me a lot. During my time here at Hive Blog, you'll see a variety of crafts that I make and try to learn. I like to share my experiences and even joke about it, because I believe creativity should be fun and accessible to everyone.
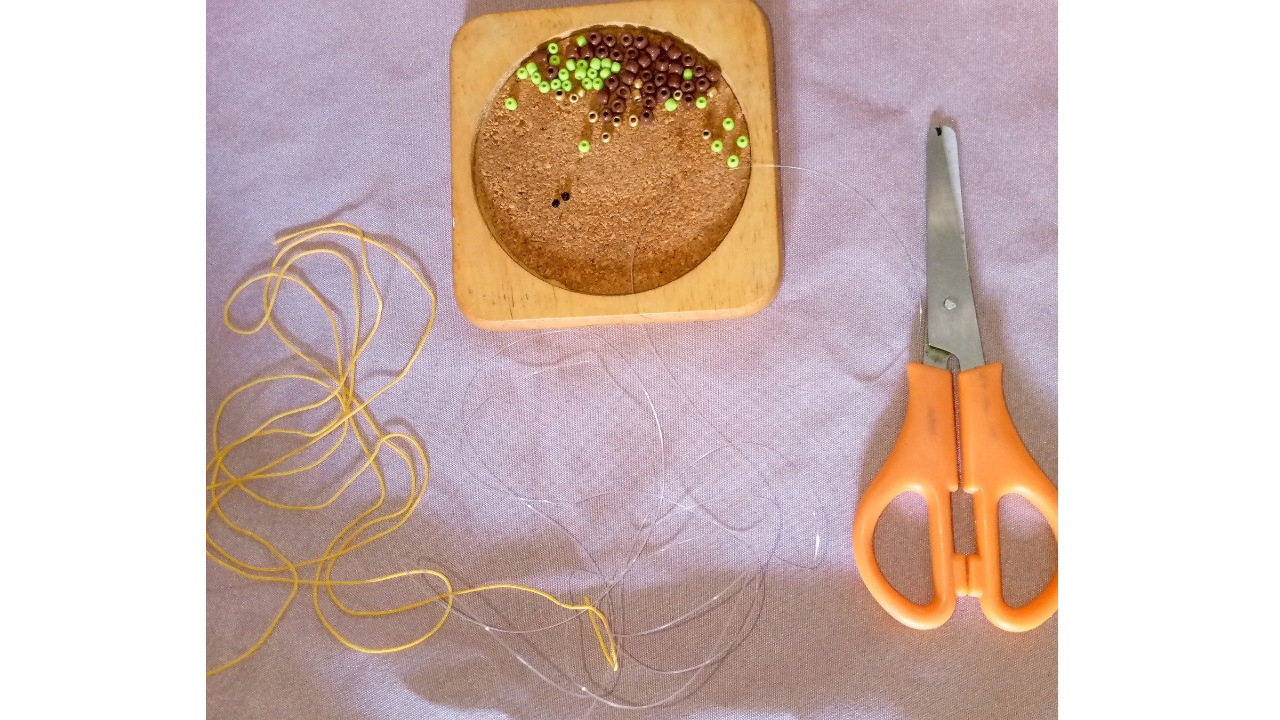
(Materiales a usar:)(Materials to use:)
- Medio metro de nilón
- Hilo chino de color amarillo
- Tijeras
- Mostacillas de color (verde, marrón, negro, dorado y blanco)
- Un poquito de relleno de peluche
- Half a meter of nylon
- Yellow Chinese thread
- Scissors
- Colored beads (green, brown, black, gold, and white)
- A little bit of stuffed animal stuffing
(Procedimiento:)(Procedure:)
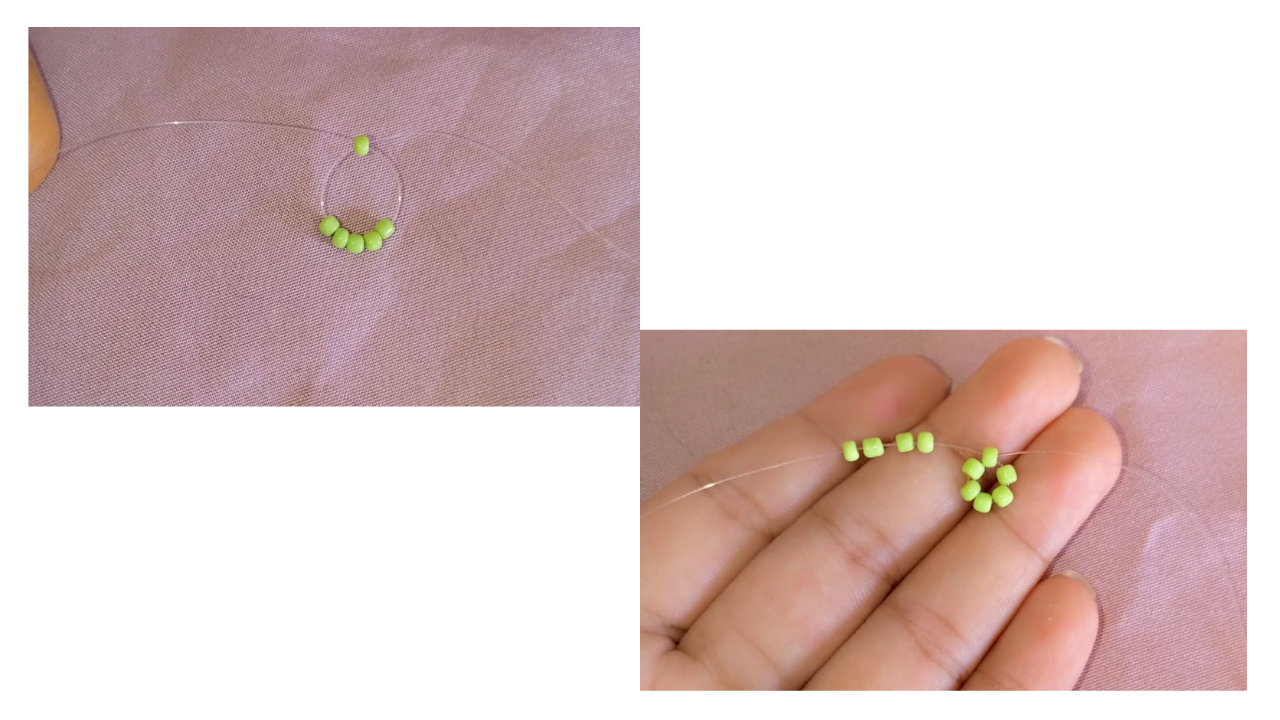
Paso nro 1
Paso nro 1
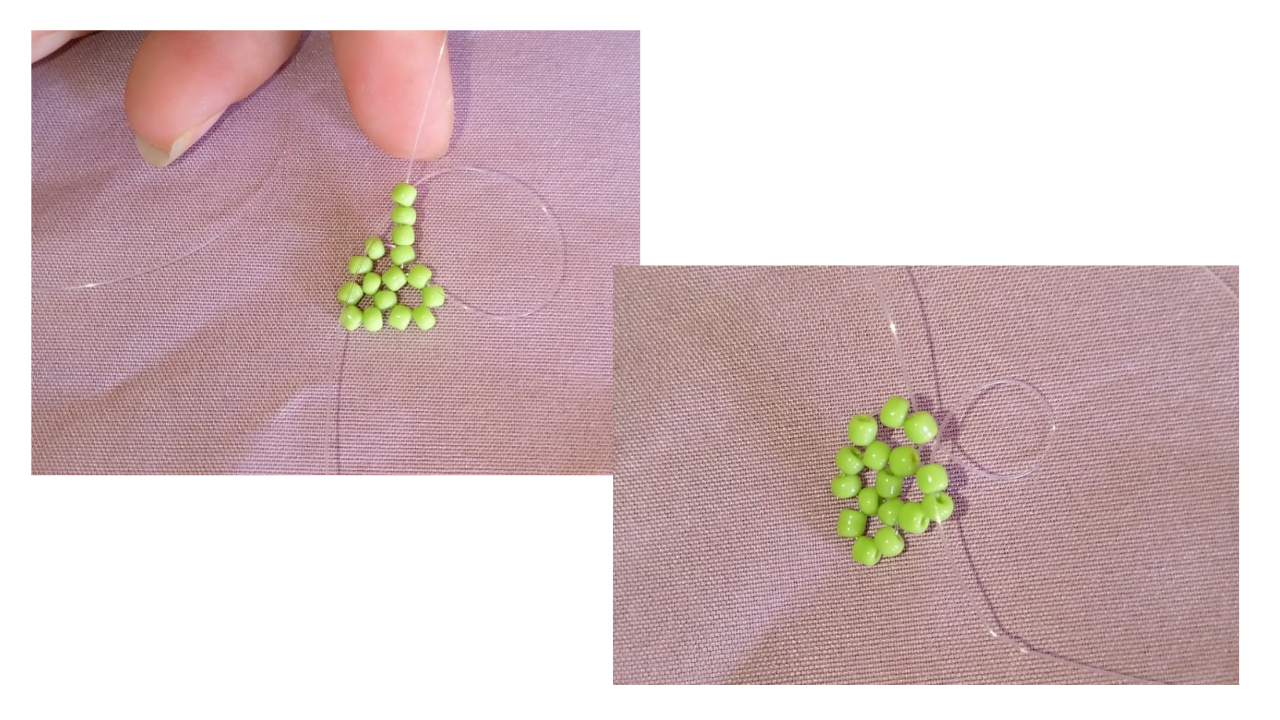
I'll start by adding six green beads and weaving the nylon through the sixth bead to form a closed circle. I make sure the beads fit tightly together and tighten the circle by gently tugging on both ends of the nylon.
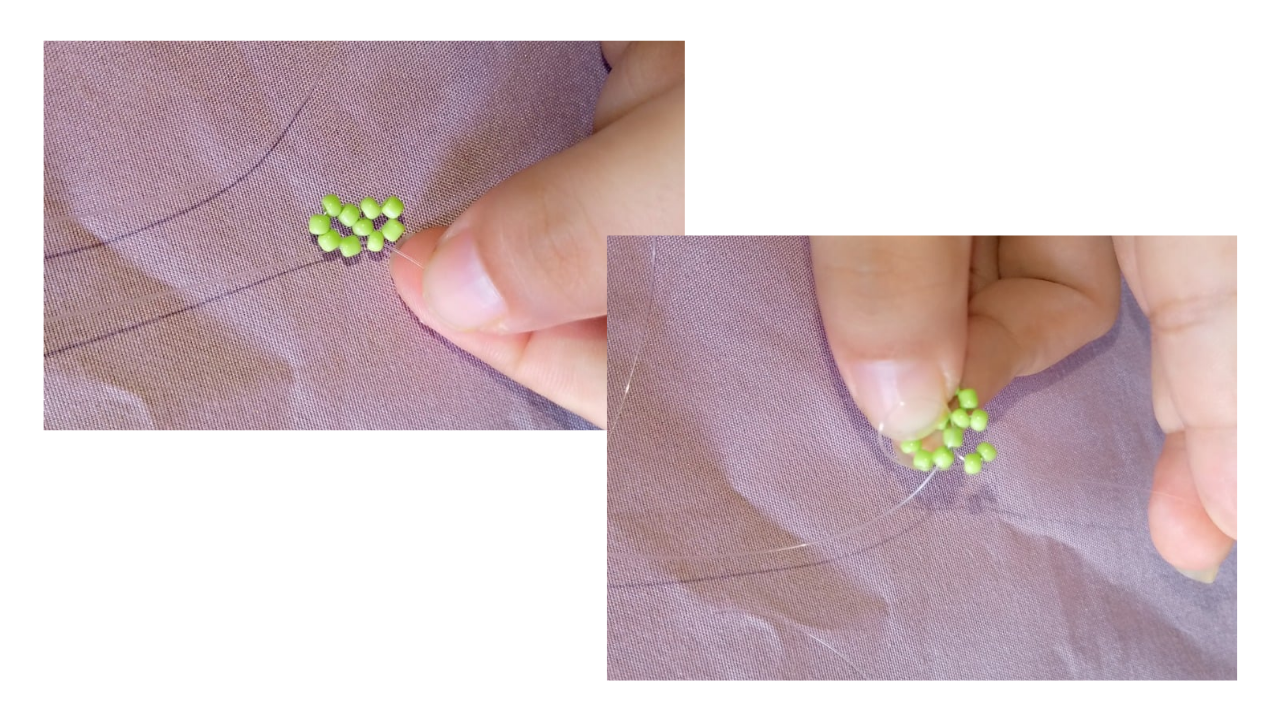
Paso nro 2
Paso nro 2
After making the base of the head, I begin making the next row with two beads. I place two beads on the right side of the nylon and cross the nylon through the second bead. Then, I thread the left nylon through the adjacent bead. Now, I begin making one of the eyes. I place two beads, first a green one and then a black one. I cross the nylon through the black bead and then thread the nylon through the adjacent bead. Next, I place two green beads and cross them again on the second bead, passing the thread through the adjacent bead. Next, I make Baby Yoda's second eye following the same procedure. I continue with this same process until I complete the row, and thus the head begins to take shape.
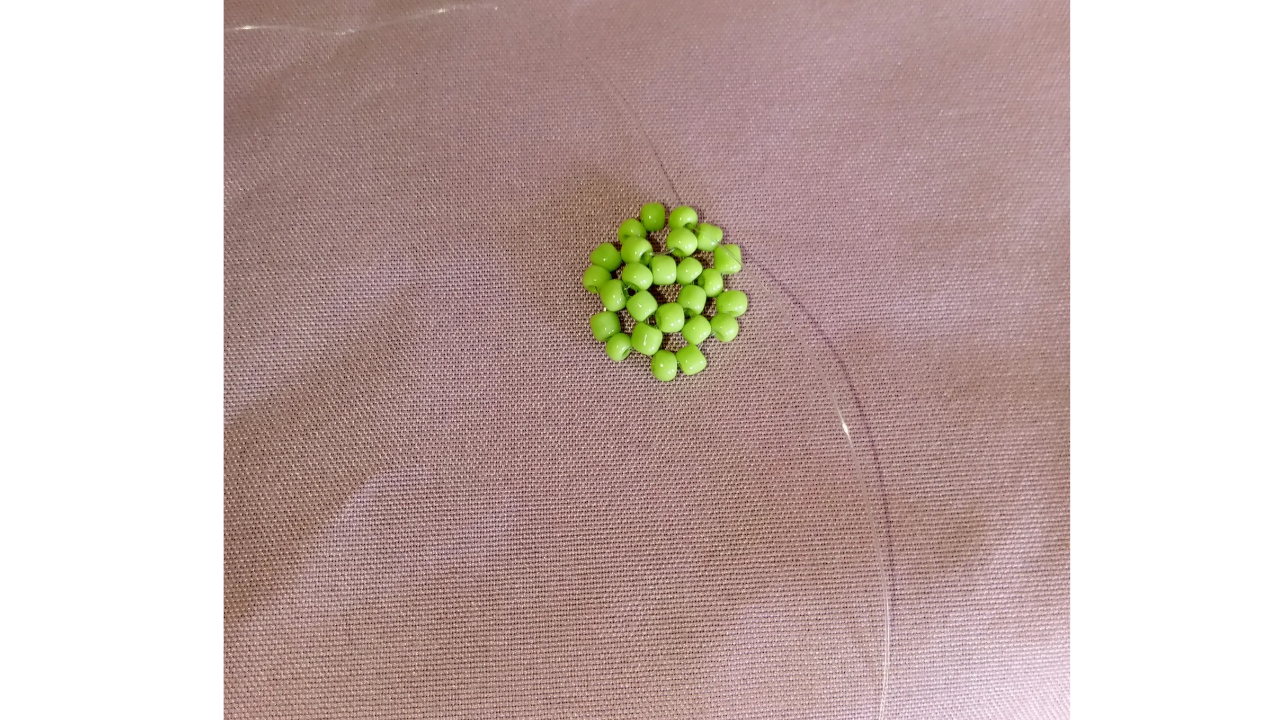
Paso nro 3
Paso nro 3
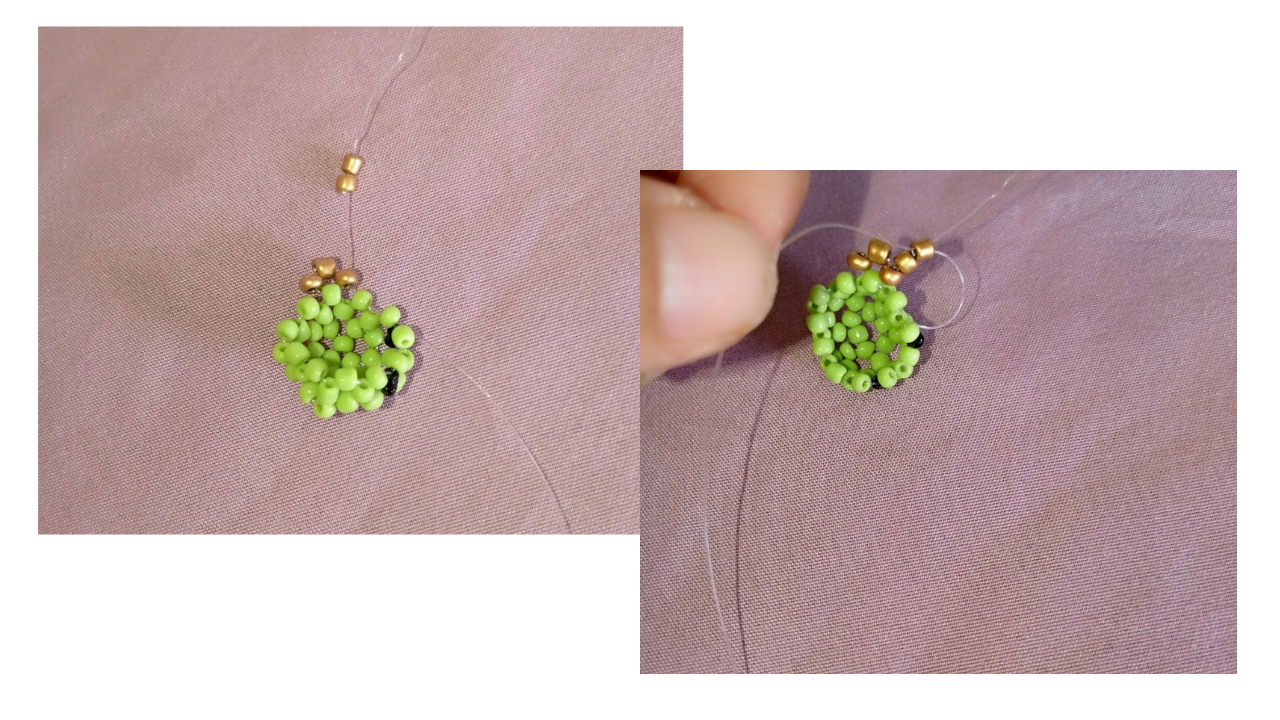
Now that Baby Yoda's head is done, I'm going to continue with an additional part that wasn't in the original design, but I want to add a little more color. For this, I'm going to use gold seed beads. I'm going to continue with the same weave: I'll place two gold seed beads, cross them over the second one, and then thread the thread through the next bead. I did this part with the intention of making it look like Baby Yoda is wearing a scarf.
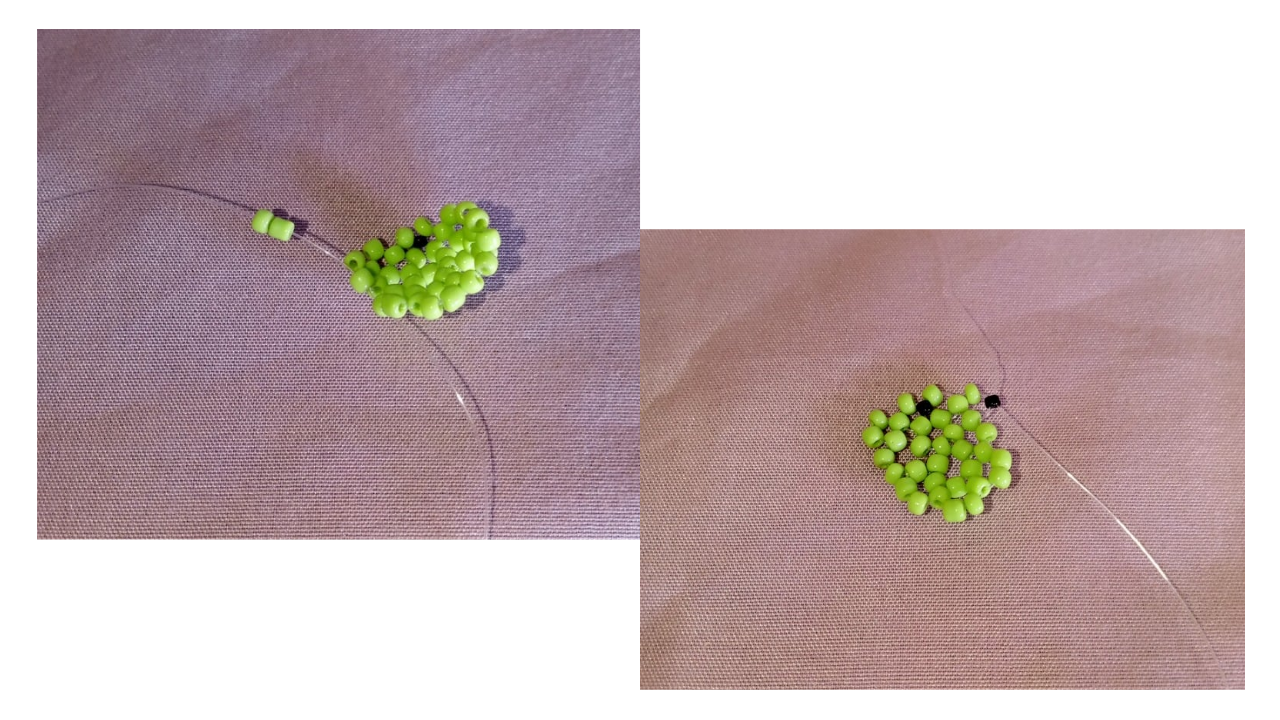
Paso nro 4
Paso nro 4
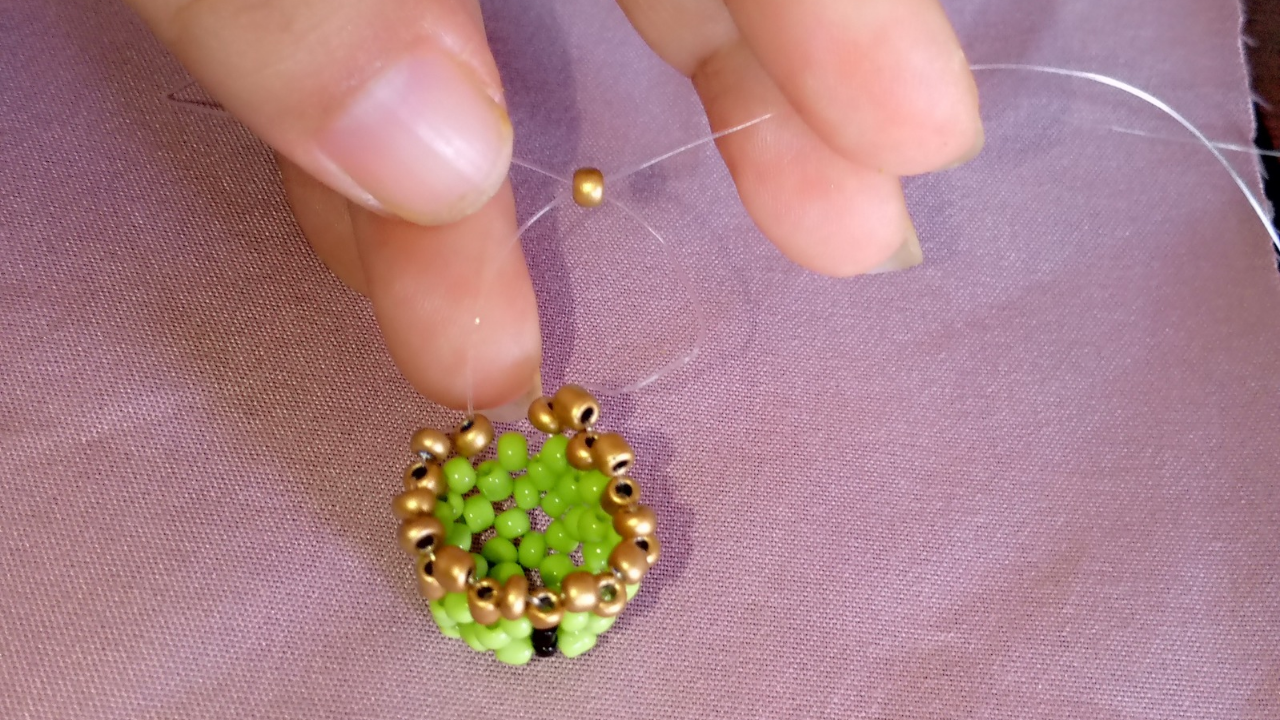
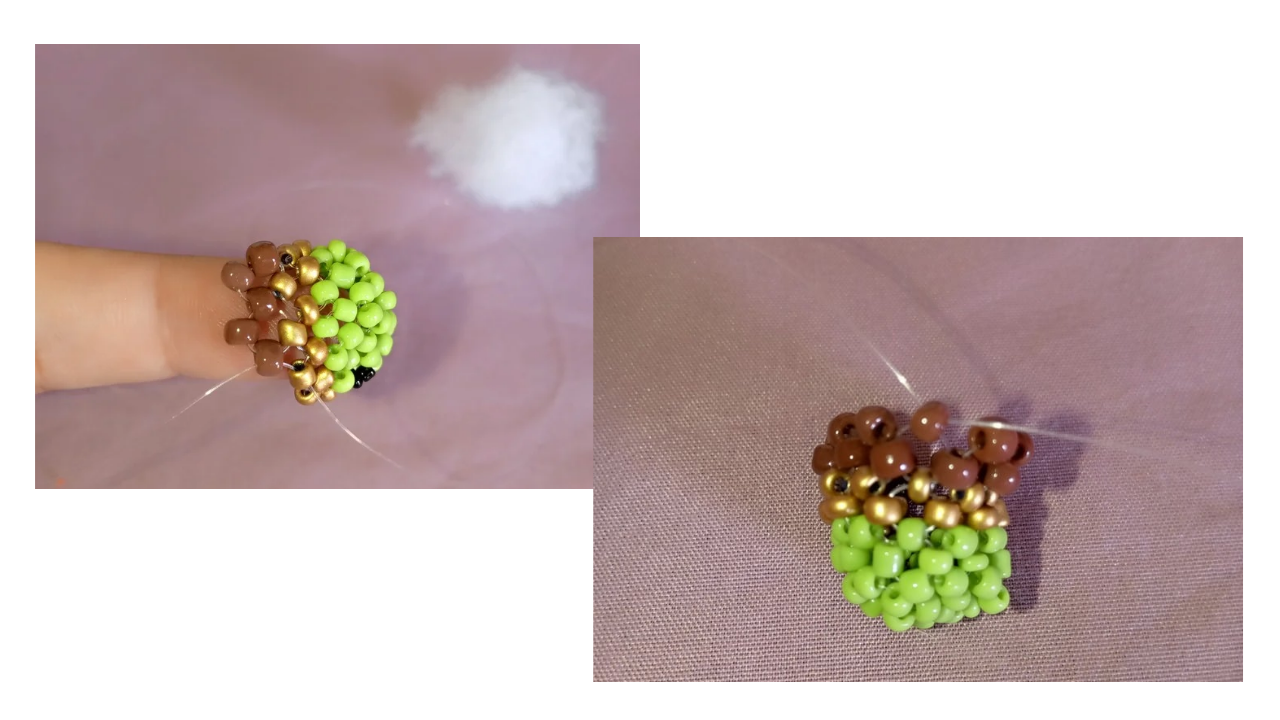
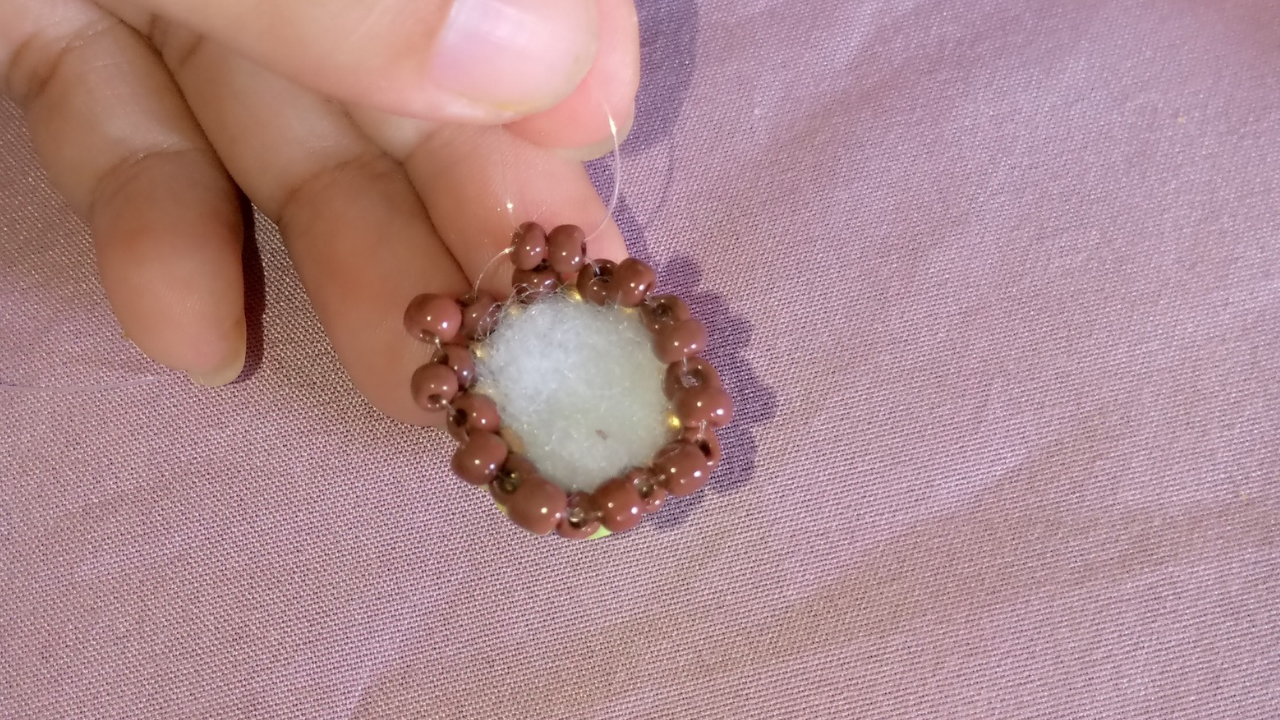
Now I'm going to move on to the body part, which will be wearing a brown robe. For this, I'll use brown beads and continue with the same sequence. I made only two rows of brown beads and, in one go, filled them with the plush stuffing. This will give Baby Yoda's body a nice shape and softness. It's already looking great!
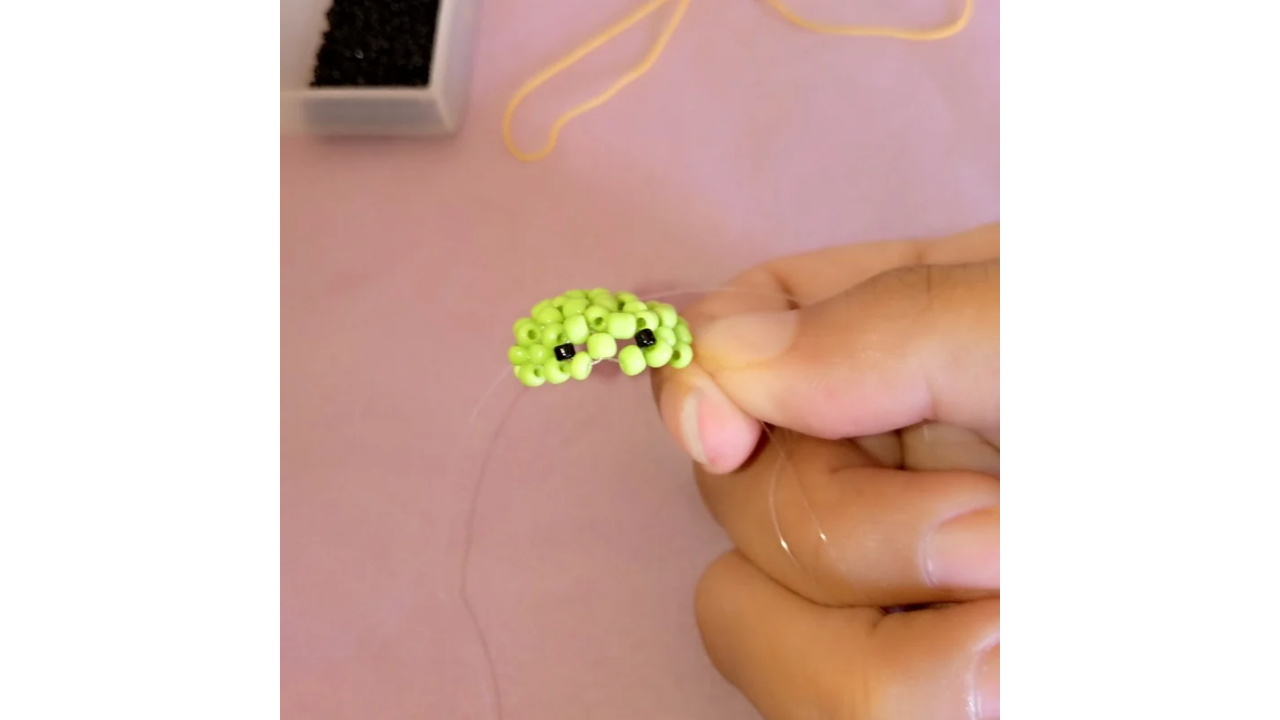
Paso nro 5
Paso nro 5
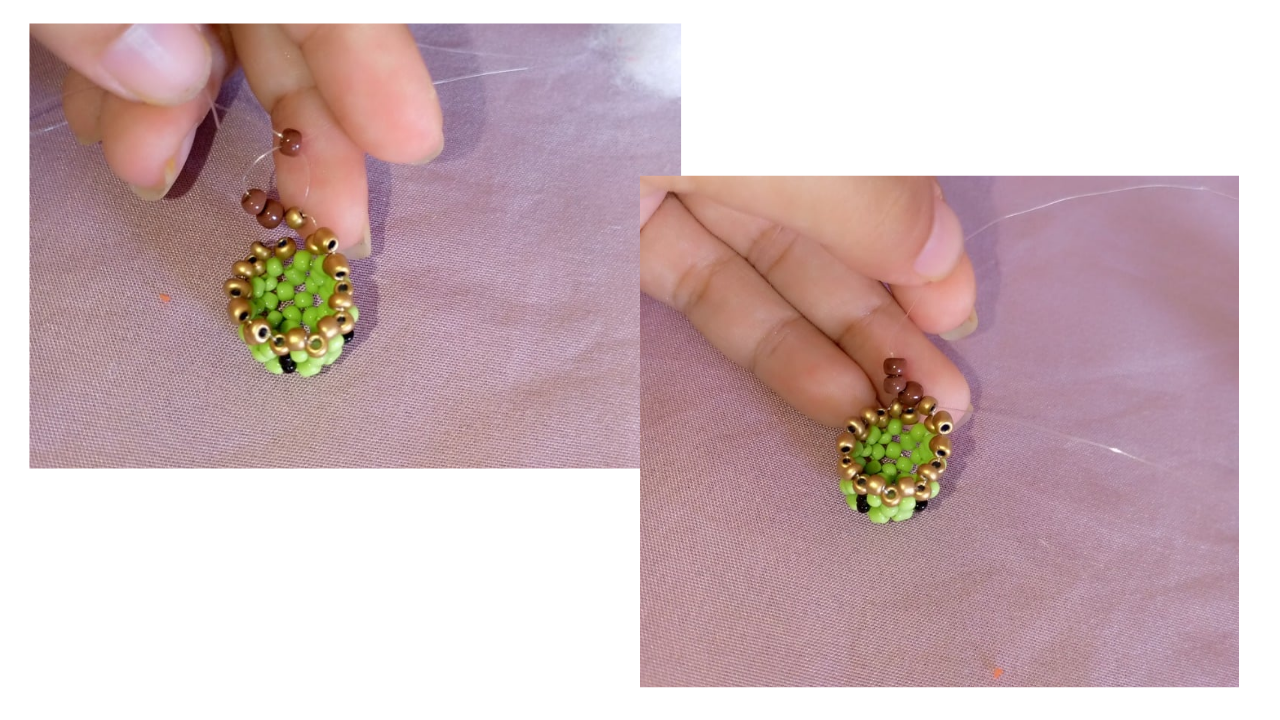
Now it's time to close the weave, and I decided to do this part with the gold-colored beads. This time I'm going to place two beads and cross them over the second, but instead of threading the nylon through the adjacent bead, I'll thread it through the two adjacent beads. This will make the weave taper and close the opening more tightly.
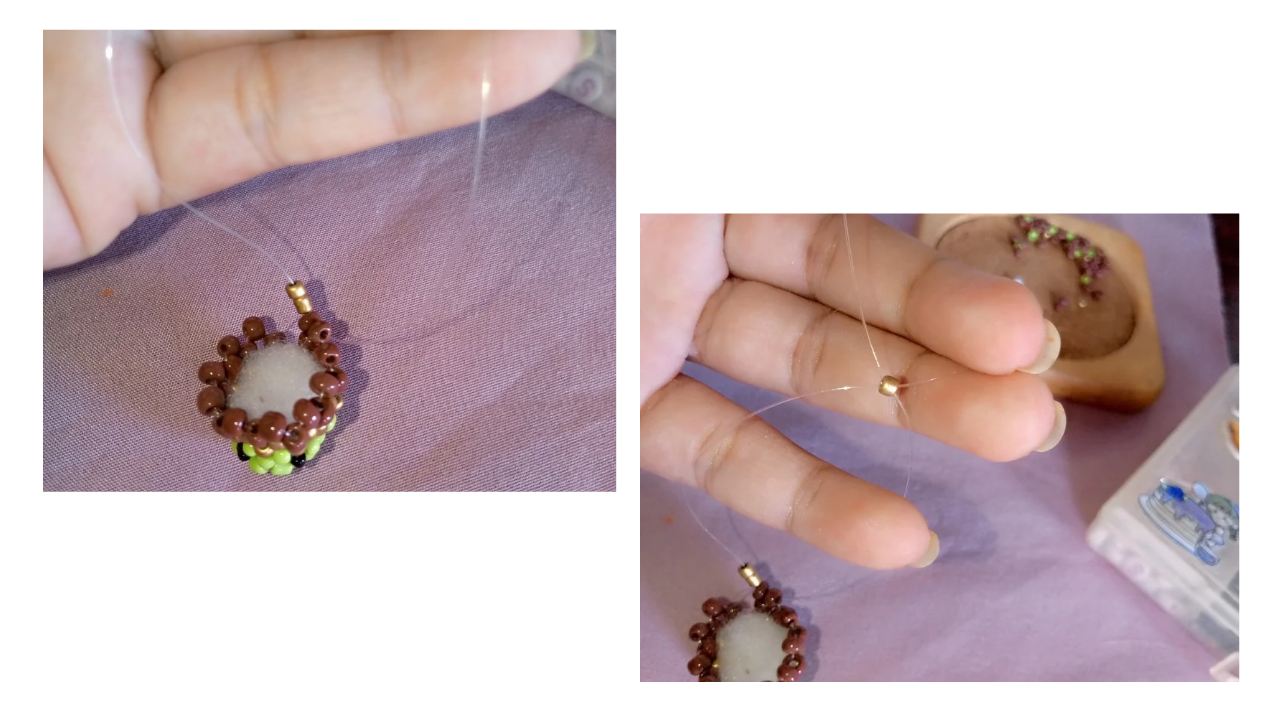
Paso nro 6
Paso nro 6
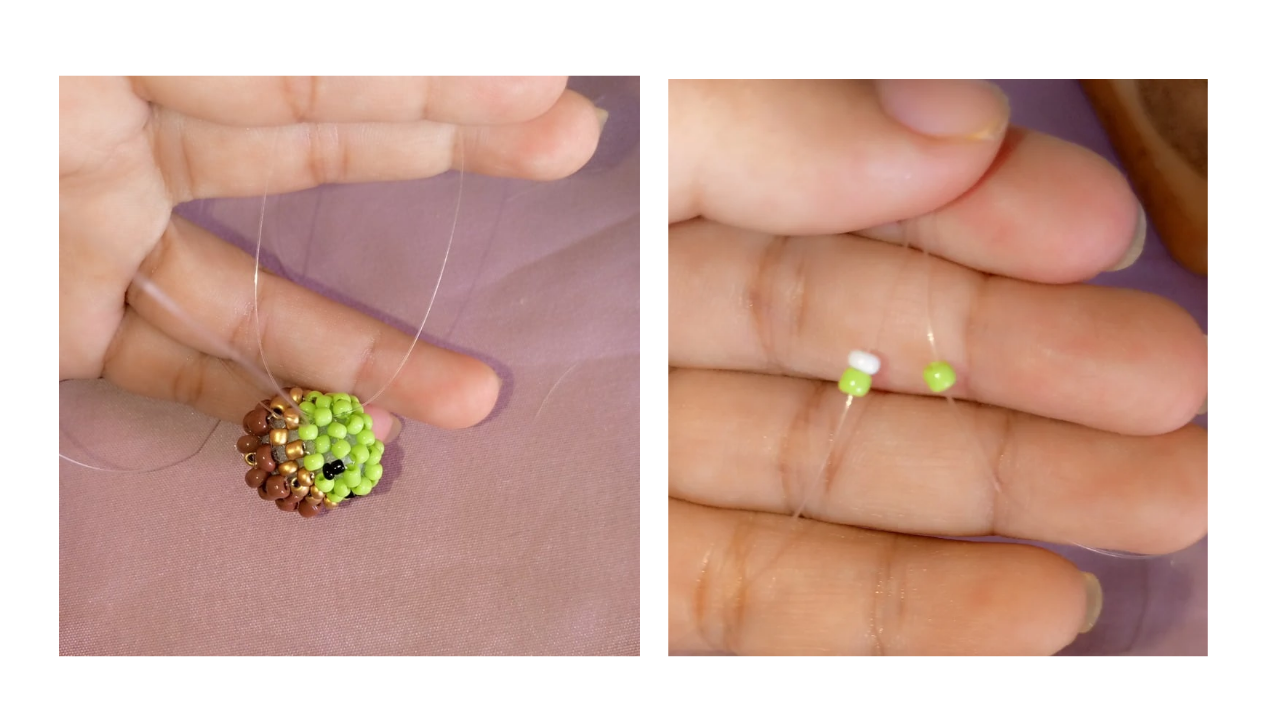
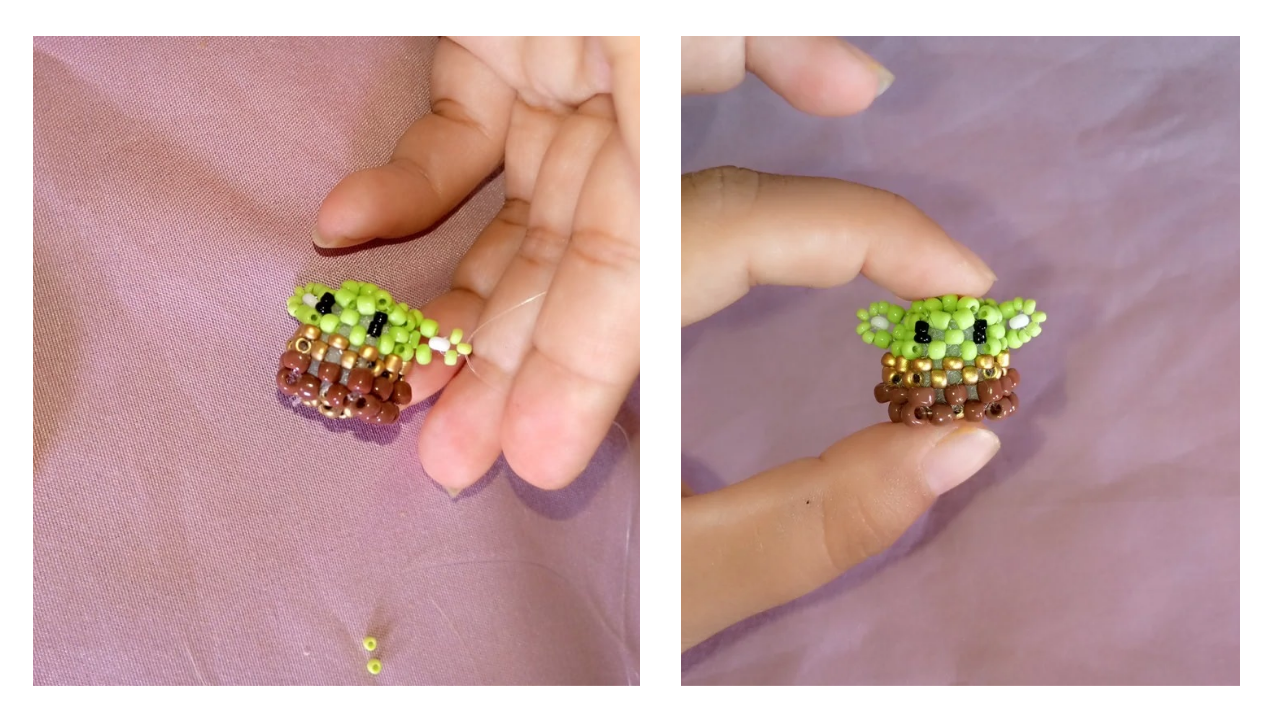
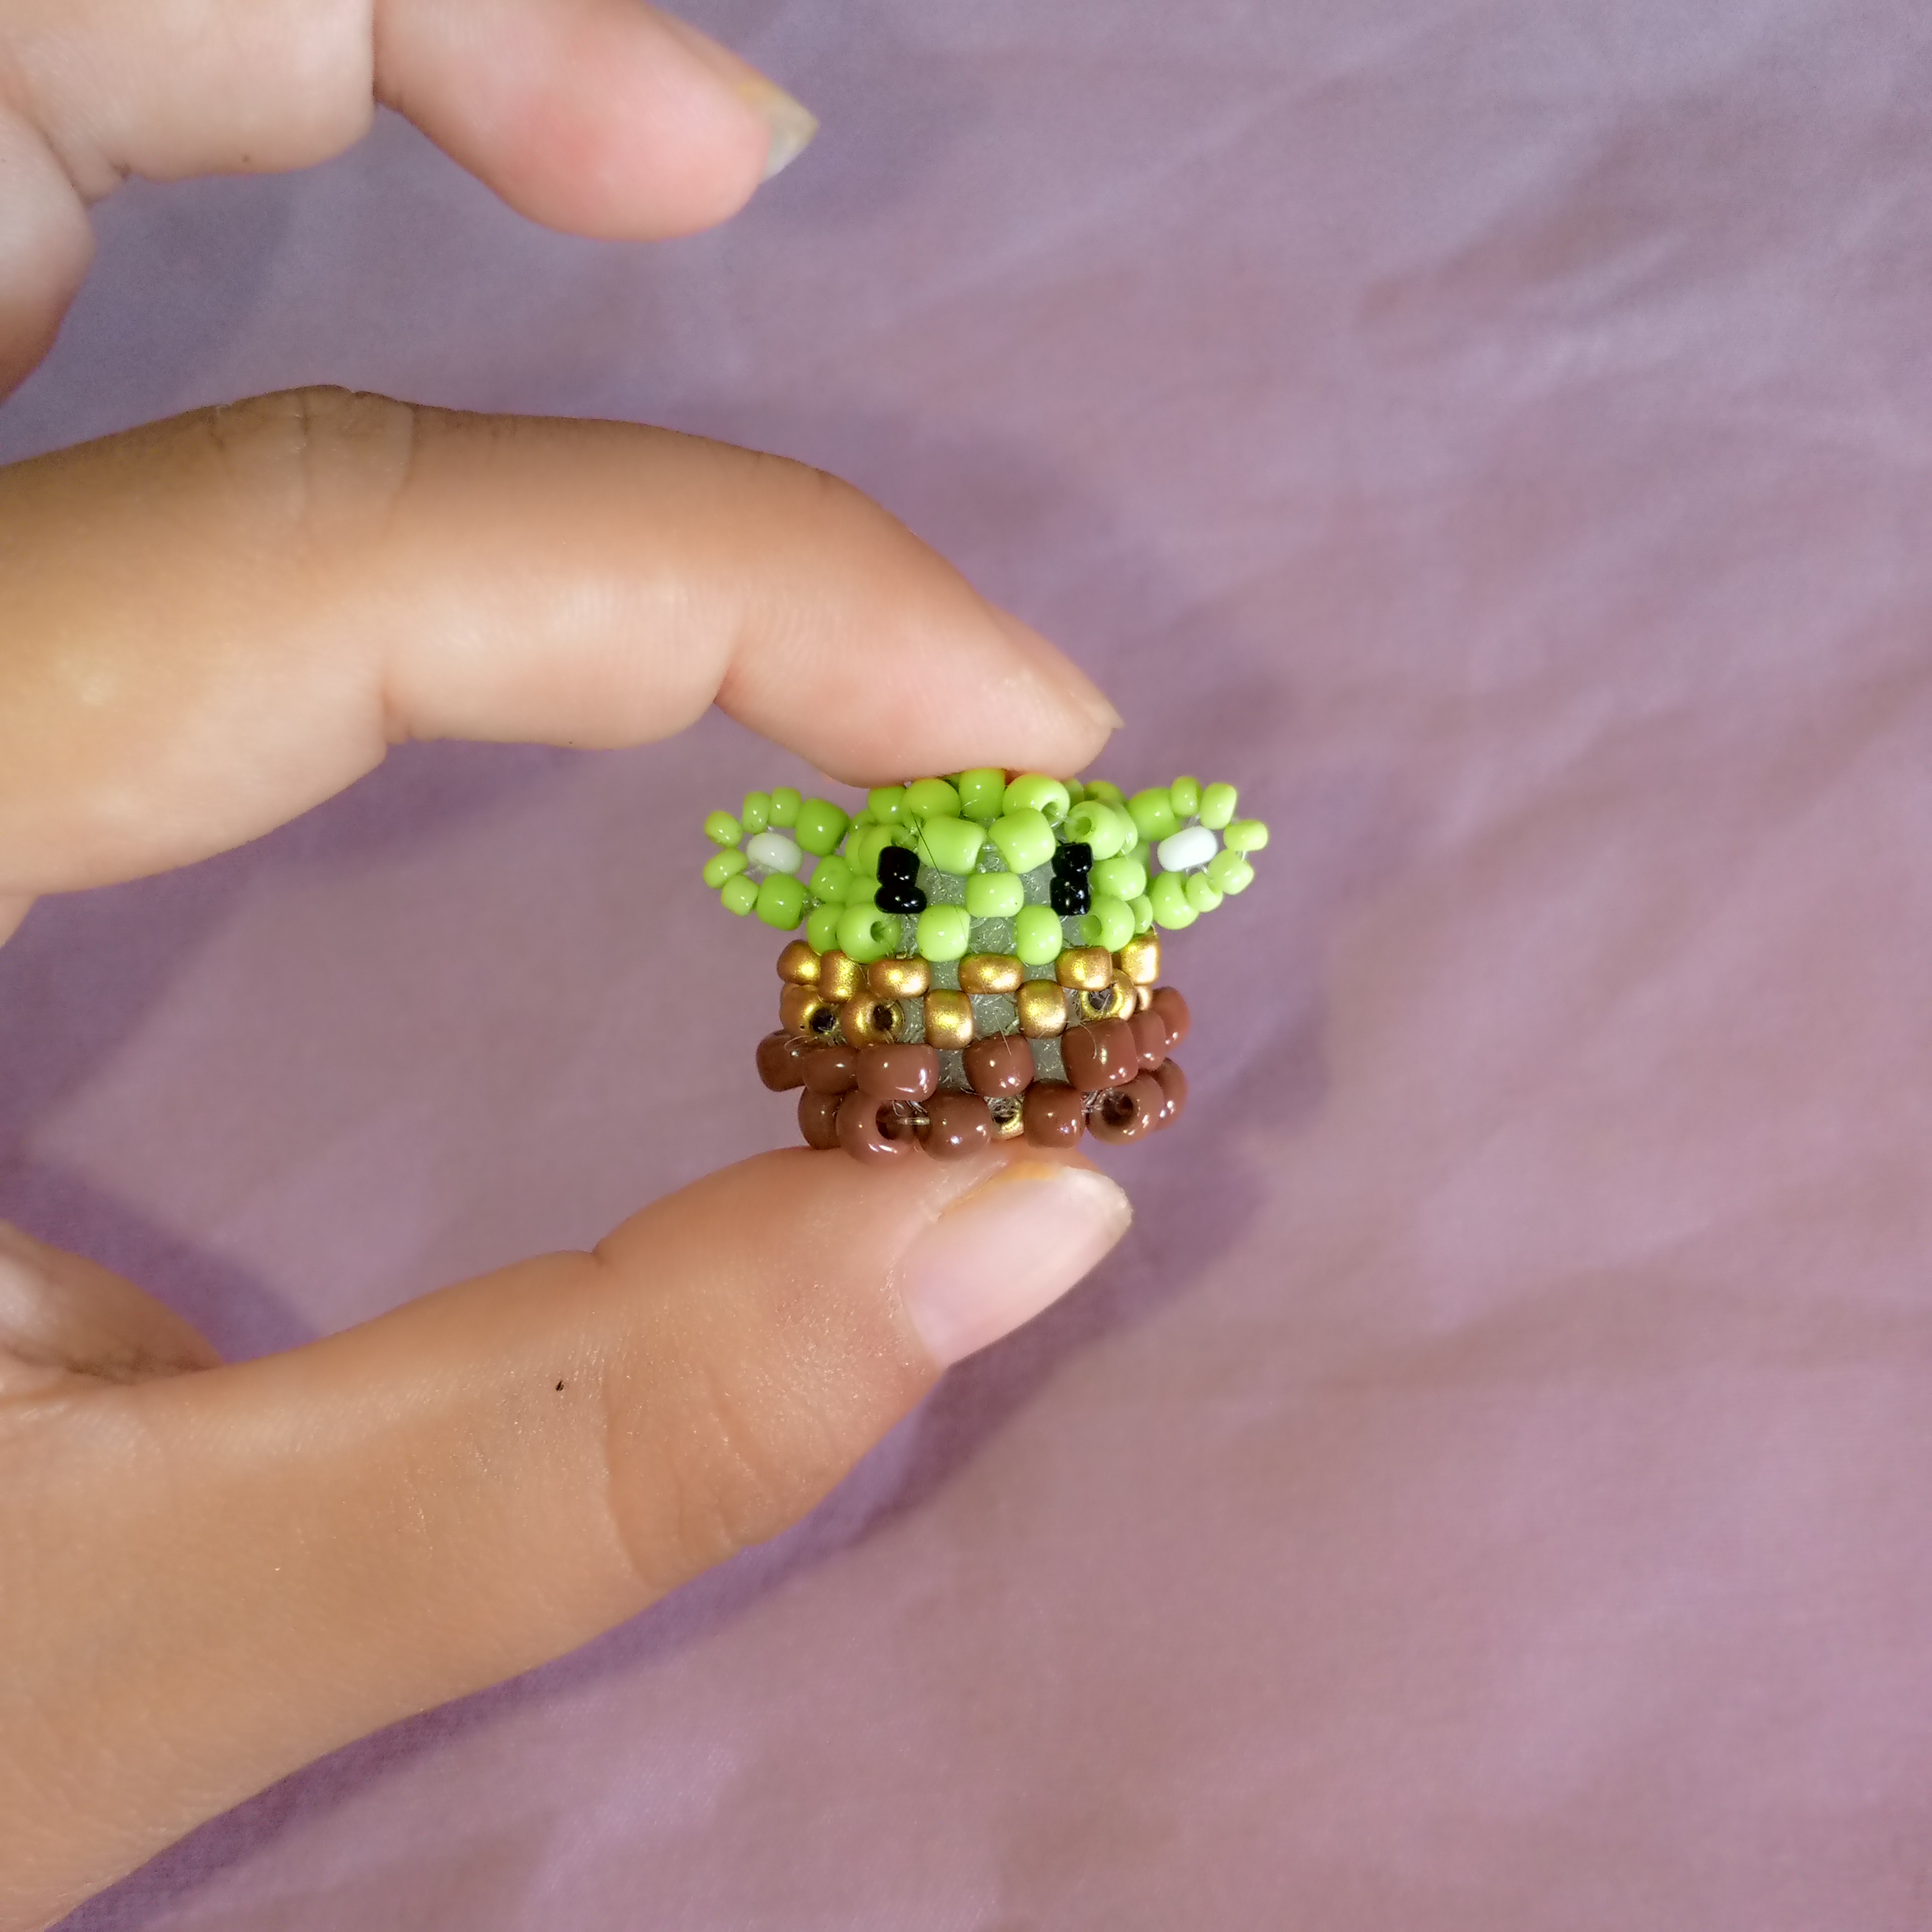
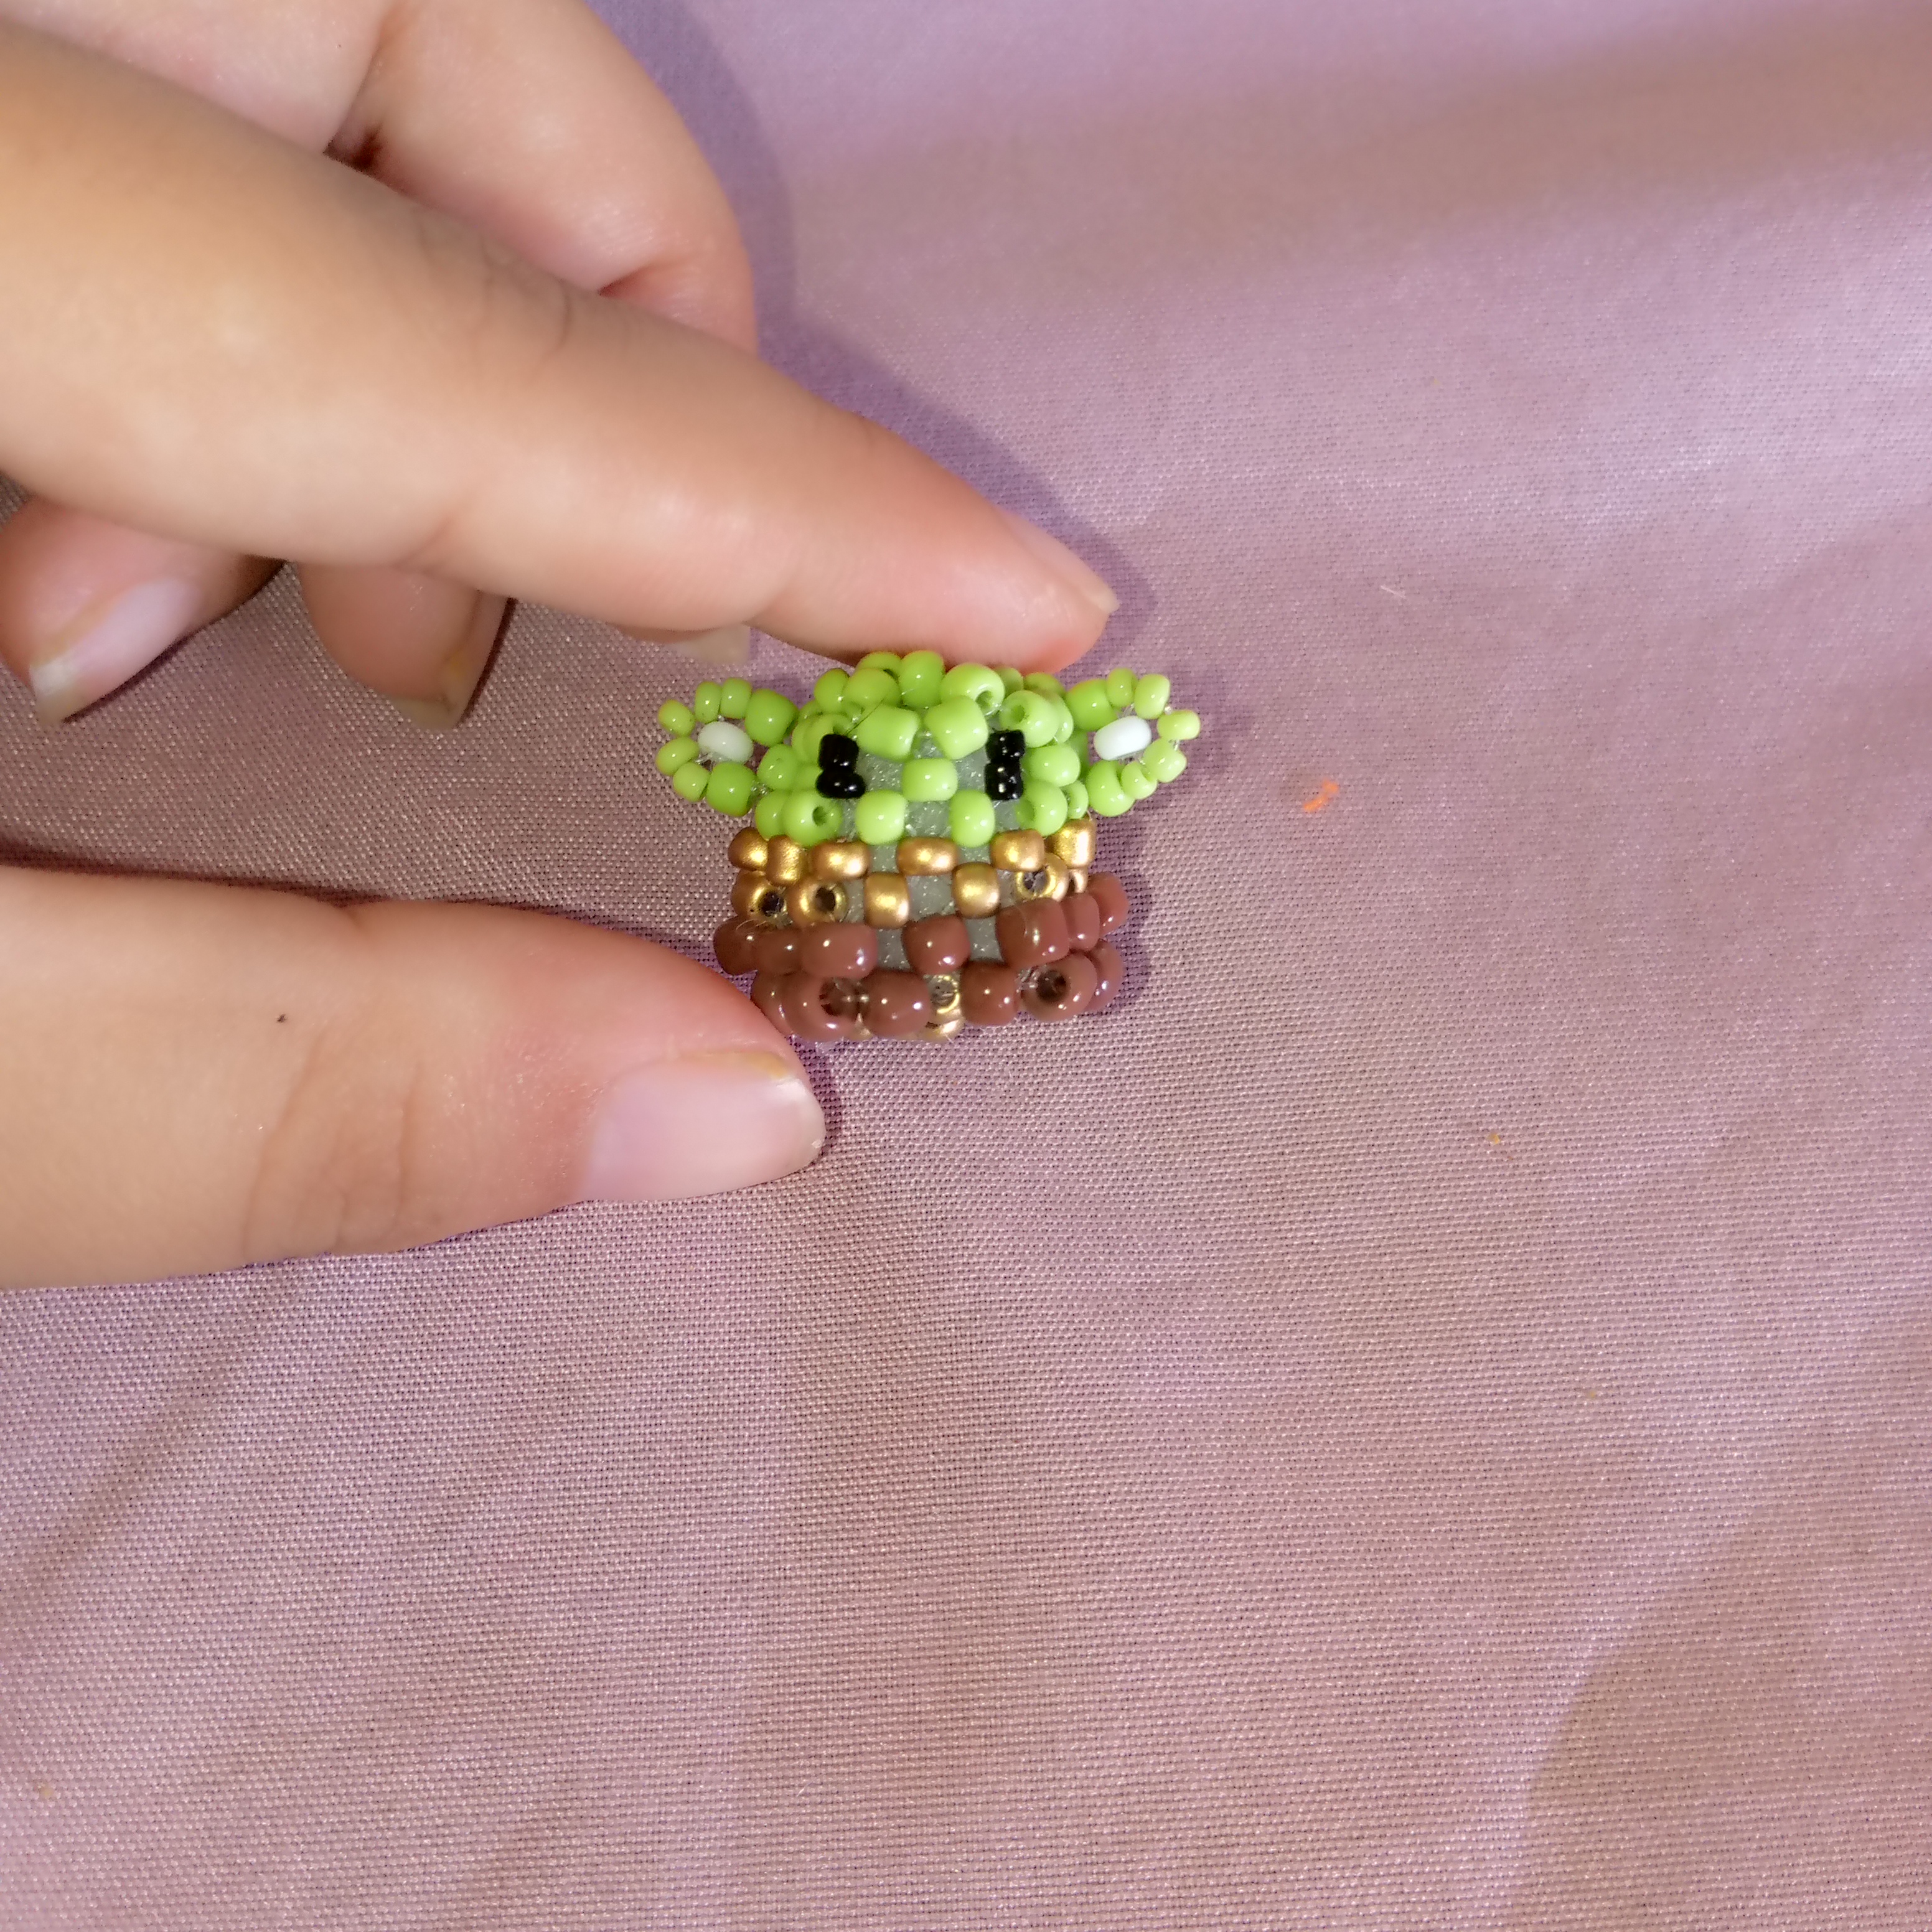
And this is how it looks. I want to mention that I tied a very strong knot to make sure there are no accidents. Now I'm going to continue with Baby Yoda's ears. For this, I'll take a little bit of nylon; you don't need much. At the same level as the eyes, I counted three spaces, and that's where I'm going to make the ears. I place two green beads on each side and cross them with a white bead. Then, I place two green beads again and cross them with another green bead. Once I have this shape, I place a light green bead on each side and pass the ends of the nylon through the first two beads. From there, I just tie a very strong knot, and that's how the ear looks. Now I'm going to make the other one the same way.


Paso nro 7
Paso nro 7
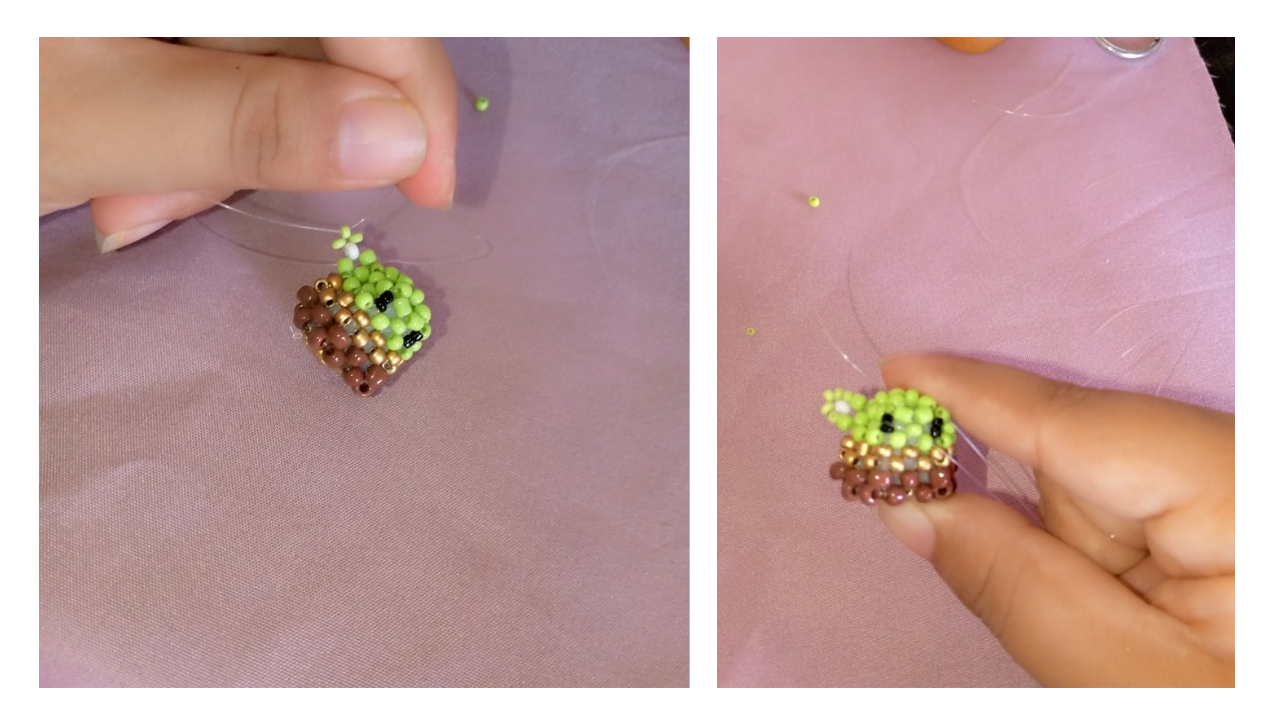
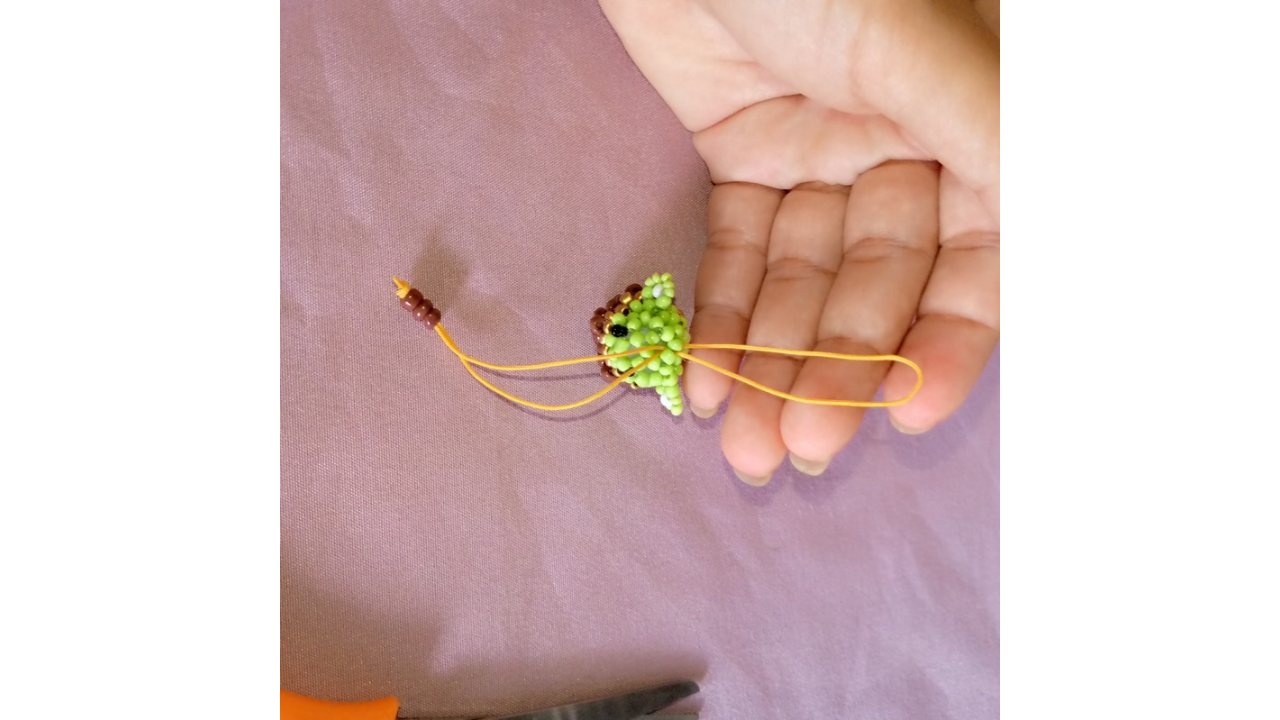
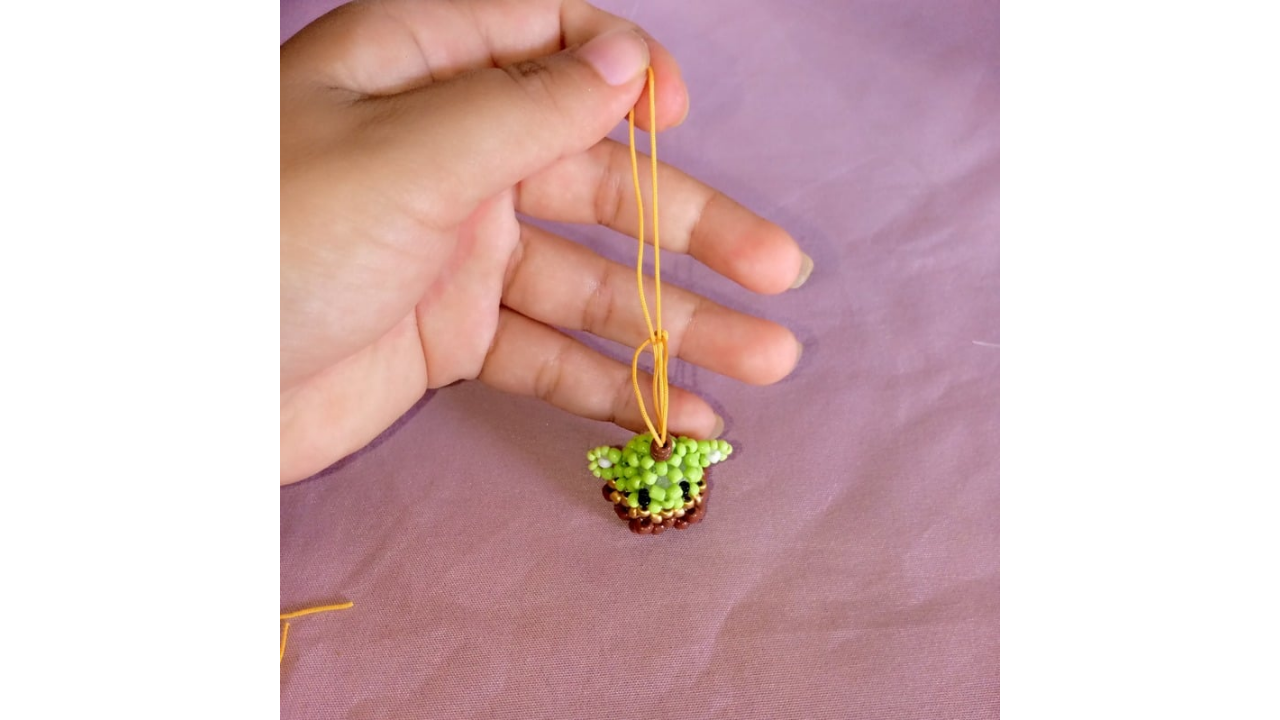
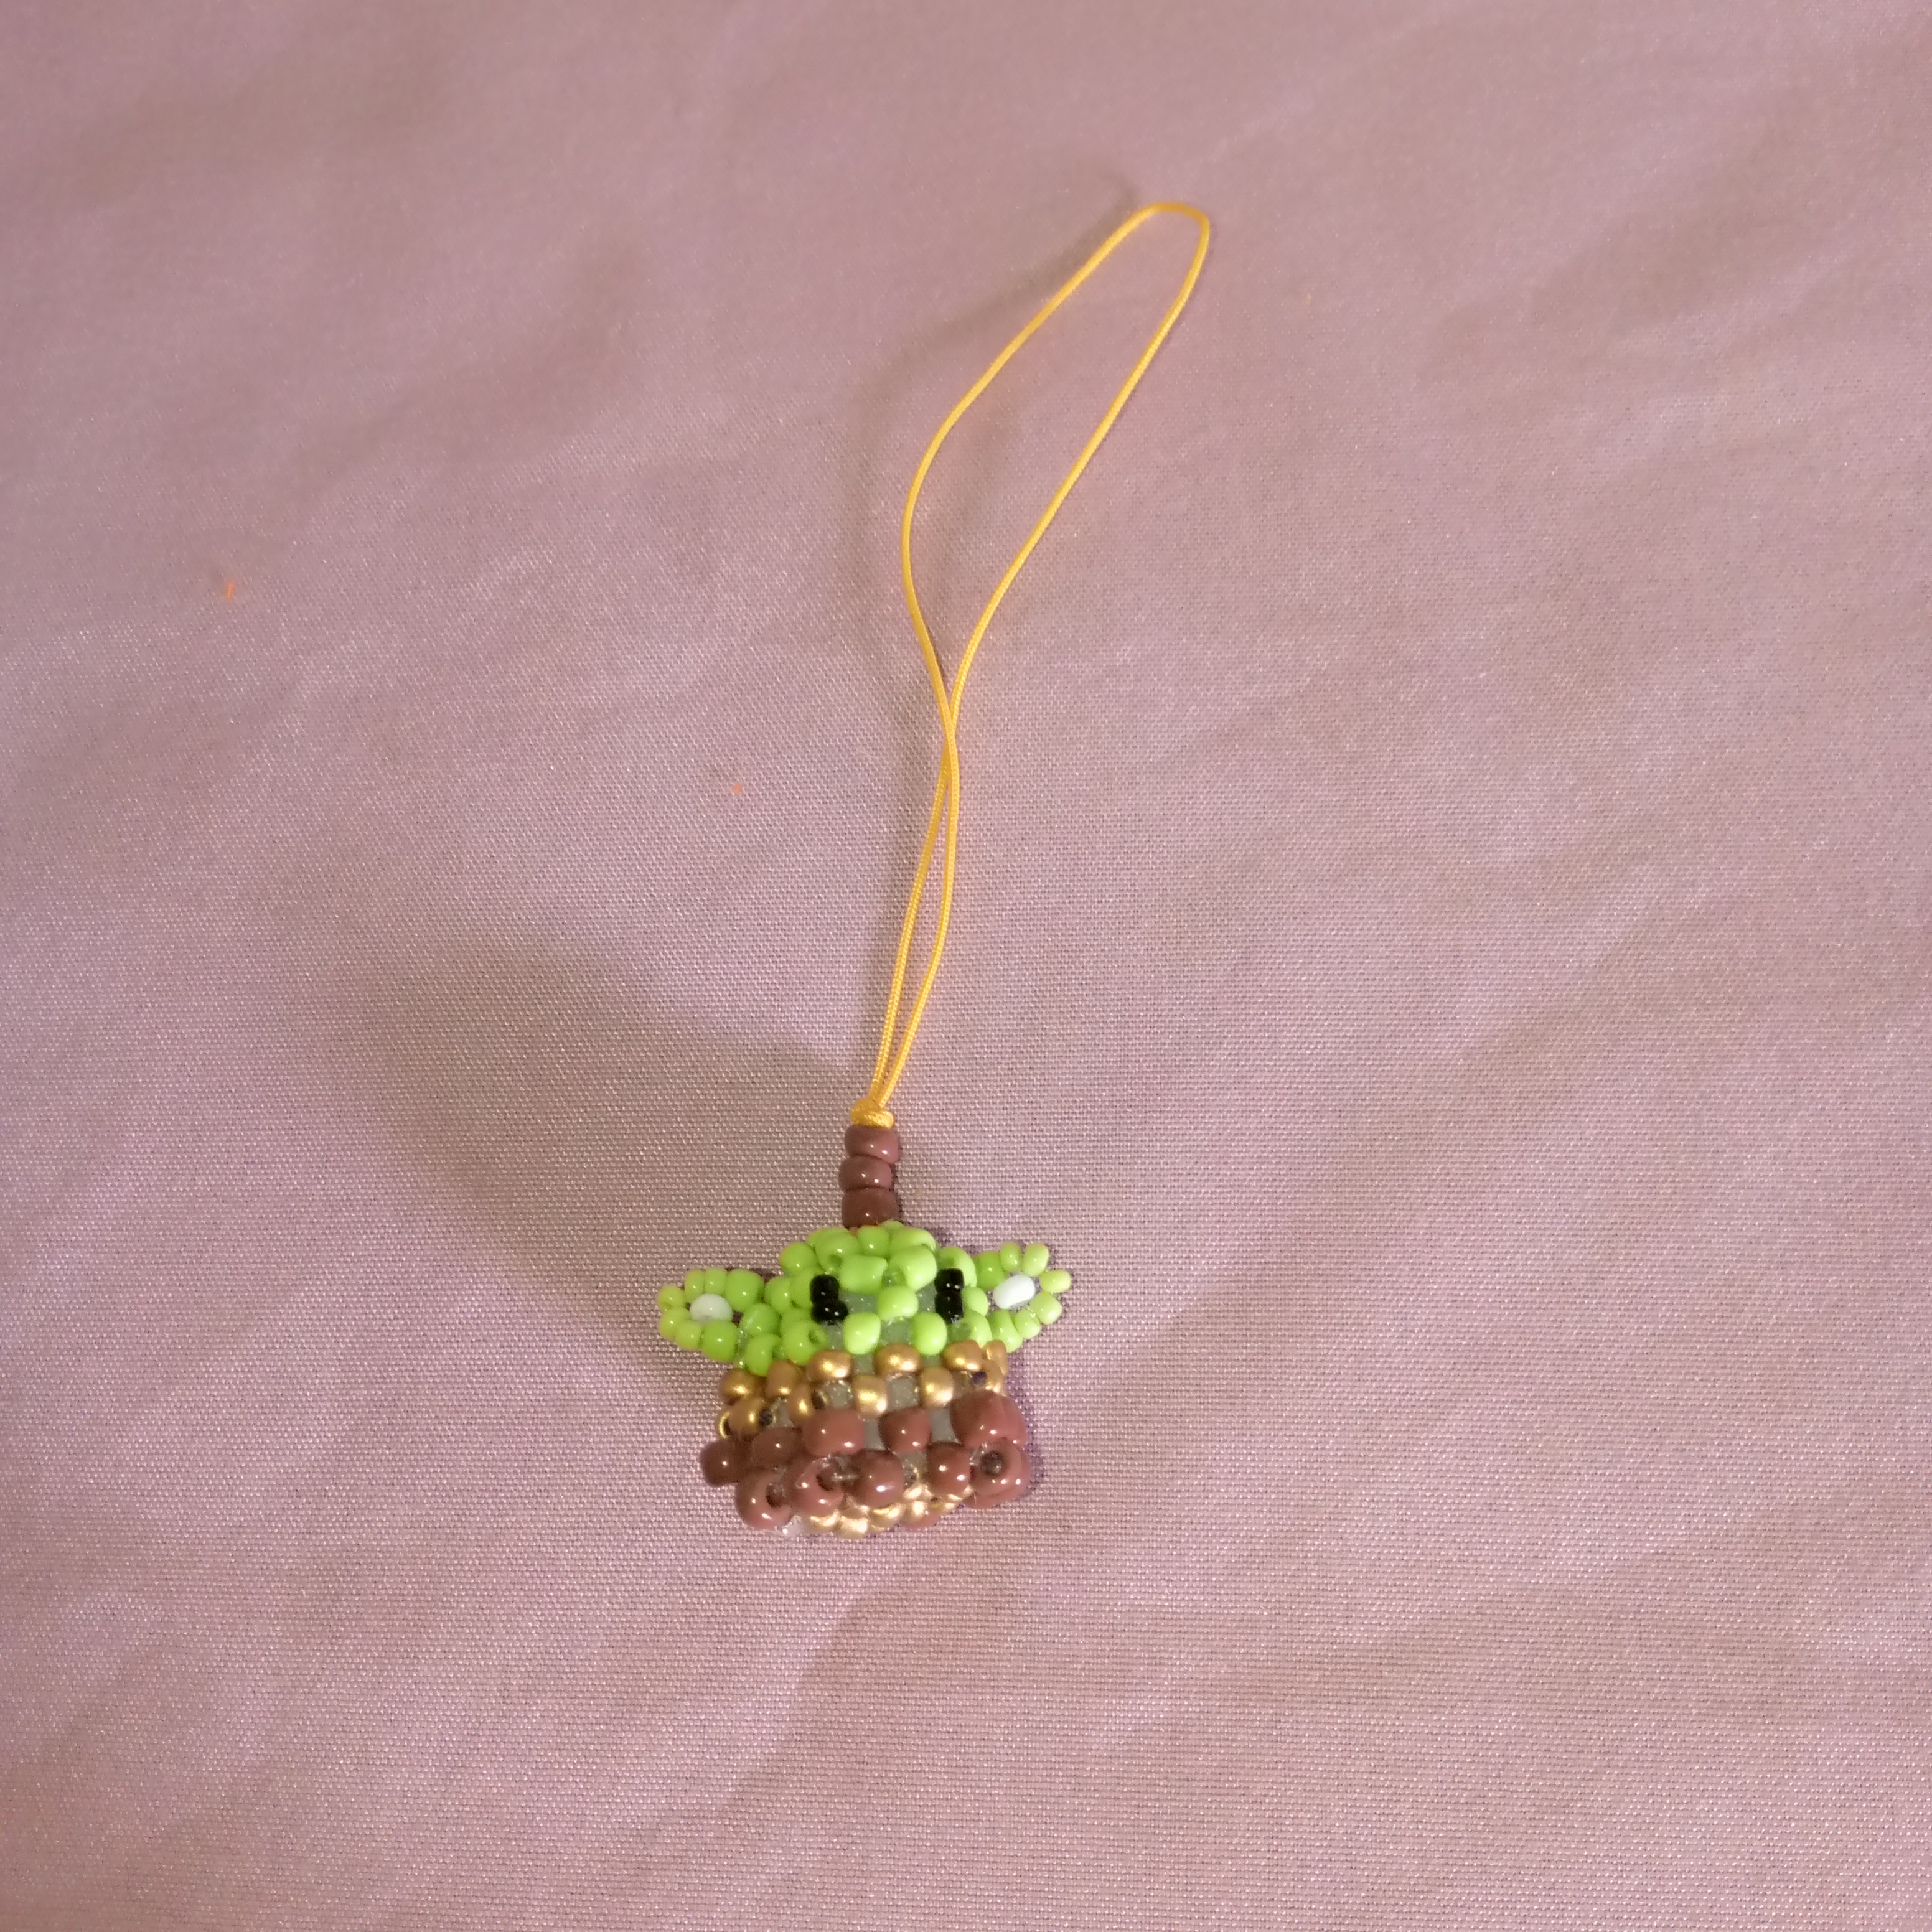
Now I'm going to attach a piece of Chinese thread, which will serve as the part to attach the keychain wherever we want. I cut it about 30 cm long, measured it with a sewing meter, tied a knot, and attached three brown beads for extra decoration. Then, I'm going to place this on top of Baby Yoda's head.
(Resultado final:)(Bottom line:)
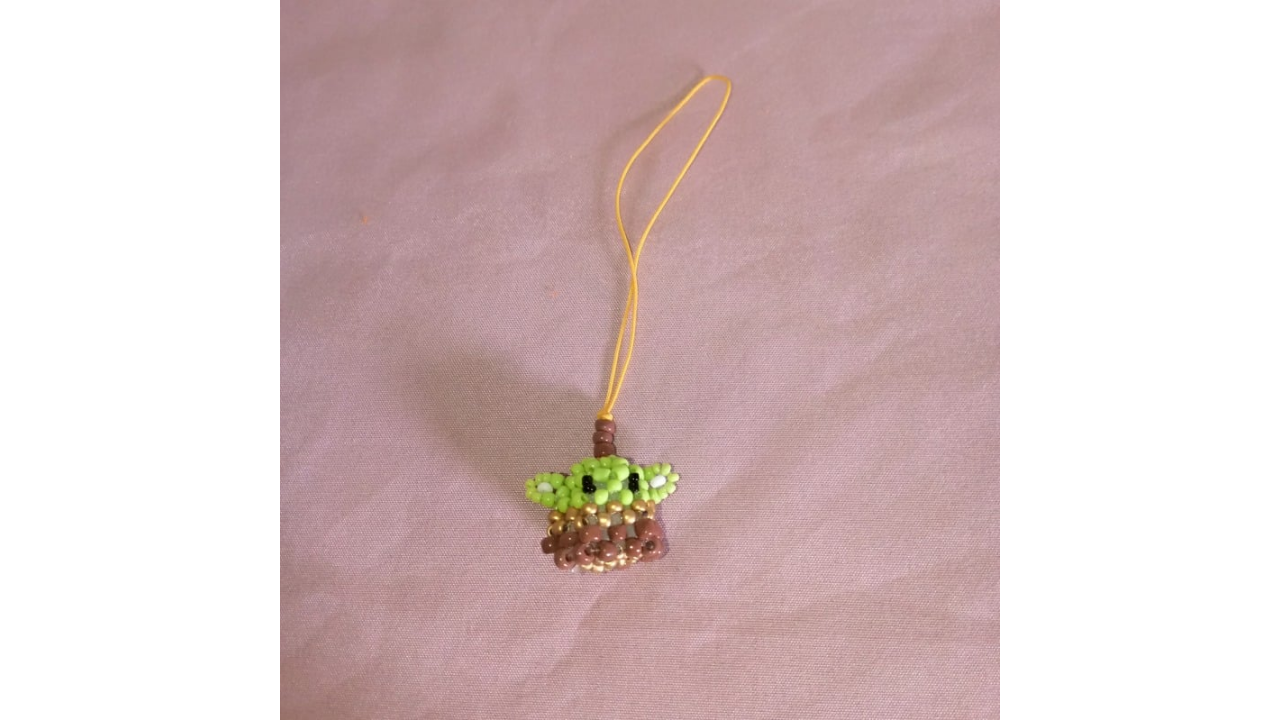
And so, after much work and dedication, I've finished my adorable Baby Yoda. Every detail, from the head to the ears to the golden scarf, gives it a unique and special touch. The keychain with the brown beads adds a decorative touch that perfectly complements the design. I'm so happy with the final result; it's charming and ready to be displayed or used as a keychain. I hope you all enjoy this creation as much as I enjoyed making it! Thank you for joining me in this process!
Las fotos de este blog son de mi propiedad|Las imágenes son editadas en canva|Fotografías tomadas en mi celular infinix Smart 7|El contenido está traducido en el traductor de Firefox.
You are very creative in designing the hanger, small beads are processed in such a way that it becomes a baby yuda. very cool👍
Hello, yes, it was truly a very fun process to do, even though I made a few mistakes, but Baby Yoda turned out great.
Something extraordinary is always accompanied by mistakes. You are great to be able to get through it👍 keep up the spirit💪 work
Ha quedado muy hermoso, un excelente diseño 👍🏻
Hola gracias ☺️ me alegra saber que te gustó
This is nice
I really love this because you really took your time to do this.
Hi, thanks, I'm so glad you liked it, thanks 😊
Te quedo genial super tierno igs me gusta ese llavero como se ve muy original, la técnica espectacular 👌 😉
Gracias me alegra saber que te haya gustado ☺️
¡Enhorabuena!
✅ Has hecho un buen trabajo, por lo cual tu publicación ha sido valorada y ha recibido el apoyo de parte de CHESS BROTHERS ♔ 💪
♟ Te invitamos a usar nuestra etiqueta #chessbrothers y a que aprendas más sobre nosotros.
♟♟ También puedes contactarnos en nuestro servidor de Discord y promocionar allí tus publicaciones.
♟♟♟ Considera unirte a nuestro trail de curación para que trabajemos en equipo y recibas recompensas automáticamente.
♞♟ Echa un vistazo a nuestra cuenta @chessbrotherspro para que te informes sobre el proceso de curación llevado a diario por nuestro equipo.
🥇 Si quieres obtener ganancias con tu delegacion de HP y apoyar a nuestro proyecto, te invitamos a unirte al plan Master Investor. Aquí puedes aprender cómo hacerlo.
Cordialmente
El equipo de CHESS BROTHERS
You have made a very beautiful keychain. It looks really cute.
Thanks You
Te quedó precioso... Me encanta lo diminuto que queda 😍 ... Lo amé!!
Una bonita técnica bien explicada.
!discovery 39
Gracias
This post was shared and voted inside the discord by the curators team of discovery-it
Join our Community and follow our Curation Trail
Discovery-it is also a Witness, vote for us here
Delegate to us for passive income. Check our 80% fee-back Program