Repairing light bulbs with a clothes iron [Eng+Spa]
Greetings to the Hive Diy community, I comment that I had not been able to publish much lately, I have been very busy in the workshop repairing a television that they consigned to me.
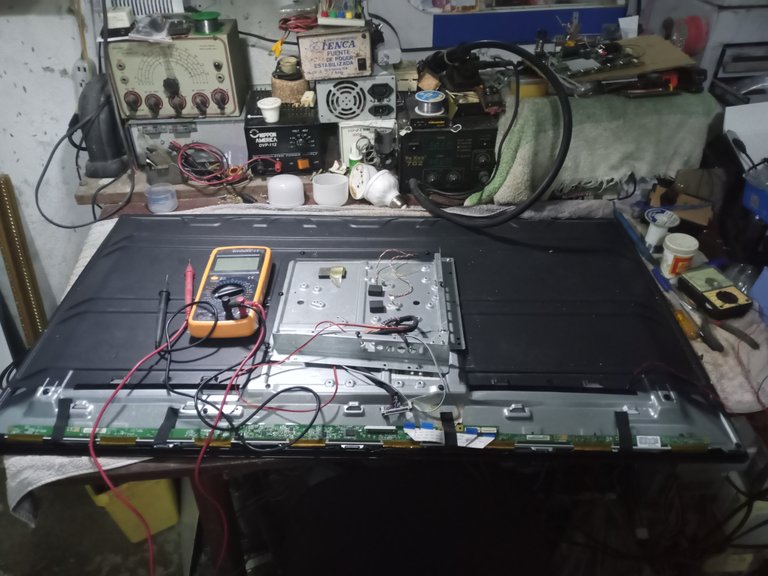
But that TV is giving a lot of battle, so I pause me while buying the spare parts and I take the opportunity to share with you some of my regular work.
Taking advantage that I already have in the deposit, several bulbs of the same manufacturer and the same model to repair.
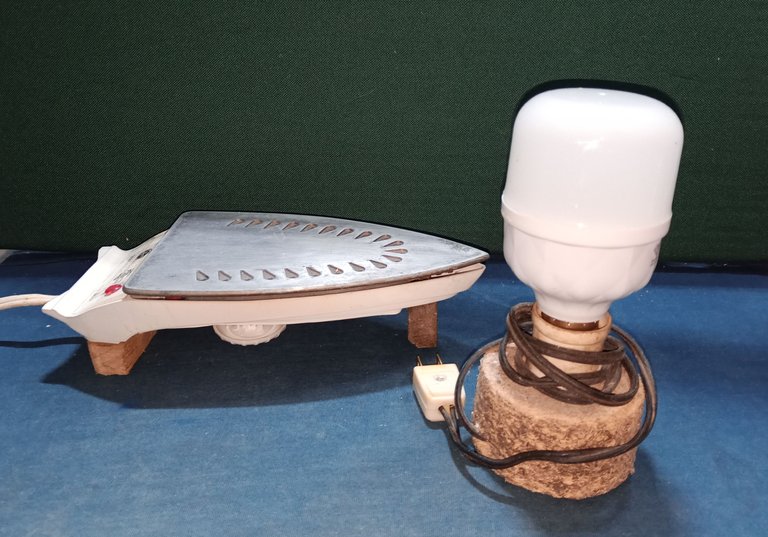
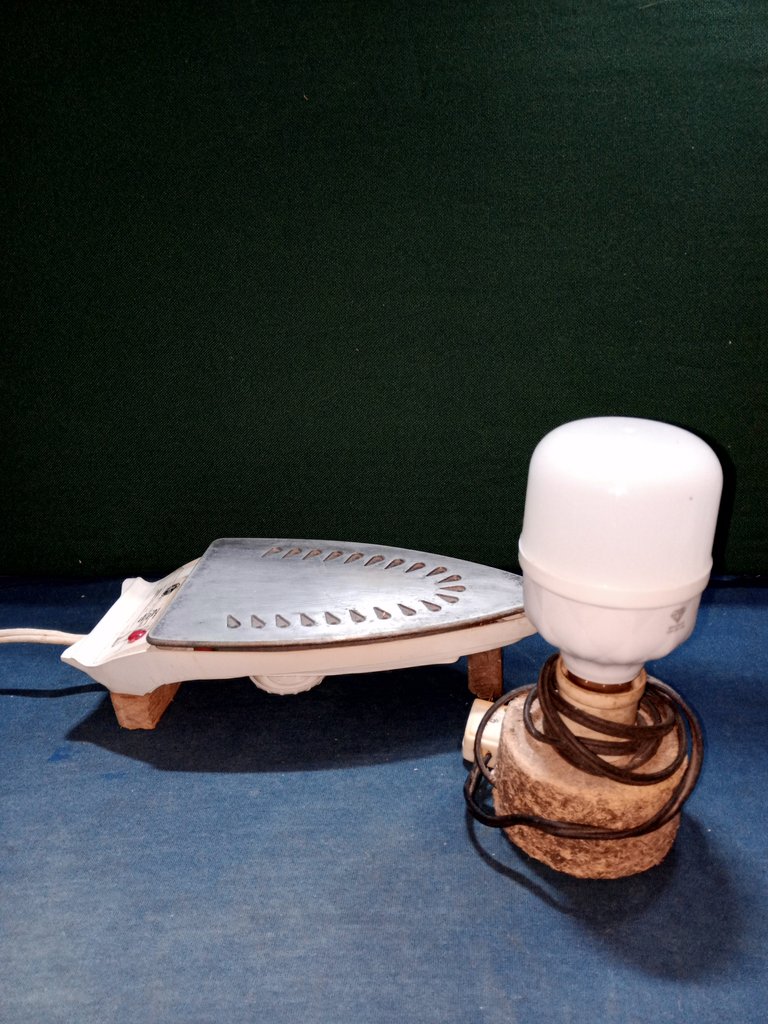
I will now show you another method to do the job in a easily, quickly, with a fairly clean termination, wearing a disappointment that manufactures with a clothing plate, which recits to make the tool.
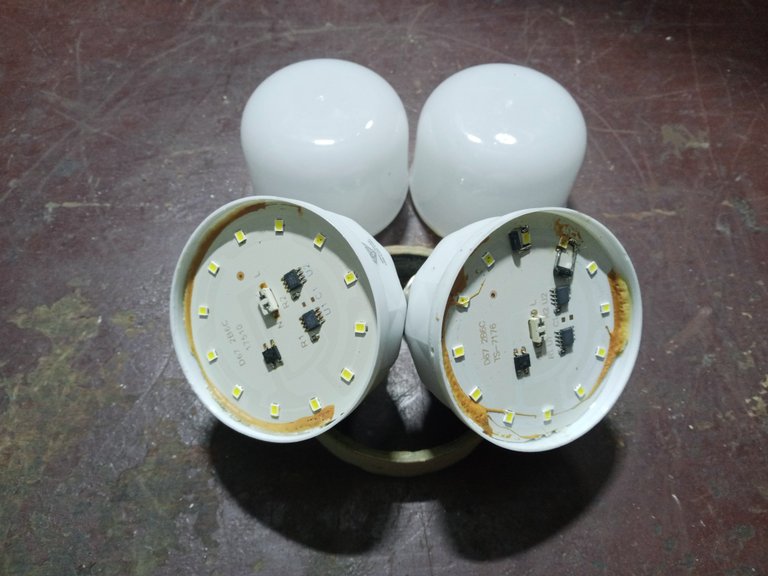
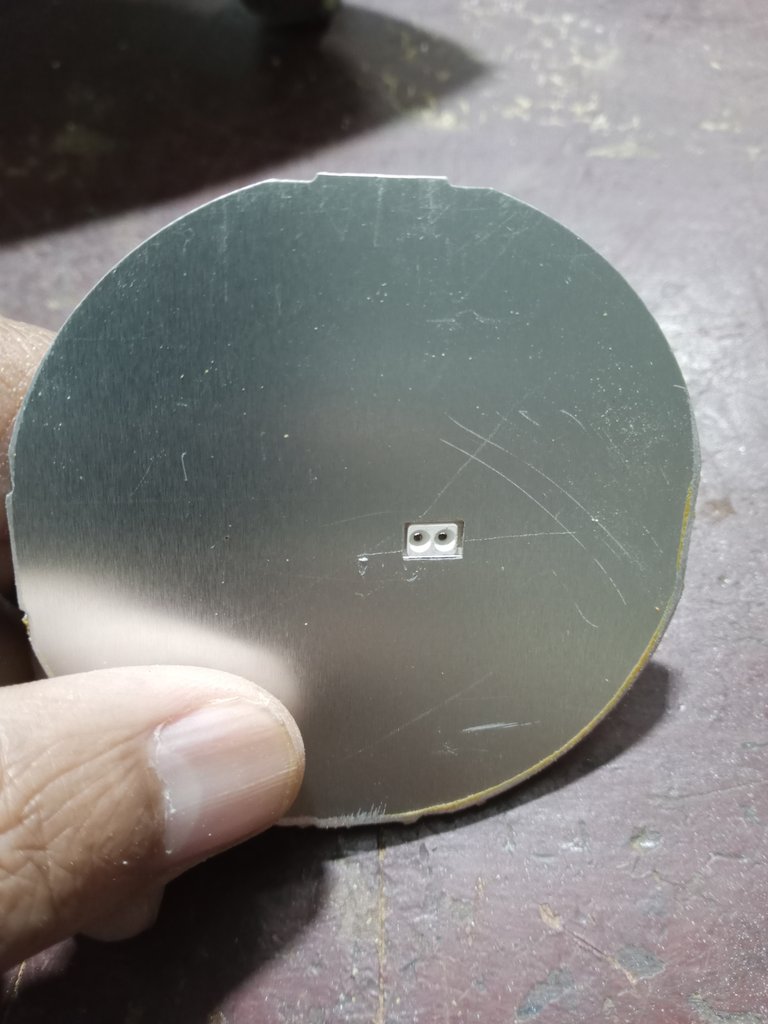
The first thing is to verify which are the LEDs that are damaged and what are the LEDs that are in good condition, I verify them with a LED tester that a while ago, recycling electronic components.
The rule is that a LED bulb with more than two damaged LEDs is not repaired and will remain as spare material for other bulbs.
In this bulb he had used diodes 1N4007, to make the repair, since at that time he did not have, another bulb of the same model, we must remember that: the LEDs of the different bulbs models, or of a different manufacturer brand, they can have different work voltages. At the time of use, after burning two more LEDs, this bulb was as a replacement material.
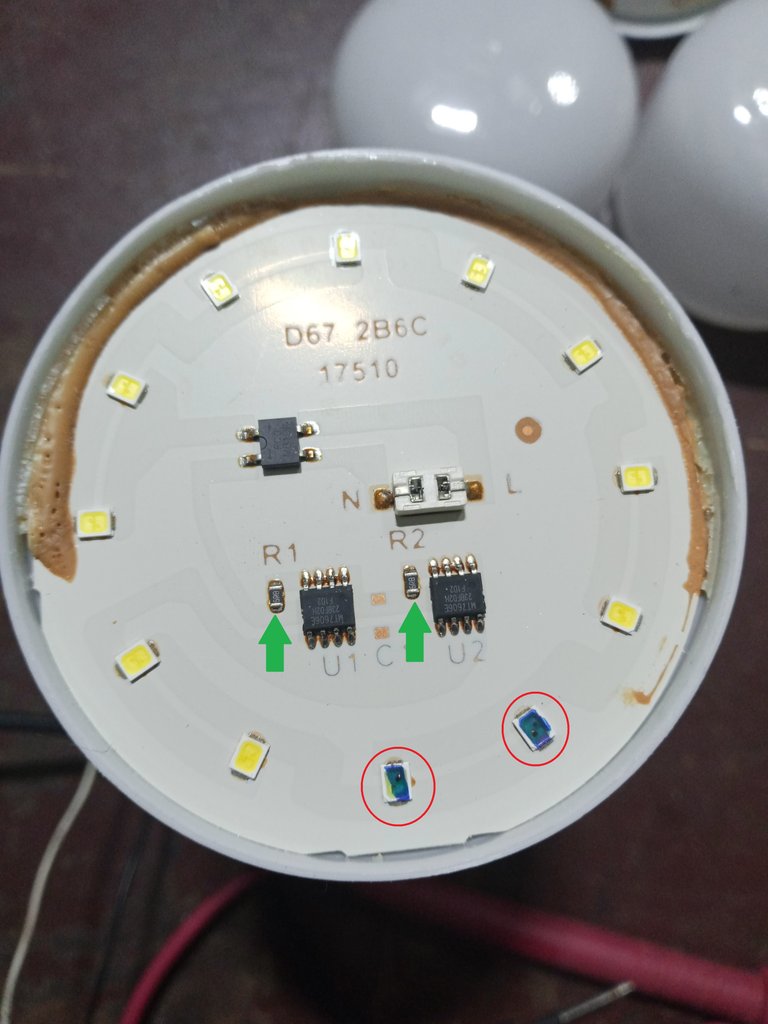
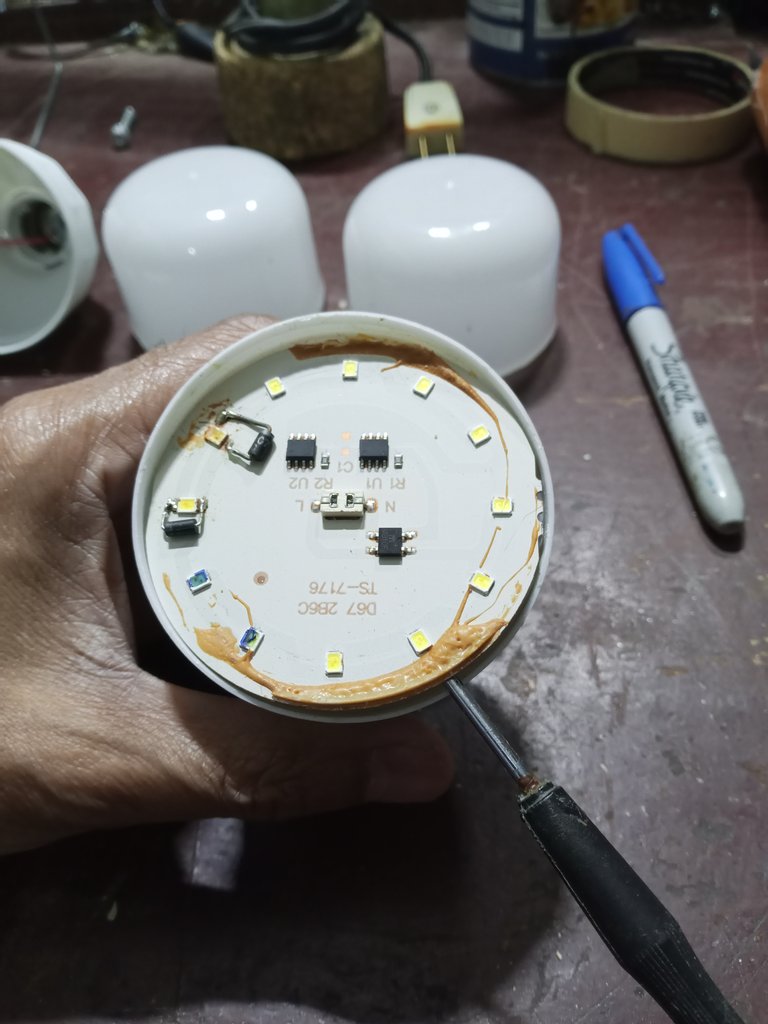
The bulb to repair only has two damaged LEDs, use a marker to identify them, usually when they are damaged they have a black burn or point on their surface, but it may happen that the LED is damaged and look good.
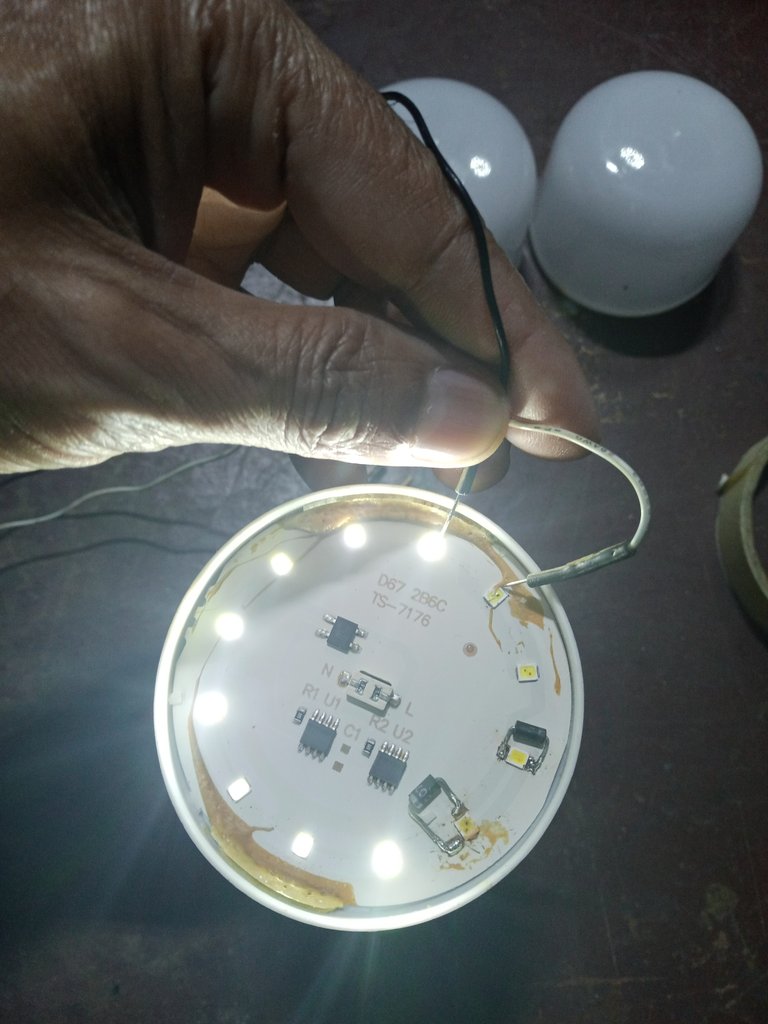
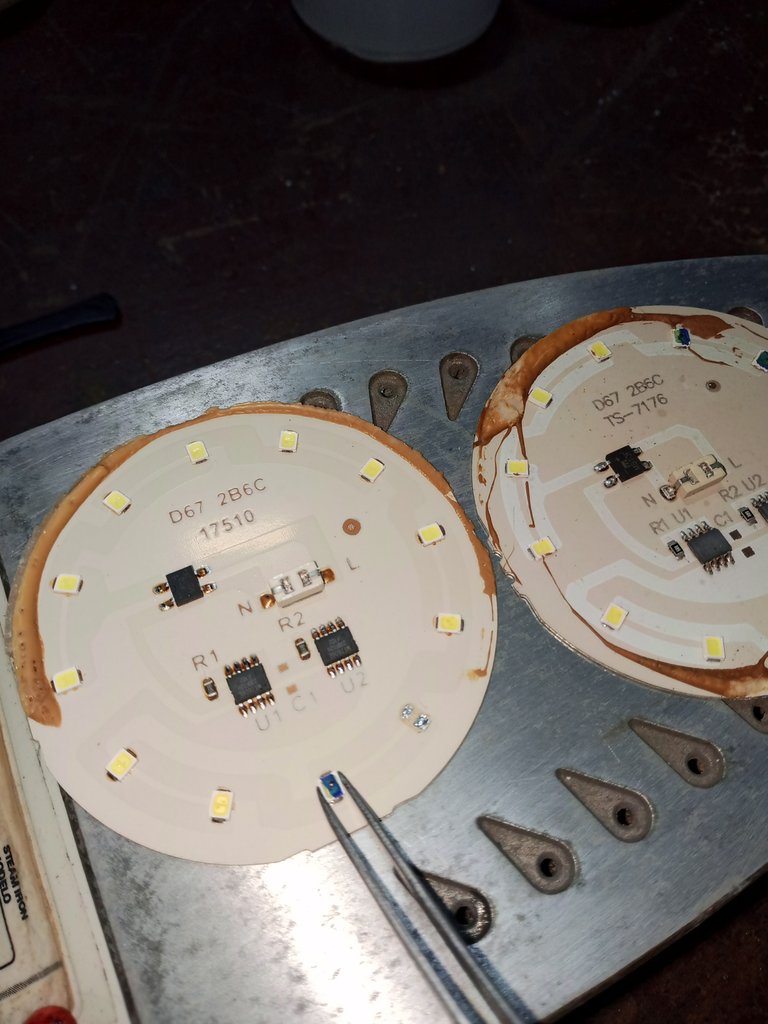
If someone wants to reduce the intensity of the working current in the LEDs, to increase the life of the bulb, they only have to replace the resistors indicated in the image with the ones green arrows. In theory, a resistor with a value slightly larger than the factory-installed resistor should be installed.
It makes more sense to change the circuit resistors when the bulb is new. When the bulbs are recycled, all the LEDs are already worn out, and the intensity needs to be lowered much further, and the bulb ends up illuminating much less.
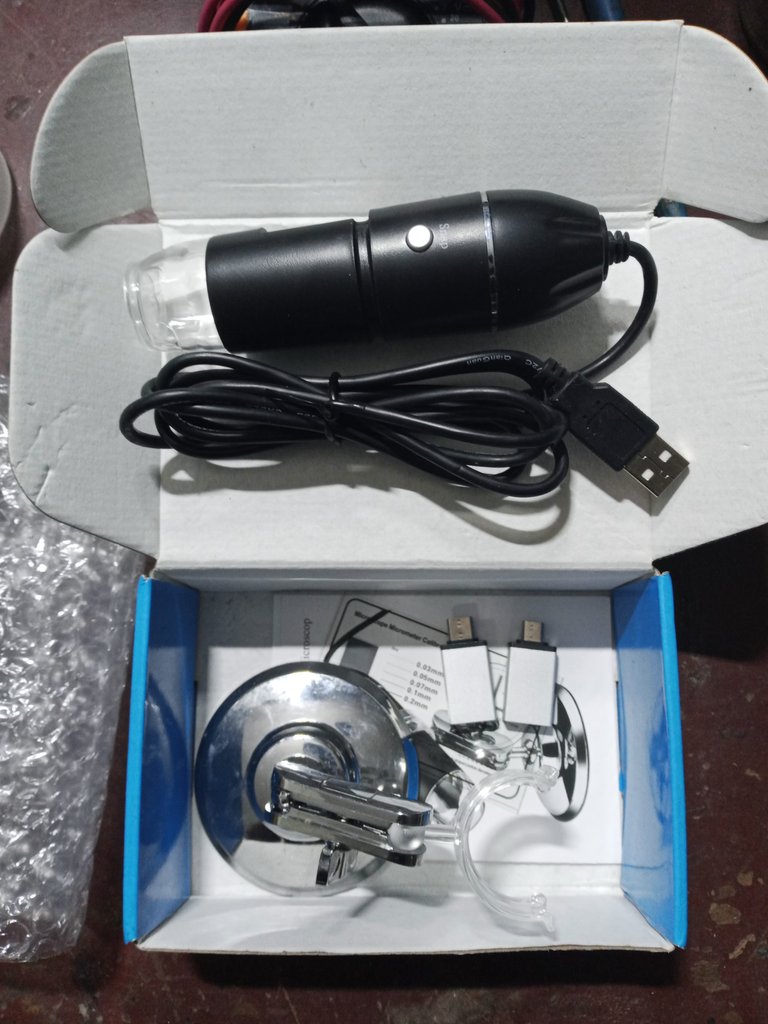
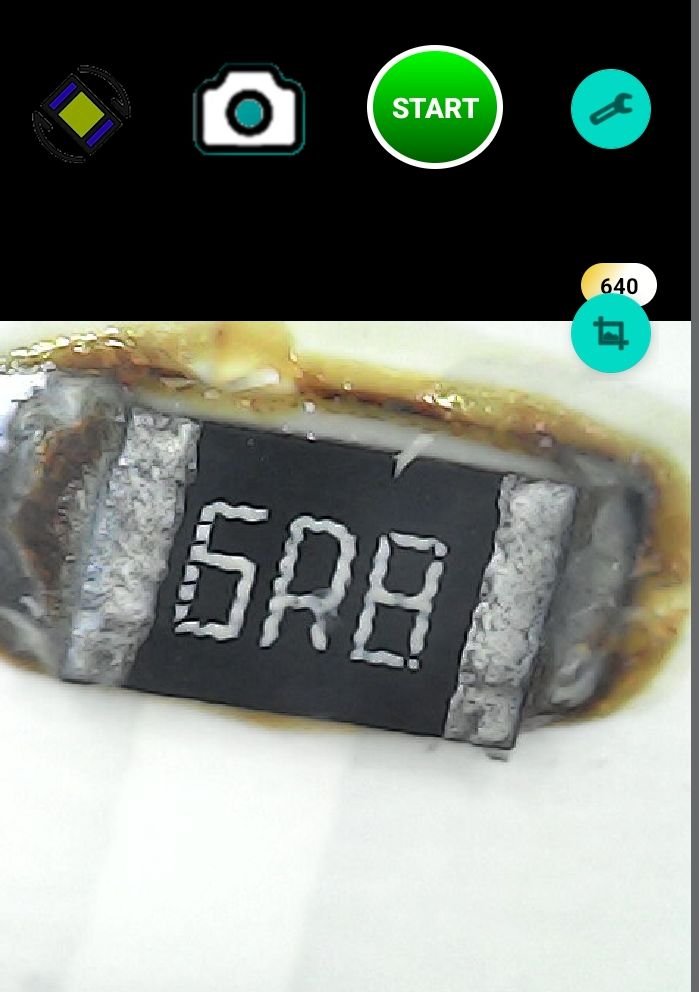
I'm going to use a Chinese microscope that was given to me to collect the data and have the information for the modification in the future.
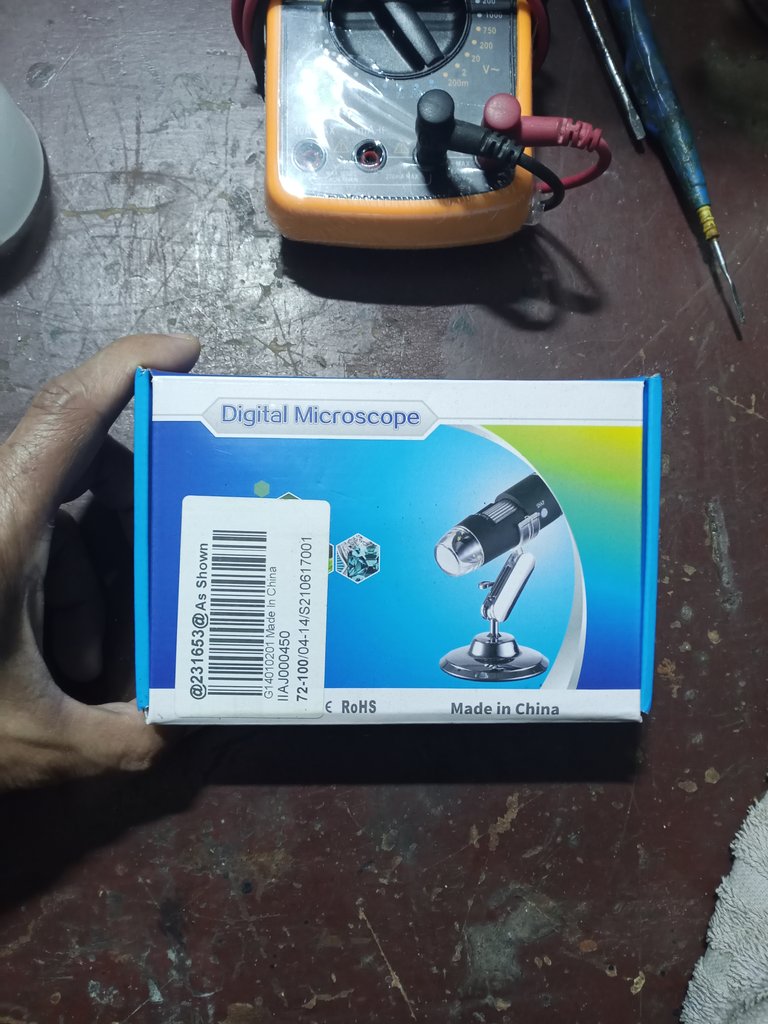
It's pretty basic, a little better than the other old microscope they lent me for some work.
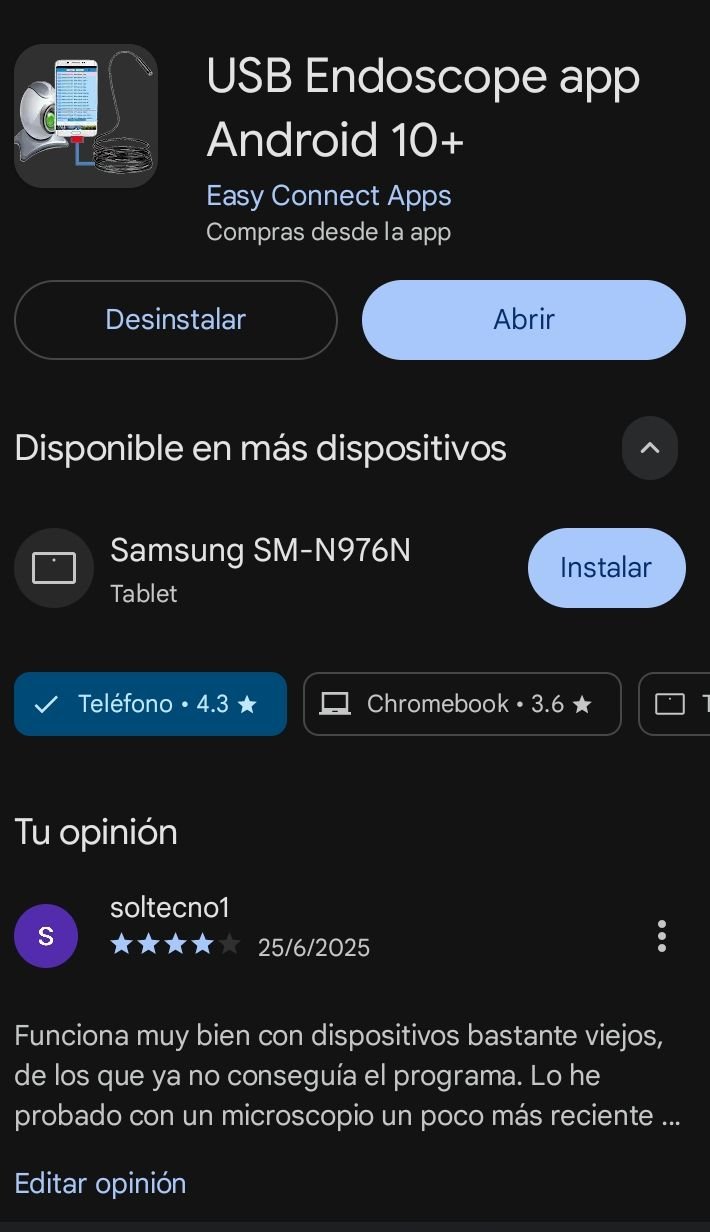
To connect the microscope to the phone, I usually use a generic app, USB Endoscope, which is quite simple and one I've been using for a while.
This app can work with very old microscopes that no longer have a downloadable software, and it can also work with this slightly newer Chinese microscope.
And by using a single app, I don't clutter up my phone's storage space with multiple apps.
I capture the value of the resistors: they are 6.8 ohms, but at the moment I don't have an approximate value in stock that would work for me, so I'll keep the originals.
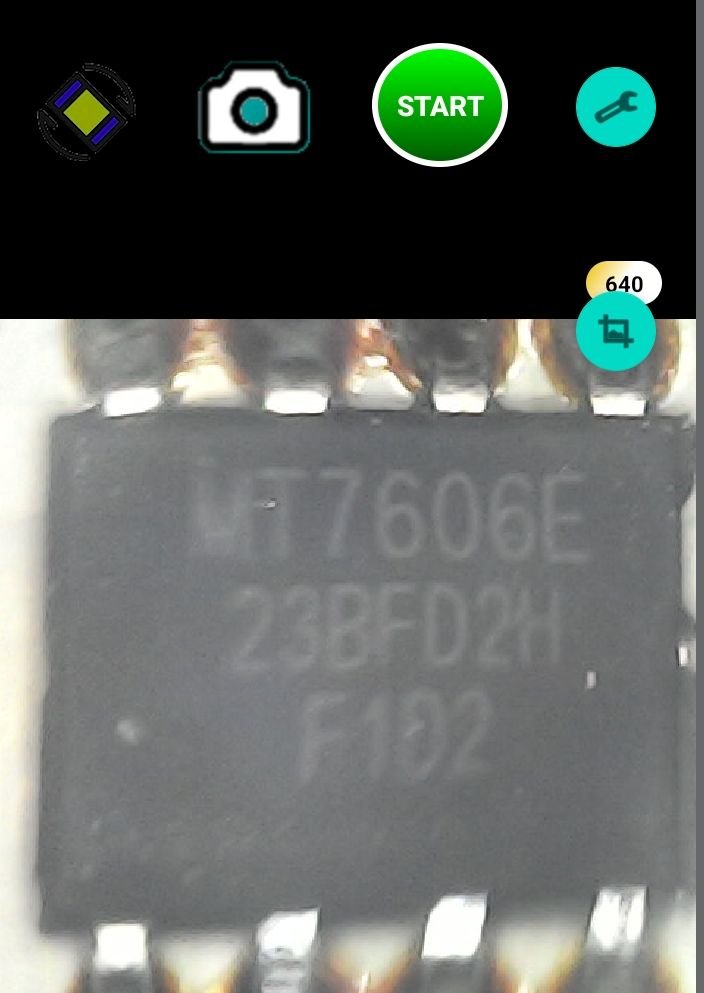
I also take this opportunity to register the registration number of the integrated circuit.
Beginning the repair and replacing parts:
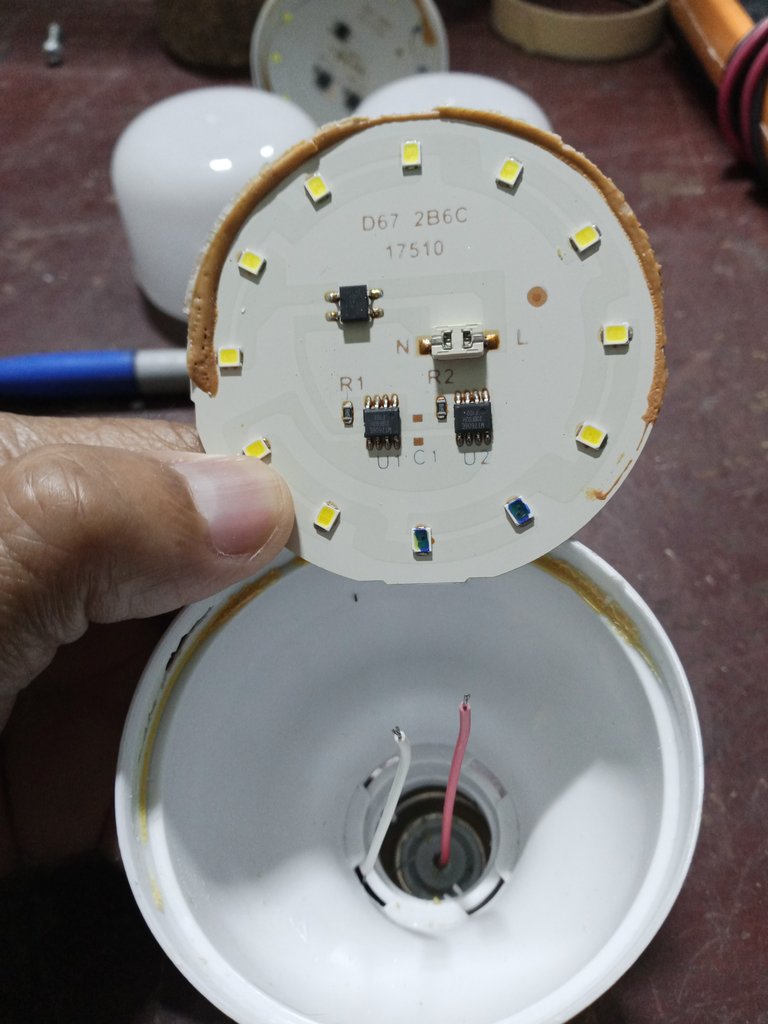
The bulb circuit board in this model has a small amount of glue on the housing, and the power wires are secured by pressure. With gentle pressure, they can be removed without much trouble.
Honestly, these cables are too short, so you have to solder more cable.
The board on which the circuit is mounted acts as a heat sink, so if you solder with a low-power soldering iron it can be a bit tedious.
I mounted the two circuit boards on the desoldering iron. The iron was adjusted so it didn't apply too much heat. Since I don't yet have a working thermometer, I adjusted the iron's temperature using several old PC cards until I reached a temperature that worked for me.
In less than a minute, the solder melted enough to allow me to replace the damaged LEDs with the good LEDs from the donor board.
I used the same heat as the board, and when I replaced the good LEDs, they were soldered securely.

I check that everything is okay before assembling.
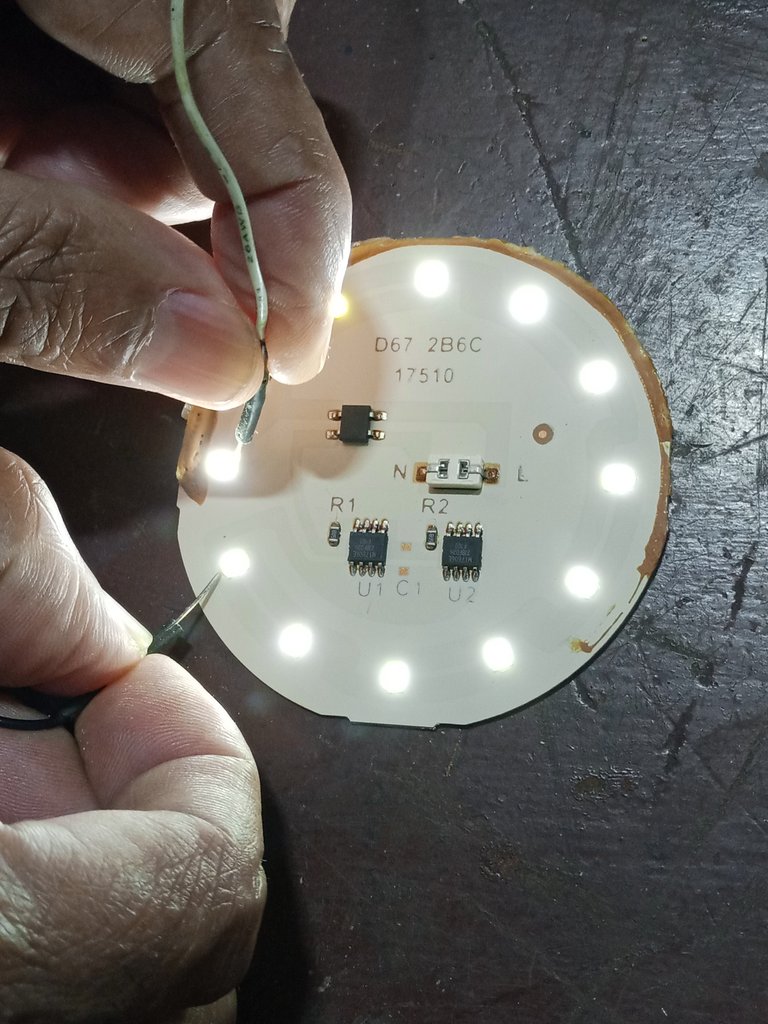
I corrected the length of the power cables and before closing I checked again.
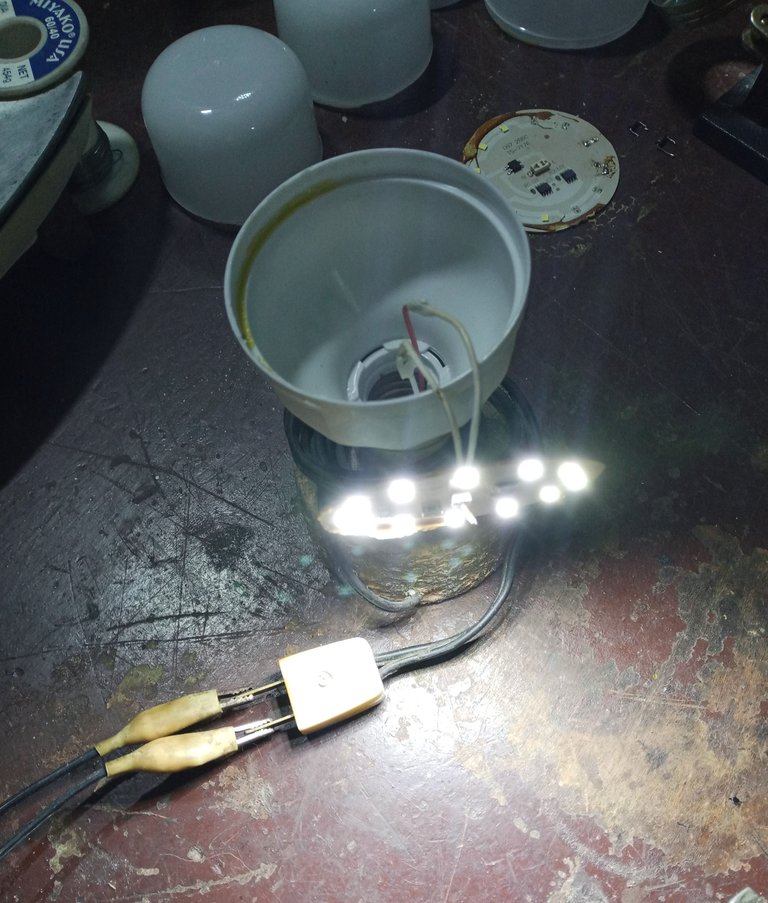
The work is now finished, now I have to assemble the other six bulbs that are on the table.
Thank you so much for stopping by and reading.
Have a great week.
Peace.
- I used Google Translate for the English language.
- I used TextStudio for the Spanish header.
- Unless otherwise noted, the images are screenshots of my workshop work.

Un saludo a la comunidad de Hive DIY, les comento que no había podido publicar mucho últimamente, he estado muy atareado en el taller reparando un televisor que me consignaron.
Pero es que ese TV está dando bastante batalla, así que me tome una pausa mientras me compran los repuestos y aprovecho para compartir con ustedes algo de mi trabajo regular.
Aprovechando que ya tengo en el depósito, varios bombillos del mismo fabricante y del mismo modelo para reparar.
Les mostraré ahora otro método para hacer el trabajo de forma fácil, rápida y con una terminación bastante limpia, usando una placa de desoldar que fabrique con una plancha de alisar ropa, que recicle para hacer la herramienta.
Lo primero es verificar cuáles son los leds que estén dañados y cuáles son los leds que estén en buen estado, yo los verifico con un probador de leds que hace un tiempo arme reciclando componentes electrónicos.
La norma es que una bombilla de leds con más de dos leds dañados no se repara y quedara como material de repuesto para otras bombillas.
En esta bombilla había usado diodos 1N4007, para hacer la reparación, ya que en ese momento no tenía, otra bombilla del mismo modelo, hay que recordar que: los leds de los diferentes modelos de bombillos, o de diferente marca de fabricante, pueden tener diferentes voltajes de trabajo. Al tiempo de uso, después de quemarse dos leds más, este bombillo quedo como material para repuesto.
La bombilla a reparar solo tiene dos leds dañados, use un marcador para identificarlos, por lo general cuando se dañan tienen una quemadura o punto negro en su superficie, pero puede pasar que el led está dañado y verse bien.
Si alguien quiere reducir la intensidad de la corriente de trabajo en los leds, para aumentar el tiempo de vida del bombillo, solo tiene que reemplazar las resistencias que indique en la imagen con las flechas en color verde. En teoría se debe colocar una resistencia de un valor un poco mayor a la resistencia instalada de fábrica.
Tiene más sentido cambiar las resistencias del circuito, cuando el bombillo es nuevo, cuando son bombillos reciclados ya todos los leds tienen desgaste y hay que bajar mucho más la intensidad, y el bombillo termina por iluminar mucho menos.
Igual voy a aprovechar un microscopio chino que me regalaron para levantar los datos y para un futuro tener la información para la modificación.
Es bastante básico, un poco mejor al otro viejo microscopio que me prestaban para algunos trabajos.
Para conectar el microscopio al teléfono suelo usar una aplicación genérica, el USB Endoscope, que es bastante sencilla, y que uso desde hace tiempo.
Esta aplicación puede trabajar con microscopios muy viejos que ya no tienen donde descargar su programa de uso y también puede usar este microscopio chino que es un poco más nuevo.
Y usando una sola aplicación no saturo el espacio del teléfono con varias aplicaciones.
Capturo el valor de la resistencias, son 6,8 ohms, pero de momento no tengo en depósito un valor aproximado que me sirva, así que conservaré las originales.
Aprovecho también de registrar la matrícula del circuito integrado.
Comenzando la reparación y el cambio de partes:
La placa de circuito del bombillo en este modelo tiene poca cantidad de pegamento en la carcasa y los cables de alimentación eléctrica están asegurados a presión, empujando suavemente puede desmontarse sin muchos problemas.
Sinceramente, estos cables están muy cortos, luego hay que soldar más cable.
La placa sobre la que está montado el circuito hace las veces de disipador, por eso si sueldas con un cautín de baja potencia se puede hacer un poco tedioso.
Monte las dos placas de circuitos sobre la plancha para desoldar, la plancha está ajustada de forma que no aplique demasiado calor. Como aún no tengo un termómetro en funciones, hice el ajuste de la temperatura de la plancha con varias tarjetas de PC viejas hasta alcanzar la temperatura que me sirva.
En menos de un minuto, ya la soldadura se derritió lo suficiente y pude cambiar los leds dañados por los leds en buen estado de la placa donante.
Use el mismo calor de la placa y al colocar los leds en buen estado quedaron soldados.
Verifico que este todo bien antes de montar.
Soluciono el largo de los cables de alimentación eléctrica y antes de cerrar verifico nuevamente.
El trabajo ya está terminado, ahora tengo que armar los otros seis bombillos que están en la mesa.
Muchas gracias por pasar y leerme.
Que tengan una excelente semana.
Paz.
- He usado el traductor de Google para el idioma inglés.
- Use el programa de TextStudio para el encabezado en español.
- Las imágenes a menos que lo indique son capturas de mi trabajo en el taller.
Se ve un poco complicado pero es bastante útil esta idea para recuperar estas bombillas dañadas, voya as llevarle la mías , en Casa tengo unas cuantas, ja ja, mis más sinceras felicitaciones por este gran trabajo, gracias por compartir, saludos 😊
Celebro que le gustara mi trabajo, muchas gracias por leerme y dejar un comentario.
Espero que tenga usted y los suyos una excelente semana.
Está interesante y la reparación se parece rápida. Bueno, cuando se sabe lo que hay que buscar, y se tienen las herramientas específicas para la tarea, entonces sí que puede hacerse las cosas más rápidamente 😀👍
!ALIVE !BBH !PIZZA !LUV
Son herramientas fabricadas en casa con los materiales que se pudieron conseguir, es un sentimiento entre satisfacción y triunfo de poder hacer las cosas a pesar de las carencias.
$PIZZA slices delivered:
@pedrobrito2004(1/5) tipped @soltecno
Come get MOONed!
This post has been manually curated by @bhattg from Indiaunited community. Join us on our Discord Server.
Do you know that you can earn a passive income by delegating to @indiaunited. We share more than 100 % of the curation rewards with the delegators in the form of IUC tokens. HP delegators and IUC token holders also get upto 20% additional vote weight.
Here are some handy links for delegations: 100HP, 250HP, 500HP, 1000HP.
100% of the rewards from this comment goes to the curator for their manual curation efforts. Please encourage the curator @bhattg by upvoting this comment and support the community by voting the posts made by @indiaunited.
Very grateful to our friend @bhattg for his great support and for the solidarity of the @indiaunited community.
My best wishes to you all. Have a great week.
You do impressive work:)
Happy Friday!
Greetings, thank you very much for taking a moment to read and leave a comment.
Have a great weekend.
Excelente corazón!!! Como siempre. viendo tu area de trabajo, me hiciste recordar mucho a mi hermano lo extraño mucho. Antes botaba los bombillos cuando se quemaban, ahora no desde que veo como los reparas, pronto me compro un cautin y me pongo a inventar, espero no quemar la casa.
Tengo que hacer algunos arreglos al taller, en verdad que quiero que luzca un poco mejor. Un cautín de 30 Watts es una herramienta útil en el hogar, siempre se le consigue algún uso para hacer alguna manualidad o una reparación. Si puedes tienes que usar estaño llamado 60/40 de 0,8 mm, y un poco de pasta para soldar estaño, es el que mejor resultado me ha dado, por lo fácil de usar.
Te agradezco que pasaras y me dejaras un comentario, es genial.
Que tengas un final de semana tranquilo, dios mediante.
Qué lindo mi amor muchas gracias
Congratulations @soltecno! You have completed the following achievement on the Hive blockchain And have been rewarded with New badge(s)
Your next target is to reach 5500 replies.
You can view your badges on your board and compare yourself to others in the Ranking
If you no longer want to receive notifications, reply to this comment with the word
STOPCheck out our last posts:
Greetings, thank you so much for stopping by and letting us know.
I hope you're all well and have a peaceful weekend.
!BEER
Gracias.
View or trade
BEER.Hey @soltecno, here is a little bit of
BEERfrom @nupulse for you. Enjoy it!Did you know that <a href='https://dcity.io/cityyou can use BEER at dCity game to buy cards to rule the world.
View or trade
BEER.Hey @soltecno, here is a little bit of
BEERfrom @nupulse for you. Enjoy it!We love your support by voting @detlev.witness on HIVE .
WOW...eres realmente muy ingenioso. Espero que te vaya bien con todos tus proyectos 🥰
Saludos, muchas gracias, me alegra que le haya gustado la publicación.
Espero que tengan un excelente final de semana.