Muse gothique | Tutorial | Tips [ENG/ESP]
💕 Greetings to all! 💕
I've been drawing quite a bit lately, however I haven't shared it with you. I feel that the more I do it, my evolution in technique is growing. It makes me feel very happy to feel passion for drawing again, because due to multiple personal problems I was blocked for a long time, until little by little I was presenting my drawings on the hive platform and my enthusiasm was recovering.
That's why I want to thank all of you who have supported me and have given me appreciative comments, they have encouraged me a lot ❤️
💕 ¡Saludos a todos! 💕
Últimamente he estado dibujando bastante, sin embargo no lo he compartido con ustedes. Siento que mientras más lo hago, mi evolución en la técnica va creciendo. Me hace sentir muy conforme volver a sentir pasión por dibujar, ya que por múltiples problemas personales estuve bloqueada por un largo tiempo, hasta que poco a poco fui presentando mis dibujos en la plataforma de hive y mi entusiasmo se fue recuperando.
Por eso, quiero agradecer a todos los que me han apoyado y me han regalado comentarios apreciativos, me han animado un montón ❤️
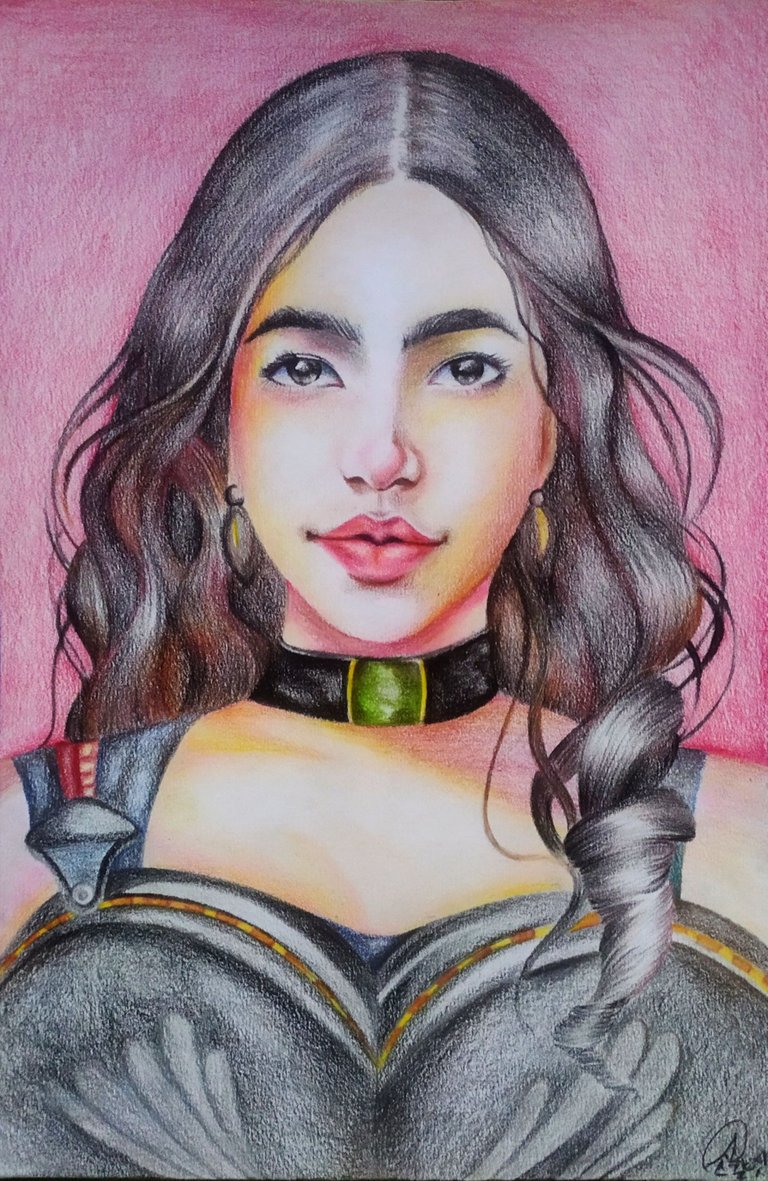

The drawing you see below is one of the most precious drawings I have made. Maybe it is because I felt very proud of my creative and technical progress when I finished it, since I am gradually improving and identifying myself in my own style.
The person you see drawn is not real, but an inspiration of a person close to me. I consider that the fictitious character I drew is my new muse, because as corny as it may sound, I loved drawing her and I would do it again.
I tried to represent her in a gothic way, although in the end she looks like another style.
That said, before explaining the process of how I did it, I would like to share with you some tips that helped me when I was drawing.
El dibujo que ven a continuación es uno de los más preciados que he elaborado. Tal vez sea porque me sentí muy orgullosa de mi avance creativo y técnico al terminarlo, ya que poco a poco estoy mejorando e identificándome en mi propio estilo.
La persona que ven dibujada no es real, pero sí inspiración de una persona cercana a mí. Considero que el personaje ficticio que plasmé es mi nueva musa, ya que por muy cursi que suene, me encantó dibujarla y lo volvería a hacer.
Traté de representarla en forma gótica, aunque finalmente da aires de otro estilo.
Dicho esto, antes de explicar el proceso de cómo lo realicé, me gustaría compartirles algunos tips que me sirvieron al momento de dibujar.
Using a black eraser to remove unwanted strokes can help a lot when drawing (always try to keep it clean). With white erasers I tend to mess everything up, especially if I don't realize that I have to clean it before erasing.
Sharpen your colors haha, I know it sounds very obvious, but I used to draw with little and the finish was not very uniform. Now I've learned that I always have to have my tips to the top (even if that leaves me without colors in the end 😢).
Draw by able. I know it is tedious (I still have to adapt) and more in large drawings, but this helps to form different reliefs in your drawings and greater intensities, since you avoid the formation of an almost impenetrable shiny layer in your drawing that will not allow you to mix different tones.
Be patient and take the time you need. Try not to finish your drawing all at once, take small breaks and focus on something else from time to time, the more time it takes you, the better the results will be and the better you will be able to think about how to paint your drawing.
Utilizar una borra negra para eliminar los trazos no deseados puede ayudar mucho al momento de dibujar (siempre tratando de mantenerla limpia). Con borras blancas tiendo a ensuciar todo, sobre todo si no me doy cuenta que tengo que limpiarla antes de borrar.
Sácale punta a tus colores jaja, sé que suena muy evidente, pero yo solía dibujar con poca y el acabado me quedaba poco uniforme. Ahora ya aprendí que siempre tengo que tener mis puntas al tope (aunque eso al final me deje sin colores 😢)
Dibuja por capaz. Sé que es tedioso (yo todavía debo adaptarme) y más en dibujos grandes, pero eso ayuda a que se formen distintos relieves en tus dibujos y mayores intensidades, ya que evitas que se forme una capa brillosa casi impenetrable en tu dibujo que no te va a permitir mezclar distintos tonos.
Se paciente y tómate el tiempo que necesites. Trata de no acabar tu dibujo de golpe, toma pequeños descansos y enfócate en otra cosa de vez en cuando, mientras más tiempo te lleve, mejor serán los resultados y podrás pensar mejor en como pintar tu dibujo.

This process will be divided into only 7 steps.
Este proceso estará dividido en tan solo 7 pasos.

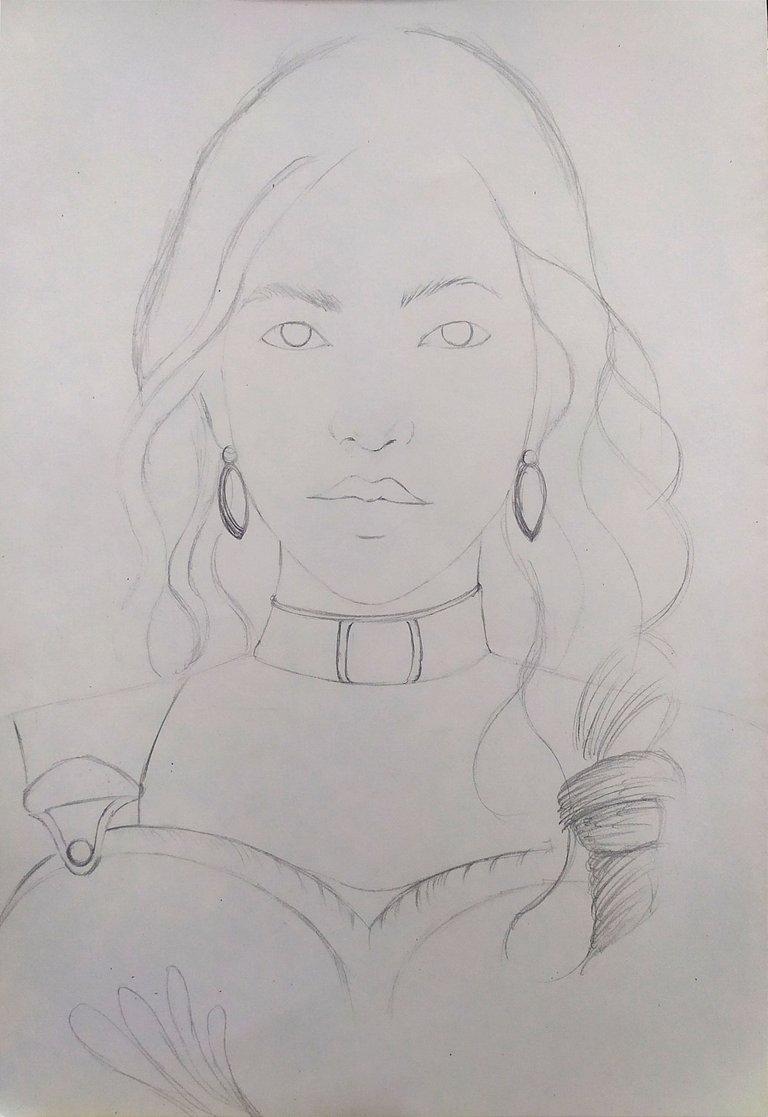
The first thing I did was to make my sketch. I tried to paint only what was necessary, without shadows or anything else, so that the result would not atrophy later. By the way, I draw with mechanical pencil (although it is not so recommended).
Lo primero que hice fue realizar mi boceto. Traté de pintar solo lo necesario, sin sombras ni nada, para que después no me atrofie el resultado. Por cierto, dibujo con portaminas (aunque no es tan recomendado).

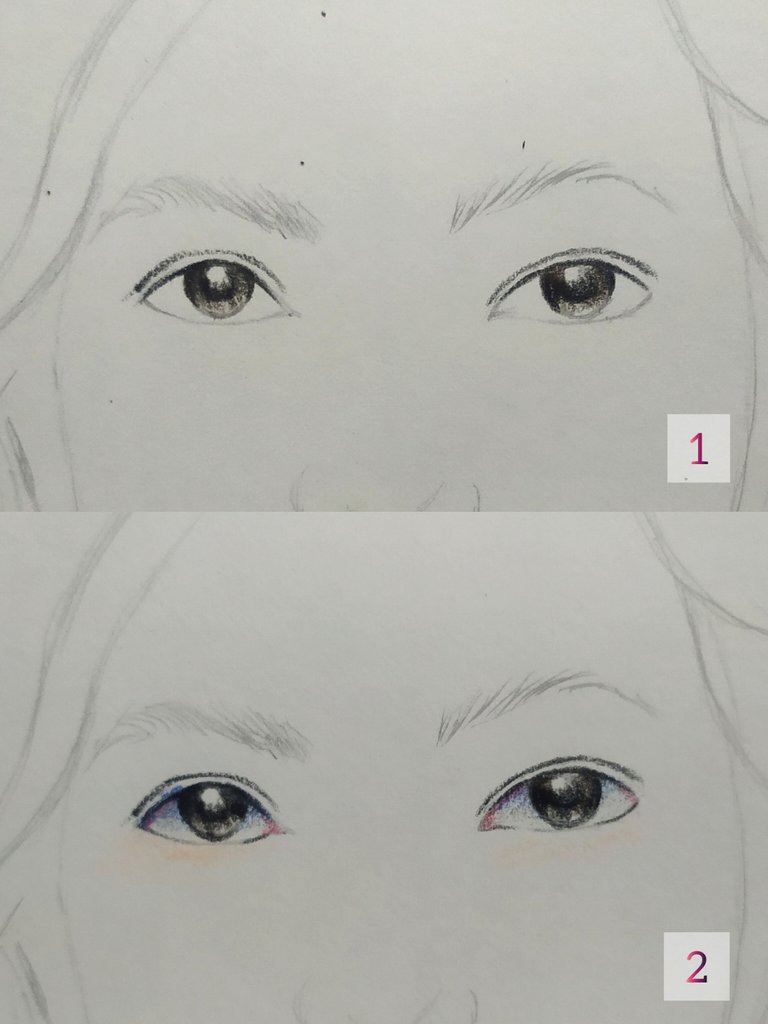
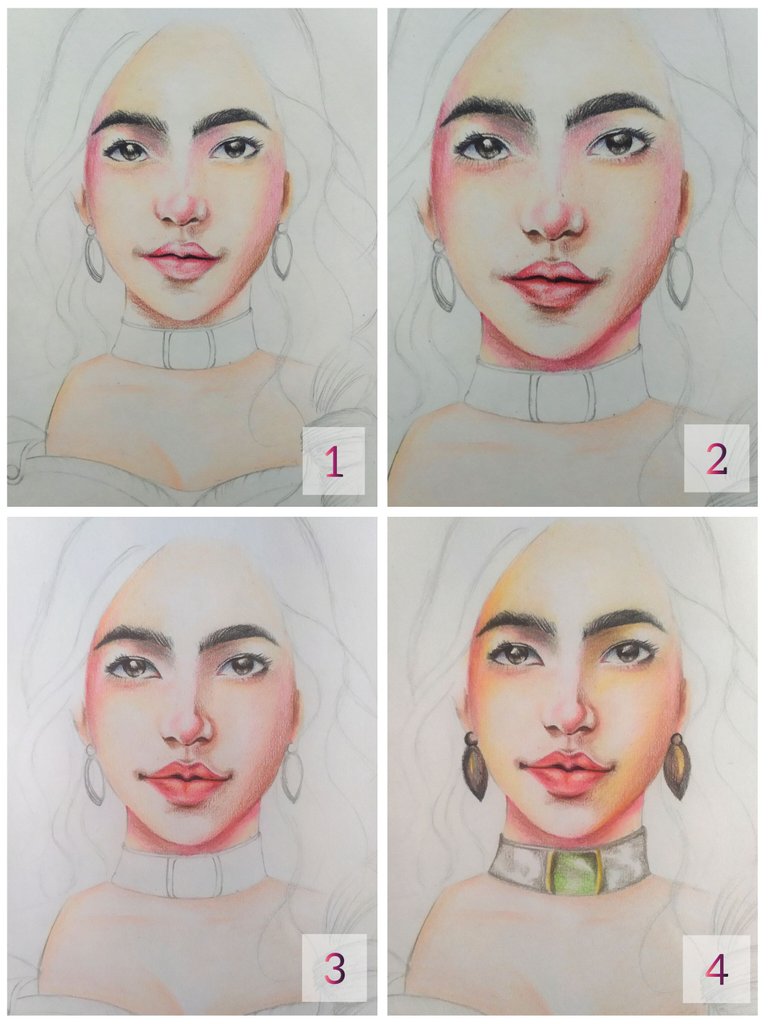
The second thing was to paint the eyes, the part where I almost always start. As you can see one is smaller than the other (I hadn't noticed it since I started to do it at night) but later I modified it.
First I painted the pupil, then the iris and finally the outer part of the eye with blue and gray shadows. The eyelashes and yes I leave them for later.
Lo segundo fue pintar los ojos, la parte por donde casi siempre empiezo. Como ven uno está más pequeño que el otro (no lo había notado ya que lo empecé a realizar muy de noche) pero más adelante lo modifiqué.
Primero pinté la pupila, luego el iris y finalmente la parte externa del ojo con sombras azules y grises. Las pestañas y sí las dejo para después.

The third thing I did was to take care of the skin of my character.
For this step I gave him the initial proportions of the face, trying to have a little resemblance with the person I was inspired by.
Lo tercero que realicé fue encargarme de la piel de mi personaje.
Para este paso fui dándole las proporciones iniciales del rostro, tratando de que tenga un pequeño parecido con la persona que me inspiré.
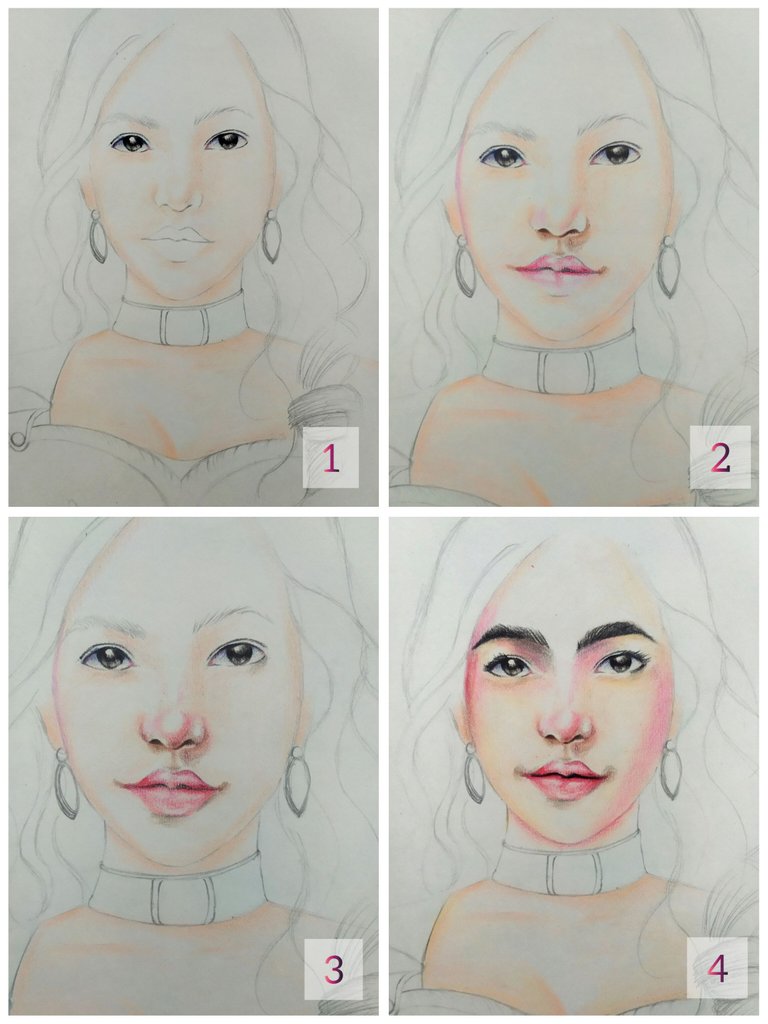

By this time it was finally taking shape (and I arranged the eyes). I also wanted to paint the first capable accessories.
Para este momento ya por fin iba tomando forma (y acomodé los ojos). También quise pintar las primeras capaz de los accesorios.

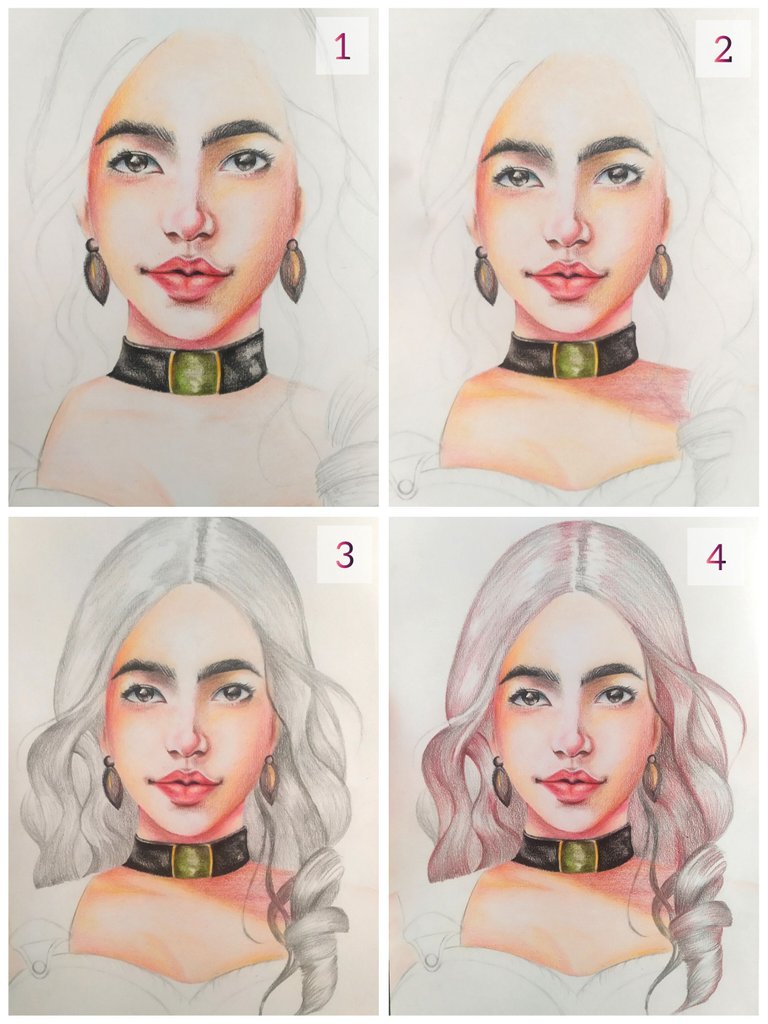
At this point I had finished the necklace and wanted to start with the first part of the hair. For this I used first a gray color, then a reddish brown...
En este punto había terminado el collar y quise empezar por las primeras capaz del cabello. Para esto utilicé primero color gris, luego un marrón rojizo...

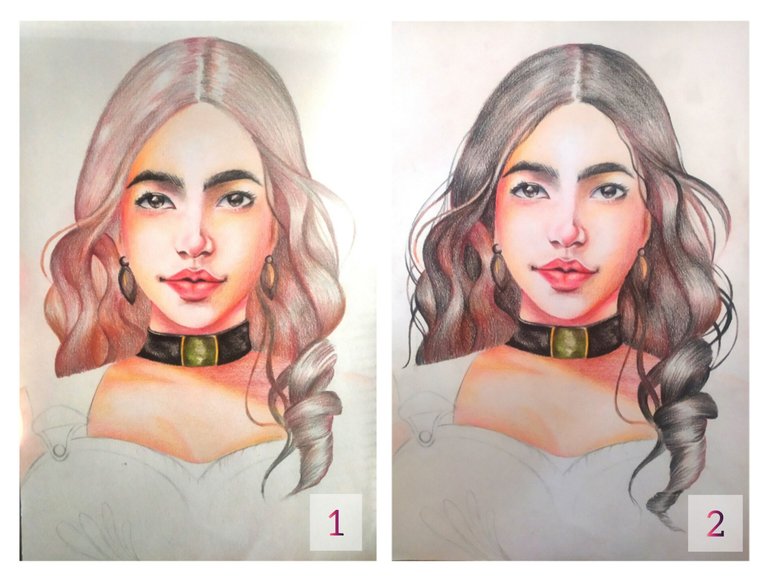
I went on to paint another layer of brown to make the hair, and finally I opted for black. My goal was to make it brown, although I didn't really know how to achieve it, but I liked the result 😊
Proseguí pintando otra capa marrón para hacer el cabello, y finalmente opté por el negro. Mi objetivo era que quedara castaño, aunque no sabía realmente como lograrlo, pero el resultado me gustó 😊

For this point I painted the first layer of the costume, I mainly wanted to make it a bluish black color, but I liked how it looked gray, so I decided to make it as if it was some kind of armor.
Para este punto pinté la primera capa del vestuario, principalmente lo quería hacer de un color negro azulado, pero gustó cómo se veía gris, así que decidí hacerlo como si fuera una especie de armadura.
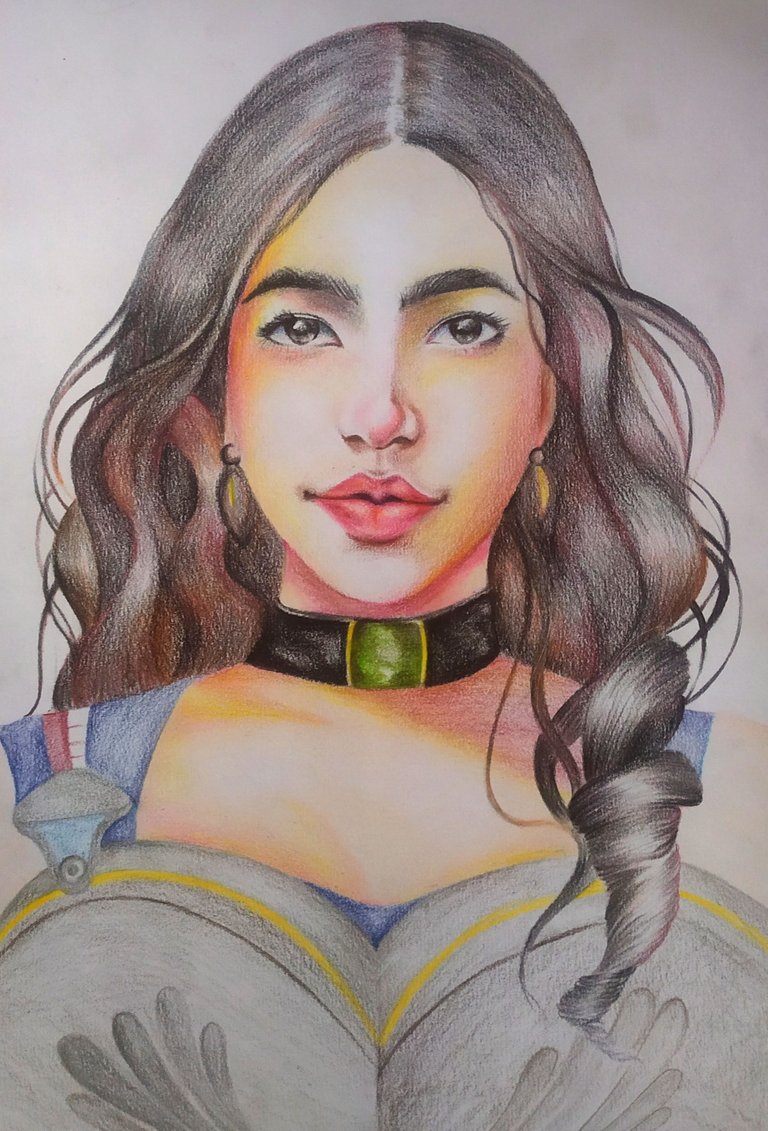

After shading the costume, painting the background and giving some final details to the drawing, I finished 🙌💕
Luego de sombrear el vestuario, pintar el fondo y darle unos últimos detalles al dibujo, terminé 🙌💕


I really enjoyed the result and the process. I hope you understood everything, any doubt, opinion or correction you can leave it below in the comments, I would be happy to hear from you.
Thank you for watching all my creative process and for having read this far, a hug ❤️✨
See you another time! See you later 😊
El resultado y el proceso lo disfruté bastante. Espero que hayan entendido todo, cualquier duda, opinión o corrección pueden dejarla abajo en los comentarios, estaría encantada de oírte.
Gracias por ver todo mi proceso creativo y de haber leído hasta aquí, un abrazo ❤️✨
¡Nos estamos viendo en otra oportunidad! Hasta luego 😊
Text translated with DeepL.
The shared images are my property. The separators were made with the help of Canva.
😸❤️✨

Muchas gracias por el apoyo ☺️💖
¡Felicidades! Esta publicación obtuvo upvote y fue compartido por @la-colmena, un proyecto de Curación Manual para la comunidad hispana de Hive que cuenta con el respaldo de @curie.
Si te gusta el trabajo que hacemos, te invitamos a darle tu voto a este comentario y a votar como testigo por La Colmena.
Si quieres saber más sobre nuestro proyecto, te invitamos a acompañarnos en nuestro servidor de Discord.
Muchas gracias 🥰❤️
Congratulations @scarletcorner! You have completed the following achievement on the Hive blockchain And have been rewarded with New badge(s)
Your next target is to reach 8000 upvotes.
You can view your badges on your board and compare yourself to others in the Ranking
If you no longer want to receive notifications, reply to this comment with the word
STOPCheck out our last posts:
🥳💕
😄🌹
The drawing is well sketch and beautiful
Muy bueno tu trabajo
Contáctenos para saber más del proyecto a nuestro servidor de Discord.
Si deseas delegar HP al proyecto: Delegue 5 HP - Delegue 10 HP - Delegue 20 HP - Delegue 30 HP - Delegue 50 HP - Delegue 100 HP.