Splinterlands Community Engagement Challenge - Tutorial on Custom Card Set Creation for Rentals
Hello, everyone on this noble platform and the Hive ecosystem at large. I am very excited to write and share this wonderful article with you all, and I hope that you guys will enjoy reading it as well. Today, I will be writing this post as an entry to the Splinterlands Community Engagement Challenge, which is focused on How to Create Custom Sets and benefits from their rental.
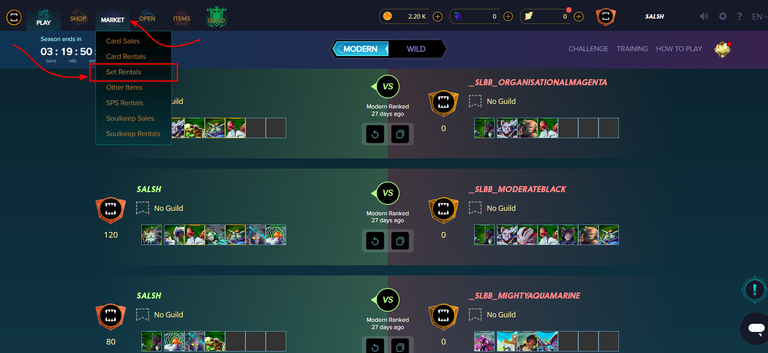
So, concerning the topic for the week, I would like us to have a brief and concise tutorial that explains the basics of renting and also creating cards set for renting. First of all, once you are logged in to your Splinterlands account, you navigate to the Market section and then click on Set Rentals button as indicated below in the screenshot.
From the new page navigated, you can see three sections namely, CREATE, RENT, and MANAGE. The Create section allows you to create a set of cards for rentals. The rent section also allows you to view the set of cards that are available in the marketplace for rentals and lastly, the manage section permits you to make edits, to your set cards or manage your set cards to be placed in rentals.

Since our focus is Custom Cards Set creation, I will navigate to the Custom Set Create button we shall explore that page. To do that, just click on the Create button on the Custom card.
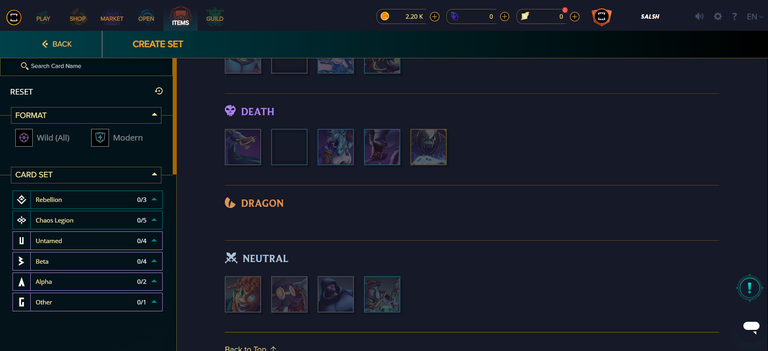
Next, you will see all your available cards that can be used to create a set of cards for rental to be done. You can go ahead and choose from any of the decks. One benefit of the custom set is that you can select or choose from multiple elements as a combination unlike the Rebellion sets where you are narrowed to only rebellion cards, the Riftwatchers set, or the Chaos Legion set.

Once you are done with the card selection for your set, you scroll up and then click on Create to finish up your creation process. You will be asked to give a name to your Cards Set.
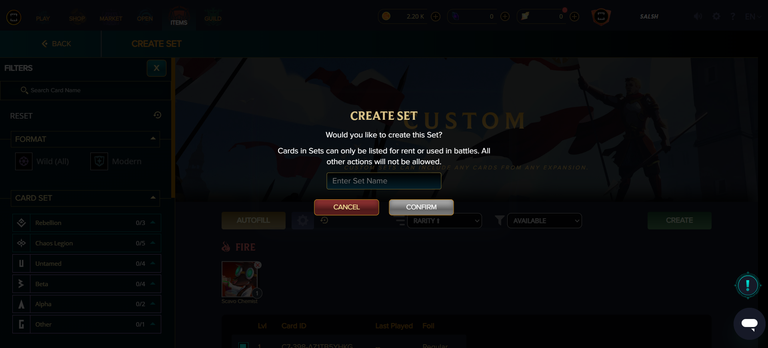
In this tutorial I will use SALSH's POWER and then click on Confirm to sign the transaction after which I will use my Hive Keychain to confirm the transaction created.
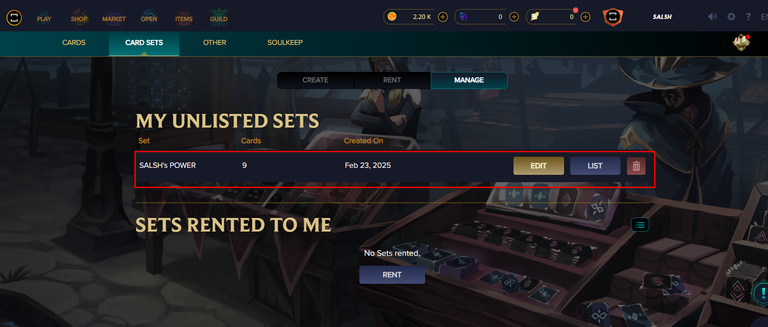
After a successful transaction confirmed, you can as well edit, list and or delete your Card Set created. This is very easy and quick to do and I hope that this tutorial was helpful to you.
Thanks, everyone for reading my post once again after a long break on the Hive platform. All images were taken from Splinterland's website.
Thanks for sharing! - @mango-juice

Congratulations @salsh! You have completed the following achievement on the Hive blockchain And have been rewarded with New badge(s)
Your next target is to reach 1250 upvotes.
You can view your badges on your board and compare yourself to others in the Ranking
If you no longer want to receive notifications, reply to this comment with the word
STOPCheck out our last posts:
Congratulations @salsh! You received a personal badge!
You can view your badges on your board and compare yourself to others in the Ranking
Check out our last posts: