Hermoso arreglo para una jovencita [Esp/Eng]
Hoy quise compartir con ustedes el paso a paso de un arreglo súper lindo, delicado y bastante sencillo que estuve realizando hace unos días como parte de nuestro emprendimiento. Este fue un pedido especial ya que fue un obsequio de parte de un familiar que se encontraba fuera del país, y el único requerimiento especial fueron los colores a utilizar, y por supuesto las dedicatorias, tanto del globo como del hablador.
Today I wanted to share with you the step by step of a super cute, delicate and quite simple arrangement that I was making a few days ago as part of our project. This was a special request as it was a gift from a family member who was out of the country, and the only special requirement was the colors to use, and of course the dedications, both the balloon and the talker.

Como les digo es un paso a paso bastante sencillo, donde lo importante es la atención a los detalles para que todo quede bien prolijo, y sobre todo que nada se mueva de su lugar a la hora de trasladarlo de un lugar a otro.
Es un arreglo bastante versátil, ya que solo con cambiar los colores, la base y la disposición de sus componentes, tendrán un arreglo totalmente distinto, así que este paso a paso les servirá para elaborar diferentes tipos de arreglos con chuches y globos, y sin más, vamos con los materiales y el paso a paso.
As I said it is a fairly simple step by step, where the important thing is the attention to detail so that everything is neat, and above all that nothing moves from its place when moving it from one place to another.
It is a very versatile arrangement, since just by changing the colors, the base and the arrangement of its components, you will have a totally different arrangement, so this step by step will help you to make different types of arrangements with baubles and balloons, and without further ado, let's go with the materials and the step by step.
Materiales
Caja de pino
Anime
Cinta de tela rosada
Papel de seda en diferentes tonos de rosa y fucsia
Palitos de brocheta
Pistola de silicón
Hablador impreso
Globo burbuja personalizado
Snacks variados
Tijera
Materials
Pine box
Anime
Pink fabric ribbon
Tissue paper in different shades of pink and fuchsia
Skewer sticks
Silicone gun
Printed talker
Customized bubble balloon
Assorted snacks
Scissors
Procedimiento/Step by step
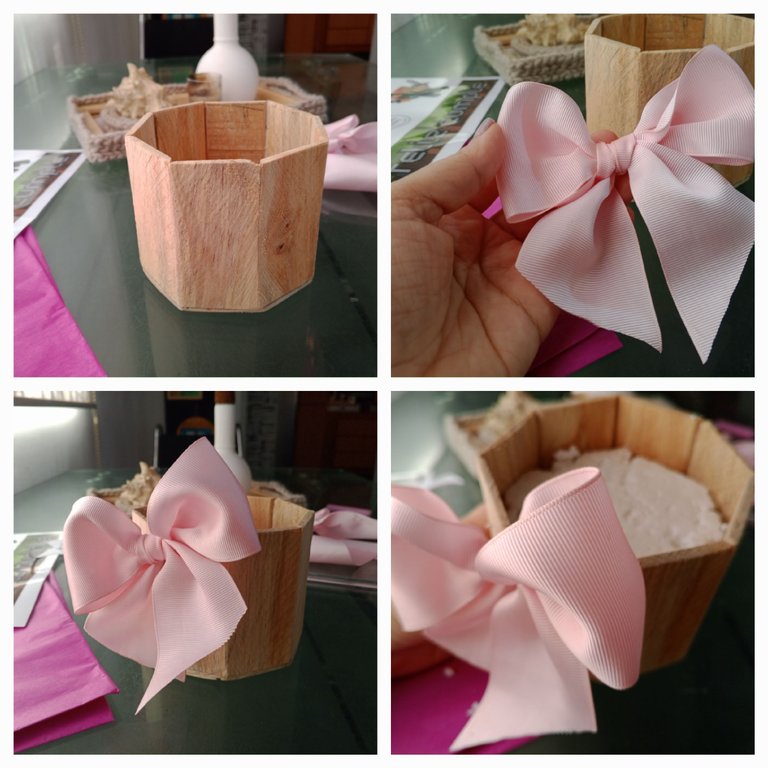
El primer paso es preparar la base en la que vamos a trabajar, que en este caso es una cajita de madera que son las que suelo utilizar tanto para los arreglos como para los desayunos, tratando de variar un poco la forma de las mismas para aportarle un toque especial a cada detalle.
Lo primero que hice fue un lazo grande de color rosado para colocar a la cajita, ya que el regalo era para una adolescente, y me pareció apropiado. Lo fijé con silicón caliente y continué con el siguiente paso que fue cortar el anime de manera que pudiese entrar en la cajita y fijar cada capa muy bien con silicón.
The first step is to prepare the base on which we are going to work, which in this case is a little wooden box, which are the ones I usually use both for arrangements and for breakfast, trying to vary a little the shape of them to give a special touch to each detail.
The first thing I did was a big pink ribbon to put on the box, since the gift was for a teenager, and it seemed appropriate. I fixed it with hot silicone and continued with the next step, which was to cut the anime so that it could fit into the box and fix each layer very well with silicone.
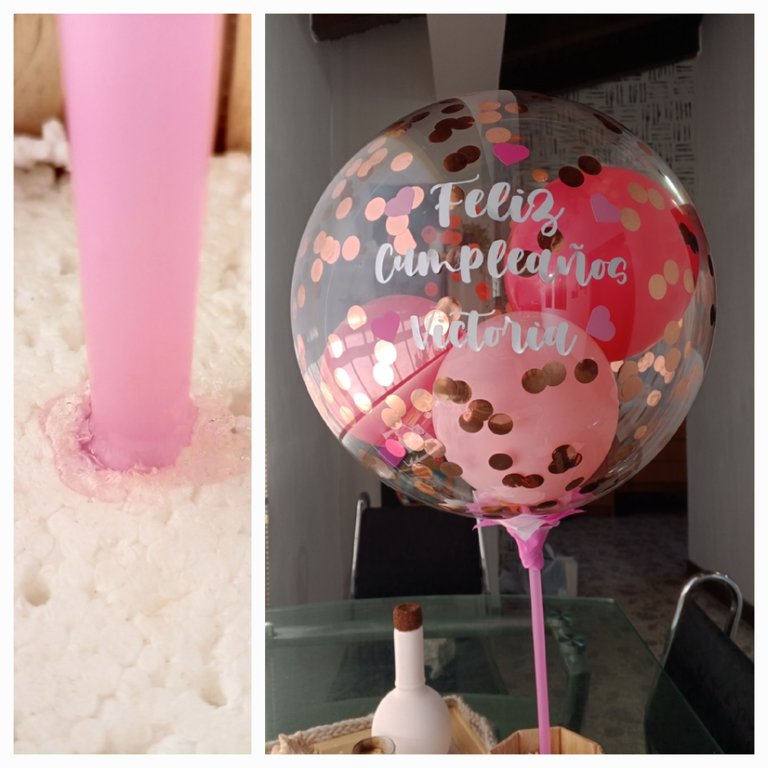
El siguiente paso fue colocar el globo en su lugar, y en esta oportunidad lo coloqué en el centro de la cajita y lo aseguré agregando una buena cantidad de silicón, pues de esa manera no se movería, ni durante el traslado, ni mientras agregaba los demás componentes del arreglo.
The next step was to place the balloon in its place, and this time I placed it in the center of the box and secured it by adding a good amount of silicone, because that way it would not move, neither during the transfer, nor while adding the other components of the arrangement.
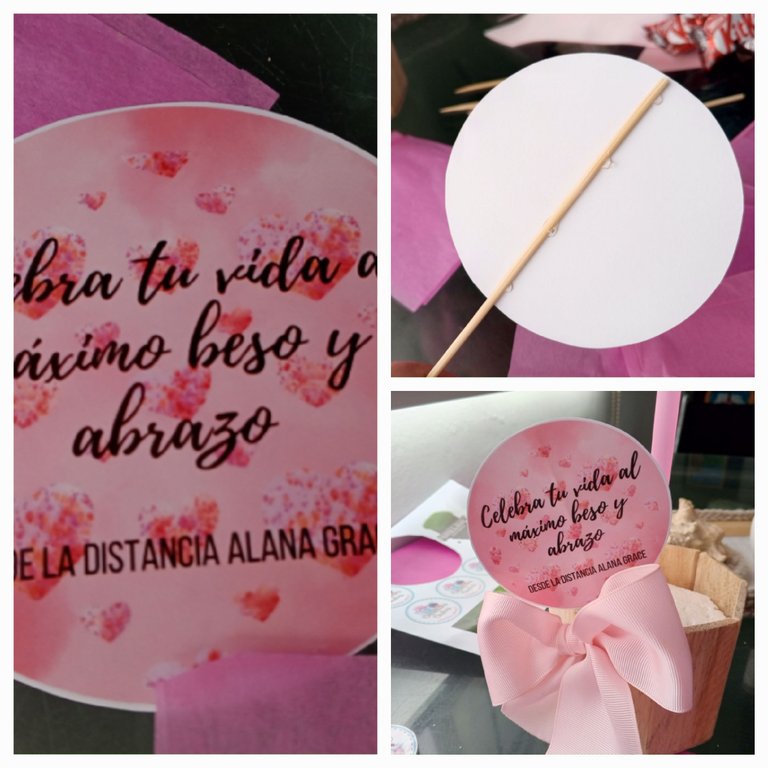
A continuación recorté el hablador con la dedicatoria especial para la cumpleañera y en la parte trasera con la pistola de silicón le pegué un palito de brocheta previamente recortado y luego lo fijé en la cajita también con silicón.
Next, I cut out the talker with the special dedication for the birthday girl and on the back with the silicone gun I glued a skewer stick previously cut out and then I attached it to the box also with silicone.
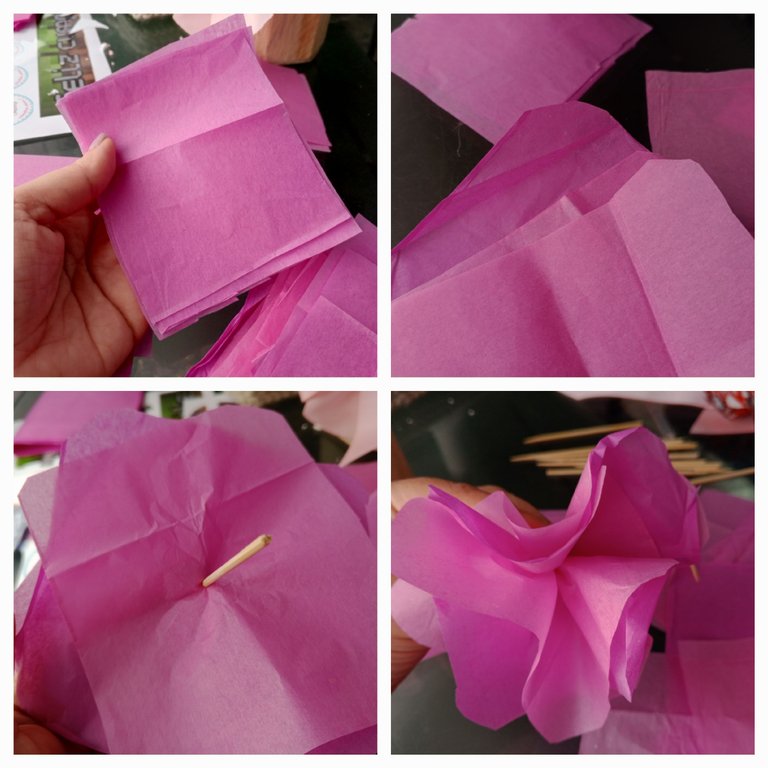
Lo que sigue es elaborar los pompones de papel de seda para decorar los espacios vacíos, y por supuesto decorar la cajita, para lo que recorté cuadrados en los diferentes tonos de colores y luego redondeé sus puntas con ayuda de la tijera.
Luego tomé tres piezas y los coloqué uno encima del otro, recorté un palito de brocheta del tamaño que necesitaba y lo atravesé justo en el centro de los papeles de seda dejando solo una pequeña parte afuera a la que agregué silicón caliente y llevé el papel de seda hacia el centro para que se fijaran bien, y de esa forma estaba listo el ponpom.
Next I made the tissue paper pompoms to decorate the empty spaces, and of course to decorate the box, for which I cut out squares in different shades of colors and then rounded their tips with the help of the scissors.
Then I took three pieces and placed them one on top of the other, cut out a skewer stick of the size I needed and pierced it right in the center of the tissue paper leaving only a small part outside to which I added hot silicone and took the tissue paper to the center so that they were well fixed, and that way the ponpom was ready.
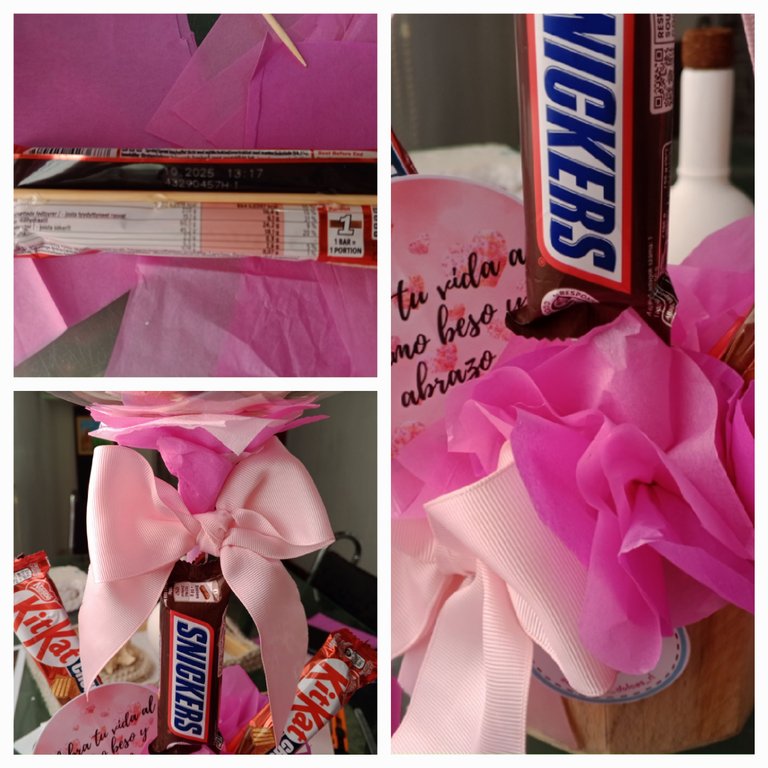
El siguiente paso es el armado de nuestro arreglo, para lo que colocaremos en la parte trasera de cada snack una brocheta, ocultándola detrás de la pestaña del empaque, la fijamos con silicón caliente y nos aseguramos de que quede bien fijada y por supuesto que no pueda verse.
Seguidamente vamos a incorporar todos los dulces junto con los pompones hasta que la cajita esté completamente llena y todo esté en su lugar.
Recuerden que cada pieza va fijada con silicón en la base para evitar accidentes a la hora del traslado.
The next step is to assemble our arrangement, for which we will place a skewer on the back of each snack, hiding it behind the packaging flap, we fix it with hot silicone and make sure it is well fixed and of course that it cannot be seen.
Next we are going to incorporate all the candies along with the pompoms until the box is completely filled and everything is in place.
**Remember that each piece is fixed with silicone on the base to avoid accidents during transportation.
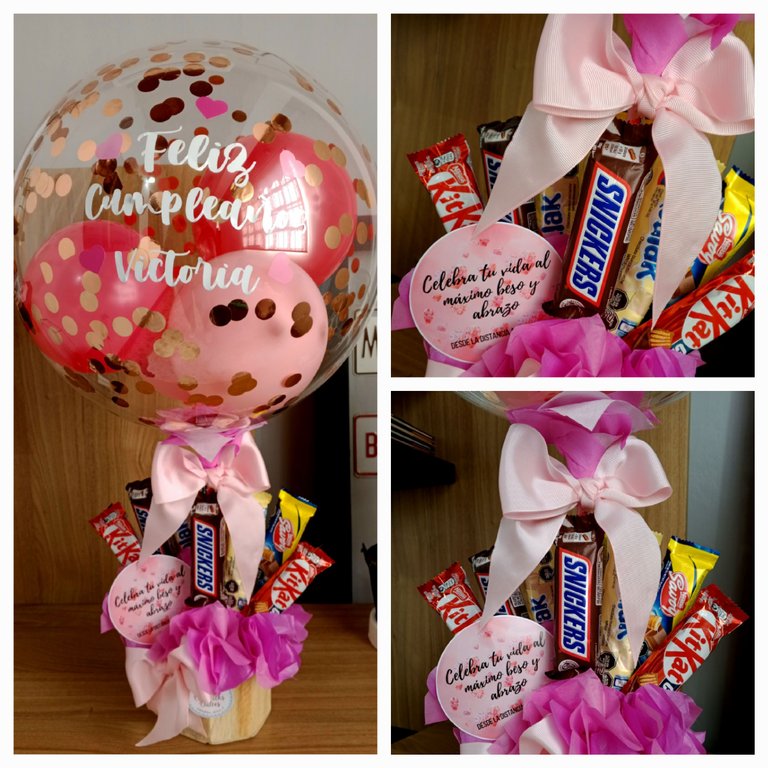
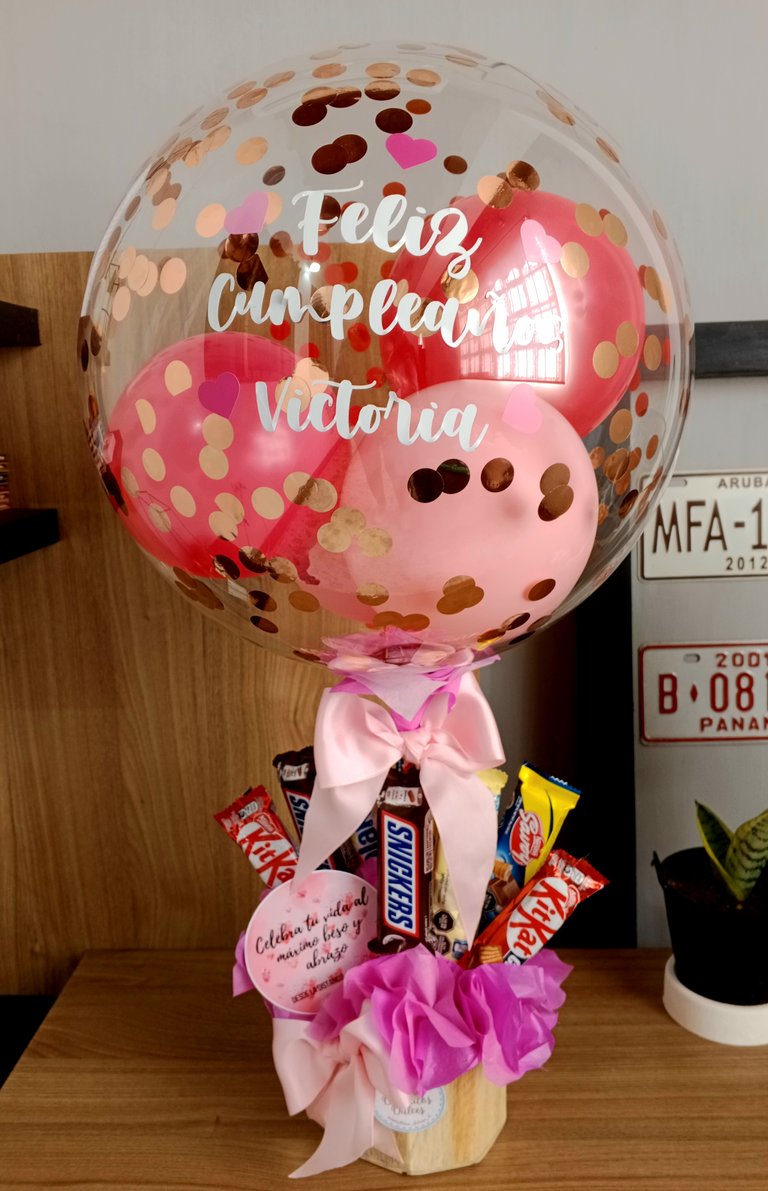
De esta forma ya tenemos listo nuestro arreglo, súper lindo y delicado para consentir a una persona especial y como les comenté arriba pueden modificarlo según su gusto y presupuesto, de hecho hay quienes usan cajitas de plástico o de cartón, e incluso tazas, también pueden utilizar globos metalizados, y por supuesto adaptarlo a la temática que deseen, así que espero que este tutorial les sea de gran ayuda.
This way we have our arrangement ready, super cute and delicate to pamper a special person and as I mentioned above you can modify it according to your taste and budget, in fact there are those who use plastic or cardboard boxes, and even cups, you can also use metallic balloons, and of course adapt it to the theme you want, so I hope this tutorial will be of great help.

Posted Using INLEO
Wow, Really looks amazing 😍
Bellooooooo 😍
Gracias por compartir 🤗♥️
Precioso y la combinación de colores super bellos. Gracias por compartir amiga. Saludos y Bendiciones
👏🏻👏🏻👏🏻 hermoso amiga..!
Me encantó.
Te quedó bellísimo este arreglo, y la persona a la que se lo obsequiaste debe haber quedado encantada 💖
Muy hermoso!! 😍
Precioso, de verdad que esta es un conocimiento que quiero adquirir ya que es muy útil para resolver una situación y quedar muy bien con esa persona especial que queremos consentir con un toque de atención y amor.
Una hermosura mi Rosita y se ve delicado. Un detalle precioso 💕
Gracias por compartir y enseñar cómo hacerlos. Siempre nos gusta sorprender a alguien especial y que mejor manera que con arreglos hermosos como éstos ❤️
Bellísimo y tierno. Muy femenino además .