Making an oversized shirt: tips and tricks (creating a casual wardrobe #4)
Hi, everyone! I hope you all are staying creative as always. I'd love to show you a shirt I made recently. I have a goal this year to sew enough casual outfits. If you read my previous post, you will know I have made a few.
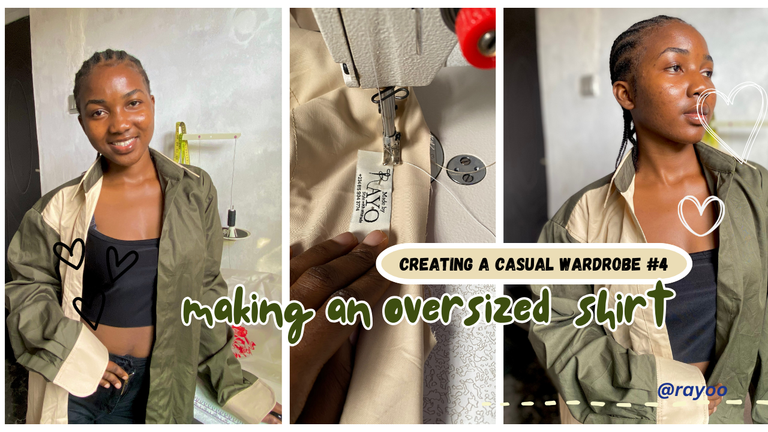
Sewing this shirt was intentional, as I have always wanted an oversized shirt. However, using this fabric was not planned.
Originally, I got two colours of linen fabric so I could make two short-sleeved shirts for my two brothers. I got one yard each but I had no idea it wouldn't be enough until I started cutting. The fabric would not be enough for the sleeves, so decided to get 1/2 yards each in addition, but unfortunately, it was already sold out. I abandoned the material until recently, I thought of combining both materials to make a long-sleeved casual shirt for myself.
Making this shirt was fun. I used some easy and helpful tricks I got from TikTok and I would love to share them with you.
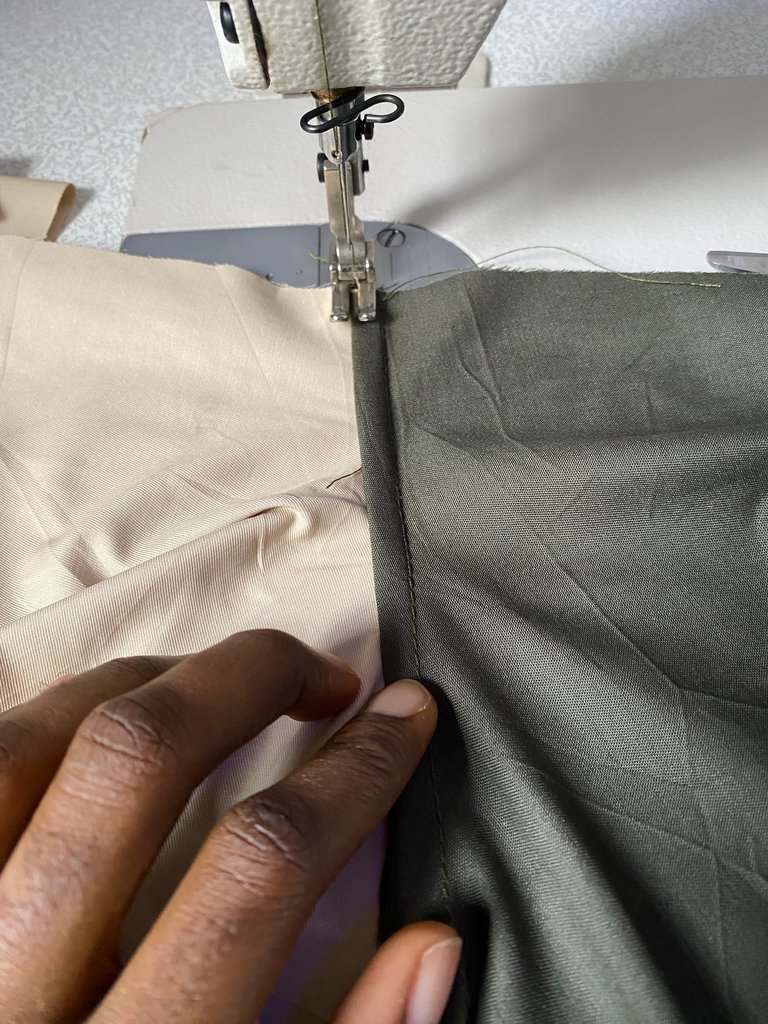
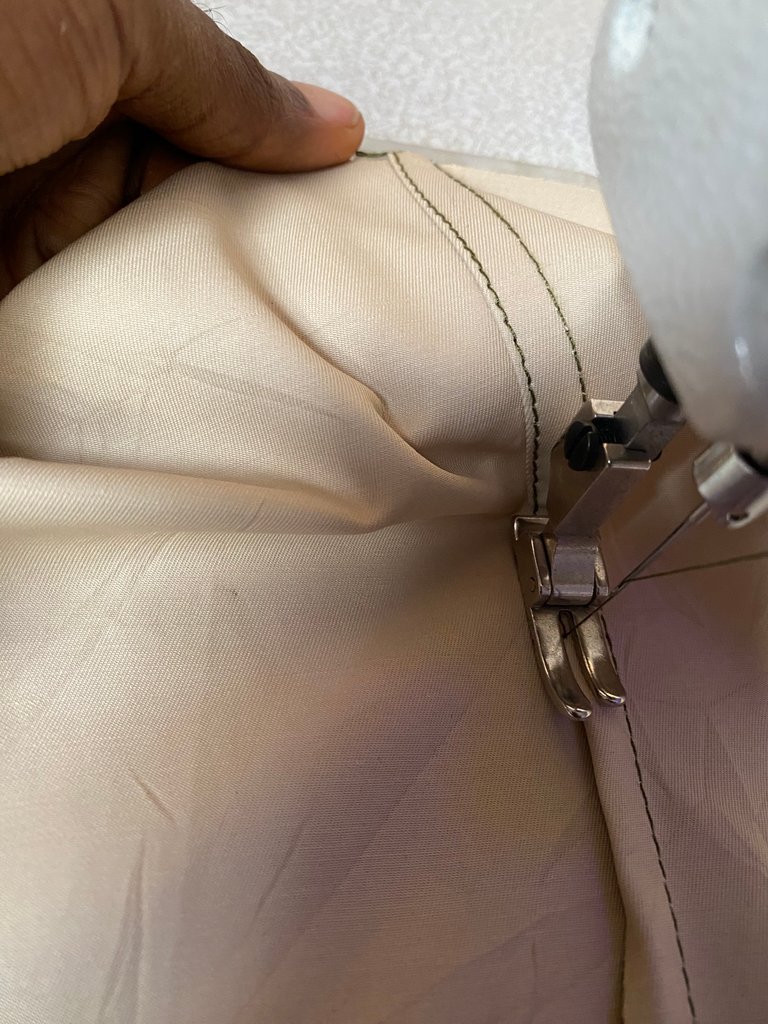
Tip 1: for topstitching your seams, I sew with unequal seam allowances (1 cm or 0.25 inches difference). It makes it easier to fold and topstitch.
Tip 2: for structured yet comfortable collars and cuffs. I used soft and hard interfacing for the collar and the cuffs. I interface one side with the soft and the second side with the hard.
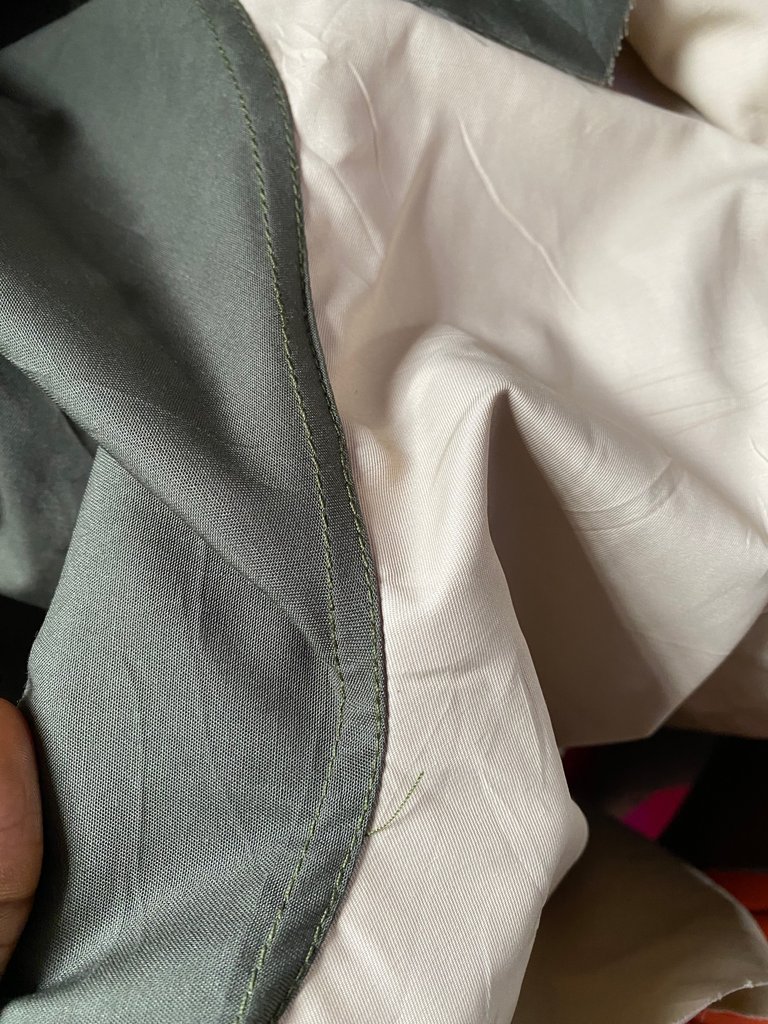
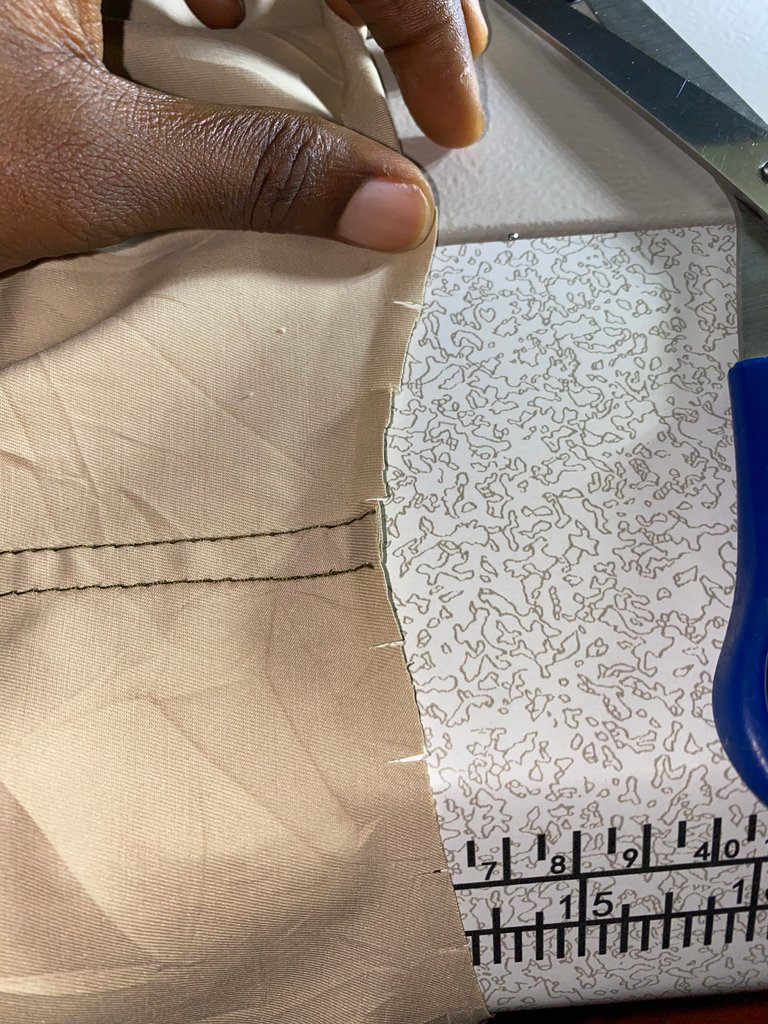
Tip 3: for the neat hem, I slightly notch the hem of my shirt before folding.
Material used:
Linen fabric in two colours, 1 yard each.
Soft and hard interfacing
Threads
THE PROCESS
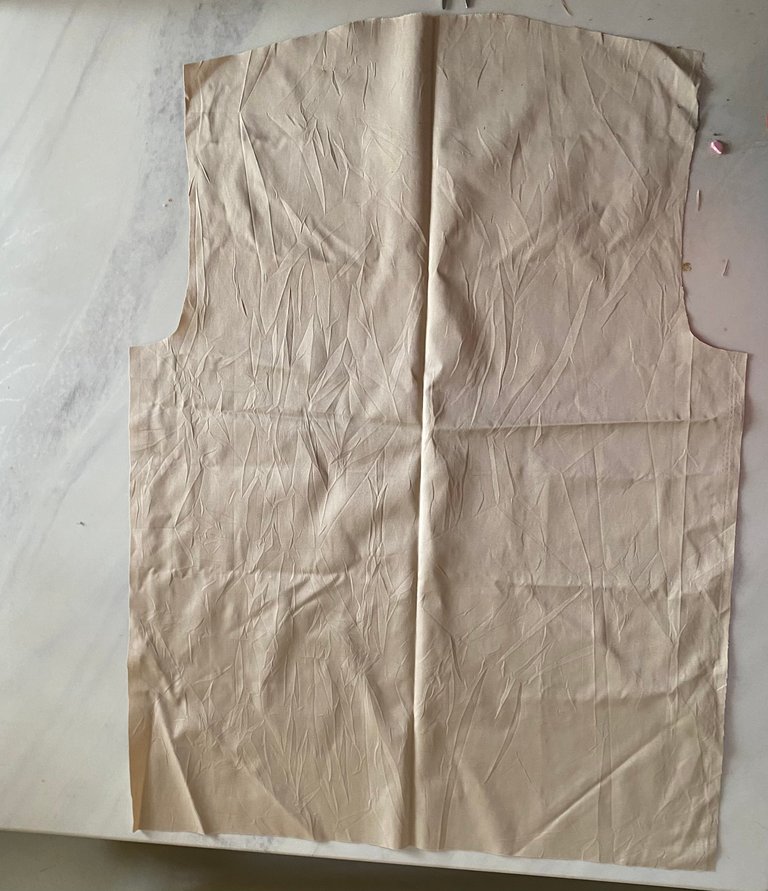
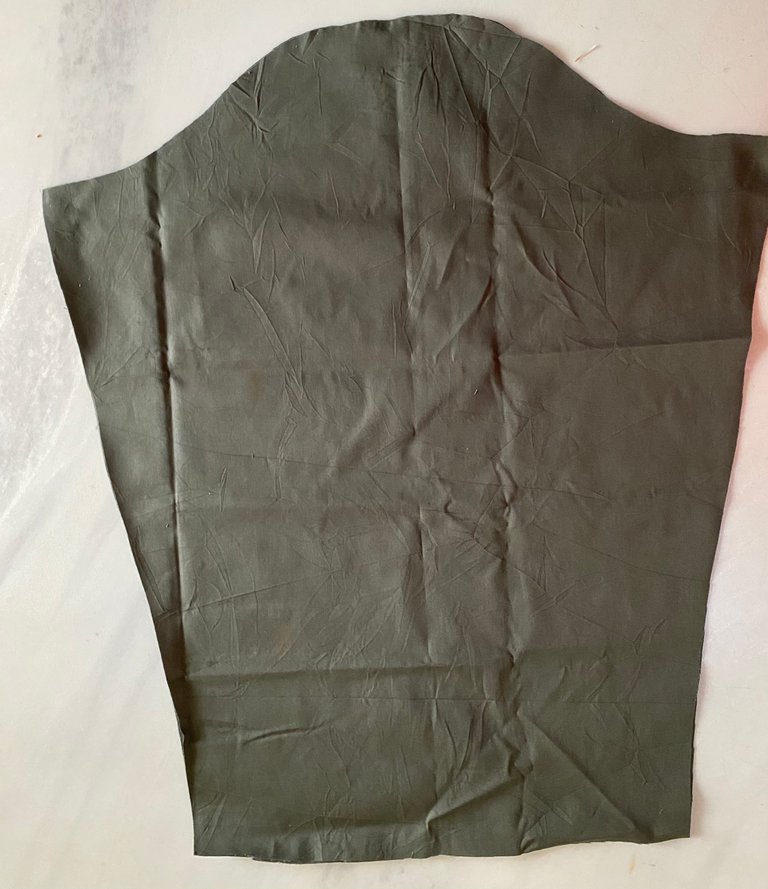
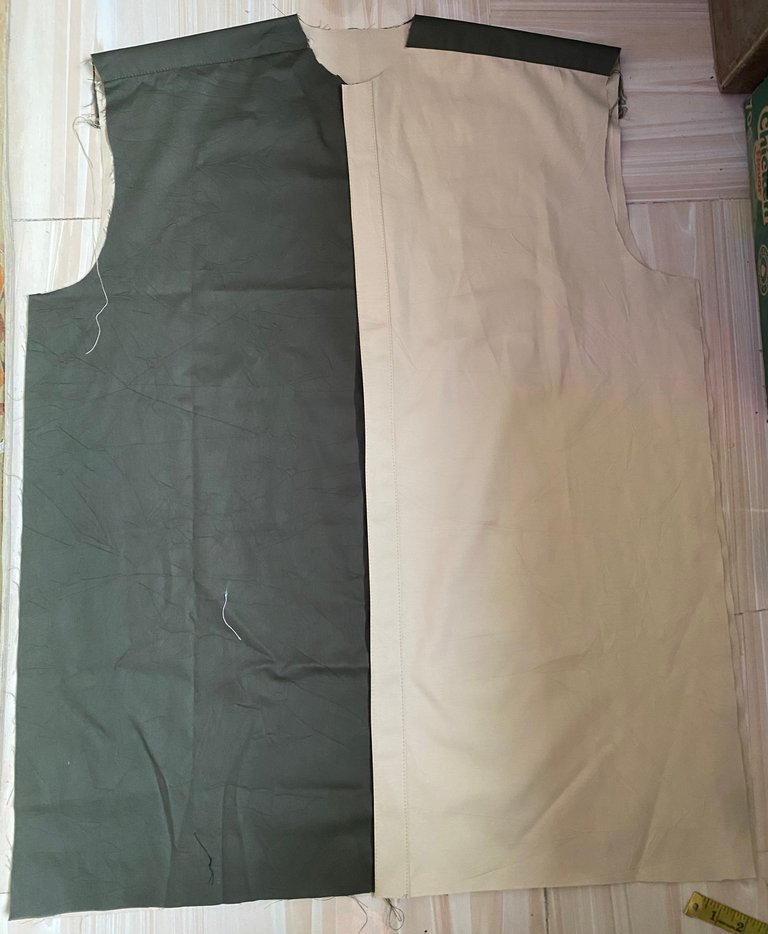
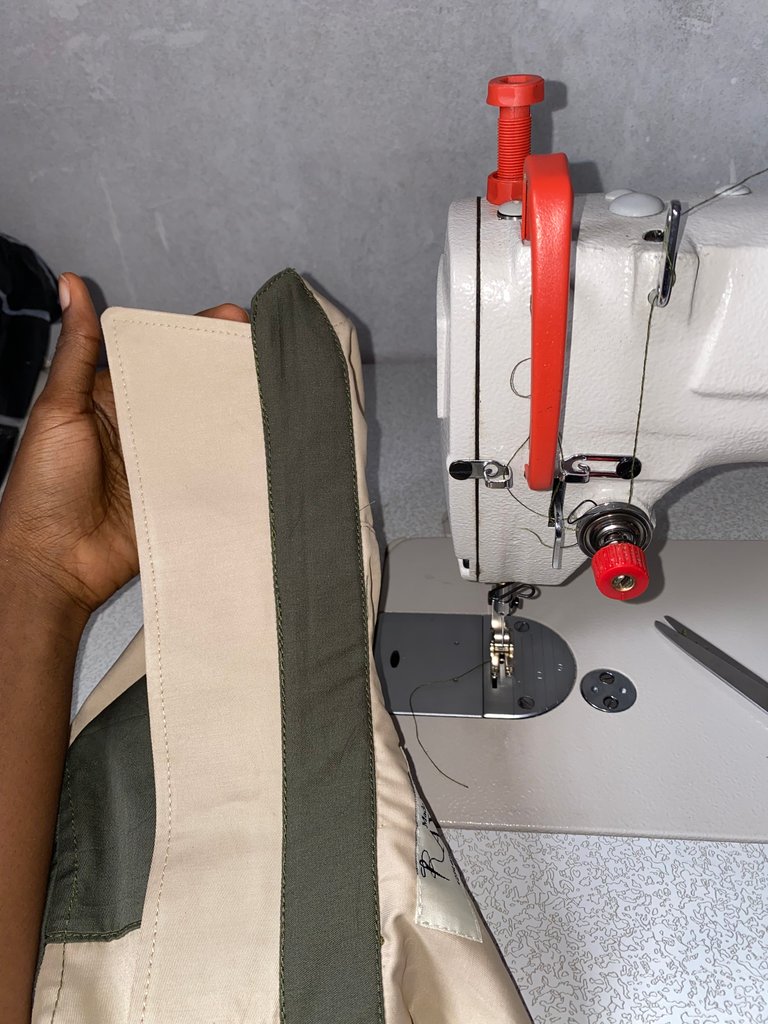
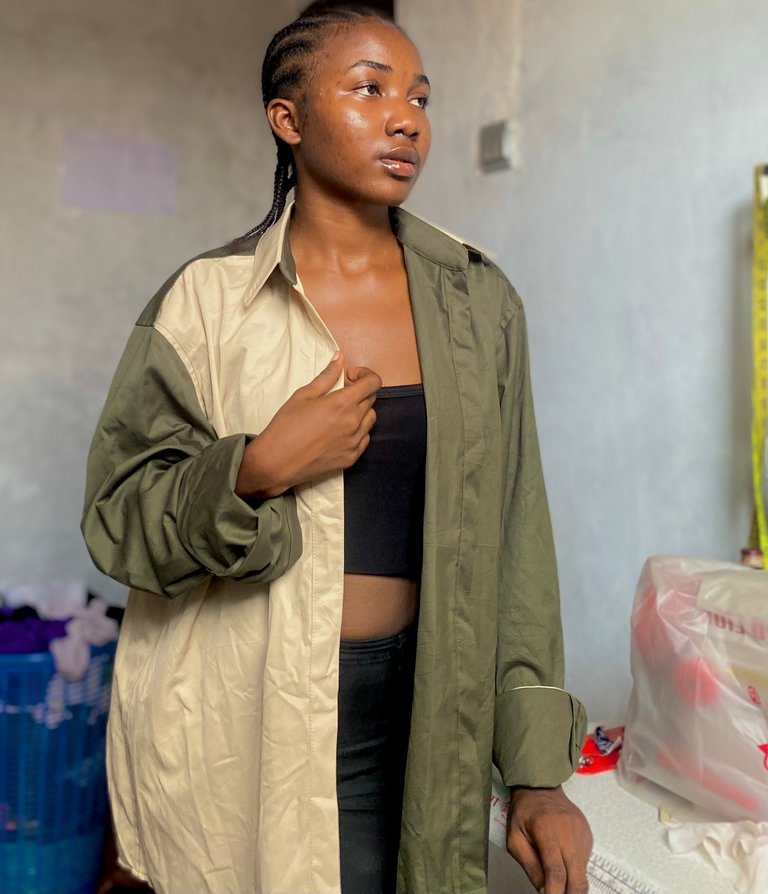
I cut the front and back pieces. The back is in beige, while the front is mixed, beige on one side and army green on the other.
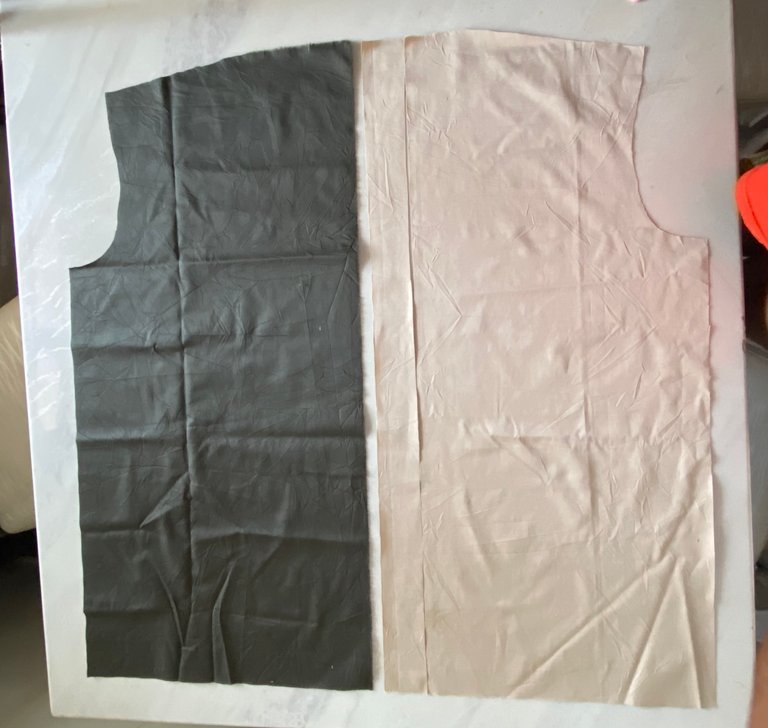 |  |
I cut the yoke at the back in an army green colour
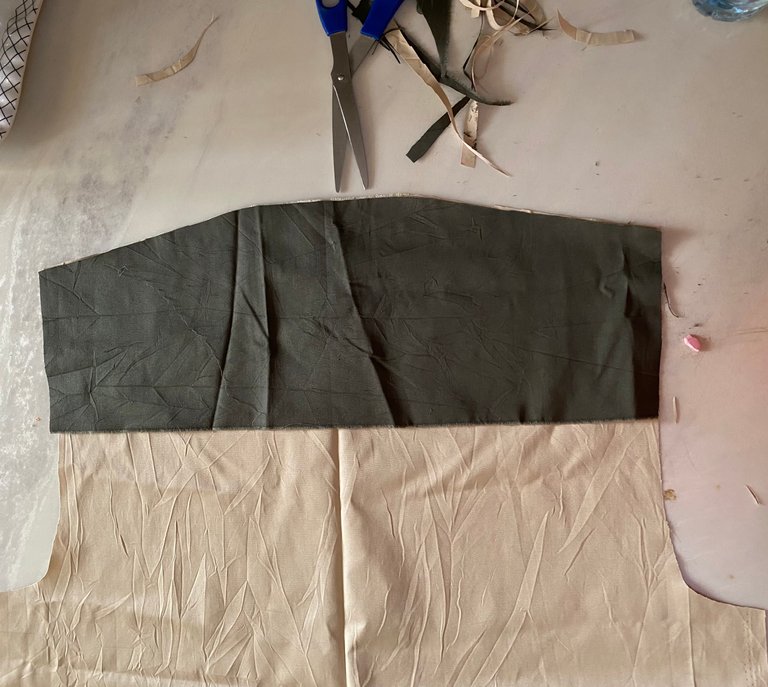
I cut the sleeve in army green
I joined the front pieces, the back and the back yoke. And top stitched.
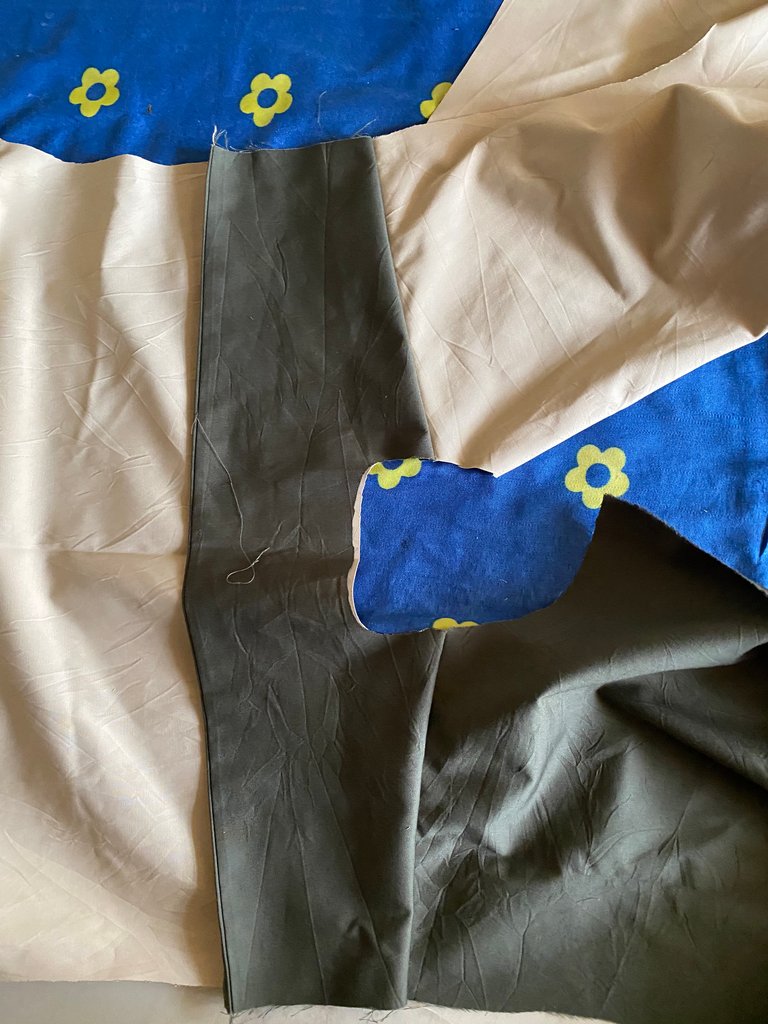
It's time to join the sleeve. I saw a trick on TikTok so I decided to try it.
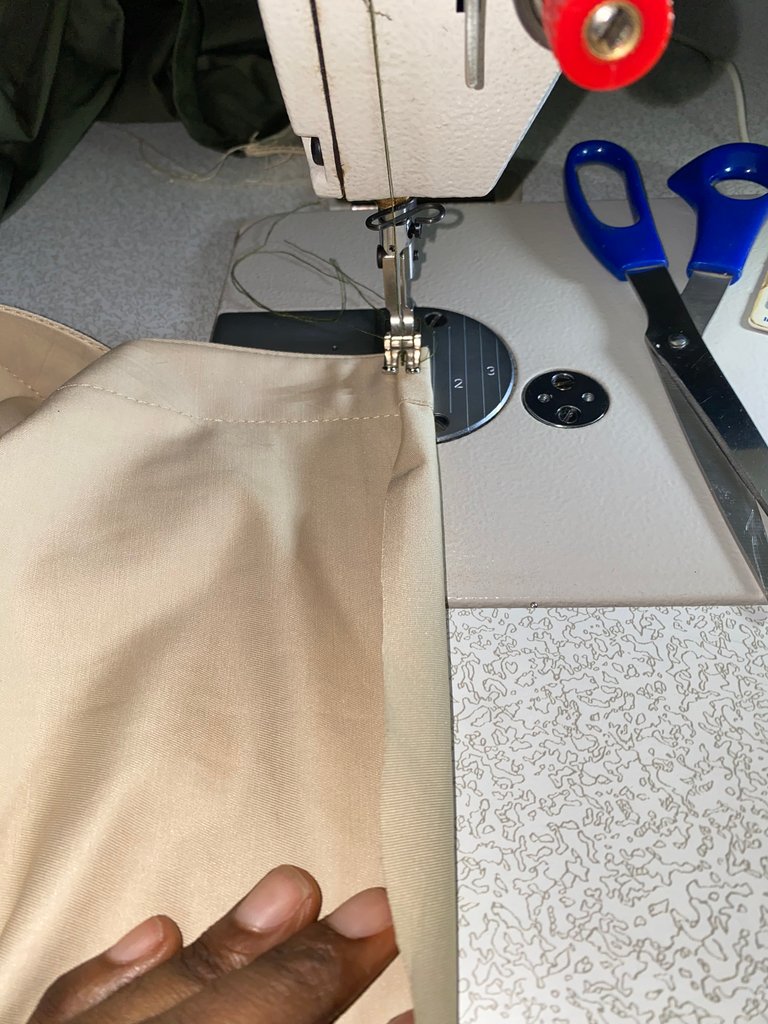
So, I normally join the fabric at 0.75 inches fold it and top stitch, due to the excess folding it usually turns out tacky. After learning this hack it is just way easier to top stitch my side seams.
Step 1 is to join your fabric unevenly, I should be about 0.25 longer than the other.

After sewing, step 2 is to fold and top stitch. It was way easier and neat, less bulky.
 |  |
I cut the collar. And I infused it with soft and hard interfacing. I also learnt another trick from a friend. I infuse a hard/stiff interface for one side and a soft interface for the other side.
After infusing interfacing, I sewed the collar and top-stitched the seams.

I sew the collar to the neckline of the shirt
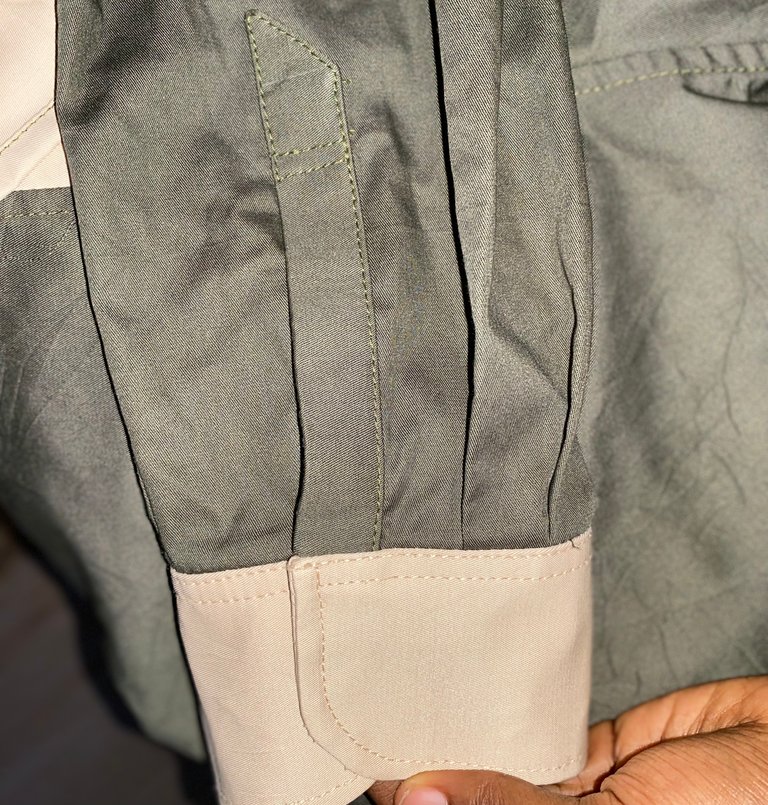
After that, I joined the sides of the cloth using my new top-stitching method
I cut the cuffs and sleeve plackets. I ironed with soft and hard interfacing. Then sew and join it to the bottom sleeves.
I hemmed the bottom of the shirt. Another tip is, for the deep curved part of the hem, I notch it for easy folding while hemming
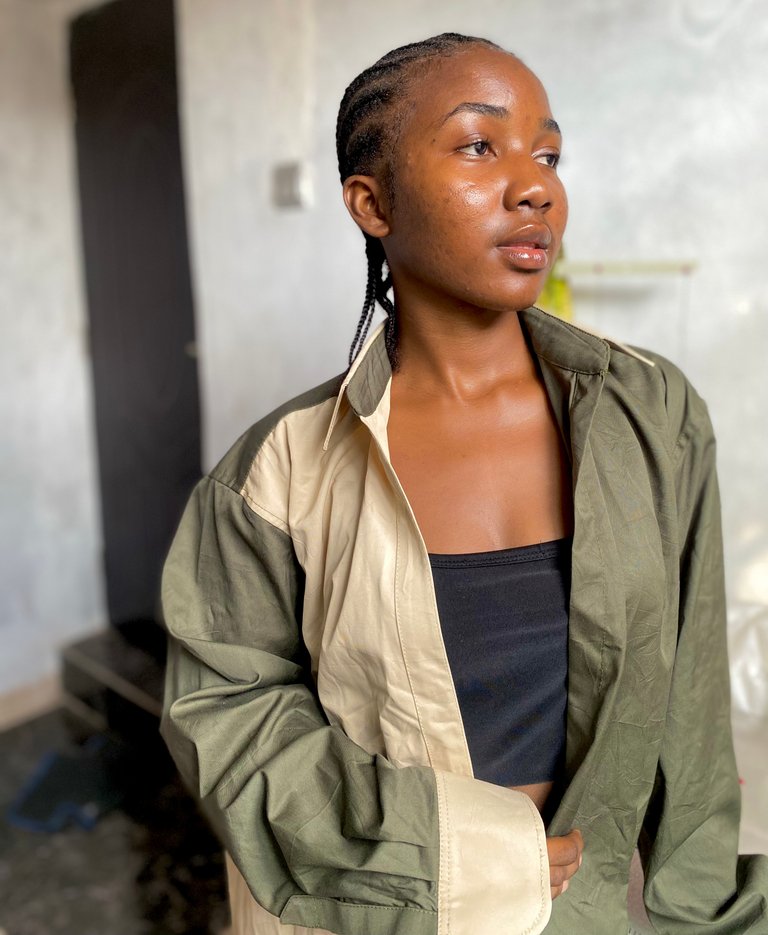
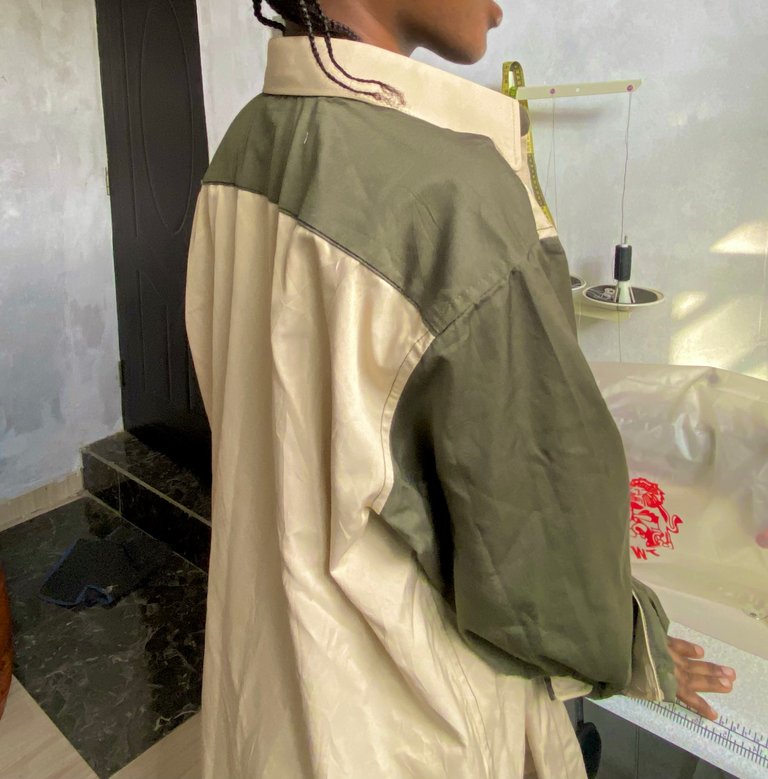
This is the final result, I hope you like it.
Feel free to share your thoughts or any other tips you know for making shirts.
Thank you for visiting my blog and stay creative ❤️
All images are mine, thumbnail by canva
These are super neat and all of the tricks worked out in your favour. I have seen short in mixed colors like this and they are often very attractive loke your.
Well done and thanks for sharing.
Thank you ❤️
How is your health now? Hope you are better
Great job on the oversized shirt. This is perfect for anyone looking to try their hand at making one. Thanks for sharing
Thanks for your comment
The jacket looks good on you. I like the design on the jacket. Well done.
Thank you for your comment. I am glad you like it.
Absolutely beautiful. I even think those fabrics were made to be mixed and matched. I really liked those neat seam tips, they look very professional. This shirt looks great, great idea! Congratulations 💕.
Thank you. I never knew the colour could go so well. I'm glad you like it. Thank you 🙂
Excellent work
A very well done finish and I loved the final result, congratulations @rayoo 👏
Thank you so much, I'm glad you like it 🙂
Sending you Ecency curation votes!

Great project, I love how the colors combine, I'm glad you were able to use that fabric so it doesn't go to waste.
Wowwww
This is really nice
I’ll definitely recreate this with this detailed tutorial. Great job Queeeen☺️
Thank you 👸 ❤️, I'm glad you like it
That's one good thing about knowing how to sew, you can make anything you want. I can't wait to see yours🥰