The Splinterlands Gazzette - The Healing Lion And The Calamity Axolotl
Blew up a battle in Splinterlands and lived to tell the tale? Built a card combo so deadly it scares your own minions? Or maybe you’ve cracked a strategy so good even your stats are jealous? Share it as we want to see your chaos in action!
Use your cards in the Conflicts to bag unique cards! It's now or never! Looks like Calamity lived up to her name. Before we were ready, she somehow slipped right past the devs and wriggled her way onto the live server!
The chaos and curiosity where in action, as we seen some spoiler in the loading screens. Players stumbled onto her early, which honestly feels very on brand for a salamander with dragon-level power and zero impulse control.

Whispers rise... whispers of Riftwatchers turning on allies, allies turning on each other. Elves, dwarves, gnomes, ulund, orcs... killing their own. One swears they walked in on themselves, saw their own face grinning above a dying friend. Madness.
Years ago, an axolotl egg found its way into the brood of Sheng Xiao. When it hatched, the lung dragon took it in, nurtured it, protected it, taught it to harness magic. She named it Calamity.
Calamity is still a salamander, but with the power of a dragon. Chaos and curiosity pulse through her, power without control. She carries 4 mana, 10 health, 3 magic attack, and a speed of 4.
At her peak, she shapeshifts across all bloodlines, electrifies her own allies with sparks each round, leeches life with every strike, and exposes enemy defenses, stripping away even immunity itself.
If left standing alone, she surges in strength—stats and health amplified by half again, refusing to fall without unleashing her fury. She didn’t wait for patch notes... she wrote her own.

The battlefield has shifted. Battle Wagons now roll to the front line. Every Mage Wagon, old or newly forged, is eligible to carry up to five cards and as many as one hundred packs—Rebellion or Conclave Arcana.
Points flow from these loads: full collection power for CA cards, half for Rebellion, while packs yield fifty, one hundred, three hundred, or six hundred points depending on type. For every one hundred thousand points, an entry is earned toward the Conflict airdrop.
Each entry carries a 0.111111% chance to land the Conflict card, with certainty granted after nine hundred attempts. For every twenty-five cards earned, one Gold Foil is guaranteed... or just thirteen with alchemy potions sharpening the odds.
The battlefield rewards patience... and relentless persistence. Potions shift fate further. Alchemy doubles the Gold Foil chance from four to eight percent, while Midnight doubles Black Foil odds from 0.1 to 0.2 percent.
At the close of each Conflict, the Conclave Arcana jackpot grows richer, with one Black Foil Arcane and five Gold Foil Arcane cards added to the treasure pool, waiting to be uncovered through packs.
Between conflicts lies the Preparation Phase, time to repair wagons, to rethink strategy, to sharpen edges before the next clash. I've got nothing after the first two and probably 416 chances are not enough again!

How about the Splinterlands Frontier? Will Calamity break some barriers? No... but a storm is brewing! The conflicts are live again! Enter Frontier... where strategy, progression, and true on-chain ownership collide.
This is your chance to prove yourself on a battlefield where every move matters. Frontier is free-to-play, built for strategy, and designed to reward skill. Every card you earn is yours and even your non-crypto friends can flex this NFT magic.
Frontier levels the field... no whales, just skill. The evolving meta keeps every season fresh, fueling demand and giving real utility to your cards. I’ve only leveled a few cards so far... but everyone’s equal right now, and strategy beats unit level. The grind will pay off!
Hustle hard and climb the ranks! There are cheats to open for each Tier you get higher! The game is on and the battles... the battles are a bit boring so far! Why? Limited cards and low selection pool!
Thorugh the chaos of new beginings, I managed to crop some good strategies. One is with Thalgrimore leading an army of death units, focusing on lowering the health of the enemies. It works!
Thalgrimore: -1 Health to all enemies
Spinaltail Fiend: Melee with Sneak
Sorrow Harvester: Caster with Weaken
Little Sister: Caster with Life Leech
Spellmonger: Untrainable & Thornes
The summoner will reduce the opponents health by one, and then the Sorrow Harvester will reduce it with another point. This gets even deadly when there are Noxious Fumes or the Earthquake battle rule.
This time was only Super Sneak and Reverse Speed, meaning the slow units will attack first and will target the back of the raw. That's why the Spellmonger waits in there! Not trainable but with Thornes.
The Twice Yester Knight attacked twice the Spellmonger, and delivered a quick demise. However, the damage inflicted to him was also considerable. As part of the plan... the Sorrow Harvter made the first victim!
In Frontier battles... everything happens quickly! Three rounds in and the battlefield was nearly empty. The casters where casting, and the Little Sister wasn't that little anymore. Attack after attack was adding health

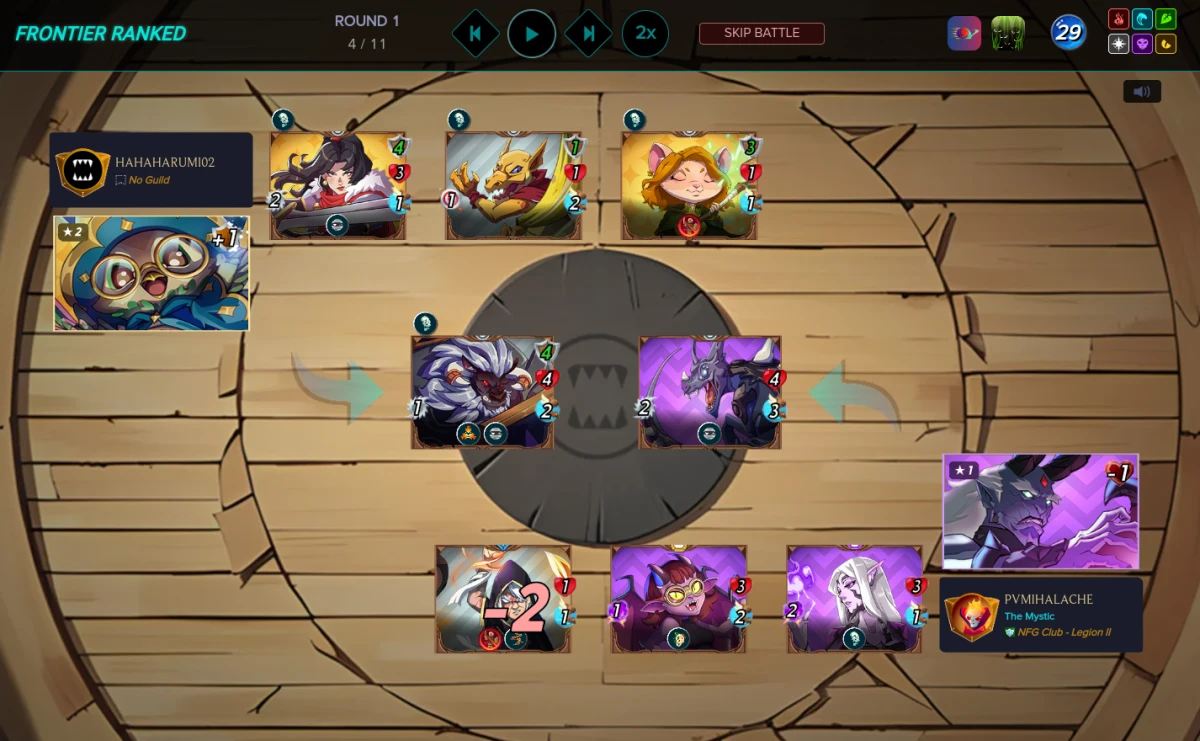
Until I upgrade my archons, probably 2035 or later, let me treat you with another epic battle! You need to think about a way to survive for longer when there's only 29 mana along Super Sneak and Explosive Weaponry! The lion's pride is at stake!
Aurelia: +1 Health to friendly units
Dread Tafarian: Melee with Heal
Mad Gearhead: Melee with Reach
New Beluroc Aegis: Meee with Taunt

Sneaky units will hit the back raw, so that blast will hit it's neighbour. The tank will hit the first unit and the blast will hit it's neighbour. When you have only three units... the one in the middle will be hit from both sides!
I went for a full melee team and it looked like a mistake, because Great Bear Druid will hit twice with Sneak active and the Sorrow Harvester's magic will ignore the armour! Not ideal!
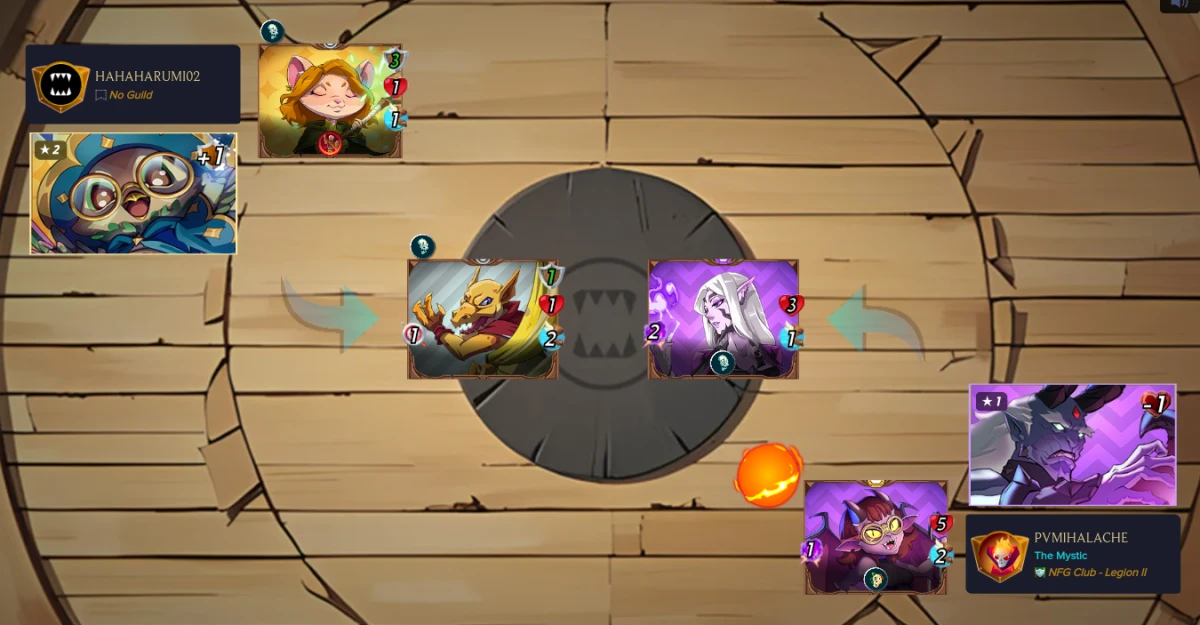
I was expecting the Mad Gearhead to be the first unit down, but surprisingly survived long enough to deliver one attack. The Sorrow Harvester demise was swift and my army was weaken no more. Plus one health to everyone!

The Mad Gearhead couldn't handle the heat from so many blating attacks, and didn't live to tell the tale! My only hope now was the Tafarian's healing power... and a bit of luck!
Even if the speed was equal, the New Beluroc Aegis hit first and delivered a deadly blow to the Great Bear Druid. Not much time to enjoy, as he fallen at the next attack.
The lion is the king! The Tafarian can't fear a rodent, and heal after heal he gained edge on the Nim Guard Captain. See the full battle here!

Residual Income:
Claim your Zerion XP!
Sonium: Sake Fi / Kyo / Arkada / Algem / Untitled Bank
AI Agents & Mindshare: Kaito / Theoriq / FantasyTop
Play2Earn: Splinterlands & Holozing
Thanks for sharing! - @mango-juice
