DIY Solar System Model Art Project
Hello friends! I finally completed the solar system model art project that I've been working on for about a month! Woohoo! So I'm here with a little DIY in case anyone would like to do something similar. :)
You'll Need:
For the planets:
-strips of newspaper
-styrofoam balls
-large metal staples
-invisible thread or fishing line
-flour and water mixed together to make glue
-craft paint
-craft or beading wire
For the asteroid belt:
-huge amounts of various beads
-more invisible thread
To hang from the ceiling:
-cup hooks
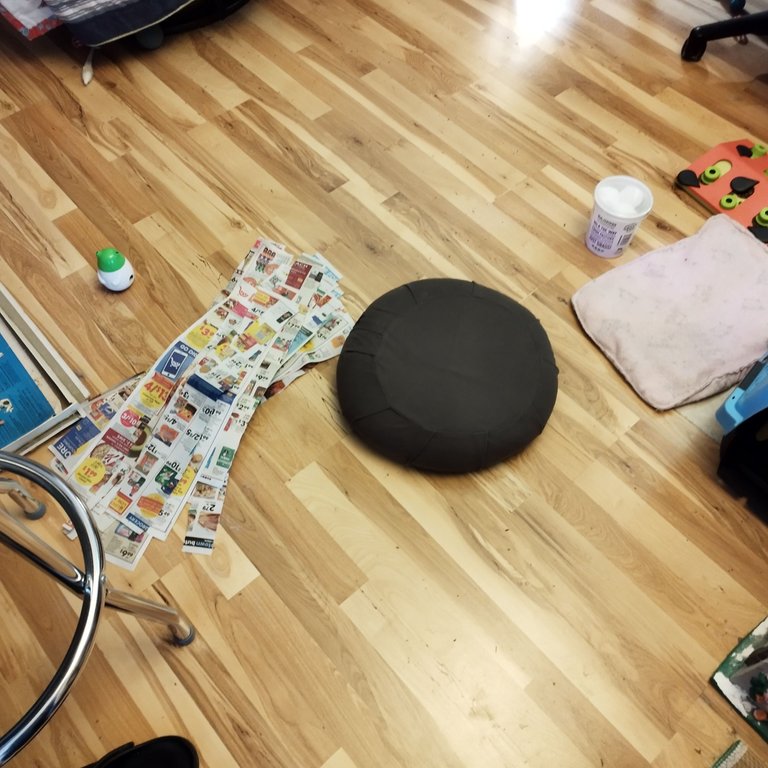
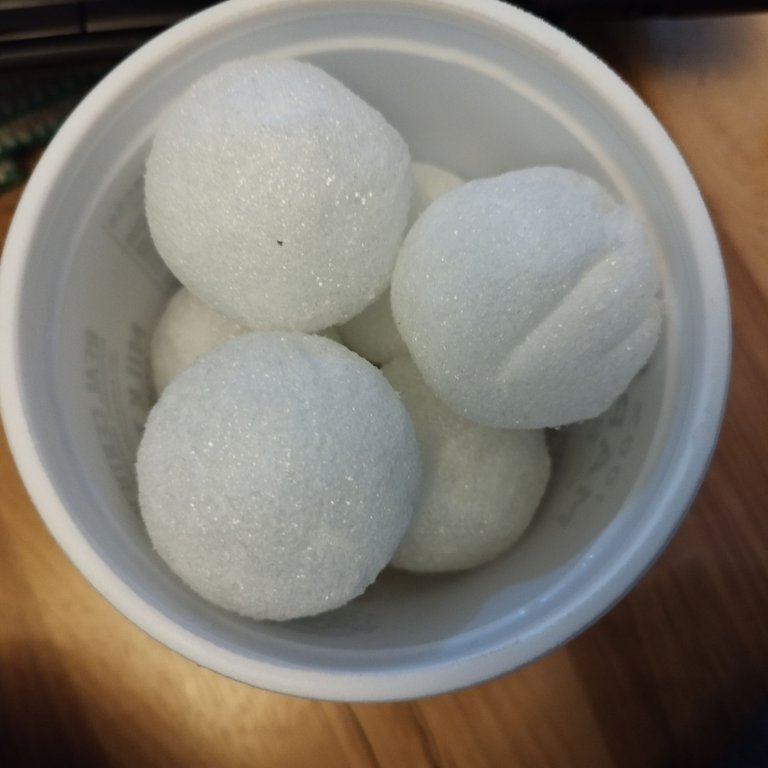
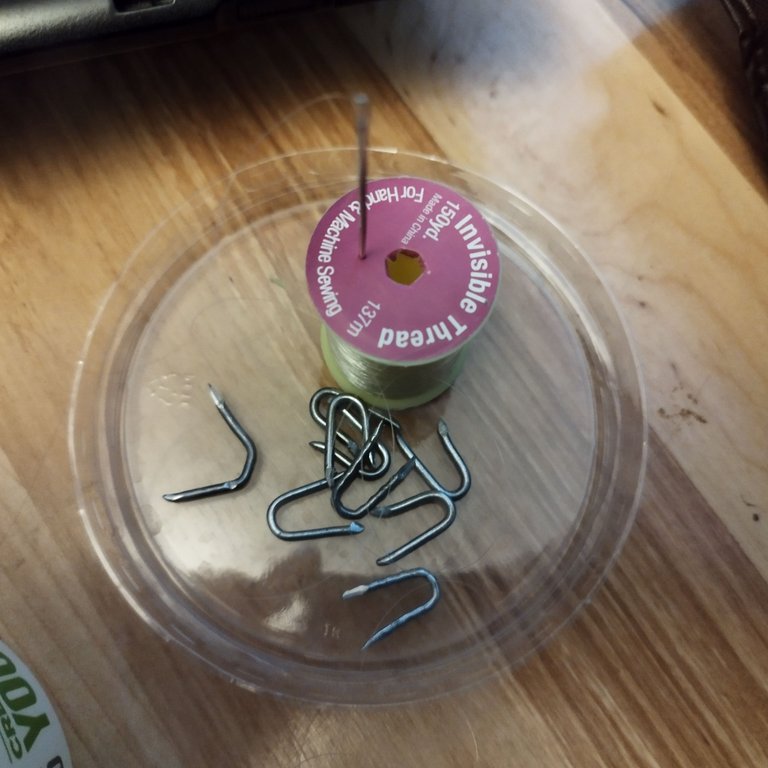
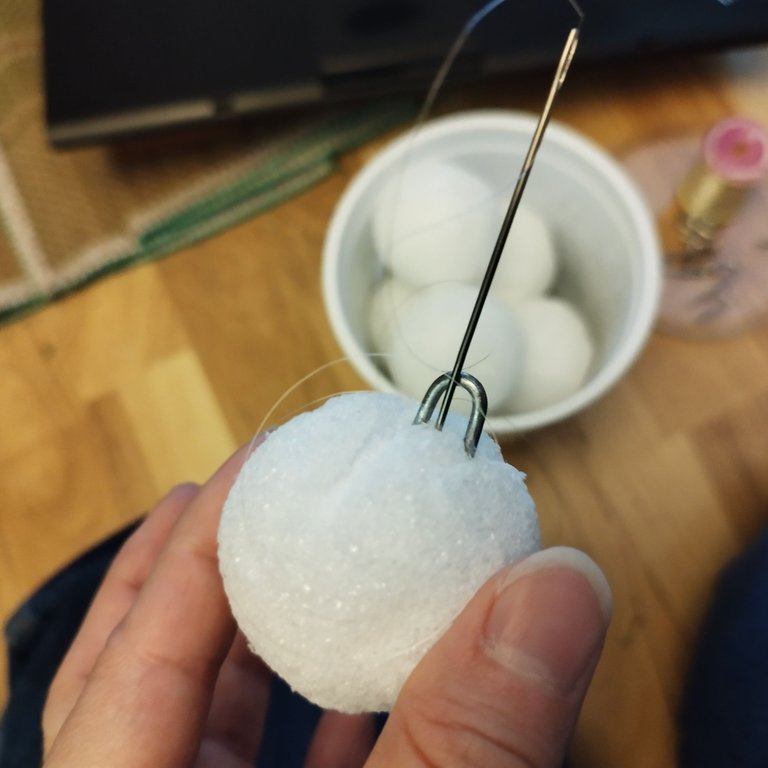
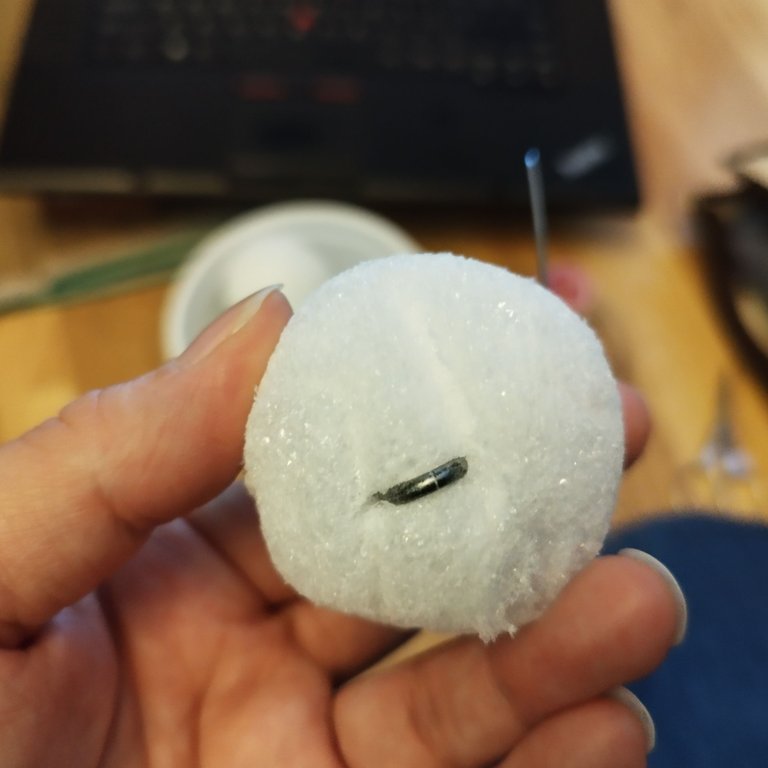
Step one for this project is to attach some of your invisible thread or fishing line to a large metal staple (these are not for a staple gun, I bought them where you can buy loose nuts and bolts at a hardware store; I'm not sure what else you'd call them though besides staples, lol). Then you thread the thread through the styrofoam ball, and push in the staple so that it is on what will now be the bottom, and the thread is coming out what will now be the top. This way it is anchored to the styrofoam ball and you can hang it from the ceiling by the invisible thread when you are done making the planets!
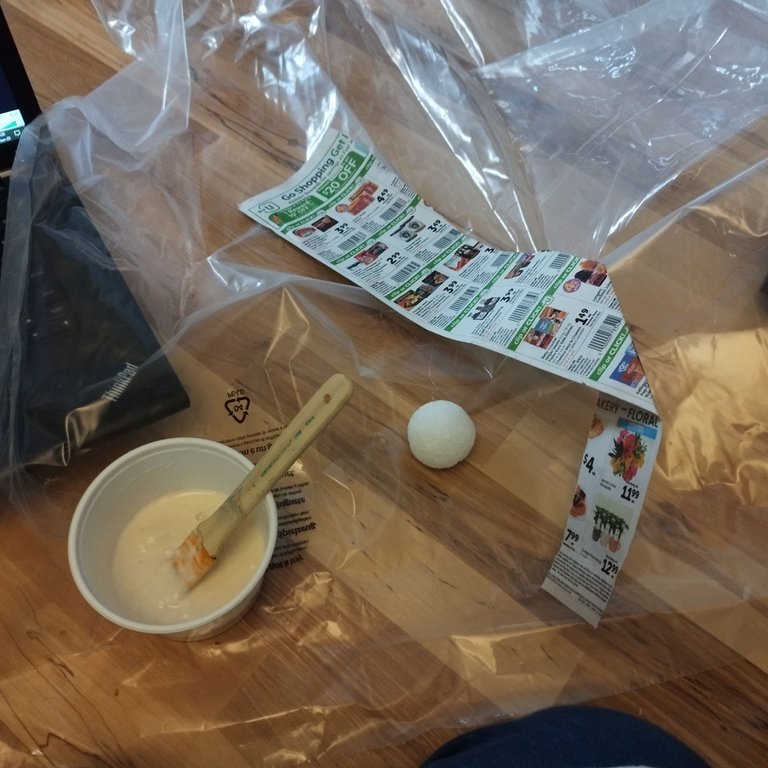
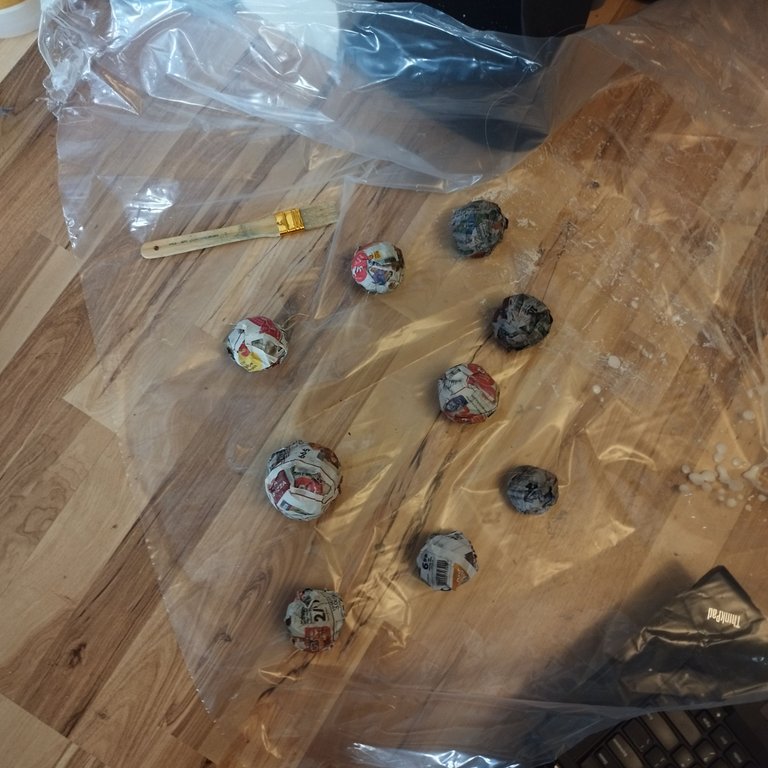
Then you want to brush the strips of newspaper with your flour and water glue, and wrap it around the styrofoam. This will need several strips of paper per ball; more for bigger planets if you want (I made Jupiter significantly larger and Saturn a little bit larger), and for Pluto since he's smaller (and I only had 8 styrofoam balls, ha ha), I made him entirely out of balled up paper and glue with no styrofoam in the middle (I threaded the invisible thread and staple the same way once I had a few strips of paper balled up and glued). You could do all of the planets without styrofoam balls if you wanted, I just happened to have these styrofoam balls in my craft supplies. Know that it took Pluto a lot longer to dry than the other planets though, as far as the glue and paper part, so if you do it that way you'll need more drying time before you paint (several days). Be careful to keep your hanging thread free from the paper! Don't let it get glued under.
I worked on the plastic wrap from my bed foam pad I got several weeks ago so that I didn't make a mess on the floor
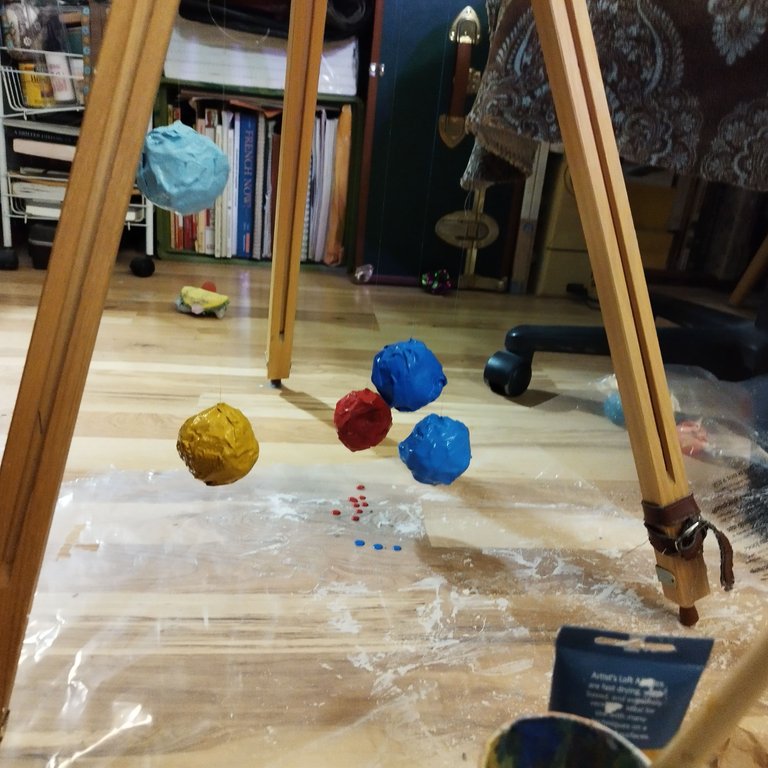
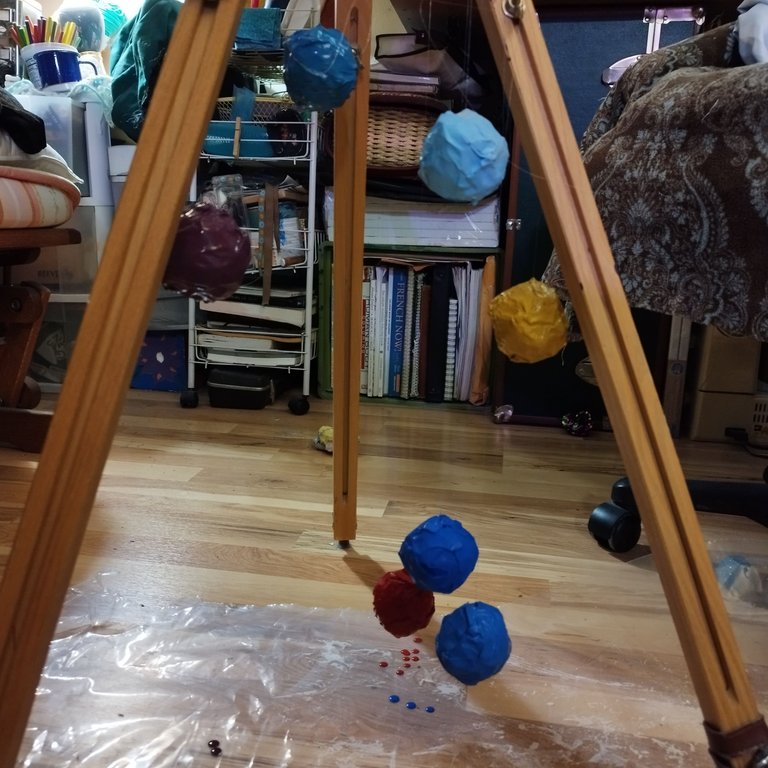
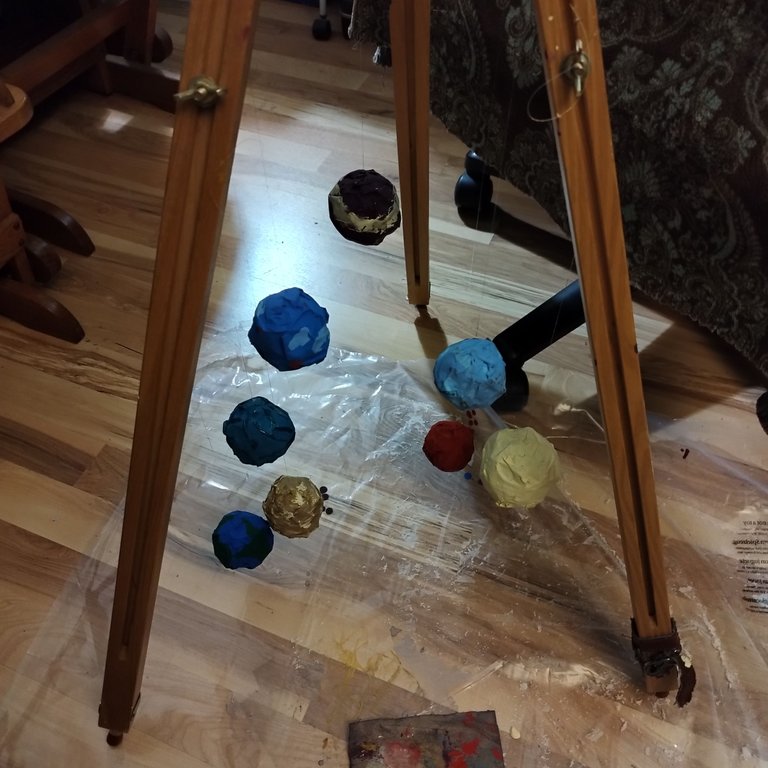
Once the paper and glue is dry (overnight for most of them, longer for the larger and styrofoam-core-less planets), you can start painting them! I did the paint in a couple of stages. First, I painted a base layer color and let that dry, and then I added more colors for stripes and highlights and whatnot on another day. Be sure you have someplace where you can hang them up to dry - I used my art easel, but if you know where you want to hang them already you can hang them from where they will ultimately be on the ceiling and then take them back down to paint the next layer later. The issue with doing that however is that they will drip as they dry (you can see the drip spots on the plastic), so make sure there is something underneath them to catch it, wherever you hang them up to dry!
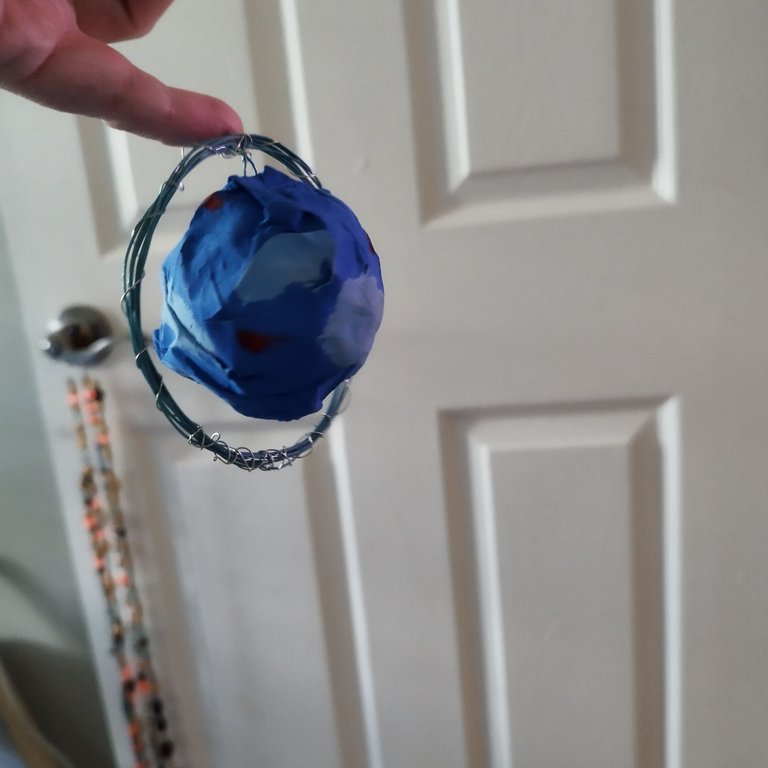
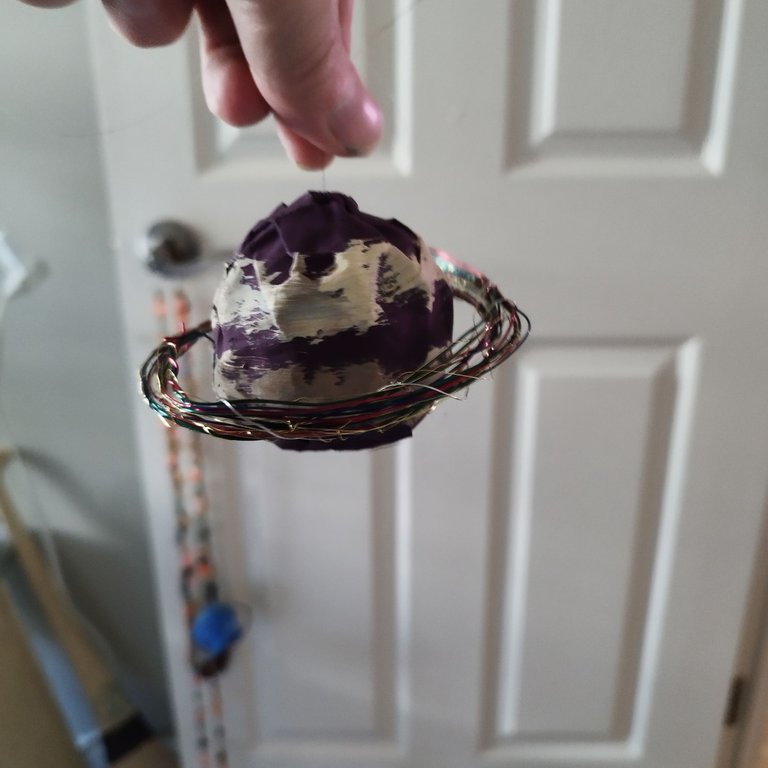
Saturn and Uranus have rings, so I used colorful jewelry beading wire to make them. I stuck the ends in one point of the planet, wound several colors around, and then wrapped those coils a little with a smaller wire so that they would stay somewhat together, and then stuck the other ends into the planet too.
The Asteroid Belt
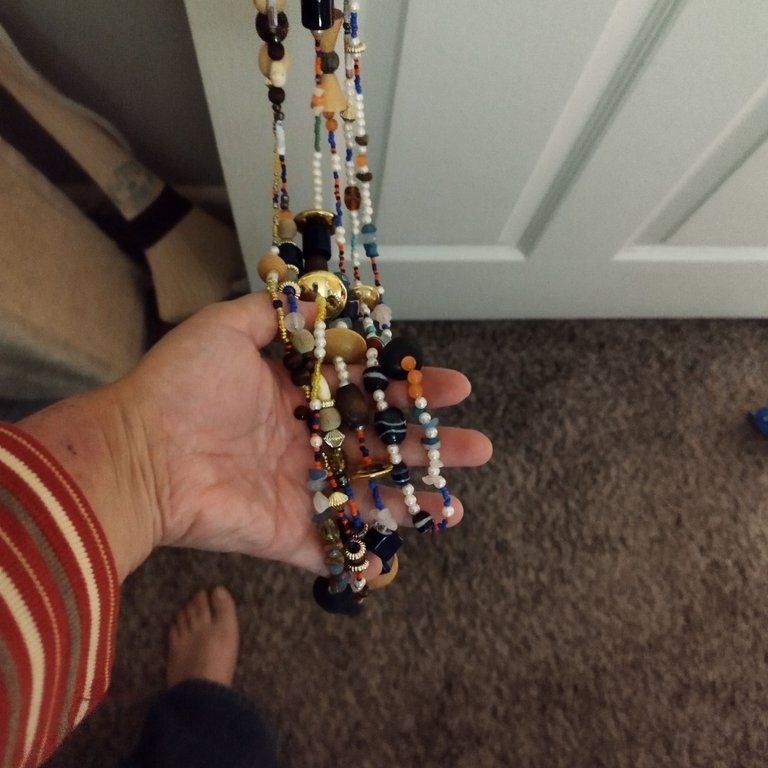
There is an asteroid belt between Mars and Jupiter, so I decided to make one with beads! I have (had, lol) a massive bead stash, so I thought this would be a great idea. Well it was - I love how it turned out - but it took a lot of time and a lot of beads, so be warned! I emptied 19 containers of beads of various sizes, and parts of other containers. It's a lot of beads!
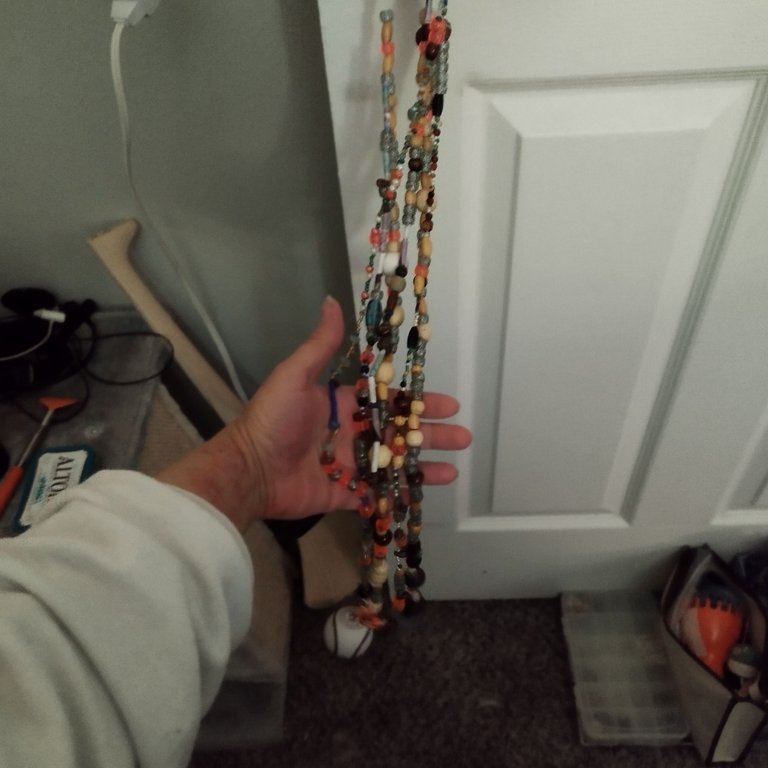
Above was my first round of bead stringing which took several hours, and how far around it got! That's when I realized this was going to take some time, lol. I didn't exactly clock it, but it it's about 10 large loops, and probably took me around a dozen hours or so?
The first strand I did was one of the longest, and I was originally thinking I was going to make one giant strand, but then I realized how heavy it was and that if the string gave out I would have all of those beads everywhere, so that's when I decided to stop and do several loops.
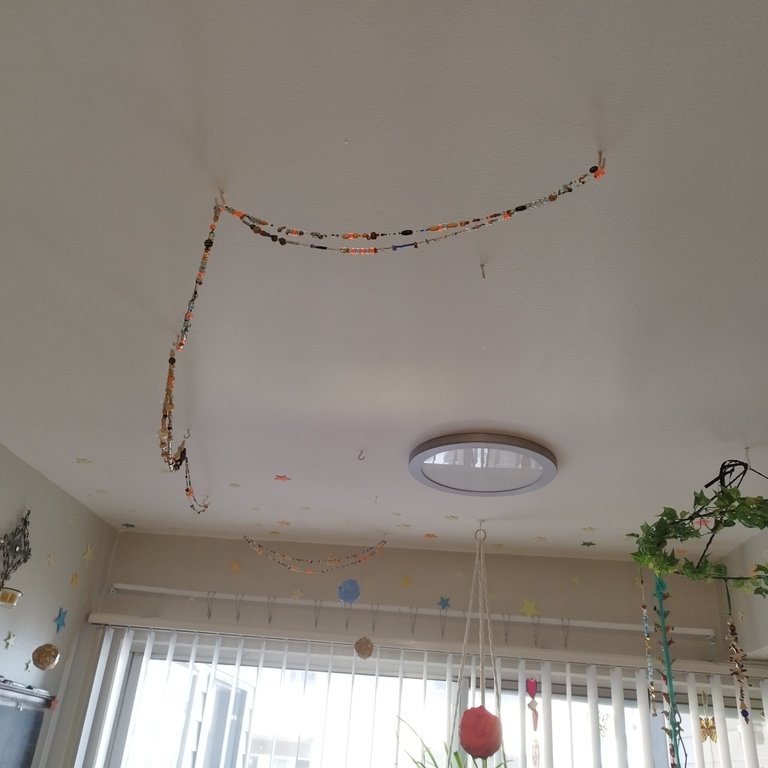
Round two, hung up, and round three, beaded
Round three, hung up, and round four, hung up
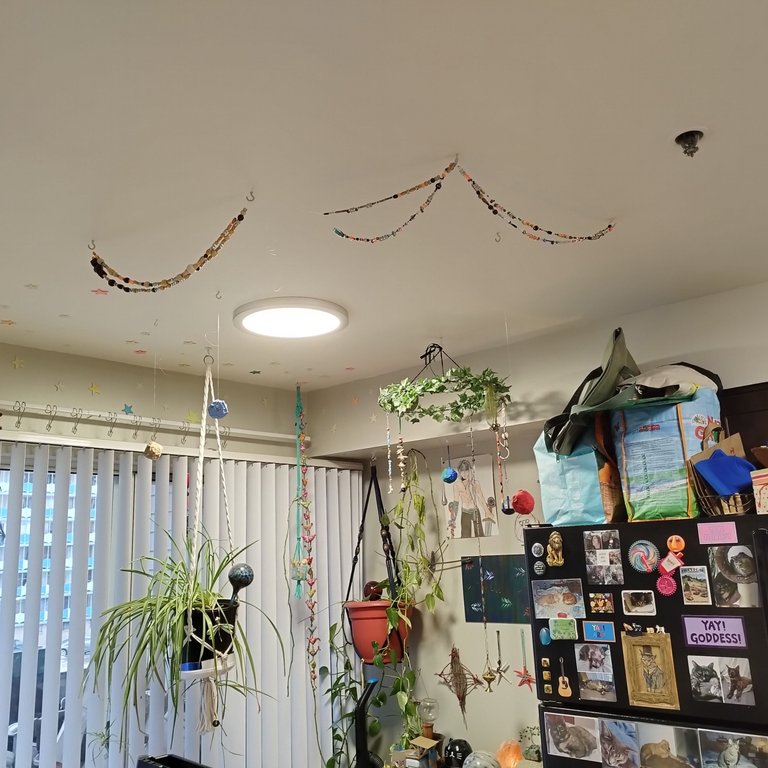
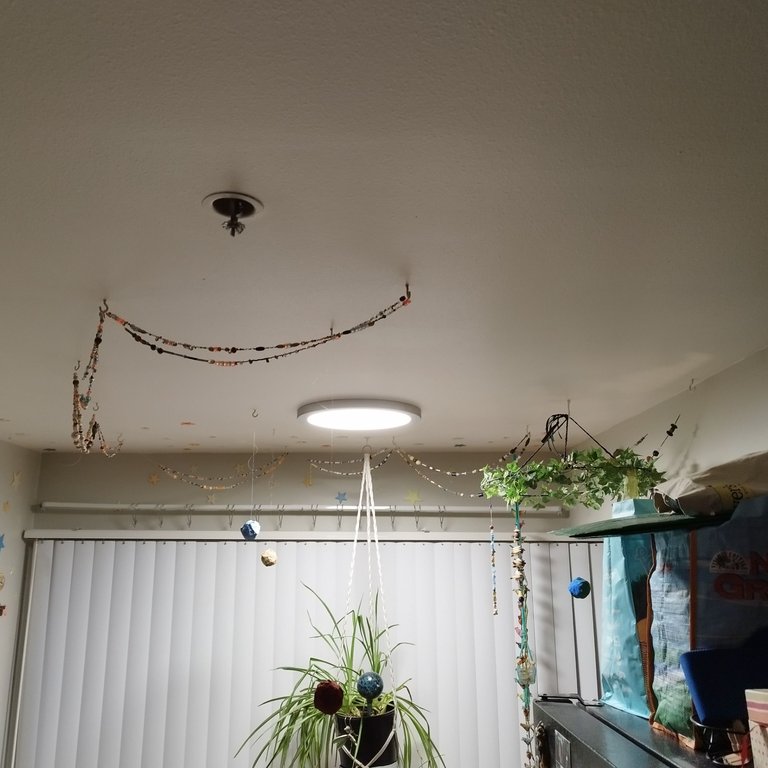
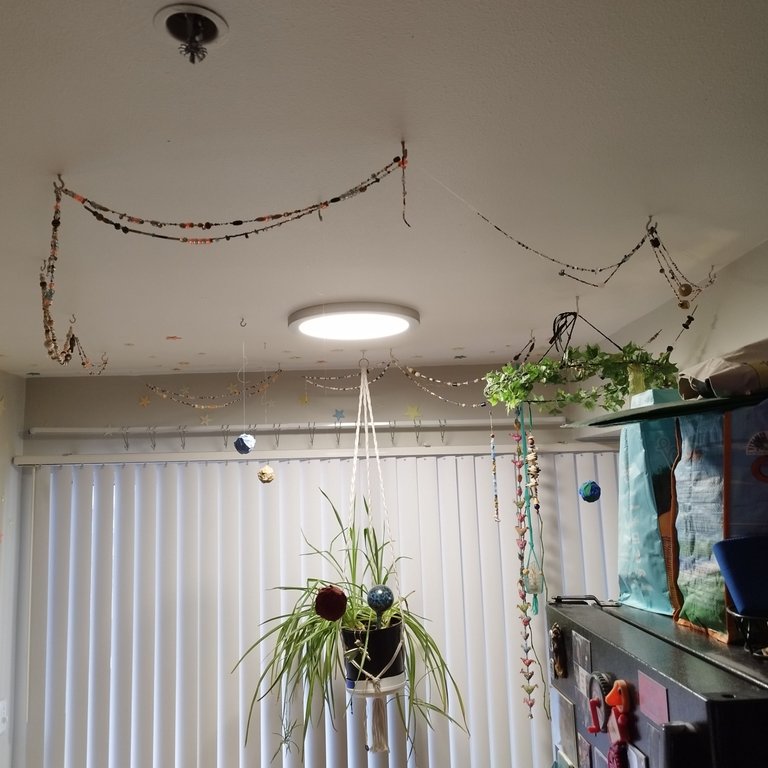
And now I have my full solar system model up! :D Video on my IG here.
The light is the sun, then Mercury, Venus, Earth, and Mars; then the asteroid belt, then Jupiter, Saturn, Uranus, Neptune, and Pluto. There are also glow-in-the-dark stars along the wall and ceiling by the sliding glass doors to represent the rest of the Milky Way galaxy. :) Though they've been up since I moved into this apartment. ^_^
It's pretty impossible to get a still photo including everything without taking down my aquarium stuff, Gods' House, and hanging baskets that are over my kitchen counter (because yes, this is in the kitchen); you can see Mercury, Venus, Earth, and Mars as well as the asteroid belt in that last photo, but the others are out of frame. So please check out the video link to see it all! <3
I'm really happy with this project. It makes my kitchen feel so magickal. I hope you enjoyed reading about it! Thanks for stopping by my blog! :)

Good work , this model do reminds me my school days 🤗
Right? I kind of had ideas like one of these:
...but ✨magickal🌟! :)
Looks great 👏🏽👏🏽 you will have a very unique kitchen that stands out with this solar system. A small note: Pluto is not considered a planet. Regards @phoenixwren
Yes but I am #TeamPluto and Neil DeGrasse Tyson isn't eating in my kitchen. ;)
Great work and it will make your kitchen beautiful .
Thanks very much!
!BEER
U are welcome
Thanks for your support
View or trade
BEER.Hey @marylove1, here is a little bit of
BEERfrom @phoenixwren for you. Enjoy it!Learn how to earn FREE BEER each day by staking your
BEER.Thank u so much I really appreciate 🤗
very beautiful
thank you! !BEER
View or trade
BEER.Hey @fixie, here is a little bit of
BEERfrom @phoenixwren for you. Enjoy it!Learn how to earn FREE BEER each day by staking your
BEER.Click on the badge to view your board.
Thank you to our sponsors. Please consider supporting them.
Check out our last posts:
Click on the badge to view your board.
Thank you to our sponsors. Please consider supporting them.
Check out our last posts:
Click on the badge to view your board.
Thank you to our sponsors. Please consider supporting them.
Check out our last posts:
Click on the badge to view your board.
Thank you to our sponsors. Please consider supporting them.
Check out our last posts:
Nice that you used the flour and water glue hehe, looks good on the video and I liked the music.
All that said, I'm curious as to why you chose this particular topic for an art project 🤔
Because I've always been mildly fascinated by space. :)
Thanks for stopping by! !PGM
BUY AND STAKE THE PGM TO SEND A LOT OF TOKENS!
The tokens that the command sends are: 0.1 PGM-0.1 LVL-0.1 THGAMING-0.05 DEC-15 SBT-1 STARBITS-[0.00000001 BTC (SWAP.BTC) only if you have 2500 PGM in stake or more ]
5000 PGM IN STAKE = 2x rewards!
Discord
Support the curation account @ pgm-curator with a delegation 10 HP - 50 HP - 100 HP - 500 HP - 1000 HP
Get potential votes from @ pgm-curator by paying in PGM, here is a guide
I'm a bot, if you want a hand ask @ zottone444
Hahah awesome then
Click on the badge to view your board.
Thank you to our sponsors. Please consider supporting them.
Check out our last posts:
Click on the badge to view your board.
Thank you to our sponsors. Please consider supporting them.
Check out our last posts:
Click on the badge to view your board.
Thank you to our sponsors. Please consider supporting them.
Check out our last posts:
Click on the badge to view your board.
Thank you to our sponsors. Please consider supporting them.
Check out our last posts:
Click on the badge to view your board.
Thank you to our sponsors. Please consider supporting them.
Check out our last posts:
Click on the badge to view your board.
Thank you to our sponsors. Please consider supporting them.
Check out our last posts: