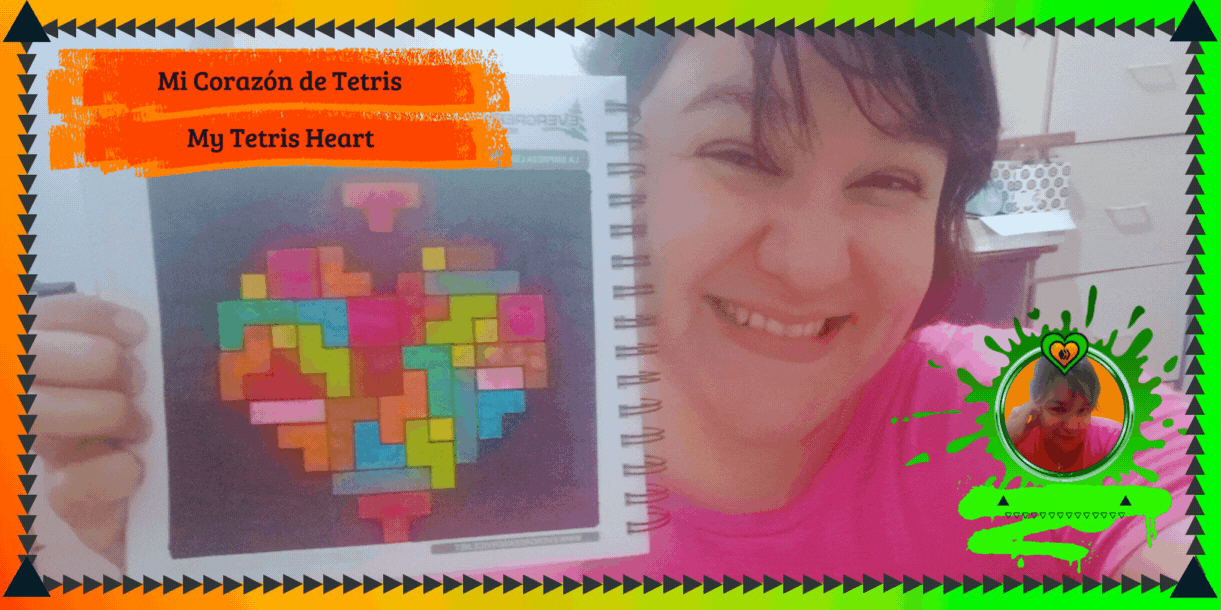
Mi Corazón de Tetris (🇪🇸 | 🇺🇸)
FULL ENGLISH VERSION

Greetings, lovely people of #HiveDIY. Have you ever been obsessed with a certain shape? Well, it seems I have. And this time it's 💜 Hearts 💜. But this time I'm bringing you a drawing, as I'm short on time and need to catch up on other things. Today, I'm sharing the process of how I made it, but I should warn you that I made a mistake and didn't like the result, so I had to redo it. But don't worry, the explanation isn't very long.
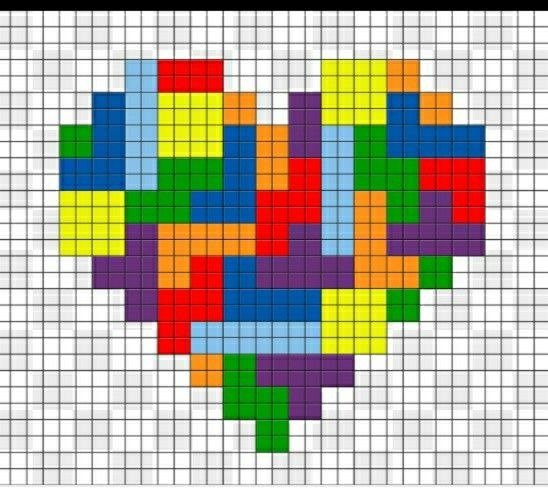
For this drawing, I started by taking inspiration from an image on Pinterest, which I'll show you below:

𝐒𝐭𝐞𝐩-𝐛𝐲-𝐒𝐭𝐞𝐩
For this drawing, I just copied the shapes that appear in the image at the beginning and started by locating the center of the sheet and working from the bottom up. But if you're good at drawing, you can easily start from the top or anywhere else.
Here, just like in the picture, I counted the squares in groups of four to make the shapes of each Tetris piece. I love this game, and it's one of the games I've played the most since I can remember.
To be honest, I'm pretty good at Tetris, and when I drew this picture, it brought back memories, and the classic sound of this video game rang in my head, but I also remembered the process of Minecraft Heart that I did last week.
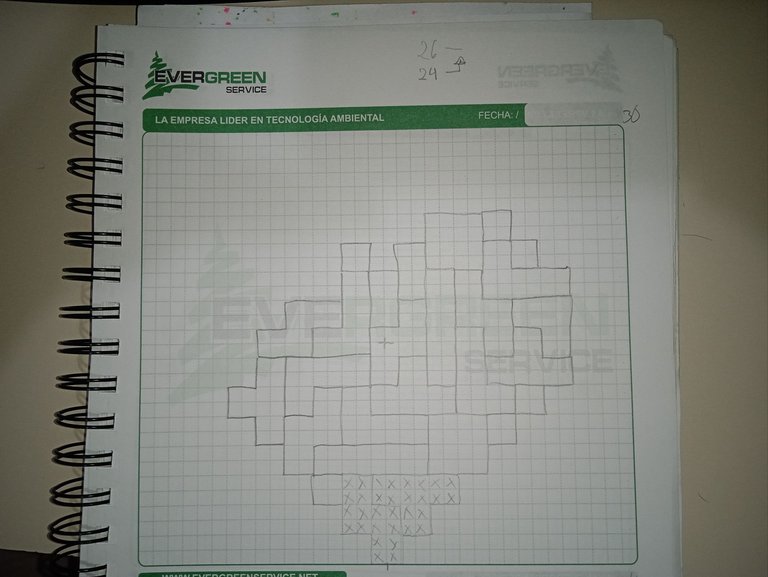
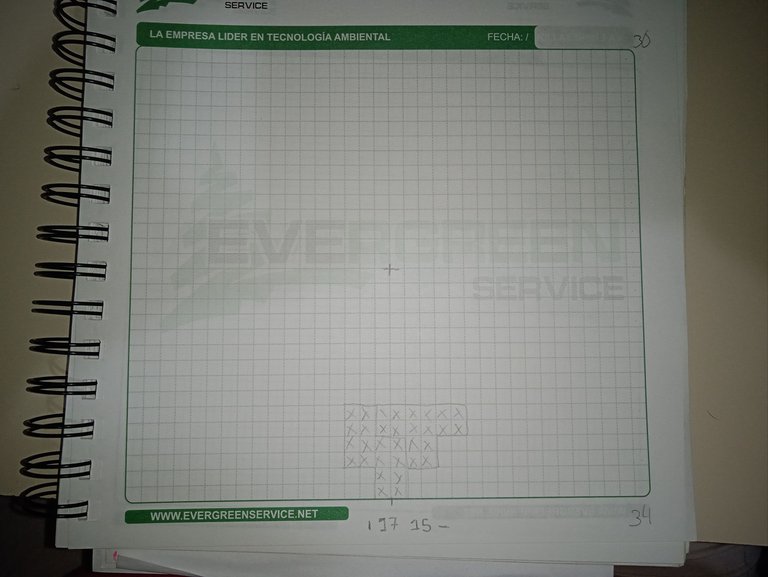
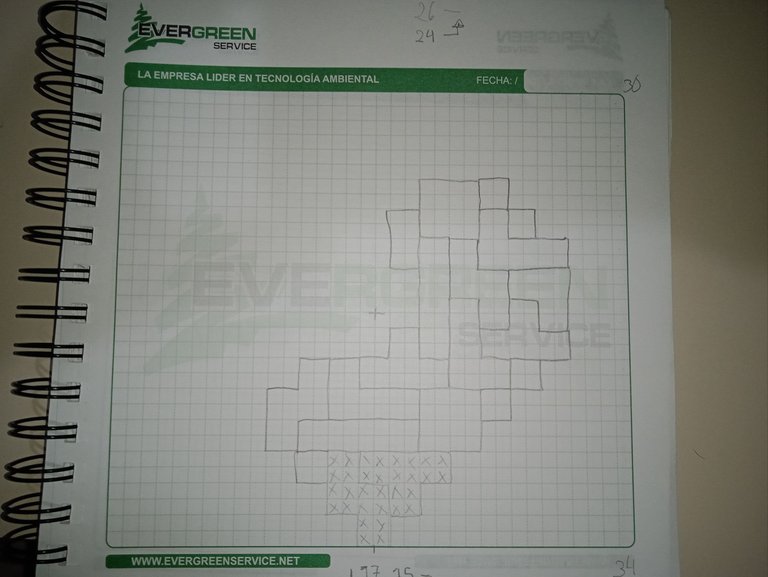
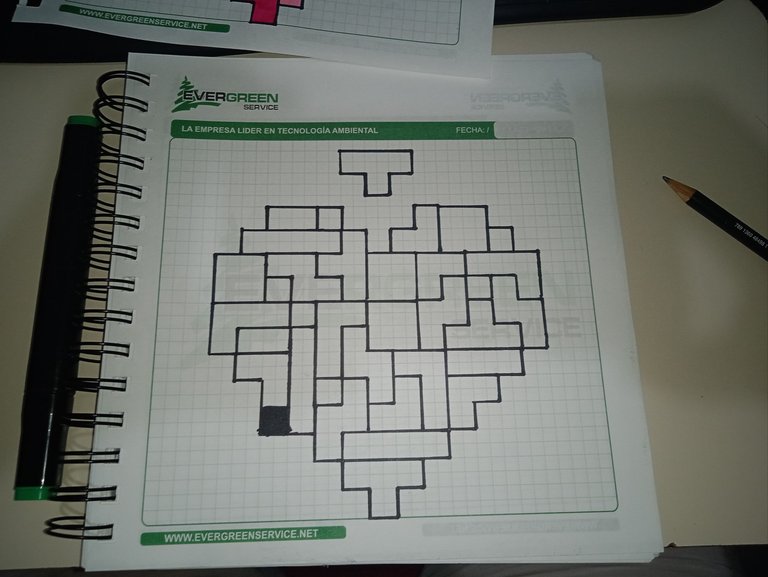
And well, in this step, you can see that the shape of the heart is starting to show, between cubes, letters L, Z, and other shapes. I started from the bottom, then moved to the right, and finished on the left.

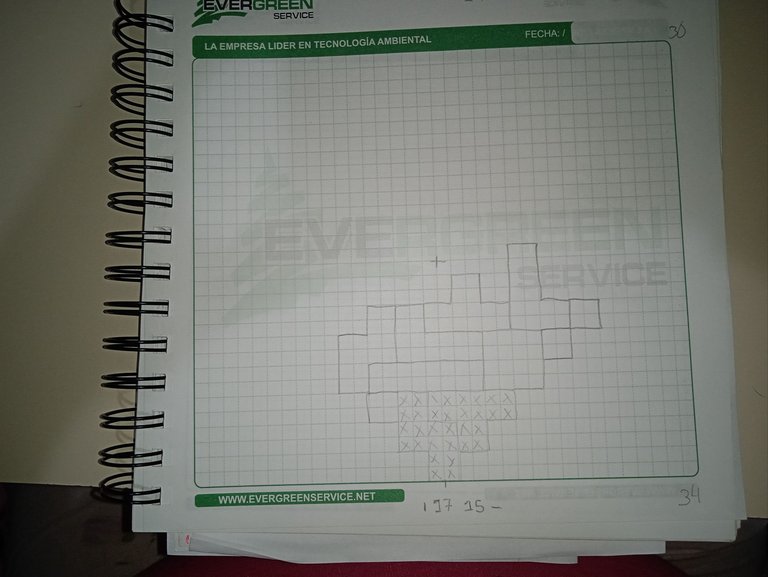
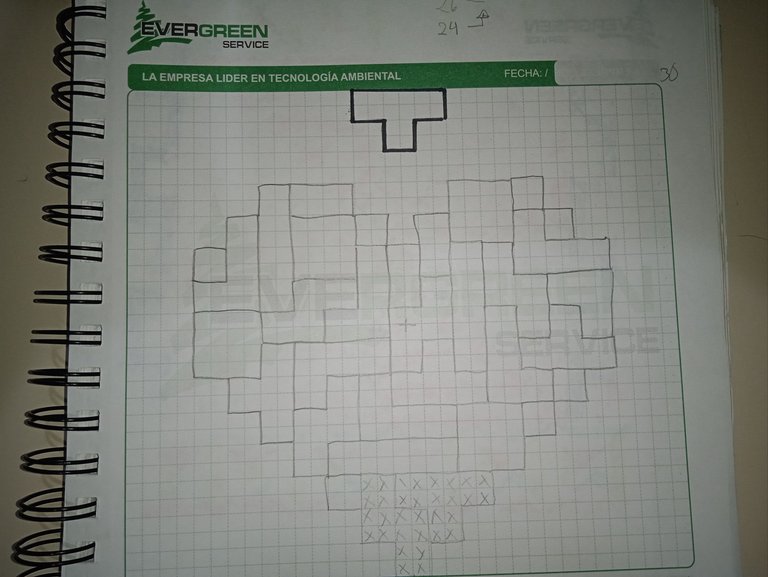
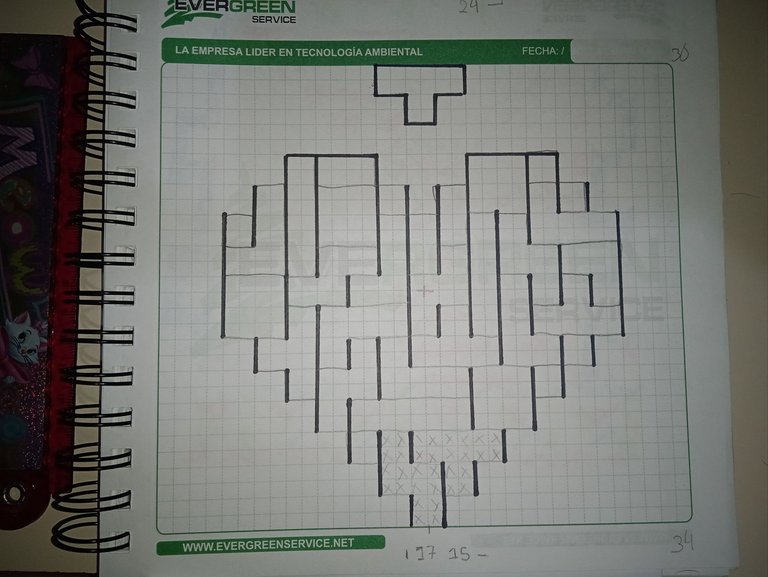
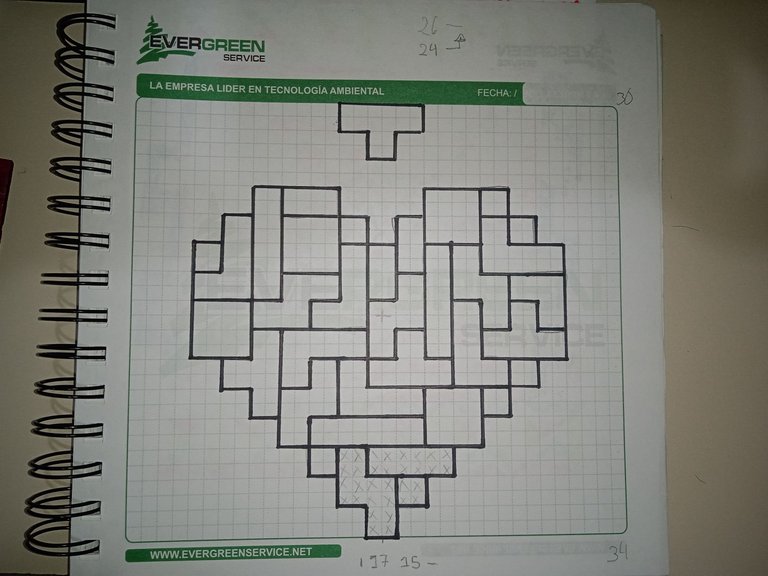
Here is the finished sketch, and I added another piece at the top to simulate it falling into place. Now I had to highlight everything in black, and so far, everything was going well.
 |  |  |
|---|---|---|
| 1 | 2 | 3 |
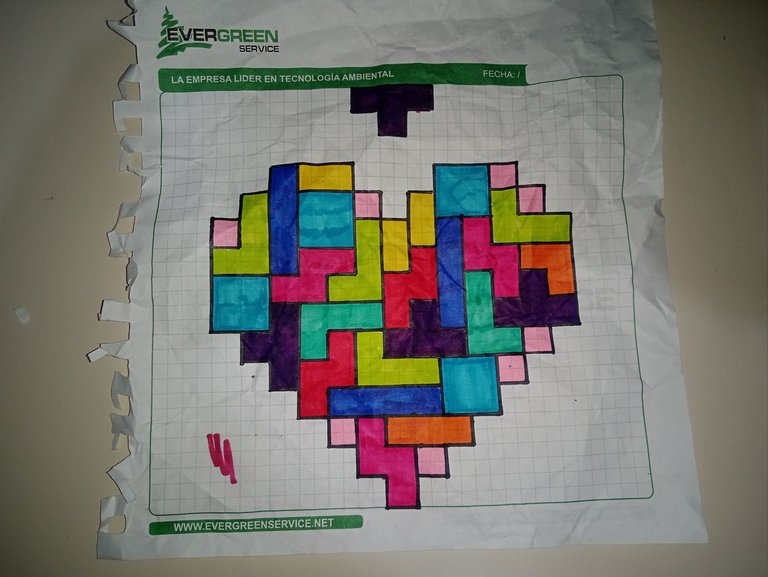
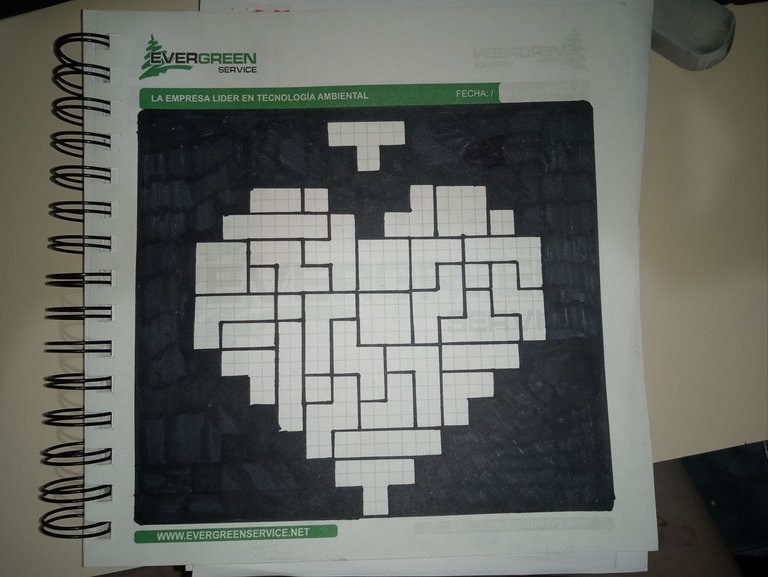
When I started coloring it, that's when the problem arose: I chose the wrong shades of color. I should have used lighter colors so that they would stand out better and the contrast would be more visible. The result of this drawing is as follows:
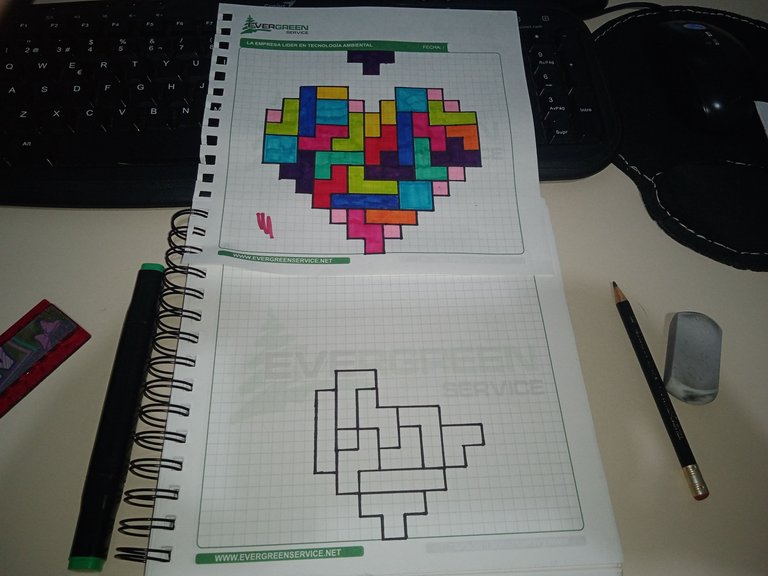
Yes, the sheet is a little wrinkled here, but that's because I realized after throwing it away that I hadn't taken a picture of how it turned out. And as I said, I didn't like the result at all, so I used it as inspiration to rebuild my Tetris heart.
Once again, I wanted to start from scratch, but this time I did it differently. I wanted to do it more my way and not as shown in the initial image, so I decided to improvise and remember the times I played Tetris.
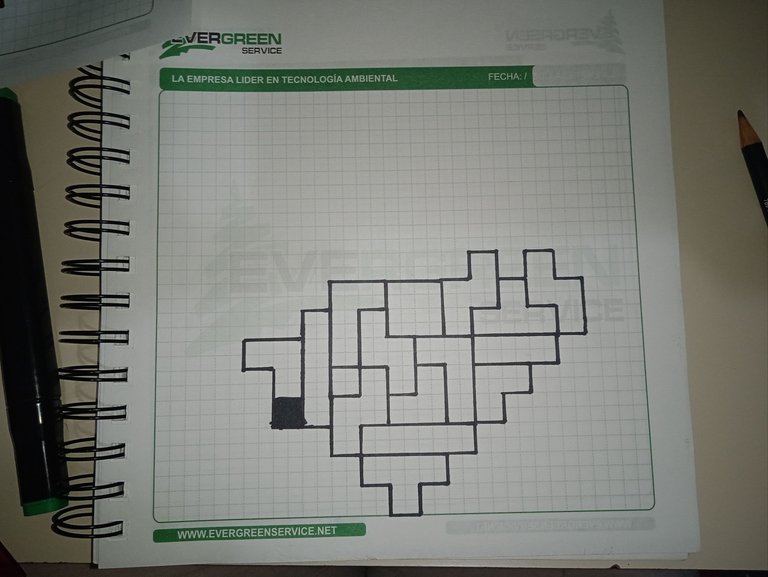
I was feeling quite inspired for the second round, but as usual, I lost focus and made another mistake, which is why you see that black box in the drawing. But don't worry, everything can be fixed. At this point, I just trusted the process completely.
Here, the sketch is ready. As you can see, I added the top piece again as if it were falling, but this time I didn't glue it to the top.
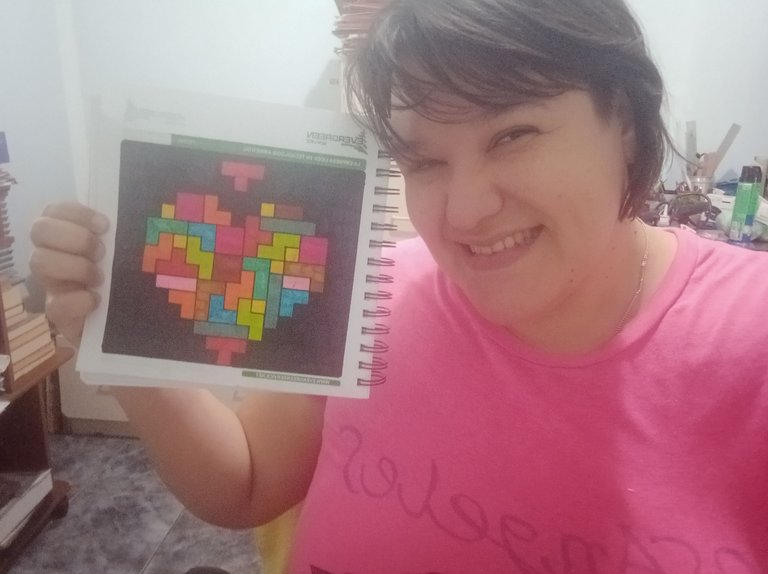
Then I just set about coloring the drawing, first in black and then with colors that provided better contrast, resulting in the following final image:
𝐅𝐢𝐧𝐚𝐥 𝐑𝐞𝐬𝐮𝐥𝐭
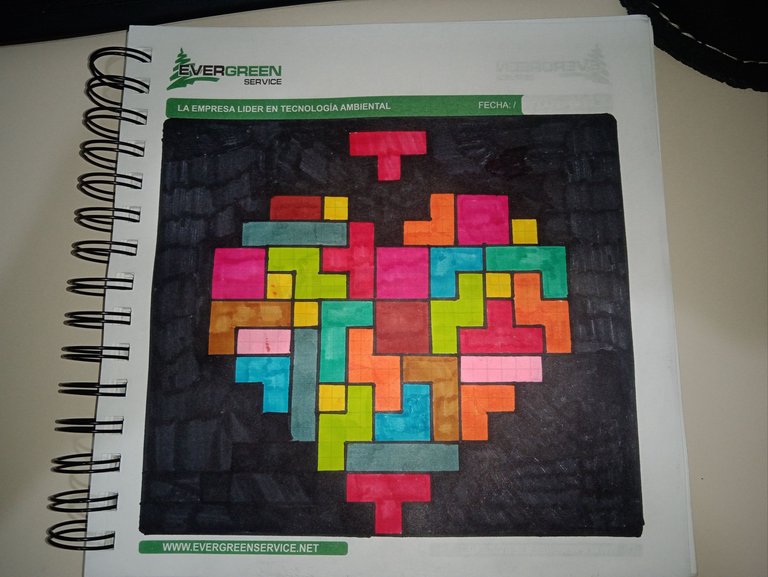
Yes, I used a lot of black ink, so I think I need to invest in another marker. But I loved this result. What did you think? I also want to show you Expectation vs. Reality 😁 and get your opinions:
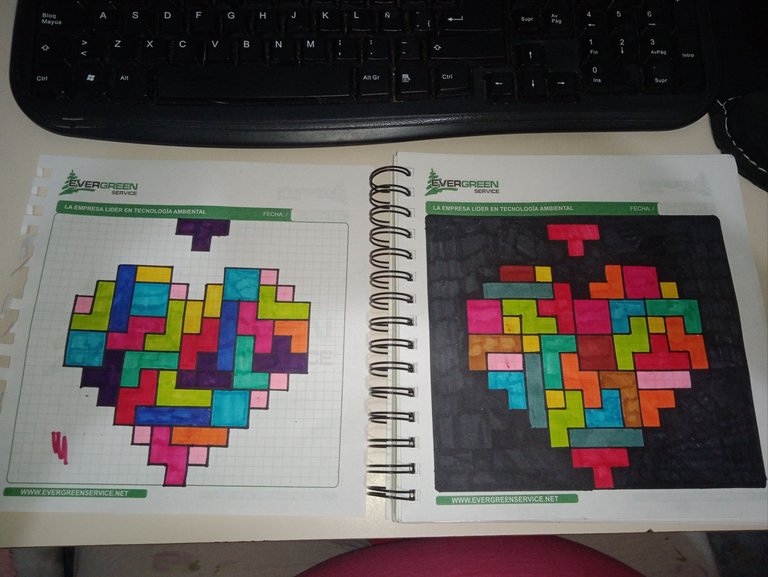
Well, I think it was a radical change, and after finishing this drawing twice, I can confirm that everyone is free to do it however they like, that is, using the shapes that suit them best, as I did, or else finding a base image on Pinterest and following its pattern. Let me know what you think in the comments. I'll be reading them! See you in my next post!💚
Español
Saludos gente linda de #HiveDIY. ¡Alguna vez se han obsesionado con alguna figura? Pues al parecer yo sí. Y en esta ocasión son los 💜 Corazones 💜. Pero esta vez lo traigo dibujado ya que ando corta de tiempo y debo ponerme al día con otras cositas. Así que hoy les traigo el proceso de elaboración, pero les advierto que me equivoqué y no me gustó el resultado, así que lo volví a hacer, pero tranquilos que la explicación no es muy larga.
Para este dibujo inicié tomando de inspiración una imagen de Pinterest que muestro a continuación:
𝐏𝐚𝐬𝐨 𝐚 𝐏𝐚𝐬𝐨
Para este dibujo sólo copié las formas que aparecen en la imagen del inicio y empecé ubicando el centro de la hoja y desde la parte inferior. Pero si eres bueno dibujando, puedes empezar tranquilamente desde arriba o cualquier otro lado.
Aquí, al igual que la figura, iba contando los recuadros de 4 en 4 para hacer las formas de cada pieza de tetris. A mí me encanta este juego, y ha sido uno de los que más he jugado desde que recuerdo.
Para ser honesta soy bastante buena en Tetris y al hacer este dibujo, aunque me trajo recuerdos y me sonaba en la cabeza el sonido clásico de este videojuego, también recordé el proceso del Corazón de Minecraft que hice la semana pasada.
Y bueno en este paso pueden ver que se va notando la forma del corazón, entre cubos, letras L, Z y otras figuras. Empecé desde abajo, luego me fui a la derecha y terminé en la izquierda.
Acá ya está el boceto terminado y le agregué una pieza más en la parte superior para simular que estaba cayendo a su respectivo lugar. Ahora me tocó resaltarlo todo en negro y hasta ahora todo iba bien.
| | |
|---|---|---|
| 1 | 2 | 3 |
Cuando lo empecé a colorear fue que ocurrió el problema, elegí mal los tonos de los colores. Debí haber usado colores más claros para que resaltaran mejor y se viera mejor el contraste. El resultado de este dibujo es el siguiente:
Si, la hoja está algo arrugada aquí, pero fue porque noté que luego de tirarla no le había tomado la foto de cómo quedó. Y ya como dije, su resultado no me gustó ni un poquito, así que lo usé de inspiración para armar de nuevo mi corazón de Tetris.
De nuevo quise iniciar desde abajo, pero esta vez lo hice diferente, quise hacerlo más a mi modo y no como se mostraba en la imagen del inicio, así que decidí improvisar y recordar las veces que jugué Tetris.
Estaba bastante inspirada para la segunda ronda y como todo, me desconcentré y me volví a equivocar, por eso ven ese cuadro negro en el dibujo, pero no se preocupen que todo tiene solución. Ya en este punto sólo confié plenamente en el proceso.
Aquí el boceto está listo. Como ven, le volví a agregar la pieza superior como si estuviera cayendo, pero esta vez no la pegué del todo de arriba.
Ya después sólo me dispuse a colorear el dibujo, primero de negro y ya después con colores que hicieran mejor contraste, quedando como resultado final el siguiente:
𝐑𝐞𝐬𝐮𝐥𝐭𝐚𝐝𝐨 𝐅𝐢𝐧𝐚𝐥
Si, gasté mucho negro, creo que debo invertir en otro marcador. Pero este resultado si me encantó. ¿A ustedes qué les pareció? También les quiero mostrar la Expectativa Vs Realidad 😁 y me den sus opiniones:
Bueno creo que fue un cambio radical y luego de terminar este dibujo 2 veces puedo confirmar que cada quien tiene libertad de hacerlo como más le guste, es decir con las formas que más le convengan como lo hice yo o sino buscar una imagen base de Pinterest y seguir su patrón. Déjenme saber en los comentarios qué opinan. ¡Los estaré leyendo! ¡Hasta mi siguiente post! 💚


| 𝐄𝐥𝐞𝐦𝐞𝐧𝐭𝐨𝐬 (𝐄𝐥𝐞𝐦𝐞𝐧𝐭𝐬) | 𝐇𝐞𝐫𝐫𝐚𝐦𝐢𝐞𝐧𝐭𝐚𝐬 (𝐓𝐨𝐨𝐥𝐬) |
|---|---|
| Las Fotos Utilizadas a lo largo del Post son de mi galería (Photos used throughout the post are from my gallery) | Cámara del Teléfono Redmi Note 9A (Redmi Note 9A Phone Camera) |
| Contenido y Texto Original de mi Autoría (Content and Original Text of my Authorship) | DeepL |
| Imagen Usada de Inspiración (Image Used for Inspiration) | CANVA |
| Grammarly |
Te quedó muy bonito lo importante es que lo lograste, a todos nos pasa que quizás intentamos algo una primera vez y no lo logramos.
!discovery 25
muchisimas gracias! valoro mucho sus palabras! Un abrazo!
This post was shared and voted inside the discord by the curators team of discovery-it
Join our Community and follow our Curation Trail
Discovery-it is also a Witness, vote for us here
Delegate to us for passive income. Check our 80% fee-back Program
Thank you!
Thank you so much!
¡Felicidades! Esta publicación obtuvo upvote y fue compartido por @la-colmena, un proyecto de Curación Manual para la comunidad hispana de Hive que cuenta con el respaldo de @curie.
Si te gusta el trabajo que hacemos, te invitamos a darle tu voto a este comentario y a votar como testigo por La Colmena.
Si quieres saber más sobre nuestro proyecto, te invitamos a acompañarnos en nuestro servidor de Discord.
Muchisimas gracias chicos! lo aprecio bastante!
Delegate your Hive Power to Ecency and earn
100% daily curation rewards in $Hive!
Thank you so much!
Aplaudo la manera en que logras transmitir la evocación al dinamismo del juego.
Me has hecho recordarlo con una sonrisa de hecho.
¡Gracias!
jajajaja muchas gracias! sus comentarios son muy lindos!
Que lindura @pannavi te quedó espectacular 🤩🤩🤩🤩 me gusta ....
aww~~ muchas gracias bella amiga! lo aprecio mucho
te quedó super