Encontrándome en lo Abstracto (🇪🇸 | 🇺🇸)

FULL ENGLISH VERSION

Greetings, my lovely #HiveDIY friends. As you may already know from my previous posts, I have a slight obsession with cubes, or rather, symmetrical abstract art. I don't really know what this type of art is called, but after practicing it, especially when I'm stressed, I find it quite relaxing. Today, I bring you this creation, so join me to see the step-by-step process.

𝐒𝐭𝐞𝐩-𝐛𝐲-𝐒𝐭𝐞𝐩

The first thing I do is make my frame so I can frame my drawing calmly. The dots marked on the right side are small 0.5 mm divisions that I will use later.

I made these divisions across the entire frame of the drawing, each one measuring 0.5 mm.
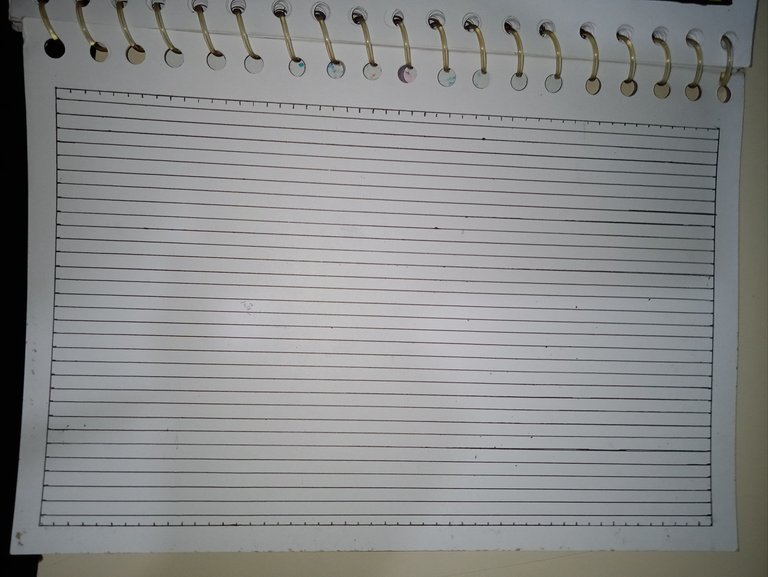
Then I started joining the lines horizontally. This left a fairly small space between each line.

Then I did the same thing vertically. My idea with these divisions was to obtain a graph paper sheet, like the ones used in mathematics.

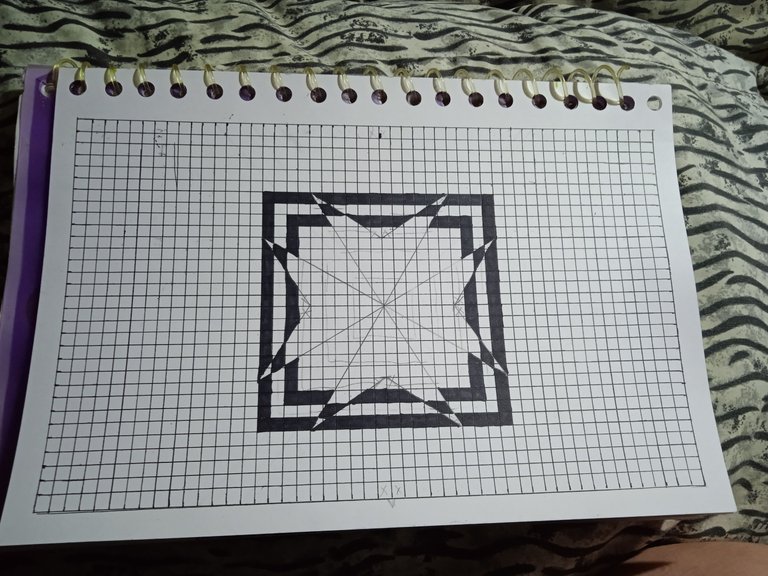
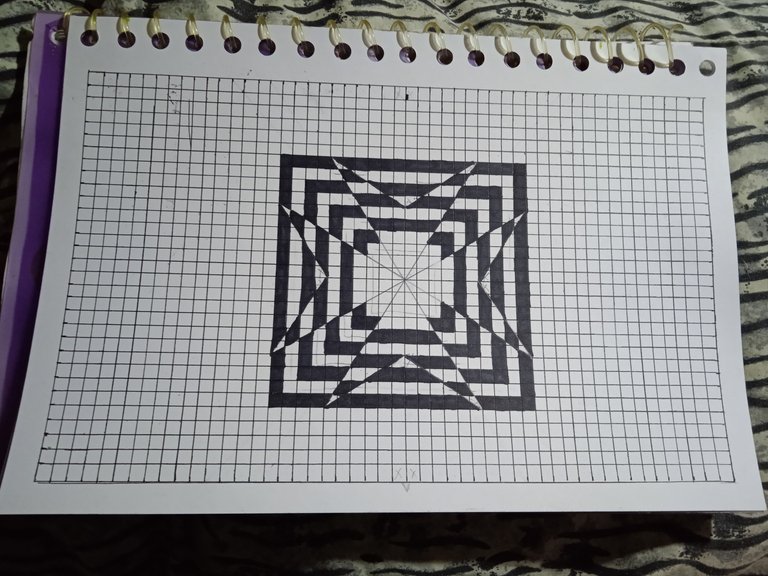
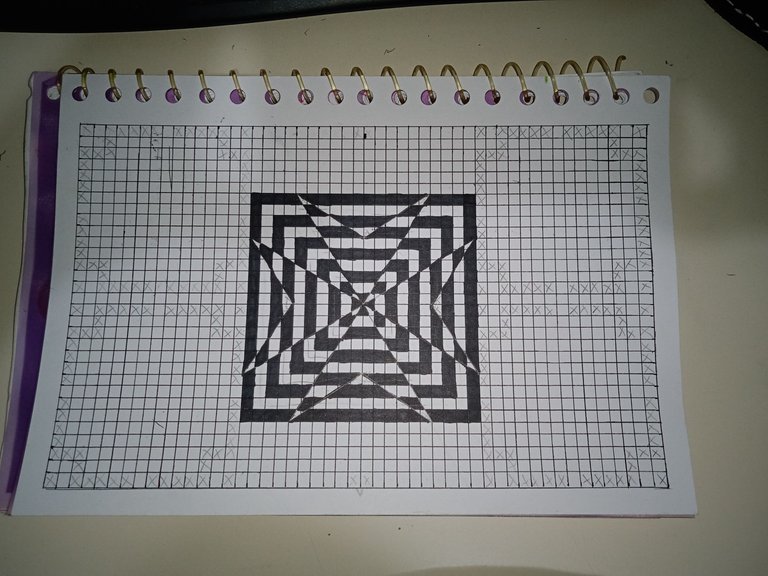
Then I counted the lines on each side to find the center of the sheet and lightly drew some guide lines to know how far the first drawing would go. Then I placed some Xs as guides so I could draw star-shaped lines and start shaping my drawing.
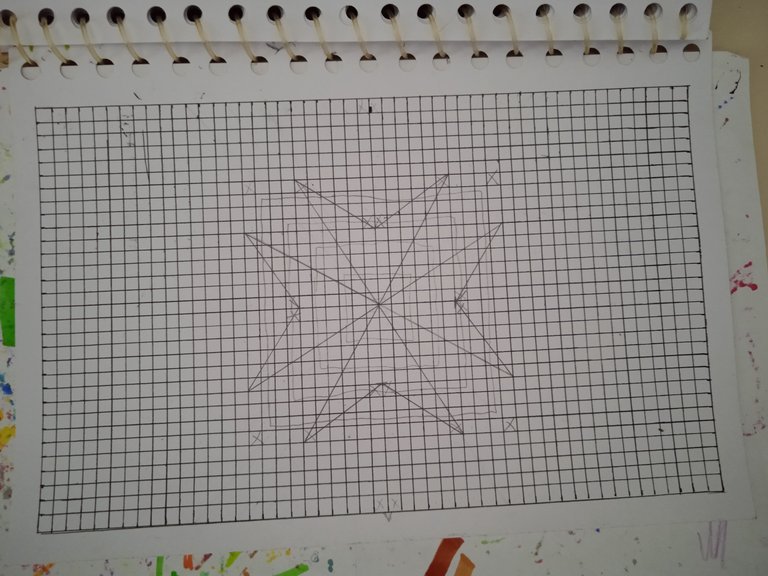
Then I finished connecting the missing dots to give my drawing the shape I wanted, resulting in the sketch you see in the image above.
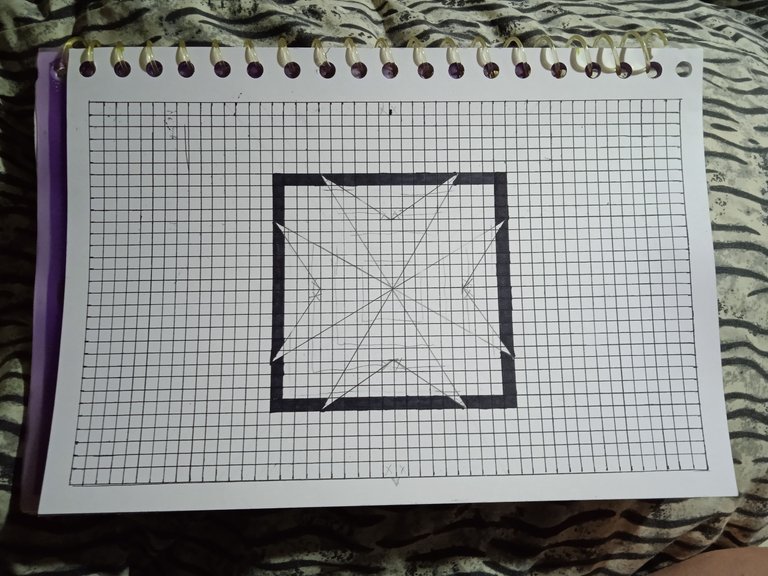
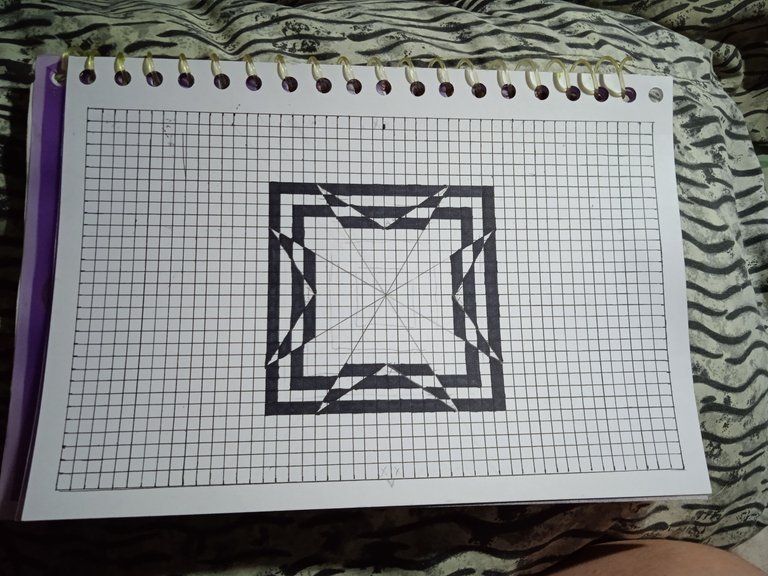
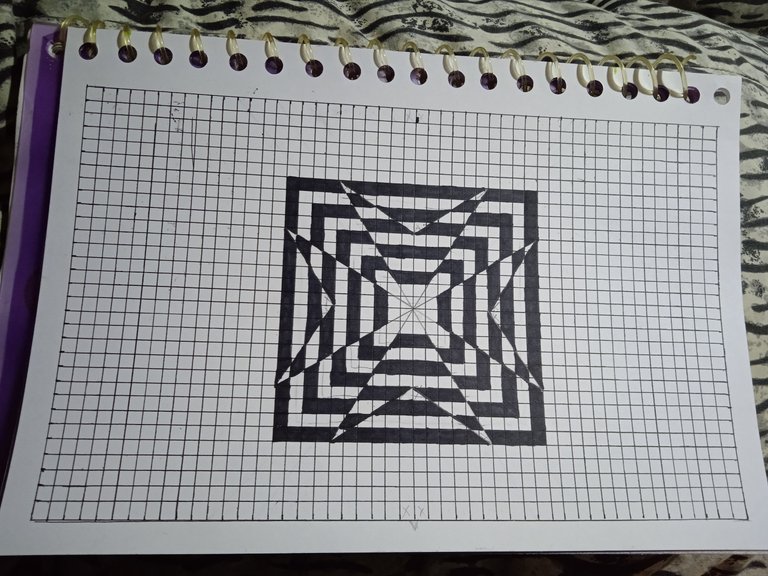
Once I had the sketch, I started coloring using black. As you can see, I left the space blank right where the figure begins and ends on the first edge. For the second edge, I did the same thing but in reverse.
In other words, my idea with this shape is to leave one line black and the other white. Or to explain it better, one black line and the second filling in only the shape. And so on with the others.
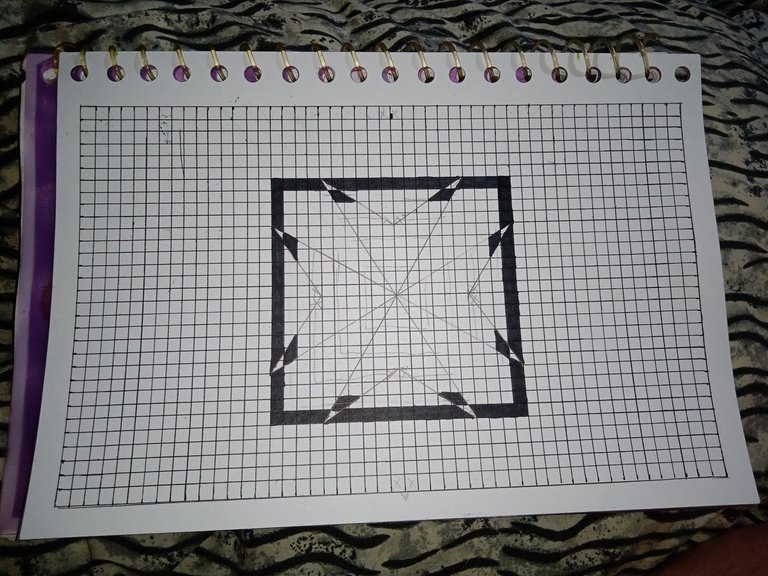
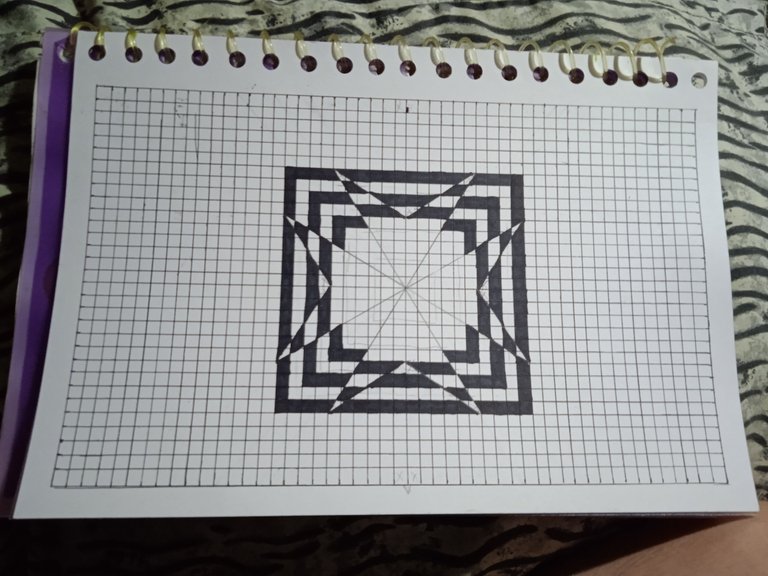
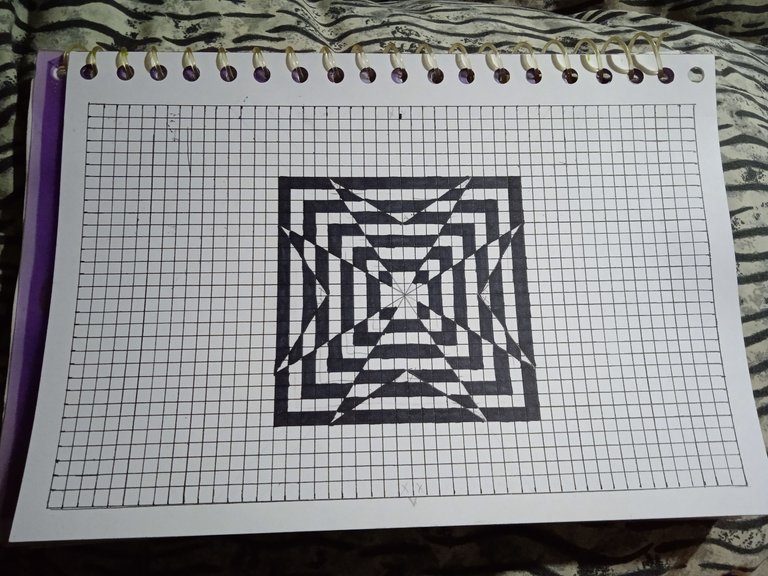
Here you can see how I drew the third line. The fourth line would only show the figure, and the next line would be in black. I will show the entire process using only images, since it involves repeating everything until you reach the center.
| Line 4 | Line 5 | Line 6 |
|---|---|---|
 |  |  |
| Line 7 | Line 8 | Line 9 |
 |  |  |
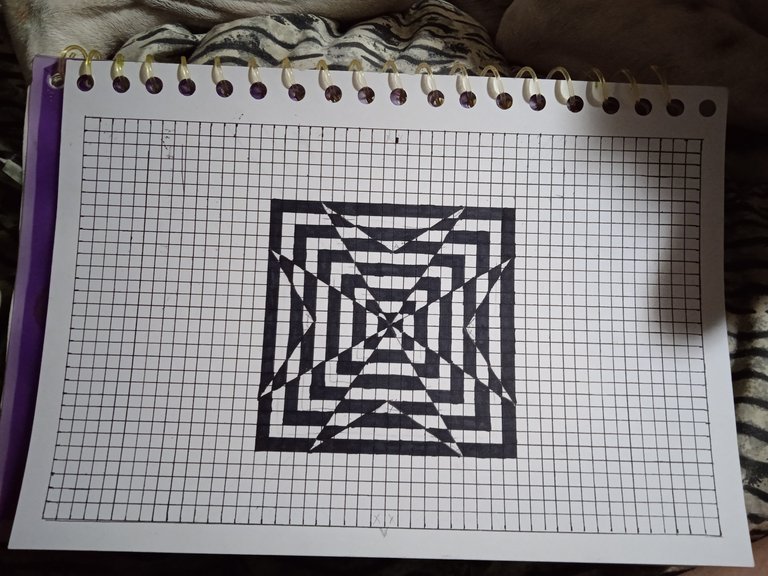
I wanted to leave line 10 aside so you could see it in full as a kind of final result, even though there's still quite a bit left to finish the drawing 🙈
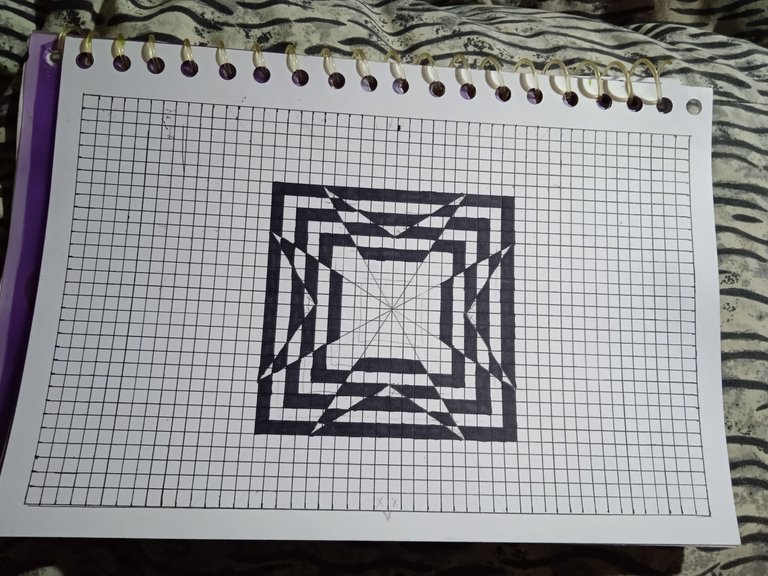
When I started the drawing, I planned to fill in every last square with color, which is why it's still unfinished. However, if you only like this figure, you can leave the work at this point. For my part, I'll continue explaining what I did next.
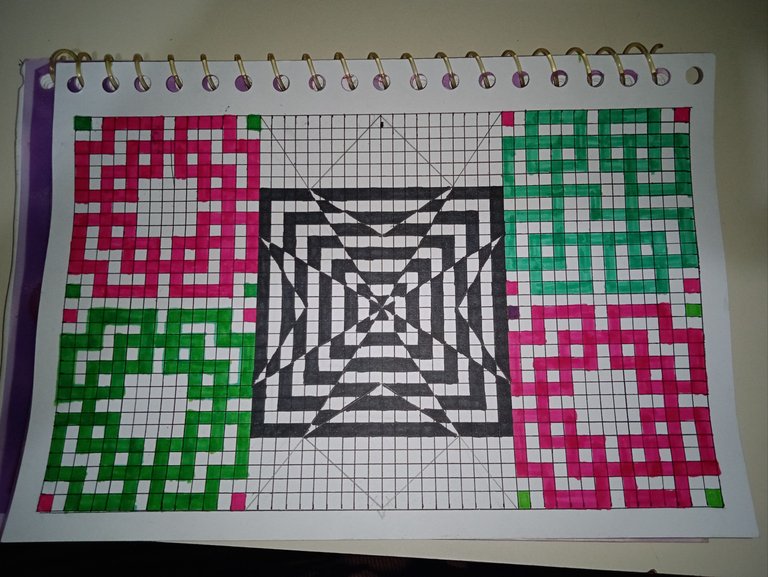
After finishing the center, I began to mark with an X in pencil the places where I would place different patterns and other colors.

For the sides, I wanted to do a Celtic knot design (I think that's what it's called), and I used two colors, although you can see three 🤣, but this type of drawing requires intense concentration, and at that moment I lost focus and that was the result of my distraction.
After finishing the sides, all that remained was to fill in the top and bottom of the center. To do this, I wanted to continue with the black-and-white patterns, but this time in the shape of a double triangle.
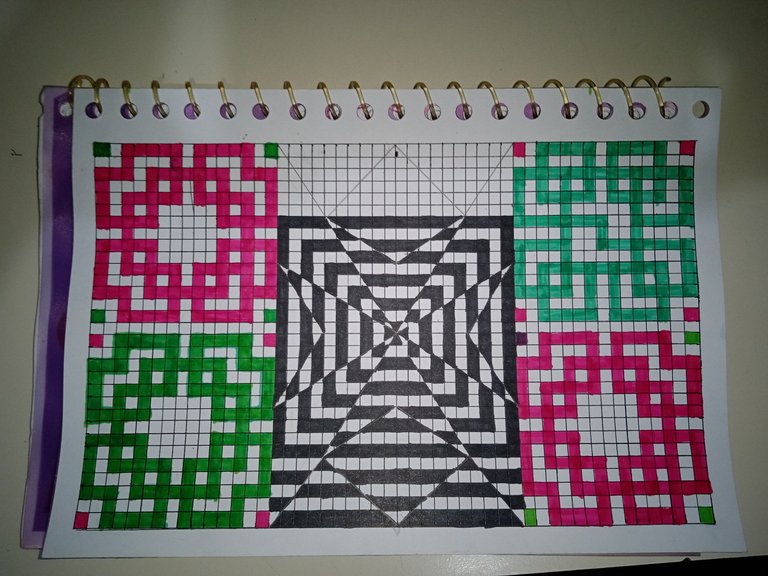
I started by drawing the bottom part, taking into account where the previously made pattern had ended.

Then I did the top part considering the same thing, and I could have left it at that. However, at this point, I decided to continue adding a little more black on the sides to highlight the colors and use a gray tone in the center.
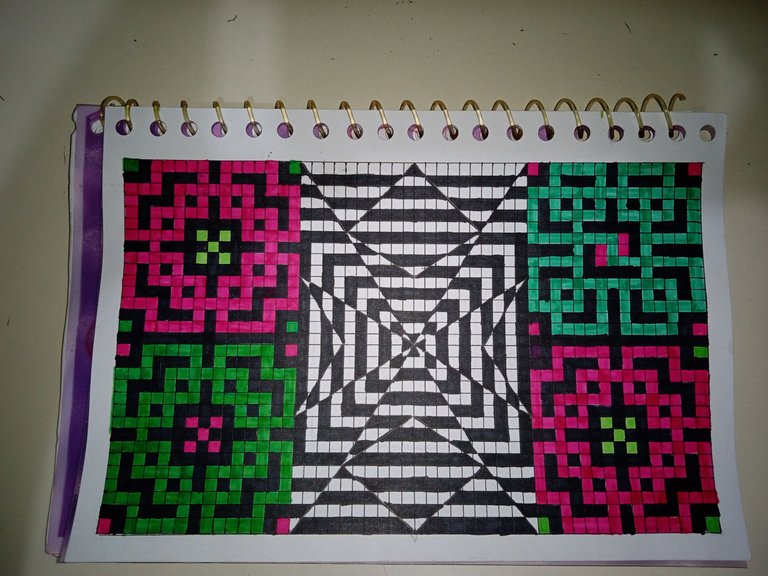
At this point, all that remains is to fill in the blank space with a gray tone, resulting in the following:
𝐅𝐢𝐧𝐚𝐥 𝐑𝐞𝐬𝐮𝐥𝐭
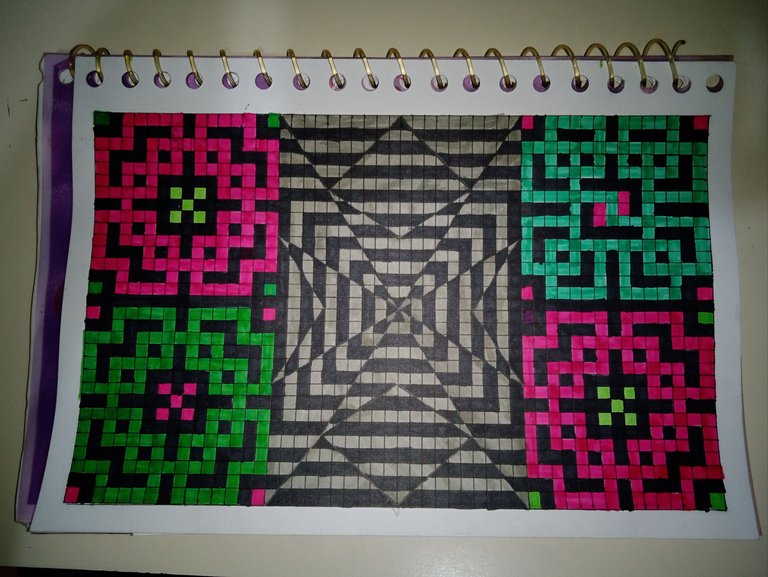
This is the final result. As I mentioned, rather than creating a symmetrical drawing, I enjoy focusing on the process and seeing how the final drawing turns out. At first glance, it looks complex, but if you look closely, it's not.
If you notice any discrepancies between colors and shapes, it's because I unfortunately made a mistake at that moment and had to improvise. Although it didn't turn out exactly as I would have liked, I think the final result is very nice. What do you think? I look forward to reading your comments! See you in my next post! 💚

Español
Saludos mi gente linda de #HiveDIY. Como ya sabrán, en mis post anteriores, tengo una leve obsesión por los cubos, o mejor dicho el arte simétrico-abstracto. La verdad es que no sé qué nombre tiene este tipo de arte, pero luego de venir practicándolo, sobre todo cuando estoy bajo estrés para mí resulta bastante relajante. Hoy les traigo esta creación, así que acompáñenme a ver el paso a paso.
𝐏𝐚𝐬𝐨 𝐚 𝐏𝐚𝐬𝐨
Lo primero que hago es hacer mi marco para enmarcar mi dibujo tranquilamente. Los puntos marcados al lado derecho son pequeñas divisiones de 0,5 mm que usaré más adelante.
Tales divisiones las hice en todo el marco del dibujo, cada una tiene la misma medida de 0,5 mm.
Luego empecé uniendo las líneas horizontalmente. Quedando un espacio bastante pequeño entre línea y línea.
Luego hice lo mismo pero verticalmente. Mi idea con estas divisiones era obtener una hoja cuadriculada, de esas que se usan en matemáticas.
Luego conté las líneas de cada lado para ubicar el centro de la hoja y tracé levemente algunas líneas guías para saber hasta dónde llegaría el primer dibujo. Después coloqué unas X como guía para poder trazar líneas en forma de estrella y así poder empezar a darle forma a mi dibujo.
Luego terminé de unir los puntos que faltaban para darle la forma que buscaba a mi dibujo, quedando como bace el boceto que ven en la imagen superior.
Ya teniendo el boceto, me dispuse a empezar a colorear usando el color negro. Como pueden ver, dejé el espacio en blanco justo donde empieza y termina la figura en el primer borde. Para el segundo hago lo mismo pero de manera inversa.
Es decir, mi idea con esta forma es dejar una línea en negro y la otra en blanco. O mejor explicado sería, una línea negra y la segunda rellenando sólo la figura. Y así y así con las demás.
Aquí pueden ver como hice la tercera línea. La cuarta estaría dibujada sólo la figura y la siguiente línea en negro. Mostraré todo el proceso sólo con imágenes ya que es de repetir todo hasta llegar al centro.
| Línea 4 | Línea 5 | Línea 6 |
|---|---|---|
| | |
| Línea 7 | Línea 8 | Línea 9 |
| | |
Quise dejar la línea 10 aparte para que la vean en grande como una especie de resultado final, aunque aún falta un poco bastante para terminar el dibujo 🙈
Cuando empecé el dibujo, tenía pensado rellenar de color hasta el último cuadrito, por eso es que aún le falta terminarlo, sin embargo si sólo te gusta esta figura, puedes dejar el trabajo hasta aquí. Por mi parte, seguiré explicando lo que hice a continuación
Luego de terminar el centro, empecé a marcar con X a lápiz los lugares donde colocaría patrones diferentes y en otros colores.
Para los laterales, quise hacer un diseño de Nudo Celta (creo que así se llama), y usé dos colores, aunque se noten 3 🤣 pero es que este tipo de dibujos requiere de suma concentración y justo en esos momentos pues perdí el enfoque y allí quedó el resultado por distraerme.
Luego de terminar los laterales, faltaba rellenar sólo la parte superior e inferior del centro. Para ello quise seguir con los patrones blanco-negro pero esta vez haciendo la forma de un triángulo doble.
Empecé dibujando la parte inferior, tomando en cuenta en dónde había terminado el patrón previamente hecho.
Luego hice la parte de arriba considerando lo mismo y se podría dejar todo hasta aquí. Sin embargo para este punto decidí continuar agregando un poco más negro en los lados para resaltar los colores y al centro usar un tono gris.
Ya en este punto sólo falta rellenar el espacio en blanco con un tono gris, quedando como resultado el siguiente:
𝐑𝐞𝐬𝐮𝐥𝐭𝐚𝐝𝐨 𝐅𝐢𝐧𝐚𝐥
Este es el resultado final. Como les comenté, más que hacer un dibujo simétrico, me agrada mucho tener que concentrarme en el proceso y ver cómo queda al final un dibujo que a simple vista resulta complejo, pero si lo detallas con cuidado no lo es.
Si notan alguna discrepancia entre colores y formas fue porque lamentablemente en esos instantes me equivoqué y me tocó improvisar y aunque no quedó exactamente como me hubiera gustado, el resultado final para mí, quedó muy lindo. ¿Ustedes qué piensan al respecto? Los leo! Hasta mi siguiente post! 💚


| 𝐄𝐥𝐞𝐦𝐞𝐧𝐭𝐨𝐬 (𝐄𝐥𝐞𝐦𝐞𝐧𝐭𝐬) | 𝐇𝐞𝐫𝐫𝐚𝐦𝐢𝐞𝐧𝐭𝐚𝐬 (𝐓𝐨𝐨𝐥𝐬) |
|---|---|
| Las Fotos Utilizadas a lo largo del Post son de mi galería (Photos used throughout the post are from my gallery) | Cámara del Teléfono Redmi Note 9A (Redmi Note 9A Phone Camera) |
| Contenido y Texto Original de mi Autoría (Content and Original Text of my Authorship) | DeepL |
| Foto de Expectativa (Expectation Photo) | CANVA |
| Grammarly |
Posted Using INLEO
Congratulations @pannavi! You have completed the following achievement on the Hive blockchain And have been rewarded with New badge(s)
Your next payout target is 6000 HP.
The unit is Hive Power equivalent because post and comment rewards can be split into HP and HBD
You can view your badges on your board and compare yourself to others in the Ranking
If you no longer want to receive notifications, reply to this comment with the word
STOPCheck out our last posts:
Go for it, @pannavi! Set your sights on that new target and keep pushing forward. Remember, every small step brings you closer to your goal.
That was actually a beautiful artwork. You really did well and i loved the way you wrote the step by step process
Te quedo excelente no se nota la imperfección. Saludos @pannavi