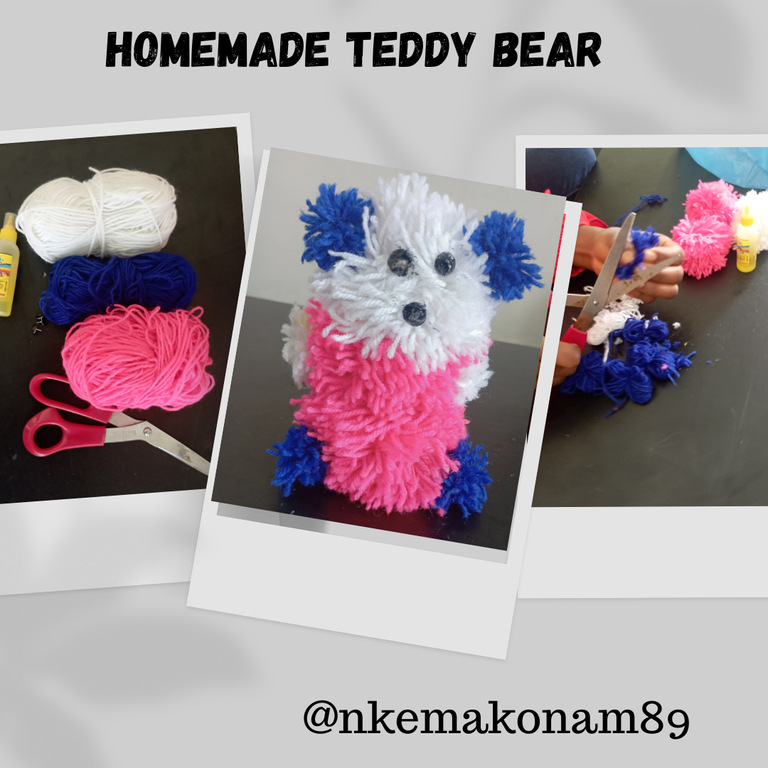
Homemade Teddy Bear
My kids have been on a one-week midterm break, but this time around, they came home with loads of assignments to do. I was wondering if the school actually wanted them to rest or continue another round of academic activities at home. In the past, their short holidays like this have always been adventurous for my kids and me. We usually use the time to explore more chores at home, doing things together and learning about keeping the surroundings clean, laundry, and more practicals in my kitchen because they have more time to do so within the holiday period. However, it's totally different this time. Since Monday until yesterday, they have been busy with their homework. I only managed to get them to do laundry once, plus their little assistant at home where needed.
So this morning, they requested that I use some of the left-over yarn 🧶 used to crochet my jewelry box last year to make a teddy bear for them. I once made a teddy bear for them some time ago, but it's no longer available. I told my sister,who lives with me, that she would do the job with my kids while I direct them on how to go about it. So this teddy bear you are seeing here is actually the kids and my sister's effort;, I was only a camera woman, haha, so let me walk you through how we achieved this .
Material used
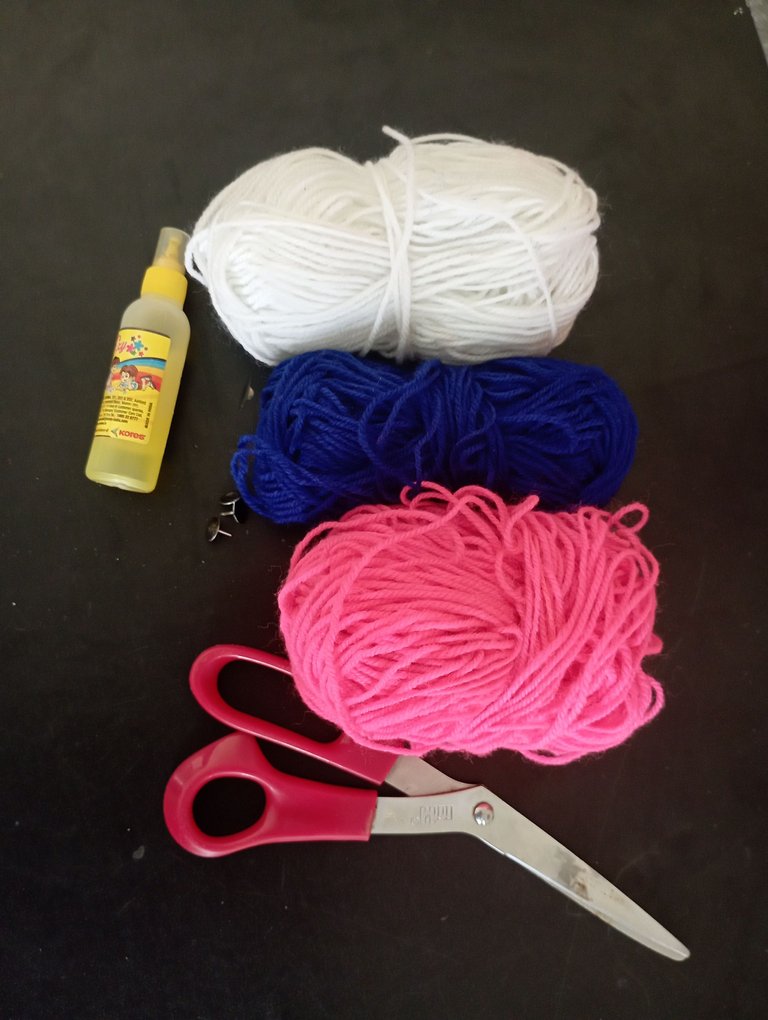
- Yarn
- Scissors
- Glue
- An empty container for rolling the yarn
- improvised teddy bear eyes; the tack pins
The procedure:
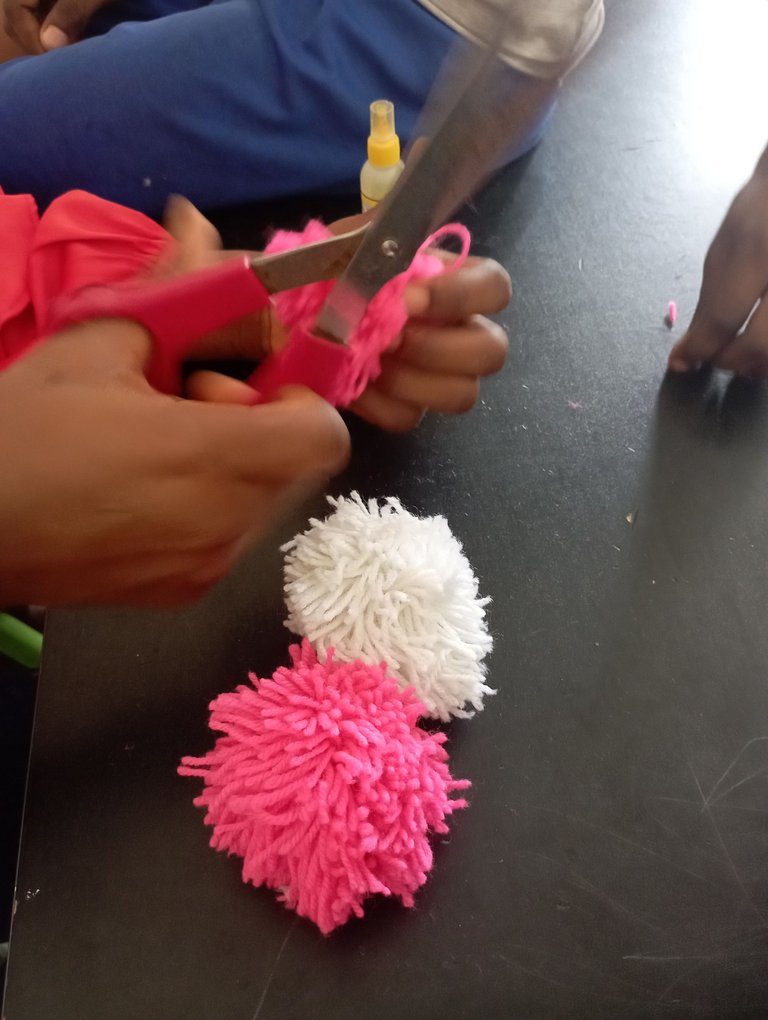
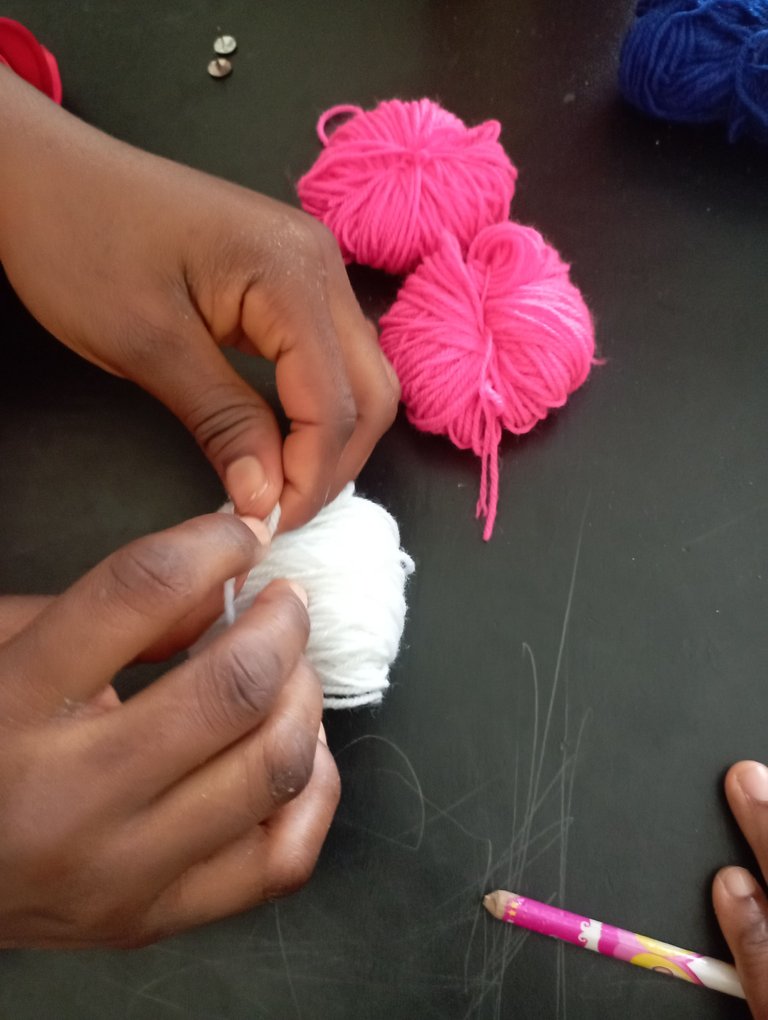
We first started by rolling the yarn 🧶aroundd this empty container 150 times. After which, we gently pull it out and tie it. This we repeated three times, ensuring that each was 150 rounds for uniformity sake.
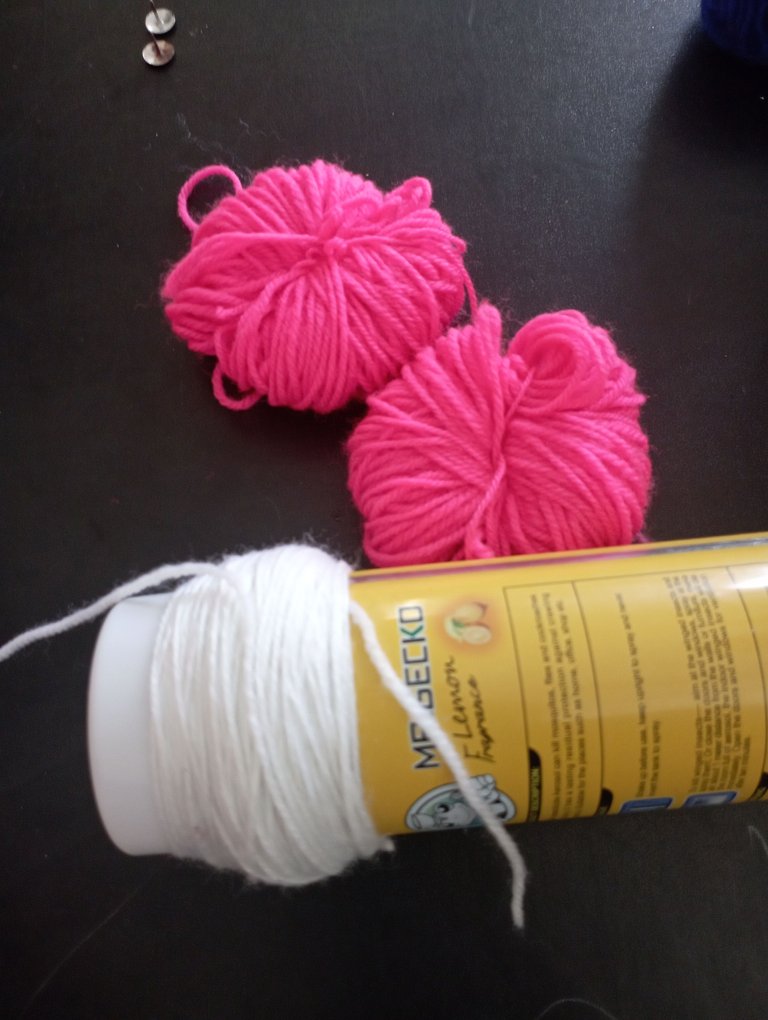
However, you can use your hands to roll if you wish, but you may need to spread out your fingers a bit while rolling. When you have achieved the quantity of poms you want, depending on the size of teddy bear you want to create, you firmly tie the yarn and then cut it into halves through the opening, and then use your hands to spread it out to form a rounded pom.
 |  |
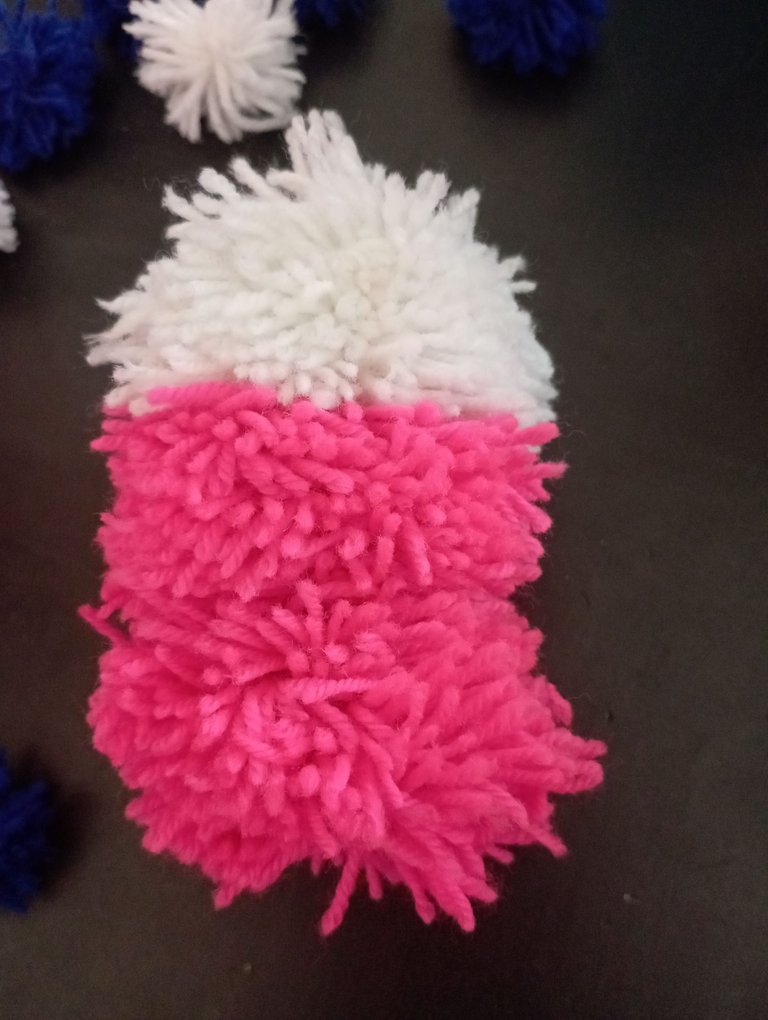
What we are trying to create here is the body of the teddy bear. Below is what it looks like.
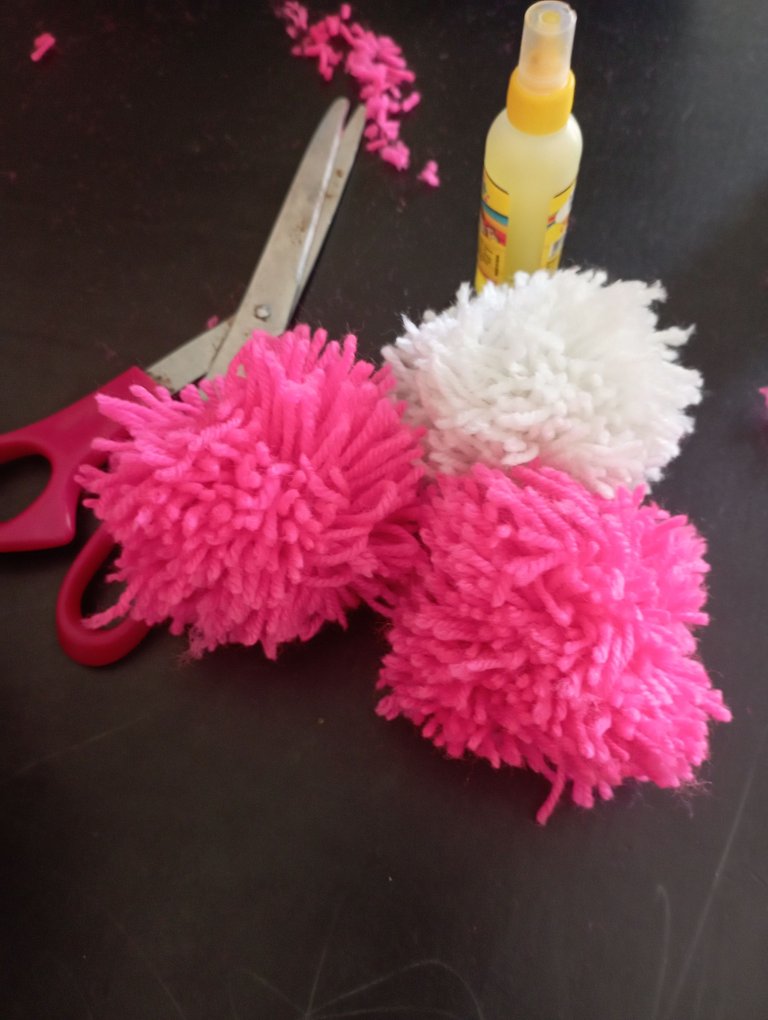
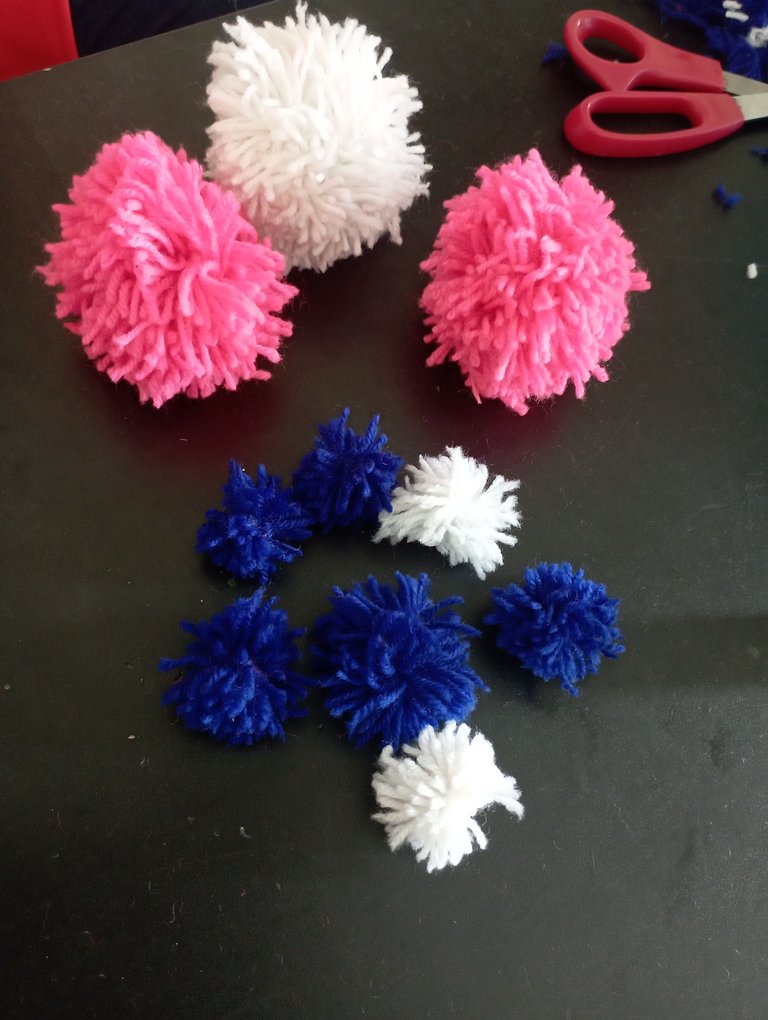
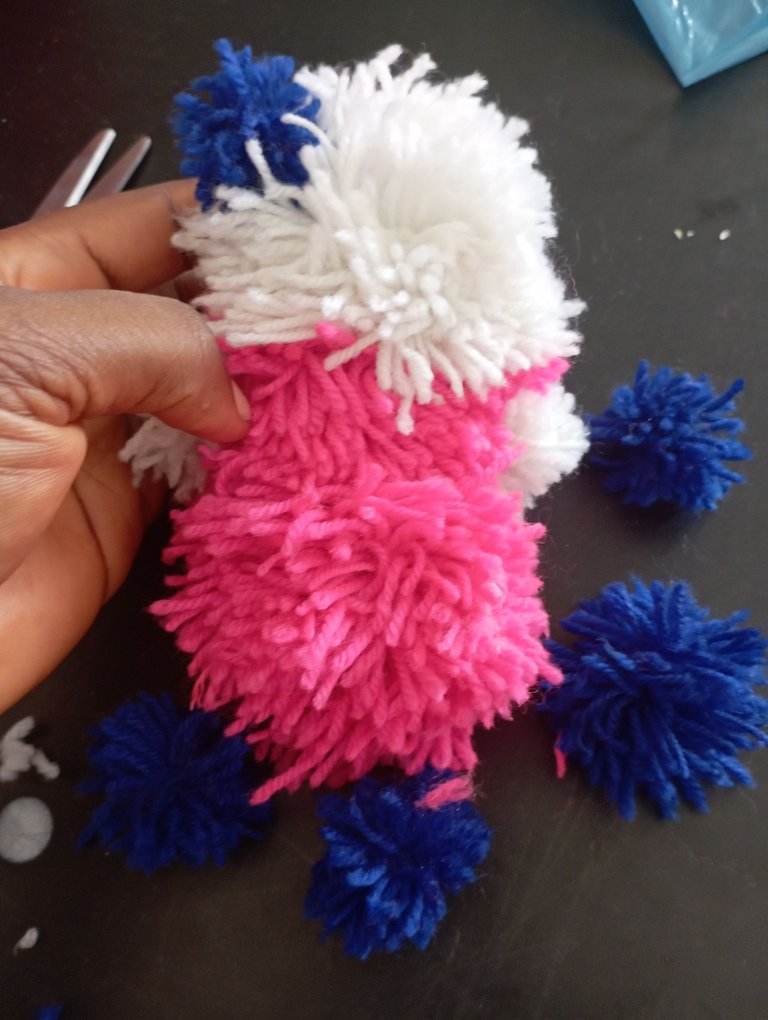
Next is working on its hands, legs, and tail. This time around, just follow the same process of rolling, tying, and cutting into halves to get your pom, but this time in a smaller size. We rolled 25 times for the body parts, and here it is below.
 | 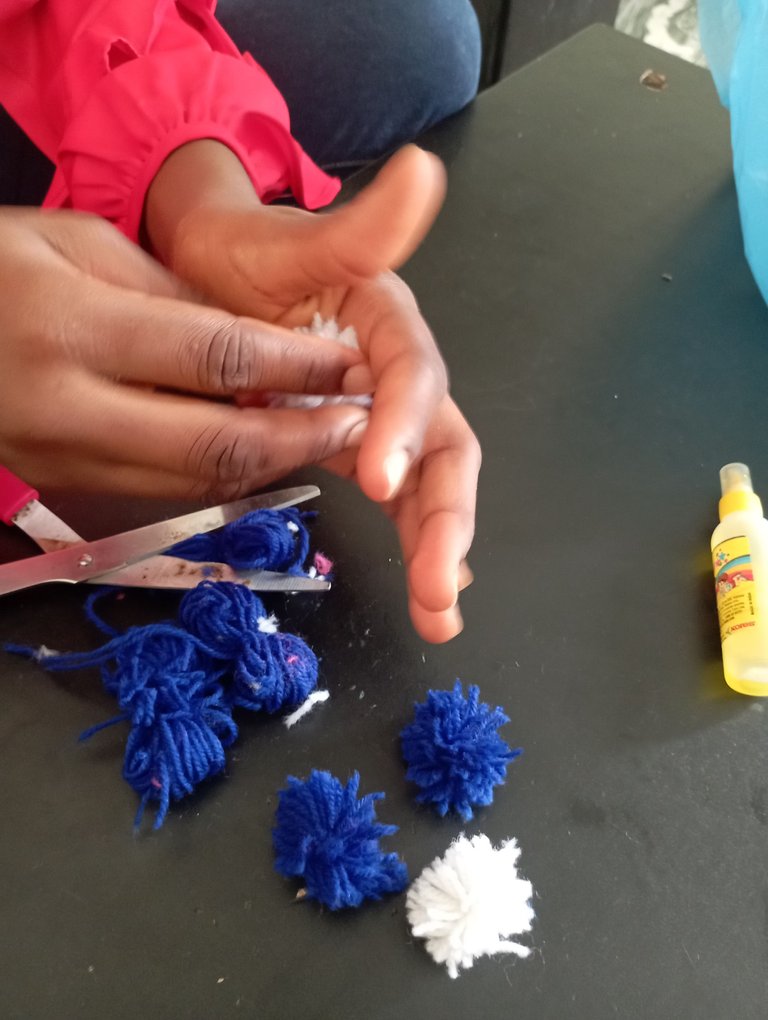 |
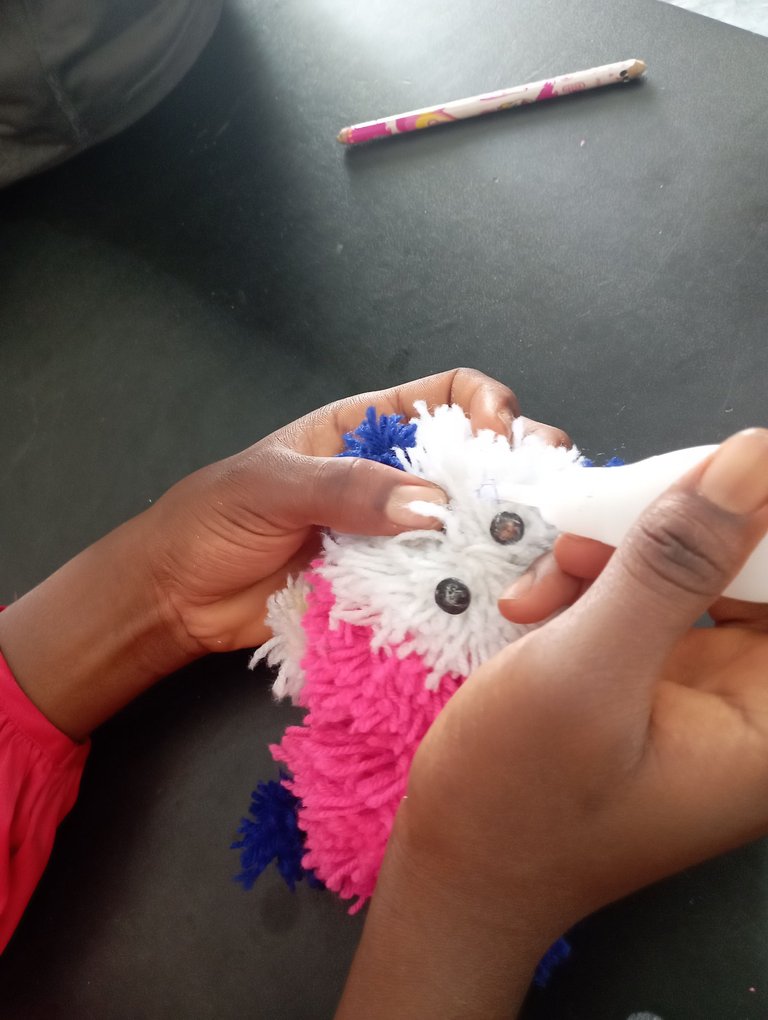
Now that the body parts are ready, all you need to do is assemble the parts using glue. For the eyes, remember I am using a tack pin as an improvise, but I used a back marker to make it black. Haha, so with my glue,we carefully attached the parts, including the eyes.
 |  |  |
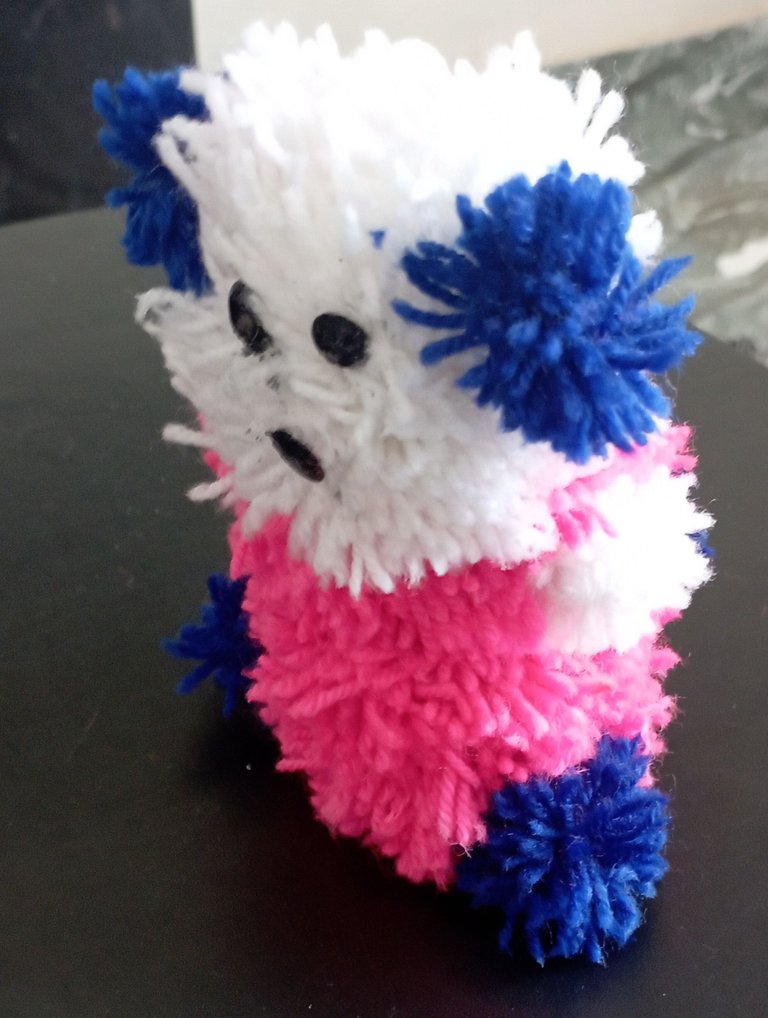
This is the final result after the parts were assembled. It's not really looking great, but I think my sister and the kids tried while following my directions.
 | 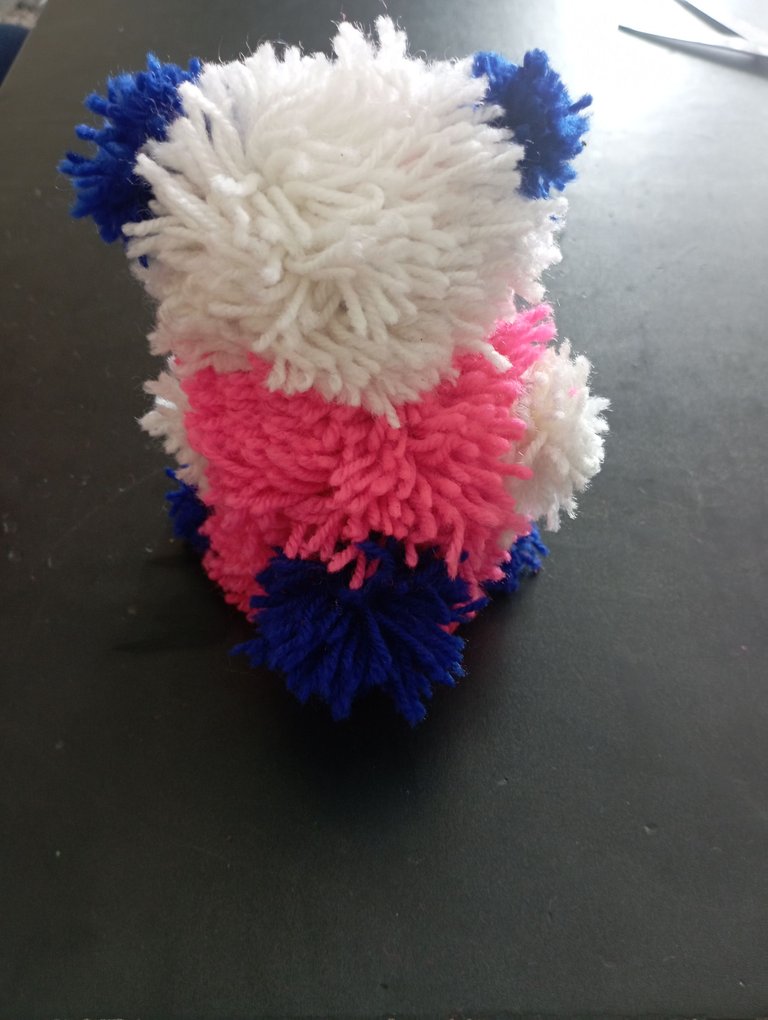 | 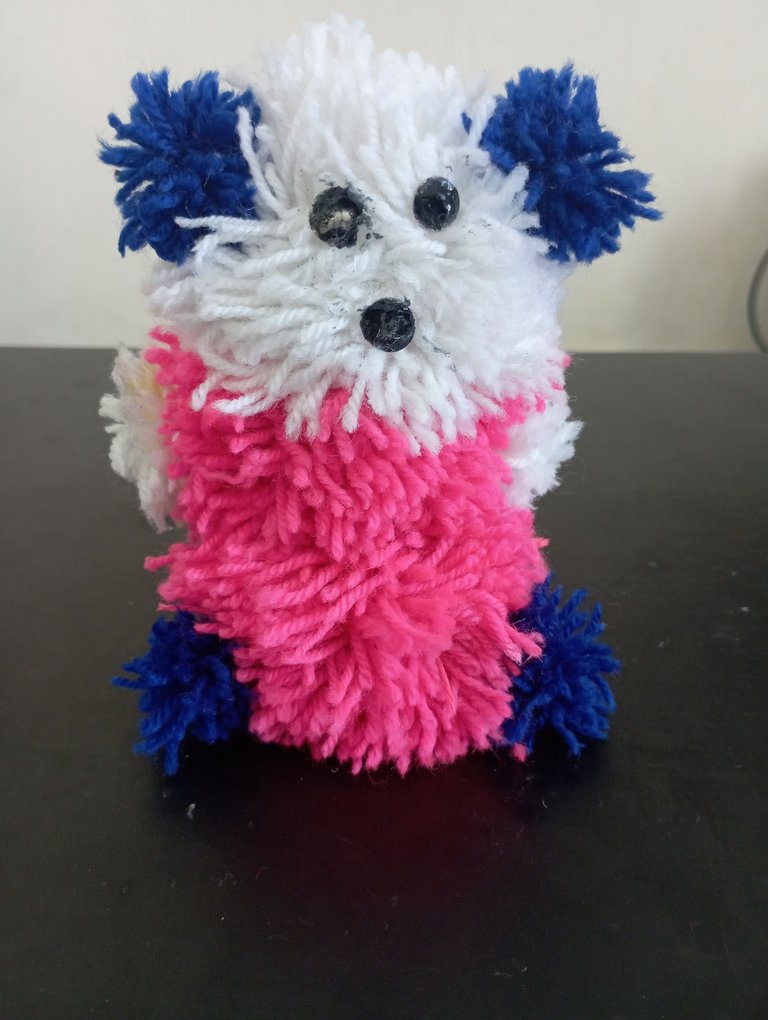 |
It was fun engaging the kids a little during the process, and how exciting for them to use the teddy bear to play. I will call it a productive holiday. On Monday, they will return to school for the rest of their activities this term. I look forward to their lengthy holiday, where we will explore more creative projects to their capacity.
Thanks for visiting.
All images are mine.
Posted Using InLeo Alpha
Wow, isn't this lovely? I love it when so engage kids with practicals regardless of the class because it helps them become more creative and most importantly keeps them busy.
You guy did a great job with this and I hope you wouldn't mind making one for me as well. I want something bigger though 🙂.
Haha 😆😂
Pay 50 hbd let me do yours, haha
Thanks for your kind and encouraging words G
Wow the Teddy Bears looks so cute, that's a good work
Thanks beauty 😍
https://inleo.io/threads/nkemakonam89/re-nkemakonam89-mxyyrfyq
The rewards earned on this comment will go directly to the people ( nkemakonam89 ) sharing the post on LeoThreads,LikeTu,dBuzz.
I was so engrossed from the beginning to the end
This teddy bear resembles someone I know o😂😂
Even me the reader I had fun so I can imagine the doers themselves
This is creative
Good job to the team
Haha 😆😆😂, who could be that person you know, haha 😆😆😂🤣... Don't loud it
Lolz...the doers had fun doing it.. something away from academic..it was relaxing a bit
Thanks for your warm comment
I better not say🤣🤣🤣
You’re welcome
What a beautiful stuffed animal with pompoms.🥰
Awww
Thank you 😍
What a nice Teddy bear, this is so lovely, the kids are so lucky to have you as a good caring and loving mother, well done good mother
Smile 😊
Thanks so much
This a creative way to spend their midterm holiday. And you tried, it really looks like a teddy bear
Thanks for your encouragement... hopefully they will explore more creativity during the long vacation
Looks like fun. I have contemplated doing something like this with the yarn I have just sitting around but they are dusty because I do not have a cabinet to store it. I have tried washing my skeins in the past putting them in nylon stockings to prevent tangling but it got tangled anyway.
Yarn can easily tangle if you don't keep it in safe place...I lost some of the materials cos it got tangled...
It's looking so pretty that I would love to snatch from you. You were lucky because I don't live nearby place of you🤣. !LOL
I am not so good in that kind of skills. I wasn't aware about this kind of skills of you. Good to know..
lolztoken.com
Her height is perfect.
Credit: reddit
@nkemakonam89, I sent you an $LOLZ on behalf of intishar
(1/4)
Farm LOLZ tokens when you Delegate Hive or Hive Tokens.
Click to delegate: 10 - 20 - 50 - 100 HP
Haha 😆😆😂
Snatch the snatcher..lolz
I use to do this kind of skill but I am not just consistent with it...glad you know this side of nkem 🤗
Thanks for the curation
What an excellent idea to make a cute bear ☺️, it turned out very well friend, I congratulate you and thank you for sharing your idea with us, greetings 🥰
Creativity at its peak 🤌
This is beautiful 😍😍