🧵🧶🪡 Lets learn HOW to do a PATCH!/ ¡Aprendamos a HACER un PARCHE! 🪡🧶🧵
💓 Hello DIYhub friends! 💓
I wish you are doing great and your creativity is wonderful 😍
Today I come to share with you how to make a patch. This is something very dynamic, you can do it with some image that you really like and want to place on another garment, or from scratch with some drawing/painting/embroidery/etc.
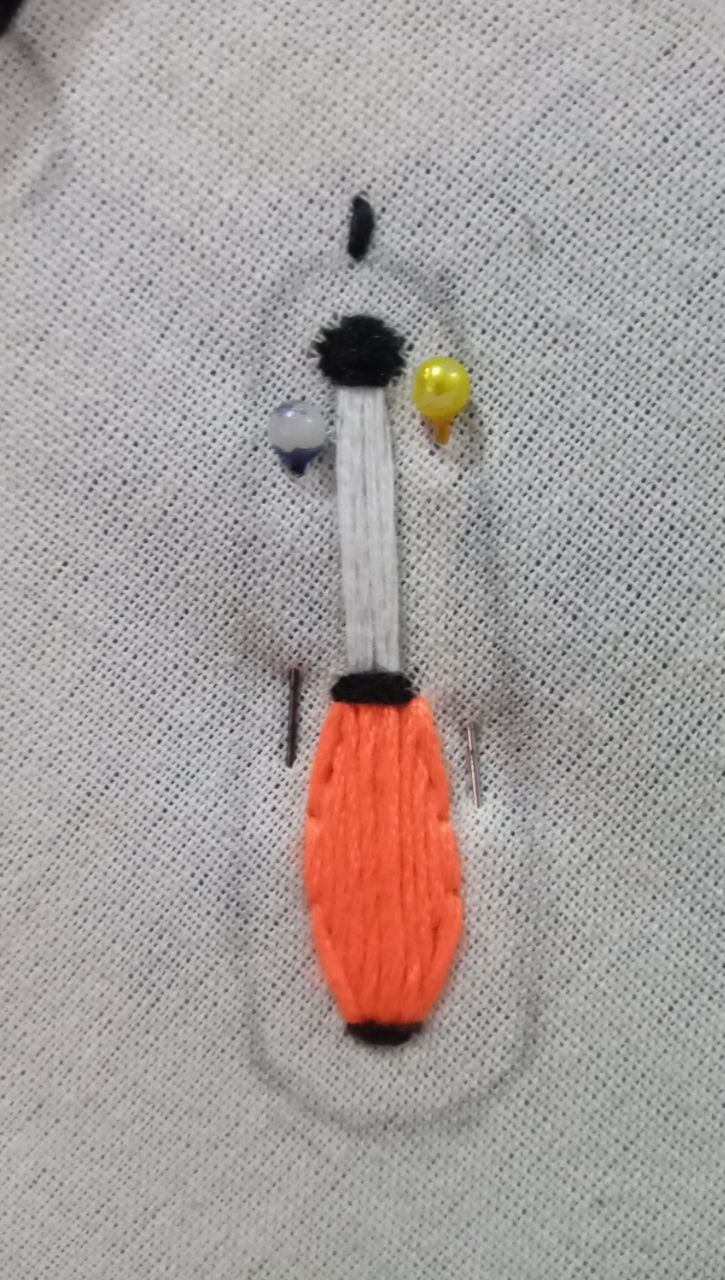
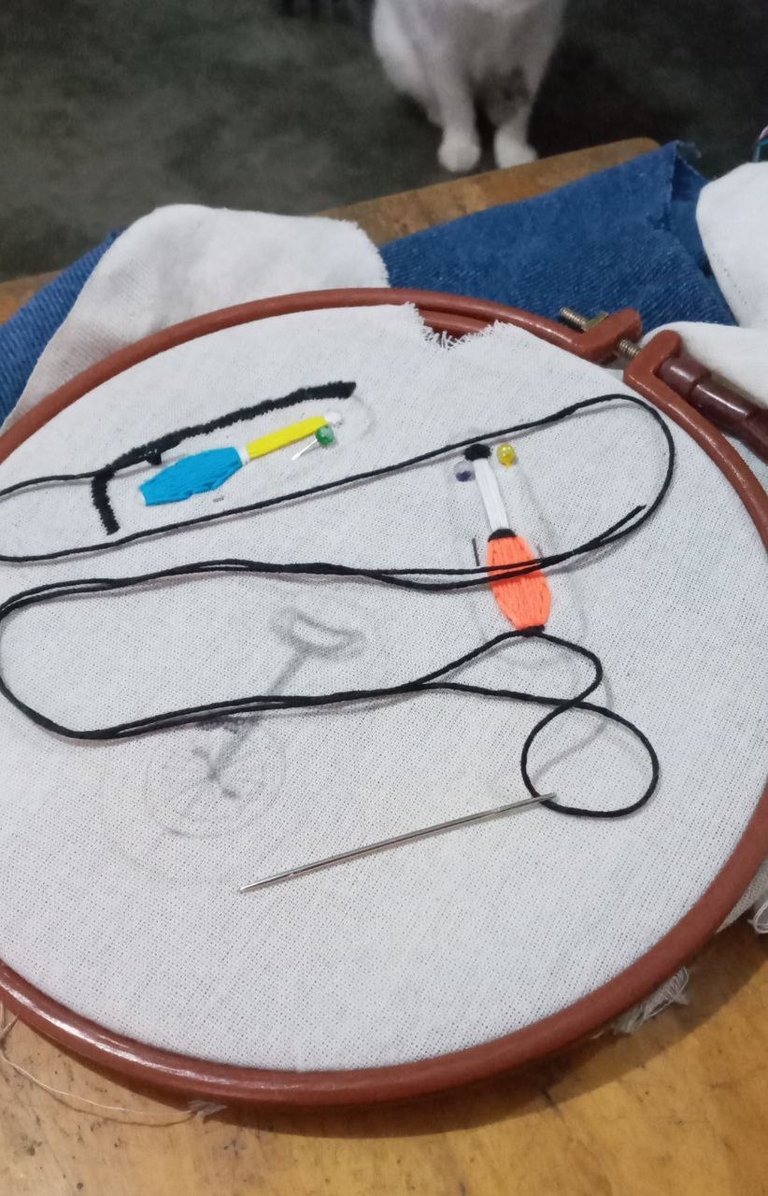
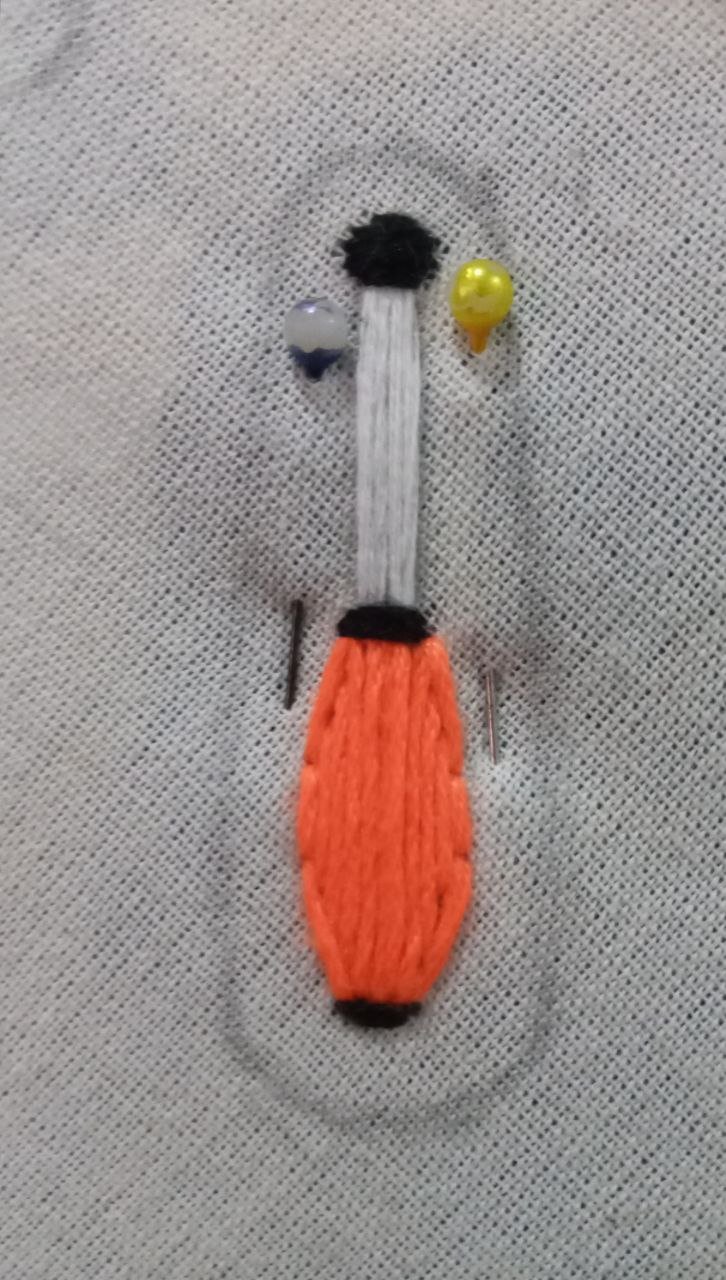
In my case, I will show you how to do it with an embroidery of a malabar club that I had already started.
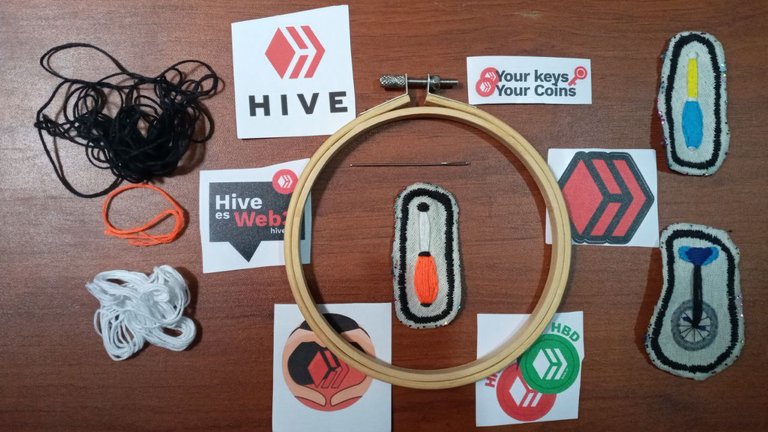
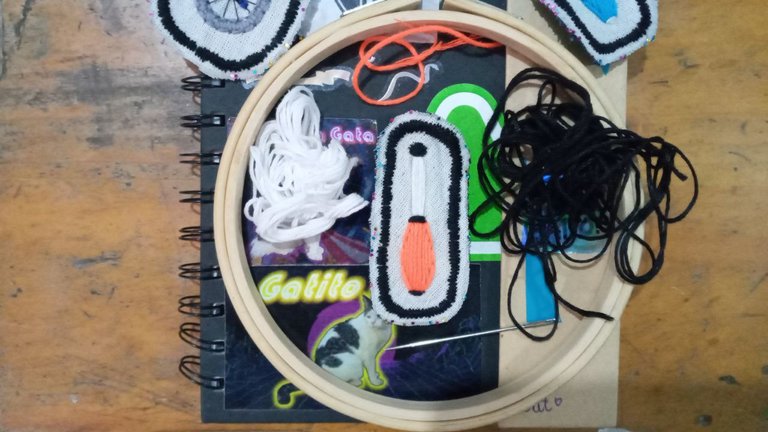
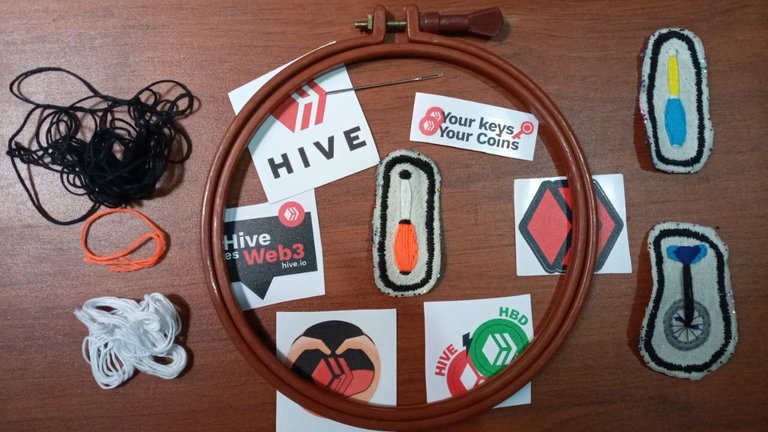
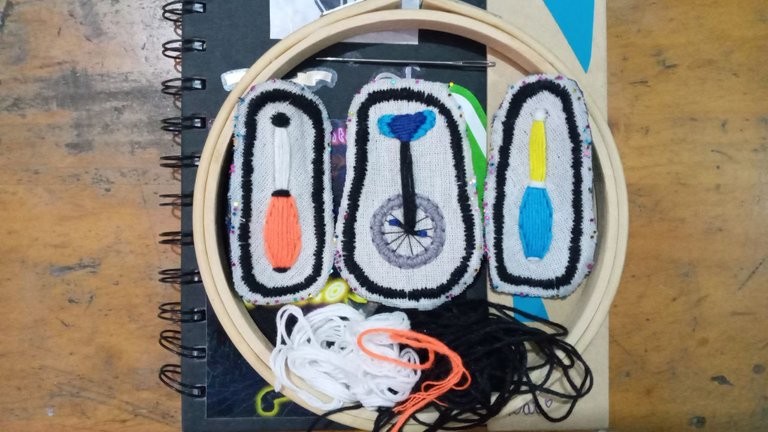
🪡 Materials we will need:
Embroidery, picture on fabric, etc.
Embroidery frame.
Needle and pins.
Thread in the color of your choice.
Jean or x fabric.
Scissors.
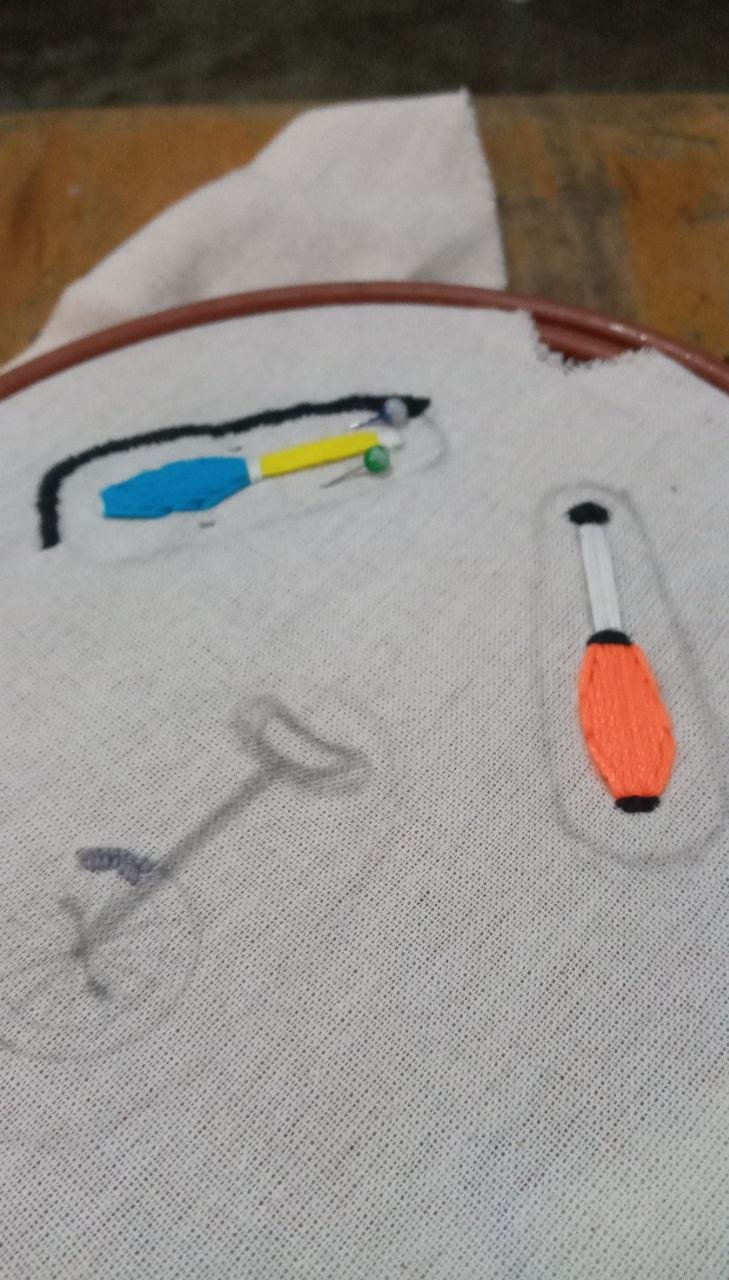
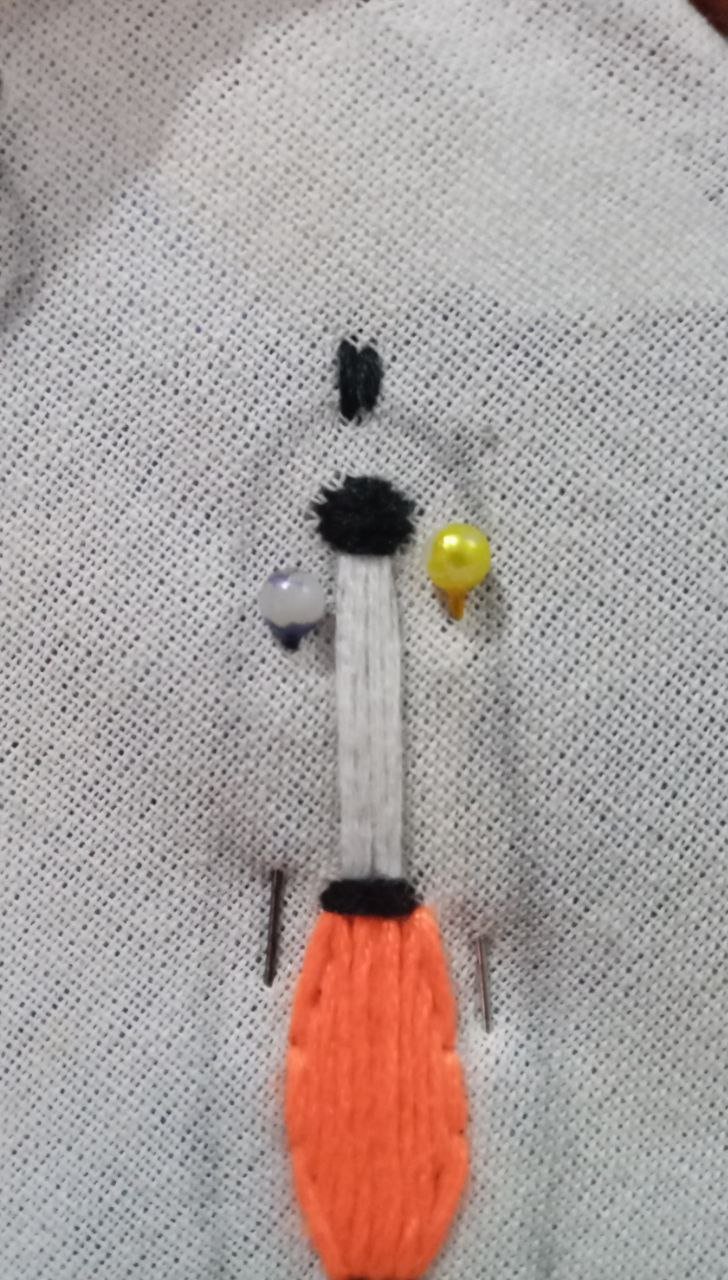
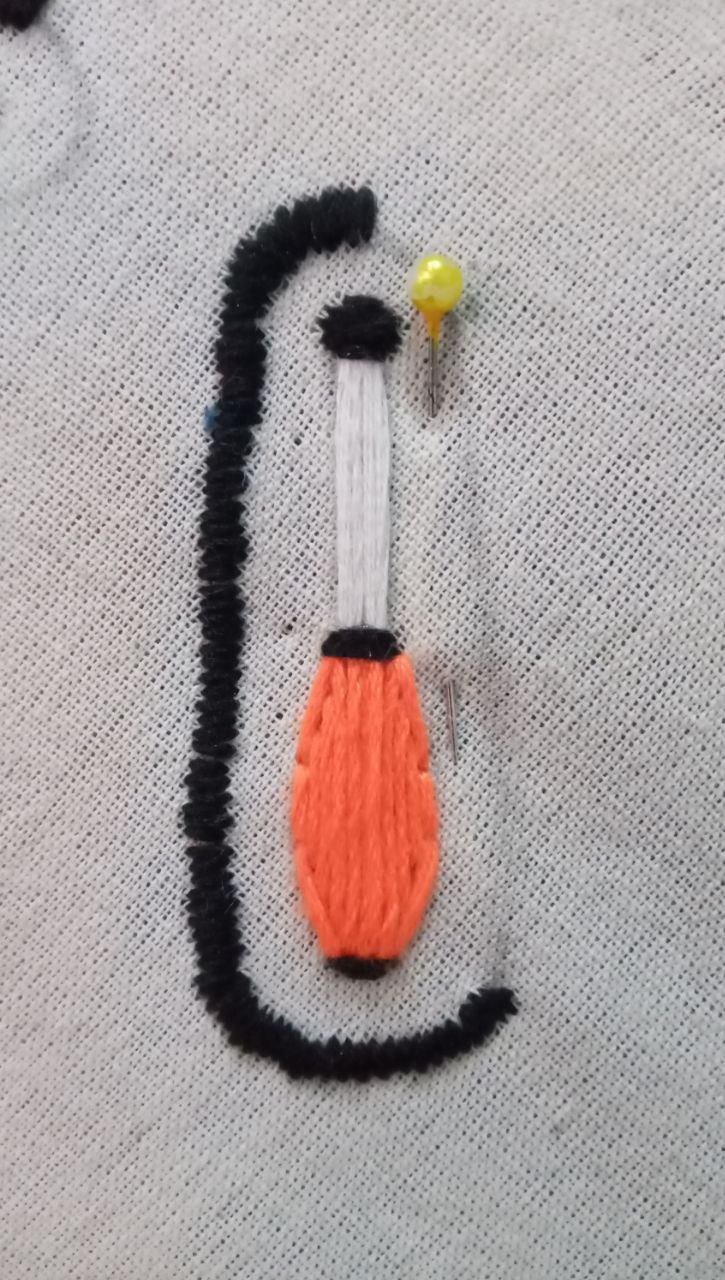
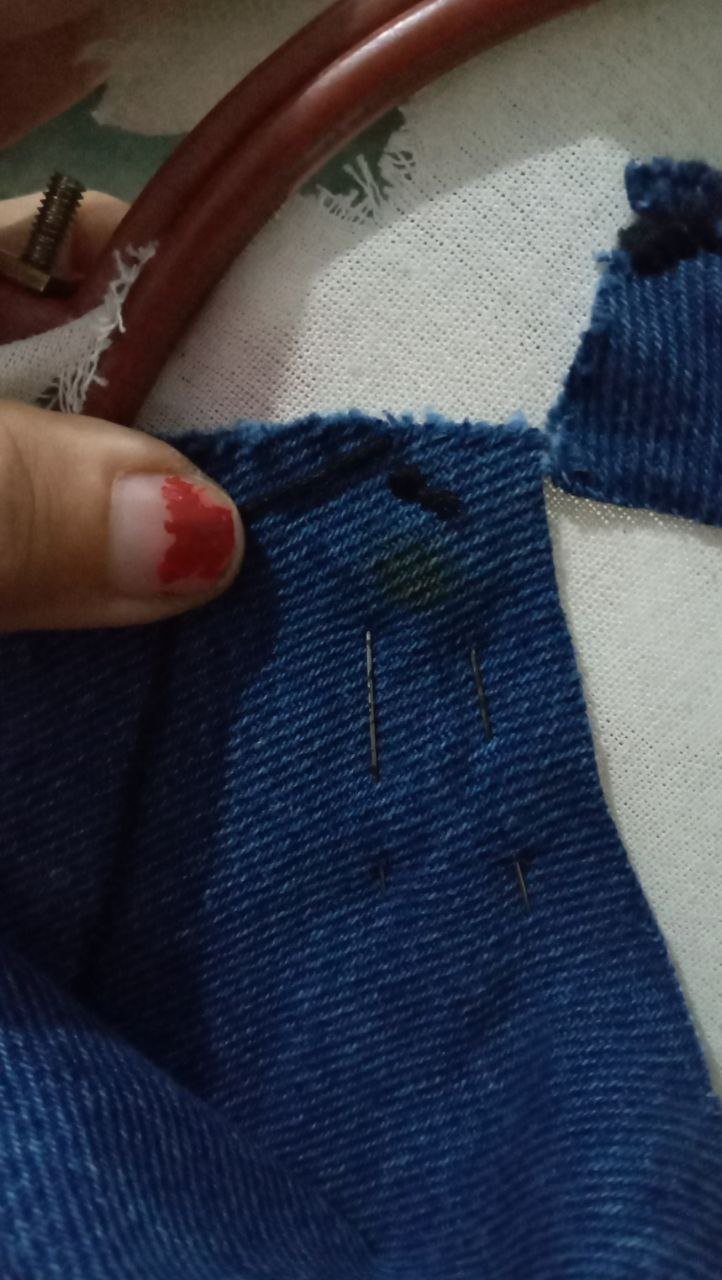
First of all it is very important to mark our guide for the border, you can do it the way you want and use the thread of the color of your preference. We place a fabric behind the image, I really like to use jean for that, I feel it gives firmness to the patch, but any fabric will do :)
We fasten it with some pins, this will give us precision. I recommend a thread size of about one meter, it's good to check every now and then to correct if the thread gets rolled up. We thread the needle and knot only one end, the other end remains loose, this allows us to take out needle and thread to correct any mistake.
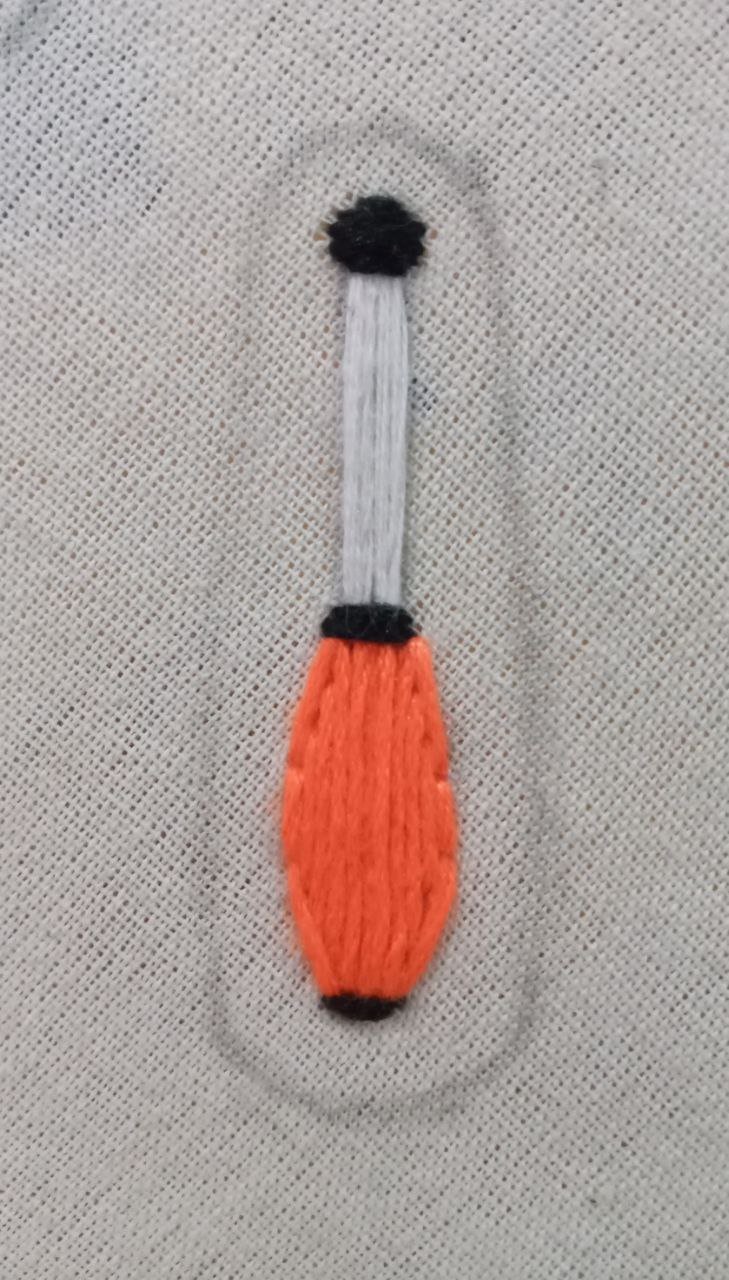
If u are new in this here are some TIPS on how to start embroidery 😉
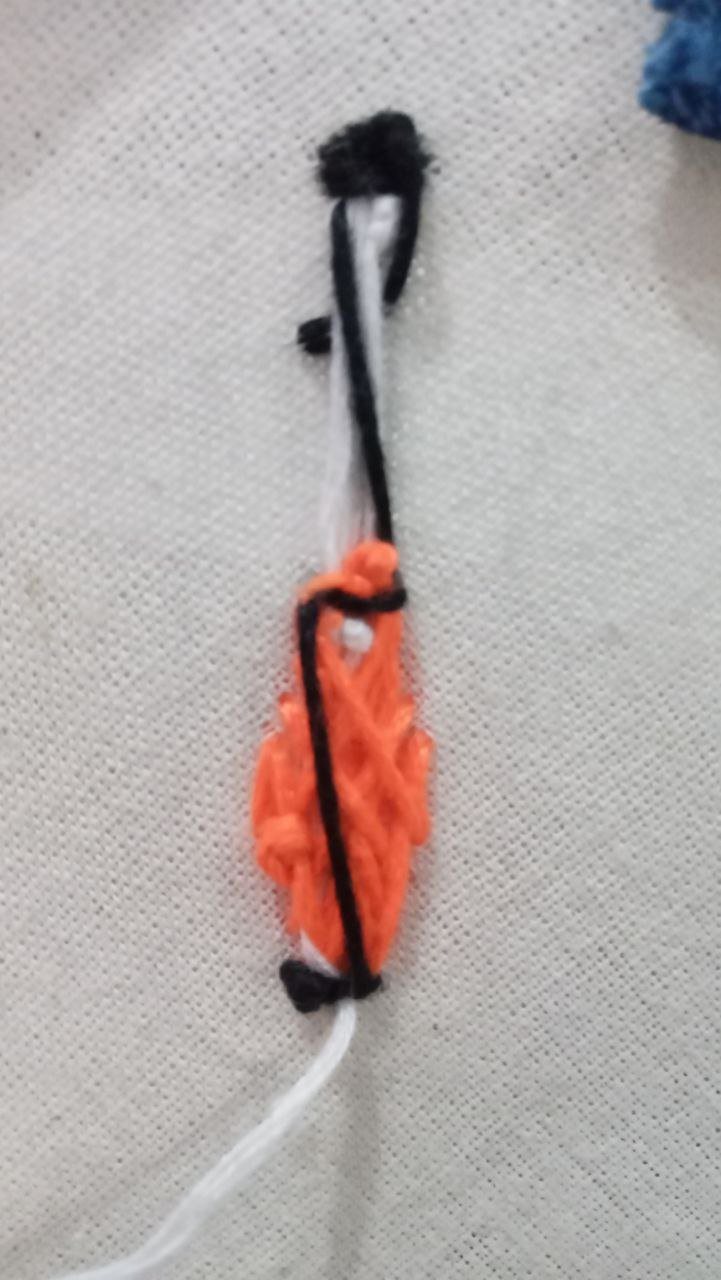
In circular embroidery it is recommended to start in the center, we make our first stitch on the fabric from back to front, and then reverse just to the side, and so we continue following our guide line. When we finish embroidering I like to close the thread and then pass it through the seam to secure it.
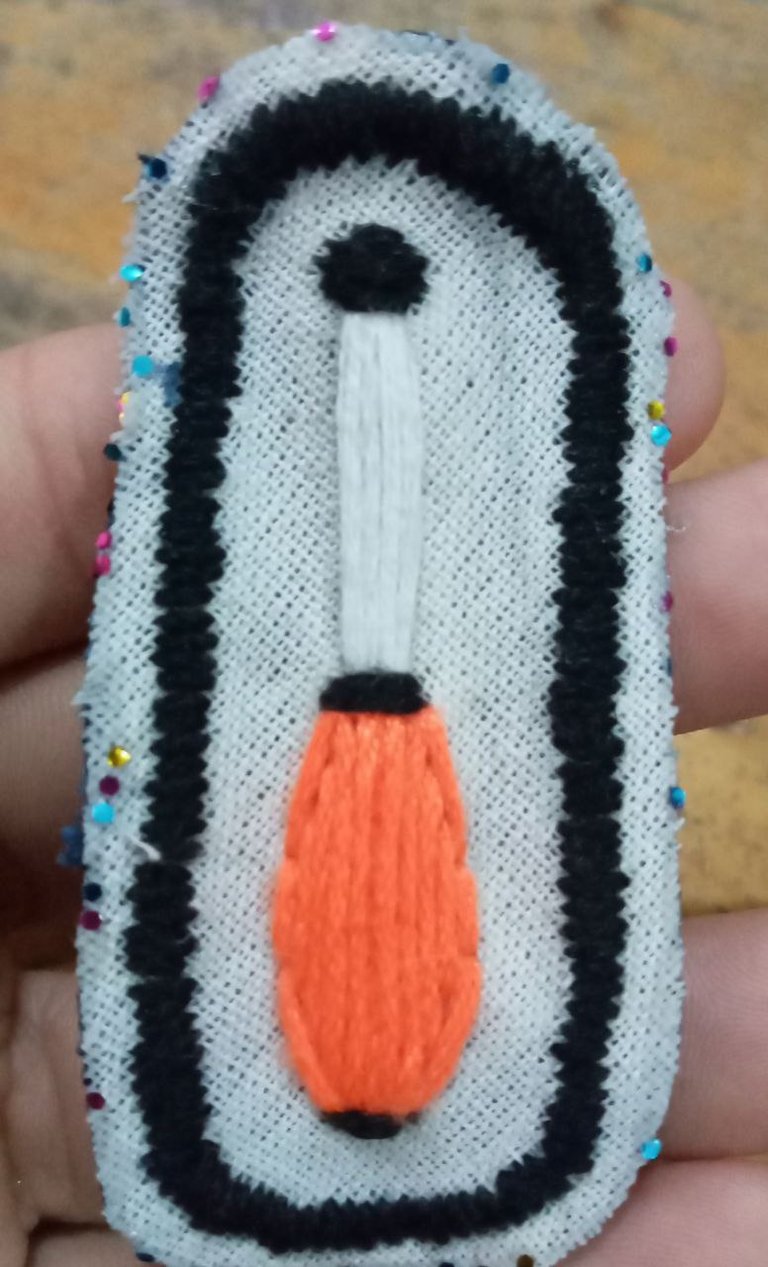
💙 Final patch 💙
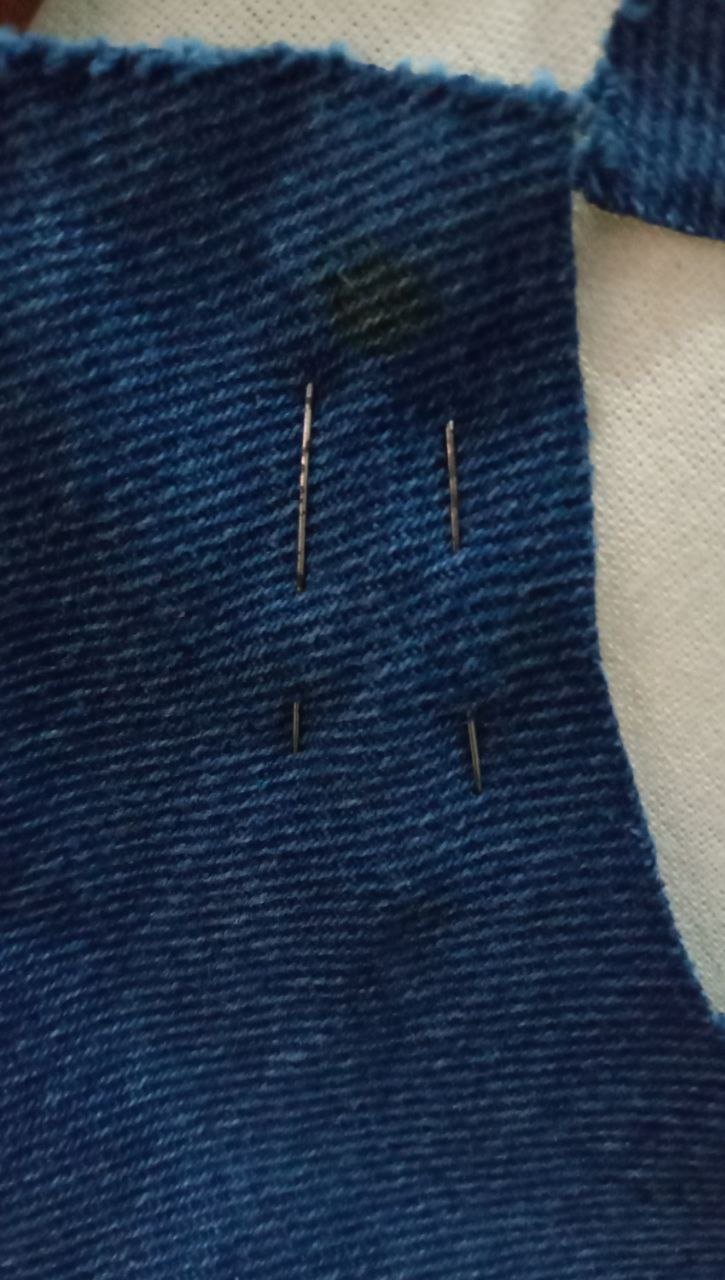
Then we cut the fabrics being very careful not to cut the thread. To finish the patch I put a little clear nail polish around the edges to prevent the fabric from fraying (this polish I used had glitter awwwww 💜).
And just like that you can make your own patches! I hope you liked the little tutorial, let me know if you liked it, if you have any doubts and leave pictures if you dare to make some patches 🤗 💞 Hugs, kisses, drink water and brush your teeth! 💞
~ 💓 See you later! 💓 ~
💓 ¡Hola amigos DIYhub! 💓
Deseo estén muy bien y su creatividad esté maravillosa 😍
El día de hoy vengo a compartirles como hacer un parche. Esto es algo muy dinámico, pueden hacerlo con alguna imagen que les guste mucho y quieran colocar en otra prenda, o desde cero con algún dibujo/pintura/bordado/etc.
En mi caso, les mostraré como hacerlo con un bordado de una clava de malabar que ya había comenzado.
🪡 Materiales que necesitaremos:
Bordado, imagen en tela, etc.
Marco para bordar.
Aguja y alfileres.
Hilo del color de su preferencia.
Tela de Jean o x.
Tijera.
Primero que nada es muy importante marcar nuestra guía para el borde, pueden hacerlo de la forma que quieran y utilizar el hilo del color de su preferencia. Colocamos una tela detrás de la imagen, a mí me gusta mucho usar jean para eso, siento que da firmeza al parche, pero cualquier tela sirve :)
La sujetamos con algunos alfileres, esto nos dará precisión. El tamaño del hilo recomiendo que sea de un metro aprox., es bueno revisar cada tanto para corregir en caso de que el hilo se enrolle. Ensartamos en la aguja y anudamos solo un extremo, el otro queda suelto, esto nos permite sacar aguja e hilo para corregir algún error.
Si eres nuevo en esto aqui hay algunos TIPS de como empezar a bordar 😉
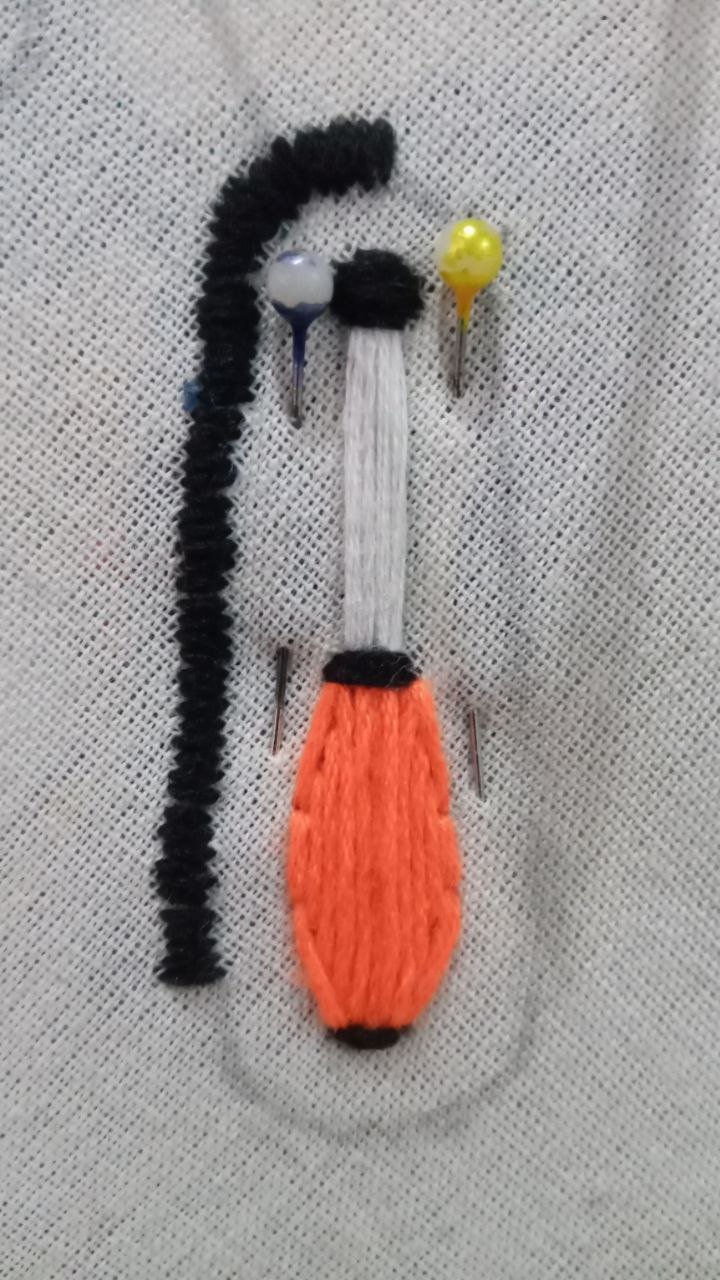
En los bordados de forma circular es recomendable iniciar por el centro, hacemos nuestra primera puntada en la tela de atrás hacia adelante, y luego inverso justo al lado, y así continuamos siguiendo nuestra línea guía. Al finalizar de bordar me gusta cerrar el hilo y luego pasarlo por la costura para asegurarlo.
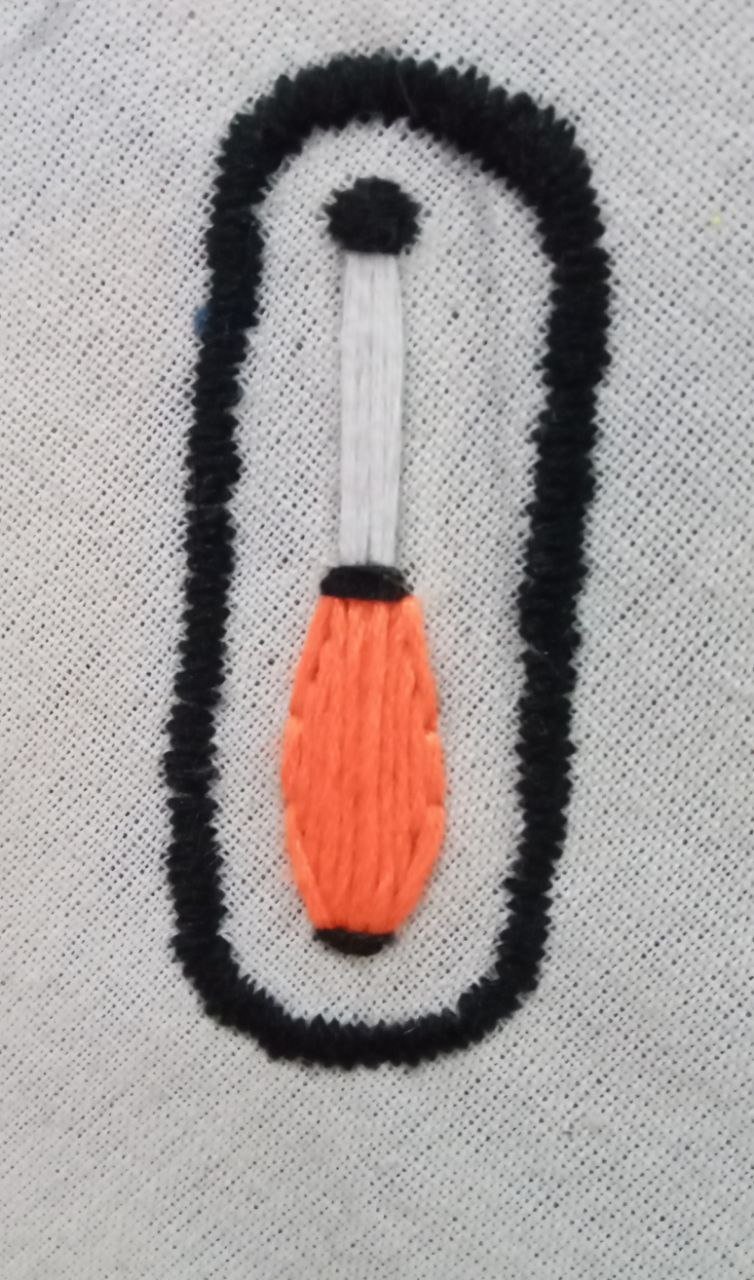
💜 Parche finalizado 💜
Luego cortamos las telas teniendo mucho cuidado de no cortar el hilo. Para finalizar el parche le paso un poco de esmalte de uñas transparente por los bordes para evitar que se deshilache la tela (este esmalte que use tenía brillitos awwwww 💜).
¡Y así de sencillo pueden hacer sus propios parches! Espero les haya gustado el pequeño tutorial, coméntenme si les gustó, cualquier duda que les haya quedado y dejen fotitos si se animan a hacer algún parchesito 🤗 💞 Abrazos, besitos, tomen agüita y cepillense los dientes! 💞
~ 💓 Nos vemos luego! 💓 ~
Las imágenes fueron tomadas por mi.
Congratulations @nattymitty! You have completed the following achievement on the Hive blockchain And have been rewarded with New badge(s)
Your next target is to reach 500 upvotes.
You can view your badges on your board and compare yourself to others in the Ranking
If you no longer want to receive notifications, reply to this comment with the word
STOPTo support your work, I also upvoted your post!
Check out our last posts:
Thanks thanks thanks 💙
All good @nattymitty! You're a real Hive pro! Onward to that new goal!
Se ven muy bien, todavía no se bordar, pero me gustaría.
Gracias por compartir la forma de hacerlo.
Muchas gracias Arianna por comentar 💙 estare subiendo mas tutoriales sobre bordado, atenta!