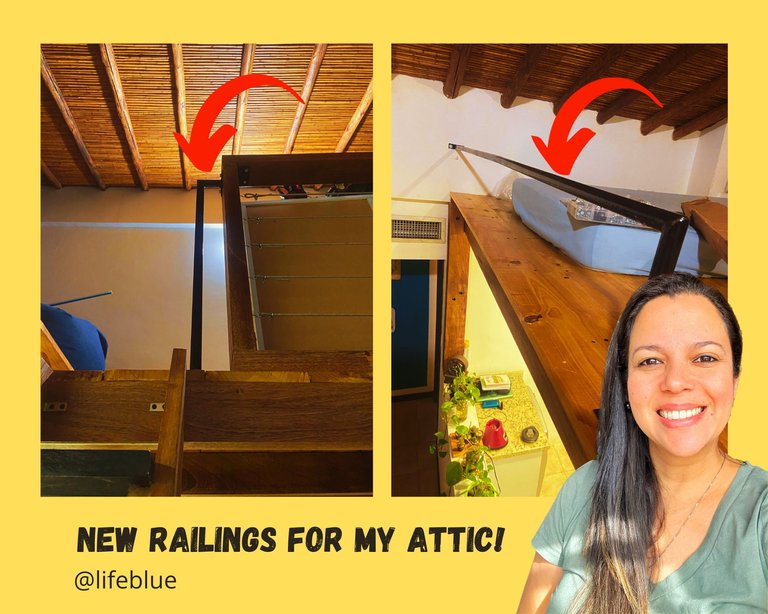
New railings for my attic! - ENG/ESP
ENG
Hello friends! How is your week going? I'm doing great, making a few things at home in the best "Bob Builder" style. I love inventing things at home and if I have the tools and the possibility, even more so. This time I had some time wanting to make some railings for the rest of the floor that I built several months ago, I leave you the link if you want to see the process I show you how I built my attic - ENG/ESP, but I didn't know how to make them since I had made the railings of one side Fabricating the attic railing -ENG/ESP that I will call "wooden railings", and I was missing the other side that without a doubt I wanted them different. So I saw a few ideas online, and I was able to decide, and although at first I thought they were pretty simple, the end result, I loved.
ESP
Hola amigos! Cómo va su semana? Yo muy bien, haciendo unas cuantas cosas en casa al mejor estilo “Bob Constructor”. Yo amo andar inventando cosas en casa y si tengo las herramientas y la posibilidad, más aún. En esta ocasión tenía tiempo queriendo hacer unas barandas para el resto del piso que construí hace varios meses, te dejo el link por si quieres ver el proceso I show you how I built my attic - ENG/ESP, pero no sabía cómo hacerlas ya que había hecho las barandas de una parte Fabricating the attic railing -ENG/ESP que llamaré “barandas de madera”, y me faltaba el otro lado que sin duda las quería diferentes. Así que vi unas cuantas ideas por internet, y pude decidirme, y aunque al principio pensaba que eran bastante sencillas, el resultado final, me encantó.
ENG
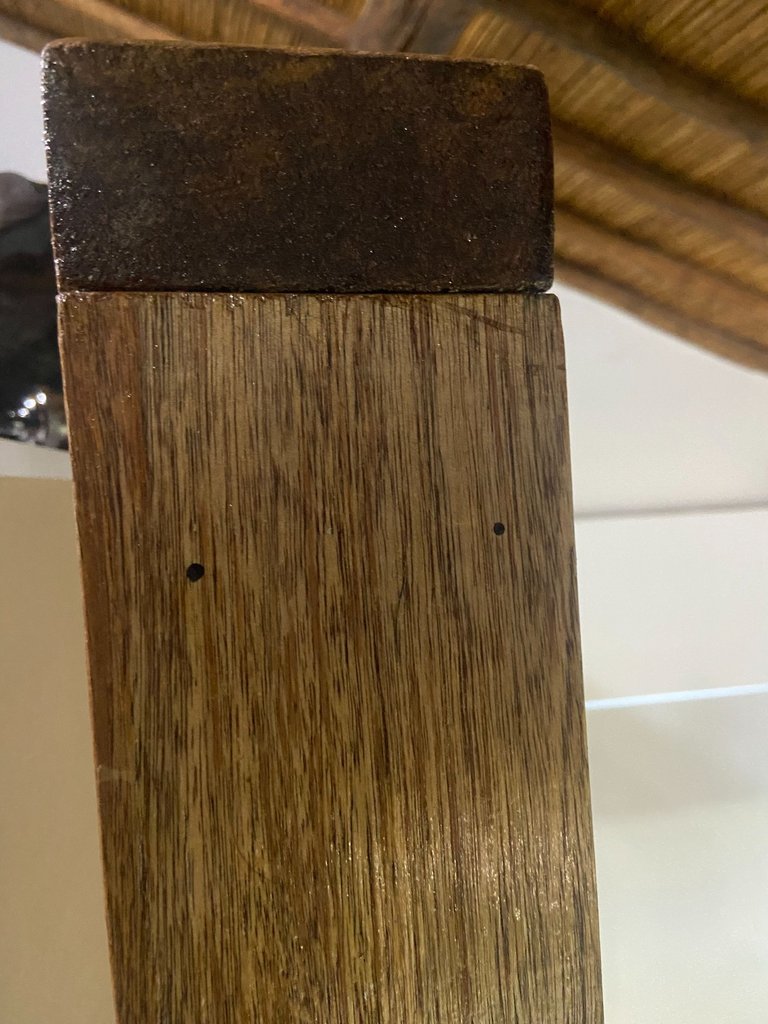
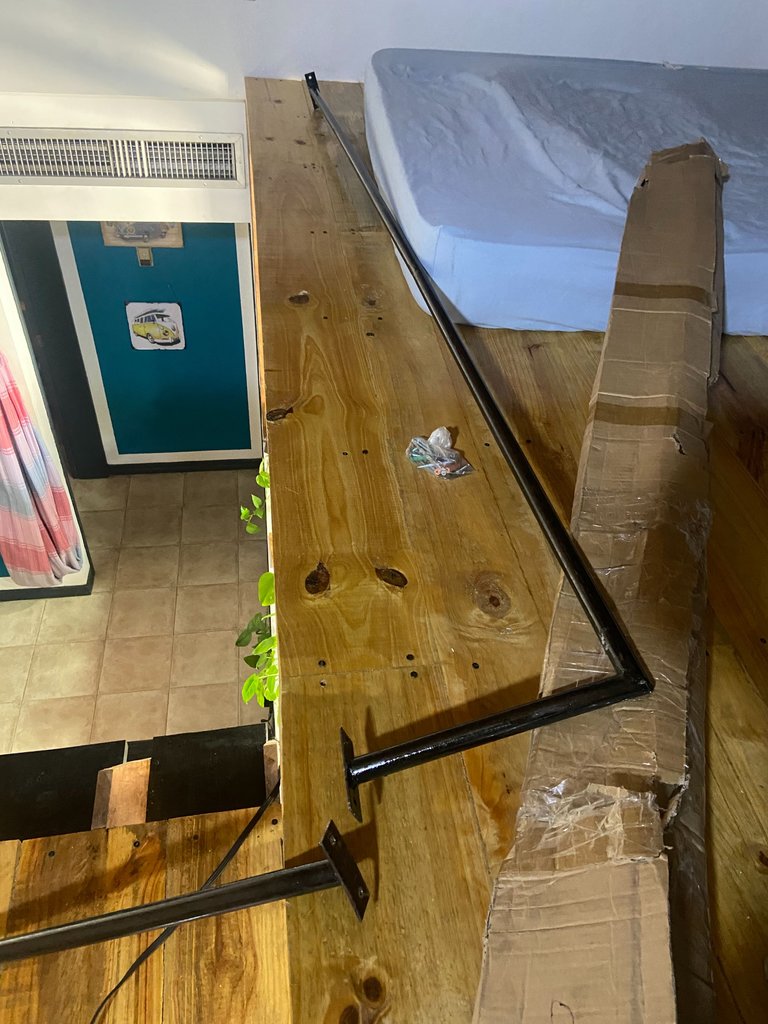
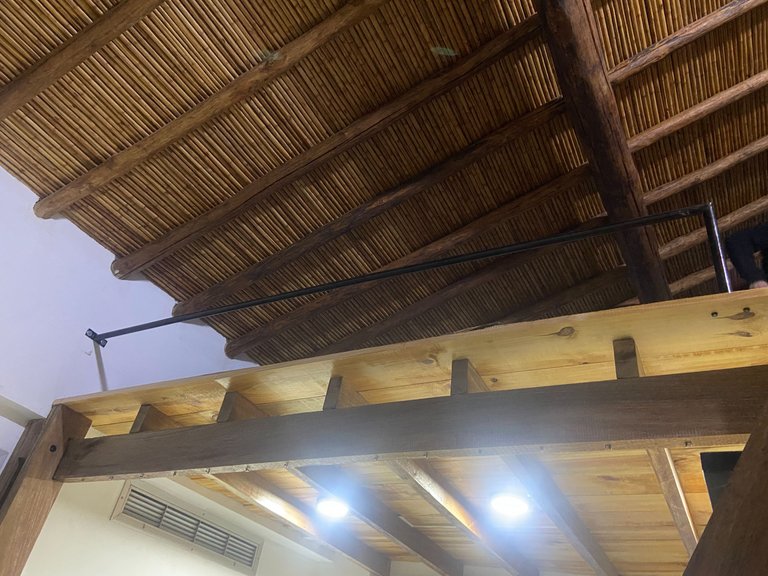
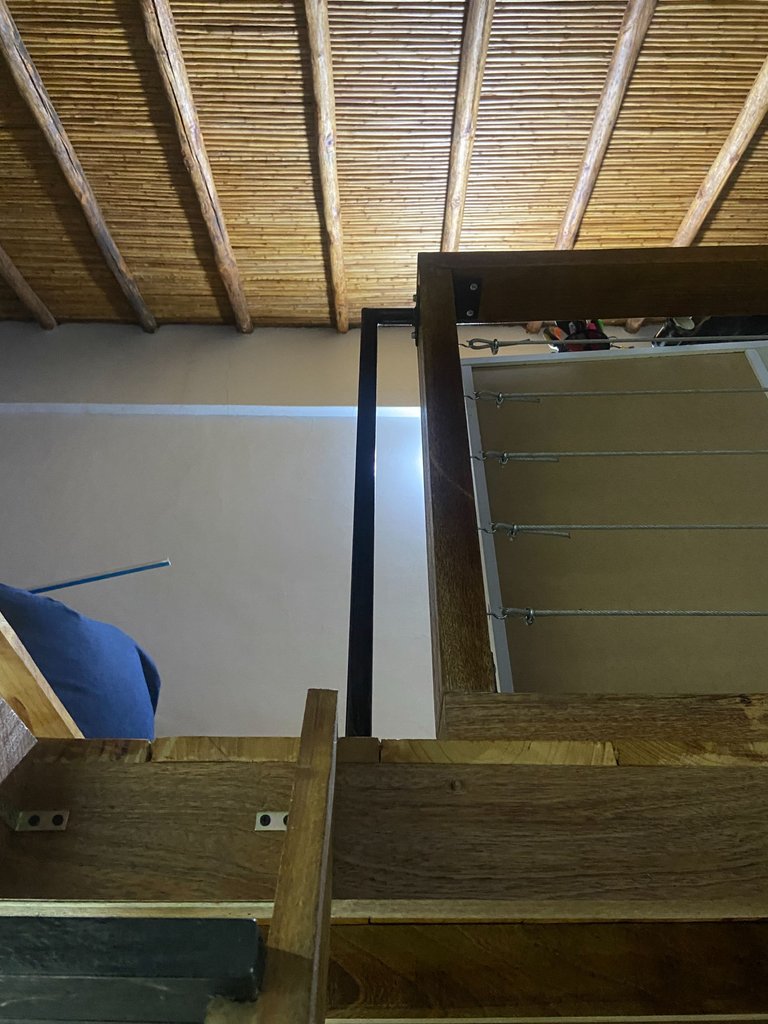
Here I show you the process and the materials I used. First I did some tests with several guinea pig friends XD to see what were the instinct points where they would grab on the way up and down. When going up, I noticed that they would hold on to the edge or the steps of the stairs, and then the highest floor, and they would end up holding on to the railing that I had already made. To go down they were always looking for a foothold so they wouldn't feel like they were going upside down, since the highest floor was very low and they had to bend down, so I had to add a few centimeters to make them feel more secure after holding on to the wooden railing. When they kept going down, they would hold on to the highest floor and then to the wall and that was it. With that information I started my creation. I had to make a railing about 30cm on the highest floor for people to hold on when going down, and to give them more security when they were up, and secondly, I would make a vertical tube to the wooden railing to give people a point to hold on when they finished going up.
ESP
Aquí les muestro el proceso y los materiales que utilicé. Primero hice unas pruebas con varios amigos conejillos de india XD para ver cuáles eran los puntos de instinto en dónde se agarrarían al subir y al bajar. Al subir, me di cuanta que se agarraban del borde o de los escalones de la escalera, y luego del piso más alto, y culminaban sosteniéndose de la baranda que ya había hecho. Para bajar siempre estaban buscado un punto de apoyo para no sentir que se iban de boca, ya que el piso más alto, era muy bajo y debían agacharse, así que debía agregar unos cuantos centímetros para que se sintieran más seguros luego de sostenerse de la baranda de madera. Cuando seguían bajando, se agarraban del piso más alto y luego ya del muro y listo. Con esa información empecé mi creación. Tenía que hacer una baranda unos 30cm en el piso más alto para que las personas se agarraran al bajar, y para darle más seguridad cuando estaba arriba, y segundo, haría un tubo vertical a la baranda de madera para así darle un punto de agarre a las personas al terminar de subir.
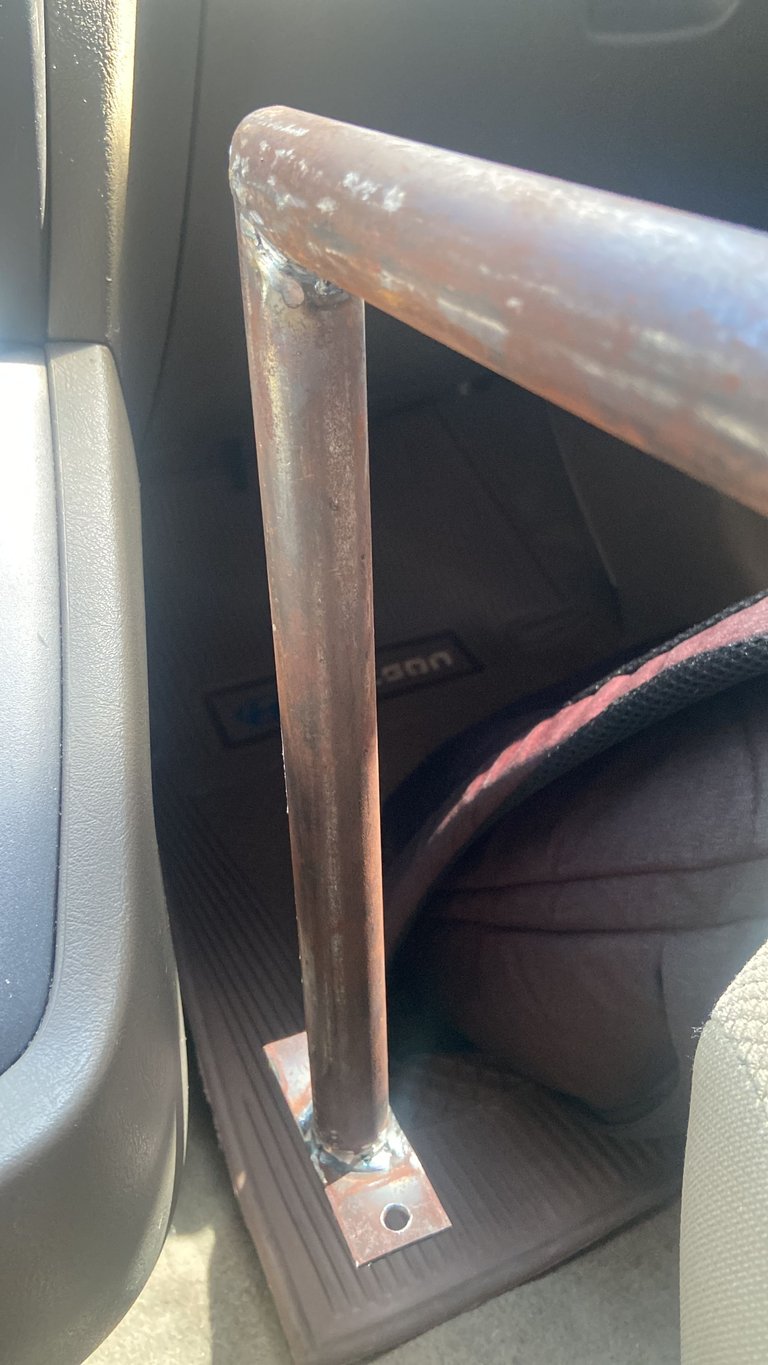
ENG
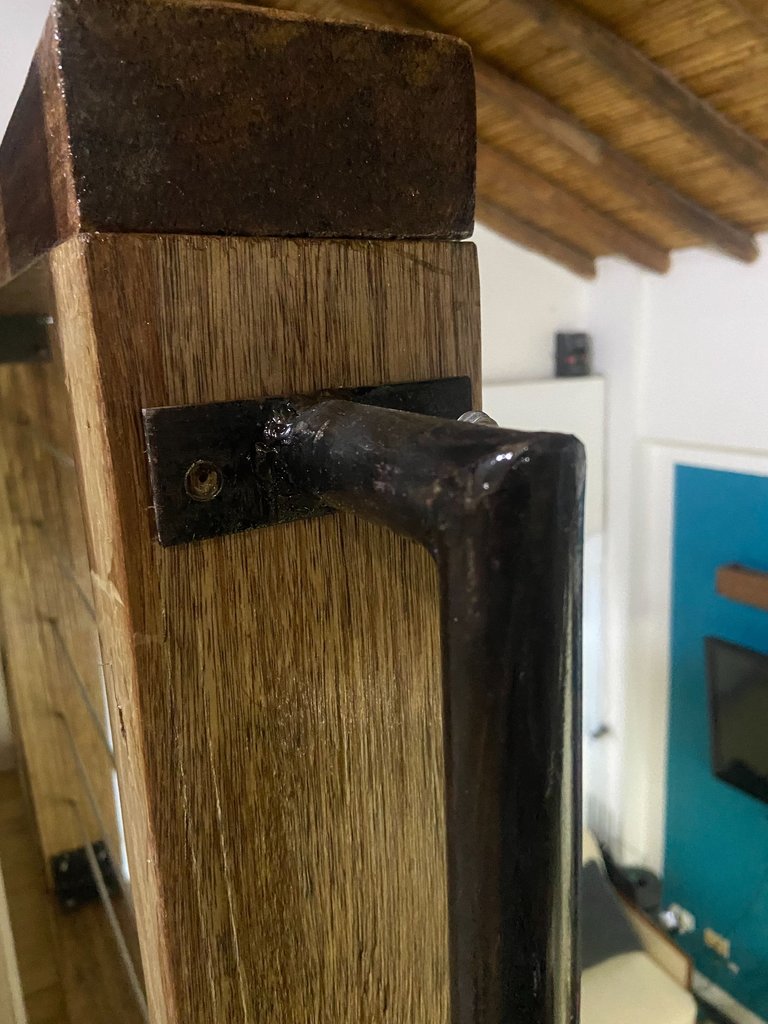
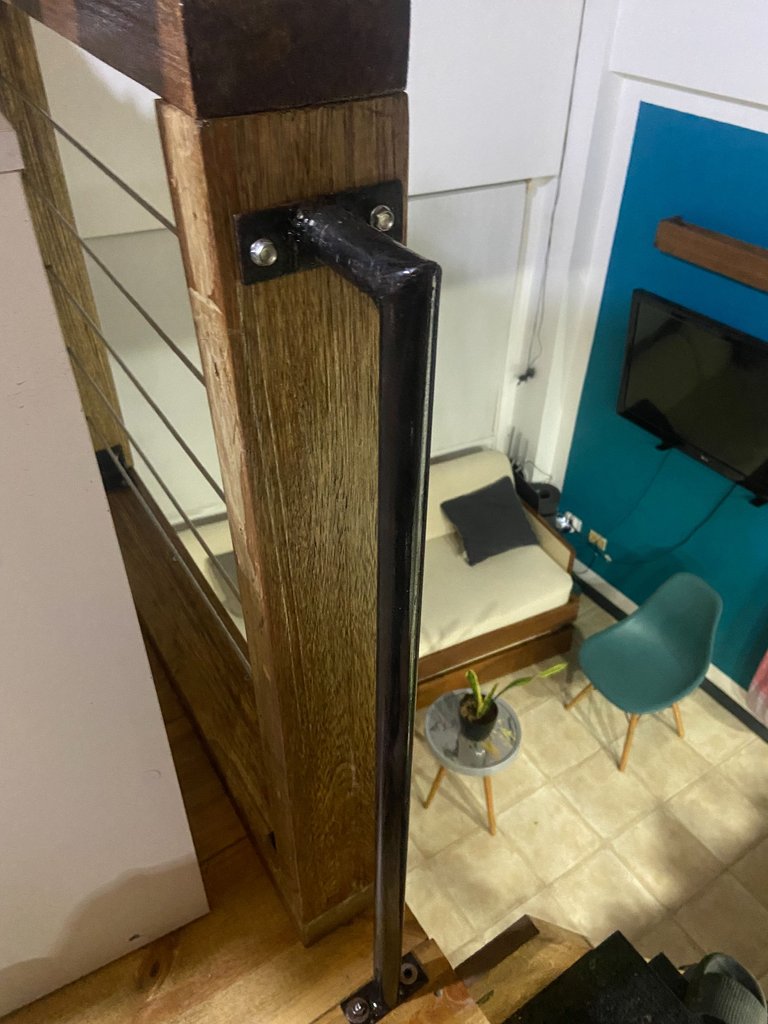
The first thing was to measure, of course, in total, I would use 3 and a half meters of 1/2 inch ventilation tube. I love this pipe because it's tough, very sturdy, I've already tested it with the hanging chair HOW I INSTALLED MY HANGING CHAIR - ENG/ESP, everyone has sat there, they rock and it's still just as perfect. So I bought the 1/2" one and talked to a very nice gentleman who is a local blacksmith and had him make my railings. I gave him a drawing and he fully understood. My idea was to make a railing 2.30 meters long and a single leg 30 centimeters high, added to that, some sheets at the ends with holes to fix it.
ESP
Lo primero fue medir, por supuesto, en total, usaría 3 metros y medio de tubo de de ventilación de 1/2 pulgada. Este tubo me encanta porque es duro, muy resistente, ya lo he comprobado con la silla colgante HOW I INSTALLED MY HANGING CHAIR - ENG/ESP, todo el mundo se ha sentado ahí, se mecen y sigue igual de perfecto. Así que compré el de 1/2” y hablé con un señor muy lindo que es herrero del lugar y le mandé a hacer mis barandas. Le di un dibujo y él comprendió en su totalidad. Mi idea era hacer una baranda de 2,30 metros de largo y una sola pata de 30 centímetros de alto, agregado a eso, unas láminas en los extremos con huecos para fijarla.
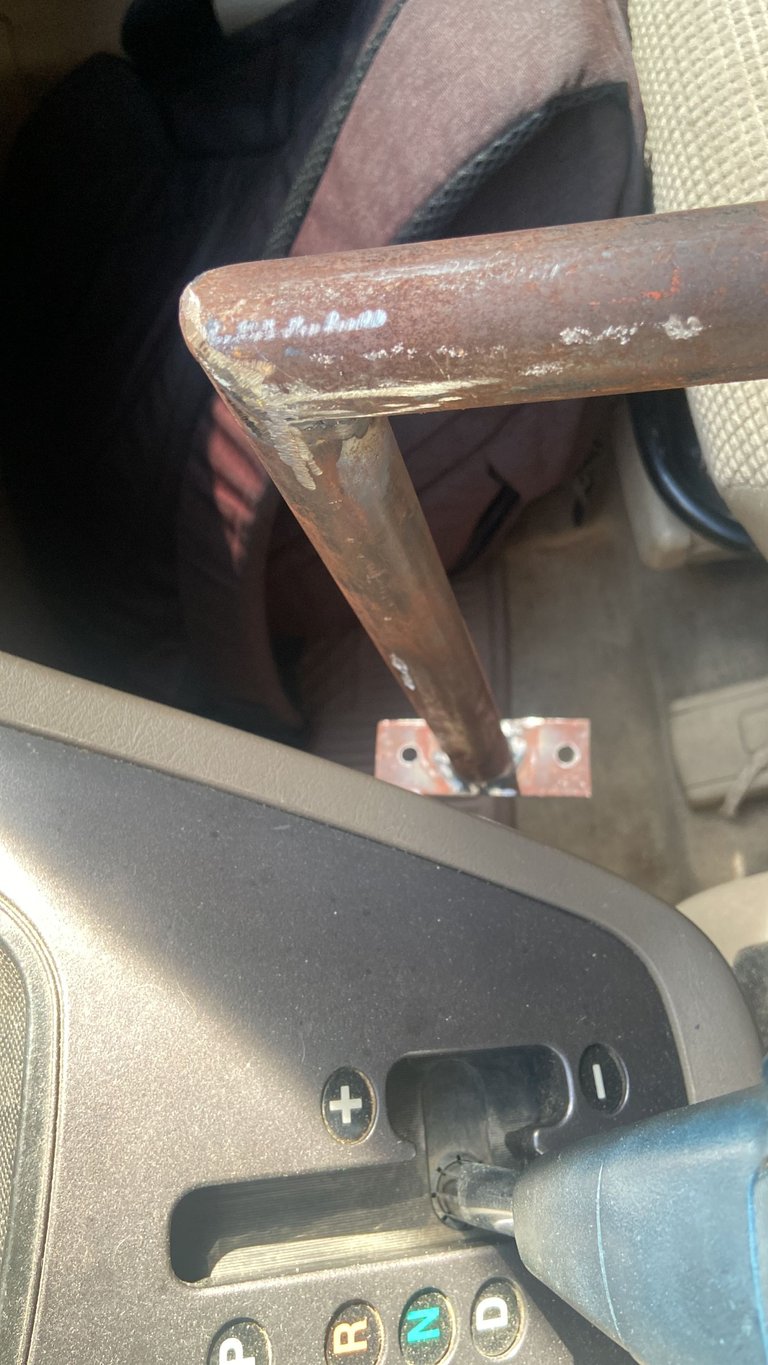
ENG
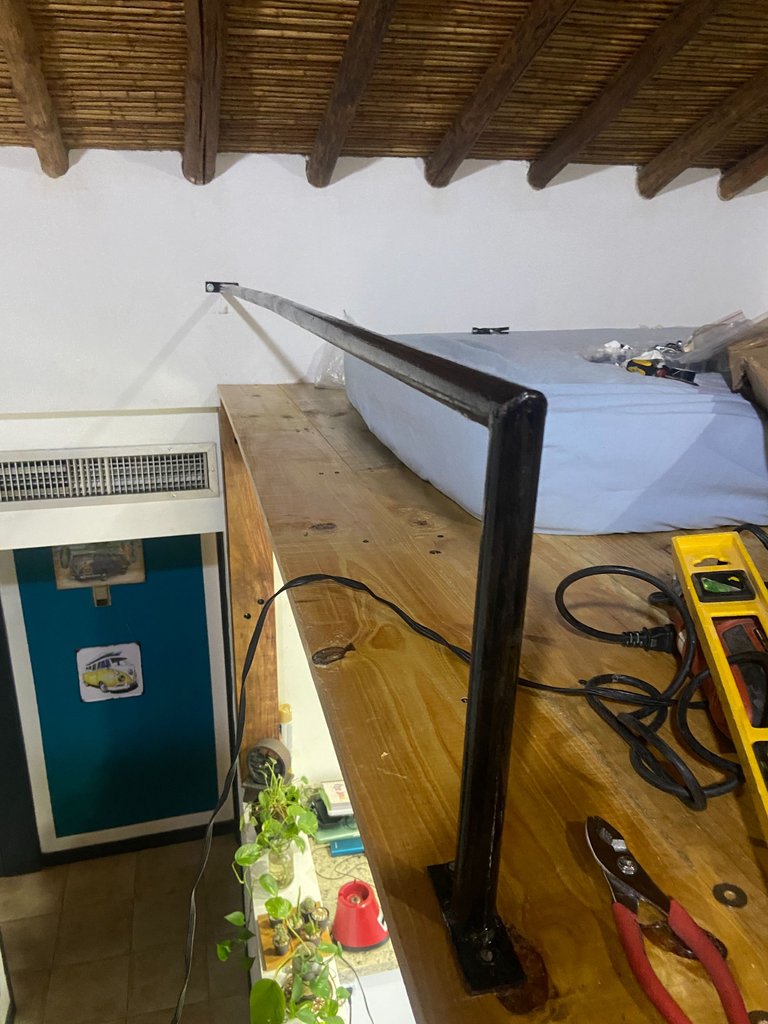
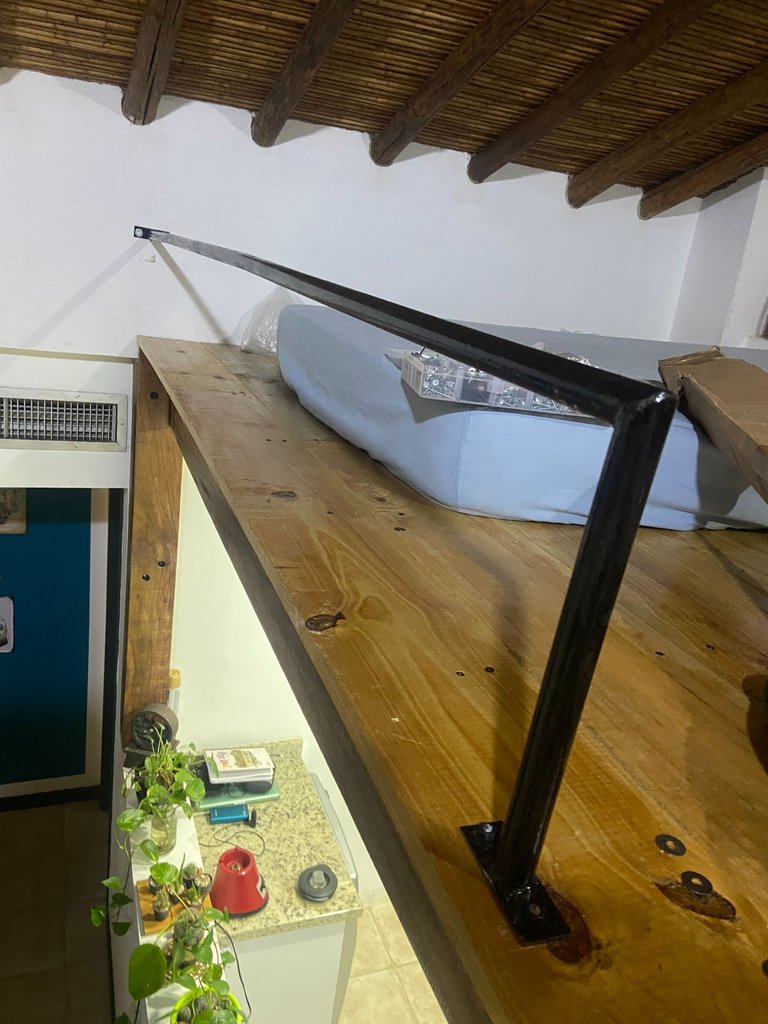
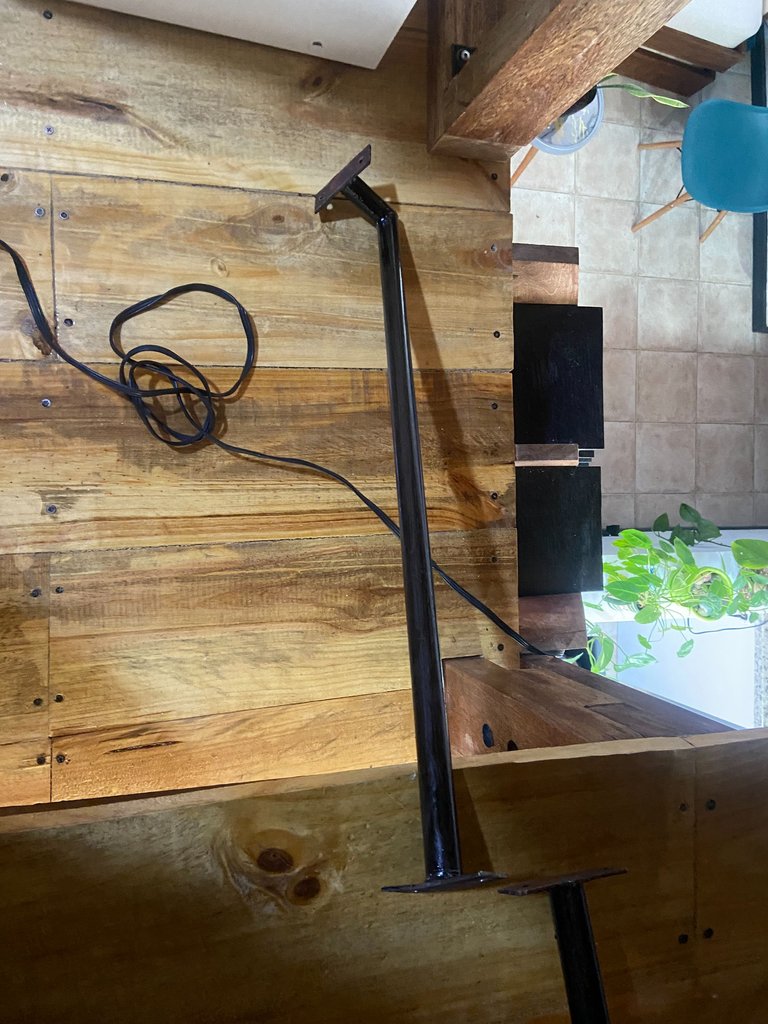
My second invention was a vertical railing that I would put on the wooden railing, 70 centimeters high, and a leg of 8 centimeters. So I let him do the job, he charged me only 10$ and delivered it the next day. Then when I had them, I only had to paint them with antirust paint and black oil base paint and wait 24 hours.
ESP
Mi segundo invento era una baranda vertical que la pondría en la baranda de madera, de alto 70 centímetros, y una pata de 8 centímetros. Así que le dejé encargado el trabajo, que me cobró solo 10$ y me lo entregó al día siguiente. Luego al tenerlas, solo las tuve que pintar con pintura antioxidante y pintura base aceite color negro y esperar 24 horas.
ENG
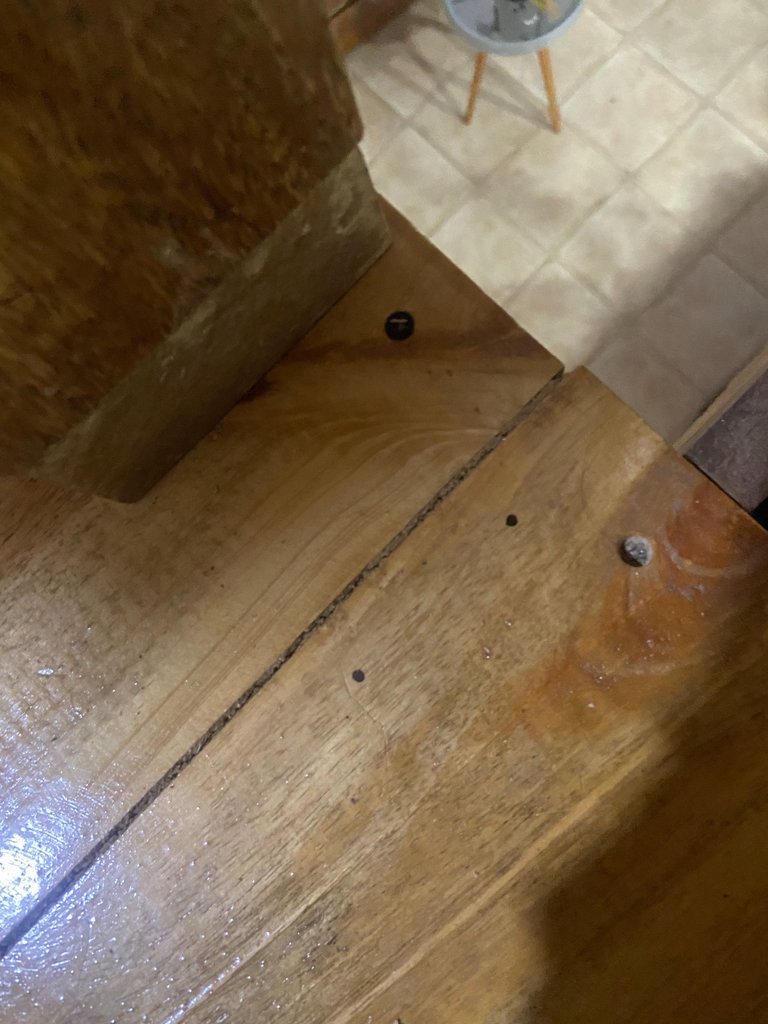
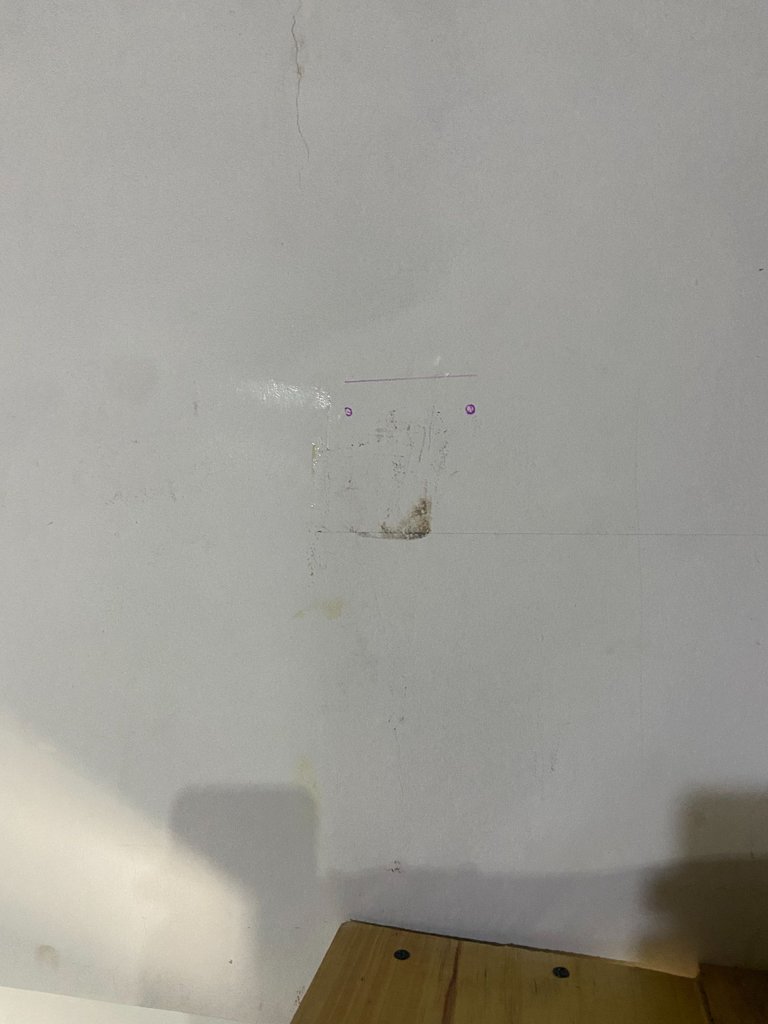
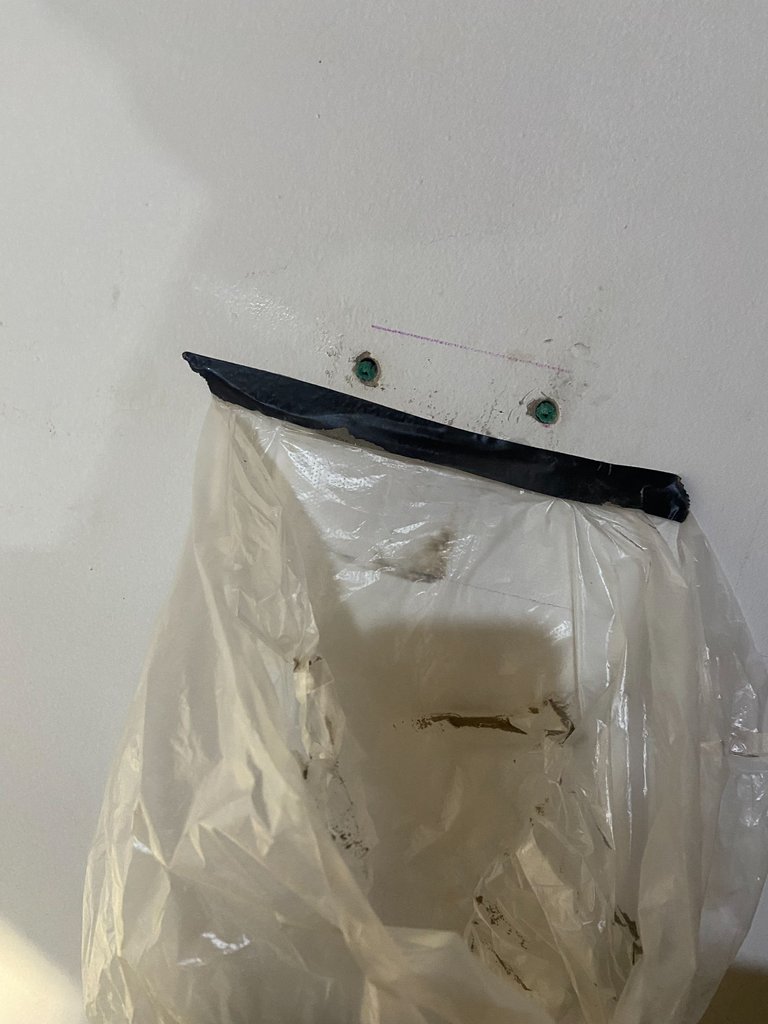
The next day, excited, I grabbed my railings and with a screwed bar and some nuts, I fixed them to the wood, and with some 2 inch screws and ramplugs, I fixed them to the wall. The truth is that they were excellent, very resistant and the feeling of security in the attic was solved. Now after this, I will certainly do more inventions at home, and I will be telling you about it here.
Remember that everything I have posted here has been installed and fabricated by myself, or at least 90% of it has been done by me with my little hands and some help from my partner, so as I once told you, we women are capable of many things that sometimes we think we are not, simply because we are women. You just have to have courage and determination....
Thank you all for reading me ❤️
ESP
Al otro día, emocionada agarré mis barandas y con una barra enroscada y unas tuercas, las fijé a la madera, y con unos tornillos de 2 pulgadas y ramplugs, las fijé a la pared. La verdad quedaron excelentes, muy resistentes y la sensación de seguridad en el ático quedó resuelta. Ahora después de esto, sin duda haré más inventos en casa, y les estaré contando por aquí.
Recuerden que todo lo que he posteado aquí ha sido instalado y fabricado por mí misma, o por lo menos el 90% lo he hecho yo con mis pequeñas manos y alguna ayuda de mi pareja, así que como les dije una vez, las mujeres somos capaces de muchas cosas que a veces pensamos que no, simplemente por ser mujeres. Solo hay que tener valor y determinación...
Gracias a todos por leerme ❤️


Congratulations @lifeblue! You have completed the following achievement on the Hive blockchain And have been rewarded with New badge(s)
Your next target is to reach 30000 upvotes.
You can view your badges on your board and compare yourself to others in the Ranking
If you no longer want to receive notifications, reply to this comment with the word
STOPThank youuuu
Keep up the fantastic work @lifeblue! Your dedication and hard work will pay off when you reach your target.
¡Felicitaciones!
1. Invierte en el PROYECTO ENTROPÍA y recibe ganancias semanalmente. Entra aquí para más información.
3. Suscríbete a nuestra COMUNIDAD, apoya al trail de @Entropia y así podrás ganar recompensas de curación de forma automática. Entra aquí para más información sobre nuestro trail.
4. Creación de cuentas nuevas de Hive aquí.
5. Visita nuestro canal de Youtube.
Atentamente
El equipo de curación del PROYECTO ENTROPÍA