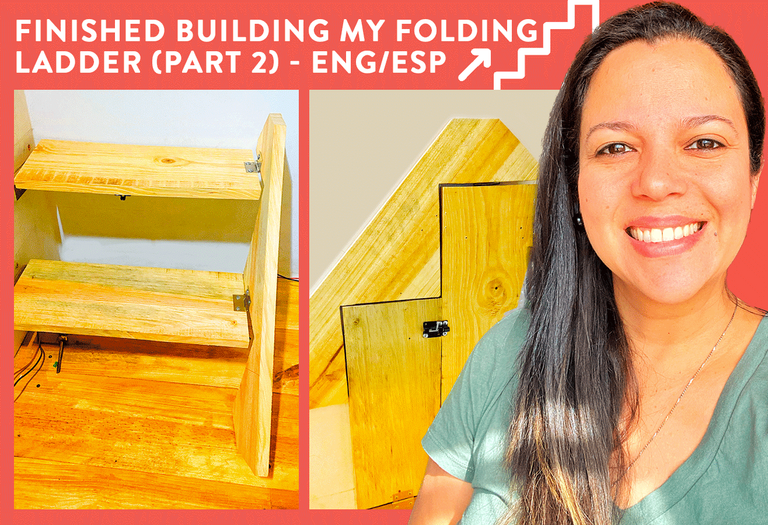
Finished building my folding ladder (PART 2) - ENG/ESP
ENG
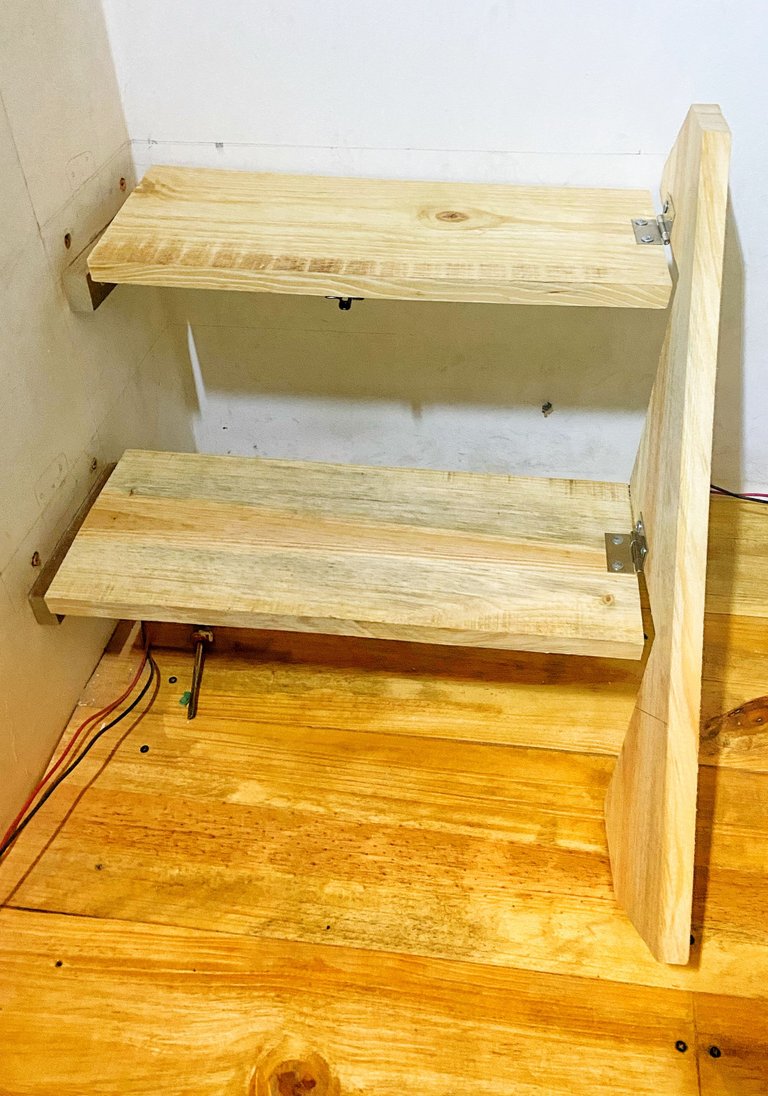
Hi Hive friends, I finally finished building my folding ladder. I don't know if you remember my last post Folding Ladder Manufacturing Startup (Part 1) - ENG/ESP, where I told you that I wanted to make a ladder to climb a level of 60 centimeters. I tell you that I have finished it, well yes but not. I bring you the conclusion and some final comments that I have to improve this week, but I was excited to tell you.
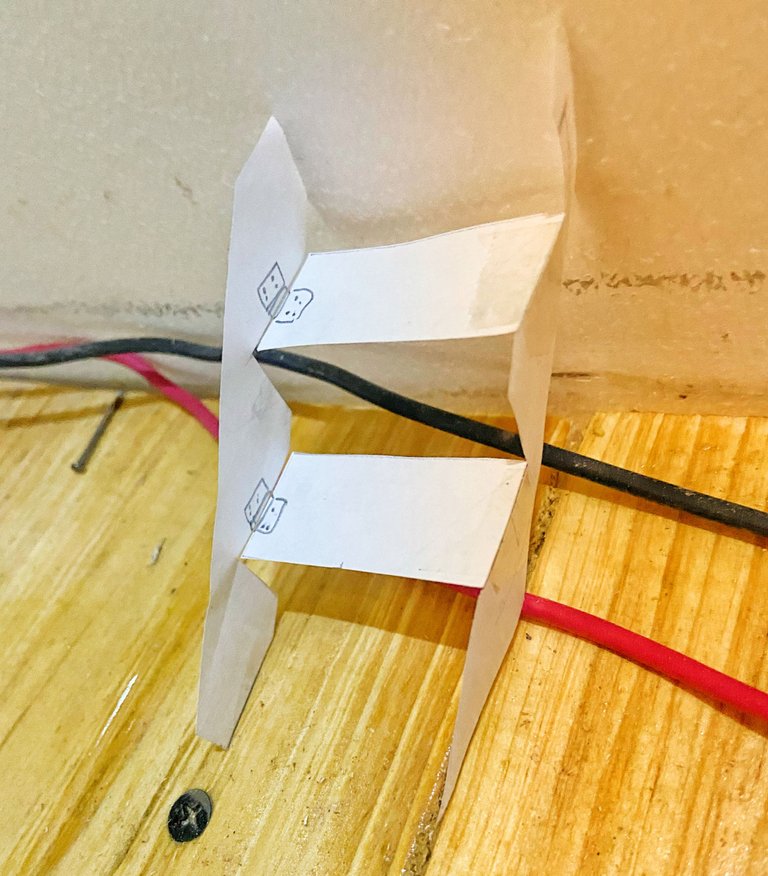
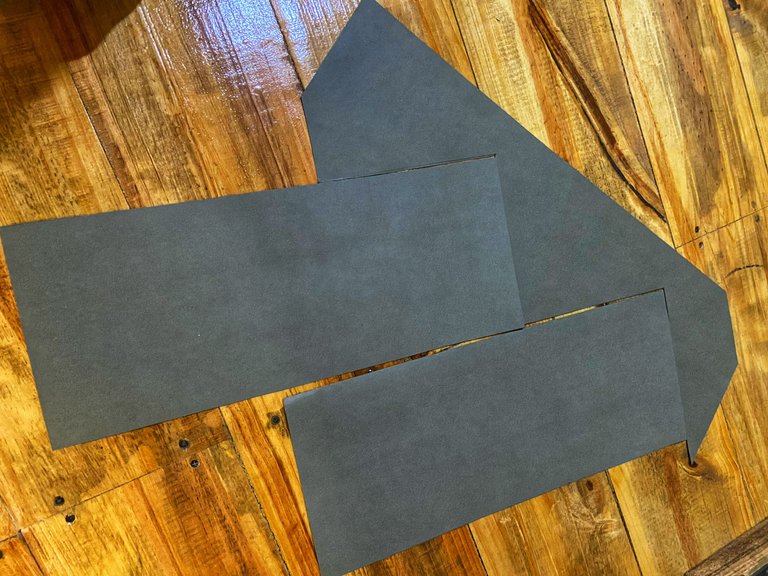
As I told you in the last post, I made my previous model on sheets of paper, then I also made the model on cardboard, which I actually did to have the exact pattern and to be able to mark on the boards that I was going to use, and then cut the pieces I was going to need for my staircase. In that post, I explained you the step by step of how I did to make it with the materials I had and not spend more, since I had some boards left over from the construction of my attic.
ESP
Hola amigos de Hive, les cuento que al fin terminé de construir mi escalera plegable. No sé si recuerdan mi post pasado de Folding Ladder Manufacturing Startup (Part 1) - ENG/ESP, donde les contaba que quería hacer una escalera para subir un nivel de 60 centímetros. Les cuento que ya la terminé, bueno sí pero no. Les traigo ya la conclusión y algunos comentarios finales que debo mejorar esta semana, pero me daba ilusión contarles.
Como les dije en el post pasado, hice mi maqueta previa en hojas de papel, también luego hice la maqueta en cartulina, que en realidad la hice para tener el patrón exacto y poder marcar en las tablas que iba a usar, para luego cortar las piezas que iba a necesitar para mi escalera. Ya en ese post, les expliqué el paso a paso de cómo hice para ingeniármelas con los materiales que tenía y así no gastar más, ya que me sobraban unas tablas de la construcción de mi ático.
ENG
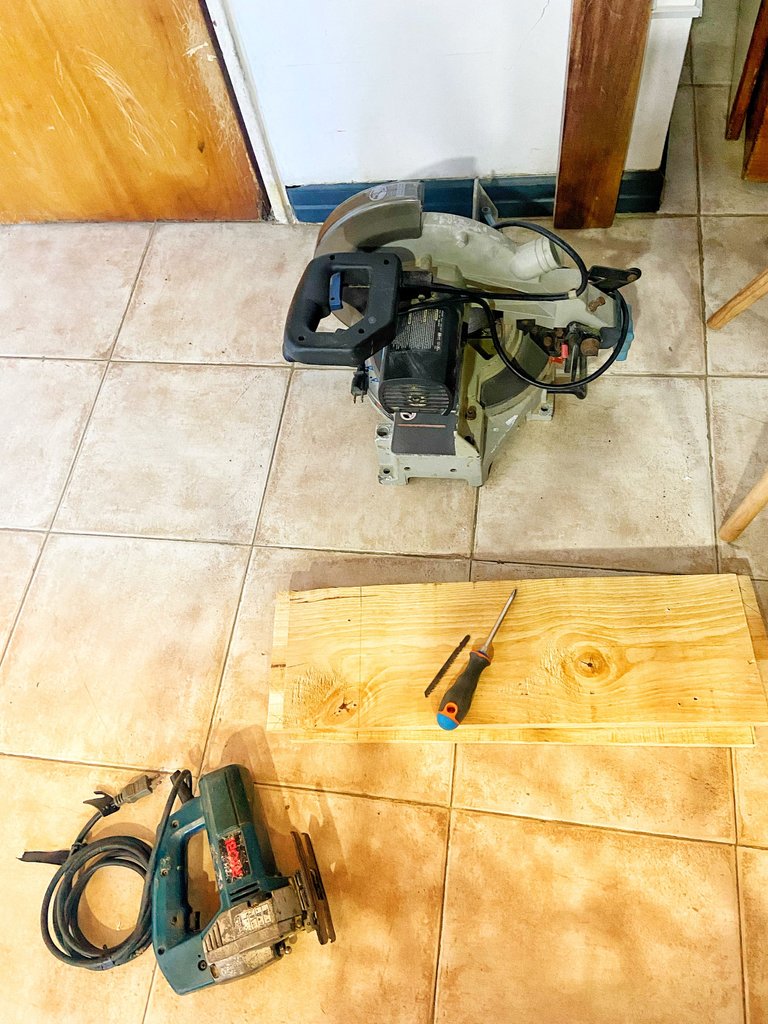
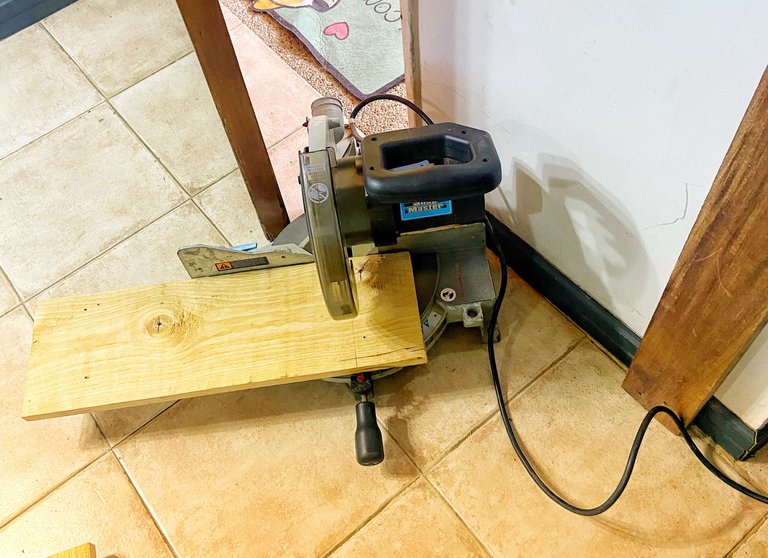
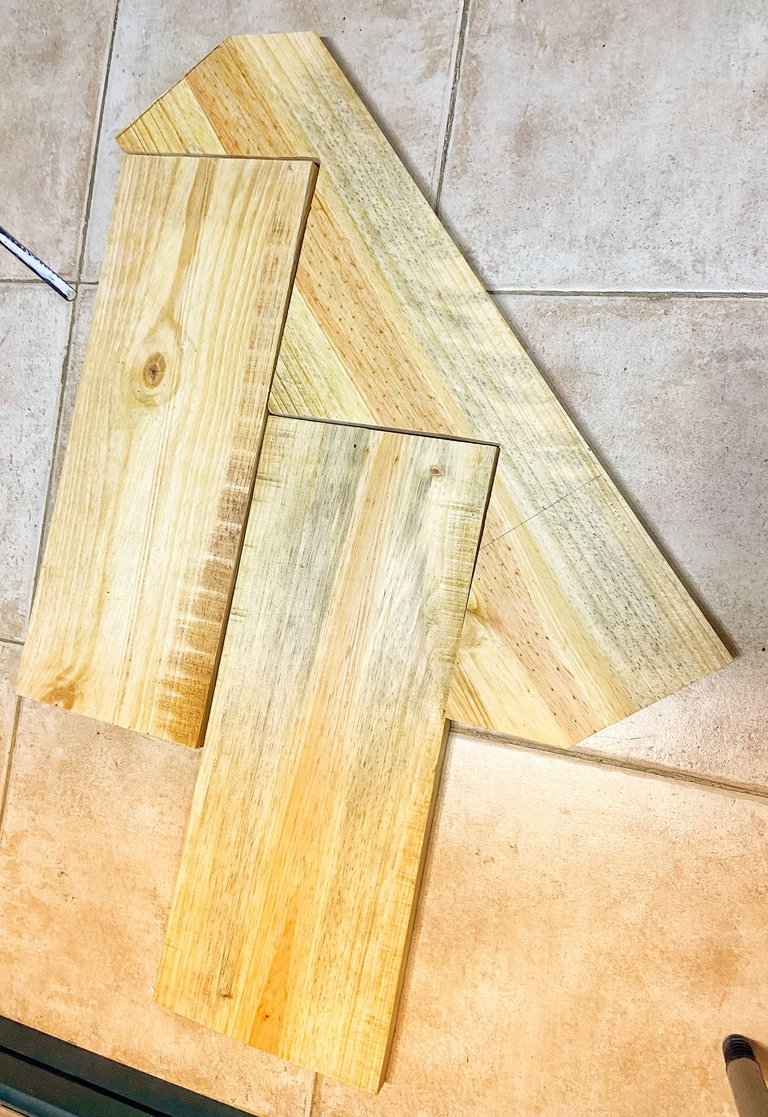
To make this staircase, it was ideal to have 4 boards long enough to make the shape of the complete model that I made with paper, but I had 4, but only two of them would serve me because of the length, the other was not so long, and the last one could be used but it would reach me to a certain point of the staircase, but in conclusion, I could build it with what I had. With the pieces marked with the pattern on cardboard, I took out my saw and my jigsaw to get down to work.
ESP
Para hacer esta escalera, era ideal tener 4 tablas lo suficientemente largas para hacer la forma de la maqueta completa que hice con papel, pero tenía 4, más solo dos de ellas me servirían por el largo, la otra no era tan larga, y la última podía usarla pero me llegaría hasta cierto punto de la escalera, pero en conclusión, sí podría construirla con lo que tenía. Ya con las piezas marcadas con el patrón en cartulina, saqué mi Sierra y mi Caladora para ponerme manos a la obra.
ENG
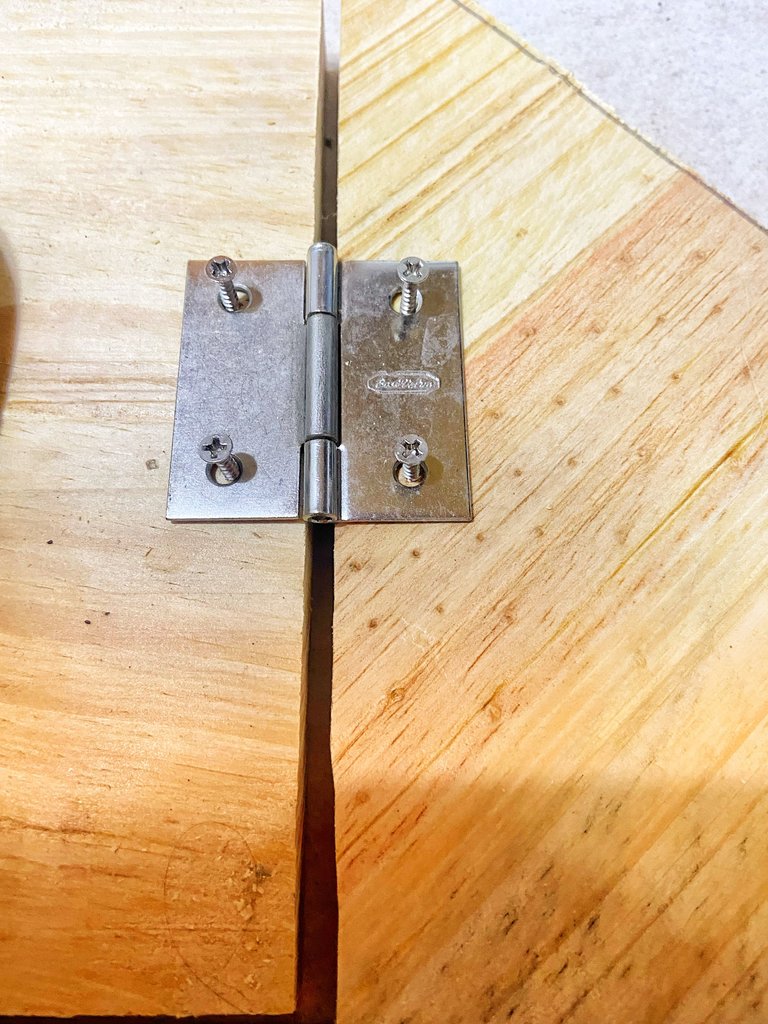
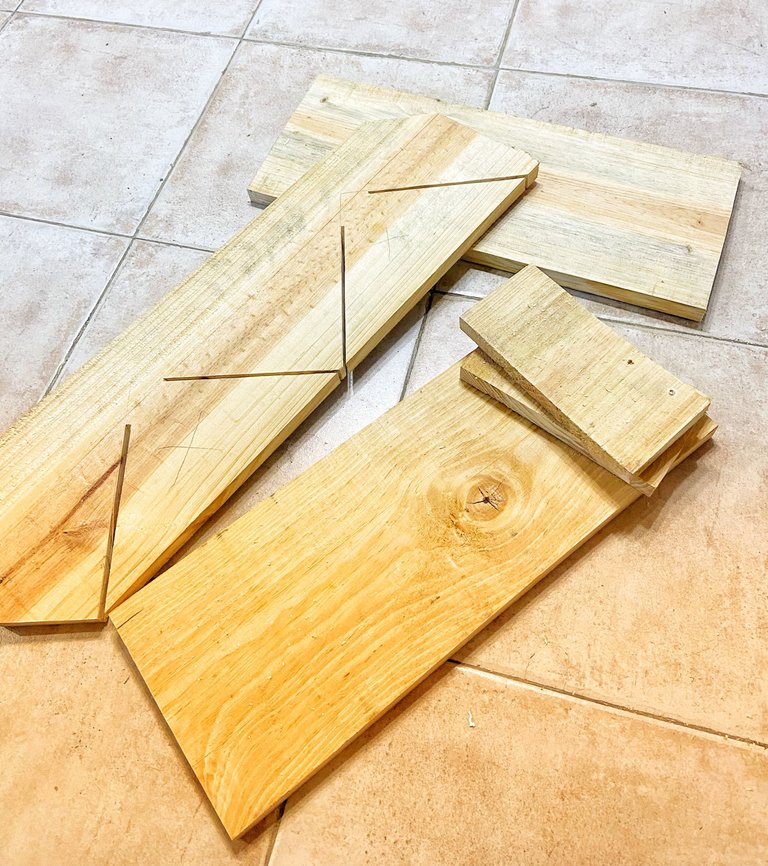
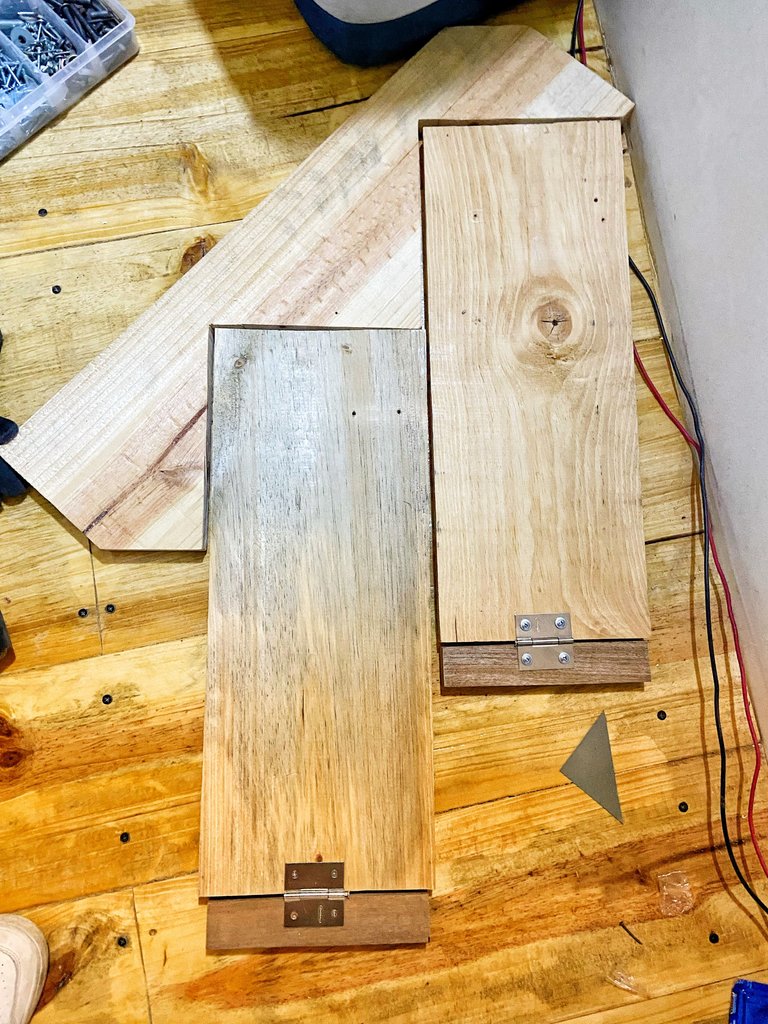
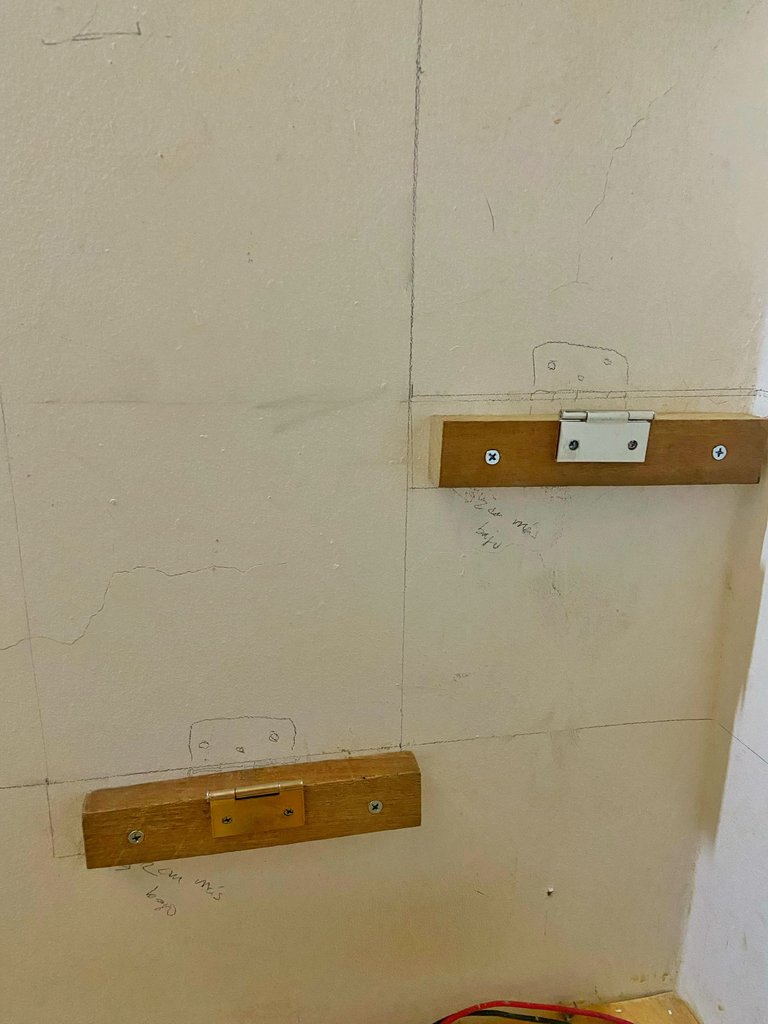
A few days ago, I had bought some 2" door hinges and a pin to secure them when they are picked up, later you will see what I mean. The first thing I did, was to cut the timbers by the marks I had made earlier, when I had them, I laid them out on the floor to see if I was on the right track, they were indeed fitting very well. Then I placed the hinges in their positions, 1 pair went on one side, and the other went on the other side, since the ladder must make two folds to be as such, a ladder, and when it was collected, it would be glued to the wall.
ESP
Unos días atrás, había comprado unas bisagras de puertas de 2” y un pasador para asegurarlas cuando estén recogidas, más adelante verás a lo que me refiero. Lo primero que hice, fue cortar las maderas por las marcas que había hecho anteriormente, al tenerlas, las presenté en el piso a ver si iba por buen camino, efectivamente estaban calzando muy bien. Luego coloqué las bisagras en sus posiciones, 1 par iba de un lado, y otro iba al otro lado, ya que la escalera debe hacer dos dobleces para quedar como tal, una escalera, y cuando estuviese recogida, quedara pegada a la pared.
ENG
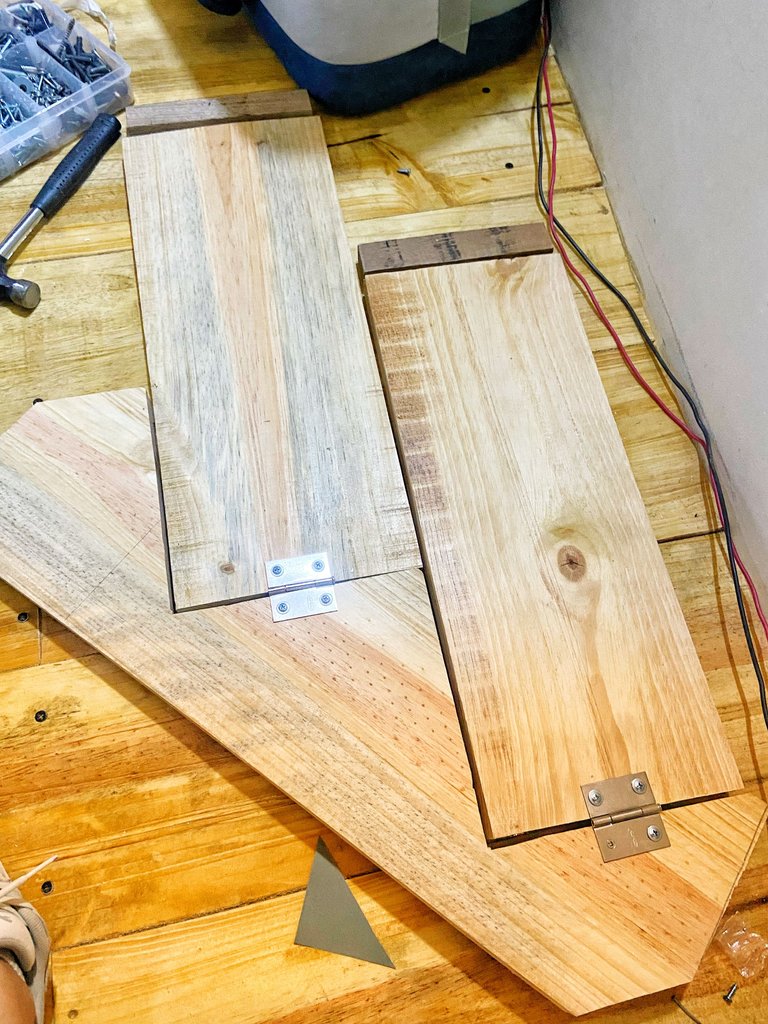
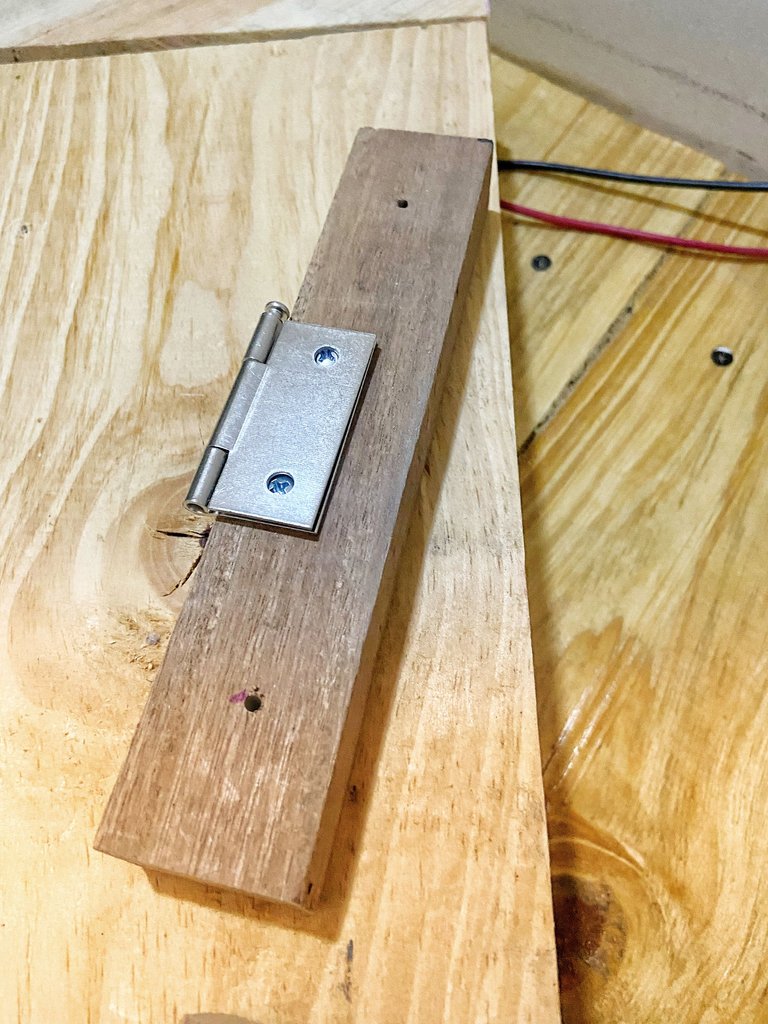
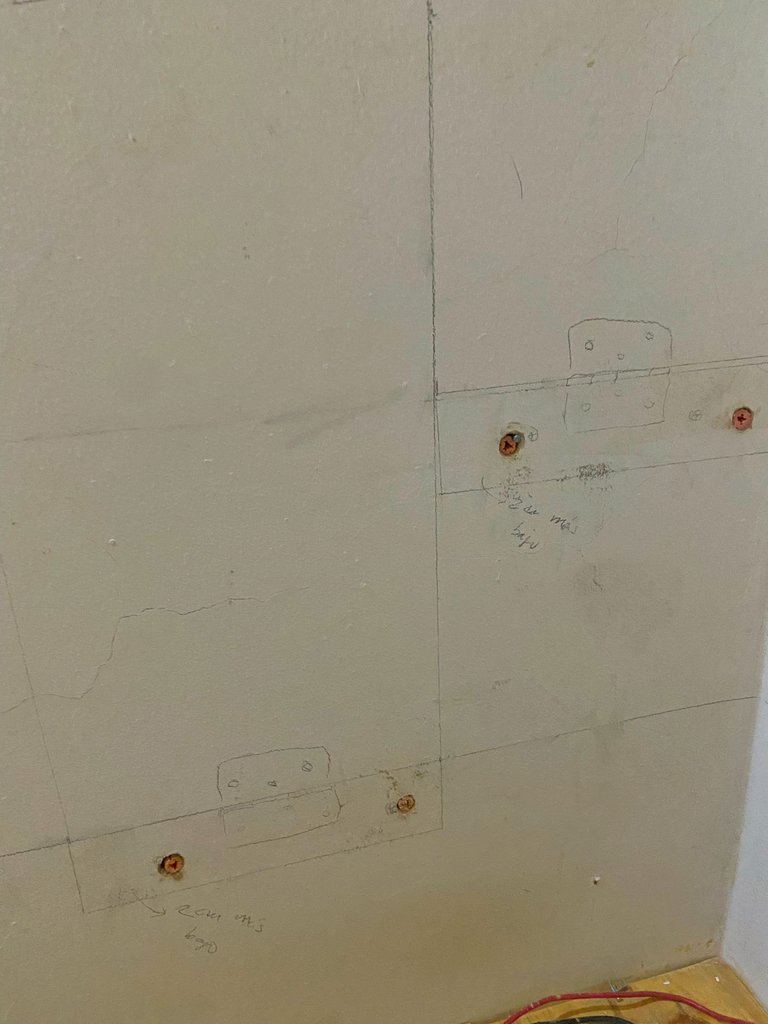
The first pair went on the side of the wall at the bottom, joining the steps with the side that is attached to the wall. By the way, on the wall was supposed to be a side of the ladder, but as I said before, I had no more material so I put some slats attached to the wall to hold the hinges that went on that side. The other two hinges were on the opposite side of the wall at the top, on the steps and the wooden side. I put them on without all the screws in case I had to move them, I only had two in place. The good thing about the hinges is that they give a little slack when unfolding the ladder, so if I make a mistake, the hinges will help me fix it.
ESP
El primer par iba del lado de la pared en la parte inferior, uniendo los escalones con el lateral que va pegado a la pared. Por cierto, en la pared se supone que iba un lateral de la escalera, pero como dije antes, no tenía más material por lo que le coloqué unas tablillas fijadas a la pared para sujetar las bisagras que iba de ese lado. Las otras dos bisagras iban del lado contrario a la pared en la parte más arriba, en los escalones y el lateral de madera. Se las coloqué sin todos los tornillos por si debía moverlas, solo tenía dos puestos. Lo bueno de las bisagras es que dan un poco de holgura al momento de desplegar la escalera, por lo que si cometo algún error, las bisagras me ayudarán a solventarlo.
ENG
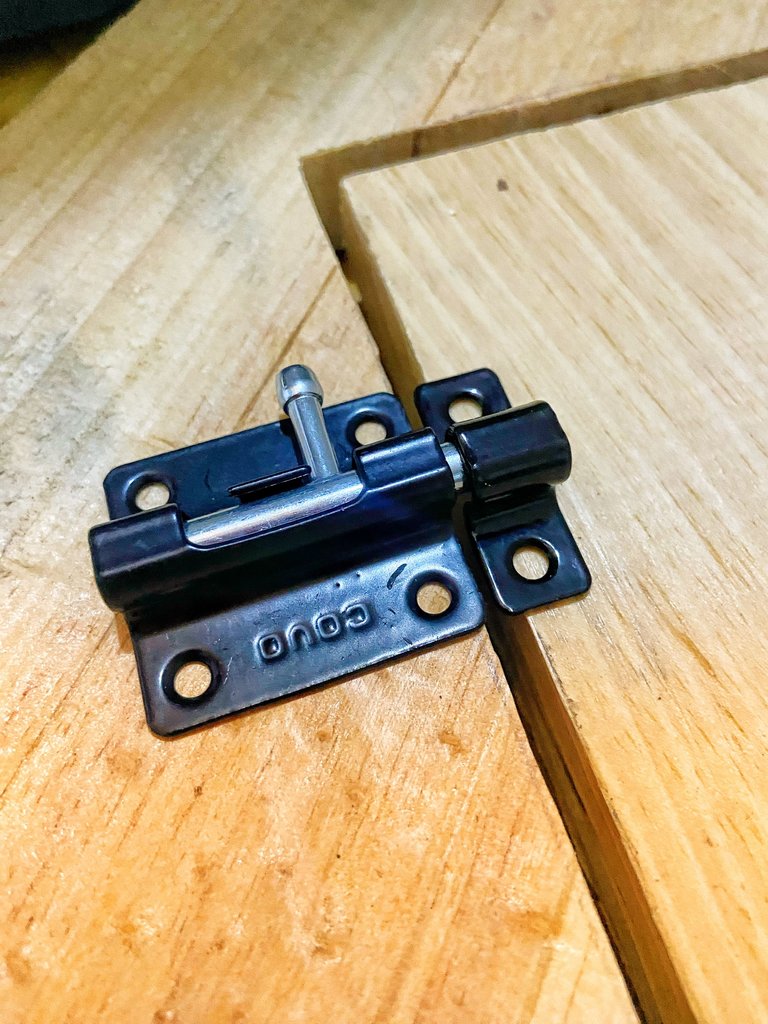
Indeed I had to move the hinges to make the ladder straight, and I even made a mistake placing the slats, I put them higher than I should, but it was not bad to die, I could fix it, although I have to fill the wall with plaster to fix it XD. In the fall of the ladder, on the top step, I put a slat to help me to have more firmness when climbing. Lastly, I put the dowel on both rungs, as this will prevent the ladder from falling and keep it tucked up against the wall.
ESP
Efectivamente tuve que mover las bisagras para que la escalera me quedara derecha, y hasta me equivoqué colocando las tablillas, las puse más alta de lo que debía, pero no fue mal de morir, pude solucionarlo, aunque debo rellenar la pared con yeso para arreglarla XD. En la caída de la escalera, en el escalón superior, puse una tablilla para ayudarme a tener más firmeza al momento de subir. Por último, coloqué el pasador en ambos escalones, ya que esto evitará que la escalera se caiga y se mantenga recogida recostada en la pared.

ENG
What I need to change:
Having it done, I went up and it is holding up, but I definitely made a mistake with the size of the hinges, so I will buy 3" hinges to make it wider on the step as they tend to bend when going up.
I will put some through bolts in the steps to prevent the small screws in the steps from coming out during use.
ESP
Lo que debo cambiar:
Al tenerla hecha, subí y resiste, pero definitivamente me equivoqué con el tamaño de las bisagras, por lo que compraré unas de 3” para que me abarque más ancho en el escalón ya que tienden a doblarse al subir.
Le colocaré unos tornillos pasantes en los escalones para evitar que del uso se vayan a salir los tornillos tan pequeños colocados en los escalones.
ENG
What I'm missing:
Something that I could see when I had them ready, is that the wall is not at 90º, so I have to put a wooden supplement so that when going up it does not tend to go to the wall and does not move, I did not take that into account at the time of making it, but it is not something that can not be solved.
ESP
Lo que me falta:
Algo que pude ver al tenerlas listas, es que resulta que esa pared no está en 90º, así que debo ponerle un suplemento de madera para que al subir no tienda a irse hacia la pared y no se mueva, eso no lo tuve en cuenta al momento de fabricarle, pero no es algo que no se pueda solucionar.
ENG
I completely forgot to paint them, but from the attic I have some liquid plastic left, first I have to adjust it completely and then I will paint it and install it again so that it is 100% operative.
And well, this is one of my passions without a doubt, inventing and now that I can do it to fix my home, the happier I feel to create and to be able to contribute more value to something that more than material, is an illusion!
I send greetings to all of you and be well!
ESP
Olvidé por completo pintarlas, pero del ático me quedó plástico líquido, primero debo ajustarla por completo y luego la pintaré y la instalaré nuevamente para que queda 100% operativa.
Y bueno, esta es una de mis pasiones sin duda, inventar y ahora que puedo hacerlo para arreglar mi hogar, más feliz me siento de crear y poder aportar más valor a algo que más que material, es una ilusión!
Les mando saludos a todos y que estén muy bien!


Wow. You've done such fine work. The painting shouldn't take too long, and then we're good to go.
Thank you very much! That's right, I put the paint quickly, I hope it dry and voila! ☺️
¡Enhorabuena!
✅ Has hecho un buen trabajo, por lo cual tu publicación ha sido valorada y ha recibido el apoyo de parte de CHESS BROTHERS ♔ 💪
♟ Te invitamos a usar nuestra etiqueta #chessbrothers y a que aprendas más sobre nosotros.
♟♟ También puedes contactarnos en nuestro servidor de Discord y promocionar allí tus publicaciones.
♟♟♟ Considera unirte a nuestro trail de curación para que trabajemos en equipo y recibas recompensas automáticamente.
♞♟ Echa un vistazo a nuestra cuenta @chessbrotherspro para que te informes sobre el proceso de curación llevado a diario por nuestro equipo.
🏅 Si quieres obtener ganancias con tu delegacion de HP y apoyar a nuestro proyecto, te invitamos a unirte al plan Master Investor. Aquí puedes aprender cómo hacerlo.
Cordialmente
El equipo de CHESS BROTHERS
Graciassss
Symmetrical cuts in wood are difficult if you are not an expert. The stairs you made are very neat.
Thank you. Without the right tools they become more complex, I did the best I could! Thank you for your comment!
You're welcome
Greetings @lifeblue, what a great idea to take advantage of the leftover wood from the attic, sure when you paint it it will look beautiful, even much nicer than the design on paper; it is rewarding to build and develop the ideas as we visualize them.
Happy Thursday!
Happy Thursday!
I always try to repurpose my leftovers into things for my home, obviously if possible. So I look for ideas and then my mind starts to create. Then I will post a new idea I had in my room with leftover wood! Regards