Fabricating the attic railing -ENG/ESP

Hello to all Hive friends!
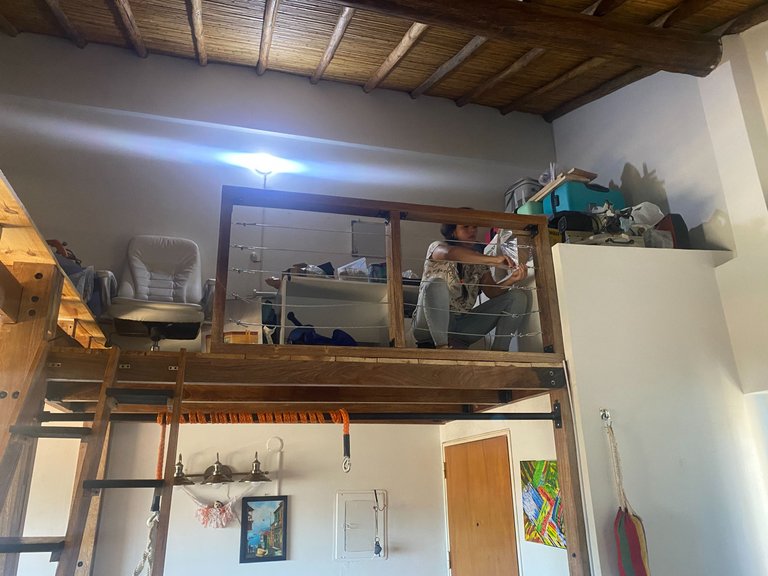
I finally made the railing for my attic, I had been trying to do it for a while but for various reasons I had not been able to finish it, or even start. XD
Hola a todos amigos de Hive!
Al fin hice la baranda de mi ático, tenía tiempo tratando de hacerla pero por varias razones no la había podido terminar, ni siquiera empezar. XD
But before time went by, I decided to make it this weekend. The truth is that I didn't know what design I would make, that's why I was dragging my feet, and without knowing the design I couldn't start, I couldn't even buy materials. As I would do it myself I needed it to be something that was within my possibilities, first, I had to make it with wood since I had material left over at home in the attic, and the rest was what I didn't know what I would use because as I said: I didn't know what the design would be like. I thought about glass, but the truth is that I don't know how to put glass and it seems very delicate, I also thought about iron but I don't know how to work with that material and I don't have the tools for that either. So in the end, I thought about cables with tensors and some clips to adjust it. With this I was more than ready.
Pero antes que el tiempo siguiera pasando, decidí hacerla este fin de semana. La verdad es que no sabía qué diseño le haría, por eso le estaba dando largas al asunto, y sin saber el diseño no podía empezar, ni siquiera podría comprar materiales. Como lo haría yo misma necesitaba que fuese algo que estuviese en mis posibilidades, primero, debía hacerla con madera ya que tenía material que me sobraba en casa del ático, y el resto era lo que no sabía que usaría porque como dije: no sabía cómo sería el diseño. Pensaba en vidrio, pero la verdad no sé poner vidrio y me parece muy delicado, también pensaba en hierro pero tampoco sé trabajar con ese material ni tengo las herramientas para eso. Así que al final, pensé en cables con tensores y unos clips para ajustarlo. Ya con esto estaba más que lista.
MATERIALS.
To start, I needed to buy the materials, knowing that the railing would be 1.70 meters long and that it would pass 5 lines of cables, with this, I would buy:
- 10 meters of cable protected with transparent rubber (per span each line I would use about 1.90 meters).
- 5 small tensioners
- 10 5mm adjustment clips
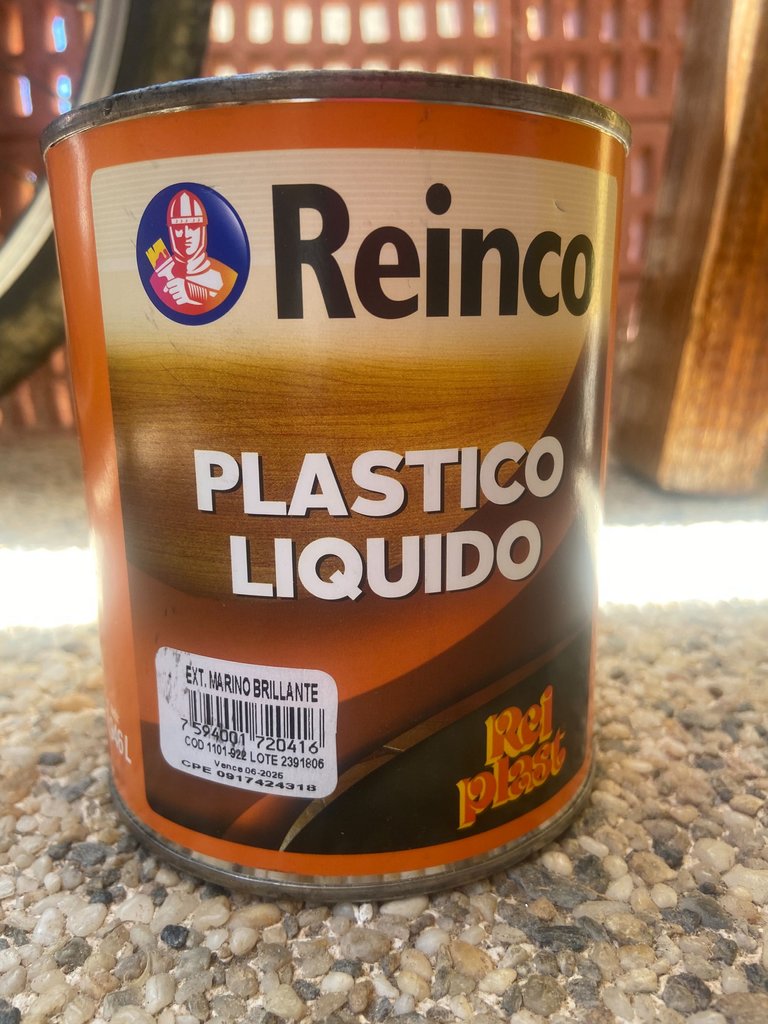
- Liquid plastic to protect the wood
- 80 grit sandpaper
- 3-inch screws
- Paintbrushes
- White glue
- 1 inch screws To fix the wood to each other, I used the 3 inch screws. I did the same to fix them to the floor and to fix the railing to the wall but with dowels or ramplugs.
MATERIALES
Para empezar, necesitaba comprar los materiales, sabiendo que la baranda sería de 1,70 metros de largo y que pasaría 5 líneas de cables, con esto, compraría:
- 10 metros de cable protegido con goma transparente (por tramo cada línea usaría unos 1,90 metros)
- 5 tensores pequeños
- 10 clips de ajuste de 5mm
- Plástico líquido para proteger la madera
- Lijas 80 de grano
- Tornillos de 3 pulgadas
- Brochas
- Pega blanca
- Tornillos 1 pulgada
Para fijar las maderas entre sí, usé los tornillos de 3 pulgadas, lo mismo hice para fijarlas al piso de igual forma para fijar la baranda a la pared pero con tarugos o ramplugs.

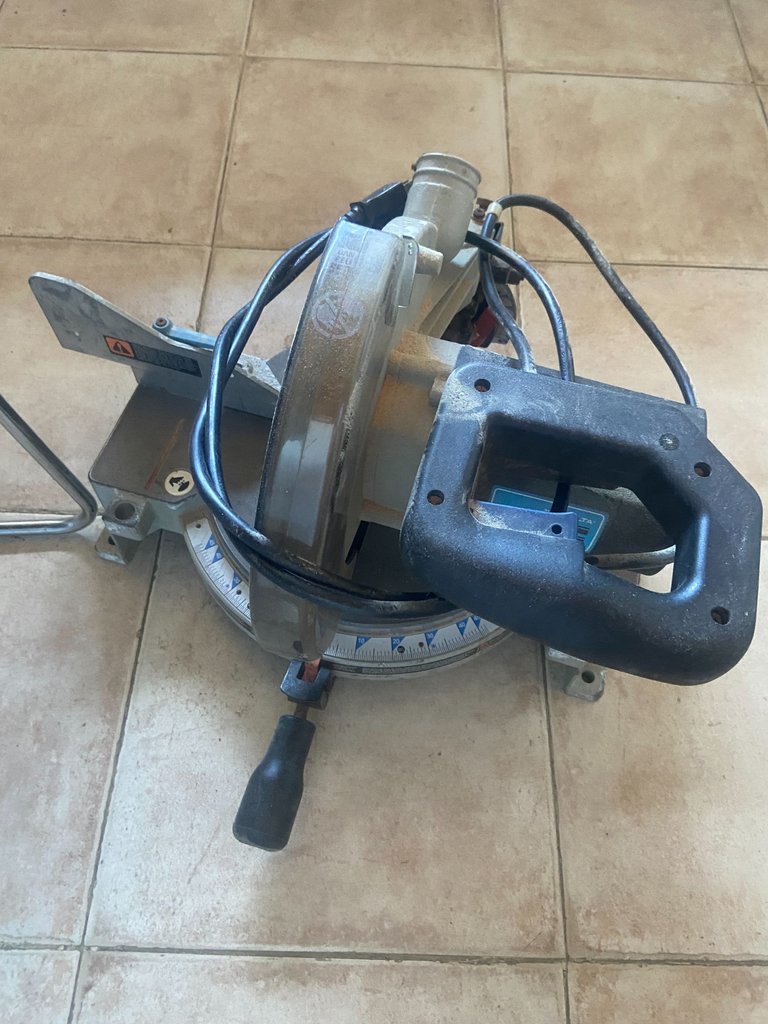
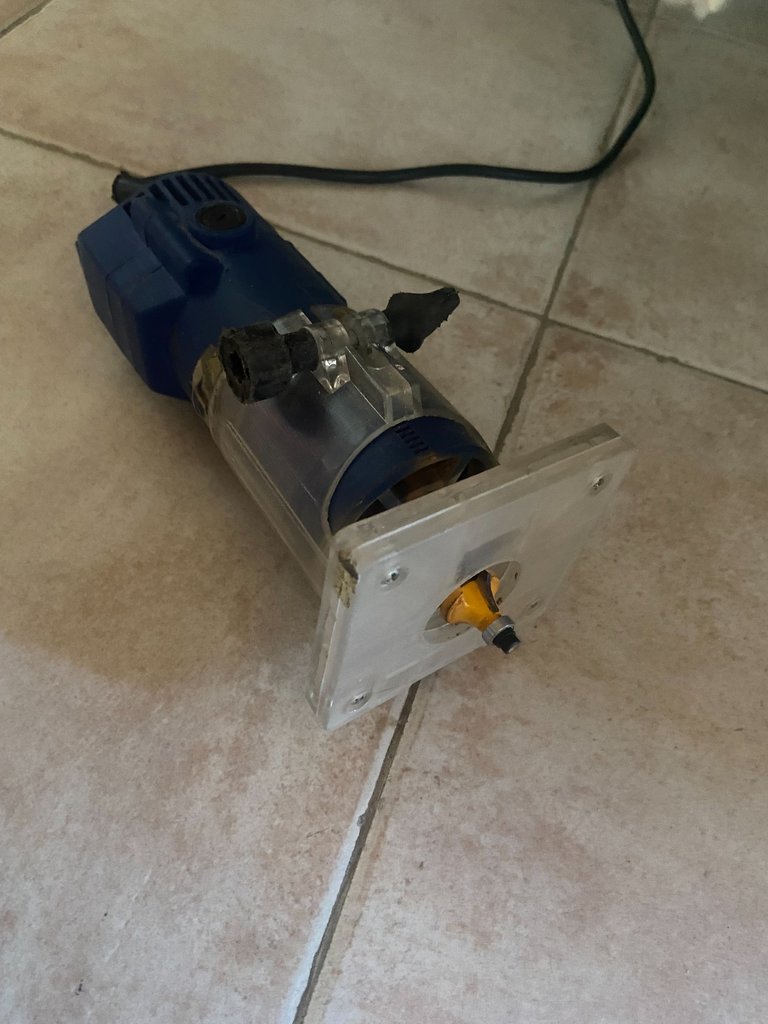
Tools I would need:
- A drill with a drill bit for concrete and for wood.
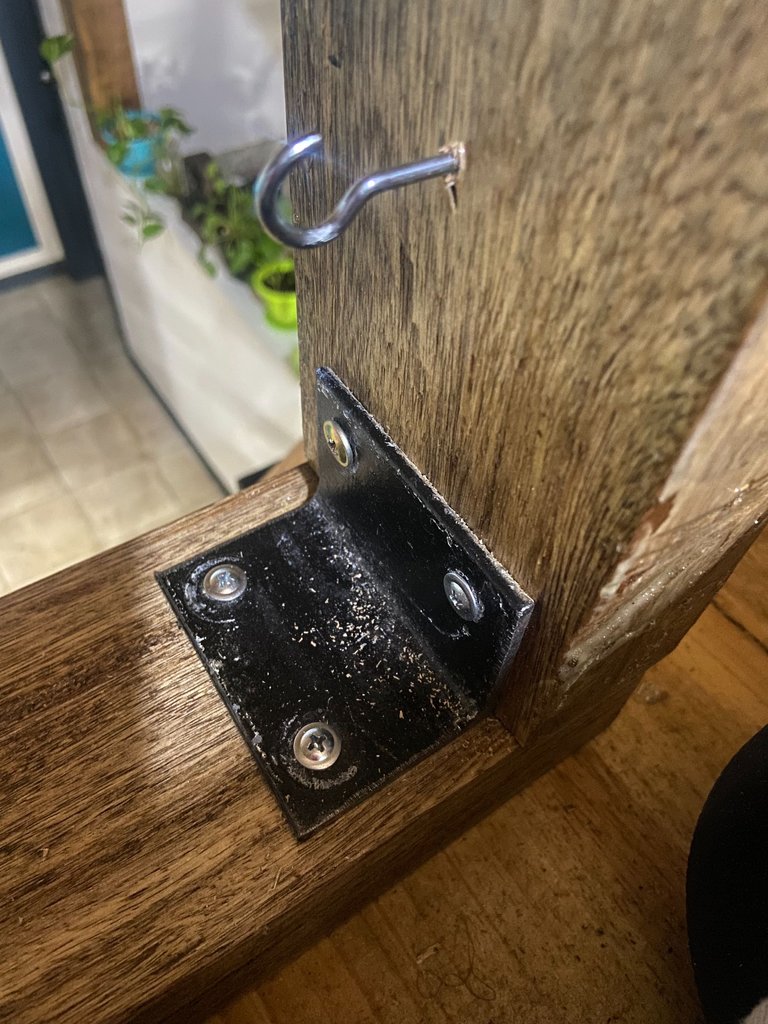
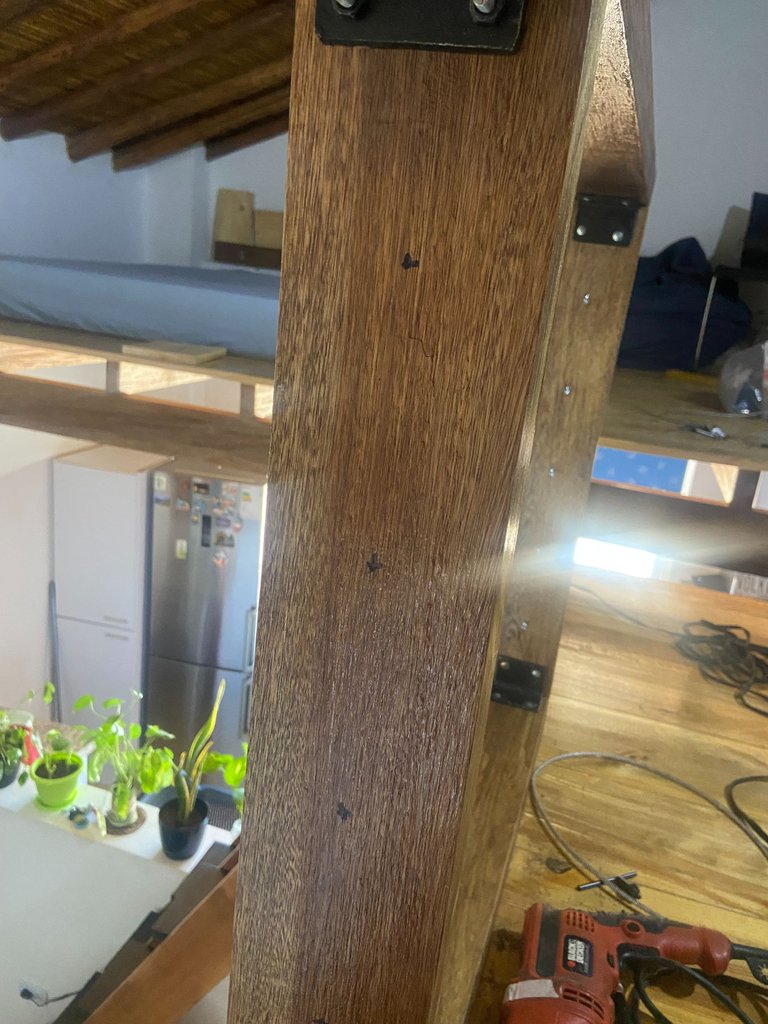
- I had some iron angles that I had left over from the construction and they were perfect for it, because they were useful both to give it more fixation and to give it a metallic touch similar to the rest of the attic.
- A saw
De herramientas necesitaría:
- Un taladro con la broca para concreto y para madera.
- Tenía unos ángulos de hierro que me sobraron de la construcción y le sentaban perfectos, porque me servían tanto para darle más fijación como para darle un toque metálico parecido al resto del ático.
- Una sierra
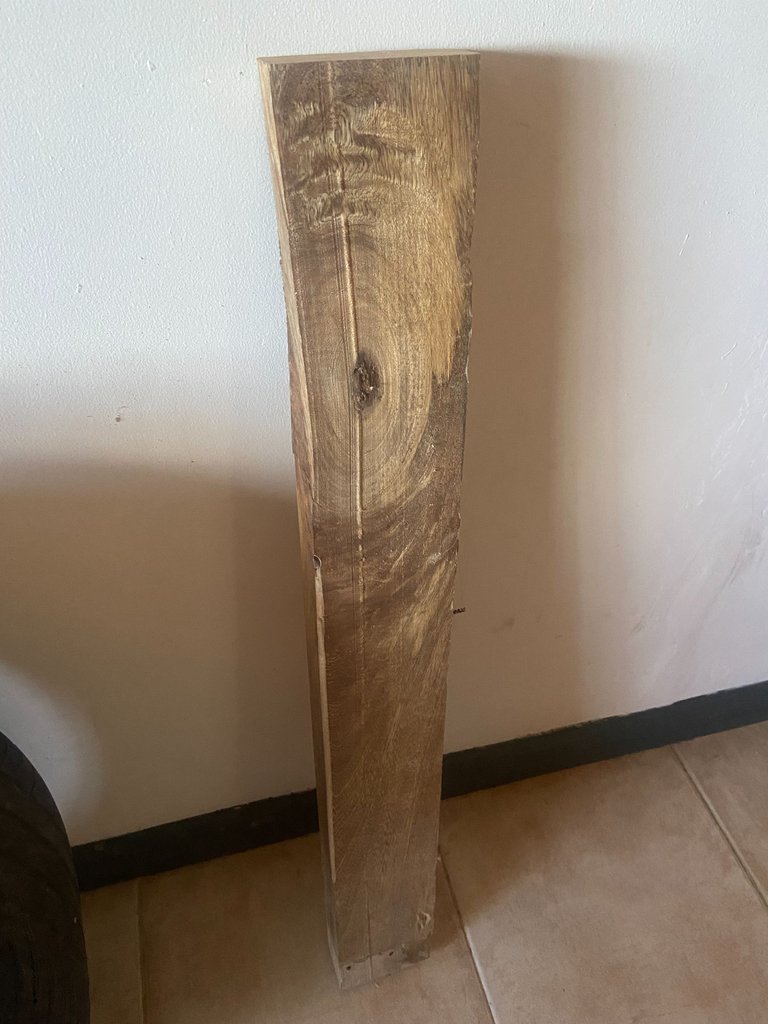
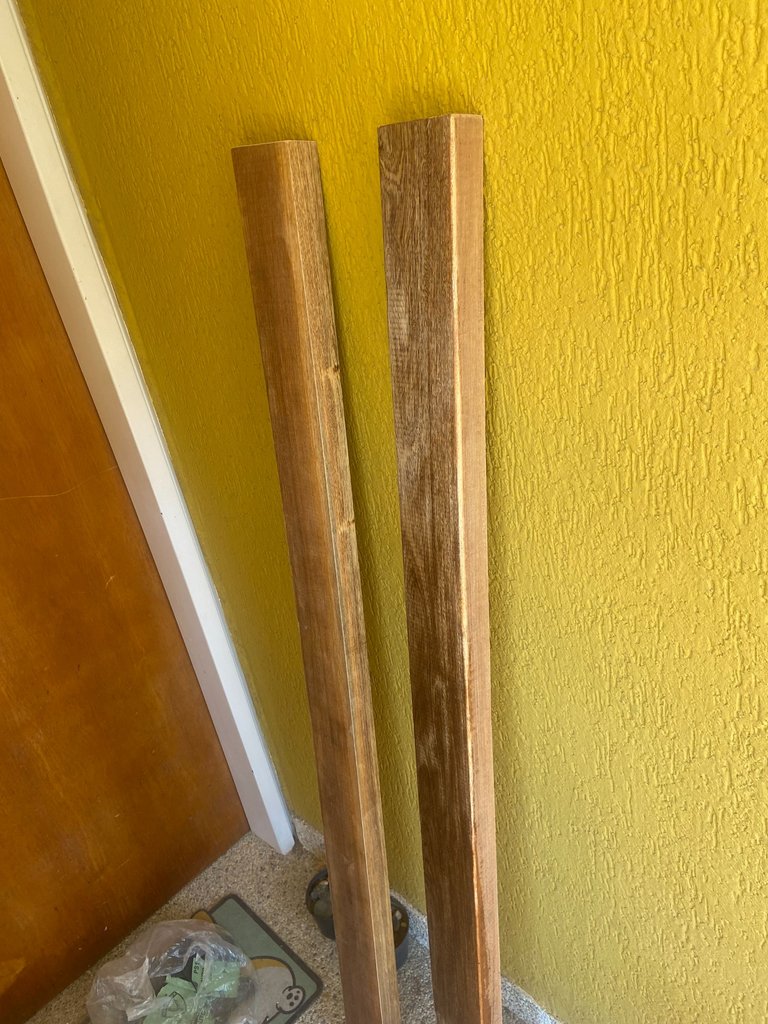
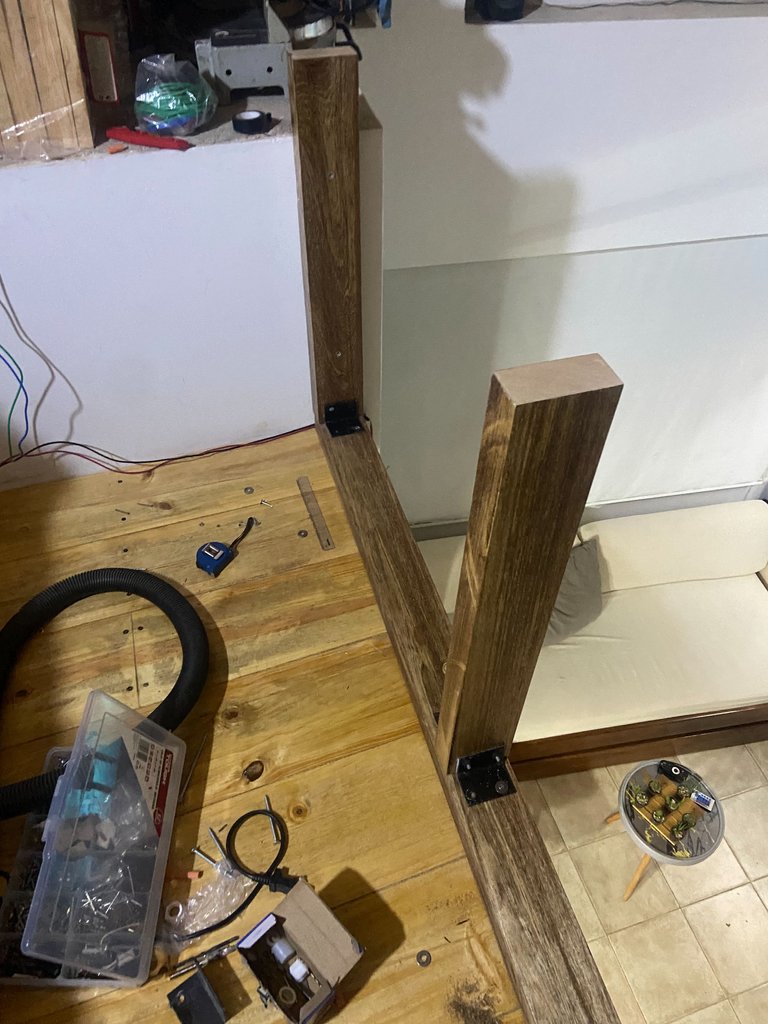
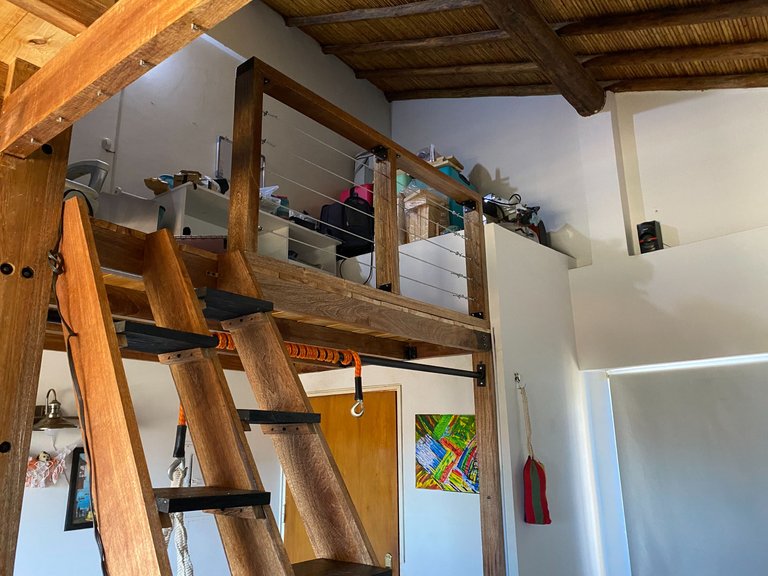
The first thing I had to do was to cut the wood. I would use 5cm x 10cm. I cut 2 strips of 1.70m and 3 of 70cm. The railings usually measure 90cm high, but in my case, I made them 80cm because the area of that floor is very small and so high it would look very exaggerated.
One of the 1.70 long boards would be the base, and the other would be the top, the handrail as such. By joining the pieces together, I would be left with a height of 80cm, 70cm of the small cuts and 10cm of the thickness of the base and the top.
Lo primero que me tocó hacer fue cortar la madera. Usaría de tamaño 5cm x 10cm. Corté 2 tiras de 1,70m y 3 de 70cm. Las barandas por lo normal miden 90cm de alto, pero en mi caso, las hice de 80cm porque el área de ese piso en muy pequeña y tan alta se vería muy exagerada.
Una de las tablas largas de 1.70 sería la base, y la otra el tope, el pasamanos como tal. Al unir las piezas, me quedaría un alto de 80cm, 70cm de los cortes pequeños y 10cm del espesor de la base y el tope.
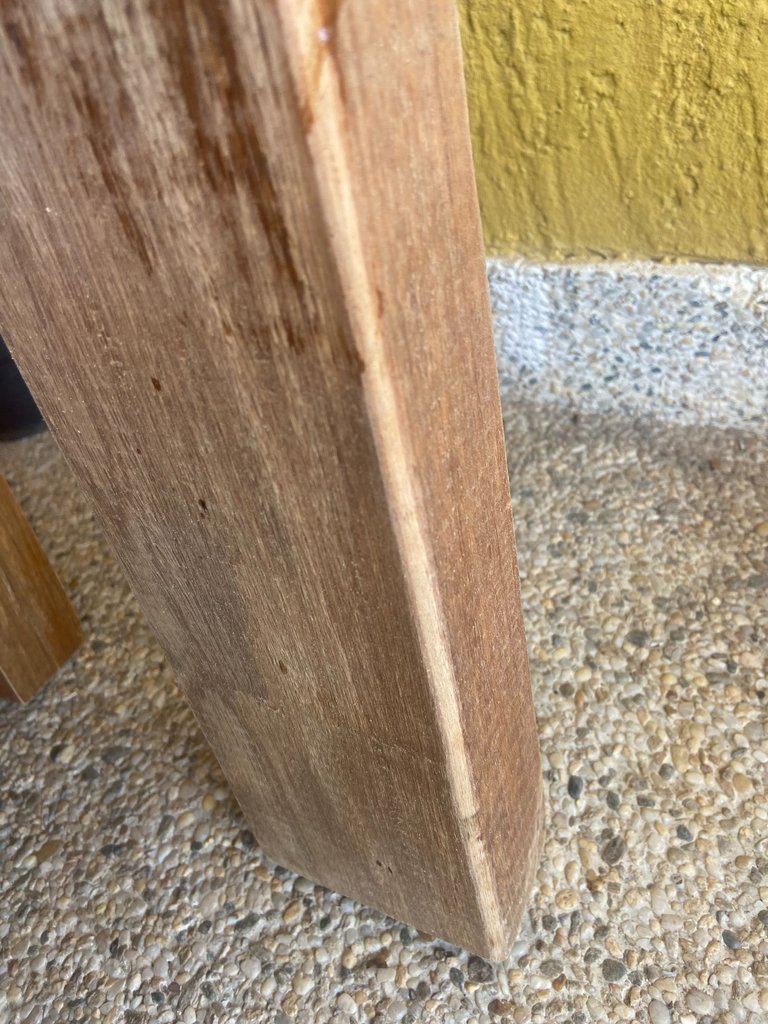
After I cut them, I used a spinning top I had so that the edges would be rounded and I wouldn't have a dangerous corner. After cutting them, I sanded them by hand with sandpaper on the cut edges to remove the splinters and to avoid nailing any sharp pieces.
After I had them sanded and cleaned, I painted the boards with two coats of liquid plastic and let them dry overnight. I left them out in the sun so I wouldn't get odor poisoning.
Luego de cortarlas, utilicé un trompo que tenía para que los bordes me quedaran redondeados y no tuviera la esquina peligrosa. Después de cortarlas, con una lija, las lijé a mano en los bordes cortados para eliminar las astillas y no clavarme ningún trozo afilado.
Luego de tenerlas lijadas y limpias, pinté las tablas con dos manos de plástico líquido y las dejé secar de un día para otro. Las dejé afuera agarrando sol y así no me intoxicaría con el olor.
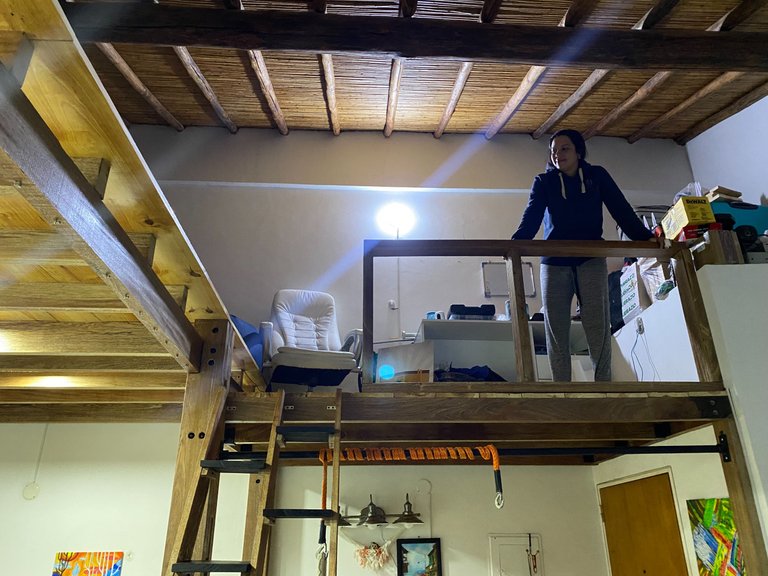
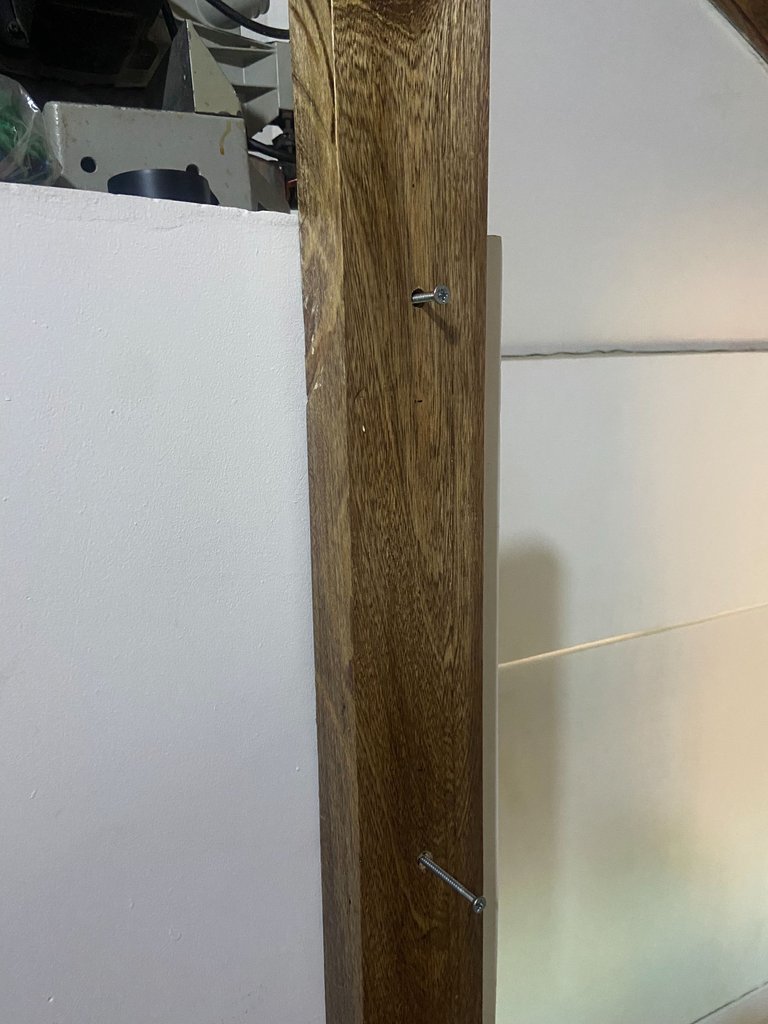
Once they were dry and ready to install, I laid out the boards where I was going to put them and started to open the holes to fix the one that was going to the wall. After marking the holes in the wall and opening them with the drill, I assembled the railing and started to fix them all separately. First I put the white glue, then the screws and finally the angles.
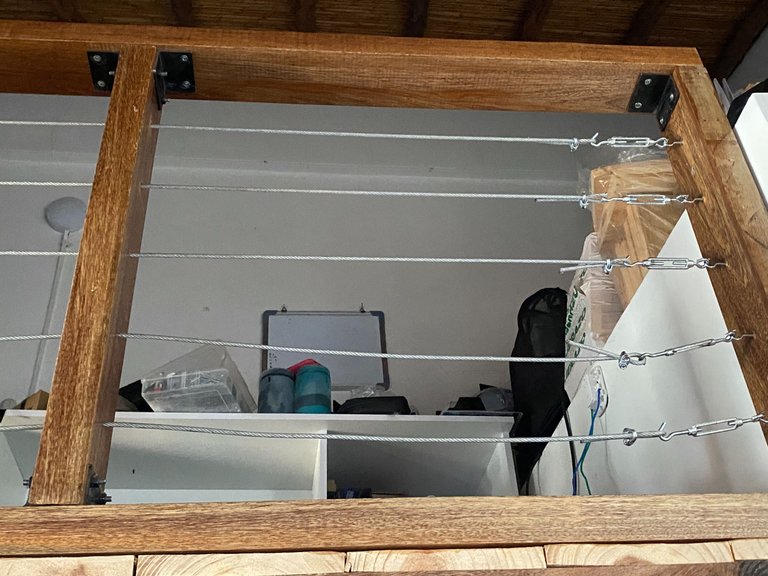
Once the structure was assembled, I fixed it to the wall with the holes already made and I opened the holes to fix it to the wooden floor, I put 4 screws of 3 inches. Once the structure was fixed, the most "simple" part came next. Put the steel cable with small hooks.
Al tenerlas secas y listas para instalar, presenté las tablas en el sitio donde las pondría y empecé a abrir los huecos para fijar la que iba a la pared. Luego de marcar los huecos en la pared y abrirlos con el taladro, armé la baranda y ahí empecé a fijarlas todas aparte. Primero le coloqué pega blanca, luego los tornillos y por último los ángulos.
Al tener ya la estructura armada, la fijé a la pared con los huecos ya previamente hechos y abrí los huecos para fijarla al piso de madera, le coloqué 4 tornillos de 3 pulgadas. Ya con la estructura fijada, venía lo más “sencillo”. Poner el cable de acero con unos garfios pequeños.
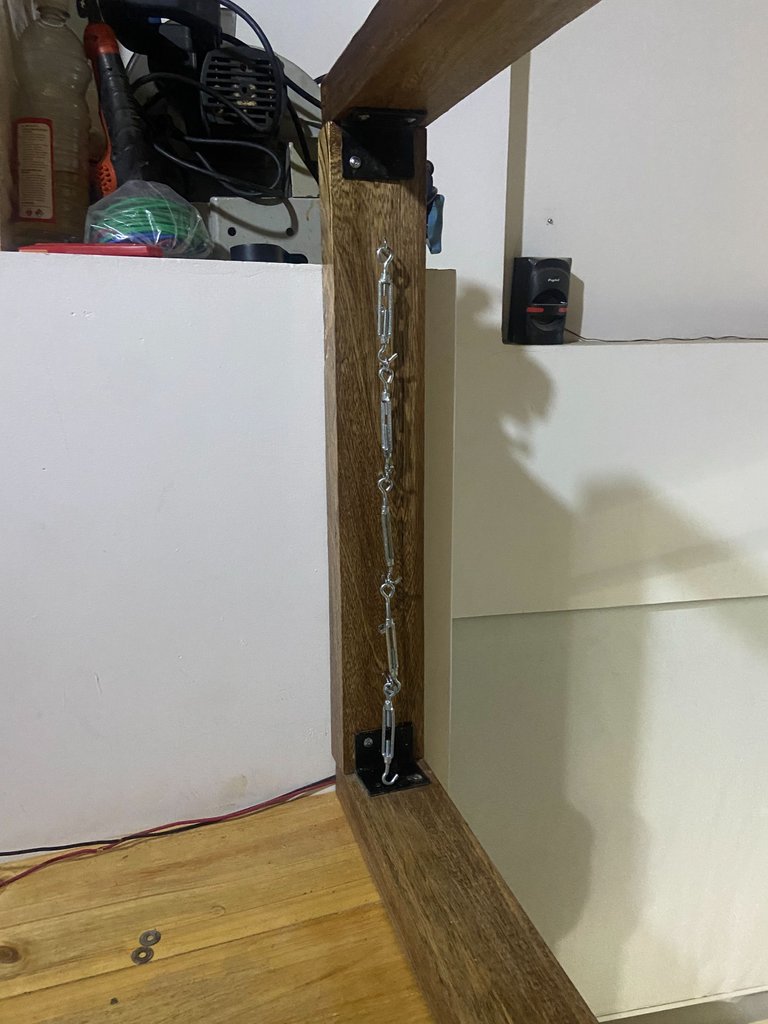
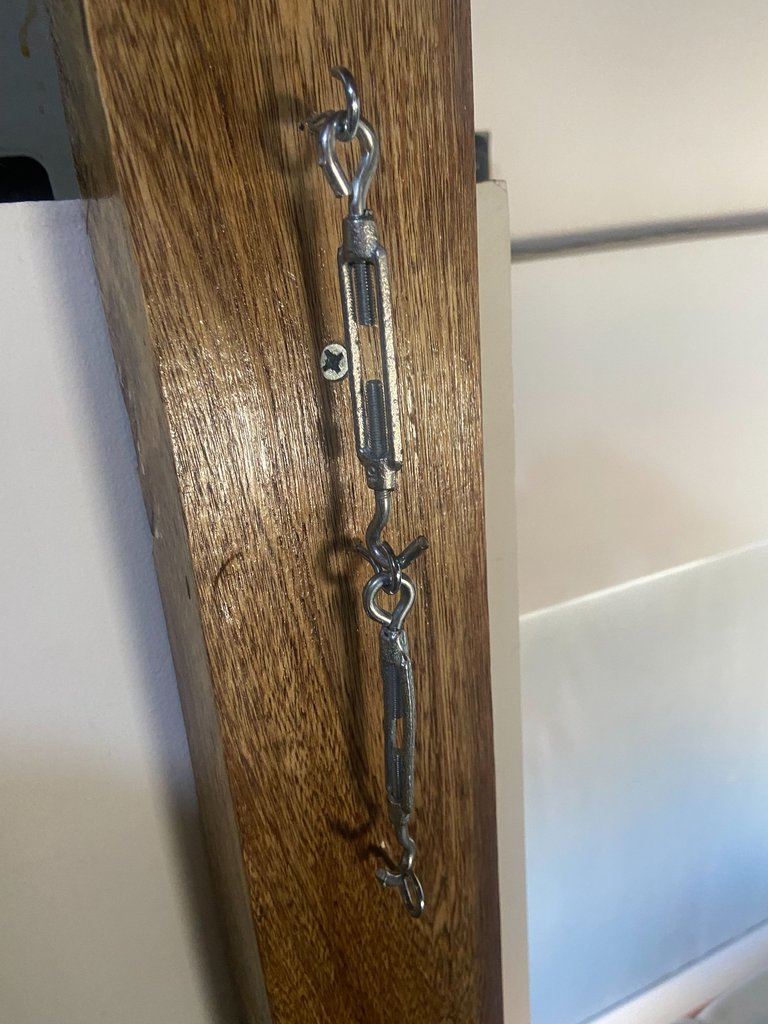
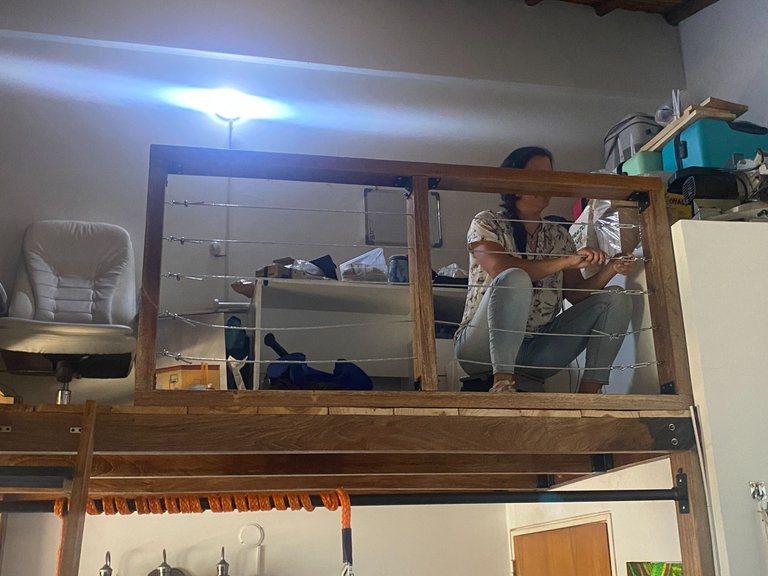
I divided the 70cm in 6 parts since I would put 5 lines of cable, they were at 11.66cm of equidistance. There I put each hook on each side and opened with a 6cm diameter drill the hole in the central wood where the cable line would go through. I put on one side the tensioners that would adjust the cable hanging on the hooks. For the cable as it was so thick, 4mm thick, I could not cut it with pliers, so I took advantage of some gentlemen who were working here in my building to do me the favor with an emery to cut them to size. So I was able to mount them, I adjusted them with the clips and tightened them as much as I could with an adjustable wrench and then I adjusted the tensioners to give rigidity to the cables.
Dividí los 70cm en 6 partes ya que pondría 5 líneas de cable, quedaron a 11,66cm de equidistancia. Ahí puse cada garfio en cada lado y abrí con una broca de 6cm de diámetro el hueco en la madera central por donde pasaría la línea de cable. Puse de un lado los tensores que ajustarían el cable colgados en los garfios. Para el cable como era tan grueso, de 4mm de espesor, no podía cortarlo con una pinza, así que aproveché a unos señores que estaban trabajando aquí en mi edificio que me hicieran el favor con un esmeril de cortármelos a medida. Así pude montarlos, los ajusté con los clips y los apreté lo más que pude con una llave ajustable y luego ajusté los tensores para darle rigidez a los cables.

So I could finish my super railing, and the best of all is that I did it easily and without so much complication, and I really liked the result.
What do you think?
Thanks for reading and greetings to all of you!
Así pude terminar mi súper baranda, y lo mejor de todo es que la hice fácilmente y sin tanta complicación, y me gustó mucho el resultado.
Qué les parece a ustedes?
Gracias por leerme y saludos a todos!!!


Dear @lifeblue. To be considered for nomination in this community, authors are highly encouraged to always engage with others by replying to their comments, including awards/messages from Architecture Anthology (our weekly curation report) and comments from our community account: aplusd. Please review and act on all your previous A+D posts. Thank you for your attention.
Ok thanks! I'll check to be able to comment on them all that sometimes I don't see them!