I Painted Our Dog Mochi Using Watercolor

Hello, how are you? It has been a while since I posted. Time does run fast. I was so busy with something that is bothering me so much, so I can’t focus on anything other than that, and I never realized it has been days since I posted. And I kind of enjoy doing so, I was so really focused on that, and the ending is it is stressing me out again LOL.
So to distract myself from going crazy, I decided to paint watercolor so that I would not forget how to do it again. So for my subject, I decided to paint our dog “Mochi,” which I really love! I remembered she was so small when my mom brought her home, and I remembered that I disagreed about adopting a puppy because that might prevent us can’t going out, but the plot twists she loves to go on trip so whenever we go out we always took her with us and by the way she got all her vaccines so she safe to go out.
I used to have a lot of my cat's photos on my phone, but now she is all over my phone, so I have a lot of references to paint her.
Materials I Used:
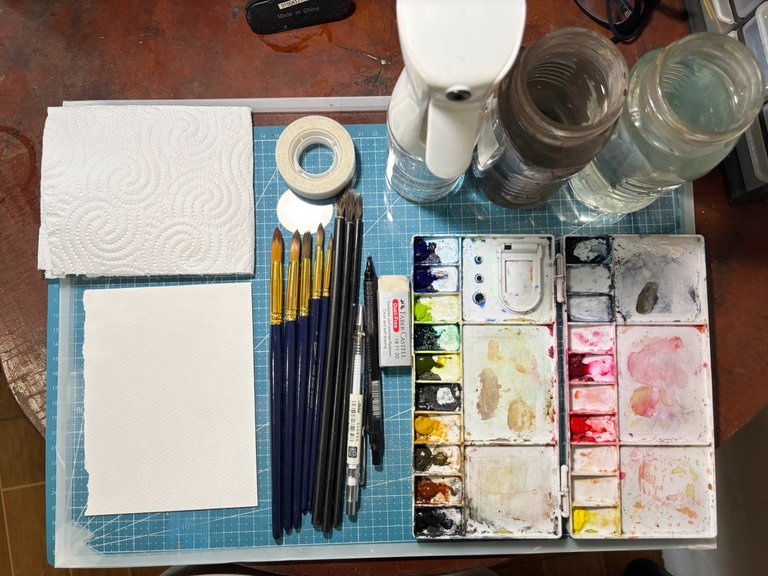
- Watercolor Paint
- Watercolor Brush
- Watercolor Paper 200gsm
- Tissue Paper
- Eraser and Kneadable Eraser
- White Pen
- Pencil
- Eraser
- Two Bottles with water
- Spray Bottle
- Fine Line Pigment Pen
- Tape
Let's Paint!
Let's Paint!


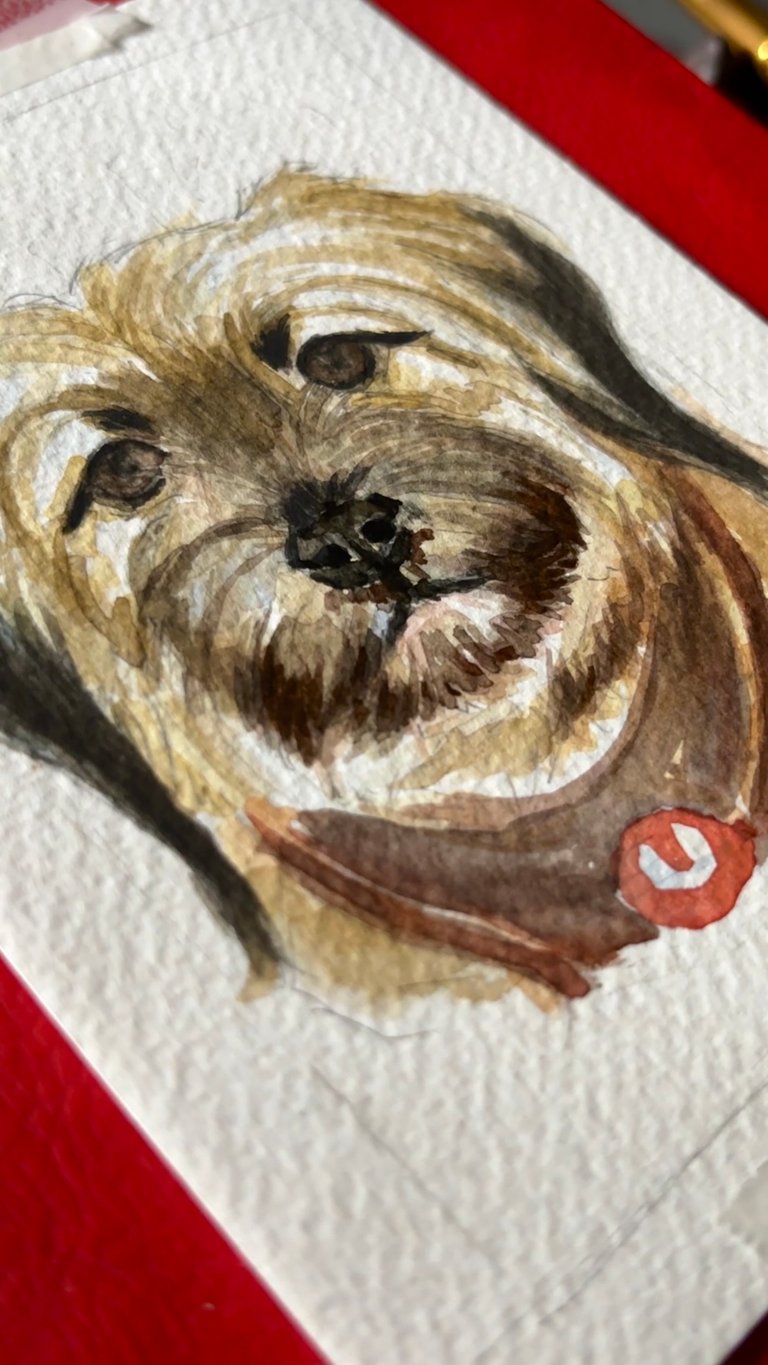
I start with a line art of her sometimes, I do erase the extra graphite from the line, but I forgot, but I think it is fine. And I started to paint the part where the shadows are, and I used less paint first and more water.

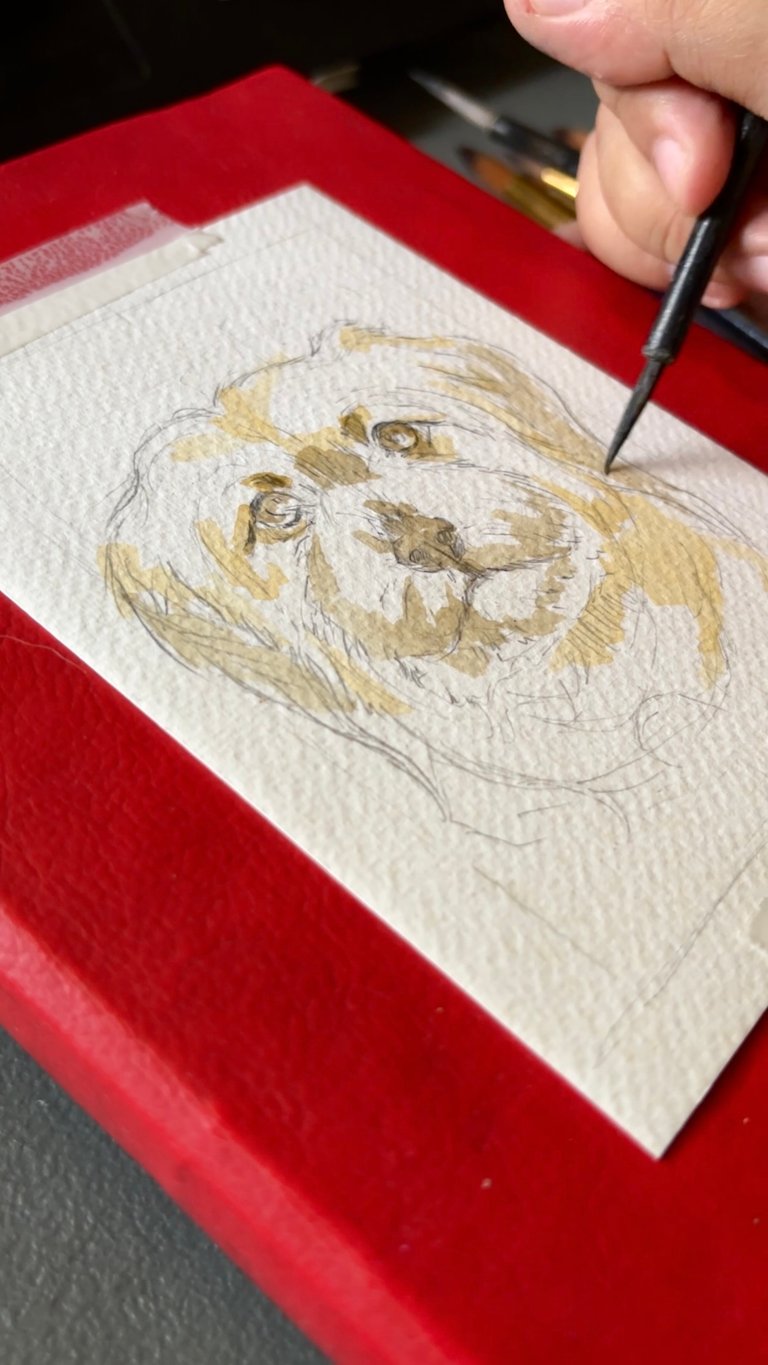
Before adding a layer of paint, the first layer should completely dry to prevent the watercolor paper from tearing.


Next is I added more dark paint on the eye and nose, which was the part that needed to be dark.
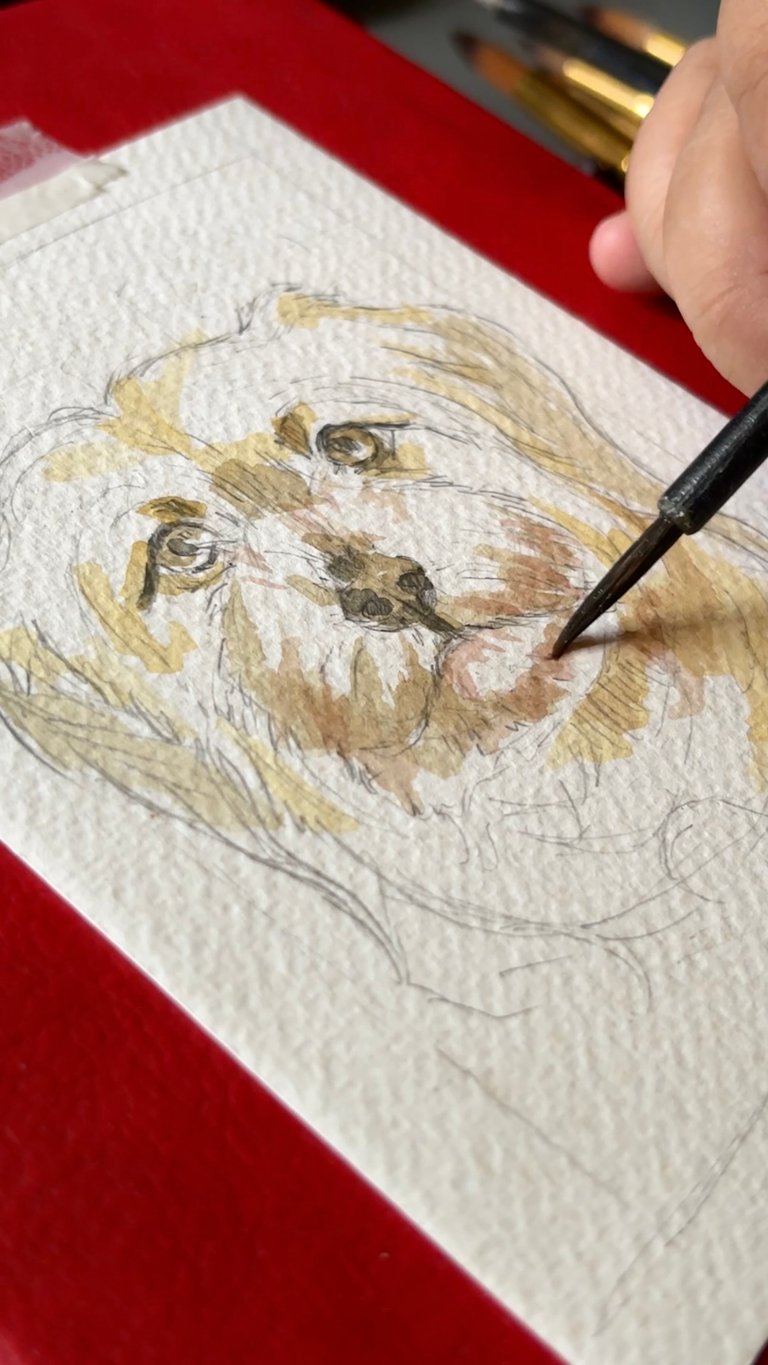

I started to layer different kinds of shades of her fur and to make the painting not too flat.


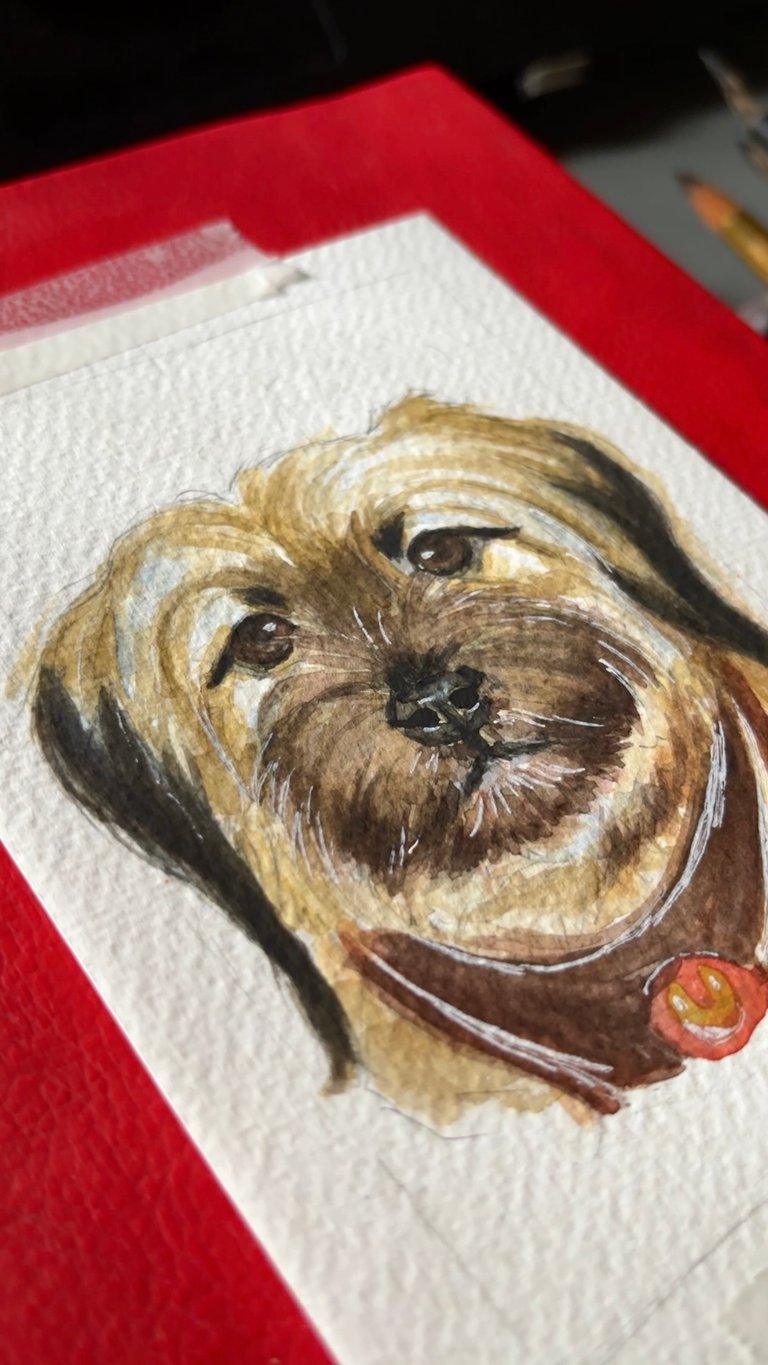
While that part is still drying, I start adding more layers of paint on the part that is already dry. To make the process fast, I recommend using a hot blower, but I don’t need it at the moment because the weather is enough to dry the paper LOL.


While I am waiting for that part to dry, I painted the lower part of her body.


For this part, I started adding more details like the fur, and I started adding more shades to the painting.
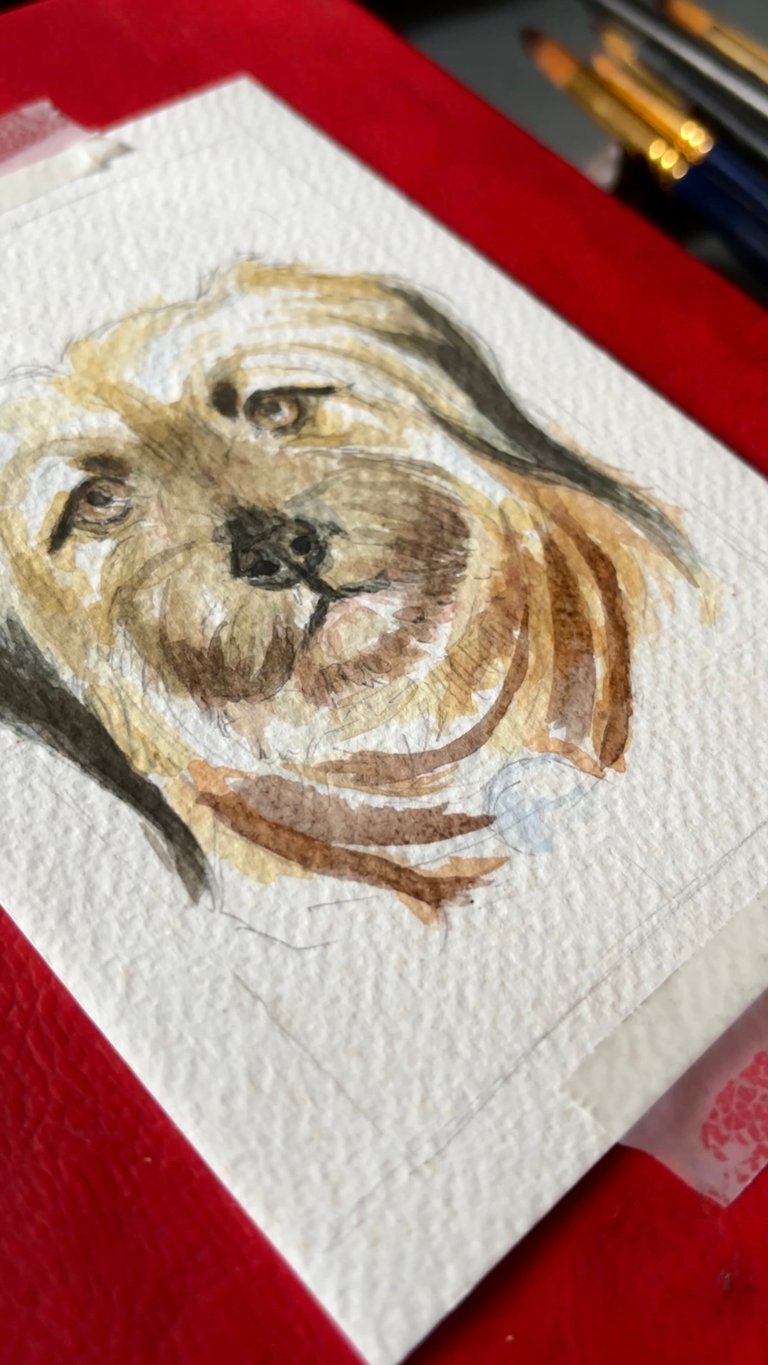

I pretty much do the same thing as I did earlier, just make sure, before layering, make the paint is dry first.

For this part, I darkened the eye and the nose, which are the main parts that needed to be the darkest, and then just added a little bit of the fur details on her.

I use this white gel pen to add a highlight to the eyes, then to the whiskers too.
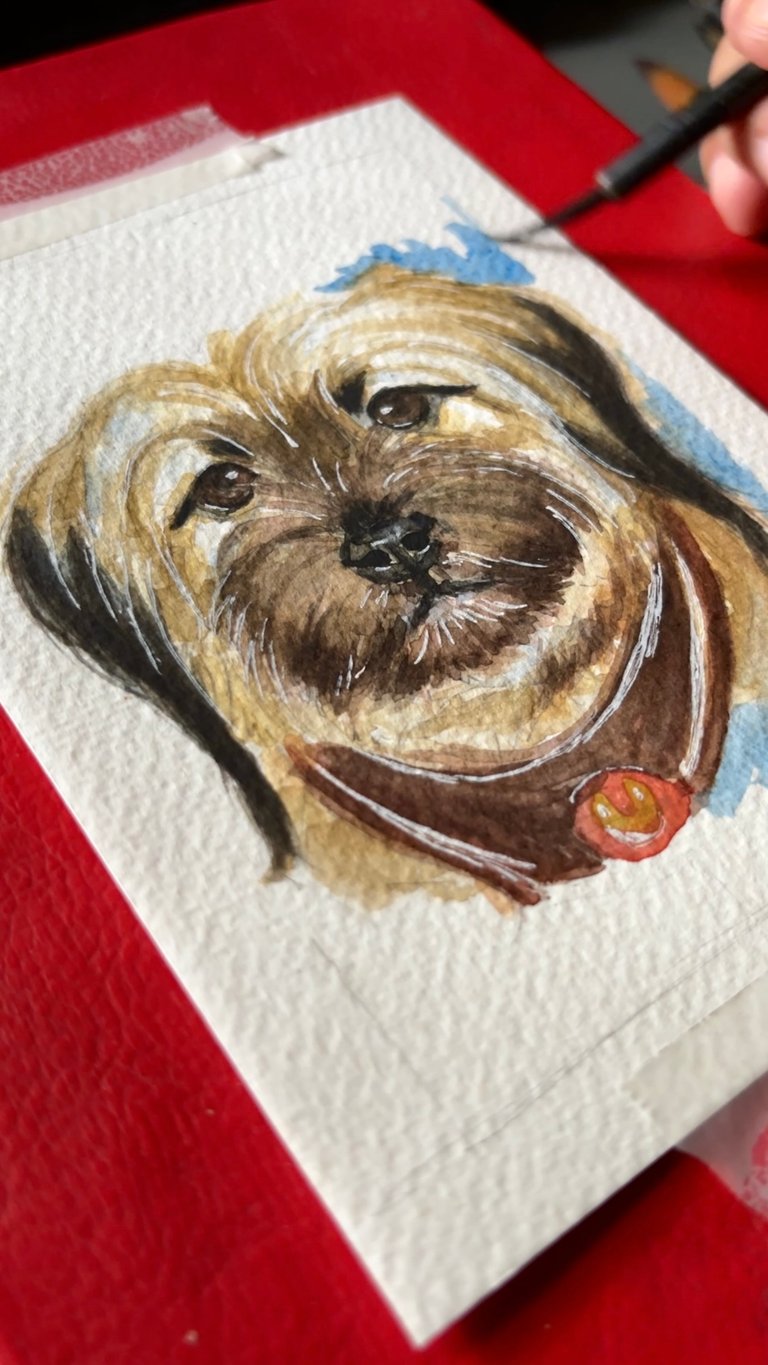

For the final touch, I added this blue background color just to make the subject pop out more.
Thank you for visiting, see you on my next blog. :D
Please take care of your mental health as well.
I hope you are okay today :))
Please take care of your mental health as well.
I hope you are okay today :))

It turned out beautifully. Great job! 😍
!discovery
Thank you so much! :D
https://www.reddit.com/r/drawing/comments/1p7048p/dog_mochi_using_watercolor/
This post has been shared on Reddit by @dayadam through the HivePosh initiative.
This post was shared and voted inside the discord by the curators team of discovery-it
Join our Community and follow our Curation Trail
Discovery-it is also a Witness, vote for us here
Delegate to us for passive income. Check our 80% fee-back Program
Beautifull 🥰.
It’s an honour to witness such a beautiful painting friend, we love it and your dog looks so cute. Well done.
selected by @ibbtammy
Aww hello mochi! 🫶🏻