How to make personalized bag T-Shirts on roblox without paying for anything :-)
Hello my dear bloggers! Today I'm back with something a little bit different that i usually post, or at least something a bit different compared to what ive been posting lately. Altough, i thought it would be nice to post something like this, even if there is barely people out there in the hive community that play games like roblox, i still wanted to share this.
To start off, you would need a painting app for this, i used medibang paint since its completely free and personally a beginner friendly interface, and its also both available on computers and mobile. Altough, if you want to use another app, please make sure it has a simillar interface, so following the steps its way easier.
*** PLEASE BE AWARE, THAT IF YOU USE A DIFFERENT APP THE INTERFACE MAY BE DIFFERENT, SO I HIGHLY RECCOMEND USING THE SAME APP IF YOU WANT TO FOLLOW THE NEXT STEPS. ***
Before starting, id reccomend having a pre-downloaded image of the bag template, which i will add below if you want to download it..
Download the image here, also, I do not own this image so. Yeah.
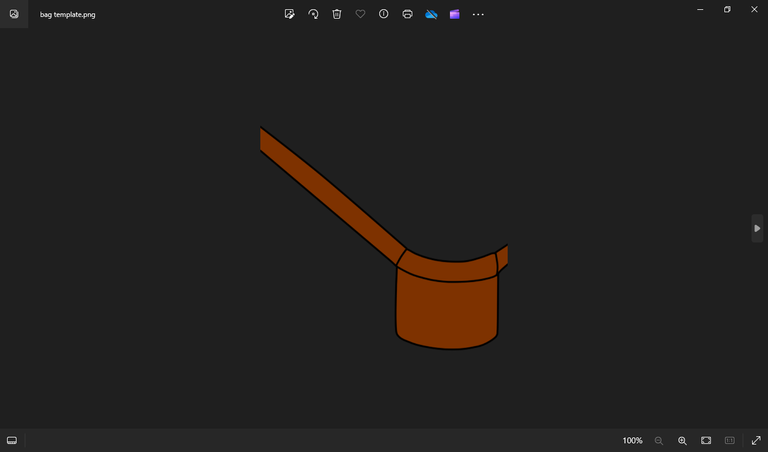
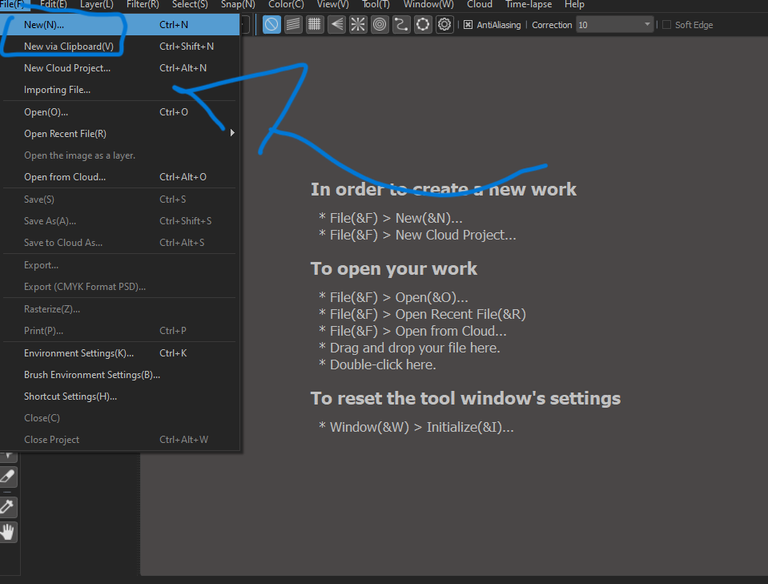
After that, we can finally start with our artwork part. You have to create a new work. I think is the most easy of them all, but still, im going to show where its ubicated anyways~
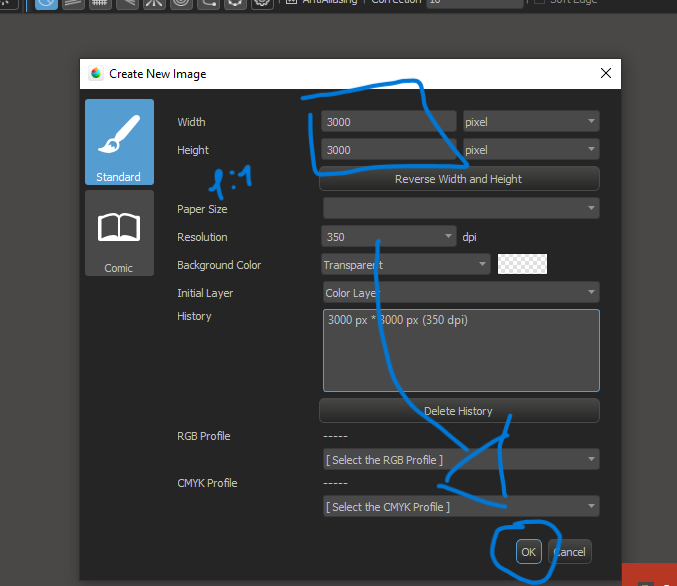
After that, this window pops up. Make sure that you select a 1:1 sized image, if you select a different sized image for this, it will most probably cut off when you upload it to the roblox platform. Then click ok.
When you see the blank space pop up, you will go to the "files" sections on the upper bar and select "Open the image as a layer."
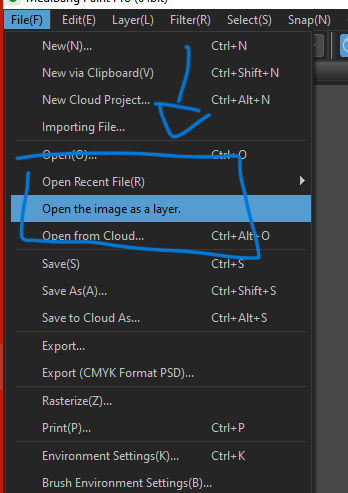
After that you will have to add the bag image previously downloaded.
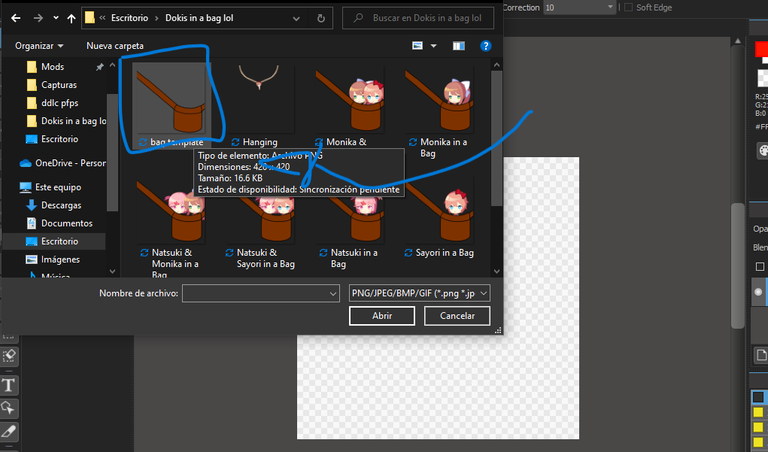
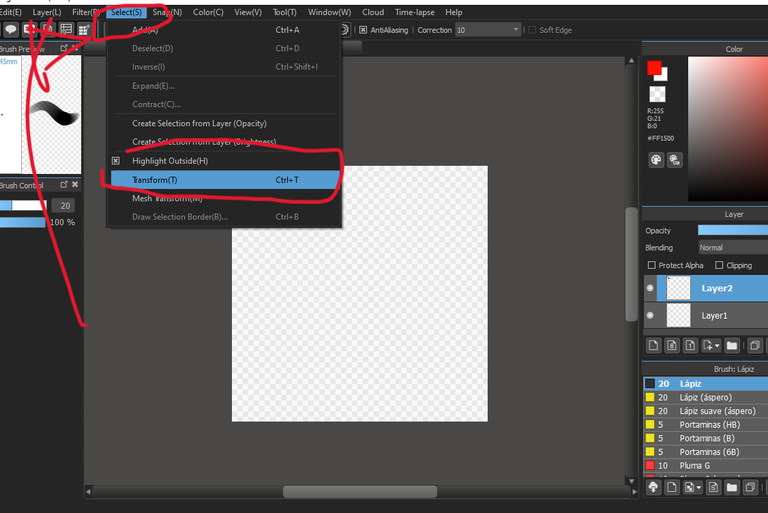
After that, if the "bag template" does not completely fit the image size, you can justselect the "select" section up above and select "Transform".
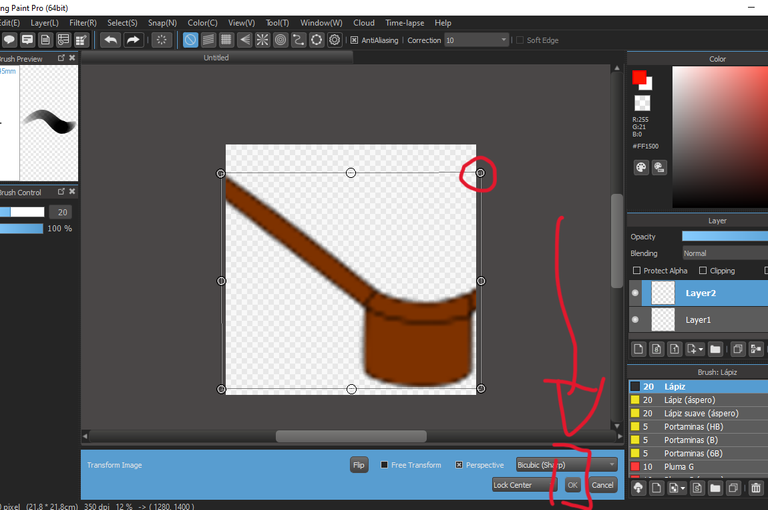
To size the image, you have to click on one of the corner dots and drag them up and dow until you get the size of your liking. After that just press "Ok".
After you have your bag picture all set up, you can then add the item/character or whatever you want to be inside of it, this step is completely opcional, but commonly, people add their favorite character so, yeah.
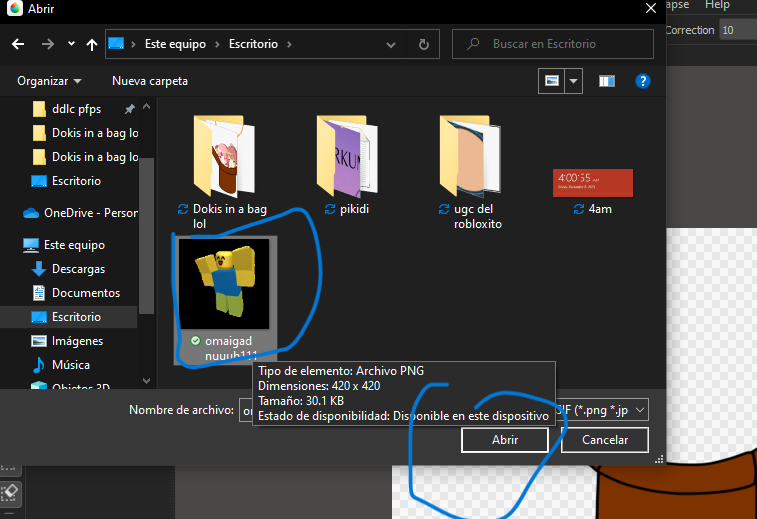
After you have added the image, you have to make sure you size it down or up so it can perfectly fit the bag.
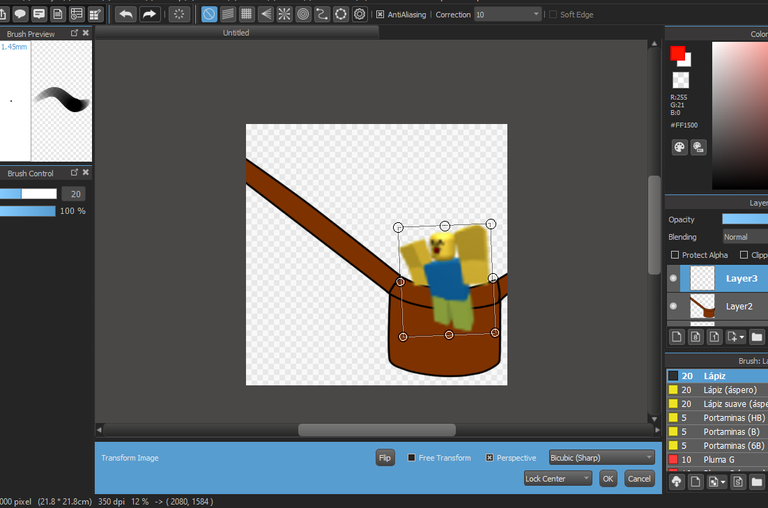
Before saing, make sure that your character stays under the layer that has the image of the bag, so the character or image does not appear infront of it.
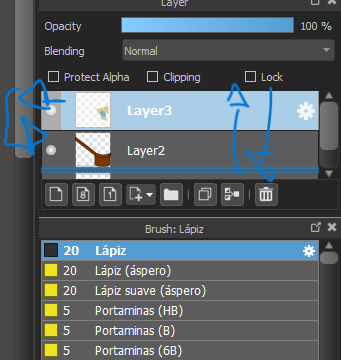
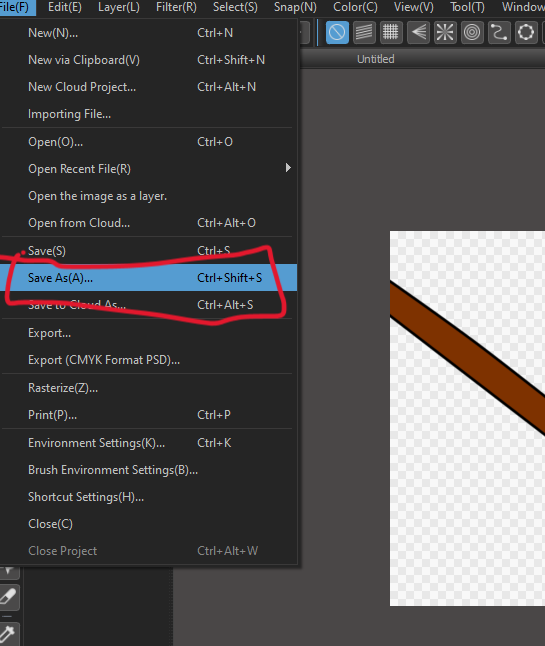
After that, you can just save the image, but make sure you press on "Save as", so select some settings that i will say in the next step
PLEASE make sure that when you save your image its either a PNG or JPEG type, since its the ones that roblox supports
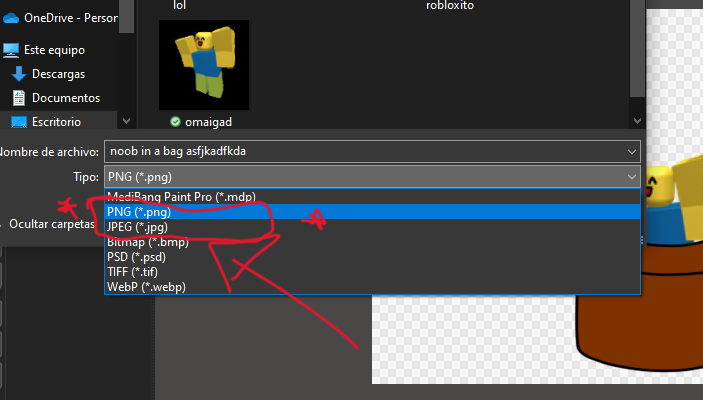
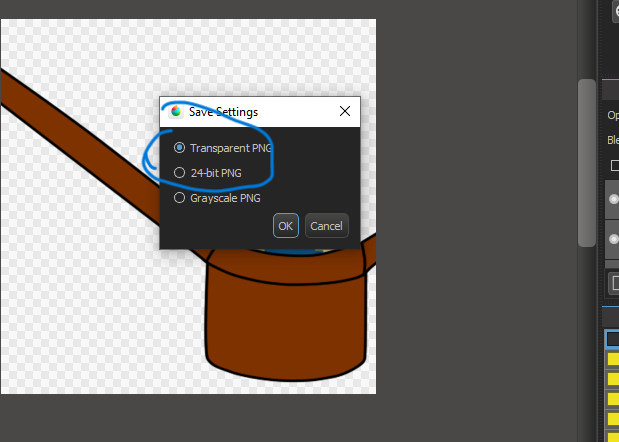
If youre using medibang paint, like me, this window will pop up, make sure you select "Transparent PNG". Because if its has a background or just doesnt have a transparent bg, it will pretty much look like a white square with a bag on it when you equip it on you character.
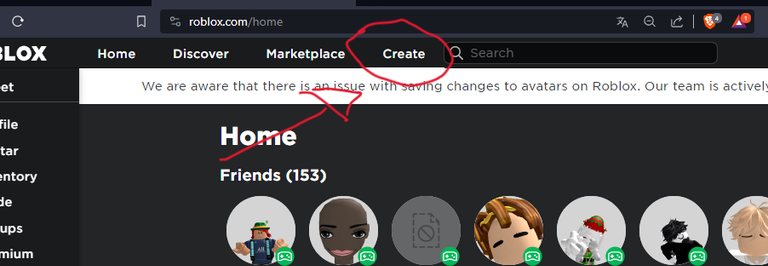
After that, go to roblox.com and go to the "Create" section
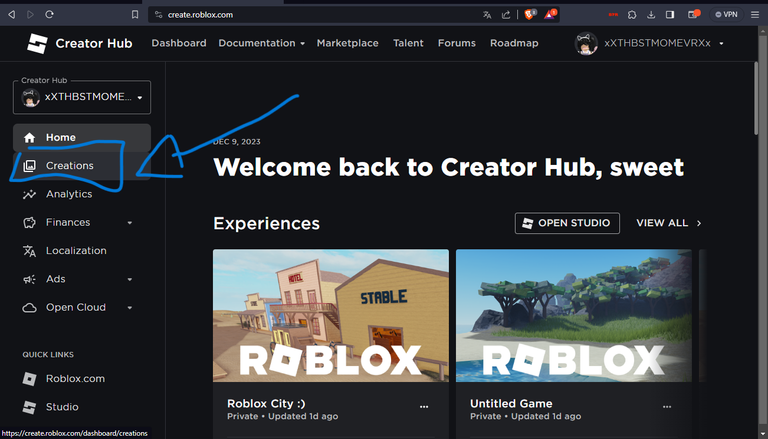
Once you load in this page, click into creations
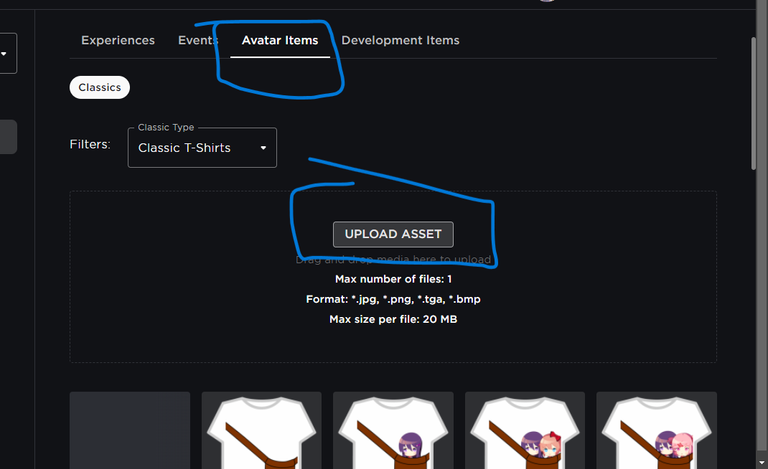
When you get to this part, you will click in "avatar items" and then "upload asset"
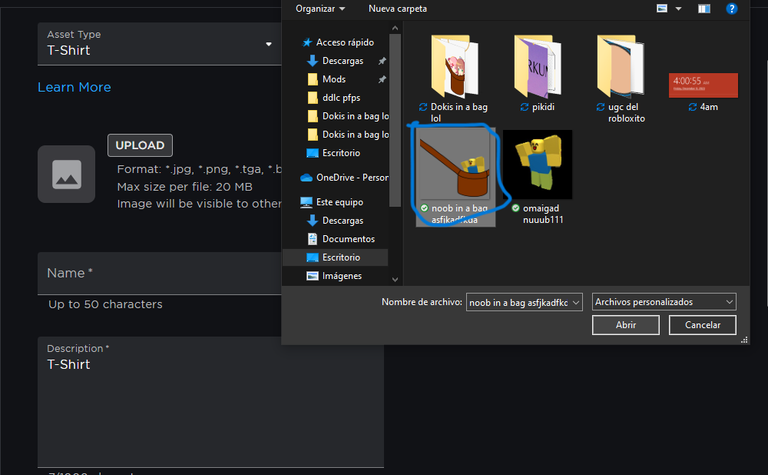
After that you just load in there your previously saved image of your little bag
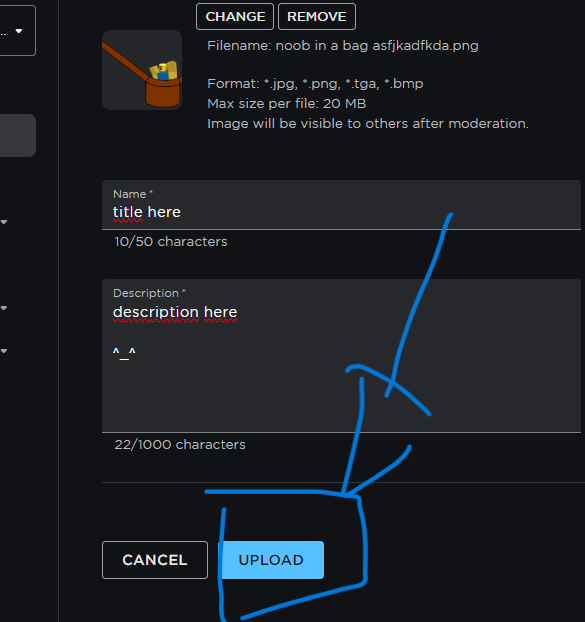
After that, you can add a title and a description, or just leave it completely bland, lol. After that click upload button, all the way to the bottom
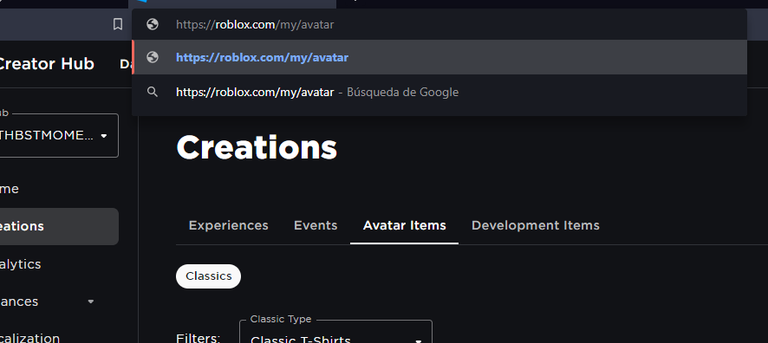
After that you can just go to you roblox avatar page and equid your new personalized t-shirt :p
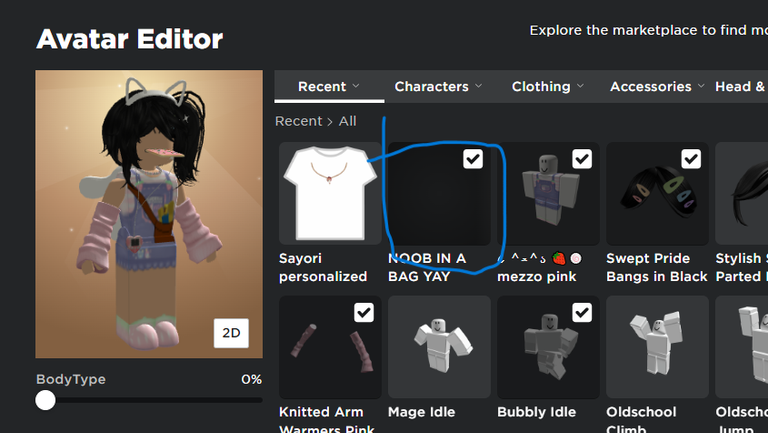
This is the result :
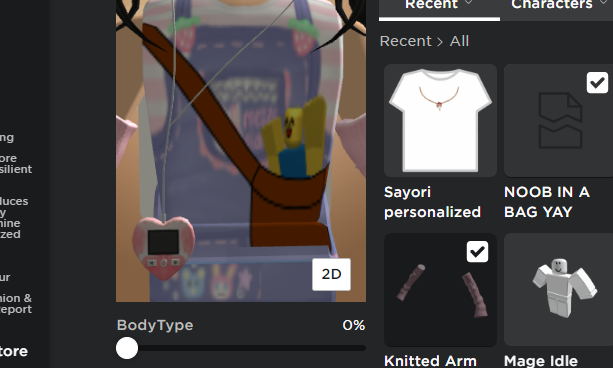
Hope this helped, and if not, i have no other solutions, sorry. (Im kidding!!!)
Hope you enjoyed, see you on my next post.
Baiii!!!!

0
0
0.000
0 comments