One Piece Macrame Bracelet
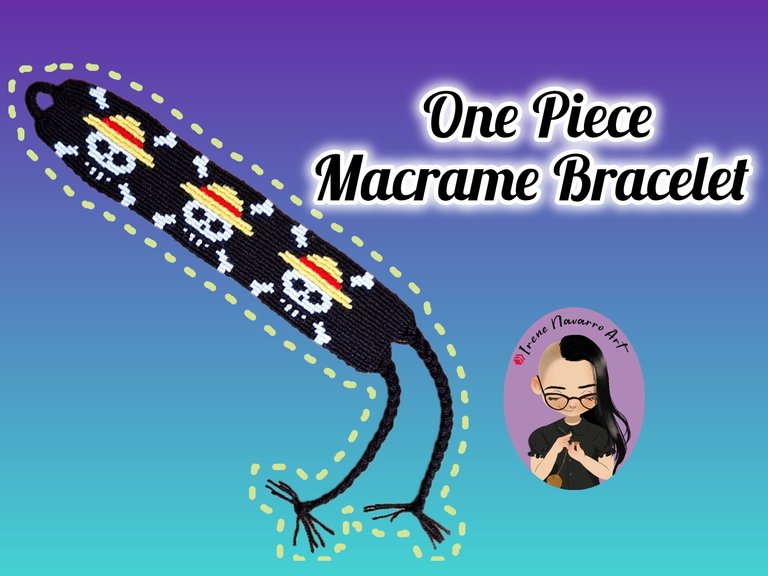
Saludos querida comunidad Hive DIY, espero se encuentren bien, hoy vengo a compartir con ustedes un tutorial para realizar un brazalete en la técnica de macramé, la imagen escogida es de One Piece un manga y anime de piratas mundialmente conocido, esta historia es muy larga y aun no llega a su final por lo que siempre los fans están a la expectativa. Espero les guste 😊
Greetings dear Hive DIY community, I hope you are well. Today I'm here to share with you a tutorial on how to make a macramé bracelet. The chosen image is from One Piece, a world-famous pirate manga and anime. This story is very long and hasn't reached its end yet, so fans are always eagerly awaiting it. I hope you like it 😊

Materiales / Materials
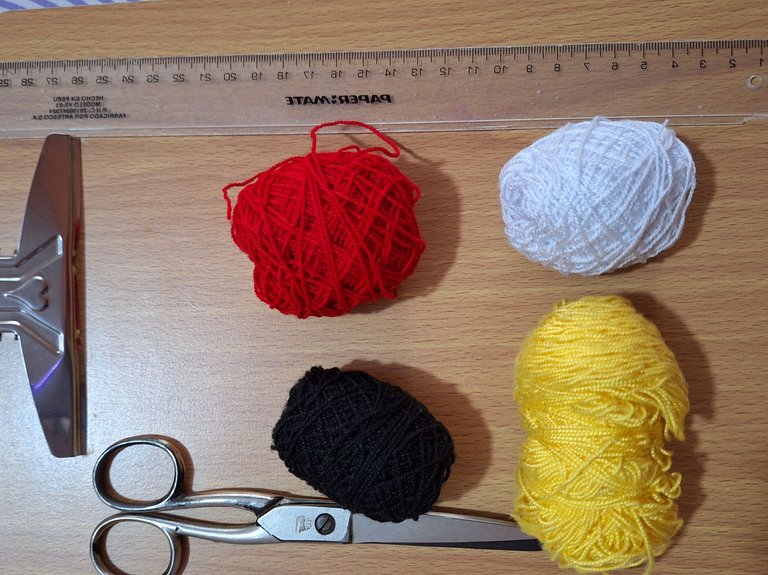
- Hilo acrílico para crochet: negro, blanco, amarillo y rojo.
- Tabla con clip
- Tijera
- Regla
- Acrylic crochet yarn: black, white, yellow, and red.
- Clipboard
- Scissors
- Ruler
Proceso / Process
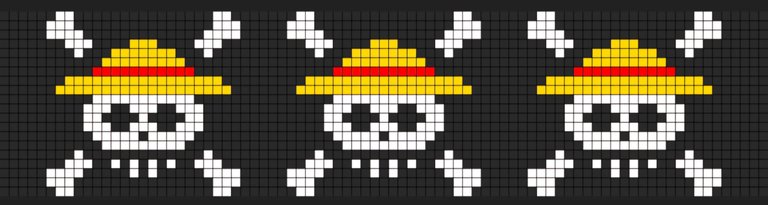
Para elaborar este brazalete el primer paso es el patrón, parra esto utilice una imagen de referencia, pero es esta el diseño estaba en forma vertical, así que hice un nuevo patrón horizontal con la aplicación Pixel Station, con un lienzo de 20 /83 cuadros, es decir que se necesitan 20 hilos guía y se harían 83 hileras de nudos.
To make this bracelet the first step is the pattern, for this I used a reference image, but in this one the design was vertical, so I made a new horizontal pattern with the Pixel Station application, with a canvas of 20/83 squares, that is, 20 guide threads are needed and 83 rows of knots would be made.
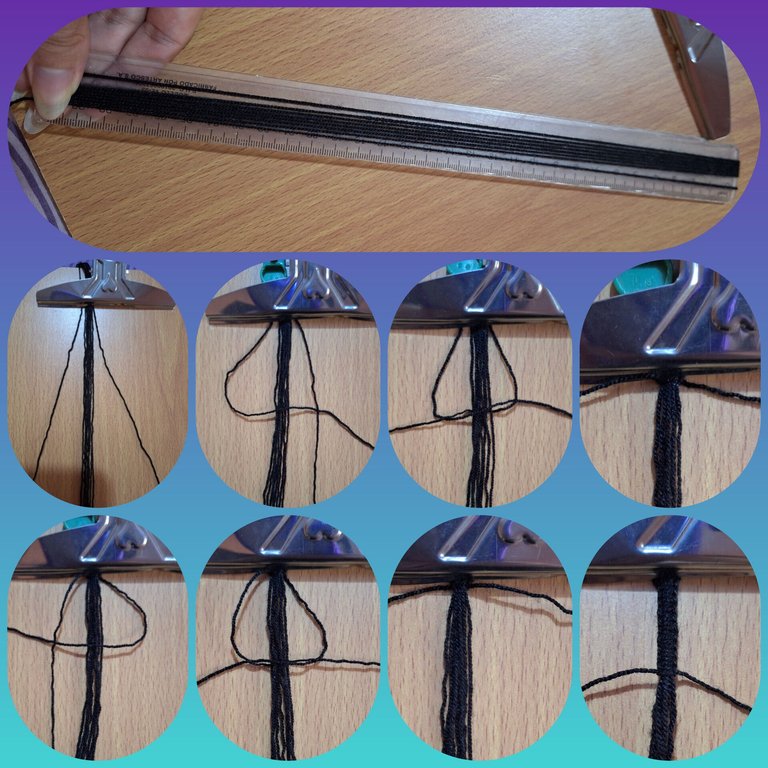
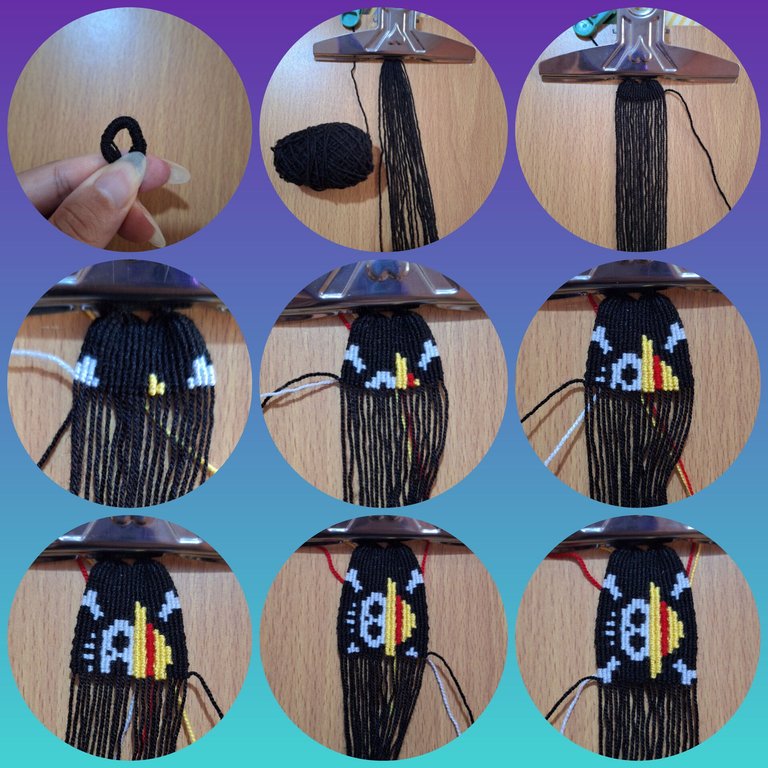
Con el hilo negro cortar 8 hebras de 60 cm, y 2 hileras de 80 cm, ubicar las hebras más cortas al centro dejando las hebras largas a los bordes, sujetar por la mitad con el clip de la tabla, con las hebras largas hacer 20 nudos planos que envuelvan a las hileras del centro. Los nudos planos se realizan alternando el nudo con forma de 4 y el nudo con forma de P.
Using the black yarn, cut eight strands of 60 cm each and two rows of 80 cm each. Place the shorter strands in the center, leaving the long strands at the edges. Secure them in the middle with the board clip. With the long strands, tie 20 flat knots that wrap around the center rows. The flat knots are made by alternating the figure-4 knot and the P knot.
Agregar el hilo anudador negro y hacer 5 hileras de nudos, en esta técnica e hilo anudador envuelve don veces cada uno de los hilos guía, de izquierda a derecha en las hileras impares y de derecha a izquierda en las hileras pares. A partir de la sexta hilera agregar los demás hilos anudadores haciendo los cambios de color según corresponde en el patrón, cada cuadro representa un nudo y las hebras se cruzan por detrás.
Add the black knotting thread and make 5 rows of knots. In this technique, the knotting thread wraps around each of the guide threads twice, from left to right on odd-numbered rows and from right to left on even-numbered rows. Starting with the sixth row, add the remaining knotting threads, changing colors accordingly in the pattern. Each square represents a knot, and the strands cross behind each other.
Hacer nuevamente cinco hileras de nudos solo con el hilo anudador negro, para luego repetir la secuencia del diseño dos veces más, hasta completar tres figuras.
Make five rows of knots again using only the black knotting thread, then repeat the design sequence two more times, until you have completed three figures.
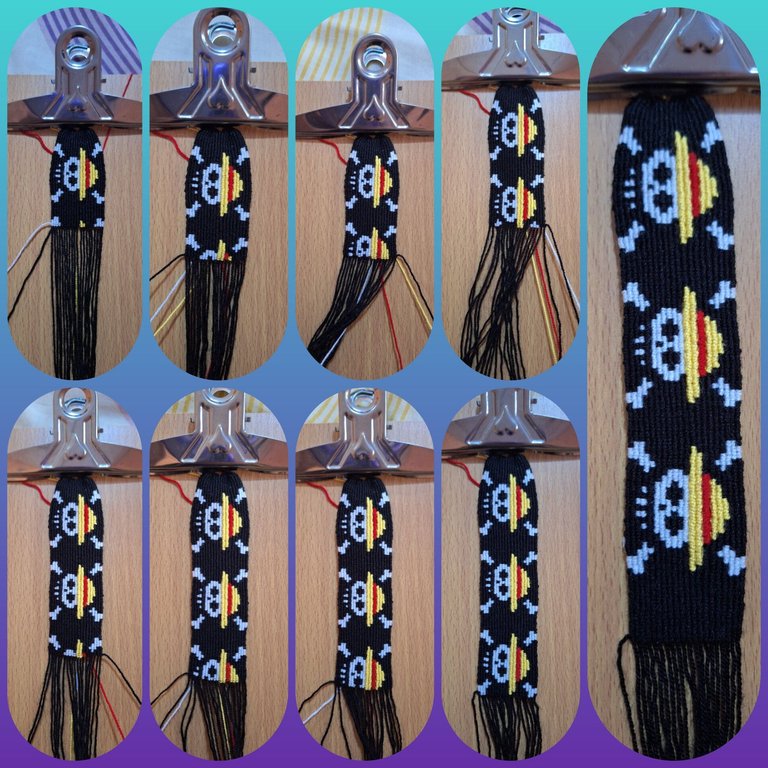
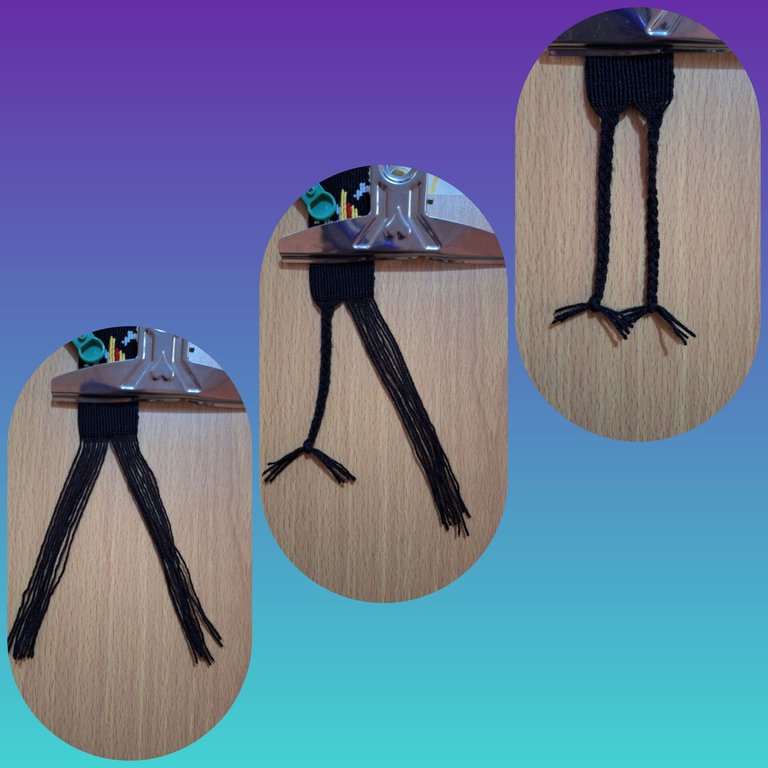
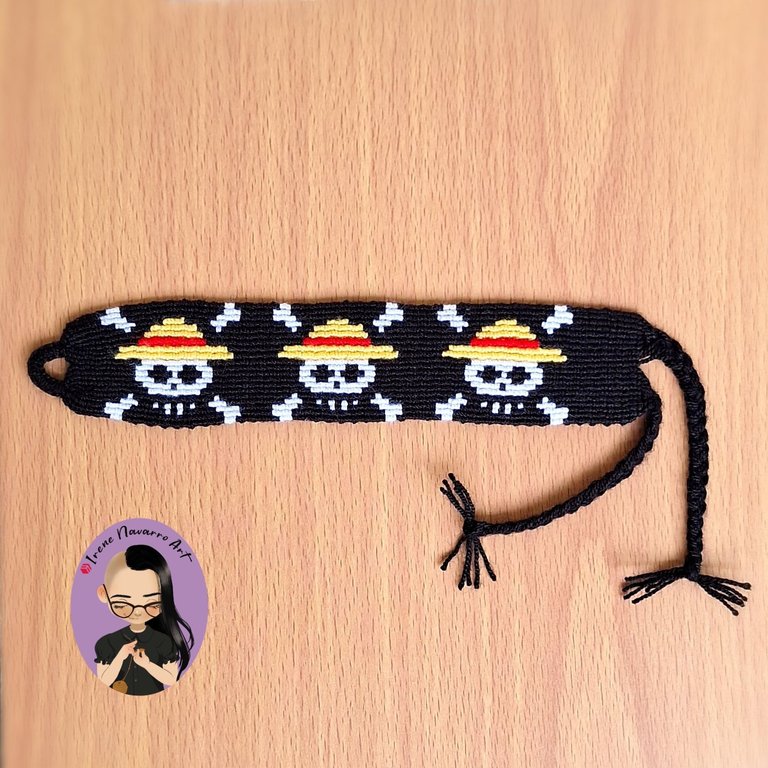
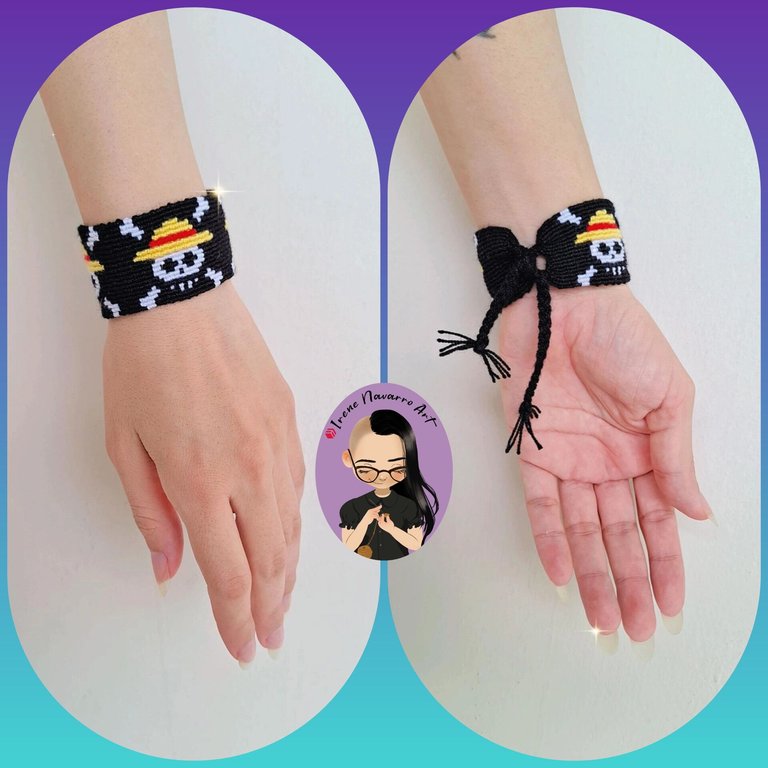
Para finalizar hacer 5 hileras mas de nudos solo con el hilo negro, separar las hebras en dos partes y hacer dos trenzas finalizadas con un nudo.
To finish, make 5 more bare rows only with the black thread, separate the strands into two parts and make two braids finished with a knot.
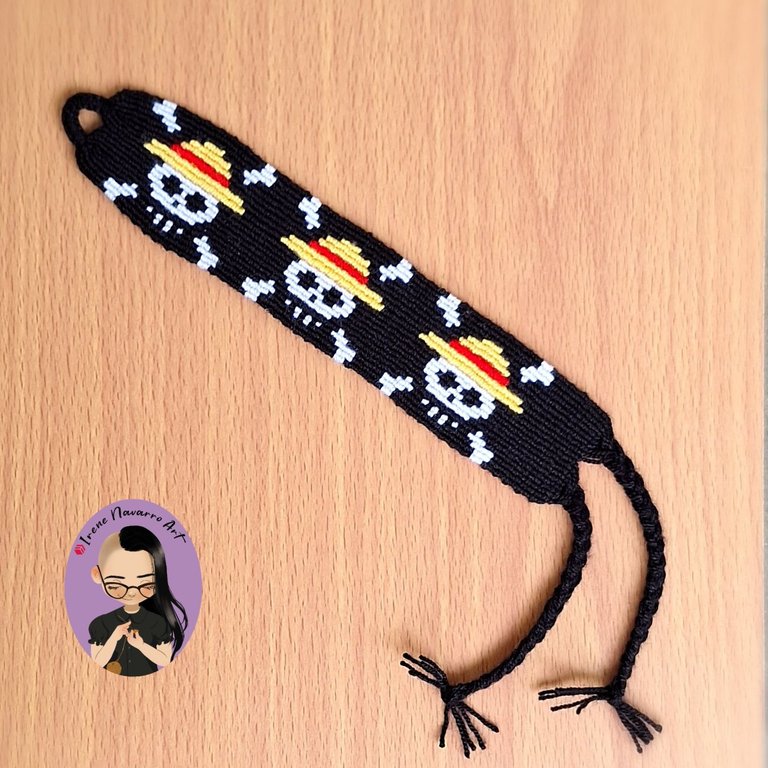
Resultado / Result
Imágenes tomadas con dispositivo Samsung A54. Portada editada en Inshot
Pictures taken with Samsung A54 device. Cover edited in Inshot

Espero les haya gustado. Les invito a leer mis próximas publicaciones y siempre estaré dispuesta a responder sus preguntas y comentarios, también pueden seguirme y contactarme en cualquiera de mis redes sociales. ¡Muchas gracias!
I hope you liked it. I invite you to read my next publications and I will always be willing to answer your questions and comments, you can also follow me and contact me on any of my social networks. Thank you!
Facebook
Twitter
Instagram
Ko-Fi
Discord: irenenavarroart#0361
Posted Using INLEO
Es bellísimo amiga, gracias por compartir el paso a paso detallado, espero poder lograr hacer uno con esta excelente guía.
Muchísimas gracias 💜
Siempre que me encuentro com tu trabajo, es imposible no detenerse a admirarlo. Es que haces con hilos de colores, obras de arte, donde cada detalle, logra notarse en las piezas que realizas. Bellísima trabajo @irenenavarroart .
Muchas gracias por tus palabras, me motivan a seguir. Saludos!
Wow, this is a really unique and stylish bracelet.
Thank you 😊
Yes, you're welcome, happy weekend.
This looks perfect and amazing, the is astonishing as always and you really did a great job, nice work and bravo
Thank you very much 😊
Wow! So cool! A macramé bracelet inspired by One Piece sounds like the perfect mix of creativity and fandom.🩷
Thank you 😊
You're welcome! 😀
Este brazalete es una obra de arte😍 la figuras se ven tan exactas 💖 gracias por compartir el paso a paso ✨
Muchas gracias, siempre que se sigue el patrón al pie de la letra el resultado es el deseado. Un abrazo!
Do you ever get tired of doing amazing things? Very meticulous work, neat, with good finish and no mistakes hahaha I can really tell you have experience and I love to see the process of your polishes.
oh thank you very much 😄
Me encantó, one piece es un anime genial y este brazalete te quedó unico, felicidades.
Muchísimas gracias 💜