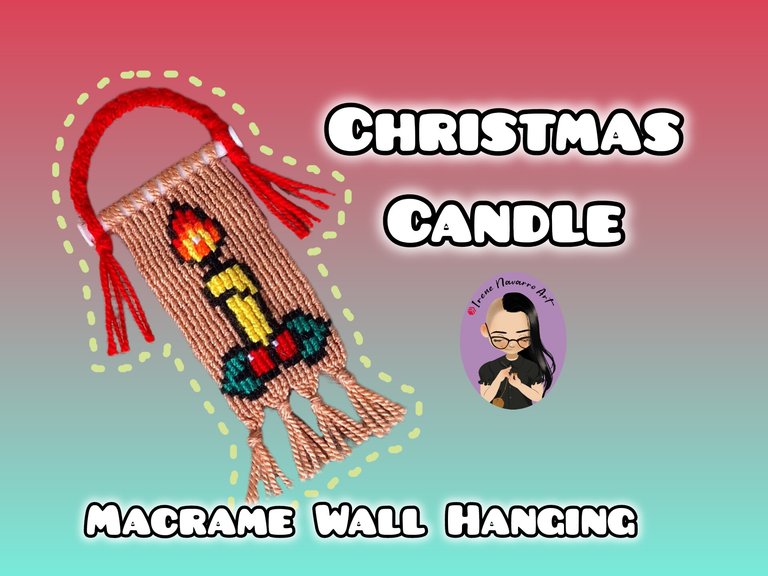
Colgante Macramé: Vela Navideña
Saludos a todos 🥰, acá estoy nuevamente compartiendo con ustedes un nuevo tutorial en macramé navideño, me emociona poder seguir decorando el árbol con creaciones completamente manuales, el valor de lo artesanal es mil veces mejor así que se siente lindo tener un árbol lleno de arte, el trabajo de hoy se trata de un colgante con la figura de una vela navideña, espero la explicación sea comprensible y aplicable para todos ustedes quienes estén interesados, los materiales con sencillos y fáciles de conseguir, deseo que les guste ☺️
Greetings to all 🥰, here I am again sharing with you a new tutorial on Christmas macramé, I am excited to be able to continue decorating the tree with completely manual creations, the value of the artisanal is a thousand times better so it feels nice to have a tree full of art, today’s work is about a pendant with the figure of a Christmas candle, I hope the explanation is understandable and applicable for all of you who are interested, the materials are simple and easy to get, I hope you like it ☺️

Materiales / Materials
- Hilo acrílico para crochet: beige, negro, blanco, rojo, amarillo, naranja y verde.
- Palito de plástico
- Tabla
- 2 pinzas para ropa
- Tijera
- Regla
- Patrón
- Acrylic crochet yarn: beige, black, white, red, yellow, orange and green.
- Plastic stick
- Board
- 2 clothespins
- Scissors
- Ruler
- Pattern
Proceso / Process
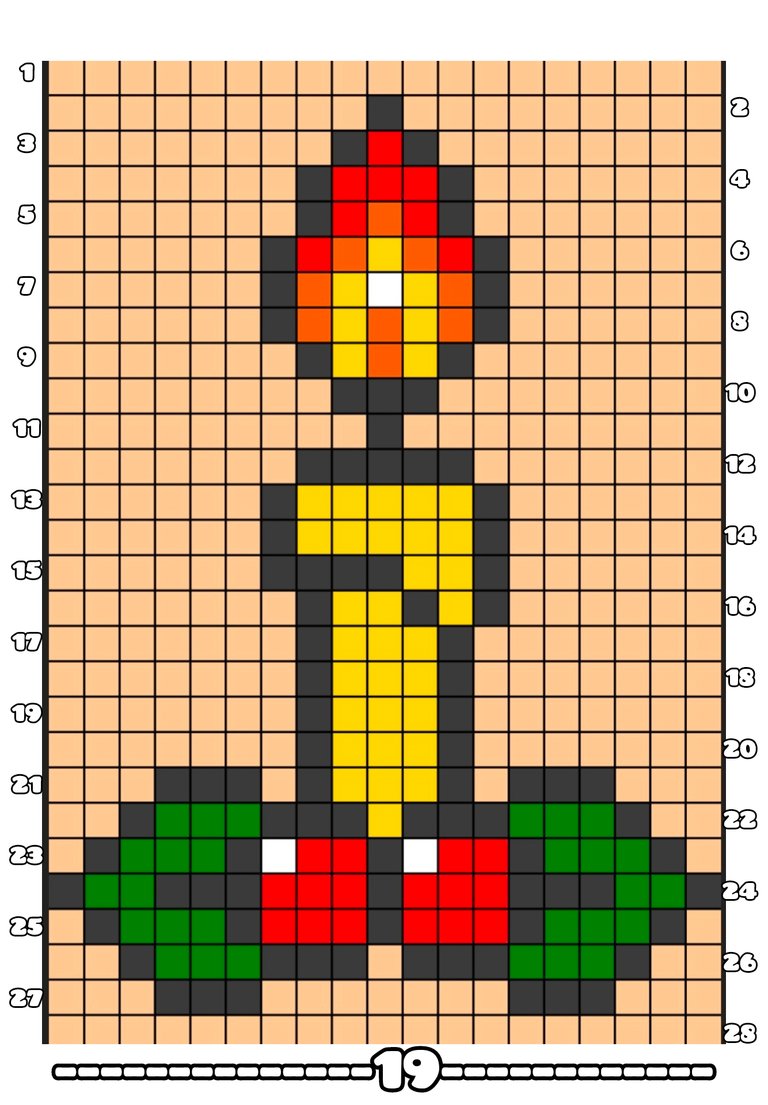
Para este diseño al igual que los anteriores he usado una imagen de referencia, para estos trabajos se pueden buscar imágenes de pixel art, patrones para punto de cruz o crochet, también se pueden buscar directamente patrones alpha que sirven para macramé, en este caso yo redibujé el diseño con unas pequeñas modificaciones en la aplicación Pixel Station la cual me permite pintar cuadro por cuadro con la herramienta pincel o con el bote de pintura para áreas más grandes, usé un lienzo de 19 columnas por 28 filas de cuadros, esto quiere decir que se necesitan 19 hilos guía y 28 hileras de nudos para completar el diseño. Agregué los números en la aplicación Inshot.
For this design as well as the previous ones I have used a reference image, for these works you can search for pixel art images, cross stitch or crochet patterns, you can also directly search for alpha patterns that are useful for macramé, in this case I redrew the design with some small modifications in the Pixel Station application which allows me to paint frame by frame with the brush tool or with the paint bucket for larger areas, I used a canvas of 19 columns by 28 rows of squares, this means that 19 guide threads and 28 rows of knots are needed to complete the design. I added the numbers in the Inshot application.
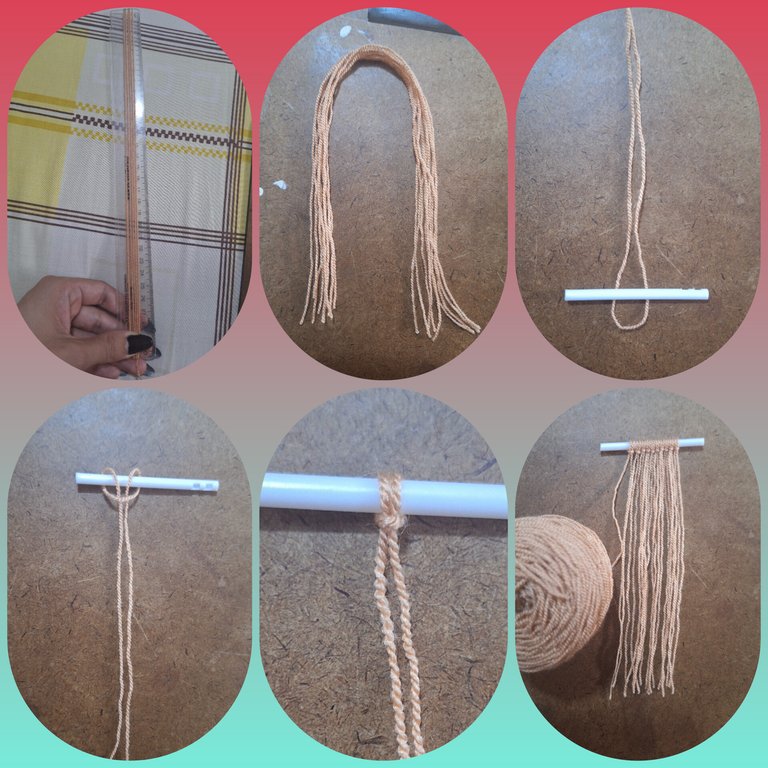
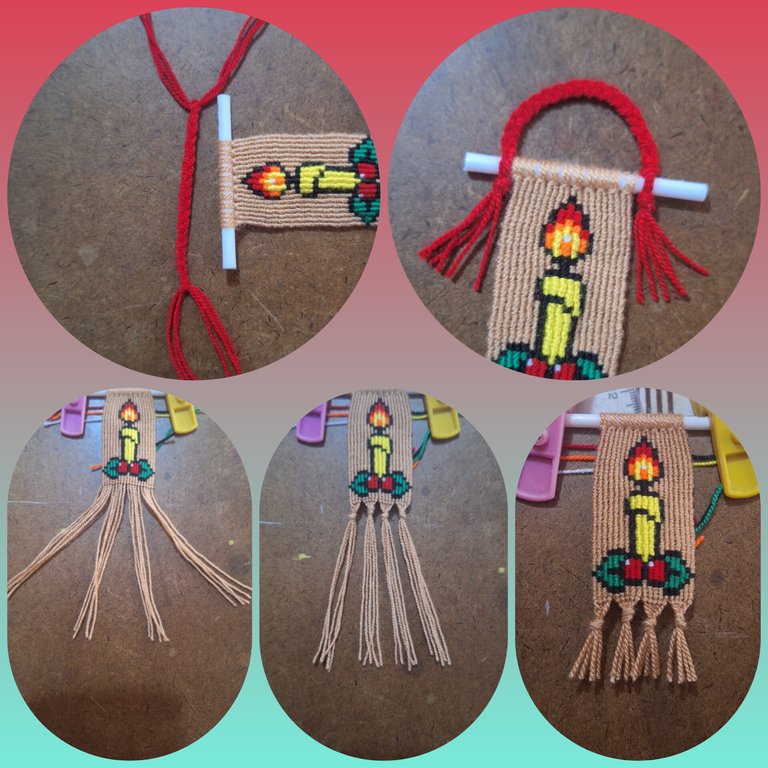
El primer paso es con el hilo beige, cortar 9 hebras de 30 cm y una hebra adicional unida al ovillo, anudar por la mitad al palito de plástico, de se modo se obtienen 19 hilos guía y la hebra unida al ovillo sirve de primer hilo anudador de color de fondo, por eso dicha hebra se debe anudar de primer lugar a la izquierda como se observa en la fotografía.
The first step is with the beige thread, cut 9 strands of 30 cm and an additional strand attached to the ball, knot in the middle to the plastic stick, in this way you get 19 guide threads and the strand attached to the ball serves as the first knotting thread of background color, that is why this strand should be tied first on the left as seen in the photograph.
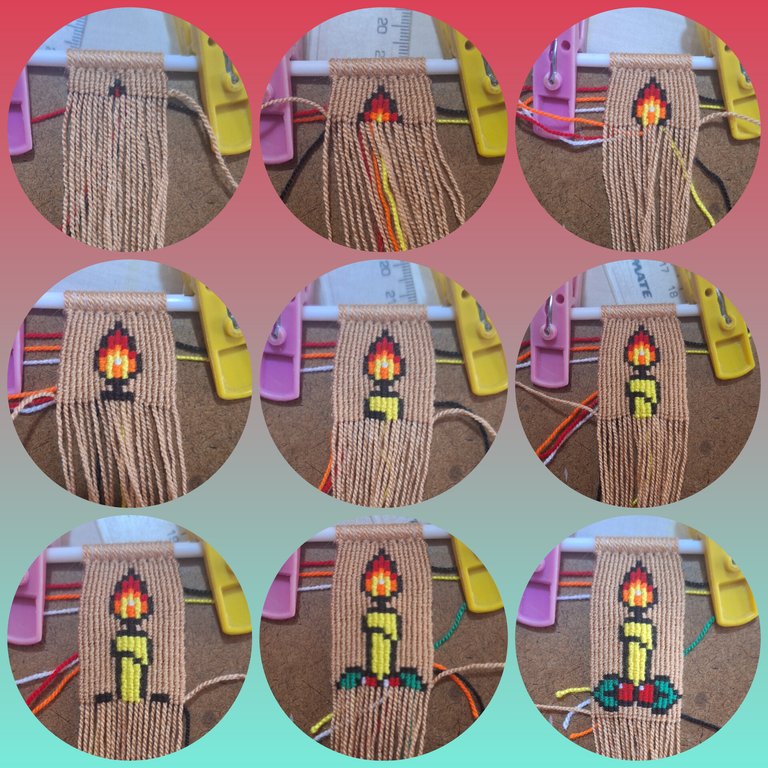
En esta técnica las hileras de número impar se anudan de izquierda a derecha y las hileras de número par se anudan de derecha a izquierda. El hilo anudador siempre envuelve dos veces cada uno de los hilos guía. Este patrón requiere la primera y ultima hilera de nudos solo del color de fondo. Los hilos anudadores de diferente color se van agregando conforme a los requerimientos del patrón donde cada nudo esta representado por un cuadro, los cambio de color de hilo anudador se hacen cruzando las hebras por detrás.
In this technique, the odd-numbered rows are knotted from left to right and the even-numbered rows are knotted from right to left. The knotting thread always wraps around each of the guide threads twice. This pattern requires the first and last row of knots to be of the background color only. The knotting threads of different colors are added according to the requirements of the pattern, where each knot is represented by a square. The knotting thread color changes are made by crossing the strands from behind.
Para finalizar se deben agrupar la hebras en 4 partes y hacer nudos, cortar las puntas para emparejar los flecos. Para el asa del colgante se debe hacer una trenza con 6 hebras de 20cm de hilo color rojo. Cortar y quemar las extremos del palito de plástico es opcional.
To finish, group the strands into 4 parts and tie knots, cutting the ends to match the fringes. For the handle of the pendant, make a braid with 6 strands of 20cm of red thread. Cutting and burning the ends of the plastic stick is optional.
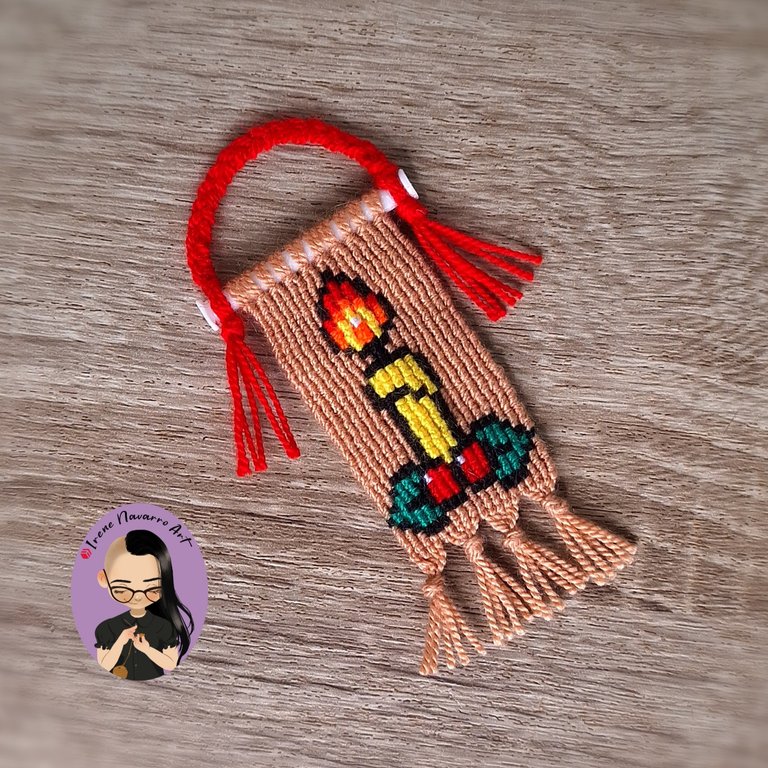
Resultado / Result
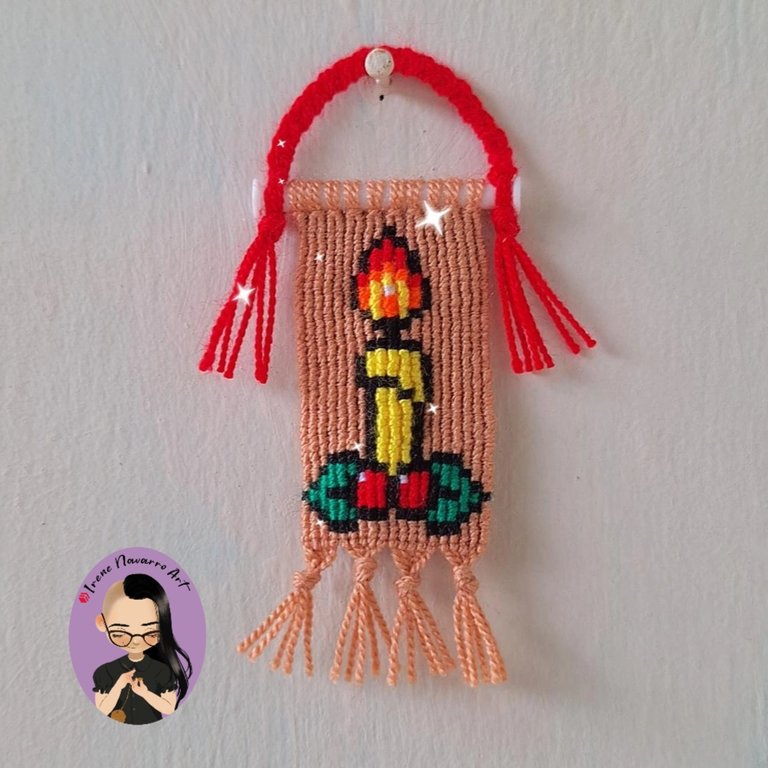
Imágenes tomadas con dispositivo Samsung A54. Portada editada en Inshot
Pictures taken with Samsung A54 device. Cover edited in Inshot

Espero les haya gustado. Les invito a leer mis próximas publicaciones y siempre estaré dispuesta a responder sus preguntas y comentarios, también pueden seguirme y contactarme en cualquiera de mis redes sociales. ¡Muchas gracias!
I hope you liked it. I invite you to read my next publications and I will always be willing to answer your questions and comments, you can also follow me and contact me on any of my social networks. Thank you!
Facebook
Twitter
Instagram
Ko-Fi
Discord: irenenavarroart#0361
Posted Using InLeo Alpha
Ya quiero ver ese árbol decorado, que belleza sera, wowwwww...
!discovery 45
Muchas gracias bella ♥️
This post was shared and voted inside the discord by the curators team of discovery-it
Join our Community and follow our Curation Trail
Discovery-it is also a Witness, vote for us here
Delegate to us for passive income. Check our 80% fee-back Program
Definitivamente tienes arte en las manos amiga, quedó súper lindo, me encanta
Muchas gracias ☺️
Cada vez me gusta más esta comunidad porque la gente habla el mismo idioma que yo, me refiero en realidad a que aman las manualidades tanto como yo las amo, y siempre me consigo con bellísimos trabajos como el que nos presentas en tu post, se nota el esmero y sobre todo el cariño que le pusiste, simplemente precioso.
Cada cosa hecha a mano tiene un gran valor y por eso es tan emocionante ver los procesos y resultados en esta comunidad. Un abrazo 🤗
Como de costumbre, un trabajo impecable. Nudo a nudo, vas creando magia. Me declaro fan. 😍
Muchísimas gracias 😊