Brazalete Macramé Gato Negro
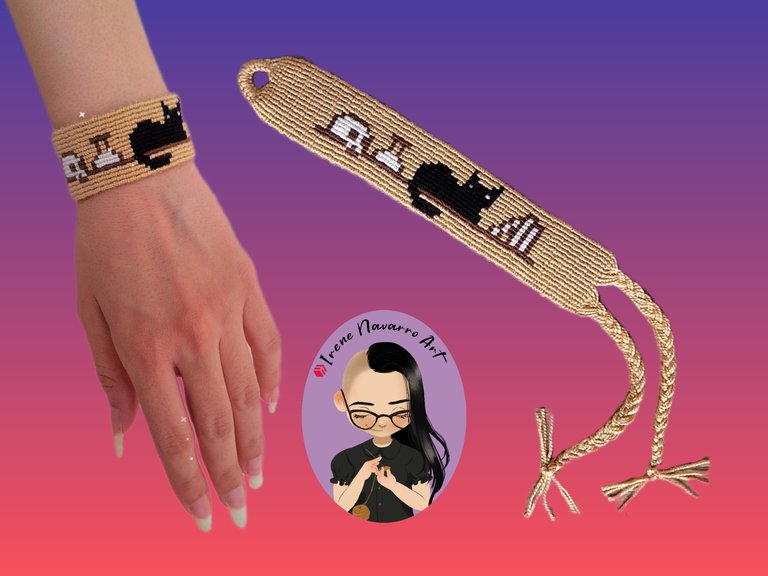
Saludos querida comunidad Hive DIY, para nadie es un secreto que la situación actual de mi país es bastante tensa en estos momentos, no duermo bien pensando en tantas cosas, pero por eso decidí darme un descanso mental, me propuse hacer un brazalete porque tejer siempre ha sido una terapia para mi, en lugar de hacer un patrón desde cero decidí buscar uno de Internet y conseguí uno diseño muy hermoso de gatito, tomé este patrón y logré hacer el brazalete trabajando poco a poco en tres días, el primer día me equivocaba mucho a pesar de mi experiencia pero lo atribuyo a mi falta de sueño, porque el diseño es sencillo y estoy segura que les puede ser de utilidad a cualquiera que practique la técnica macramé. Espero les guste.
Greetings dear Hive DIY community, it is no secret that the current situation in my country is quite tense right now, I don’t sleep well thinking about so many things, but that’s why I decided to give myself a mental break, I set out to make a bracelet because making macramé has always been a therapy for me, instead of making a pattern from scratch I decided to look for one on the Internet and I found a very beautiful kitten design, I took this pattern and managed to make the bracelet working little by little in three days, the first day I made a lot of mistakes despite my experience but I attribute it to my lack of sleep, because the design is simple and I’m sure it can be useful to anyone who practices the macramé technique. I hope you like it.

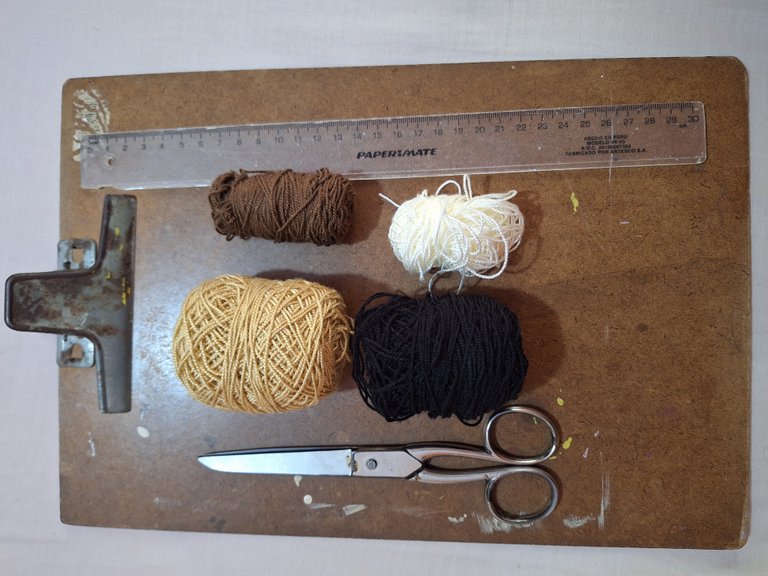
Materiales / Materials
- Hilo a acrílico para crochet: beige, marrón, amarillo muy claro y negro.
- Tabla con clip
- Regla
- Tijera
- Patrón
- Acrylic yarn for crochet: beige, brown, very light yellow and black.
- Board with clip
- Ruler
- Scissors
- Pattern

Patrón / Pattern

Source

Proceso / Process
El patrón consta de 16 cuadros en vertical lo que indica que se necesitan 16 hilos guía, para esto con el hilo beige cortar 2 hebras de 70cm y 6 hebras de 60cm. Colocar las hebras largas de cada lado y la hebras cortas al centro.
Con las hebras largas hacer 20 nudos planos, envolviendo a la hebras del centro. Los nudos planos se hacen alternando el nudo con forma de 4 y el nudo con forma de P como muestran las imágenes.
The pattern consists of 16 vertical squares, which means that 16 guide threads are needed. To do this, cut 2 strands of 70 cm and 6 strands of 60 cm from the beige thread. Place the long strands on each side and the short strands in the center.
With the long strands, make 20 flat knots, wrapping them around the center strands. The flat knots are made by alternating the 4-shaped knot and the P-shaped knot as shown in the images.
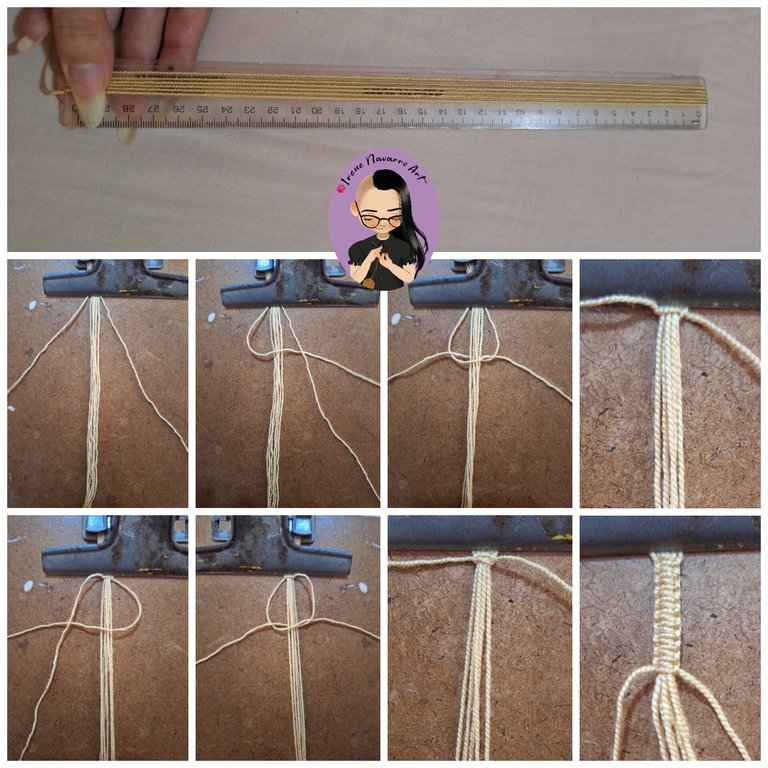

Doblar el forma de U y sujetar con el clip de la tabla. Agregar el hilo anudador y hacer 10 hileras de nudos simples, es decir que el hilo anudador envuelve dos veces cada una de los hilos guía de derecha a izquierda en la primera hilera luego de izquierda a derecha en la segunda hilera y así sucesivamente.
En la hilera 11 agregar el hilo marrón y comenzar a hacer los cambios de color de hilo anudador según el patrón, cada cuadro presenta un nudo y los hilos anudadores se cruzan por detrás, se agrega el color amarillo claro para hacer la calavera.
Fold the U-shape and secure with the board clip. Add the knotting thread and make 10 rows of simple knots, that is, the knotting thread wraps twice around each of the guide threads from right to left in the first row, then from left to right in the second row, and so on.
On the 11th row, add the brown thread and begin to make the knotting thread color changes according to the pattern, each square has a knot and the knotting threads cross behind, add the light yellow color to make the skull.
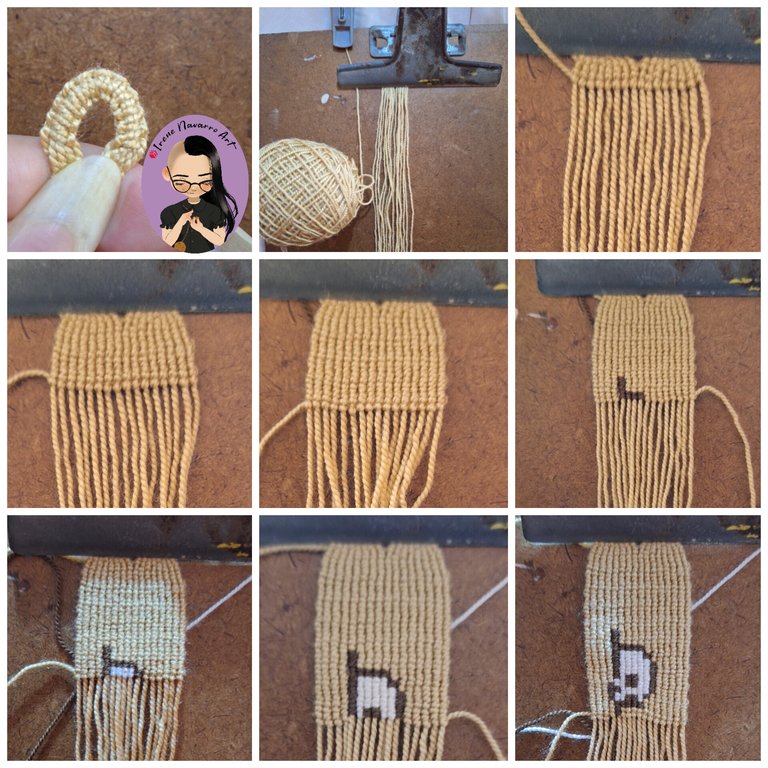

Seguir la secuencia de colores de nudos del diseño, agregar el hilo negro para hacer la figura del gato y luego los libros.
Follow the knot color sequence of the design, add the black thread to make the cat figure and then the books.
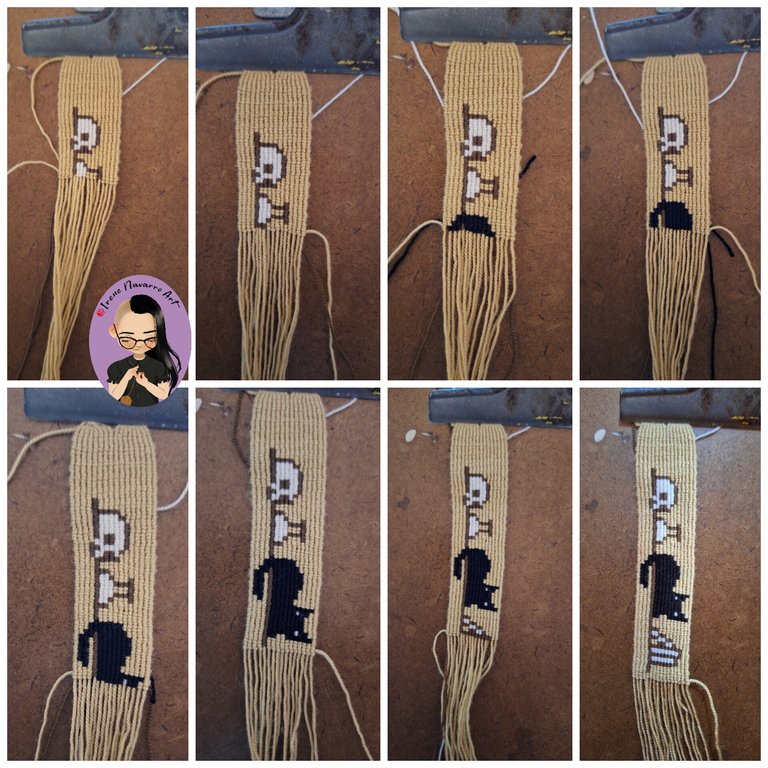

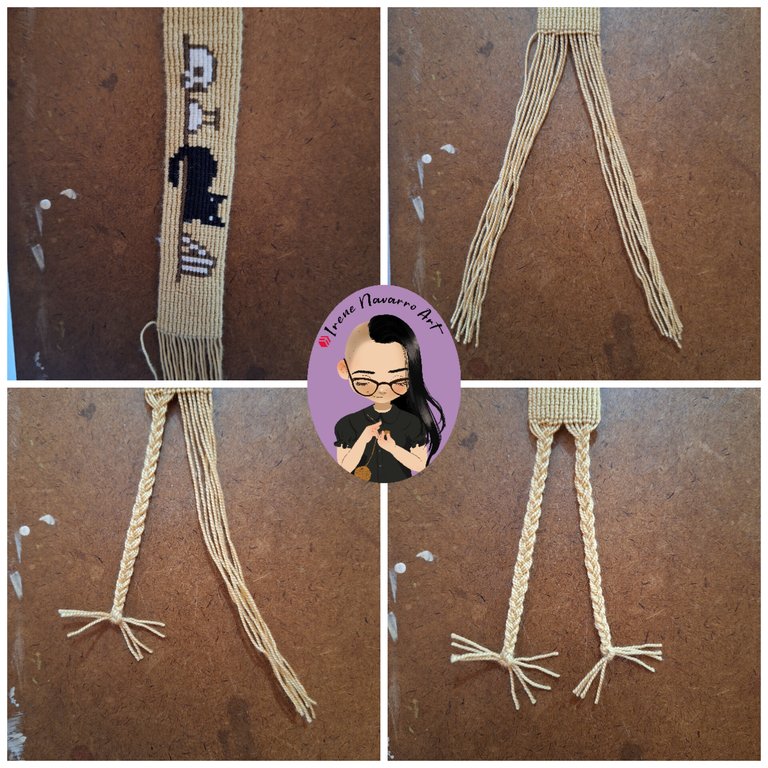
Al finalizar el diseño cortar los hilos y continuar solo con el color de fondo y hacer 10 hileras más, para finalizar dividir las hebras en dos grupos y hacer dos trenzas.
Once you have finished the design, cut the threads and continue only with the background color and make 10 more rows. Finally, divide the strands into two groups and make two braids.

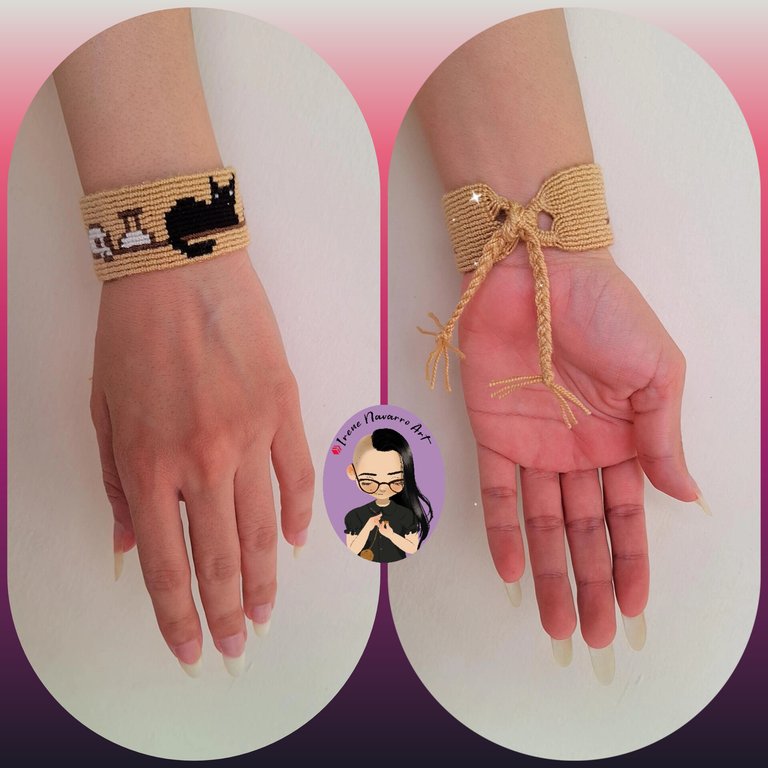
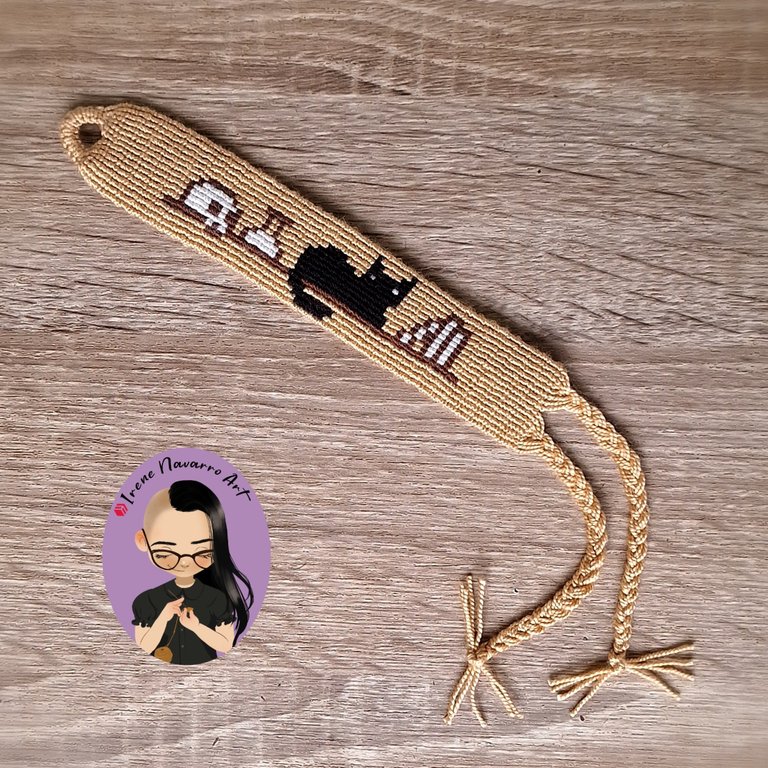
Resultado / Result
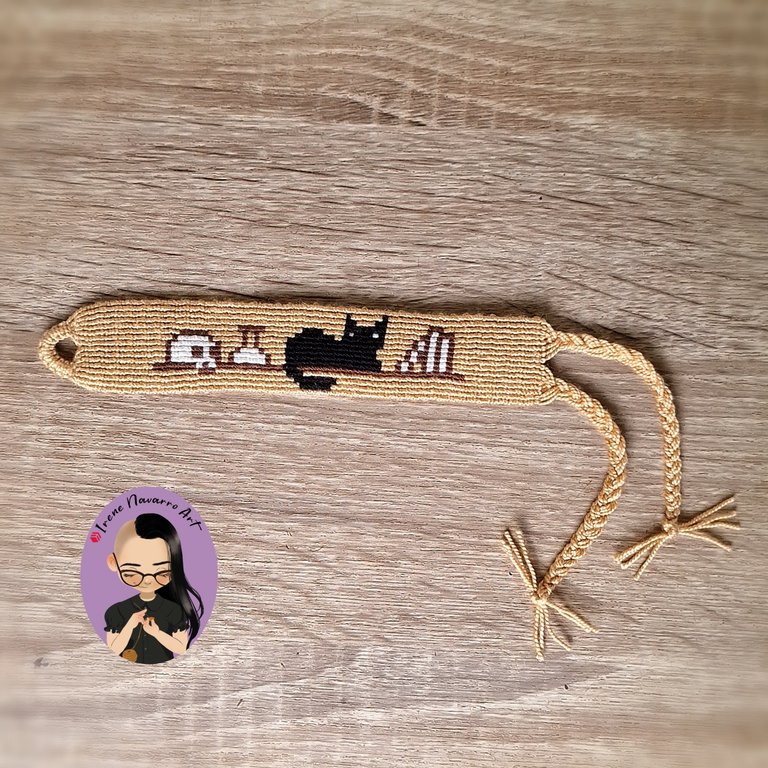
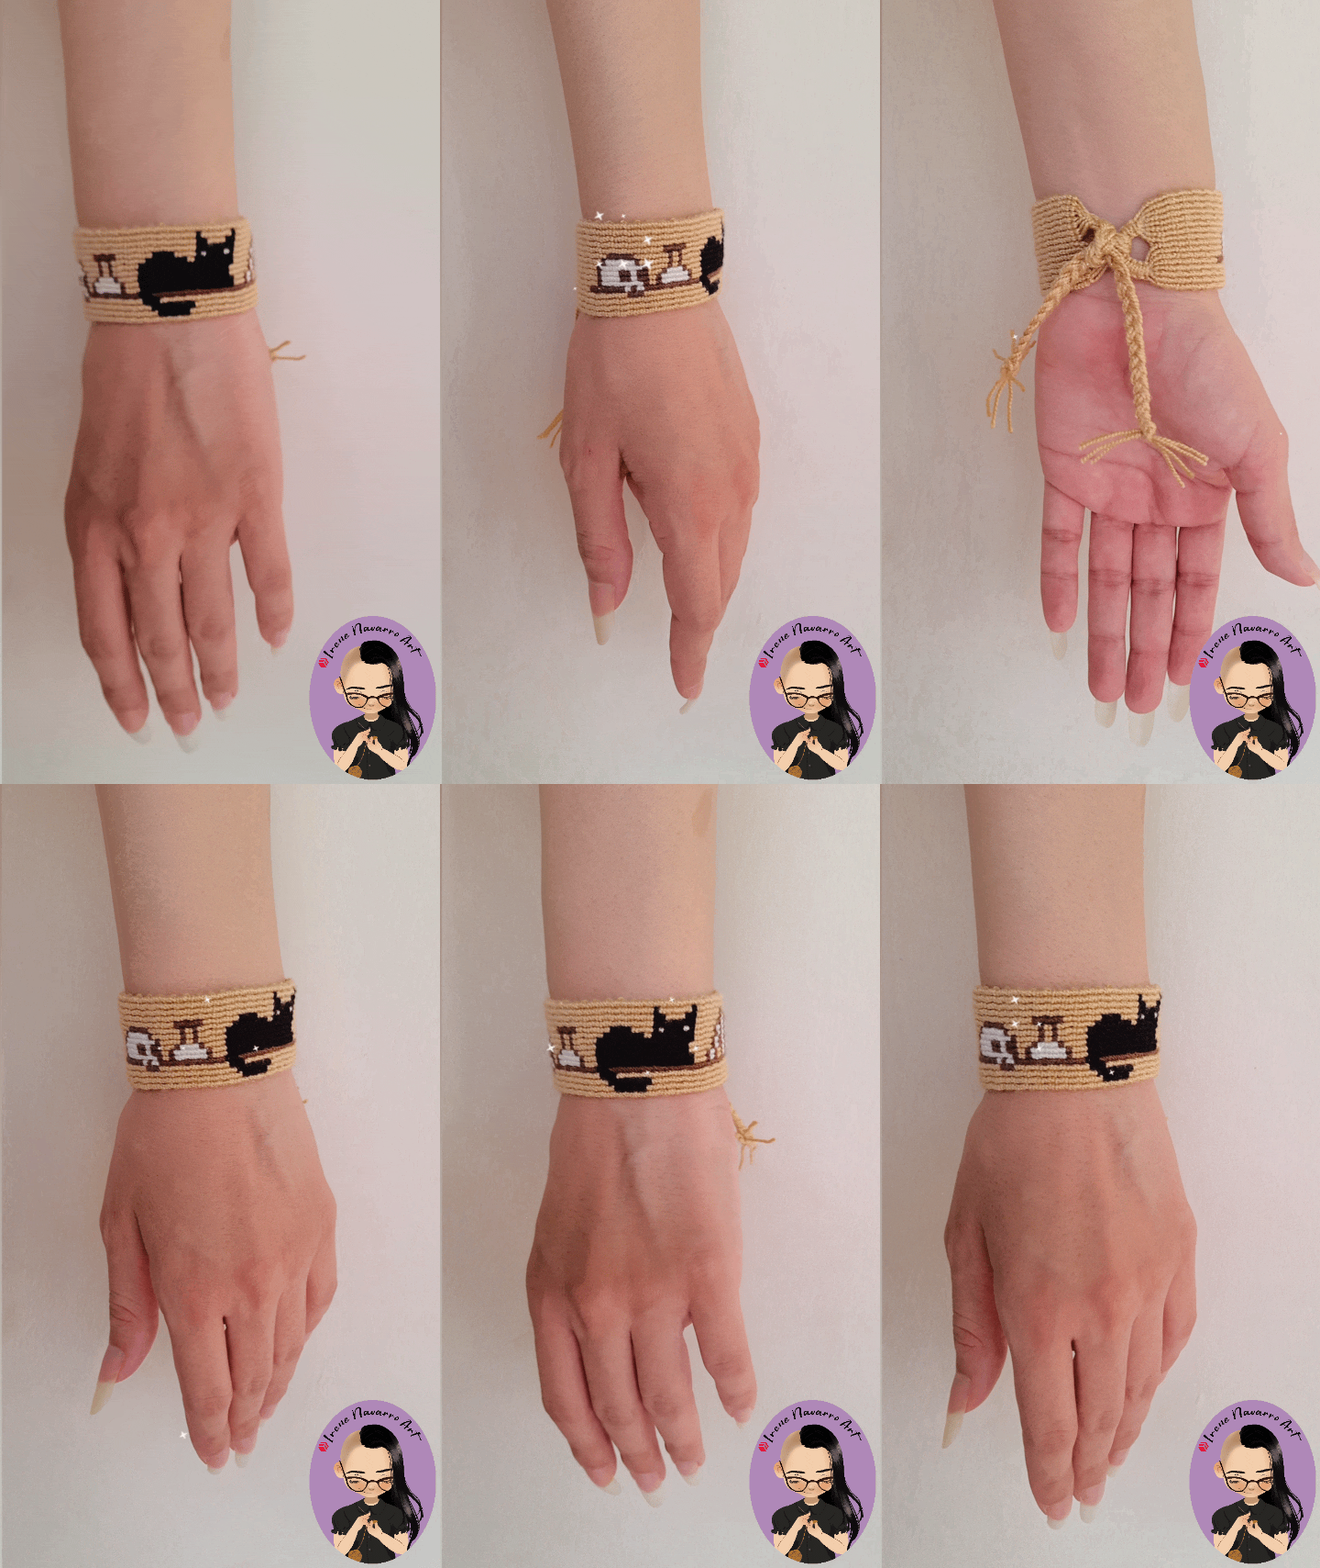

Imágenes tomadas con dispositivo Samsung A54. Portada editada en Inshot
Pictures taken with Samsung A54 device. Cover edited in Inshot

Espero les haya gustado. Les invito a leer mis próximas publicaciones y siempre estaré dispuesta a responder sus preguntas y comentarios, también pueden seguirme y contactarme en cualquiera de mis redes sociales. ¡Muchas gracias!
I hope you liked it. I invite you to read my next publications and I will always be willing to answer your questions and comments, you can also follow me and contact me on any of my social networks. Thank you!
Facebook
Twitter
Instagram
Ko-Fi
Discord: irenenavarroart#0361
Posted Using InLeo Alpha
Congratulations @irenenavarroart! You have completed the following achievement on the Hive blockchain And have been rewarded with New badge(s)
You can view your badges on your board and compare yourself to others in the Ranking
If you no longer want to receive notifications, reply to this comment with the word
STOPCheck out our last posts:
Que hermosoo
Amiga, pero qué lindo brazalete, amo los gatitos.❣️
This is nice and it fits your wrist perfectly.
Bellísimo este brazalete, y los colores muy combinables con muchos outfits
https://x.com/hivediy47901/status/1820587893481456018