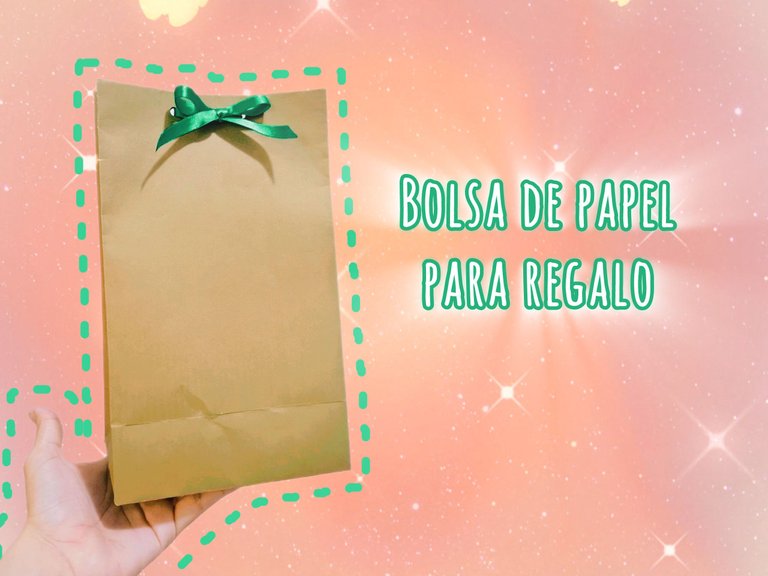
Bolsa de papel para regalo
Saludos querida comunidad de las manualidades, esta semana es el cumpleaños de mi persona especial, así que decidí hacer una bolsa de regalo con los materiales que tenía en casa para meter dentro el obsequio, por supuesto que pude haber comprado una bolsa, pero para mí se siente muy bonito hacer las cosas por uno mismo, además que estas obsequiando tu cariño y tiempo 😊 Espero les guste este práctico tutorial.
Greetings dear craft community, this week is my special someone's birthday, so I decided to make a gift bag with the materials I had at home to put the gift inside. Of course, I could have bought a bag, but for me it feels very nice to do things for yourself, and you are also giving your love and time 😊 I hope you like this practical tutorial.

Materiales / Materials
- Cartulina doble faz o papel de regalo
- Cinta del color de su preferencia
- Lápiz
- Tijera
- Regla
- Perforador o Sacabocado
- Pegamento blanco o silicón
- Double-sided cardstock or wrapping paper
- Ribbon in the color of your choice
- Pencil
- Scissors
- Ruler
- Hole punch
- White glue or silicone
Proceso / Process
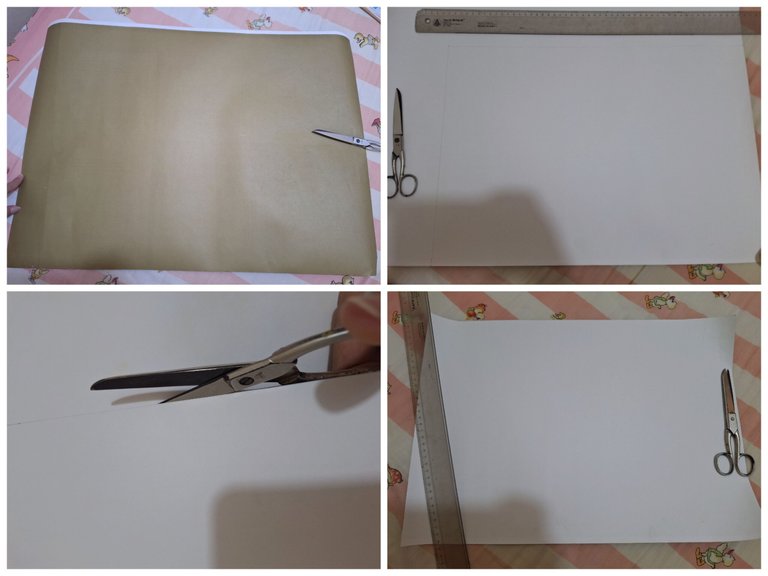
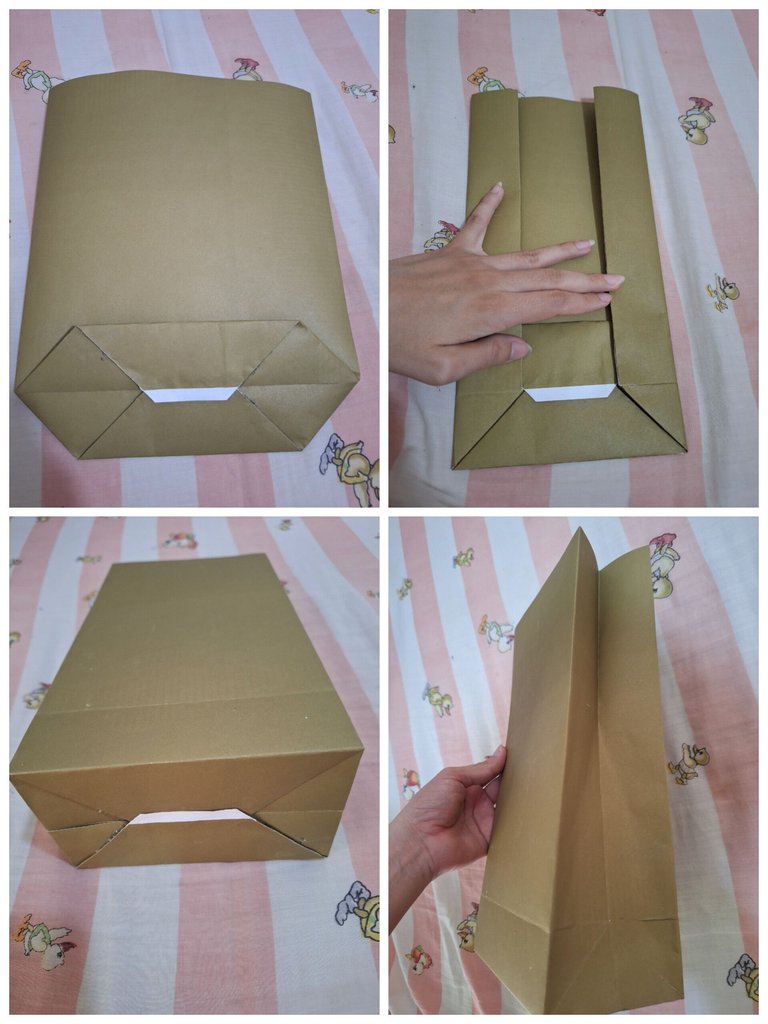
Tomar el pliego de papel y medir un rectángulo de 50 cm de ancho por 35 cm de alto con la regla y marcar con un lápiz, con la tijera cortar siguiendo la trayectoria de las líneas hechas previamente.
Take the sheet of paper and measure a rectangle 50 cm wide by 35 cm high with the ruler and mark it with a pencil. Use scissors to cut along the path of the lines made previously.
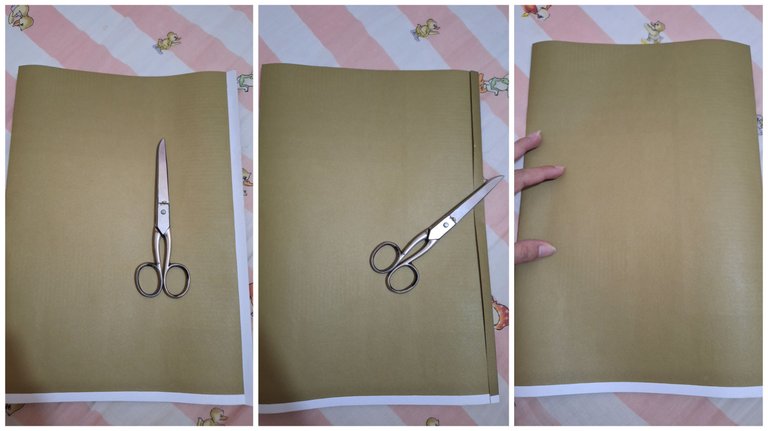
Doblar el papel en dos partes dejando un pequeño borde de 1 cm a lo alto del papel, doblar el borde, aplicar pegamento solo en esa pestaña creada y pegar del lado de adentro.
Fold the paper in two parts leaving a small edge of 1 cm at the top of the paper, fold the edge, apply glue only on that created tab and glue on the inside.
Una vez este seco el pegamento medir 10 cm desde abajo y doblar, luego abrir del doblez del lado de adentro y volver a doblar como se observa en la siguiente imagen.
Once the glue is dry, measure 10 cm from the bottom and fold, then open the fold on the inside and fold again as shown in the following image.
Tomar los bordes creados y doblarlos de nuevo por la mitad enfrentando ambos lados hacia el centro para formar la base de la bolsa, aplicar pegamento solo en las áreas donde mantienen contacto las pestañas dobladas.
Take the created edges and fold them in half again, facing both sides toward the center to form the base of the bag. Apply glue only to the areas where the folded tabs make contact.
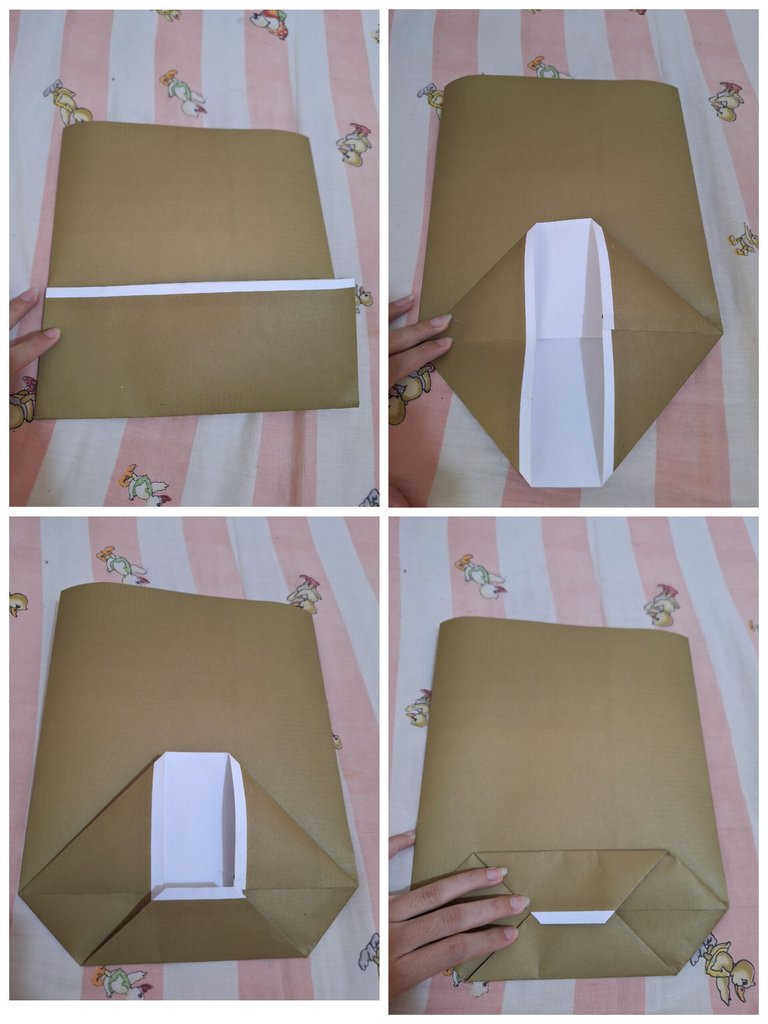
Tomar ambos lados de la bolsa y doblarlos hacia el centro guiándose por los triángulos formados en la base. Luego meter la mano por dentro de la bolsa para abrir y separar el papel, de modo que se pueda dar la forma a la bolsa, doblar los laterales hacia adentro.
Take both sides of the bag and fold them toward the center, following the triangles formed at the bottom. Then, insert your hand inside the bag to open and separate the paper, allowing you to shape the bag. Fold the sides inward.
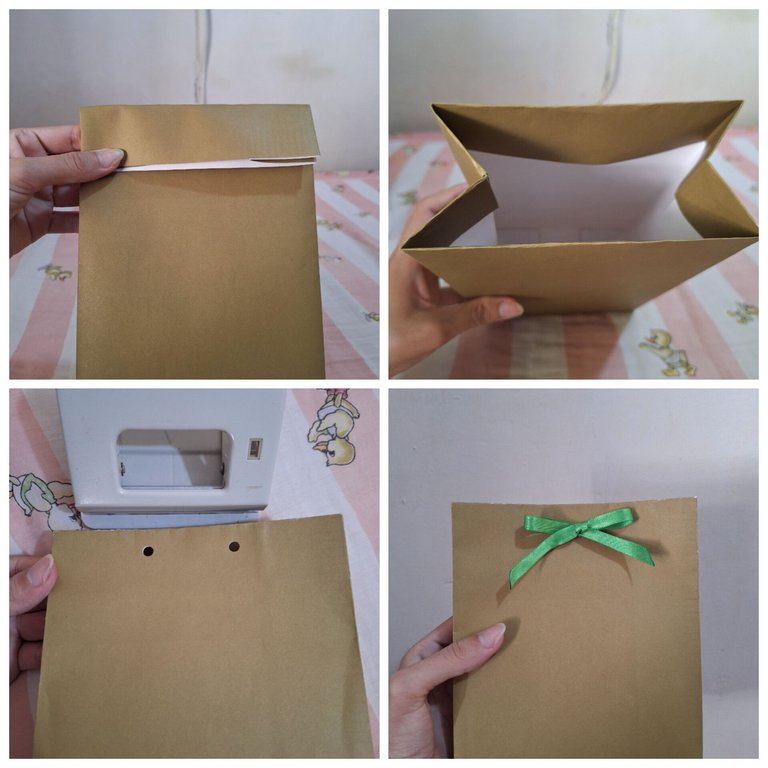
Del borde de arriba doblar a los 5cm, luego doblar el papel hacia el lado de adentro de la bolsa para crear un borde más grueso y prolijo. Con el perforador abrir dos agujeros en el centro de la bolsa, pasar la cinta por los agujeros y hacer un lacito 😊
From the top edge, fold 5cm, then fold the paper toward the inside of the bag to create a thicker, neater edge. Use a hole punch to punch two holes in the center of the bag, thread the ribbon through the holes, and make a bow.
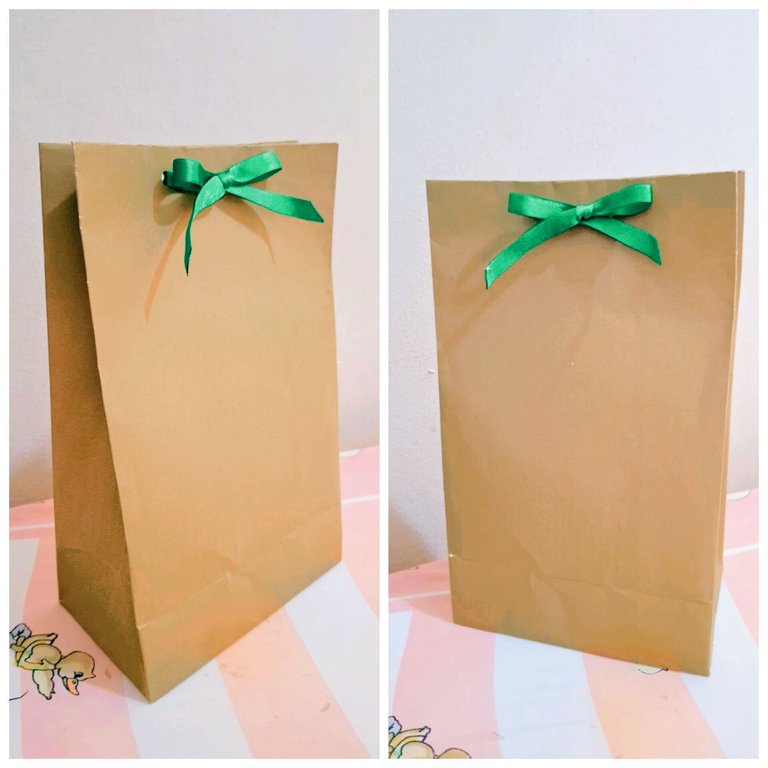
Resultado / Result

Imágenes tomadas con dispositivo Samsung A54. Portada editada en Inshot
Pictures taken with Samsung A54 device. Cover edited in Inshot

Espero les haya gustado. Les invito a leer mis próximas publicaciones y siempre estaré dispuesta a responder sus preguntas y comentarios, también pueden seguirme y contactarme en cualquiera de mis redes sociales. ¡Muchas gracias!
I hope you liked it. I invite you to read my next publications and I will always be willing to answer your questions and comments, you can also follow me and contact me on any of my social networks. Thank you!
Facebook
Twitter
Instagram
Ko-Fi
Discord: irenenavarroart#0361
This is beautiful.i love it. I will like to make one for myself.kudo's dear
Thank you very much ☺️
Your welcome
Woah,this DIY is cool.I like the cute green ribbon heheh.You make creativity in just small things.
Thank you ☺️
Your very much welcome.
Que idea tan bonita, me encantó que la compartieras ❤️🥰
Muchas gracias ☺️
Creating gifts for our loved ones hits different and it’s always beautiful to see how we put in so much effort to make sure they come out nicely.
This is so beautiful friend, well done.
selected by @ibbtammy
Thank you very much 😊
Que linda bolsa, parece sencila de hacer, gracias por explicar el paso a paso minuciosamente.
Saludos!
Gracias 😊 Saludos!