Amigurumi: Mula para pesebre
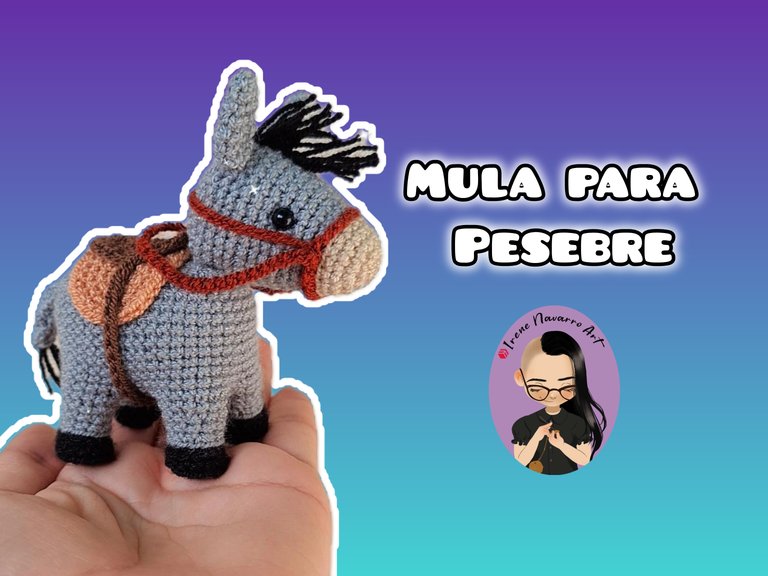
Saludos querida comunidad, el año pasado hice un pesebre en la técnica de amigurumi para mi hermana @mayoly1, este estaba compuesto solamente por las figuras de María, José y el niño Jesús, por lo que este año mi hermana me ha pedido que haga las figuras de la Mula y Buey para completar la escena del nacimiento de Jesús, debido a otras ocupaciones no había tenido tiempo de poner manos a la obra en este encargo hasta el día de hoy, comencé primero con la figura de la mula y espero pronto poder comenzar la figura del buey antes de que llegue la navidad , estoy como en una carrera contra reloj y espero trabajar diligentemente en esto, por ahora les comparto el proceso de elaboración de la mula y espero sea de su agrado
Greetings dear community, last year I made a nativity scene using the amigurumi technique for my sister @mayoly1, it consisted only of the figures of Mary, Joseph and baby Jesus, so this year my sister has asked me to make the figures of the Mule and the Ox to complete the scene of the birth of Jesus, due to other occupations I had not had time to get down to work on this assignment until today, I started first with the figure of the mule and I hope to soon be able to start the figure of the ox before Christmas arrives, I am like in a race against the clock and I hope to work diligently on this, for now I share with you the process of making the mule and I hope it is to your liking

Proceso / Process
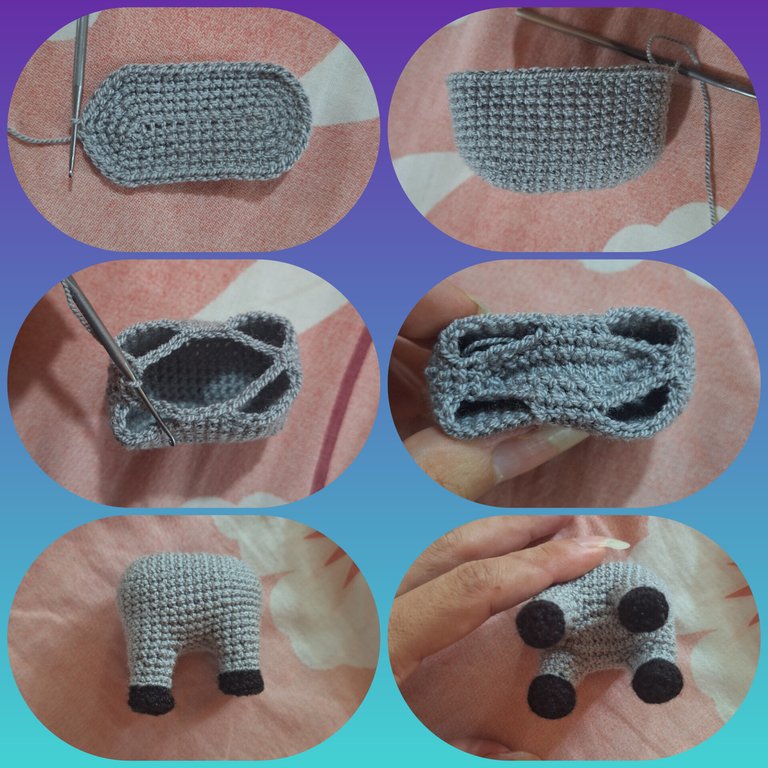
Para este amigurumi usé hilos acrílicos para crochet y ganchillo de 1.25mm, comencé primero con el cuerpo de la mula desde el lomo, haciendo 12 cadenas de base, hice 4 aumentos por cinco hileras, ubicando los aumentos en los extremos, luego hice ocho hileras de puntos bajos, luego parar crear los agujeros para las patas salté 8 puntadas e hice 4 cadenas para cada uno, luego levanté los puntos para hacer las patas, finalizando con hilo negro en la ultimas tres hileras.
For this amigurumi I used acrylic crochet yarn and a 1.25mm crochet hook. I started first with the body of the mule from the back, making 12 base chains, I made 4 increases for five rows, placing the increases at the ends, then I made eight rows of single crochet, then to create the holes for the legs I skipped 8 stitches and made 4 chains for each one, then I picked up the stitches to make the legs, finishing with black thread on the last three rows.

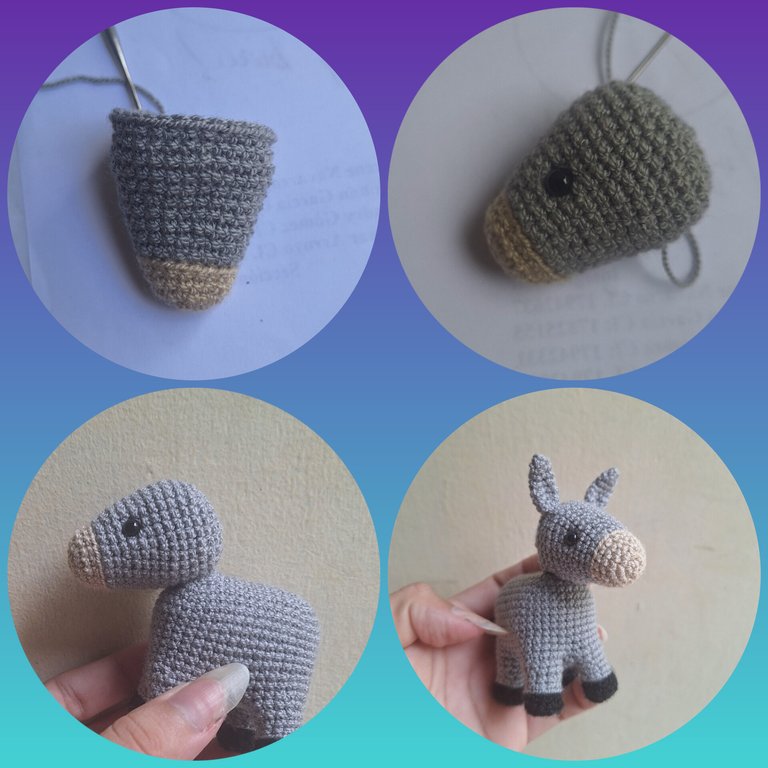
Para la cabeza comencé con hilo beige el hocico, con 6 puntos bajos en un anillo, hice dos hileras de 6 aumentos, una hilera sin aumentos y cambié a hilo gris, a partir de allí alterné hileras de 3 aumentos con hileras sin aumentos hasta obtener 30 puntadas, hice 4 hileras sin aumentos y luego 6 disminuciones por cuatro hileras para cerrar, como usé ojos de seguridad los coloqué a mitad del proceso. Para cada una de las orejas hice 4 puntos bajos en un anillo, un aumento por cuatro hileras, dos hileras sin aumentos y cosí las orejas a la cabeza.
For the head I started with beige yarn for the snout, with 6 single crochet stitches in a ring, I did two rows of 6 increases, one row without increases and changed to grey yarn, from there I alternated rows of 3 increases with rows without increases until I got 30 stitches, I did 4 rows without increases and then 6 decreases for four rows to close, since I used safety eyes I placed them halfway through the process. For each of the ears I did 4 single crochet stitches in a ring, one increase for four rows, two rows without increases and sewed the ears to the head.

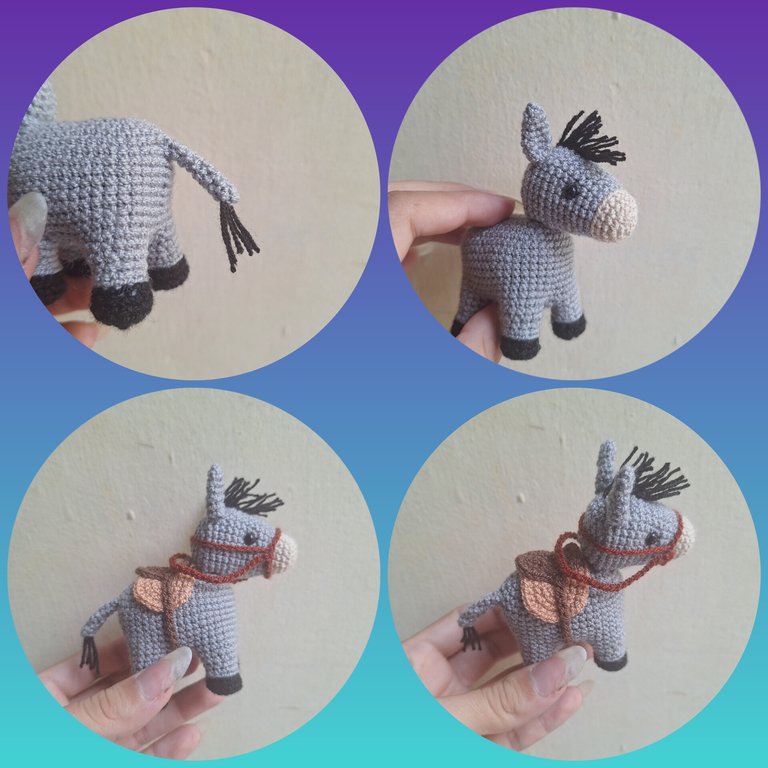
Para detalles finales hice la cola con 4 puntos bajos en una anillo y 8 hileras de puntos bajos, luego hice con el hilo color beige un óvalo grande y el con el color marrón un ovalo pequeño para formar la silla de montar la mula, las cuerdas las hice solo con cadenas.
For the final details I made the tail with 4 single crochets in a ring and 8 rows of single crochets, then I made a large oval with the beige thread and a small oval with the brown thread to form the mule's saddle, I made the strings only with chains.

Resultado / Result
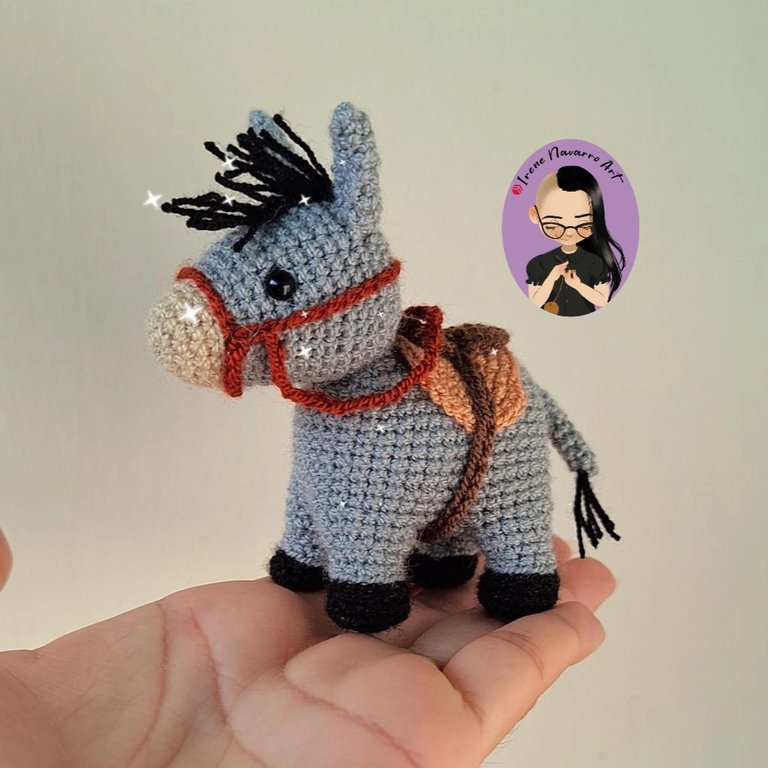
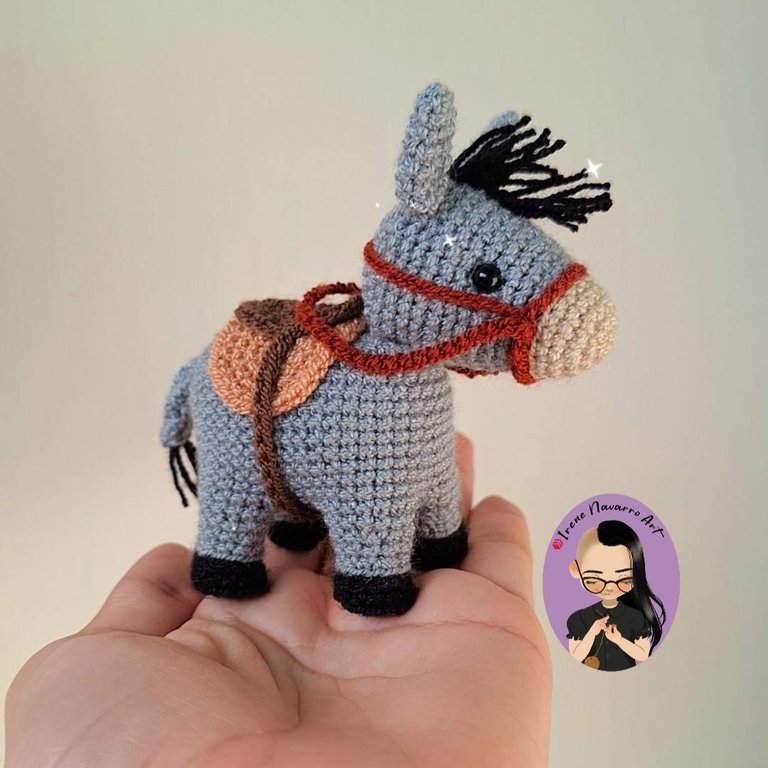
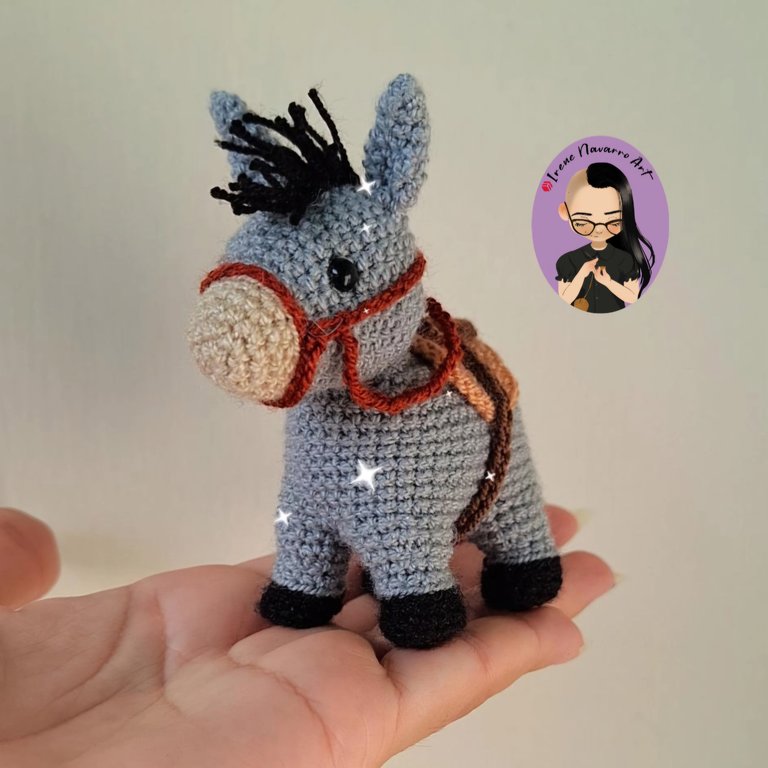
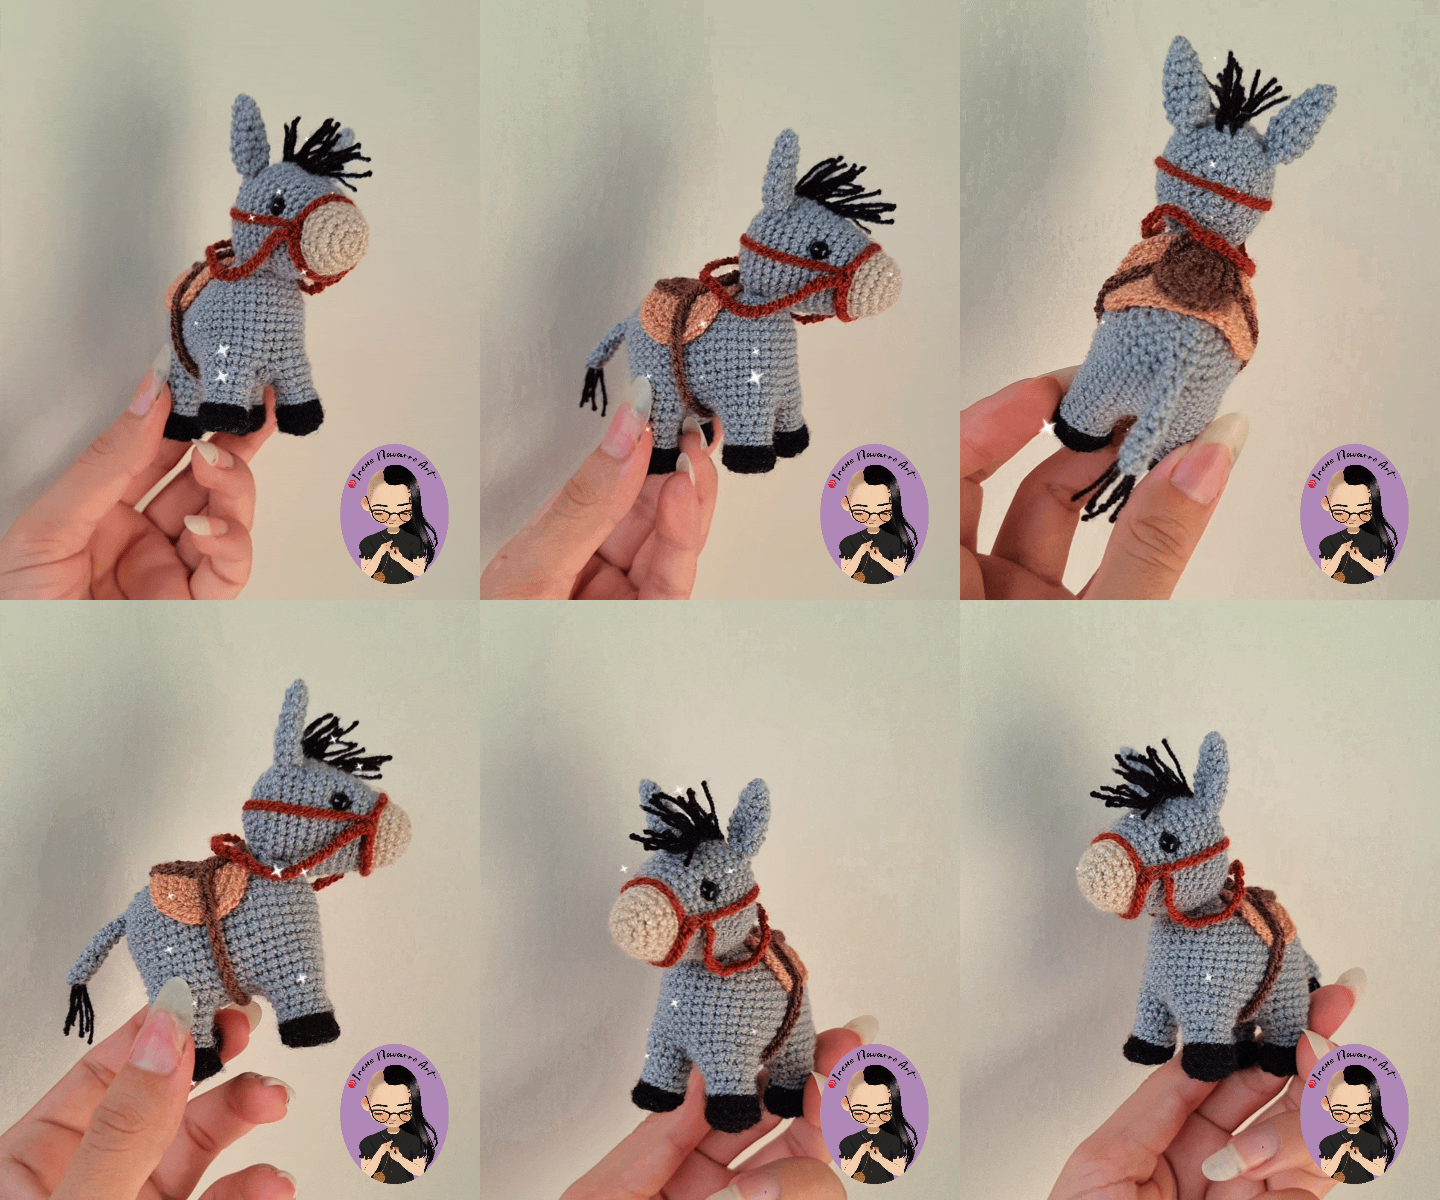

Imágenes tomadas con dispositivo Samsung A54. Portada editada en Inshot
Pictures taken with Samsung A54 device. Cover edited in Inshot
Espero les haya gustado. Les invito a leer mis próximas publicaciones y siempre estaré dispuesta a responder sus preguntas y comentarios, también pueden seguirme y contactarme en cualquiera de mis redes sociales. ¡Muchas gracias!
I hope you liked it. I invite you to read my next publications and I will always be willing to answer your questions and comments, you can also follow me and contact me on any of my social networks. Thank you!
Facebook
Twitter
Instagram
Ko-Fi
Discord: irenenavarroart#0361
Posted Using InLeo Alpha
Te quedó demasiado cute esta mulita. Me encantó. Te felicito @irenenavarroart
Muchas gracias, mañana si todo sale bien empiezo el buey para no dejar a la amula solita 😊
Hermoso trabajo, me imagino todo el pesebre juntos.
Muchas gracias ☺️ poquito a poco ahí voy jeje
¡Es demasiado hermoso! 💖, de verdad no puedo con tanta belleza 🥺, te quedó increíble ✨.
Ay gracias 🥰 yo no le tenia tanta fe pero cuando le agregué los detalles me gustó mucho también
Te quedo hermosísima, ya extrañaba tus amigurumis amiga, que bueno que la hayas podido hacer a tiempo, estaré atenta para ver al buey.😊🤗
Muchas gracias bella,si tenia un rato que no tejia amigurumis jeje. Abrazos
❤️🤗
Que cosita, más linda. Adoro las creaciones a crochet
Muchas gracias 🥰
¿ᴺᵉᶜᵉˢᶦᵗᵃˢ ᴴᴮᴰ? ᵀᵉ ˡᵒ ᵖʳᵉˢᵗᵃᵐᵒˢ ᶜᵒⁿ @ruta.loans
Quite a beautiful artistic creation from the handicrafts that my friend showed me.
Pero que cuchituraaaaaaaaaaa, maravisllosa. Felicitaciones.
Muchas gracias 😄 si quedó muy cuchi. Abrazos
Que bellísimo y delicado te quedo esta mulita!! A mi me encantan los amigurumis pero todavía no consigo un hilo adecuado acá en mi cuidad para hacerlos tan lindos!!
Lo ideal es hacerlos con lanas suaves, pero también cualquier hilo para crochet es posible, yo uso del finito porque trabajo con aguja pequeña, debes probar con lo que consigas y el grosor de la aguja. Abrazos 😊
https://www.reddit.com/r/Amigurumi/comments/1hjc8b6/charming_mule_creation_process_and_result/
https://www.reddit.com/r/blogger/comments/1hjjowu/mule_for_the_nativity_scene/
The rewards earned on this comment will go directly to the people( @x-rain, @irenenavarroart ) sharing the post on Reddit as long as they are registered with @poshtoken. Sign up at https://hiveposh.com. Otherwise, rewards go to the author of the blog post.
Es la perfección. La parte de las piernas me dejó fascinada, voy a probar tu técnica, deja un acabado muy prolijo.
a mi me encanta así porque no quedan con costuras en las piernas. Abrazos 😊
Lo bueno de un Nacimiento personalizado es que puedes hacer los animalitos a escala. Te quedó de lujo, ya quiero adoptarlo, jaja.