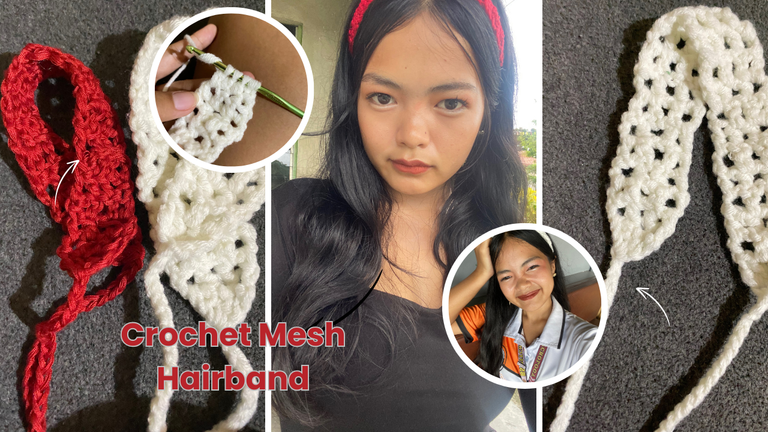
Crochet mesh hairband
Hello there my lovely hivers!!!!!!
It's been a while since I do crochet since I was really busy on my academics and I also didn't had a urge to make one but one of my fb friends post on her my day the crochet that she made and it looks really cute. The jellyfish crochet caught my attention and that made me inspire to make one. But for today's blog, the crochet pattern, I will share to you is this headband that I wore on my previous blog. It's just easy to do it takes less than 30 minutes to finish it.

If you want to knew how I made this jellyfish crochet just comment down below and I would right away made a easy tutorial for all the beginners like me!!
Before, I made this headband I already made a one crochet jellyfish but the thing was I didn't had a time to capture the step by step process. So I look another things to crochet and I stumbled this headband crochet in youtube. I also made a red headband before I made this white headband, I love how it turned out so I needed to make a white headband to match the fits of mine.
PREPARE THE MATERIAL FIRST
YARN
HOOK
SCISSOR
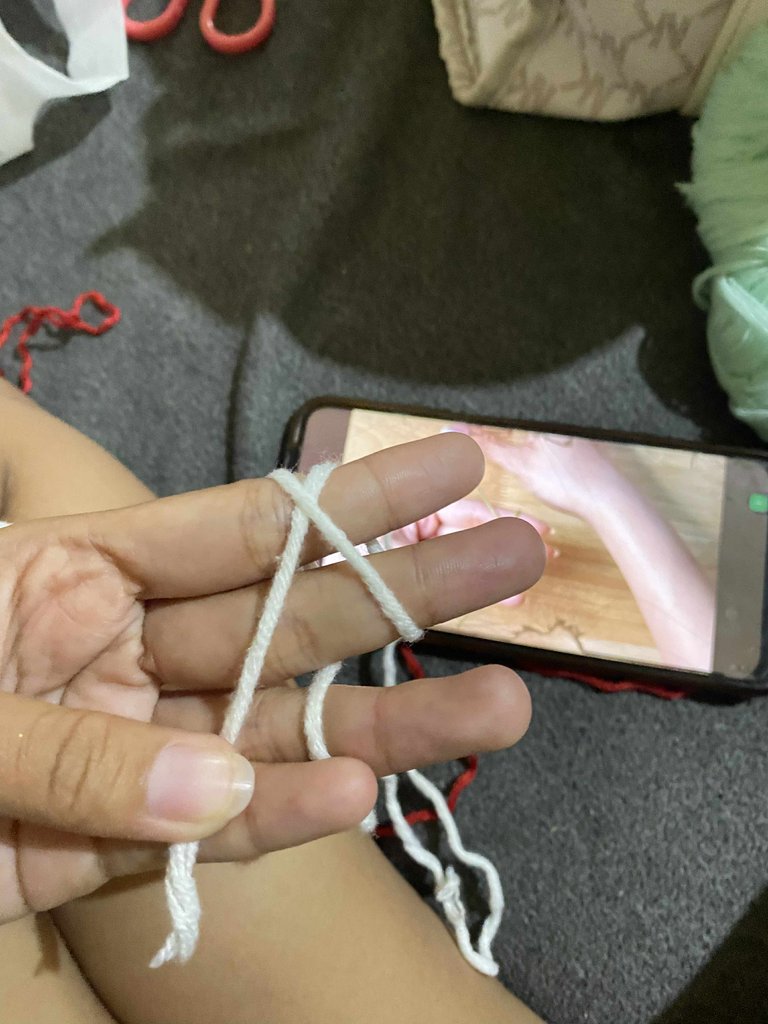
FIRST, make a slip knot and to do that you should place your yarn over your hand. Grab the yarn and wrap it on your 2 fingers to make an x and hold it with your pinky. Then, grab your hook and go inside on one side of the x and then go over and grab the other side of the x and pull it. Remove the yarn on to your hands and pull it through.
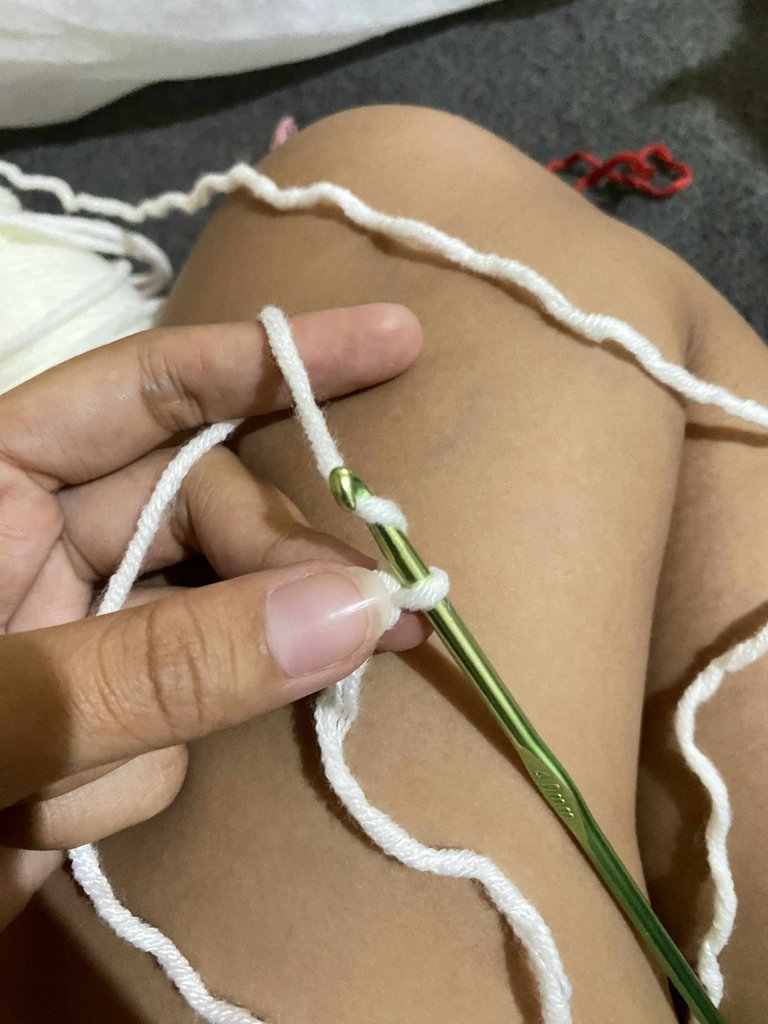
Second, to make a chain you pull over the yarn and pull it through and do it again and again until you reach 40 chains/ 26 cm long and it depends on what yarn you use. It also depends on your preferences if you want a longer strap you can chain until you were satisfied on it and you can also chain shorter if you want it.

Third,tighten the last chain by doing that, chain 3 and on the last chain you make, you will do double crochet on it.
To do that, yarn over and insert on the last chain and you should have a 2 loops your hook, yarn over and pull through. So you should have a 3 loops and to close it you just have to yarn over and pull 2 loops and yarn over pull 2 loops.
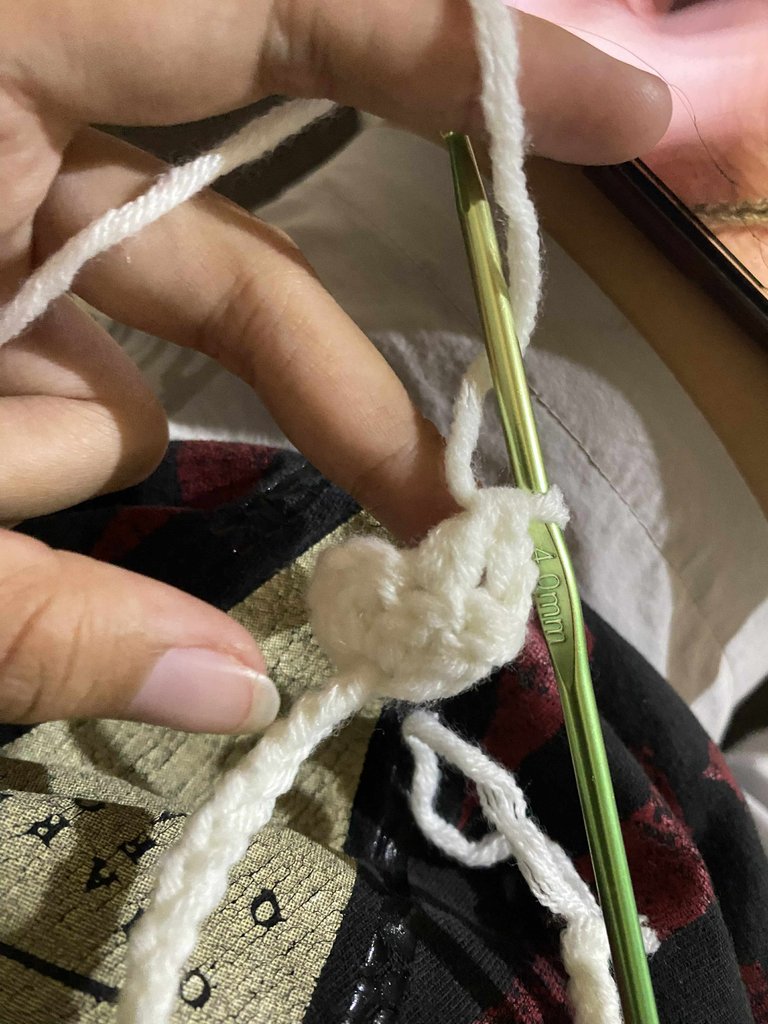
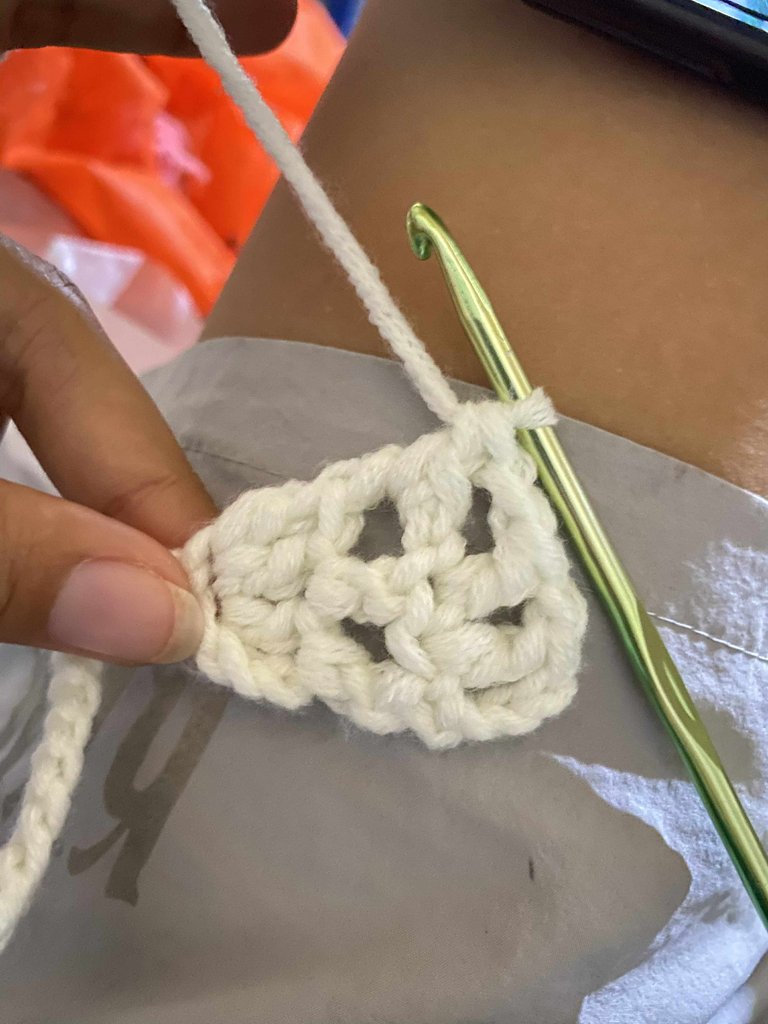
On the same chain, make another double crochet. Repeat the process until you had 3 double crochet on one chain. The reason why we do this, and tighten this area so this whole wouldn't be that big. This serves us our first row.
ROW 2

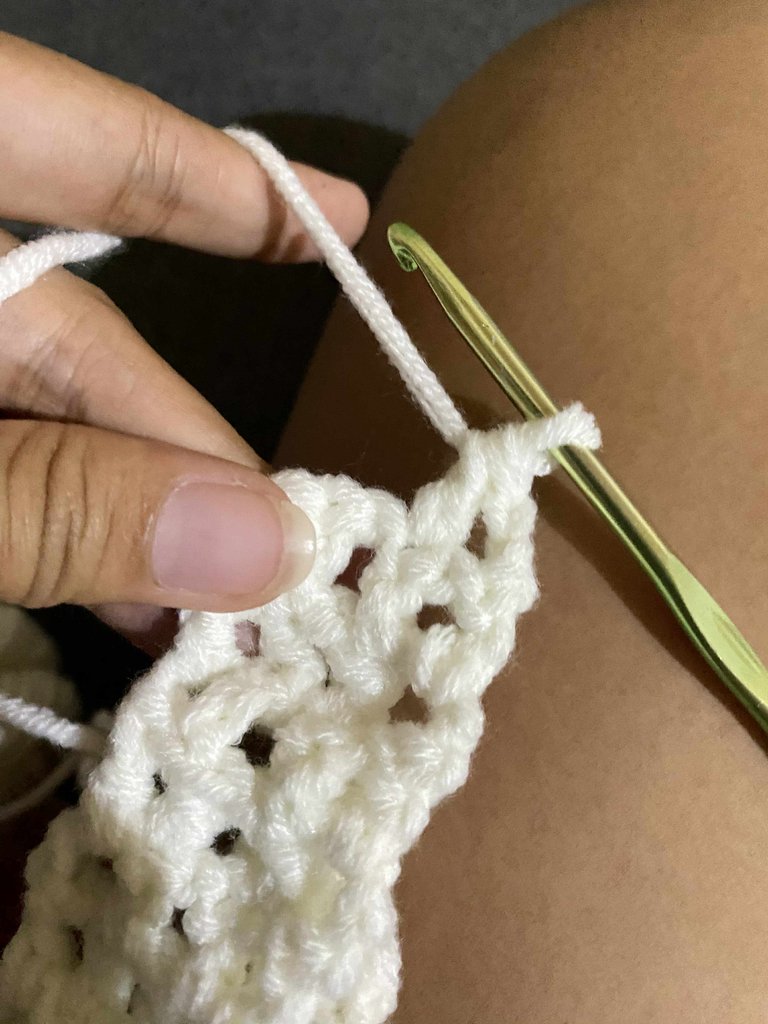
Fourth, on the next row chain 3 and turn/ flip it to the back, this 3 chains that we do it serves as a first double crochet. You can see on the chains there are 4 holes yarn. Go under the 2nd stitch and do a double crochet.
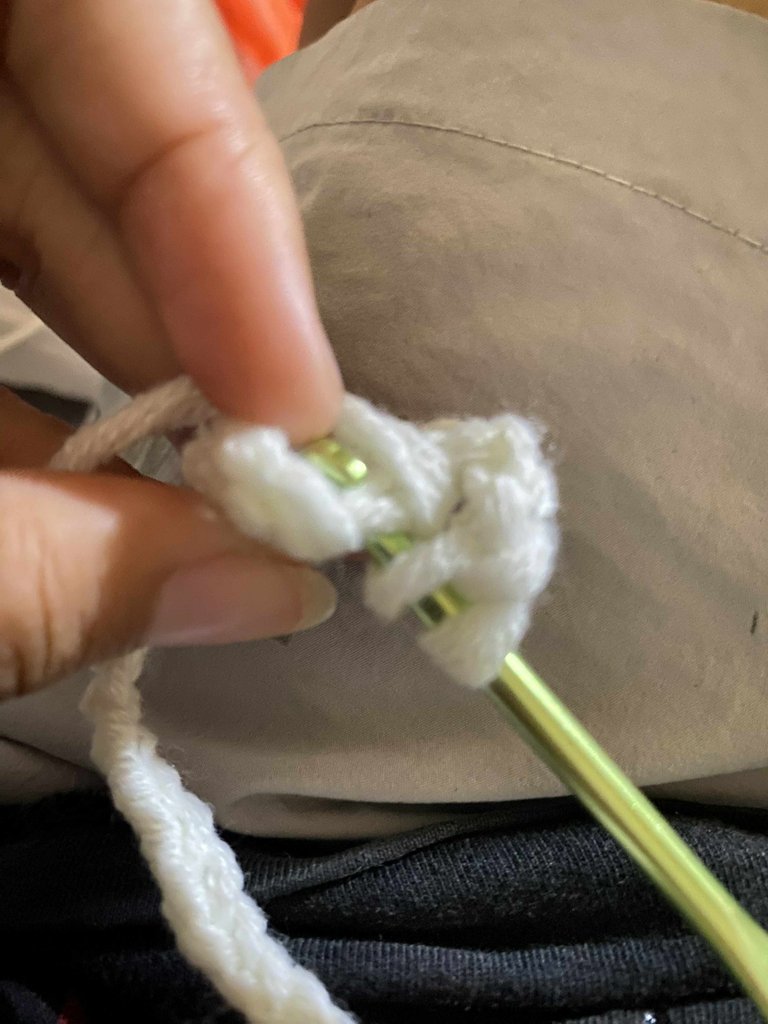
Add chain 1, and then do a double crochet on the next chain. Then chain 1 and this last part of the hole this is also a first part of our double crochet and also it is our last stick so insert your hook and yarn over.
ROW 3 - ROW 23
Repeat the process on row 2, chain 3 and double crochet each holes. Until you reach the size you want.

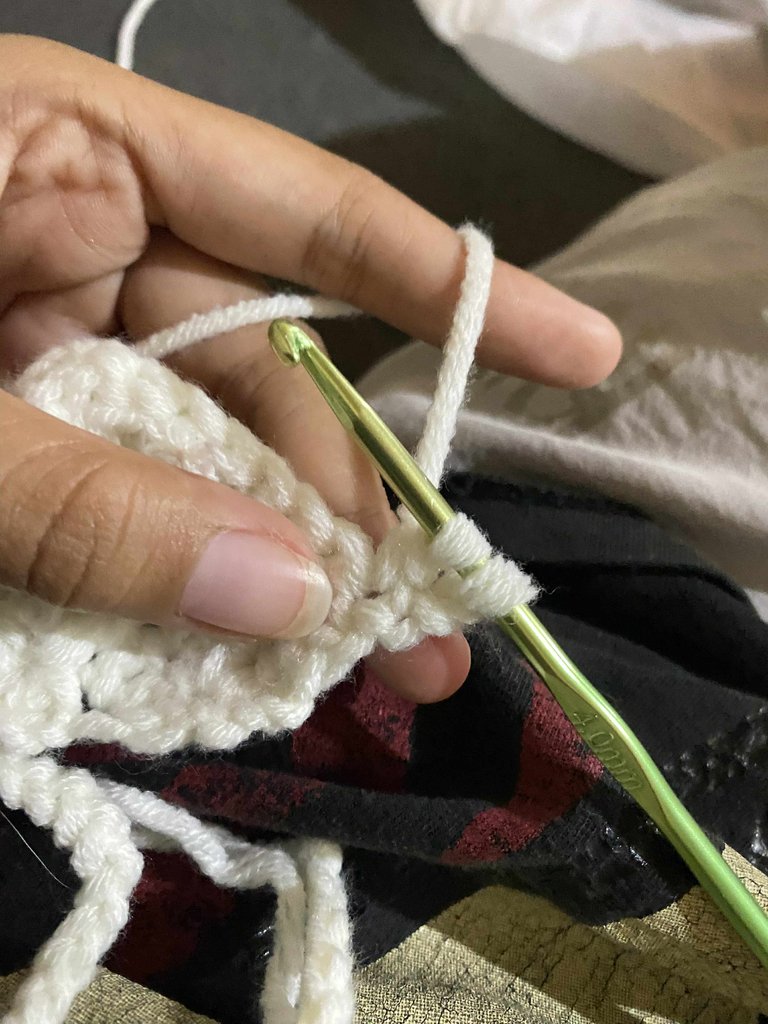
To close the headband on the side it's just the sane with the first you just have to double crochet on the last stitch, and do not chain one and repeat the process until you reach the end. This serves as our 23rd row.
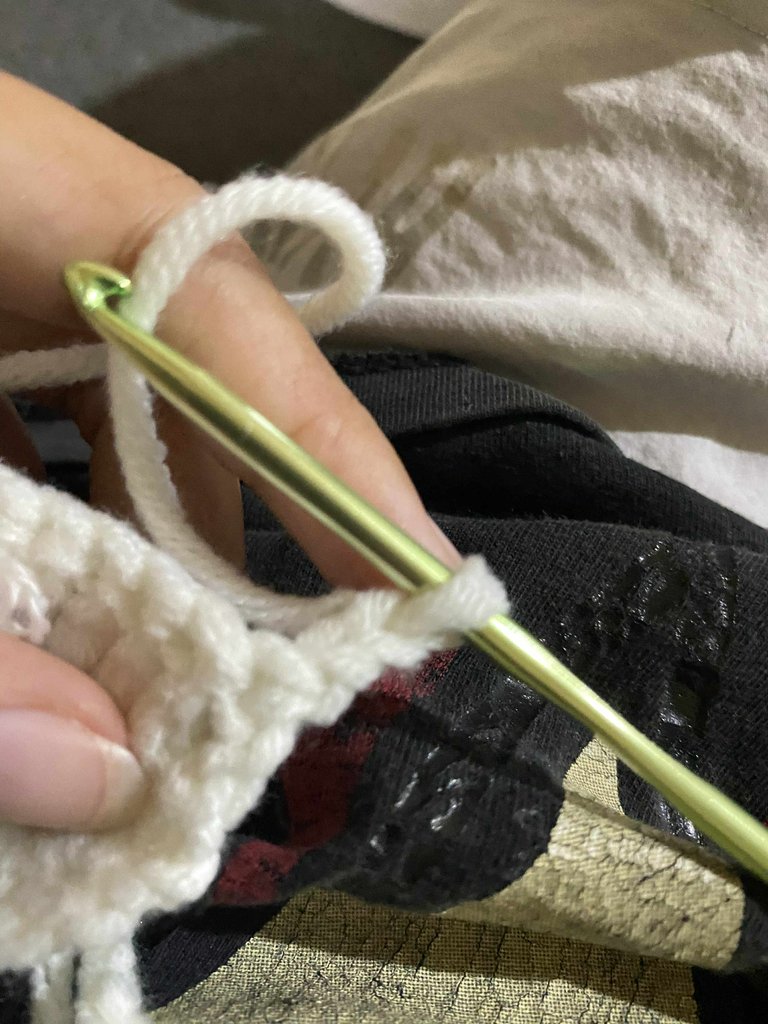
Row 24
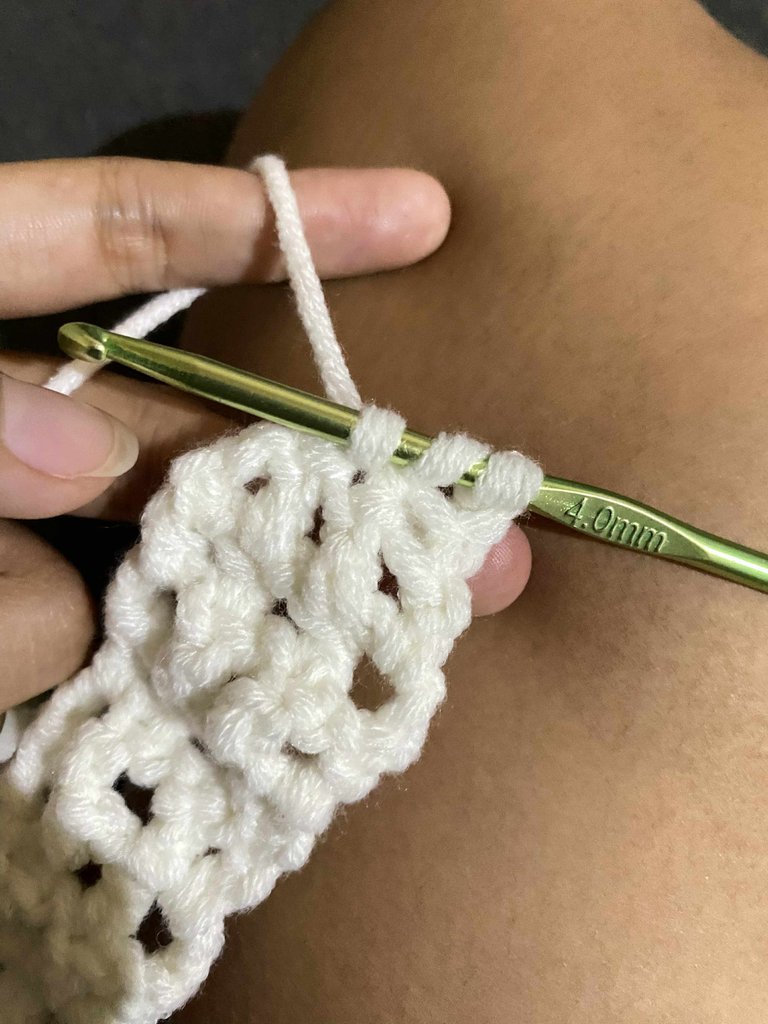
Chain 2, flip your work and do the double crochet on the 2nd stitch. And on the last chain you would do double crochet so insert your hook on the 2nd stitch yarn over and pull through and you would just have a 2 loops on your hook every stitch of yours until you get done on the last hole. In the end you should have a 4 loops on your hook and yarn over to close it.

Just like the other side, repeat how many chains you stitch. If you were done to chain, you should fasten it off.
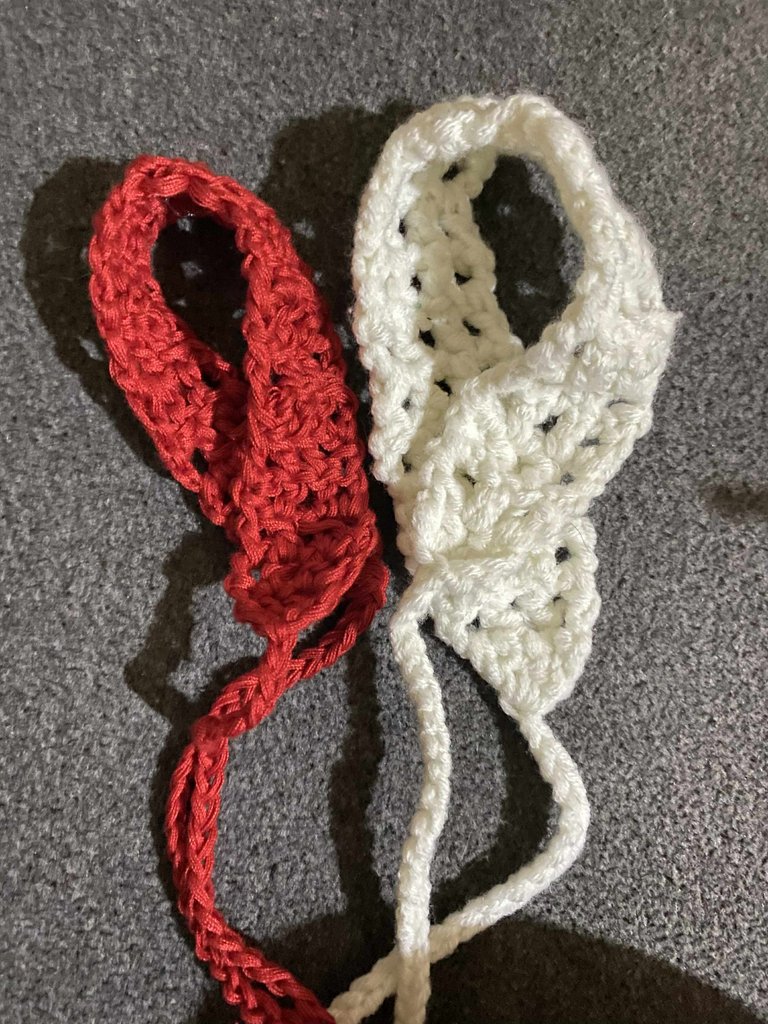
This is how it turned out.
That'e cute, simple pero ang ganda. And I think you can also put other design in it no if you want lang.
Yessss, and I didn't want to add baka it will made my headband not pleasing hehehehhe. Thanks for appreciating my work
It is fashionable, charming, and elegant. It looks so beautiful. It is good to see each step of making this. Well done!
selected by @rezoanulvibes
Thankyou so much @diyhub also special thanks @rezoanulvibes. I appreciate it so much and it made me inspire to make more crochet