Sketchbook BONUS - Hands in any pose Tutorial (With Video)
Hello and happy Wednesday!
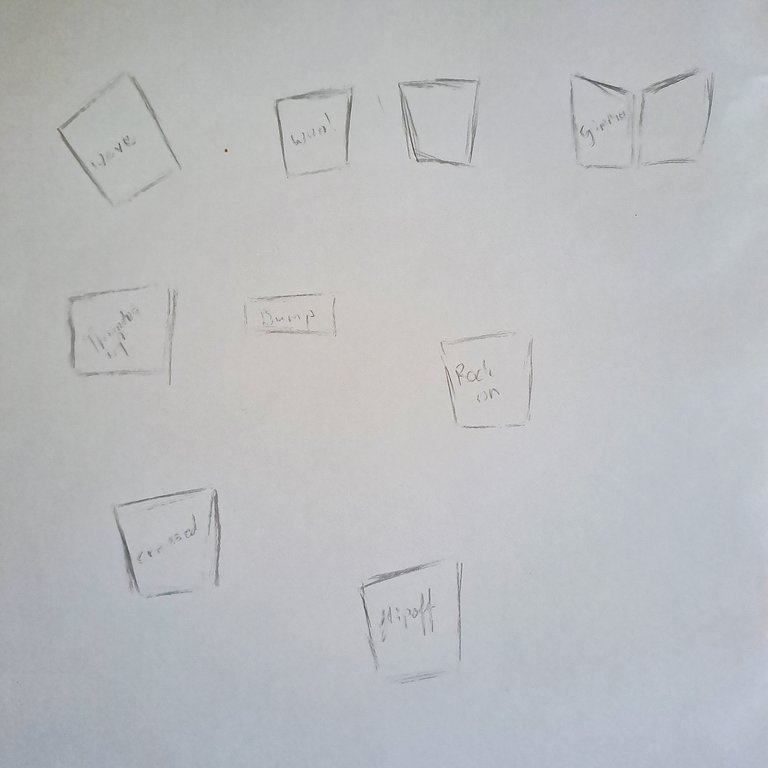
Step 1 - The palm - Start with a basic square shaped, with the top line being slightly slanted so that the side that'll have the thumb is slightly longer.

Step 2 - Wrist Placement - Draw a circle at the base of the previous shape to indicate the wrist.
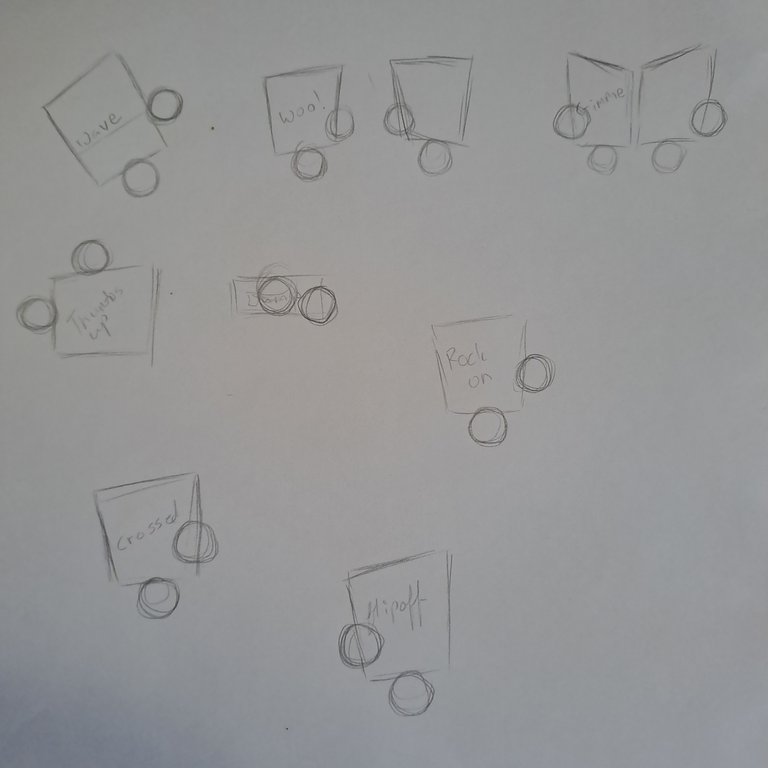
Step 3 - Thumb Placement - Add a circle on the longer side of the base shape, this is going to be the base of your thumb.
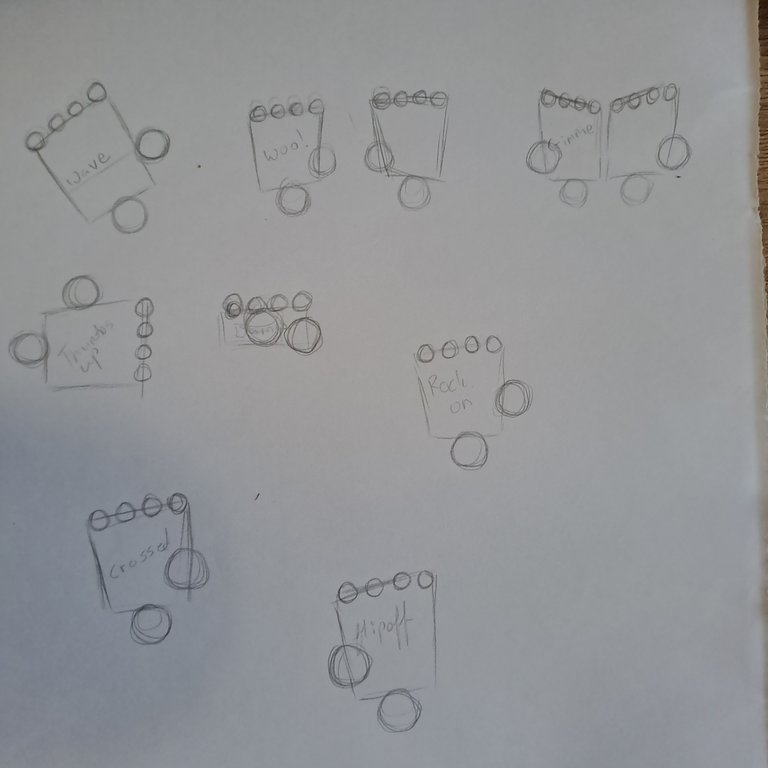
Step 4 - Knuckles - Focusing on the pose you wish to draw, along the top of the base shape, add four small circles, these will be your knuckles.
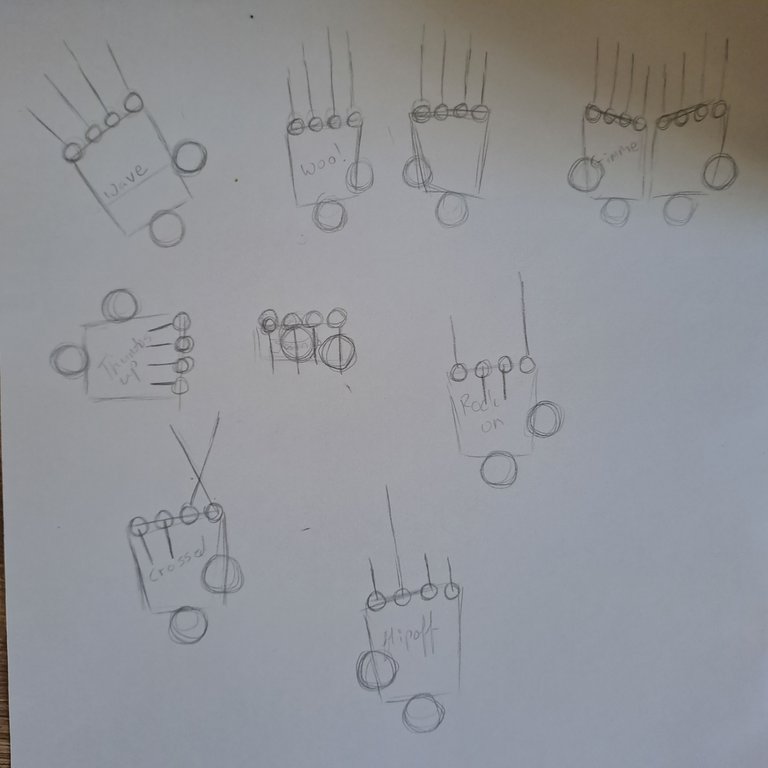
Step 5 - Finger Pose - Draw lines from each knuckle circle, to indicate finger placement.
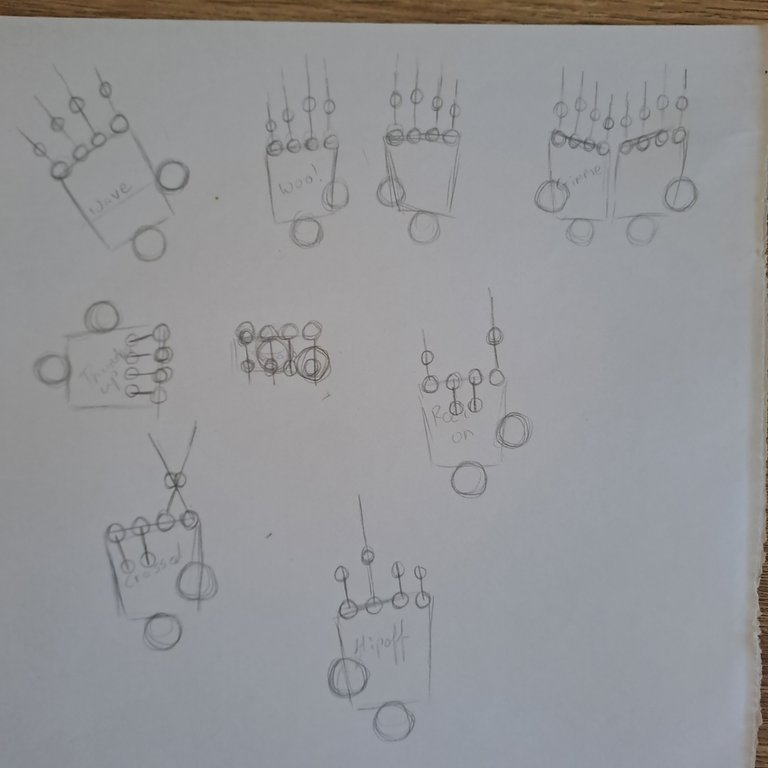
Step 6 - Finger joints - First bend - Indicate where fingers will bend, keeping in mind difference in finger lengths.
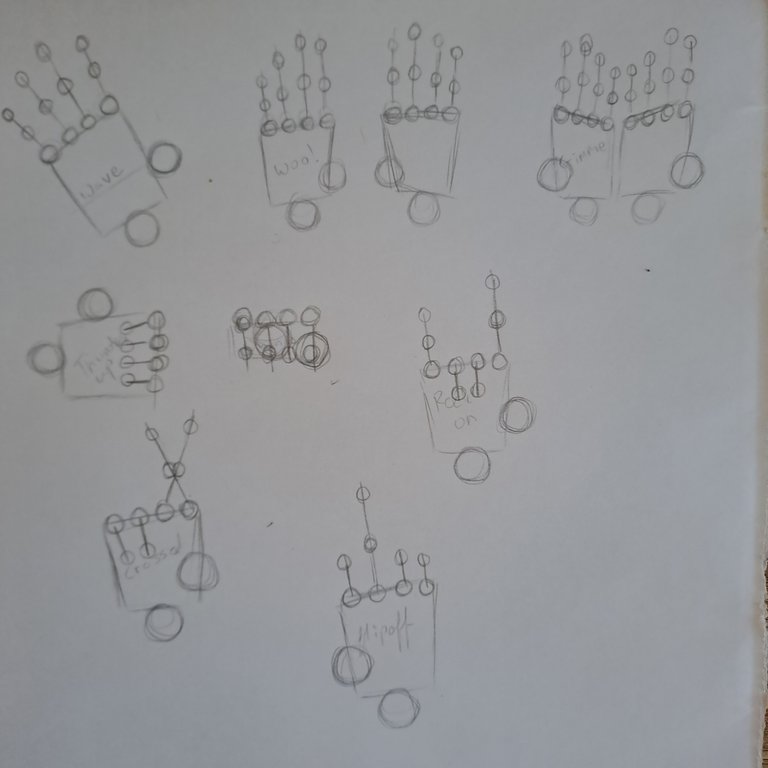
Step 7 - Fingertips - At the top of the finger lines, add a small circle to indicate fingertip and also finger length.
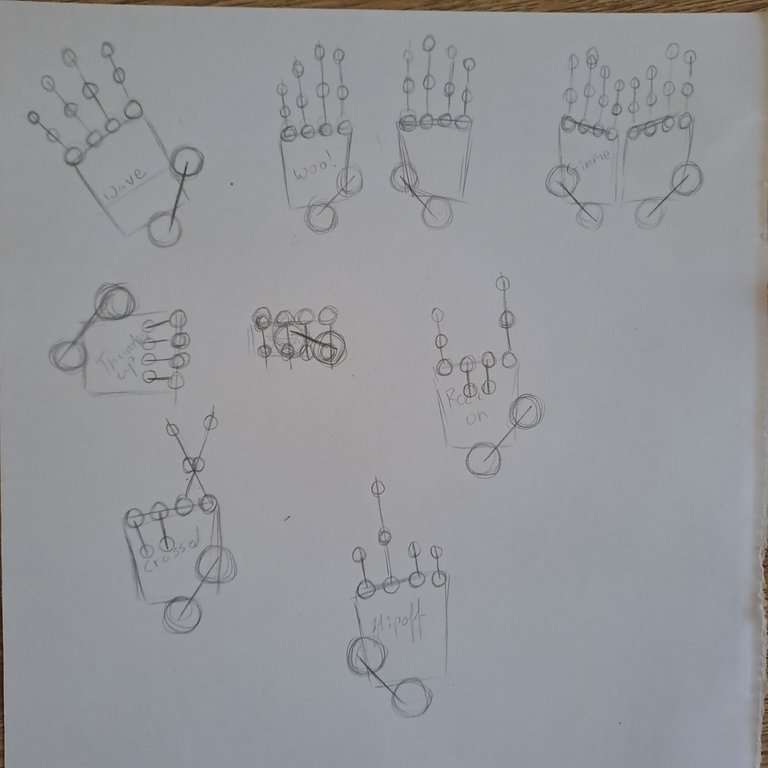
Step 8 - Thumb - Connect wrist and thumb base circles with line, keeping finger pose in mind.
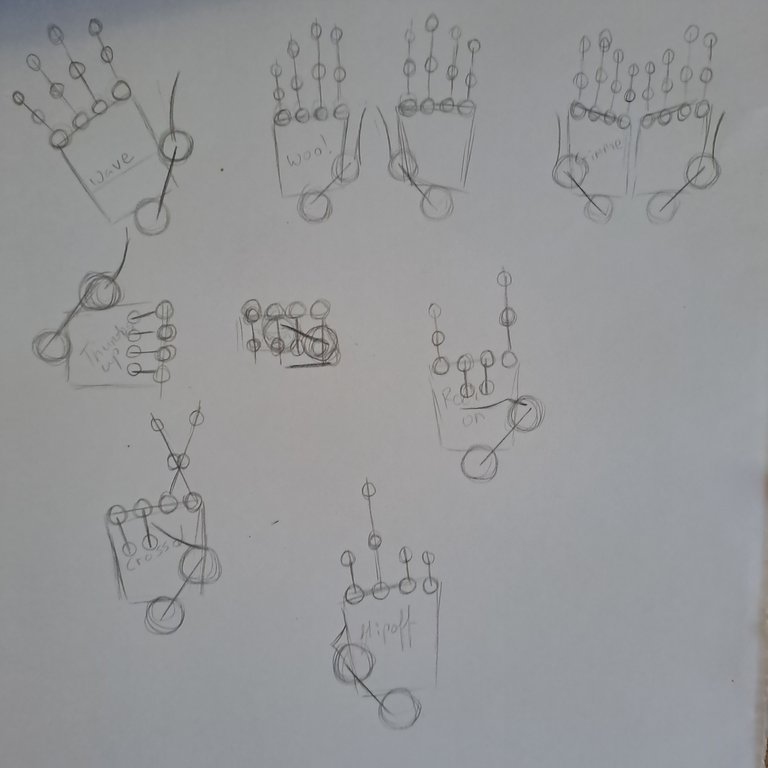
Step 9 - Thumb Position - To thumb base, add a line indicating thumb placement.
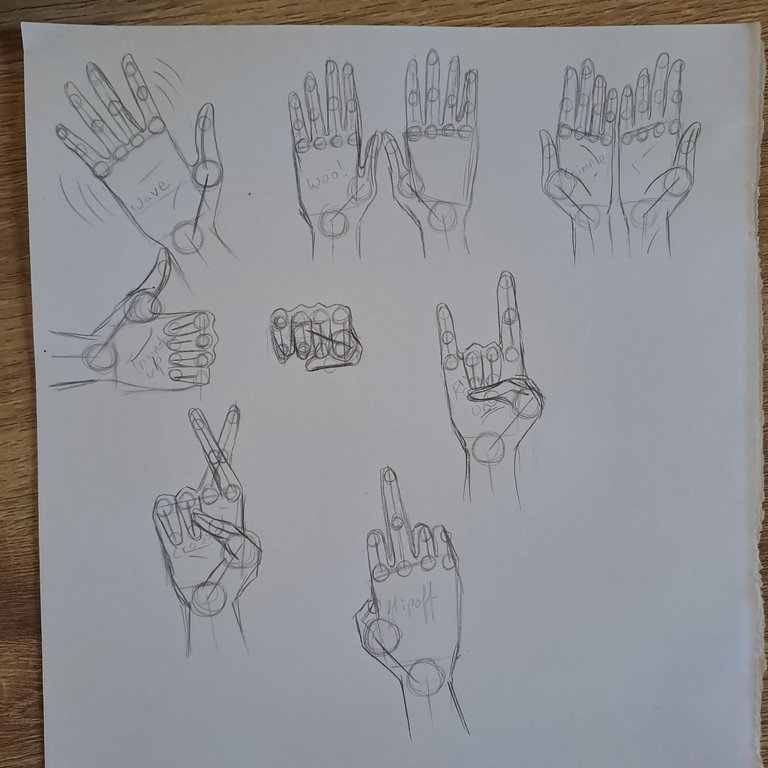
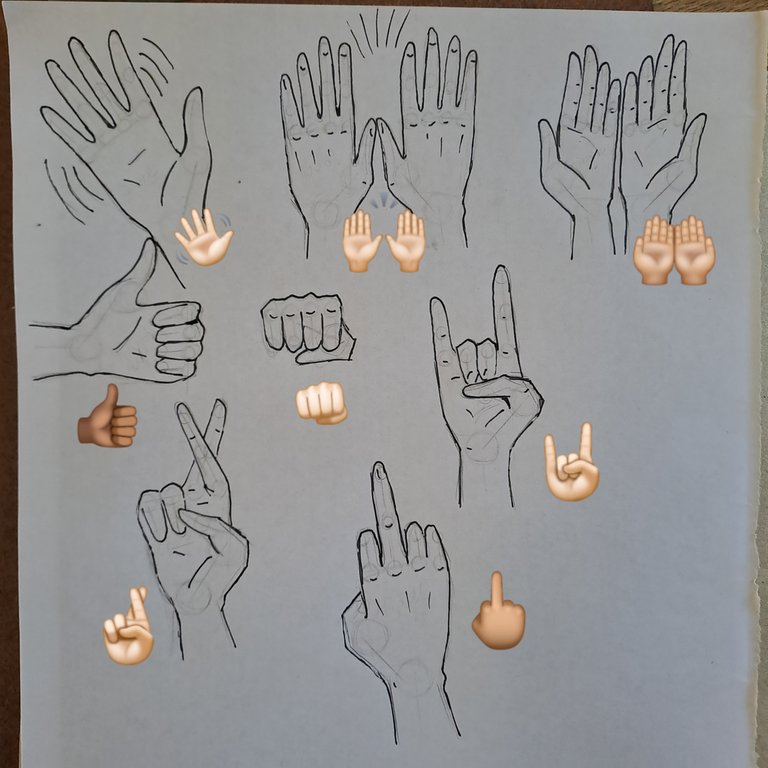
Step 10 - Outline - Using a simple outline, go ahead and draw you hand!
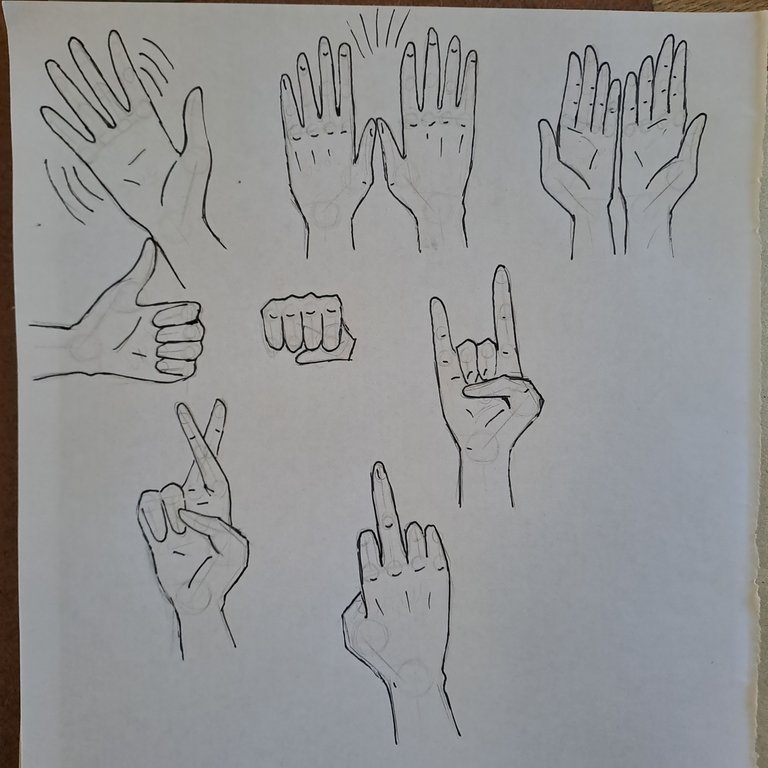
Step 11 - Finishing Touches - Clean up drawing, add details like shading or colour, go crazy!
BONUS - VIDEO
Hope this will be helpful/useful to someone!

Credit - All work and photos belong to me.
Banner created using Adobe Express
thank you for your artistic sharing
🥰Hope it motivates more people to believe that they can draw!
Hands are hard and you can do hands!
@aimeludick a tip for you!
Thank you! 😁 they are very hard to do yes, but this really helps. Anyone can do it if they know the cheats 😅
'We are what we repeatedly do' - Aristotle | Excellence in action 🎯
You only look human. Unlock your super powers. Aquarius Academy 🐬