Sketchbook 054 - Horned Skull Tutorial in Ink (Step By Step)
Greetings!

A tutorial created for and because of and for my muse.
Process
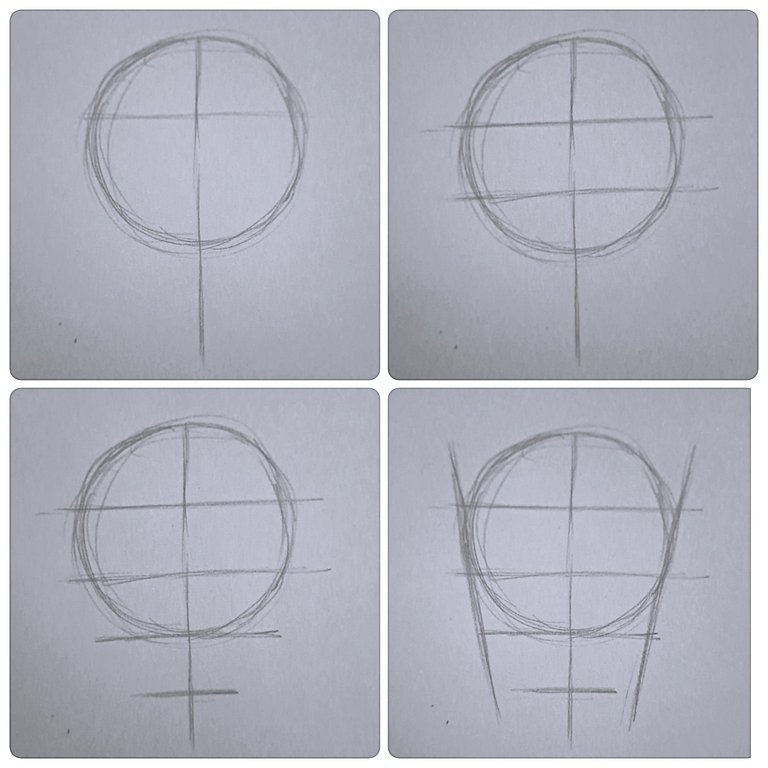
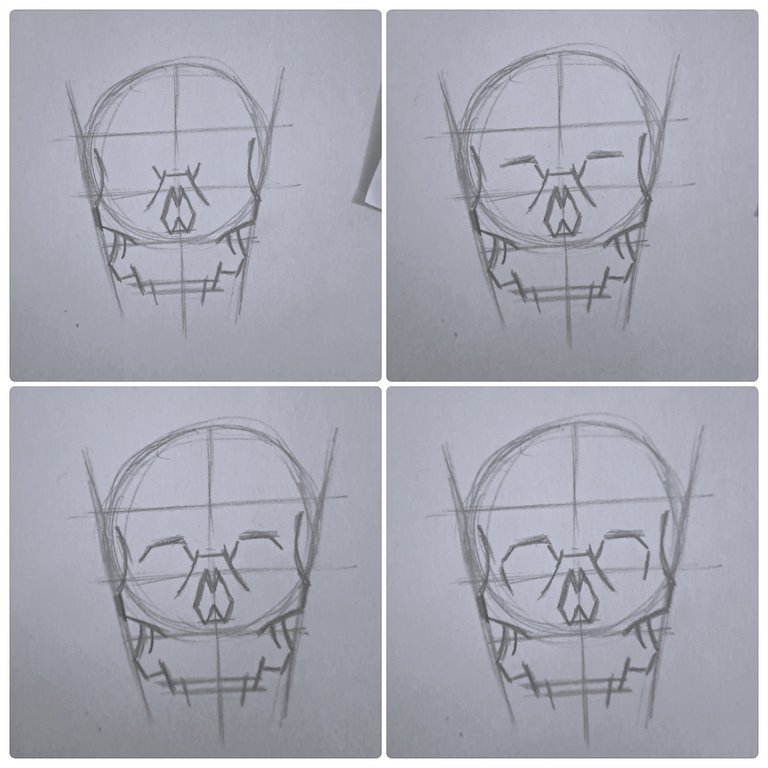
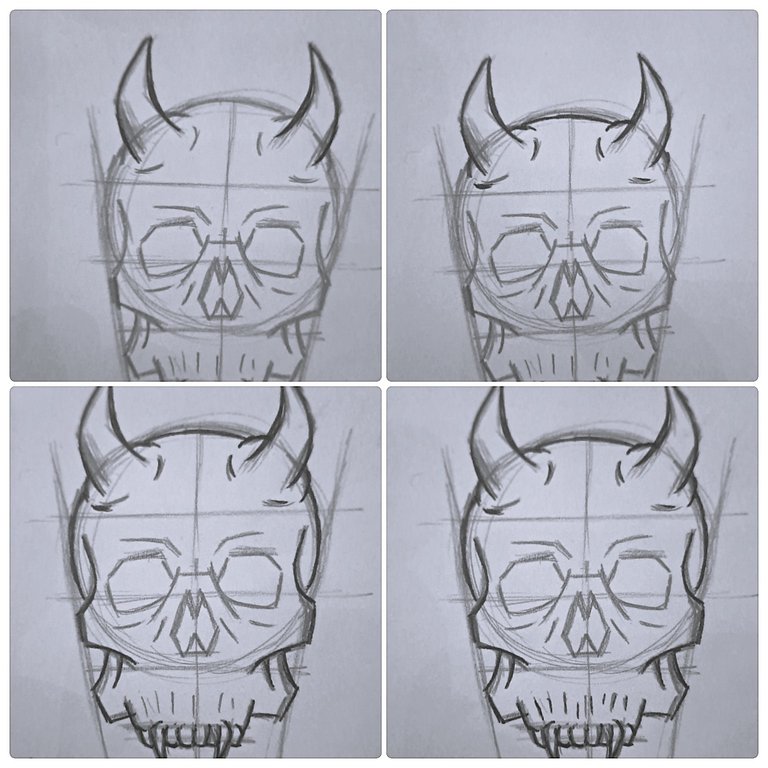
Start with a circle, draw a vertical line, halving the circle, then divide into thirds. Add another horizontal line at the bottom, with the same space between lines as the rest of the lines. Draw in lines angled in towards the bottom to create a head like shape.
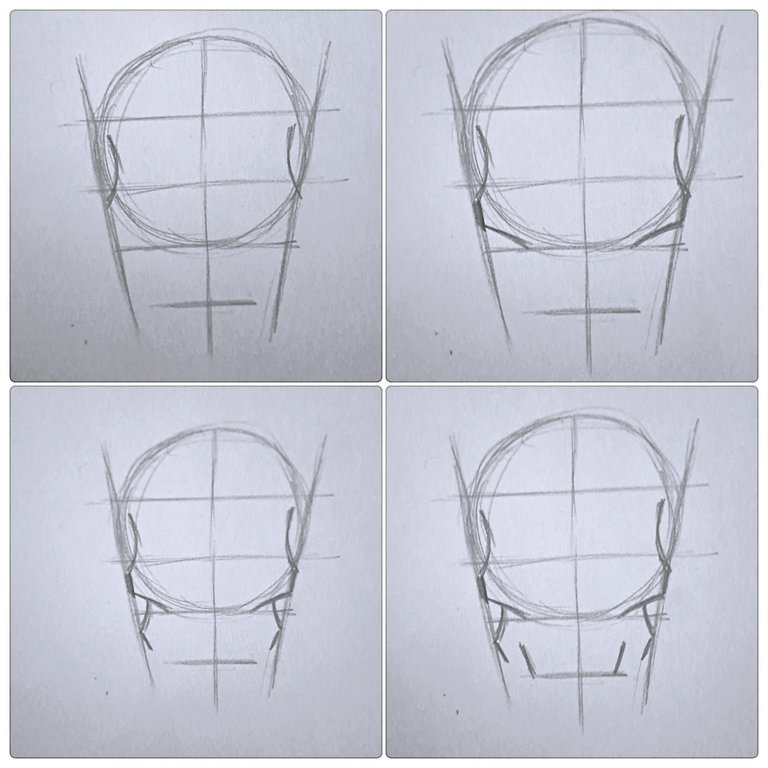
Add curved lines in second section from top. Below that, draw in lines for the cheekbones, these should extend to just under half of the 'box' they are in. Add lines to cheekbone lines, these will be for the jaw. Draw in two lines for the placement of the teeth.
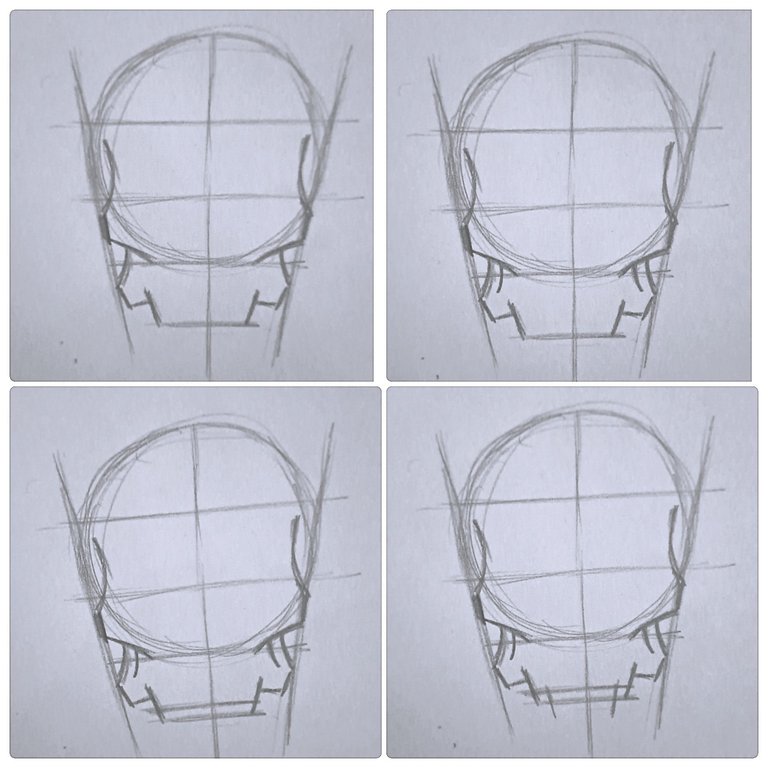
Connect jaw lines to lines for the teeth, then and small lines, following the shape of the jaw lines. Draw in narrow line above the line for the teeth, this will be to determine where the top of the teeth go. Add two lines for the placement of the fangs.
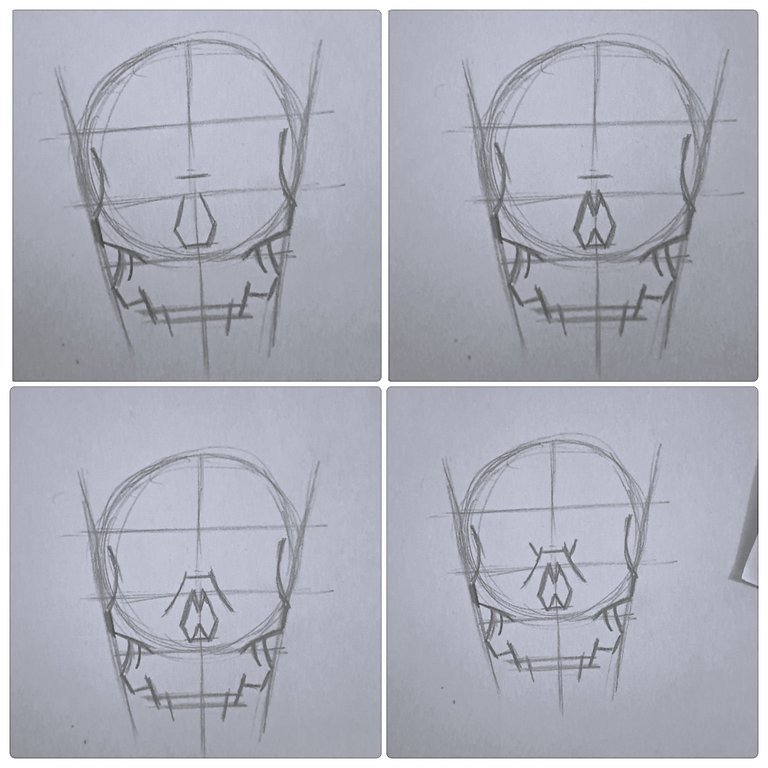
Above the section for the mouth, draw in the shape for the nose and a short line for the space between the eyes. Complete the nose shape as shown. From the eye divider line, draw two curving lines using the shape of the nose as guide for position and placement. Add two more lines for the top of the eyes.
Next add two vertical lines, facing downwards ever so slightly, add lines angled downwards and then inwards. The eyes are now almost complete.
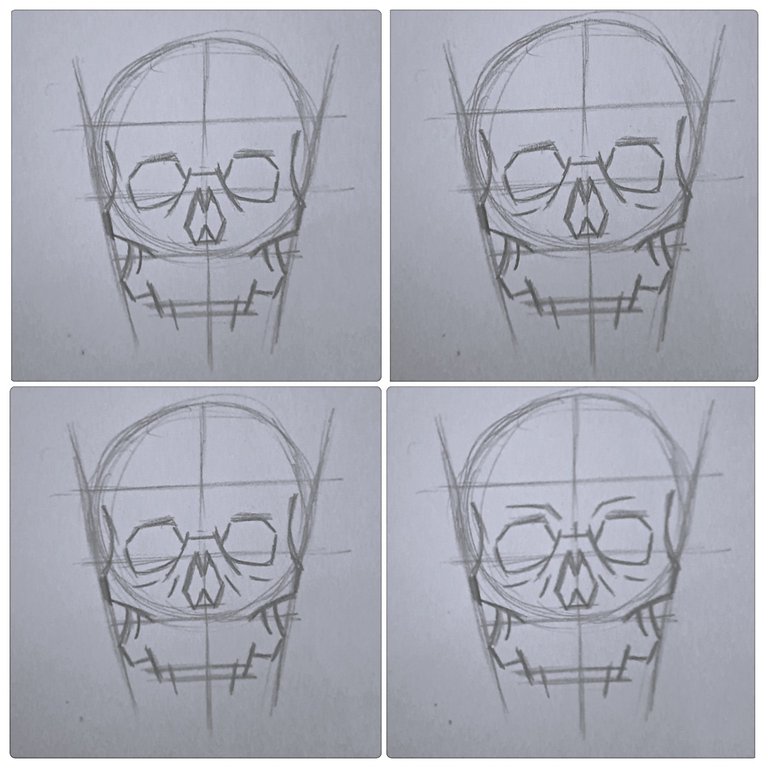
Complete the eyes by drawing in a line that curves upwards ever so slightly. Add lines underneath the eyes, following the shape of the eye socket. Add lines along the sides of the nose and around the top of the eyes.
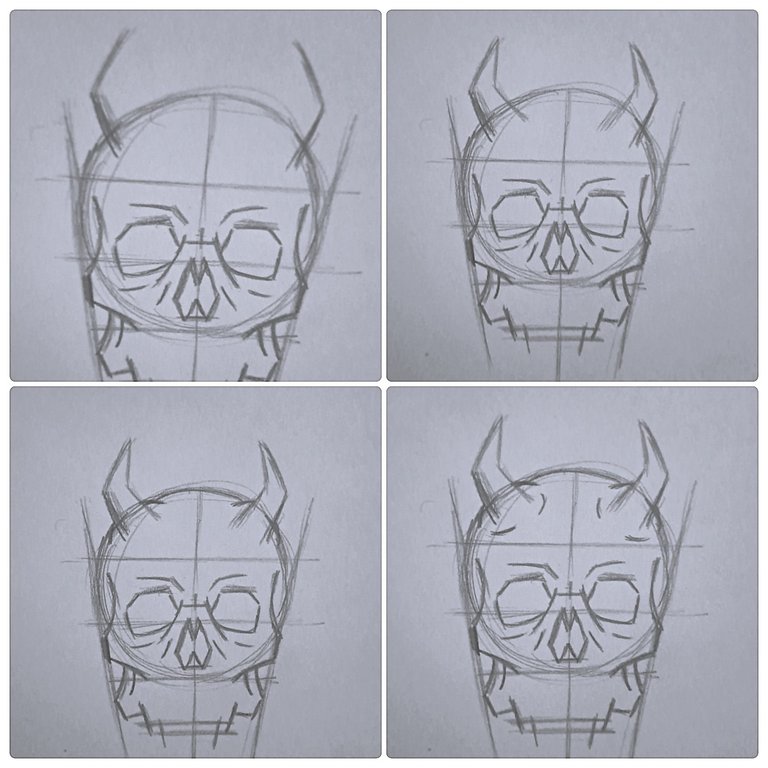
Now for the fun part, draw two lines along the top of the head for the horns, then complete the horn shape by adding two more lines to the inner part of the horns. Add little raised rounded shapes along the sides of the horns.
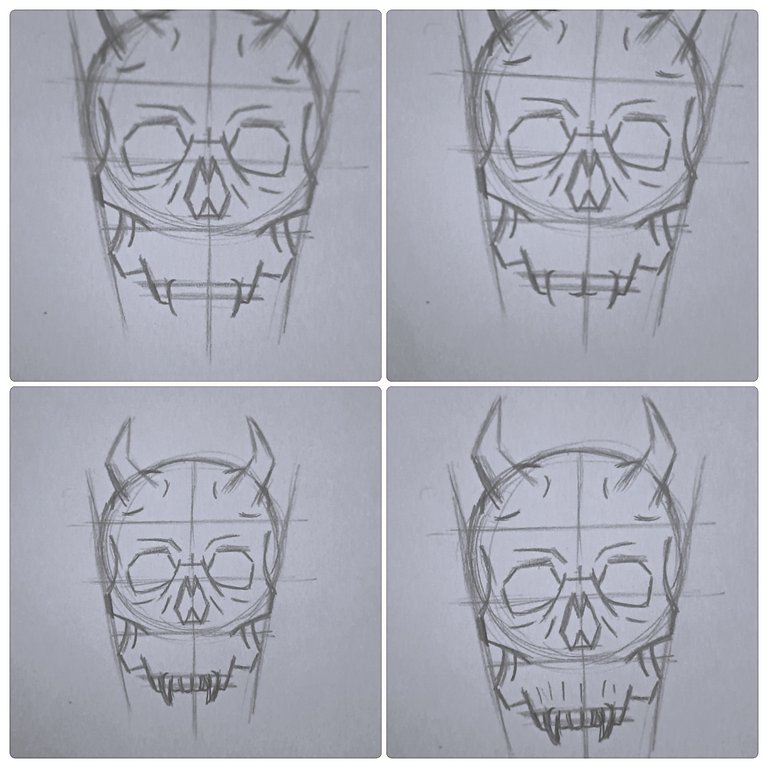
Now for the teeth. Draw a tooth shape on either side of the lines for the fangs. Next mark the center of the teeth and draw in the bottoms of the two front teeth. Draw tooth shapes working outward from the front teeth, remember to keep things more or less uniform and to add the fang shape last. Add a few lines above the teeth.
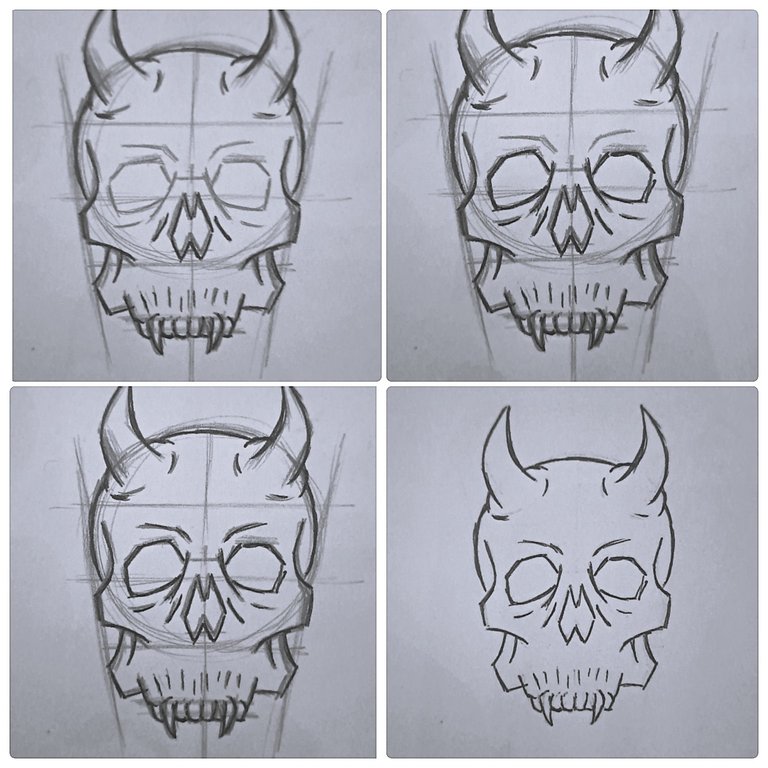
Draw over ink ink pen, correct and improve anything that doesn't look quite right in this step. Finally, erase the pencil lines.
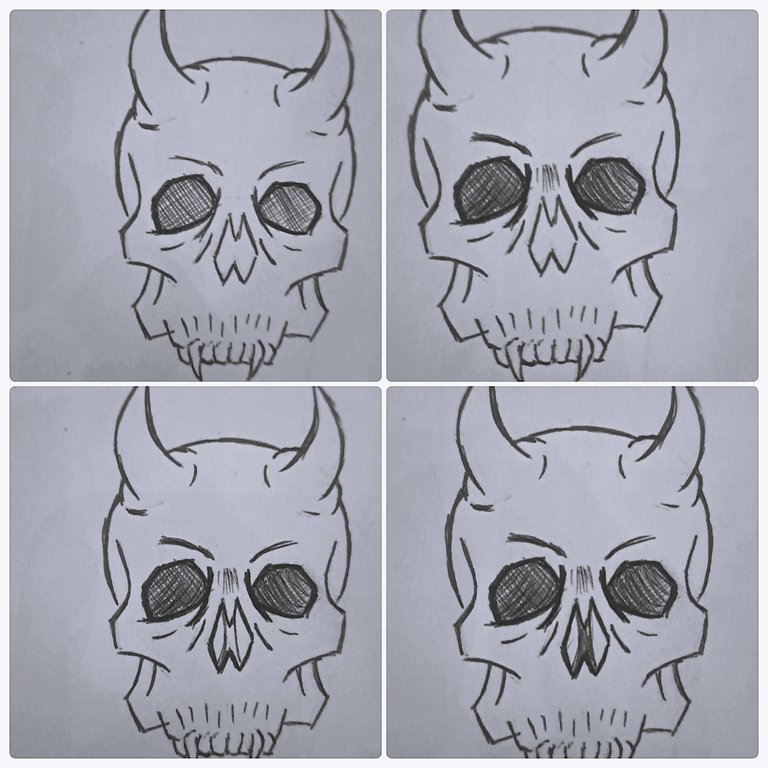
The eye sockets can be shaded very dark but it helps to add some depth if the shading is slightly heavier towards the bottom inner parts. Add some shading between the eyes and a dark shade along the inner part of the nose.
Shade outer parts of the nose hole area slightly lighter. Add some shade along the eye and nose areas. Shade a bit darker along the area under the cheekbones then add shading details around the jaw and teeth.
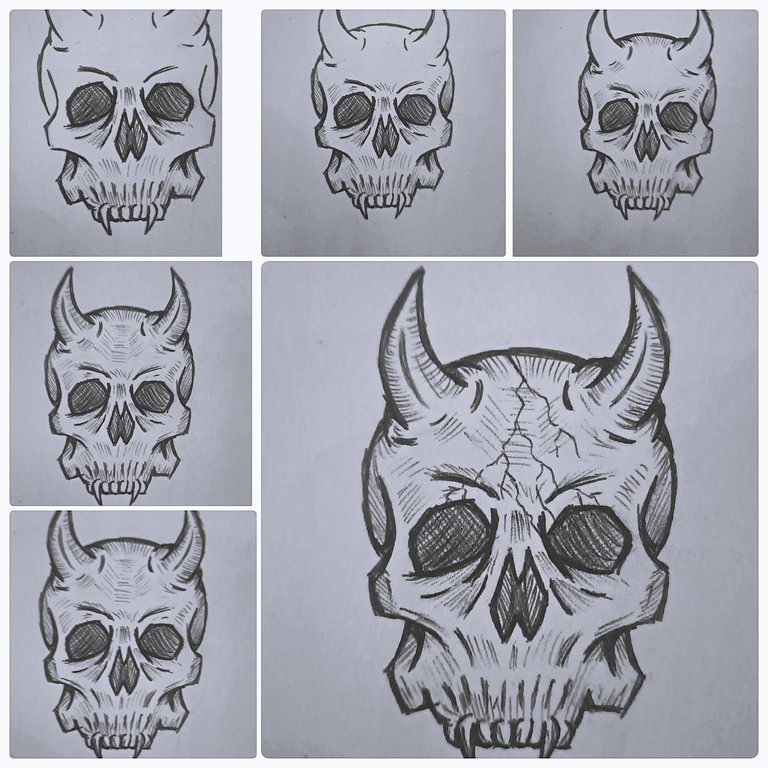
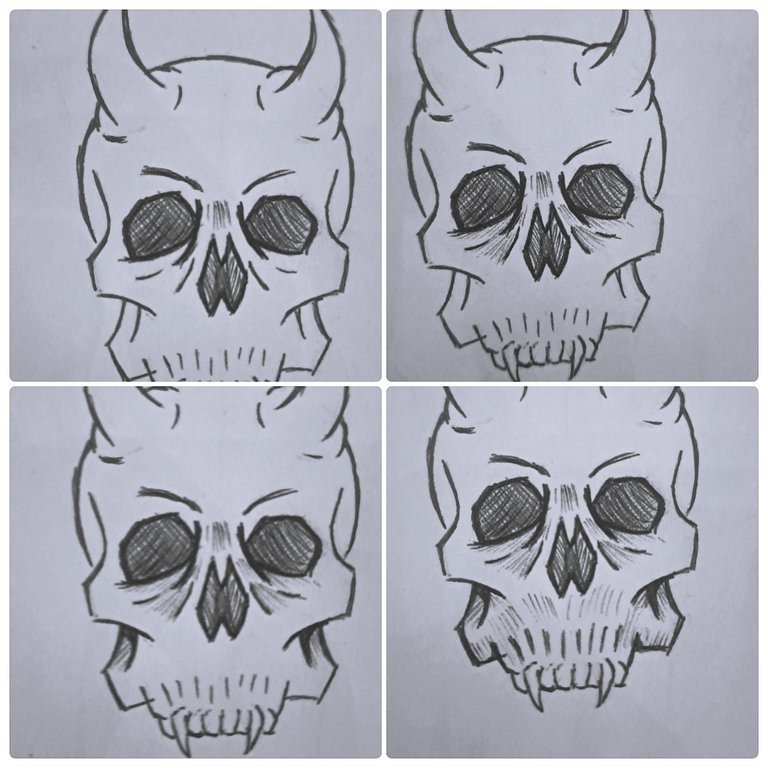
Keep shading along all areas of the skull, I added the cracks towards the end just because it felt right at the time.
The final sketch, because I just had to keep doodling and adding to it. It is definitely a little bit longer and more involved but worth attempting.
Well that's it for now. Till next time!

Credit - All content in this post has been created by and belongs to me.
Banner created using Adobe Express mobile app
@merenludick you will like this.