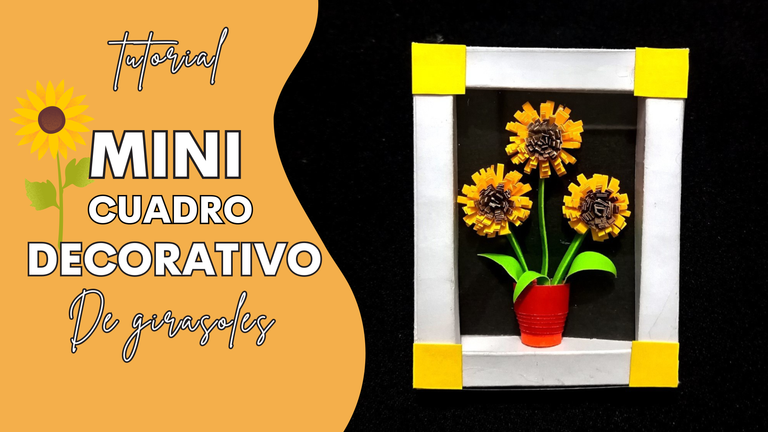
Crea tu Mini Cuadro Decorativo de Girasoles (paso a paso) [ES-EN]
¡Hola amantes de la manualidades!
Como saben ya es agosto, y para este mes siempre acostumbro ver girasoles floreados. Esta es mi flor favorita, así que decidí hacer un mini cuadro decorativo para tener mis propios girasoles en mi habitación.
¡Espero les guste!
![English]
Hello craft lovers!As you know it's already August, and for this month I always use to see flowered sunflowers. This is my favorite flower, so I decided to make a mini decorative painting to have my own sunflowers in my room.
I hope you like it!
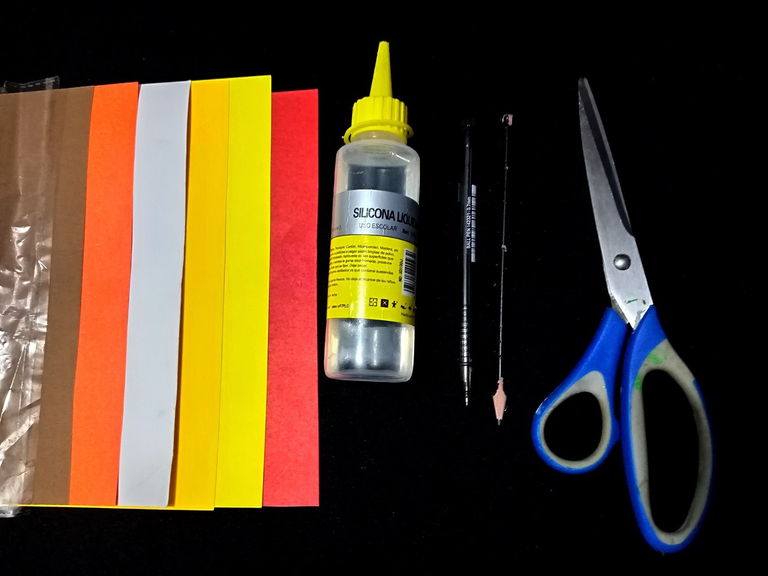
Materiales
- lápiz.
- regla.
- Silicon frío.
- Tijeras
- Cartulina blanca.
- Cartulina negra.
- Cartulina amarilla.
- Cartulina marrón.
- Cartulina verde.
- Cartulina roja.
- Cartulina anaranjada.
![English Version]
Materials
- pencil.
- ruler.
- Cold silicon.
- Scissors
- White cardboard.
- Black cardboard.
- Yellow cardboard.
- Brown cardboard.
- Green cardboard.
- Red cardboard.
- Orange cardboard.
Procedimiento
Para el marco
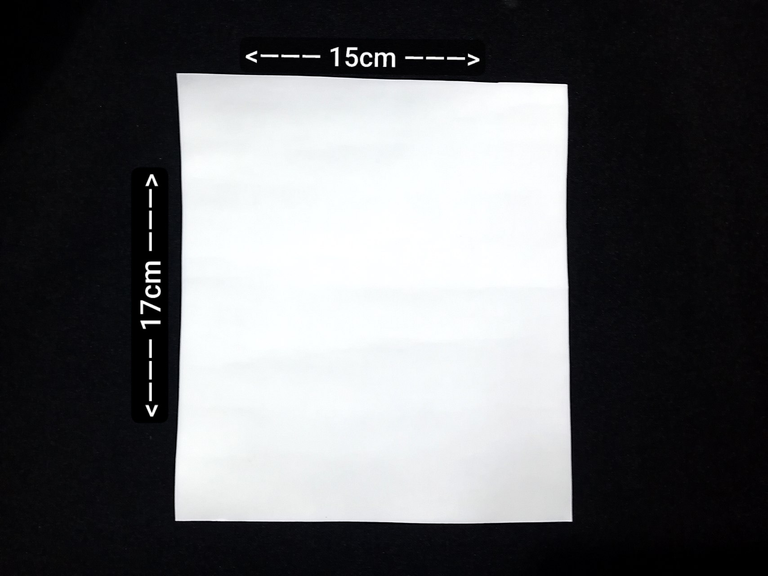
- Paso 1
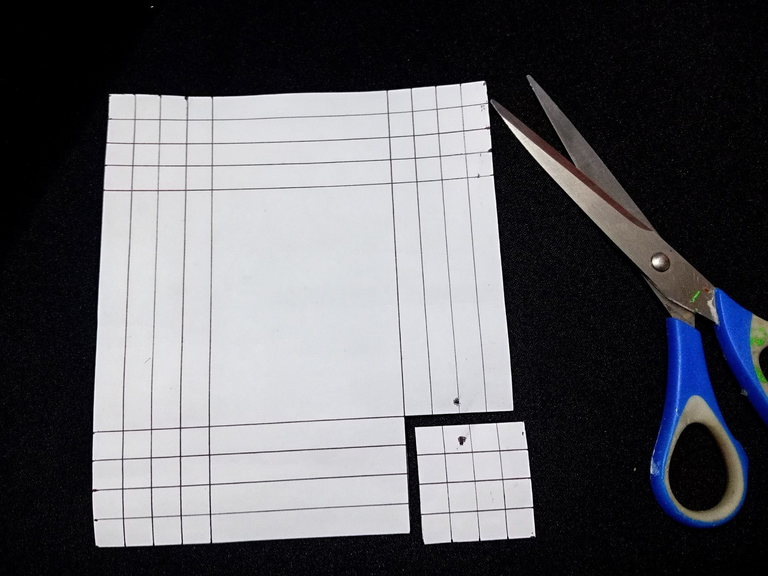
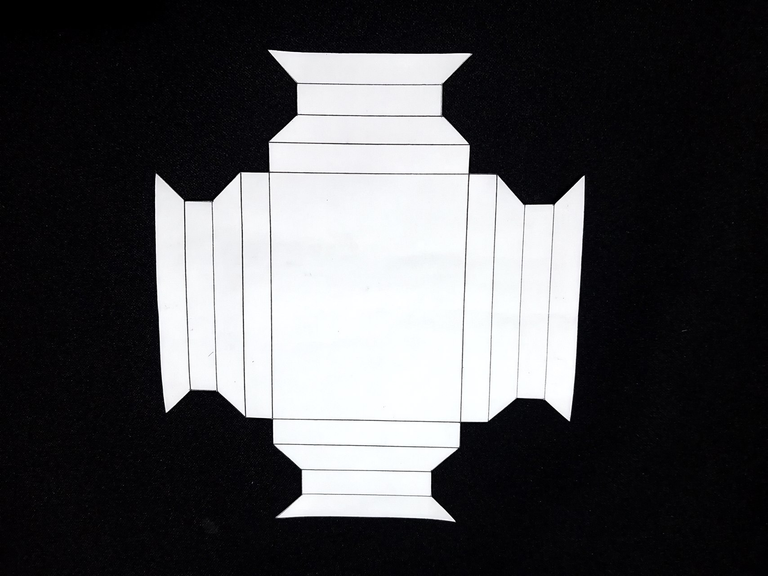
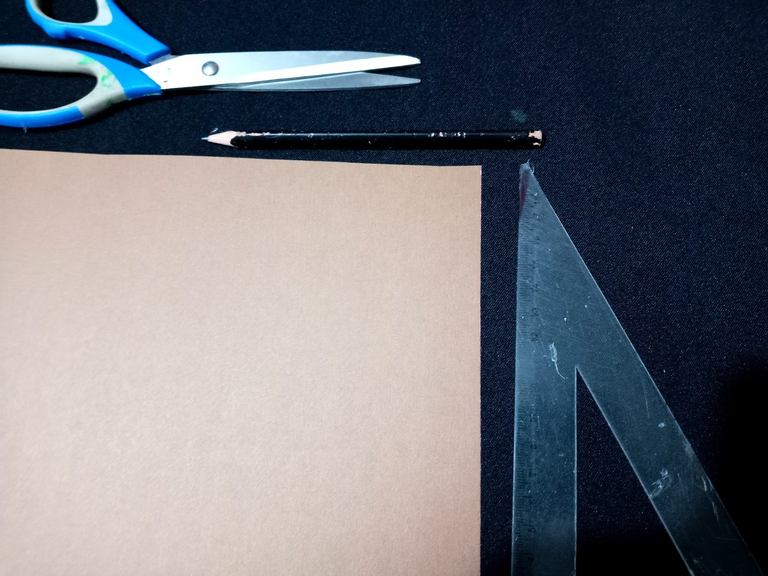
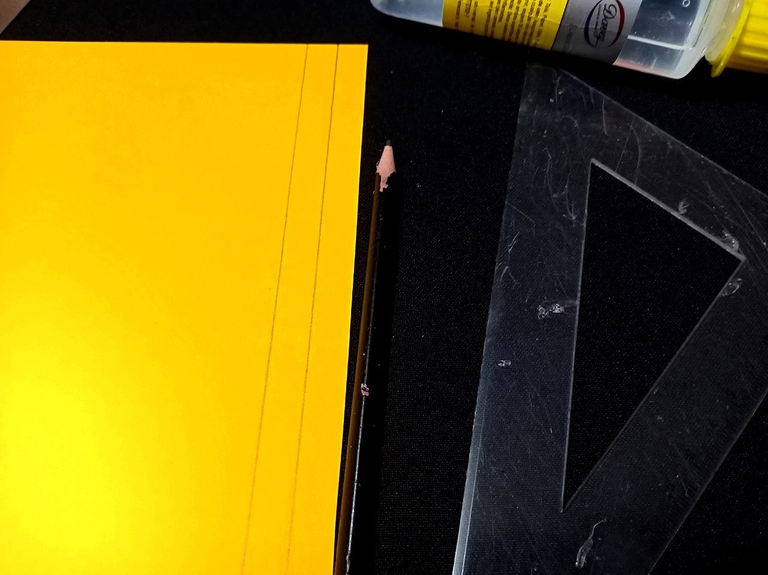
Para hacer un mini cuadro, comencé cortando una pieza de cartulina de 15 cm x 17 cm para obtener un cuadro de aproximadamente 9 cm.
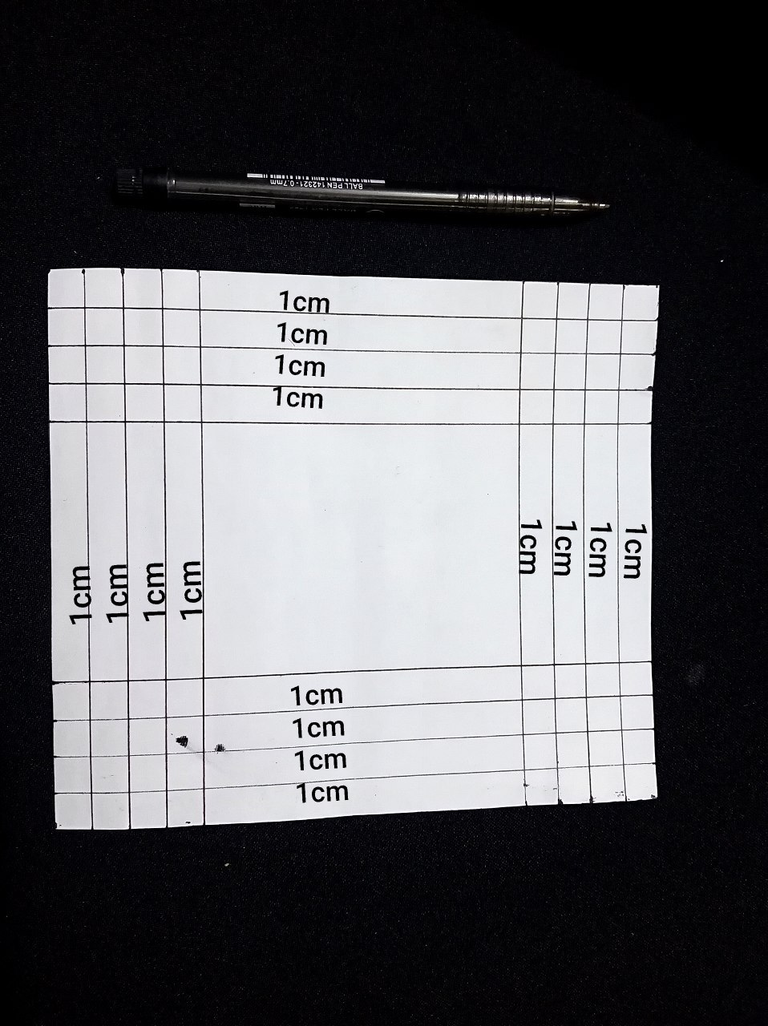
Para hacer los marcos, marcamos 4 líneas de 1 cm cada una, desde cada borde de la cartulina (arriba, abajo y a los lados). Esto nos dará un ancho de 1 cm al marco. Recuerda que puedes ajustar estas medidas si quieres que el marco sea más grueso o más delgado.
![English Version]
ProcedureFor the frame
- Step 1
To make a mini frame, I started by cutting a 15 cm x 17 cm piece of cardstock to get a frame of approximately 9 cm.
To make the frames, we mark 4 lines of 1 cm each, from each edge of the cardstock (top, bottom and sides). This will give us a width of 1 cm for the frame. Remember that you can adjust these measurements if you want the frame to be thicker or thinner.
 |  |
|---|
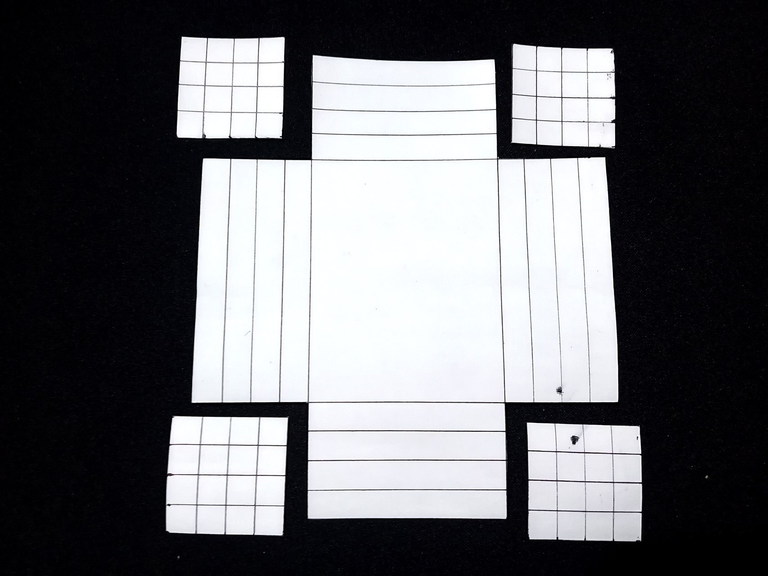
- Paso 2
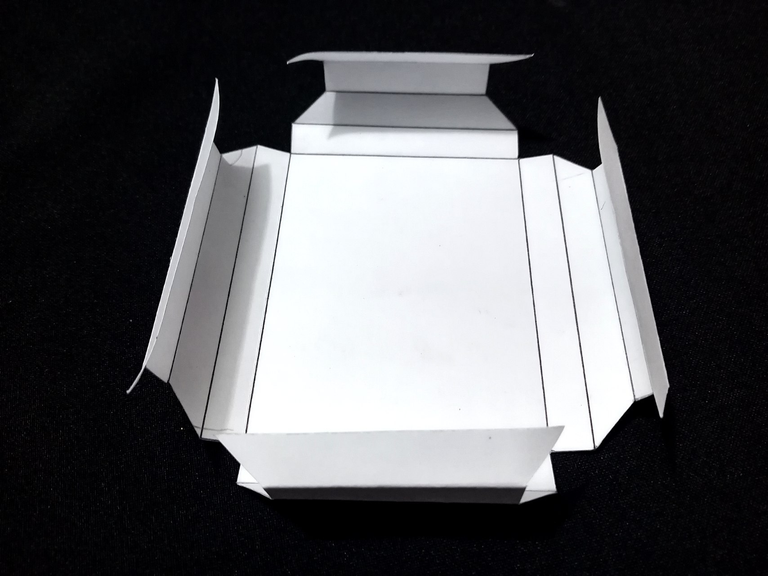
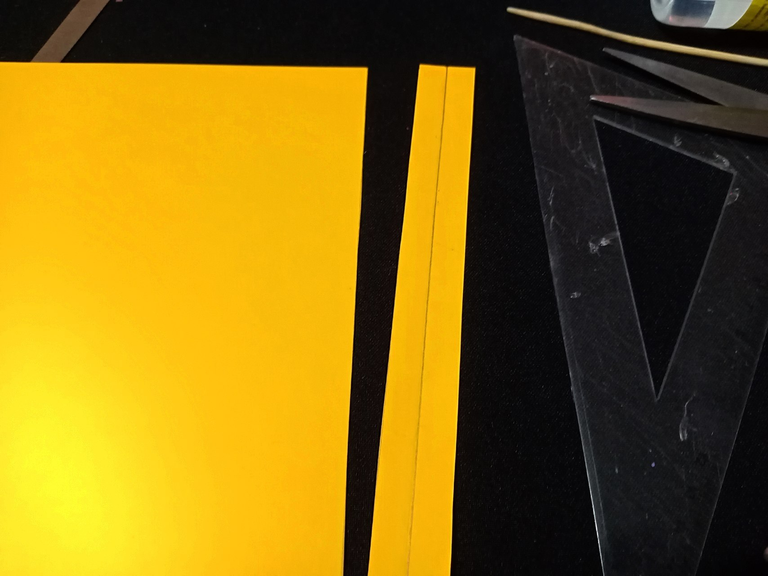
Una vez que tengas las marcas en los cuatro lados de la cartulina, con las tijeras cortamos cuidadosamente las cuatro esquinas para formar cuatro pestañas.
![English Version]
Once you have the marks on the four sides of the cardboard, carefully cut the four corners with the scissors to form four tabs.
 |  |
|---|
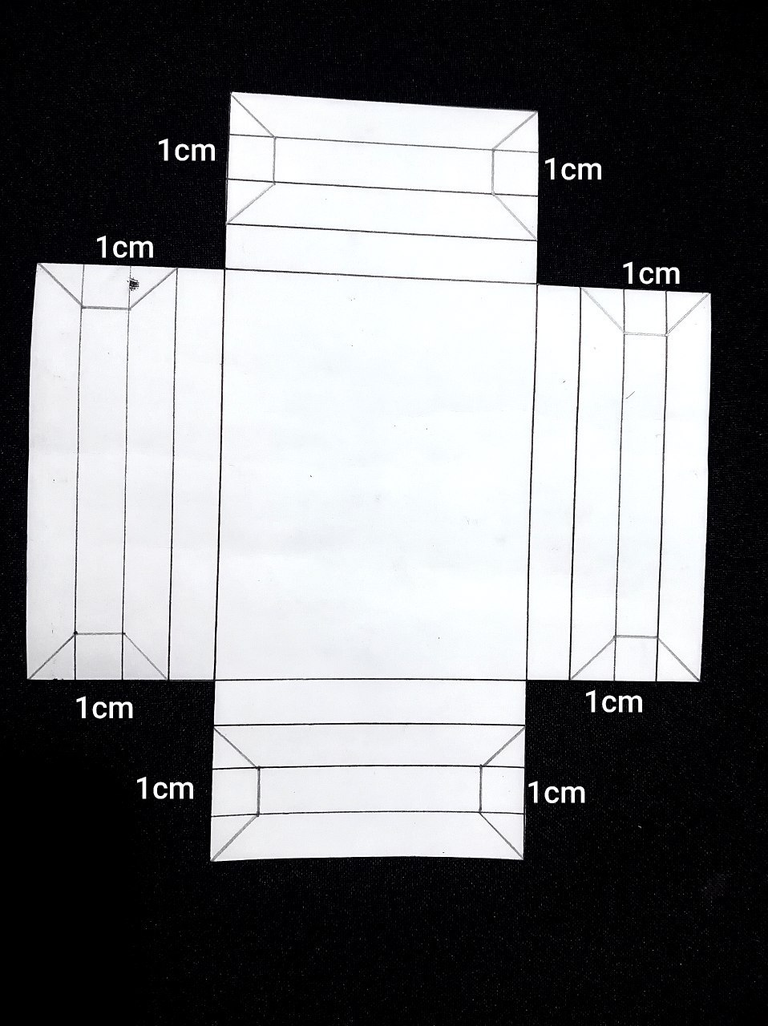
Para continuar, toma la segunda pestaña (de afuera hacia adentro) y haz una marca a 1 cm. Luego, une esa marca con las esquinas de las pestañas laterales.
Repite este proceso con todas las pestañas. Después, usa las tijeras para cortar las marcas que acabas de hacer.
![English Version]
To continue, take the second tab (from the outside in) and make a mark at 1 cm. Then join that mark with the corners of the side tabs.
Repeat this process with all the tabs. Then, use the scissors to cut the marks you just made.
 |  |  |
|---|
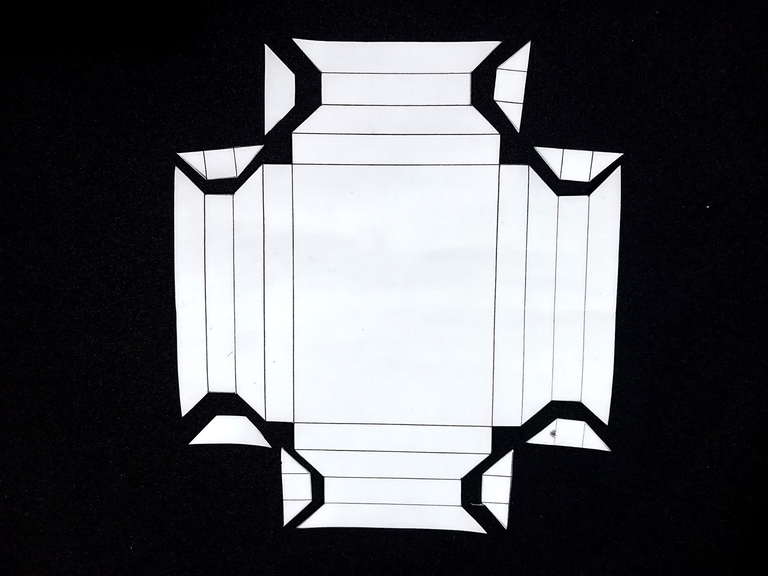
- Paso 3.
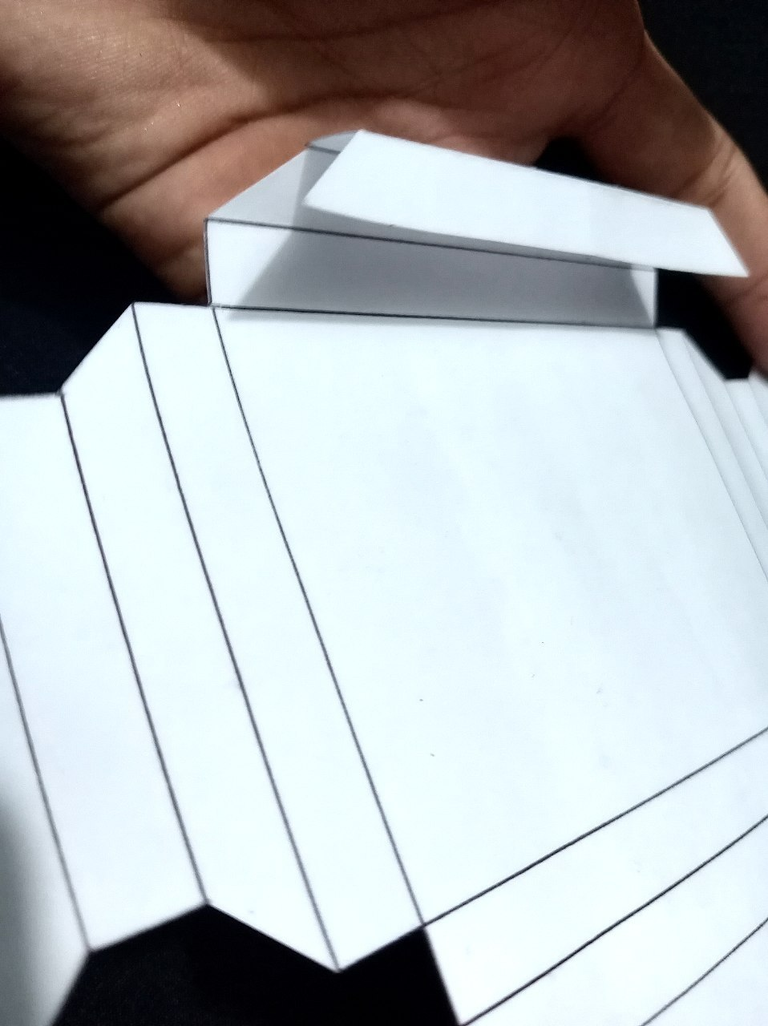
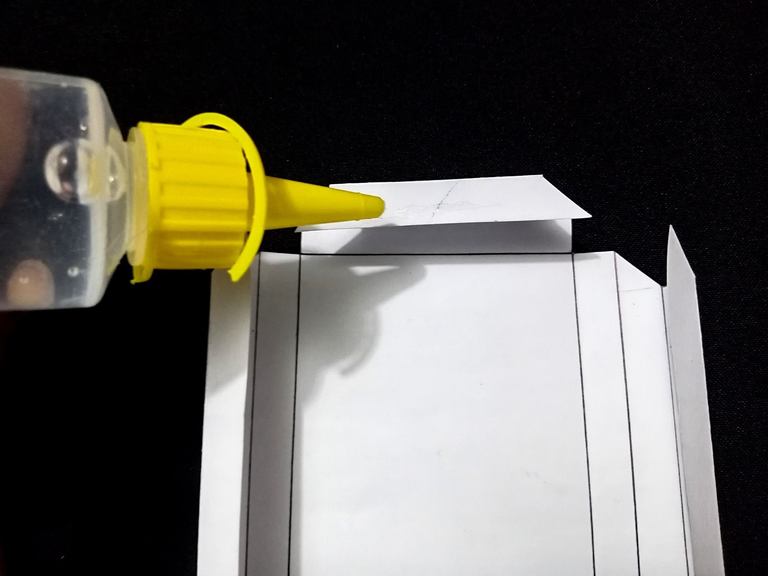
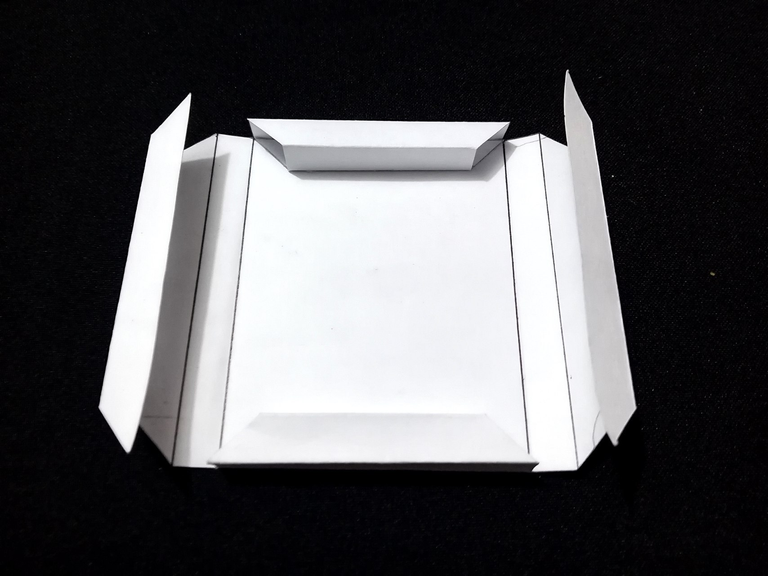
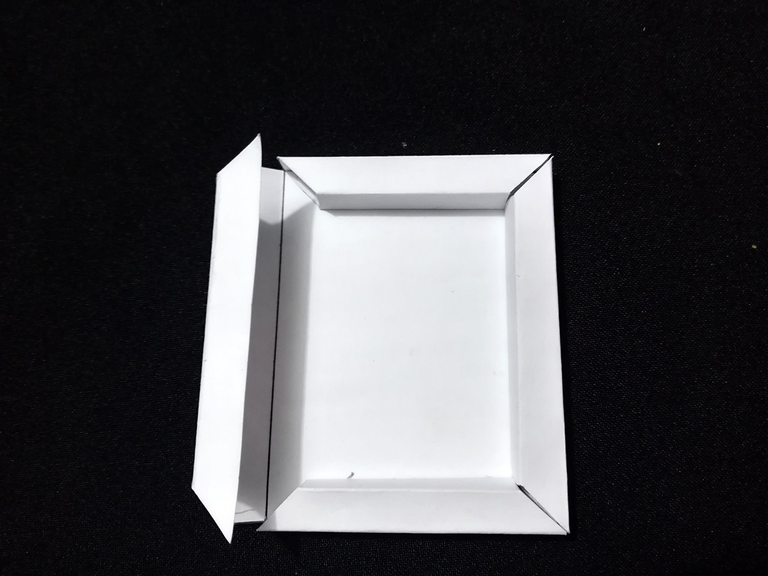
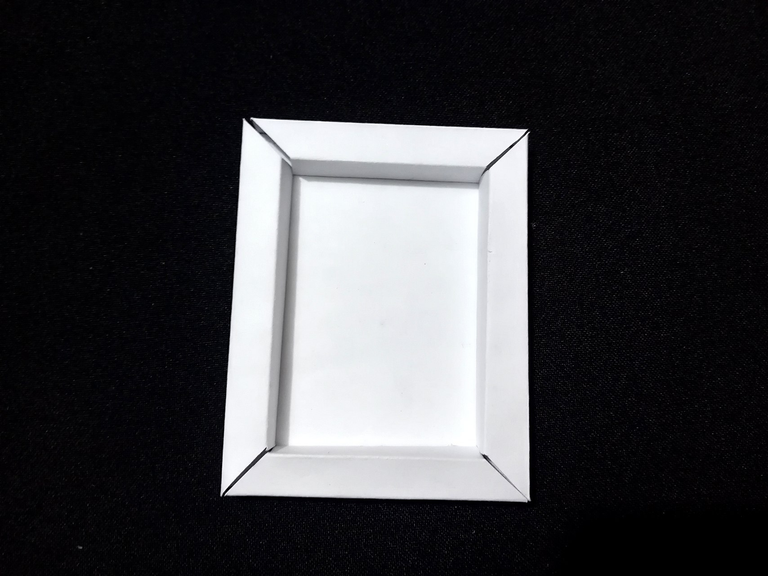
Ahora, con la ayuda de una regla, dobla todas las pestañas hacia adentro.
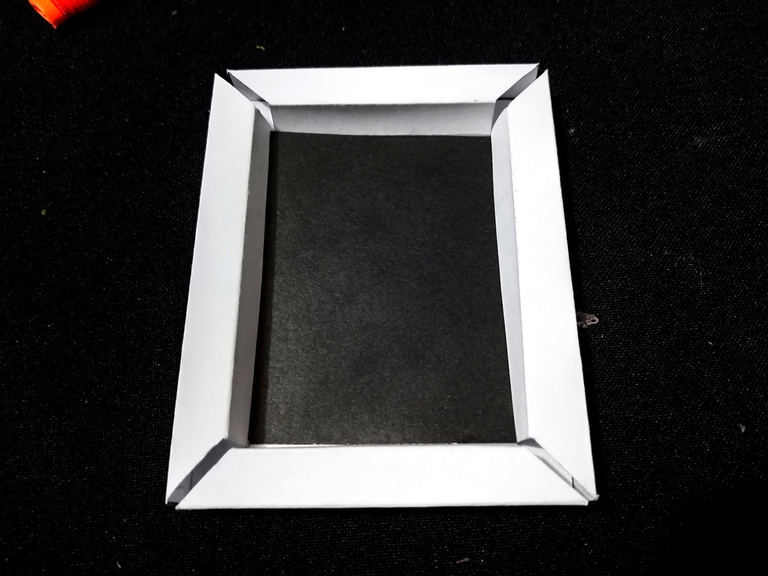
Una vez dobladas, aplicamos el silicon frío en la parte de atrás de la primera pestaña y la pegamos con cuidado a la base del cuadro. Repite este mismo proceso con todas las pestañas restantes y, ¡listo!, ya obtenido el marco de nuestro cuadro.
![English Version]
Step 3.Now, with the help of a ruler, bend all the tabs inwards.
Once folded, apply cold silicone to the back of the first tab and carefully glue it to the base of the frame. Repeat this same process with all the remaining tabs and, that's it, you have obtained the frame of our picture.
 |  |  |
|---|
 |  |  |
|---|
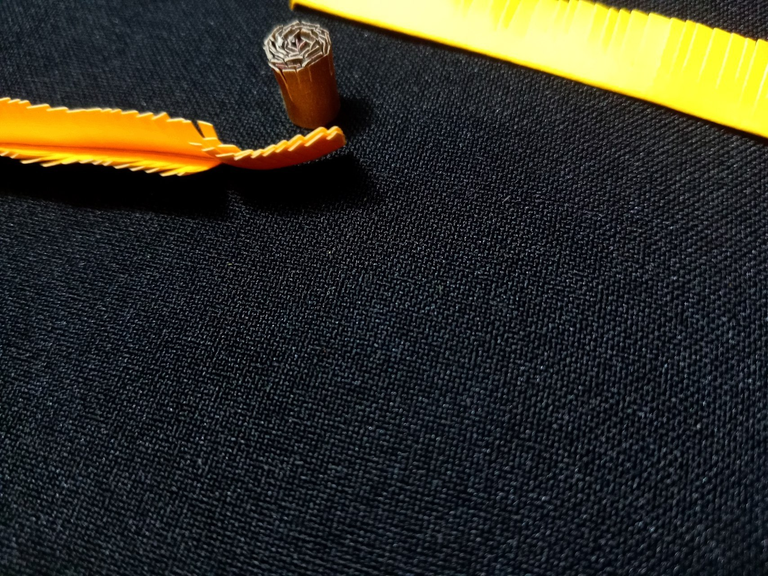
Para los girasoles
- Paso 1.
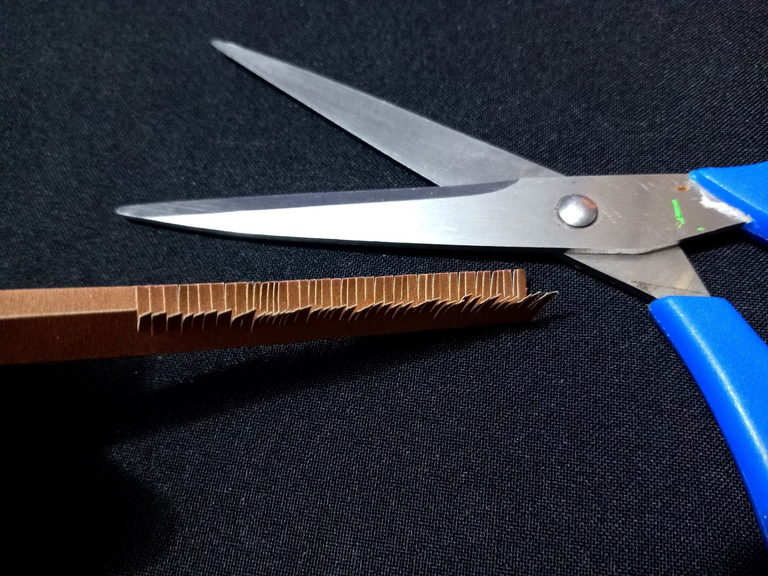
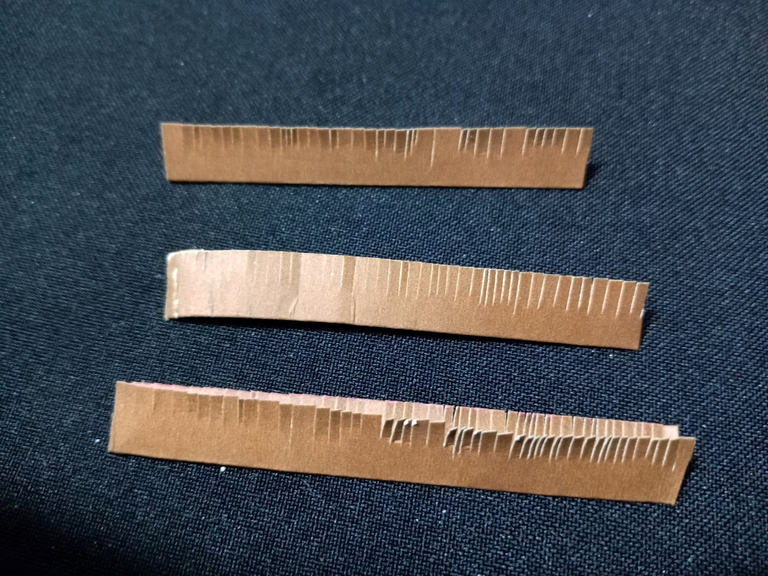
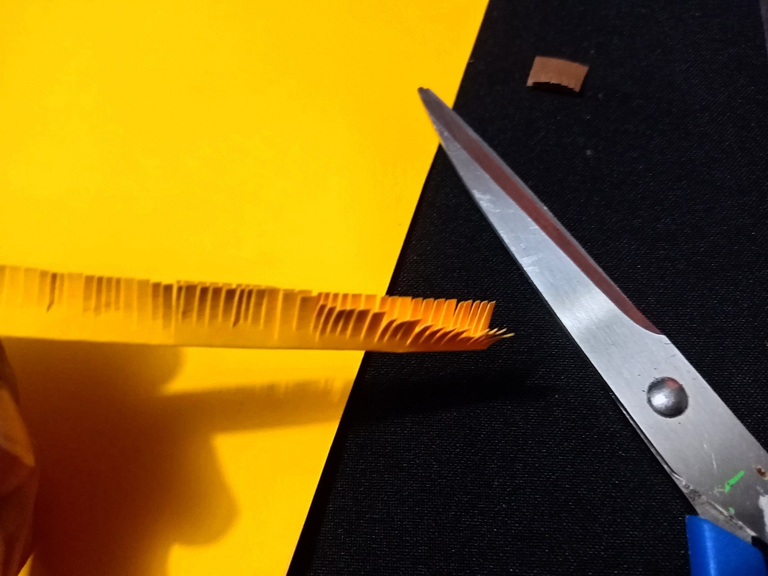
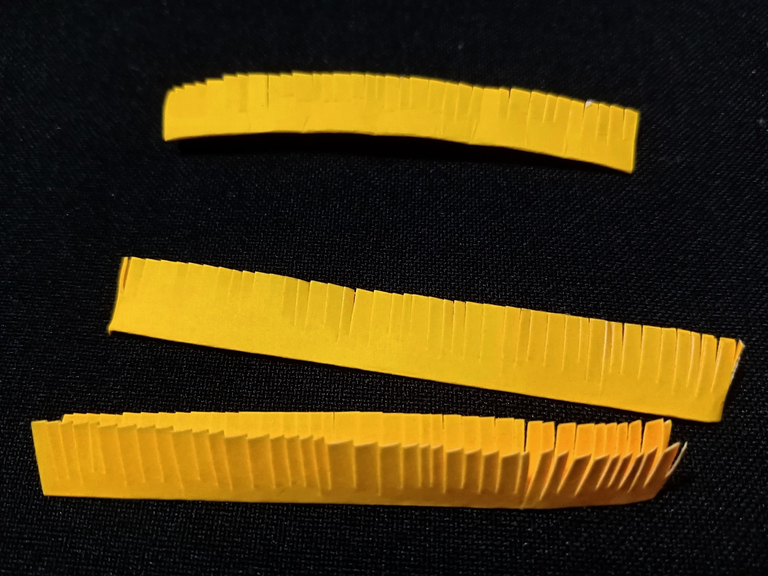
Para hacer los centros de los girasoles, comenzamos cortando una tira de cartulina marrón de 1.8 cm de ancho. Marcamos la mitad de la tira y, con ayuda de una regla, doblamos a lo largo.
A continuación, con unas tijeras, hacemos cortes a lo largo de toda la tira, sin llegar a cortarla por completo. Después, dividimos la tira en tres partes. Ya que serán tres girasoles.
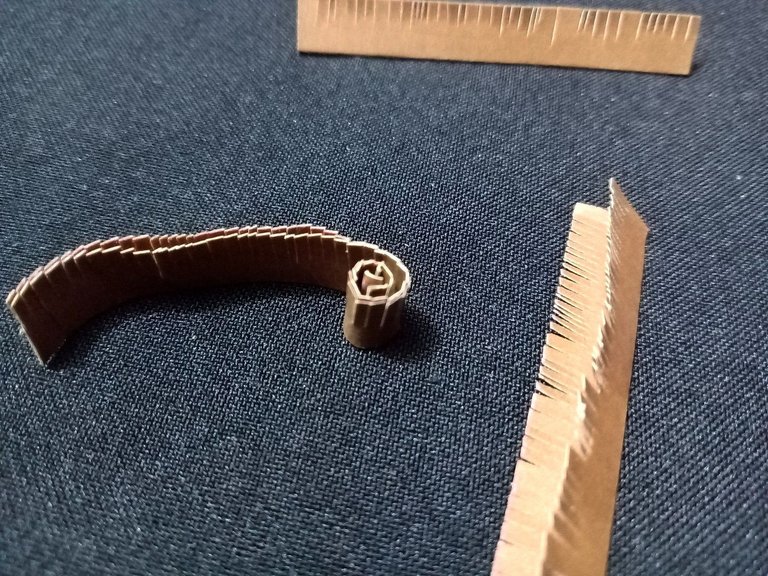
Finalmente, enrollamos las tiras por separados, aplica un poco de silicon frío en el extremo y pégala para que no se desenrolle.
![English Version]
For the sunflowersStep 1.
To make the centers of the sunflowers, we start by cutting a strip of brown cardboard 1.8 cm wide. Mark the middle of the strip and, using a ruler, fold it lengthwise.
Then, with a pair of scissors, we make cuts along the entire length of the strip, without cutting it completely. Then, we divide the strip into three parts. Since they will be three sunflowers.
Finally, roll the strips separately, apply a little cold silicone on the end and glue it so that it does not unroll.
 |  |  |
|---|
 |  |
|---|---|
 |  |
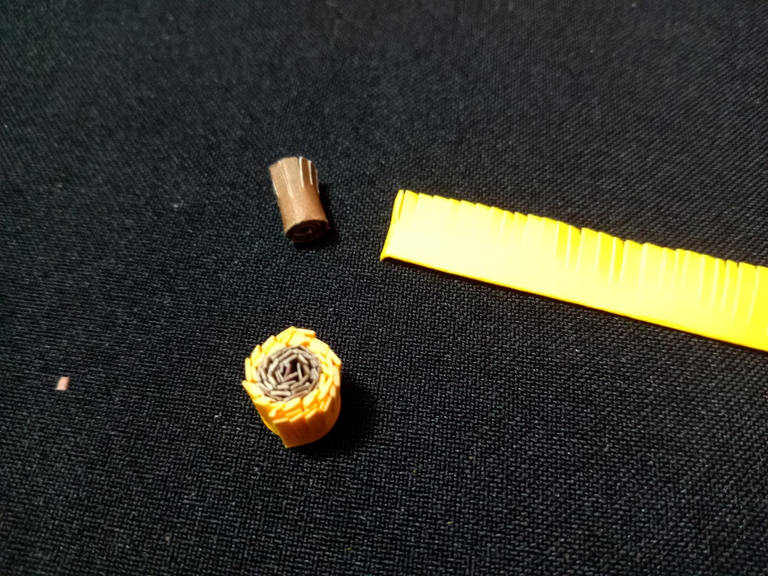
- Paso 2.
Para los pétalos de los girasoles, corta una tira de cartulina amarilla de 1.8 cm de ancho. Márcala por la mitad y, con ayuda de la regla, dóblala a lo largo.
![English Version]
Step 2.For the sunflower petals, cut a 1.8 cm wide strip of yellow cardstock. Mark it in half and, using the ruler, fold it lengthwise.
 |  |
|---|---|
 |  |
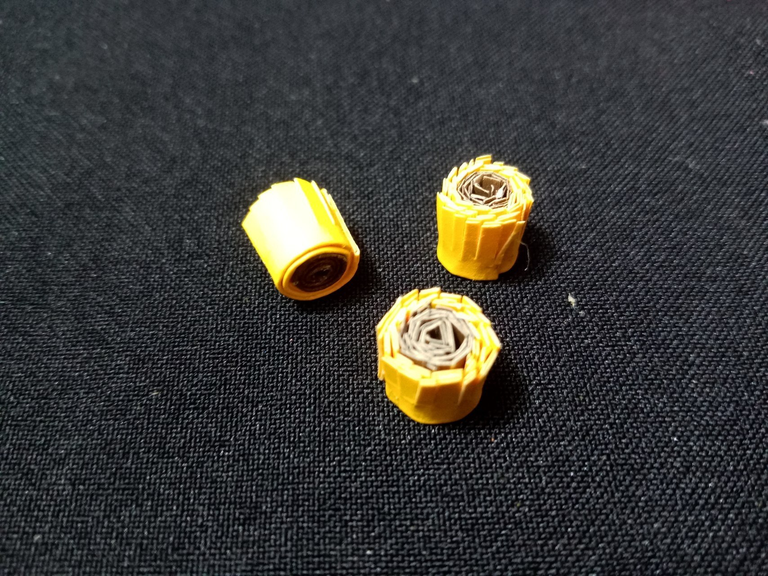
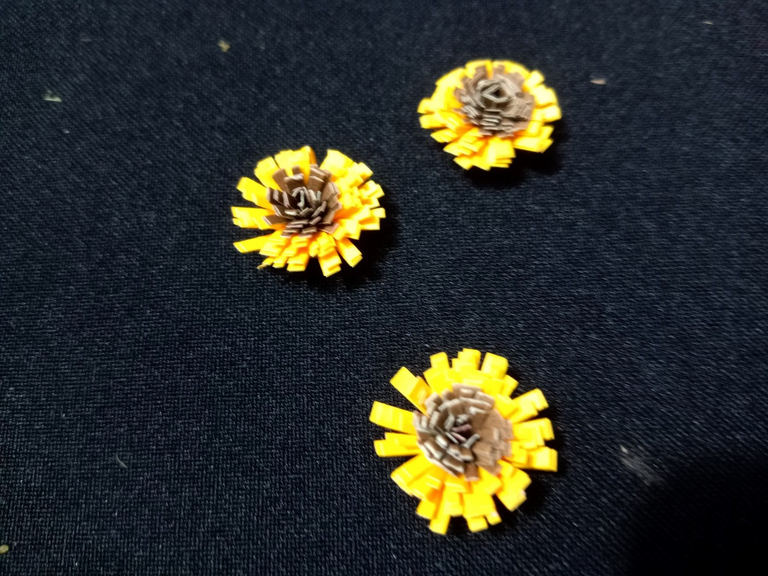
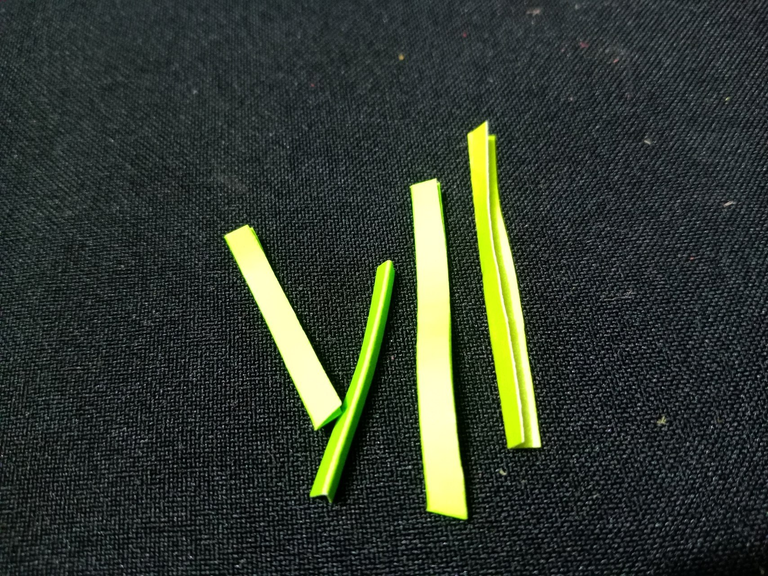
- Paso 3.
Luego, haz cortes a lo largo de toda la tira con las tijeras, sin llegar a cortarla por completo. Después, divide la tira en tres partes.
A continuación, toma los centros de girasol que ya tenemos y pegamos las tiras de pétalos alrededor. Finalmente, con tus dedos, abre los pétalos de adentro hacia afuera para darle forma a nuestros tres girasoles.
![English Version]
Step 3.Next, make cuts along the entire length of the strip with the scissors, without cutting all the way through. Then, divide the strip into three parts.
Next, take the sunflower centers we already have and glue the petal strips around them. Finally, with your fingers, open the petals from the inside out to shape our three sunflowers.
 |  |
|---|---|
 |  |
- Paso 4.
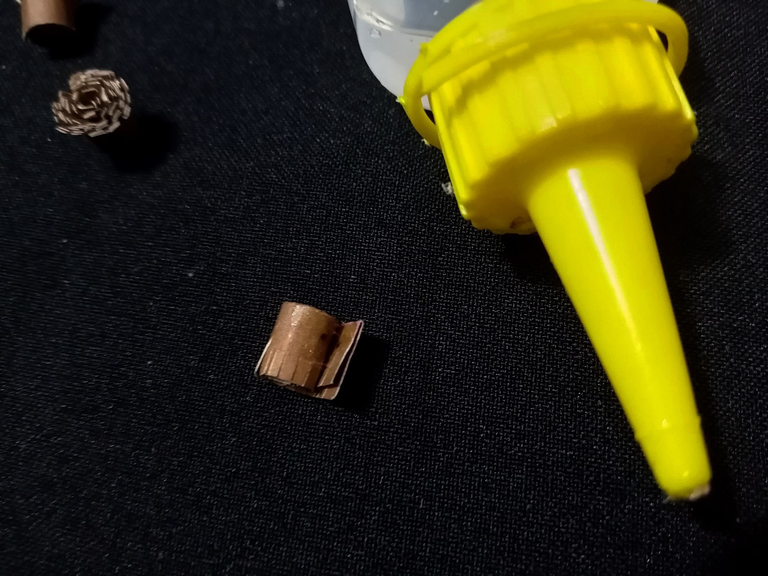
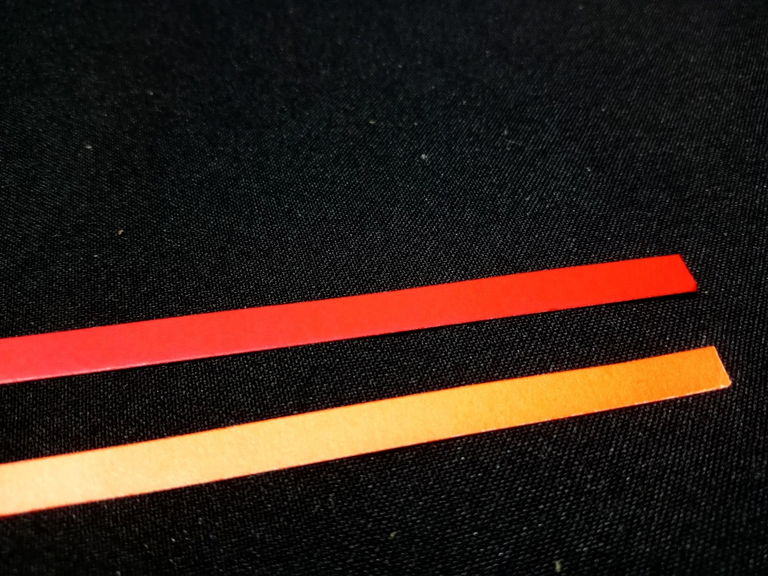
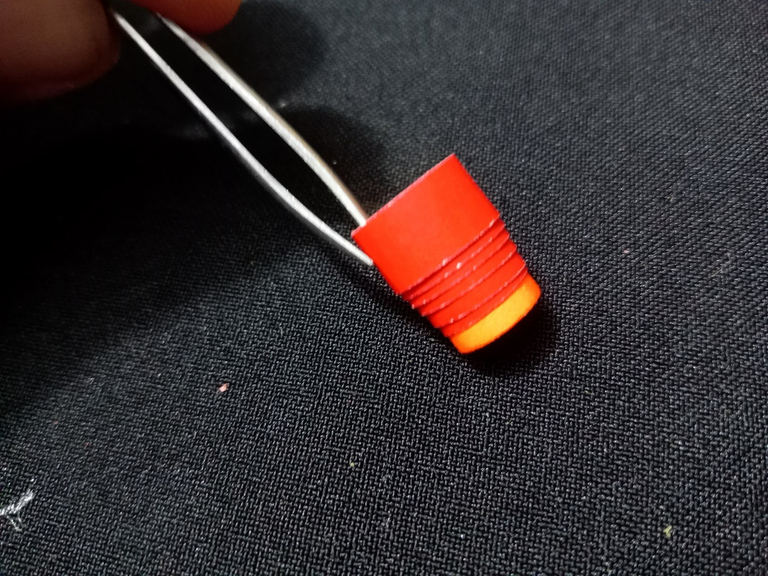
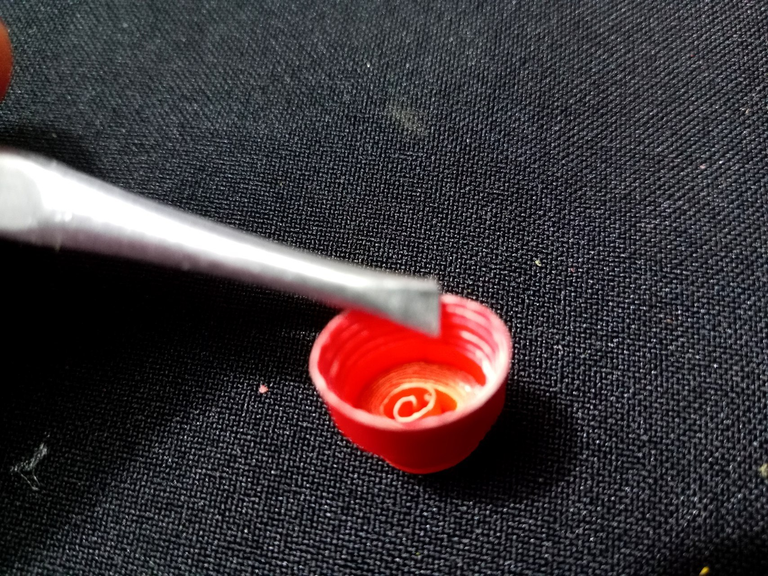
Para hacer el florero, tomamos dos tiras de cartulina de 1 cm de ancho cada una: una de color rojo y otra de color naranja (puedes usar los colores que prefieras).
Primero, enrollamos completamente la tira naranja y pegamos el extremo con silicon frío para que no se suelte. A continuación, pegamos la mitad de la tira roja al centro del rollo que acabas de hacer. Luego, enrolla la tira roja de forma ascendente para crear una espiral hueca que será la forma del florero.
![English Version]
Step 4.To make the vase, we take two strips of cardboard 1 cm wide each: one red and one orange (you can use the colors you prefer).
First, we roll the orange strip completely and glue the end with cold silicon so that it does not come loose. Next, glue half of the red strip to the center of the roll you just made. Then, roll the red strip upwards to create a hollow spiral that will be the shape of the vase.
 |  |
|---|---|
 |  |
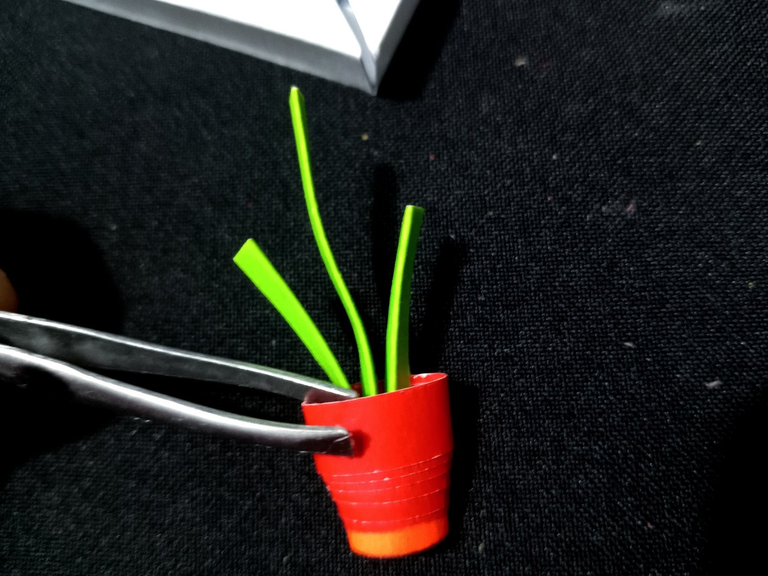
- Paso 5
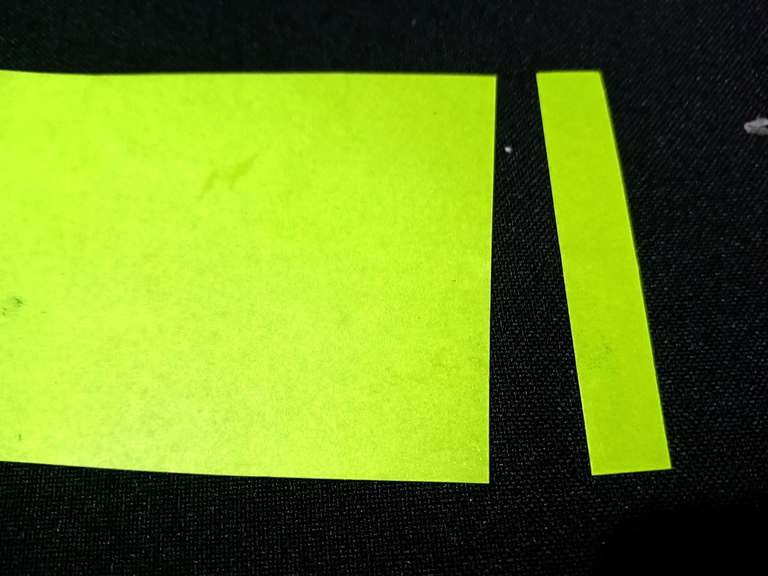
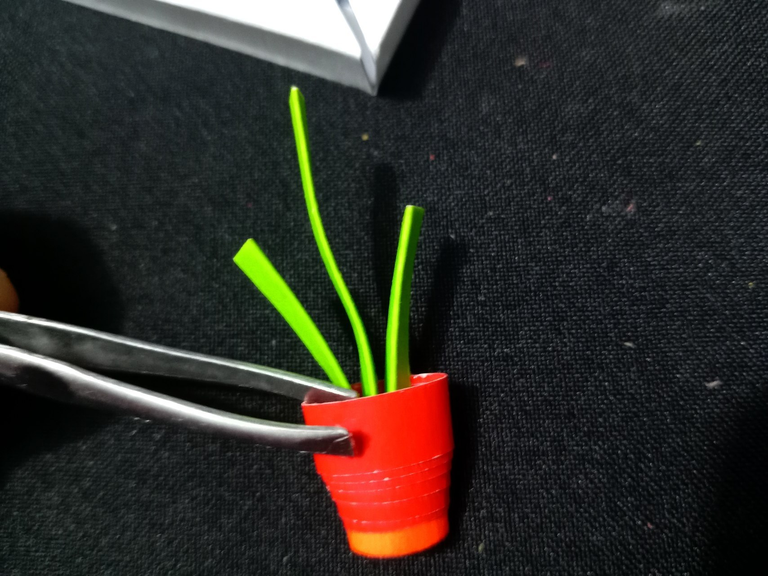
Para los tallos de los girasoles, cortamos una tira de cartulina verde de1 cm de ancho. Marcamos la mitad a lo largo y doblamos con la regla. Luego, dividimos la tira en tres partes: una de 4 cm, una de 2.5 cm y la última de 2 cm.
Tomamos el florero que hice anteriormente y aplico silicon frío en el interior e introducimos los tallos para pegarlos de manera que quede el borde hacia el frente.
![English Version]
Step 5For the stems of the sunflowers, cut a strip of green cardboard 1 cm wide. We mark the middle lengthwise and fold with the ruler. Then, we divide the strip into three parts: one of 4 cm, one of 2.5 cm and the last one of 2 cm.
We take the vase I made earlier and apply cold silicone on the inside and insert the stems to glue them so that the edge is facing the front.
 |  |  |
|---|
Armado
- Paso 1.
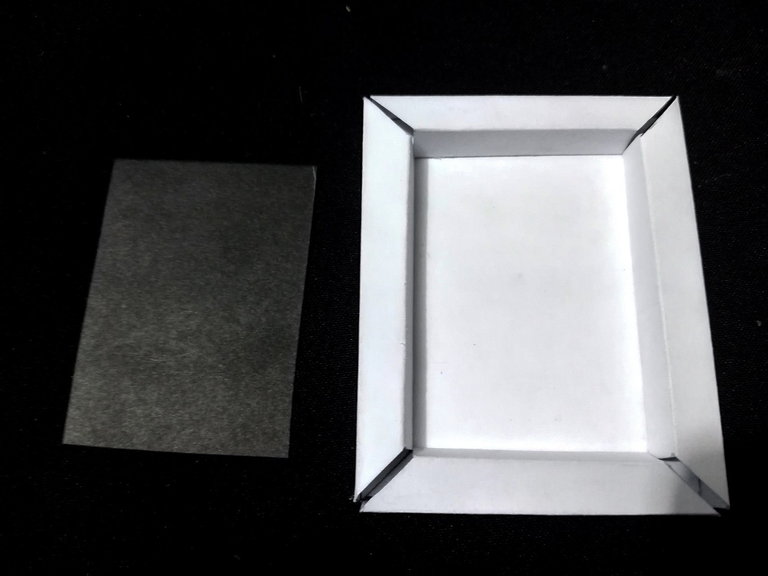
Para el interior del cuadro, cortamos un trozo de cartulina negra de aproximadamente 5x7cm (o del color que prefieras). Con silicón frío, pegamos en la base del cuadro. Puedes hacer este paso antes de pegar las pestañas a la base, aunque yo lo hago después porque no estaba seguro del color de fondo que quería usar.
![English Version]
AssemblyStep 1.
For the inside of the frame, cut a piece of black cardboard of approximately 5x7cm (or the color of your choice). With cold silicone, glue it to the base of the frame. You can do this step before gluing the tabs to the base, although I do it later because I wasn't sure of the background color I wanted to use.
 |  |  |
|---|
- Paso 2.
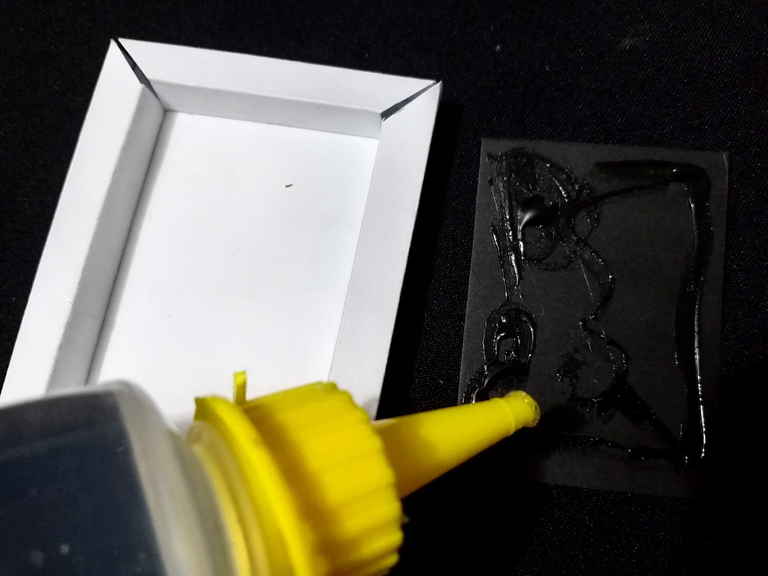
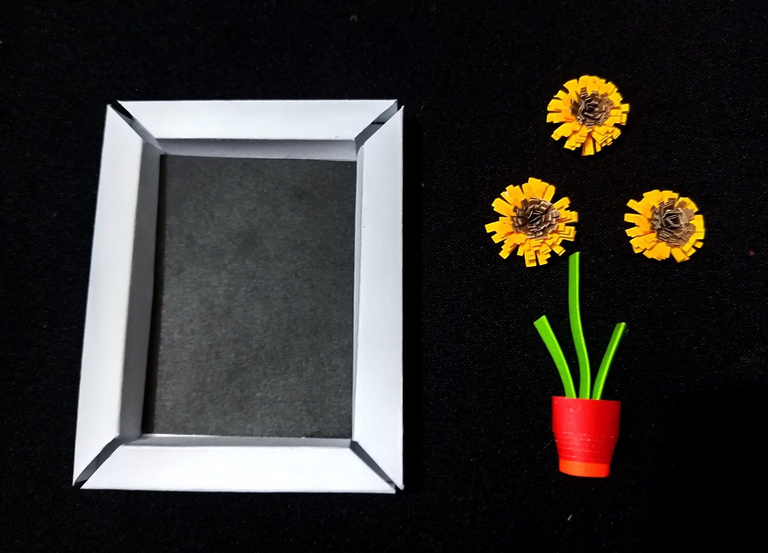
Con todas las piezas listas, es momento de armar nuestro cuadro.
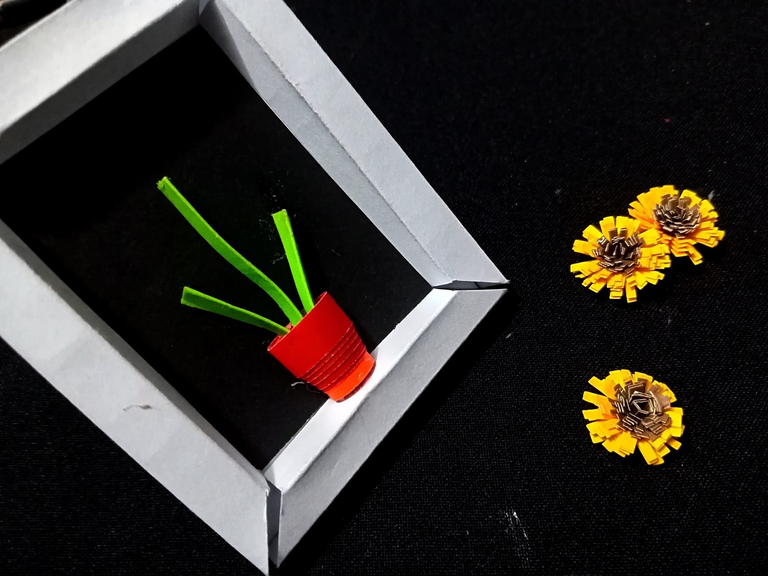
Primero, tomamos el florero y lo presionamos un poco para que se vea algo plano. Luego, usamos el silicón frío para pegarlo en el centro del cuadro. A continuación, pegamos cada girasol en la punta de los tallos. Para darle un toque final, hice unas pequeñas hojas y las pegué dentro del florero, alrededor de los tallos.
![English Version]
Step 2With all the pieces ready, it's time to assemble our painting.
First, we take the vase and press it a little bit to make it look a little flat. Then, we use the cold silicone to glue it in the center of the frame. Next, we glued each sunflower to the tip of the stems. To give it a final touch, I made some small leaves and glued them inside the vase, around the stems.
 |  |
|---|---|
 |  |
- Paso 3
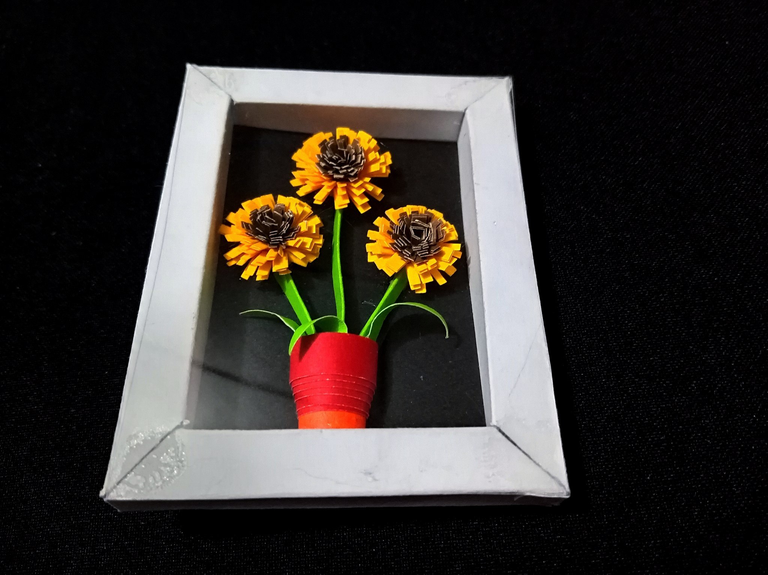
Para terminar nuestro cuadro, corta un trozo de acetato del tamaño exacto del marco (9x7 cm). Pegamos en la parte superior del cuadro, aplicando un poco de silicón frío solo en las cuatro esquinas.
Finalmente, corta cuatro cuadrados pequeños del color que prefieras y colócalos en cada una de las esquinas del cuadro para darle un toque final.
![English Version]
Step 3: Cut a piece of acetate the exact size of the frame (9x7 cm).To finish our picture, cut a piece of acetate the exact size of the frame (9x7 cm). Glue on the top of the frame, applying a little cold silicone only on the four corners.
Finally, cut four small squares in the color of your choice and place them in each of the corners of the frame to give it a final touch.
 |  |
|---|
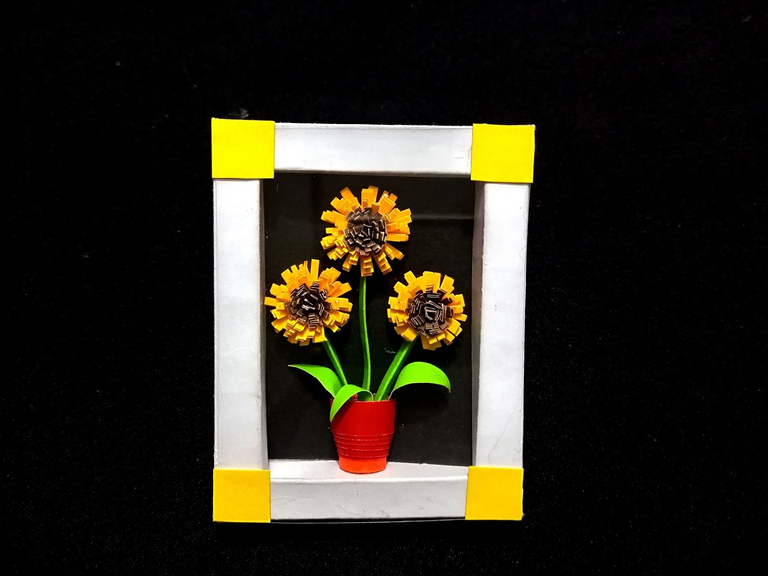
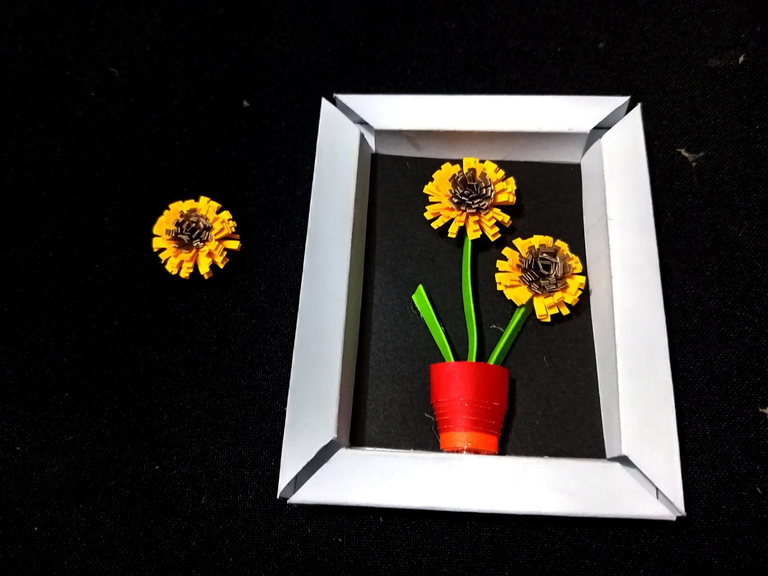
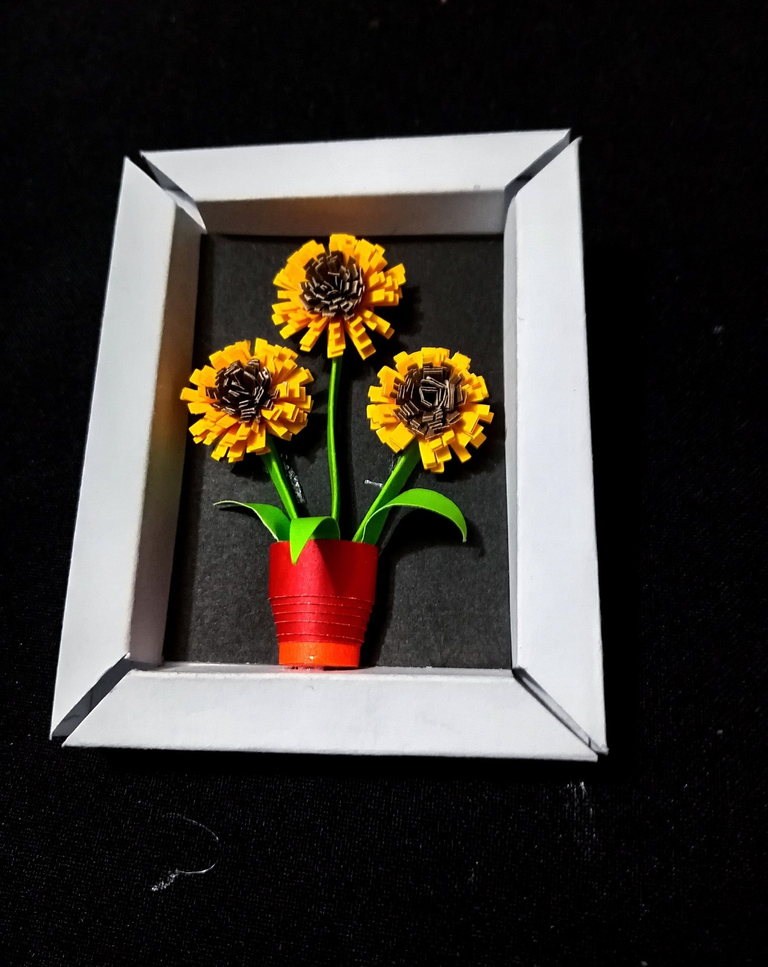
Y así obtienes tu propio mini cuadro decorativo de girasoles. Esta es una excelente opción si amas este tipo de flores y quieres retratarlas en la pared de tu habitación o cualquier otro espacio de tu casa.
¡Espero les haya gustado el resultados y se animen a hacerlo! Nos vemos en la próxima.
La imagen principal fue creada con Canva.
![English Version]
And so you get your own mini decorative painting of sunflowers. This is an excellent option if you love this type of flowers and want to portray them on the wall of your room or any other space in your home.I hope you liked the results and are encouraged to do it! See you next time.
The main image was created with Canva.
Congratulations @gsusart! You have completed the following achievement on the Hive blockchain And have been rewarded with New badge(s)
Your next target is to reach 30 posts.
You can view your badges on your board and compare yourself to others in the Ranking
If you no longer want to receive notifications, reply to this comment with the word
STOPCheck out our last posts:
Wow, this is truly an extraordinary work. Although small, its charm is truly amazing. Its aura is presented as lively and cheerful.
Thank you so much! ♥️ I'm so glad you captured the essence and charm of the piece. Small but with so much love. ☺️
Yes you're welcome. Keep up the enthusiasm for your work, friends.
Me encantó el resultado, realmente quedó lindo y prolijo. Me robo la idea para hacer el marco, pues tengo algunos dibujos que quisiera colocar enmarcados y me queda como anillo al dedo el procedimiento para hacerlo.
¡Me alegra muchísimo! Hazlo, así exhibir tus obras, un. Mini museo en casa ☺️ te quedará genial. ¡Gracias por tu comentario!
Este post ha sido votado y curado por el equipo Hive Argentina | Participa en nuestro Trail de curación.
Únete a nuestro Trail Aquí.
Puedes hacerlo también en nuestros enlaces preconfigurados de Hivesigner:
| 10 HP | 25 HP | 50 HP | 100 HP | 250 HP | 500 HP | 1000 HP | 1500 HP | 2000 HP |
Me encanta tu proyecto y la presentación del mismo, la pulcritud en los detalles, el maquetado es precioso y un paso a paso bien explicado, te felicito.
Excelente trabajo! Este post ha sido curado por el equipo de @hivediy
Unete a nuestro Trail
You can also delegate using our preconfigured Hivesigner links:
| 50 HP | 100 HP | 250 HP | 500 HP | 1000 HP | 1500 HP | 2000 HP |
¡Gracias! Que genial, Me alegra mucho que te haya gustado, al igual que la presentación. Los detalle por más pequeños que sean hacen del trabajo una hermosa obra ☺️ tus palabras me animan a seguir creando.♥️🌻
The tutorial looks very easy, but in reality I'm not very good at it hahah.. Amazing work, sis. Thank you for sharing.
Hahaha ☺️I totally understand, it's happened to me! Sometimes a tutorial seems simple, but putting it into practice is a different story. There's no need to get discouraged; the trick is to keep trying! Thanks for your comment.🌻🌻