DIY // I made a stylish Kimono Shirt Jumpsuit
Hello, creative hivers! Welcome to my blog, it's always my delight to have you stop by and I will be sharing with us another beautiful and interesting project of mine, a jumpsuit I just completed after working on it all through yesterday.
 Image is mine, collaged using canva
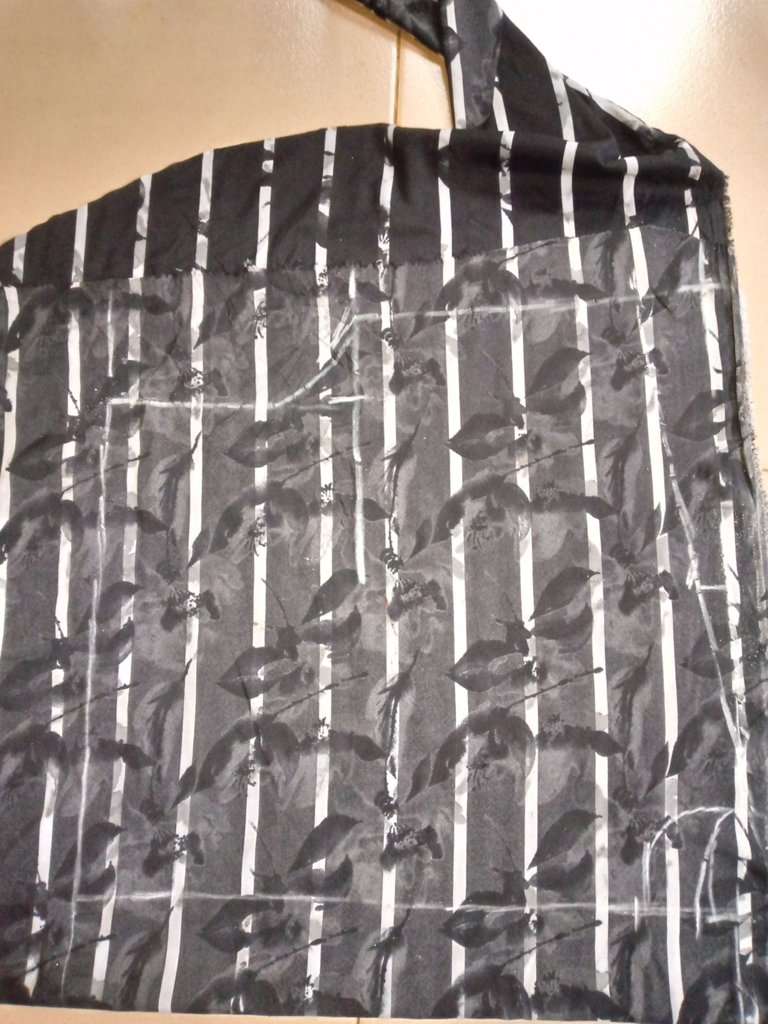
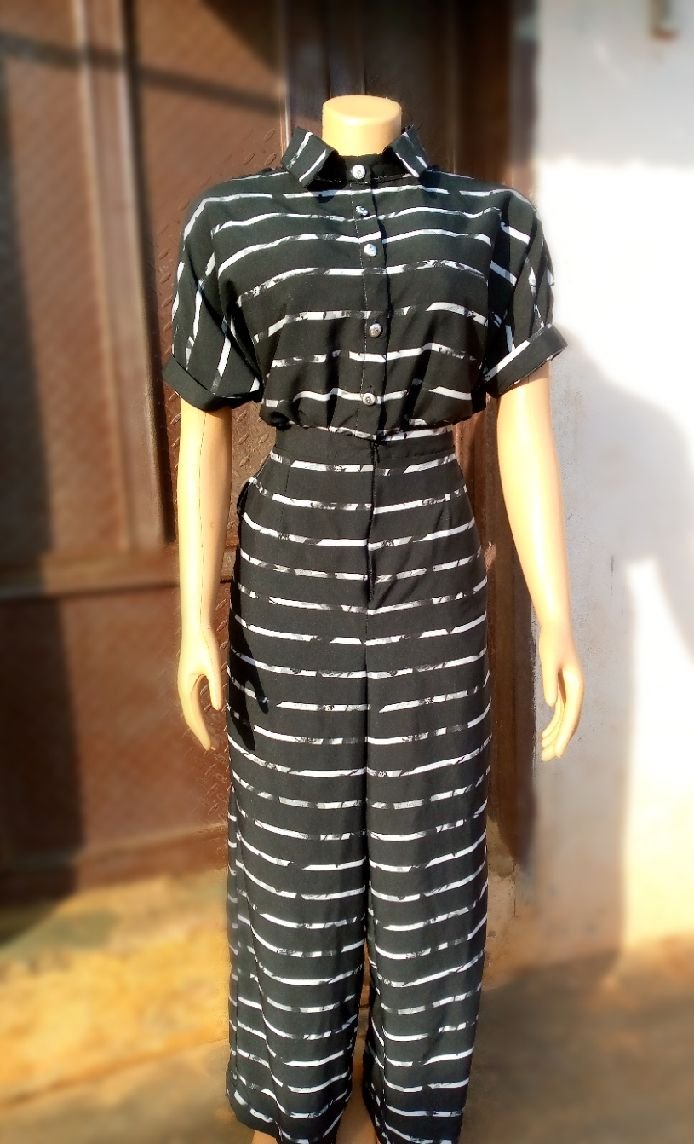
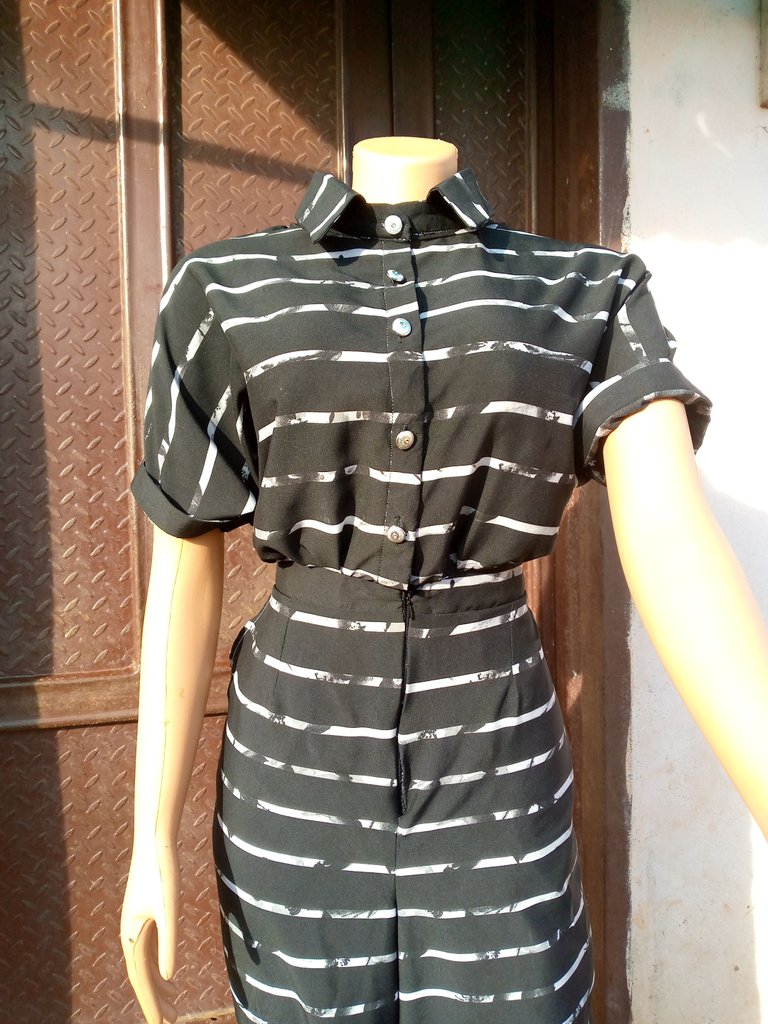
one classy outfit in a lady's wardrobe is the jumpsuit, you would agree with me that jumpsuits gives this unique and classy vibes, especially when paired with the right accessories, what's more interesting is that as a fashionable lady, depending on the style of the jumpsuit, you could just put on a jacket on your jumpsuit and it can move from a casual to a formal wear, some jumpsuits also depending on the chosen style can be rocked to the beach, party, or hangout with friends.
For mine, I decided to make a blend of both, it can be with as formal or casual wear, its called a kimono shirt jumpsuit. Kimono is a Japanese traditional wear, from my understanding, it's a cut-together sleeve outfit, meaning the sleeves are not separated from the main bodice and this style has taken over most of the modern fashion trends. stay tuned, and I hope you enjoy the process, as I also did while making this jumpsuit.
Materials/Tools used
- Light crepe fabric
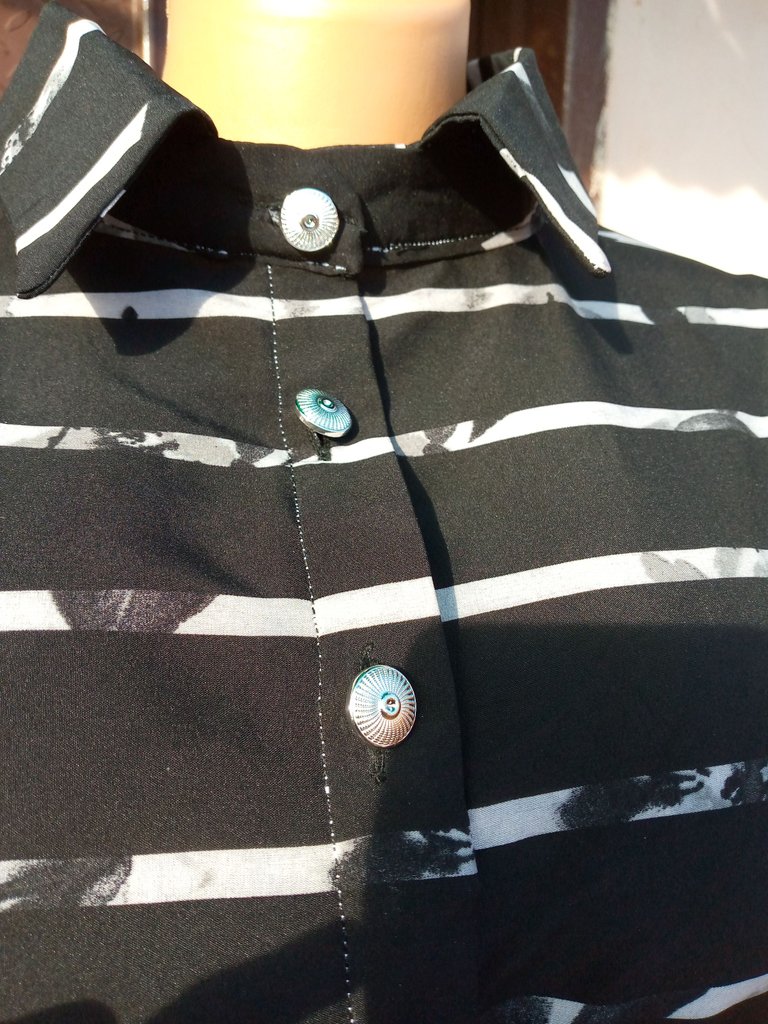
- Buttons
- Collar Stay
- Thread
Sewing machine, measurement tape, and scissors
Process
Step 1

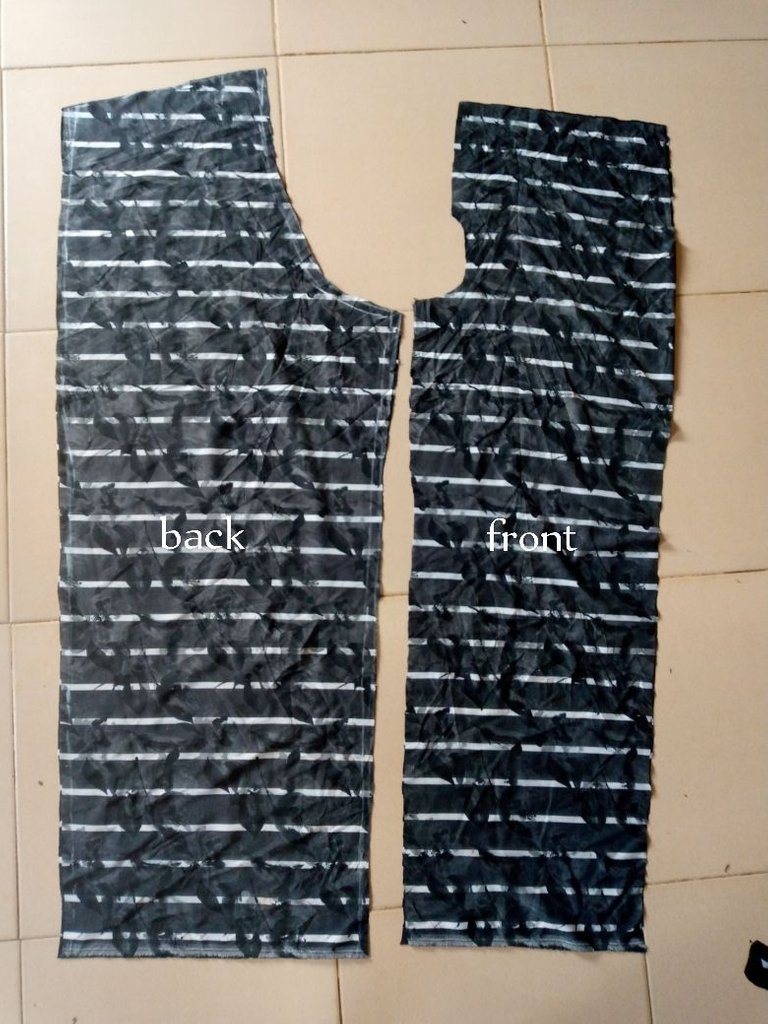
I started by drafting and cutting out the upper front and back pattern, as you can see from my explanation of what a kimono means, the body and the sleeves are not separated, but rather cut together. The front has two pieces while the back is on fold'
Step 2
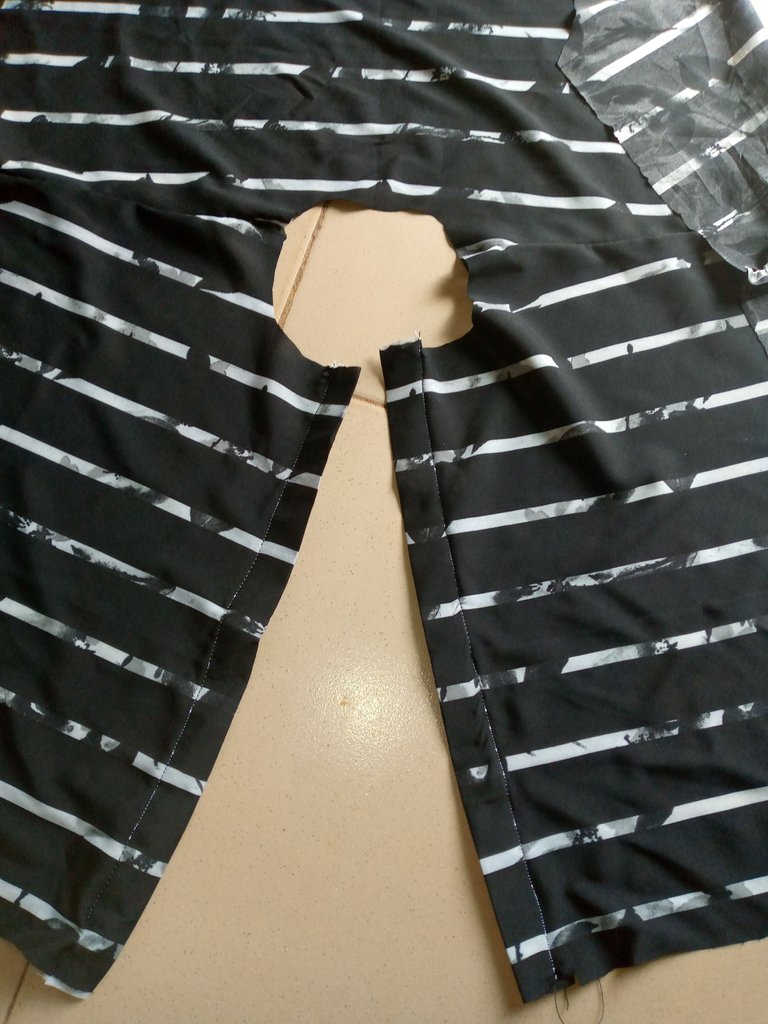

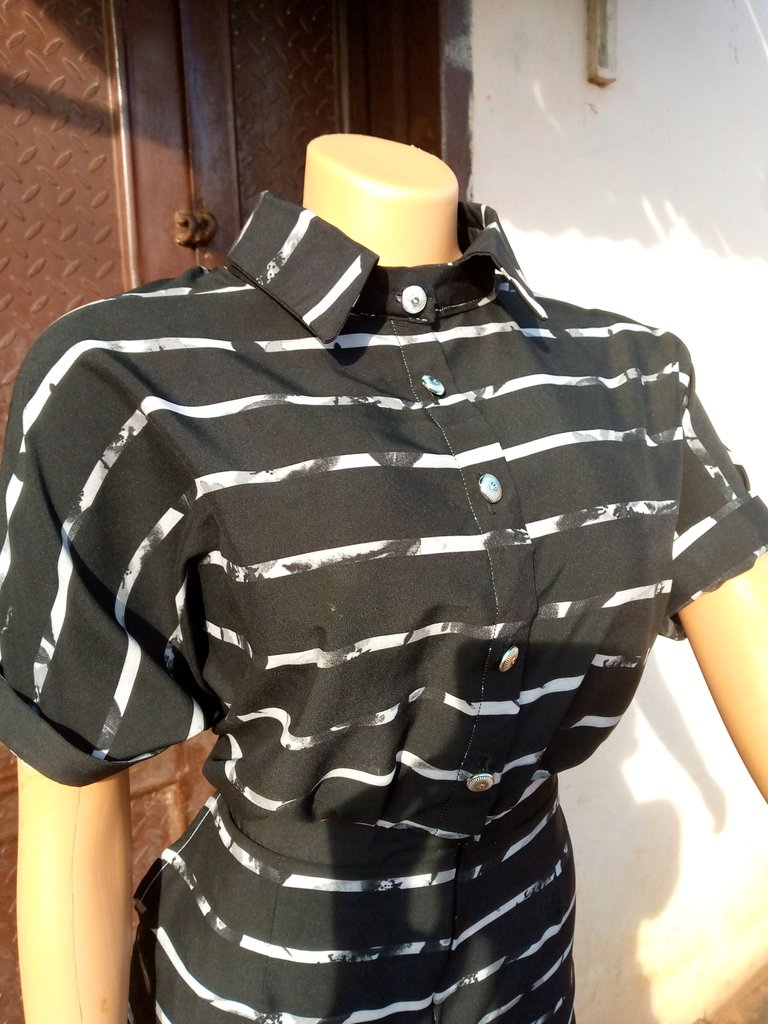
I joined the above front and back pattern by the shoulder and folded the placket where the buttonhole and button will be fixed.
Step 3
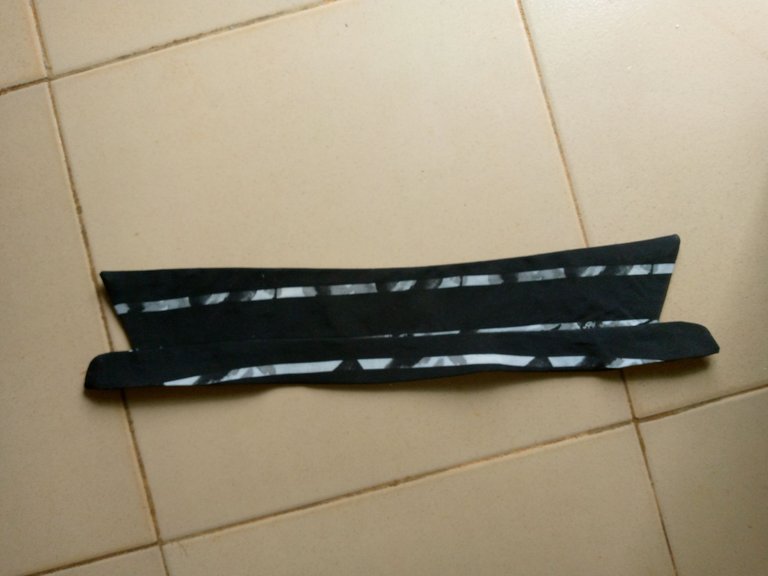
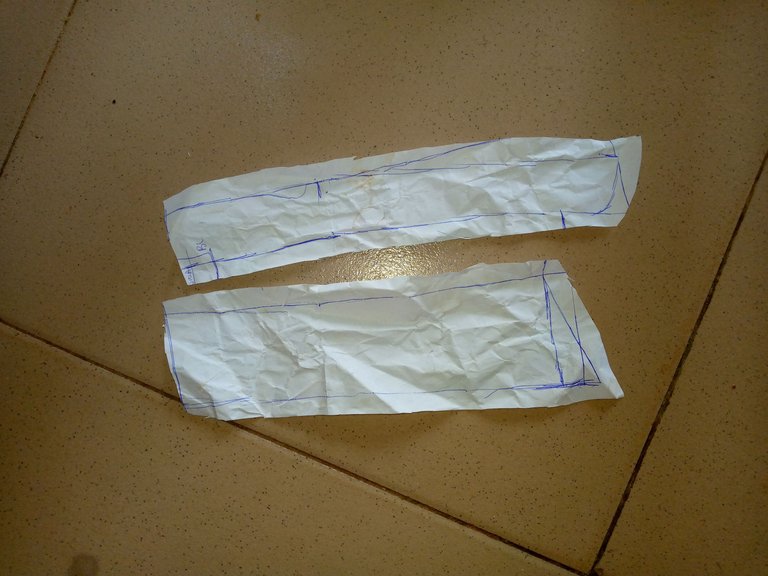
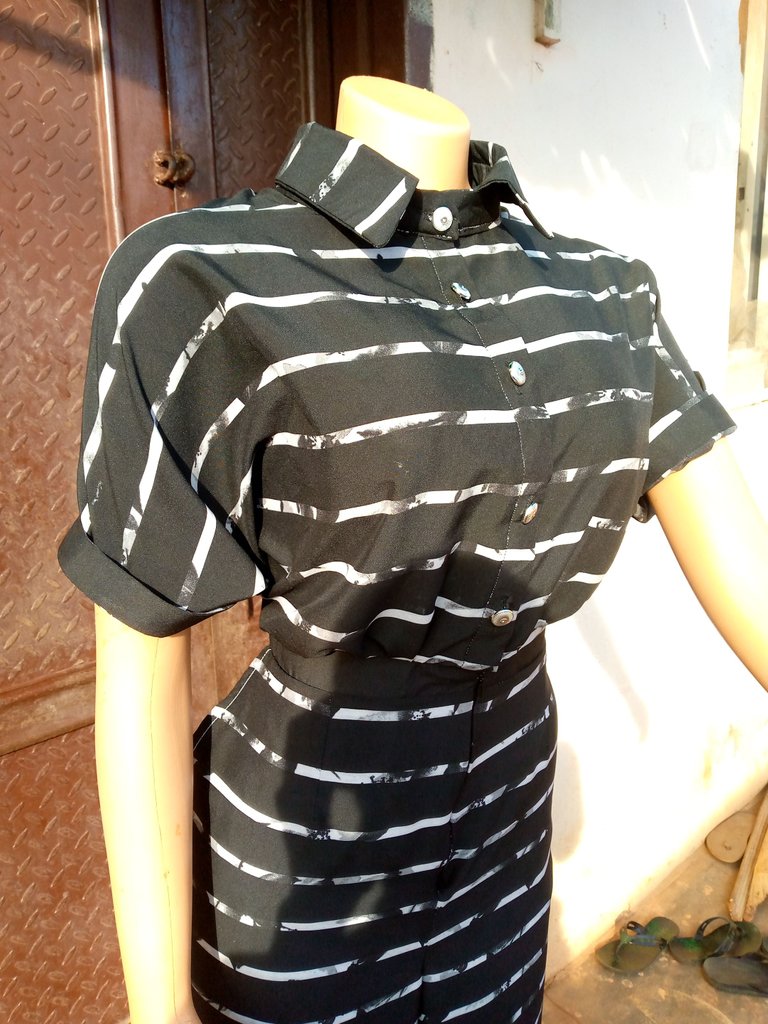
I drafted and cut out the collar patterns and added collar stay at the wrong side of the fabric or more durability before joining all collar patterns together to form the collar
Step 4
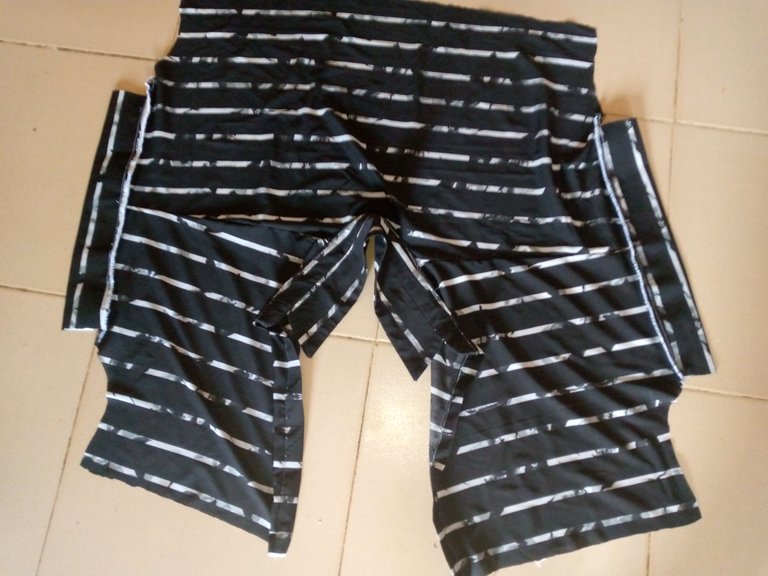
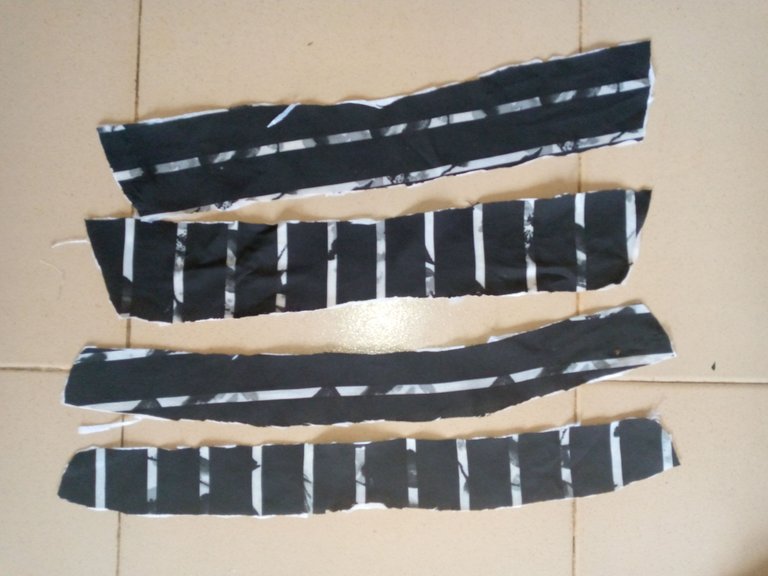
I wanted turnup sleeves, so I cut out extra strips in a fold of 2.5 inches which I attached to both sides of the sleeves, and also sew my already made collar to the neckline of the upper bodice.
Step 5
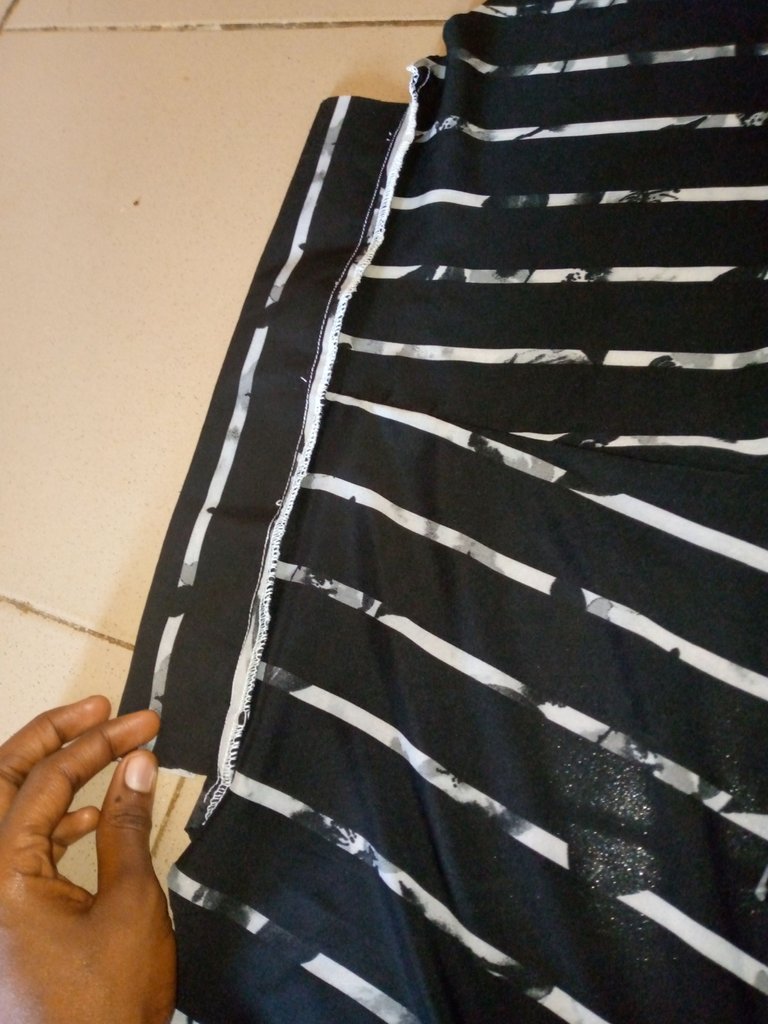
Moving on, I drafted and cut out the lower part of the jumpsuit which is a trouser pattern, and added bands too, I attached sides pocket to the front part of the trouser, then them by the crotch and also to their upper sides,
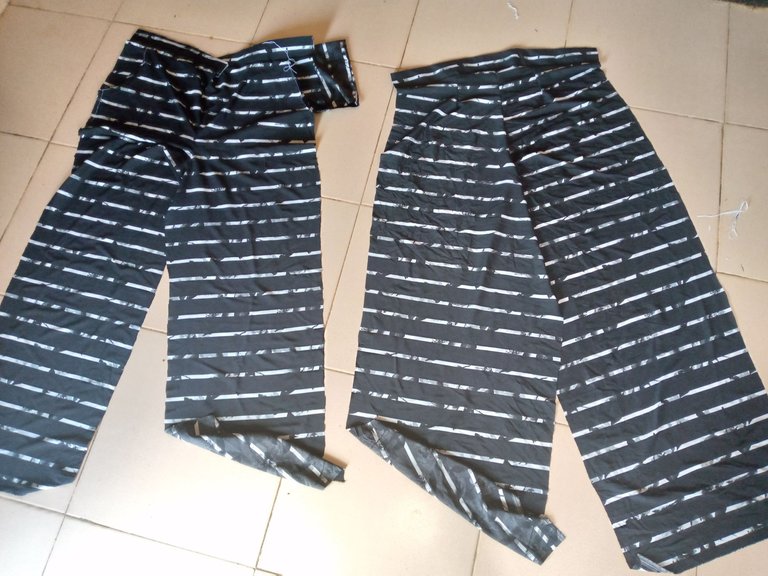
And finally, hemmedned all by the sides, fix the buttons and hemed the trouser part. My beautiful Kimono Shirt jumpsuit is ready to be rocked.
I hope you find this DIY process easy to follow. So, would you rock this jumpsuit? I would love to know in the comment section, also tell me if you need more clarification on some parts, I will be more than happy to explain more.
Please note, all images used in this post are mine.
Thank you very much for your time on my blog. Do have a wonderful day ahead.
I may have mentioned before how much I love jumpsuits. I like that you used a black material here, it make the design stand out more. And the button you used...really unique.
You did an amazing job sis.
!diy
Thanks dear, yea black definitely suit this jumpsuit style.
You're most welcome
You can query your personal balance by
!DIYSTATSGreat job @glorydee, your design is always beautiful and classy this is not an exception with the collar and beautiful button used. I love the outcome.
Thanks @bimpcy, glad you love the outcome.
Very nice design, good job. Thanks for sharing in our community your step by step.
Thank you for having me🤗
https://leofinance.io/threads/glorydee/re-leothreads-2ttesuvry
The rewards earned on this comment will go directly to the people ( glorydee ) sharing the post on LeoThreads,LikeTu,dBuzz.
This is pure class talent,
Your creation is so elegant
Well done dear
I love this set I want it for me, the fabric is my favorite, I love the combination of stripes, also it was very well detailed. thank you for sharing, congratulations! 😘 🤗
🤗 I'm sure you will look elegant in this jumpsuit, glad you love it. Thank you for your heartwarming words of encouragement.
Wow, this is very beautiful. I will definitely rock this jumpsuit and you explained the steps very well.
I'm also looking forward to joining this amazing community myself. Thank you for sharing.
Popped in from @dreemport #dreemerforlife
This is so beautiful
The DIY process is an easy to follow one my dear. Any tailor seeking to know more, this definitely will be so useful. I gave up on learning tailoring due to the mathematics involved 😂😂
This is beautiful my dear
Well done ✅
#dreemerforlife
Wow!! That looks great. Well, I can't keep myself from wanting to wear it. You're amazing 😍 and I can't do needlework even in my life depending on it.😂
💛Made my way here through #dreemport. #Dreemerforlife