I put a WordPress site on my VPS (and saved 158€/year) [EN/FR]
Hello Hive! Today, I'm going to show you how to host a WordPress site on a VPS already configured to run a Next.js application.
The goal of my project is simple: I have a server with available space, and @altheana is launching a new project. Instead of paying for shared hosting (around 13.20€/month, or 158€/year), we will install her WordPress site on my VPS, which runs on Nginx. This will require a few adjustments, but you'll see that it's not that complicated.
Installation of prerequisites
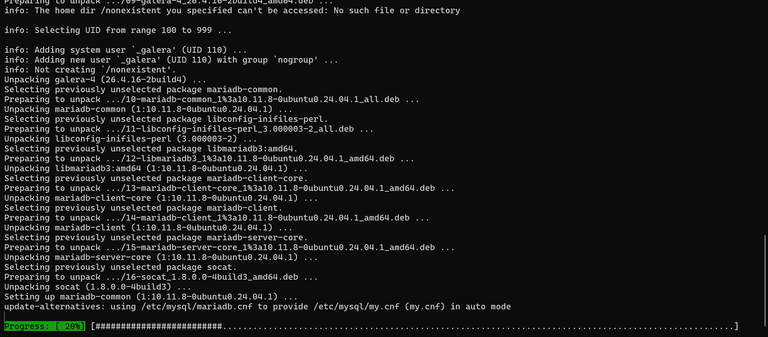
WordPress relies on PHP and a MySQL or MariaDB database. So, we will start by installing the necessary packages:
sudo apt update && sudo apt install mariadb-server php php-fpm php-mysql -y
After installation, I encountered a problem: an error indicating that Apache was conflicting with Nginx.
Apache and Nginx are both web servers. If both are installed, they may conflict as they try to listen on the same ports.
I don’t recall installing Apache on this VPS, but to avoid any issues, I removed it:
sudo systemctl stop apache2
sudo systemctl disable apache2
sudo apt remove --purge apache2 -y
sudo apt autoremove -y
Now, we have a clean environment with MariaDB, PHP, and Nginx ready to be configured.
2. Creating a database for WordPress
WordPress needs a database. On shared hosting, this process is often automated, but on a VPS, we have to do it ourselves.
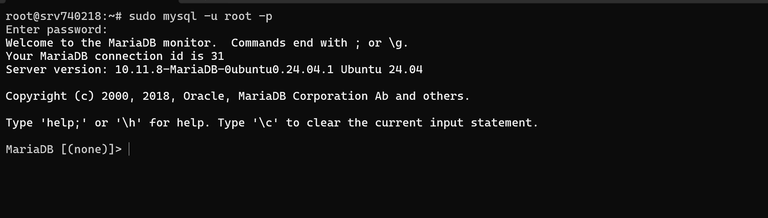
We start by connecting to MariaDB:
sudo mysql -u root -p
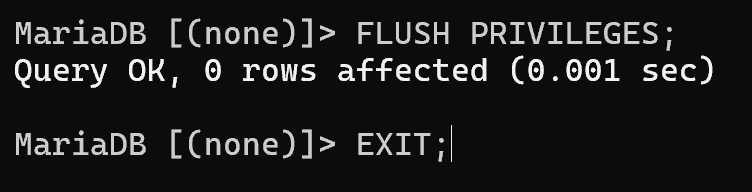
Once inside the MariaDB console, here are the essential commands (to be adapted) to create a database and a secure user:
CREATE DATABASE database_name;
CREATE USER 'user'@'localhost' IDENTIFIED BY 'secure_password';
GRANT ALL PRIVILEGES ON database_name.* TO 'user'@'localhost';
FLUSH PRIVILEGES;
EXIT;
Now, I have to create my database in SQL. I won’t share my connection details since this is sensitive data. That being said, my database is successfully created, and we can move on:
3. Installing WordPress
It's now time to install WordPress. I start by navigating to my Nginx server directory, which already hosts LexiStep:
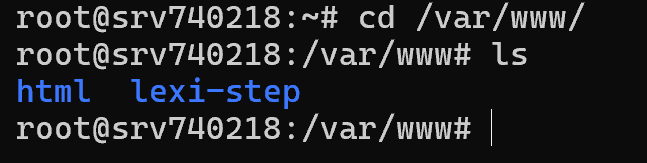
Here, I will create a new storage space to host @altheana's site.
sudo mkdir crochet_creatif && cd crochet_creatif
Once inside my new storage space, I can download the latest WordPress archive.

Now, we need to extract the archive and remove the compressed folder:
sudo tar -xzf latest.tar.gz --strip-components=1
sudo rm latest.tar.gz
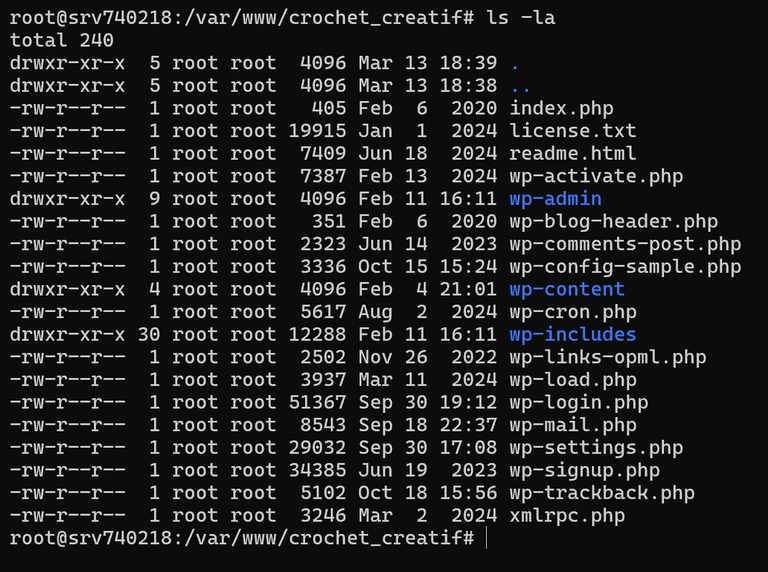
If I list the folders and files in my storage space, we can see that the entire WordPress installation has been completed successfully:
Setting permissions
For WordPress to function correctly (adding plugins, uploading images, etc.), we need to assign the correct permissions to the web server:
sudo chown -R www-data:www-data /var/www/crochet_creatif
sudo chmod -R 755 /var/www/crochet_creatif
4. Configuring Nginx
Now, we need to configure Nginx so that it serves WordPress correctly while coexisting with my Next.js application. Here is an example of a configuration file (this is not mine; this configuration is extremely basic):
server {
    listen 80;
    server_name super-site.com;
    root /var/www/super-site;
    index index.php index.html index.htm;

    location / {
        try_files $uri $uri/ /index.php?$args;
    }

    location ~ \.php$ {
        include snippets/fastcgi-php.conf;
        fastcgi_pass unix:/run/php/php-fpm.sock;
        fastcgi_param SCRIPT_FILENAME $document_root$fastcgi_script_name;
        include fastcgi_params;
    }
}
We activate this configuration and restart Nginx. On my end, it looks like this:

5. Finalizing the installation
Now that everything is in place, @altheana just needs to purchase a domain name and point it to my server. Then, she can access the WordPress installation by going to http://crochet-creatif.com/wp-admin/install.php and following the steps.
So, is it worth doing it yourself?
- Savings: Shared hosting costs around 158€/year. Here, the cost is zero since we are sharing an existing VPS.
- Flexibility: We can optimize performance and security according to our needs.
- Learning: We get a better understanding of how a web server, a database, and WordPress hosting work.
If this project works well, it will also allow me to make my VPS more cost-effective.
However, there are many drawbacks, particularly in terms of security, since I am managing my own server. If something goes wrong, I have no one to turn to. But with cryptocurrencies, I'm used to taking care of my business. 😜
Version Française
Salut Hive ! Aujourd’hui, je vais vous montrer comment héberger un site WordPress sur un VPS déjà configuré pour faire tourner une application Next.js.
L'objectif de mon projet est simple : j’ai un serveur avec de la place libre, et @altheana lance un nouveau projet. Plutôt que de payer un hébergement mutualisé (environ 13,20 €/mois, soit 158 €/an), nous allons installer son site WordPress sur mon VPS, qui tourne sous Nginx. Ca va me demander quelques ajustements, mais vous verrez que ce n’est pas si compliqué.
Installation des prérequis
WordPress repose sur PHP et une base de données MySQL ou MariaDB. Nous allons donc commencer par installer les paquets nécessaires :
sudo apt update && sudo apt install mariadb-server php php-fpm php-mysql -y
Après l’installation, j’ai rencontré un problème : une erreur indiquant qu’Apache était en conflit avec Nginx.
Apache et Nginx sont tous deux des serveurs web. Si les deux sont installés, ils peuvent entrer en conflit car ils tentent d’écouter sur les mêmes ports.
Je n’ai pas souvenir d’avoir installé Apache sur ce VPS, mais pour éviter tout problème, je l’ai supprimé :
sudo systemctl stop apache2
sudo systemctl disable apache2
sudo apt remove --purge apache2 -y
sudo apt autoremove -y
Maintenant, nous avons un environnement propre avec MariaDB, PHP et Nginx prêts à être configurés.
2. Créer une base de données
2. Création d'une base de données pour WordPress
WordPress a besoin d’une base de données. Sur un hébergement mutualisé, ce processus est souvent automatisé, mais sur un VPS, c’est à nous de le faire.
On commence par se connecter à MariaDB :
sudo mysql -u root -p
Une fois dans la console MariaDB, voici les commandes essentielles (à adapter) pour créer une base de données et un utilisateur sécurisé :
CREATE DATABASE nom_bdd;
CREATE USER 'user'@'localhost' IDENTIFIED BY 'motdepasse_sécurisé';
GRANT ALL PRIVILEGES ON nom_bdd.* TO 'user'@'localhost';
FLUSH PRIVILEGES;
EXIT;
A moi maintenant de créer ma base de données en SQL. Je ne vais pas partager mes informations de connexion car ça représente des données sensibles. Cela dit, ma base de données est bien créée et nous pouvons à présent passer à la suite :
3. Installer WordPress
Il est maintenant temps d'installer WordPress. Je commence par me rendre dans le dossier de mon serveur Nginx qui héberge déjà LexiStep :
Ici, je vais créer un nouvel espace de stockage pour héberger le site d'@altheana.
sudo mkdir crochet_creatif && cd crochet_creatif
Une fois dans mon nouvel espace de stockage, je peux installer l'archive de la dernière version de WordPress.
Il faut maintenant extraire l'archive et supprimer le dossier compressé :
sudo tar -xzf latest.tar.gz --strip-components=1
sudo rm latest.tar.gz
Si je liste les dossiers et fichiers de mon espace de stockage, on peut voir que toute l'installation de WordPress s'est bien faite :
Attribution des droits
Pour que WordPress fonctionne correctement (ajout de plugins, téléchargement d’images, etc.), il faut donner les bons droits au serveur web :
sudo chown -R www-data:www-data /var/www/crochet_creatif
sudo chmod -R 755 /var/www/crochet_creatif
4. Configuration de Nginx
Maintenant, nous devons configurer Nginx pour qu’il serve correctement WordPress tout en cohabitant avec mon application Next.js. Voici un exemple de fichier de configuration (ce n'est pas le miens, cette configuration est extrêmement basique) :
server {
    listen 80;
    server_name super-site.com;
    root /var/www/super-site;
    index index.php index.html index.htm;

    location / {
        try_files $uri $uri/ /index.php?$args;
    }

    location ~ \.php$ {
        include snippets/fastcgi-php.conf;
        fastcgi_pass unix:/run/php/php-fpm.sock;
        fastcgi_param SCRIPT_FILENAME $document_root$fastcgi_script_name;
        include fastcgi_params;
    }
}
On active cette configuration et on redémarre Nginx. De mon côté, ça donne ça :
5. Finalisation de l’installation
Maintenant que tout est en place, @altheana n’a plus qu’à acheter un nom de domaine et le pointer vers mon serveur. Ensuite, elle pourra accéder à l’installation de WordPress en allant sur http://crochet-creatif.com/wp-admin/install.php et suivre les étapes.
Alors, est-ce que le faire soi-même vaut le coup ?
- Économies : Un hébergement mutualisé coûte environ 158 €/an. Ici, le coût est nul puisqu'on mutualise un VPS existant.
- Flexibilité : On peut optimiser les performances et la sécurité selon nos besoins.
- Apprentissage : On comprend mieux comment fonctionne un serveur web, une base de données et un hébergement WordPress.
Si ce projet fonctionne bien, cela me permettra aussi de rentabiliser mon VPS plus facilement.
En revanche, les inconvénients sont nombreux. Notamment pour ce qui est de la sécurité, puisque c'est moi qui gère mon propre serveur, en cas de problème je ne peux pas me retourner chez quelqu'un. Mais avec les cryptomonnaies, je suis habitué à faire attention à mes affaires ;D
The English translation was done using the DeepL API.
Elle pourra y linker ses articles hive, et faire du onboarding, qui sait :)
!PIZZA
Your post has been manually reviewed for curation by the Principality of Bastion.
Check the Trail of posts we voted
Principality of Bastion - Our Leit Motiv? Let's Grow Together.
Principality's site | Minava NFT Market | Discord | Our Twitch Channel
You may TRAIL this account if you like the curation we do, or join our discord to know more about what we do.

Ce serait pas mal de faire un peu d'onboarding effectivement. A réfléchir, je ne sais pas comment elle voudra tourner son projet :D
!BBH
!BBH
!BBH
$PIZZA slices delivered:
@itharagaian(2/10) tipped @genesisledger
Faut vraiment que je commence à apprendre le codage sa peux toujours servir pour des projets en tête .
!LOLZ
lolztoken.com
He goes under cover.
Credit: marshmellowman
@genesisledger, I sent you an $LOLZ on behalf of hive-103505
(1/10)
NEW: Join LOLZ's Daily Earn and Burn Contest and win $LOLZ
Oui, en réalité, ce sont les idées qui t'apprennent à coder. Mal au début, puis plus tu pratiques, plus tu t'améliores. Il s'agit de savoir se remettre en question 😁
https://www.reddit.com/r/Wordpress/comments/1jcjb74/i_put_a_wordpress_site_on_my_vps_and_saved/
The rewards earned on this comment will go directly to the people( @blkchn ) sharing the post on Reddit as long as they are registered with @poshtoken. Sign up at https://hiveposh.com. Otherwise, rewards go to the author of the blog post.