When We Can't Catch A Live Bird, We Bead A Penguin 🐧
There is this bird in my neighborhood; every time we pass by it, my son always points and asks me to look. He loves this bird so very much that I wish I could give it to him, but since I can't fly high and catch this bird, I have decided to give him a beaded penguin as a little part of his second Children's Day present.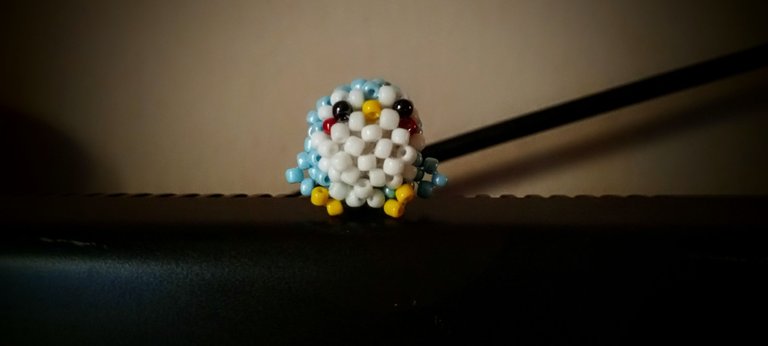

So guy, come along and let me show you how it all went down.
Materials used:
Blue, white, yellow, red, and black seed beads. 0.3 fish line and a pair of scissors.

Step-by-step process:The process is straightforward and not very time-consuming.
Step 1:
I put 6 blue beads on a 100cm fishing line and then crossed both fishing lines with the sixth bead.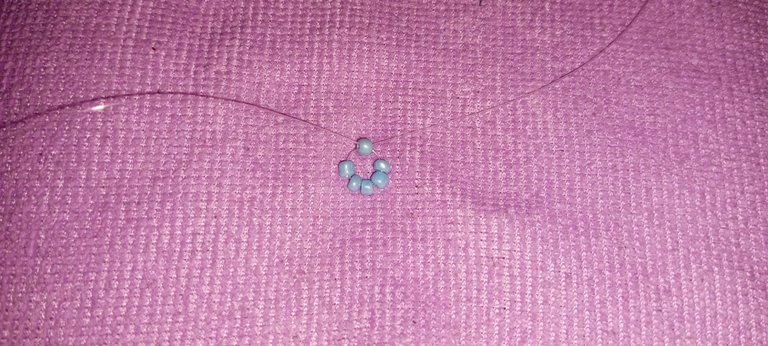
Step 2:
I put 4 blue beads on my left fishline then crossed both fishing lines with the fourth bead.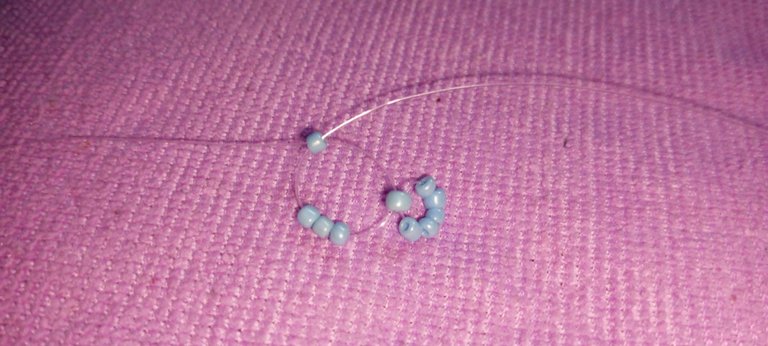
Step 3:
Here I started to introduce the white color to form the chest and its stomach. I passed my right fishing line through the next bead, put two white beads and one blue bead on my left fishline and then crossed both fishing lines with the third bead.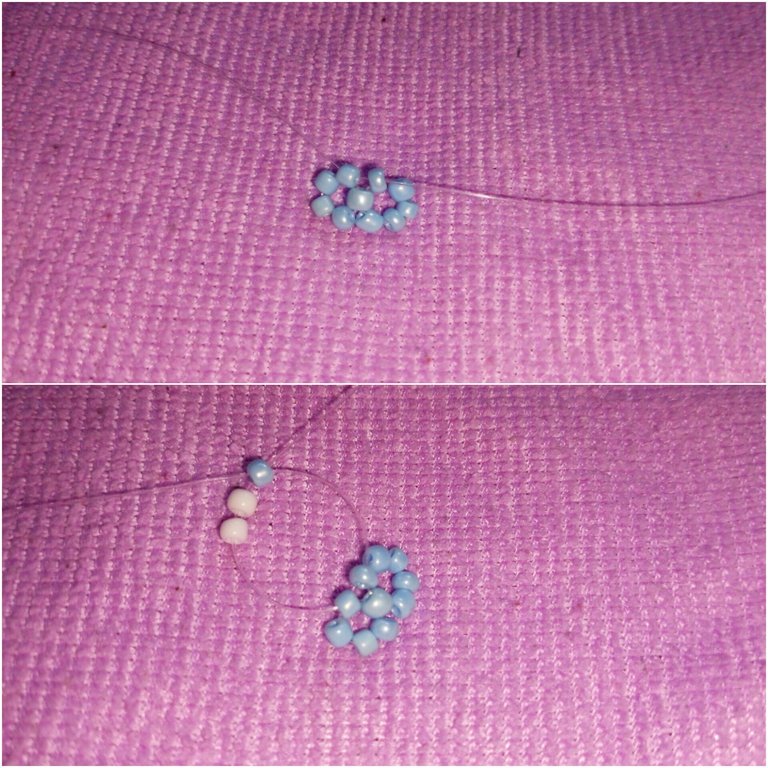
Step 4:
I passed my right fishing line through the next bead, put two white beads and one blue bead on my left fishline and crossed both fishing lines with the third bead.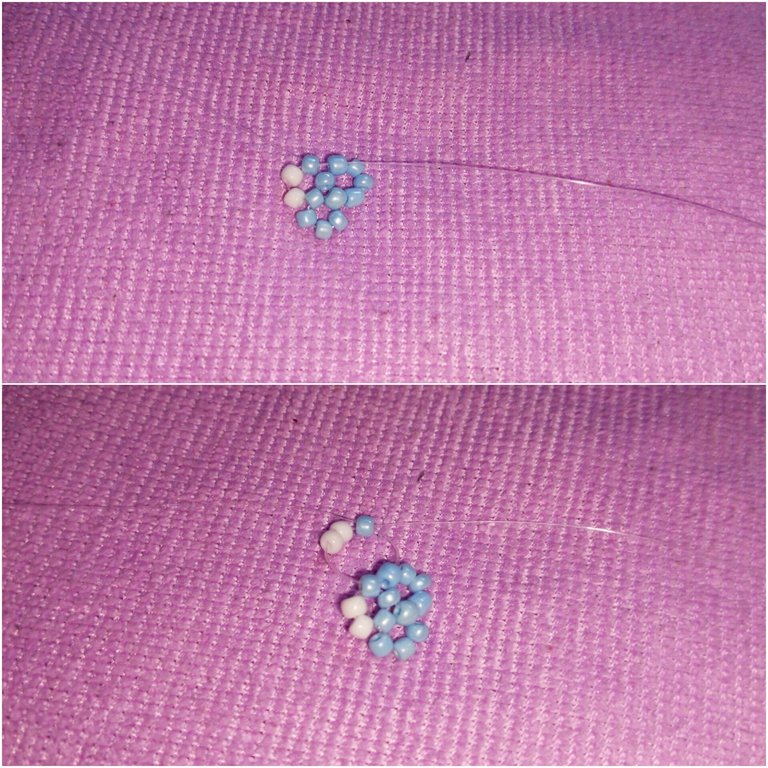
Step 5:
Back to building the back of the penguin, I passed my right fishline through the next bead, put three blue beads on my left fishline, and crossed both fishlines with the third bead.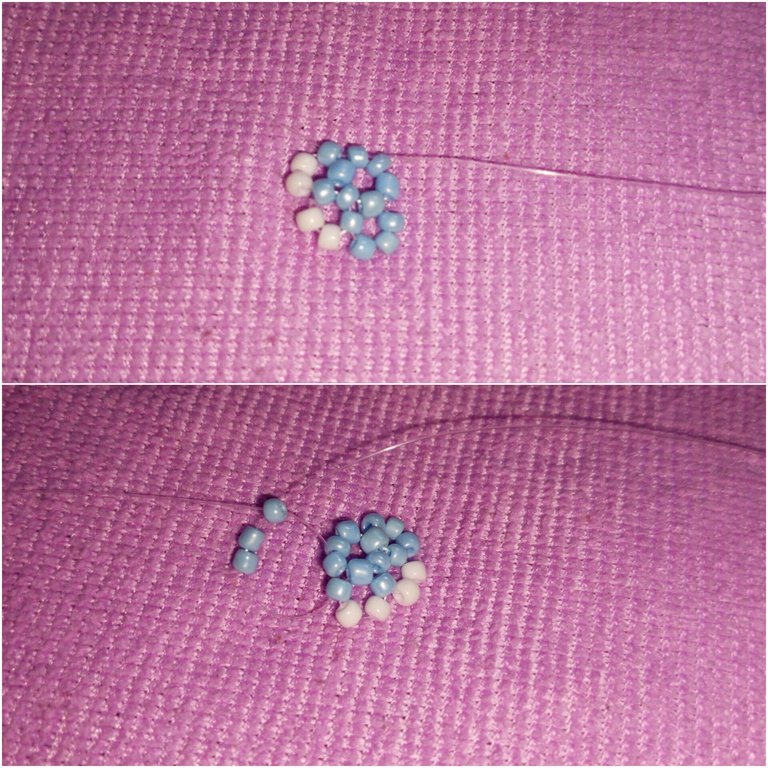
Step 6:
I passed my right fishline through the next bead, put three blue beads on the left fishline, and crossed both fishlines with the third bead.
Step 7:
To end this row, I passed my right fishline through the two next beads, put two blue beads on the left fishline, and crossed both fishlines with the second bead.
Step 8:
I started a new row by putting three blue beads on my left fishline and crossing both fishlines with the third bead.
Step 9:
I passed my right fishing line through the next bead, put two blue beads on the left fishline and crossed both fishing lines with the second bead.
Step 10:
I passed my right fishing line through the next bead, put one blue and one white bead on the left fishline and crossed both fishing lines with the second bead.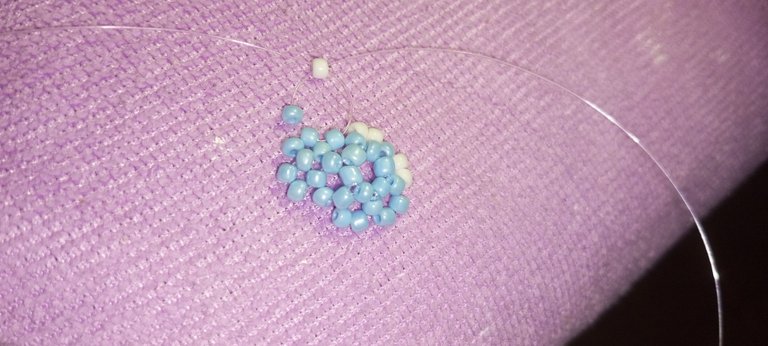
Step 11:
To make the eyes, I passed my right fishing line through the next bead, put one red and one black bead on the left fishline and crossed both fishing lines with the second bead.
Step 12:
And for the mouth, I passed my right fishline through the next bead, put one white and one yellow bead on the left fishline, and then crossed both fishlines with the second bead.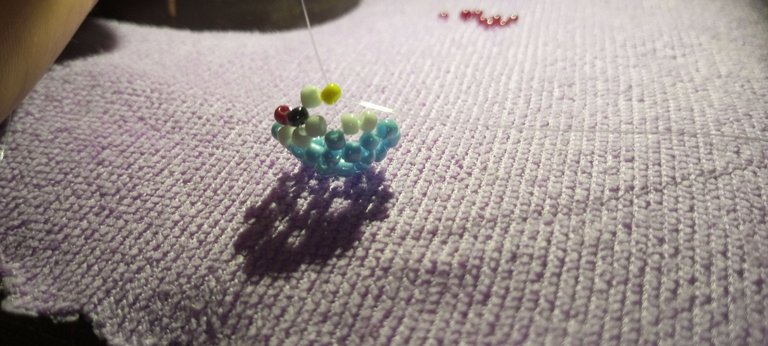
Step 13:
I passed my right fishing line through the next bead, put one white and one black bead on my left fishline and crossed both fishing lines with the second bead.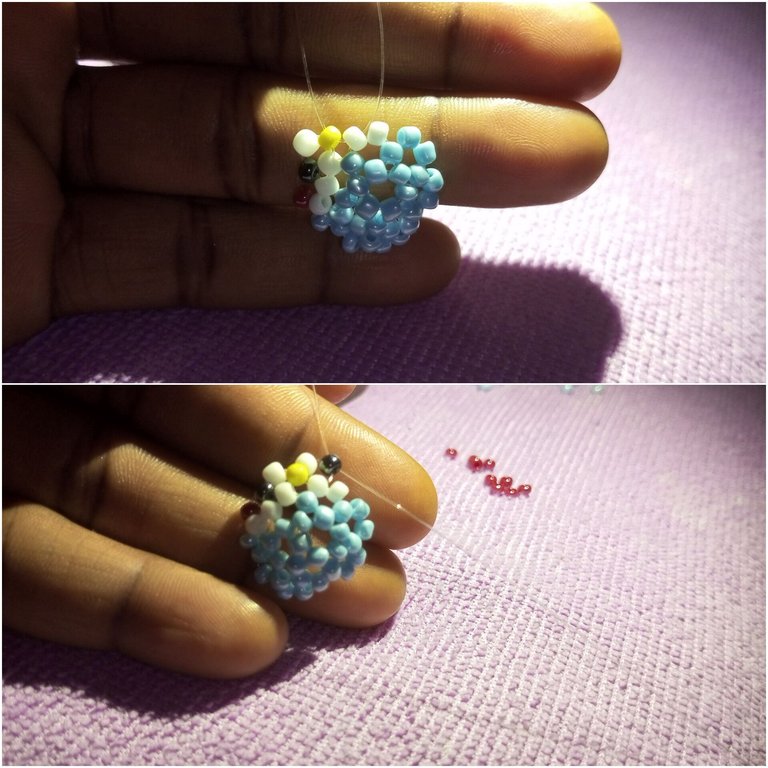
Step 14:
I passed my right fishing line through the next bead, put one red and one white bead on my left fishline and crossed both fishing lines with the second bead.
Step 15:
I passed my right fishing line through the next bead, put two blue beads on the left fishing line, and crossed both fishing lines with the second bead.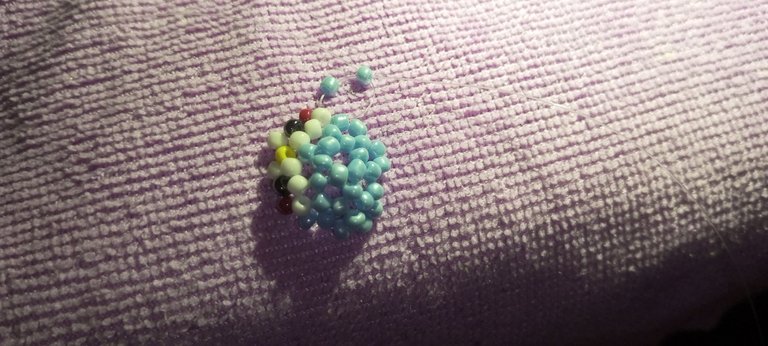
Step 16:
I passed my right fishing line through the next bead, put two blue beads on the left fishing line, and crossed both fishing lines with the second bead.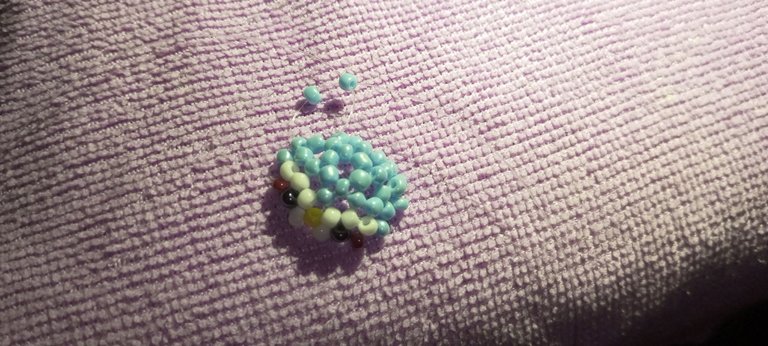
Step 17:
I passed my right fishing line through the next bead, put two blue beads on the left fishing line, and crossed both fishing lines with the second bead.
Step 18:
To end this line, I passed my right fishing line through the next two beads, then crossed both fishing lines with one blue bead.
Step 19:
Here, I started a new row by putting three blue beads on the left fishing line and crossed both fishing lines with the third bead.
Step 20:
I passed my right fishing line through the next bead, put two blue beads on the left fishing line, and crossed both fishing lines with the second bead.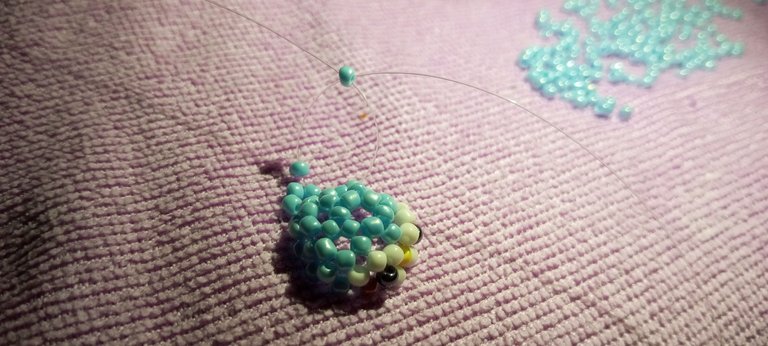
Step 21:
I passed my right fishing line through the next bead, put two blue beads on the left fishing line, and crossed both fishing lines with the second bead.
Step 22:
I passed my right fishing line through the next bead, put one blue and one white bead on the left fishing line, and crossed both fishing lines with the second bead.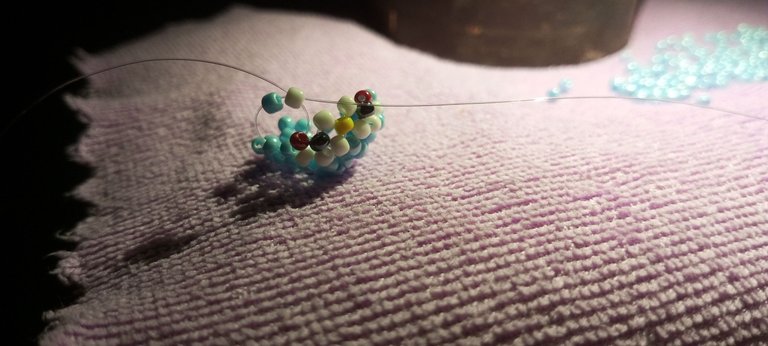
Step 23:
I passed my right fishing line through the next bead, put two white beads on the left fishing line, and crossed both fishing lines with the second bead.
Step 24:
I passed my right fishing line through the next bead, put white beads on the left fishing line, and crossed both fishing lines with the second bead.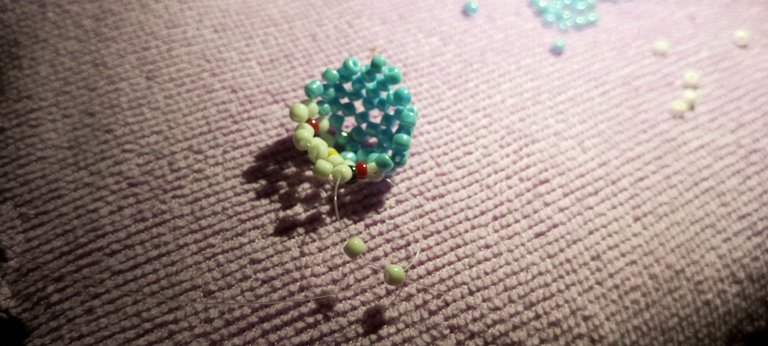
Step 25:
I passed my right fishing line through the next bead, put two blue beads on the left fishing line, and crossed both fishing lines with the second bead.
Step 26:
I passed my right fishing line through the next bead, put two blue beads on the left fishing line, and crossed both fishing lines with the second bead.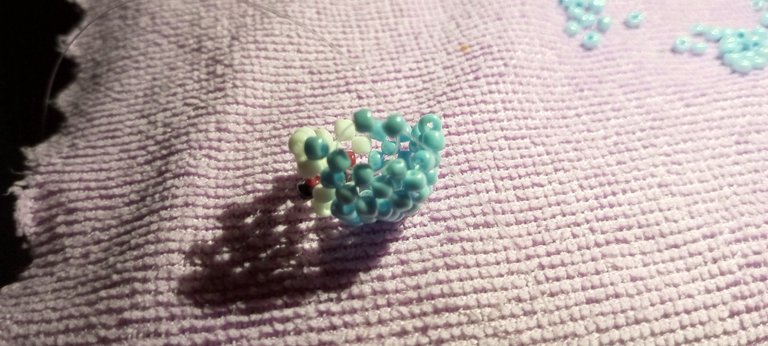
Step 27:
I passed my right fishing line through the next bead, put two blue beads on the left fishing line, and crossed both fishing lines with the second bead.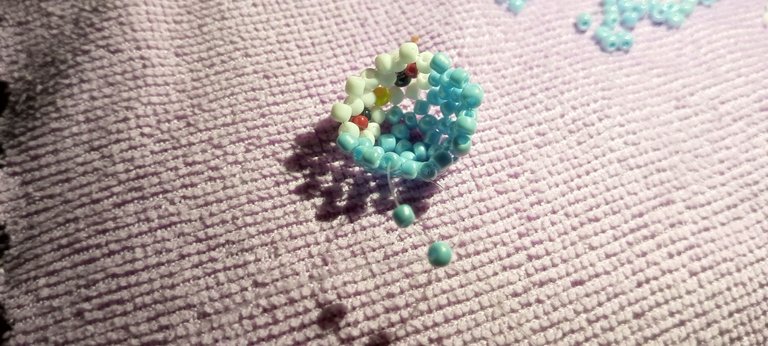
Step 28:
To end this row, I put my right fishing line through the next two beads and then crossed both fishing lines with one blue bead.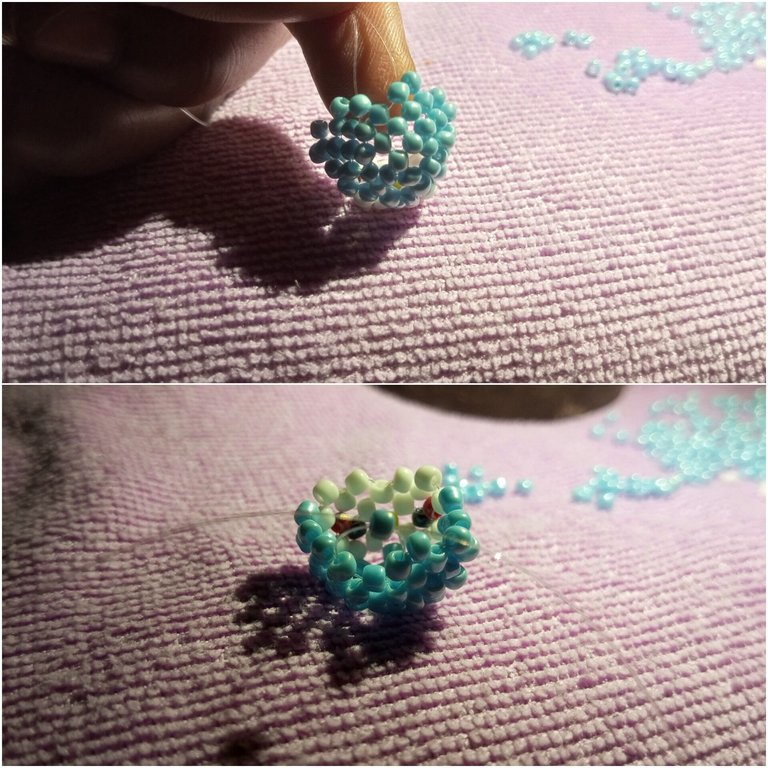
Step 29:
To start a new row here, I put three blue beads on the left fishing line and crossed both fishing lines with the third bead.
Step 30:
I put two blue beads on the left fishing line and crossed both fishing lines with the second bead.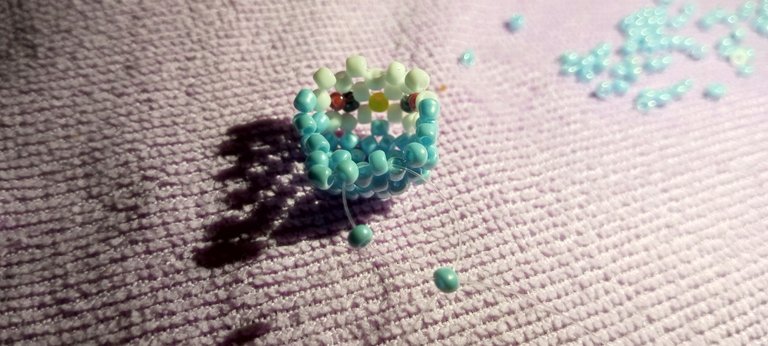
Step 31:
I put two blue beads on the left fishing line and crossed both fishing lines with the second bead.
Step 32:
I put two blue beads on the left fishing line and crossed both fishing lines with the second bead.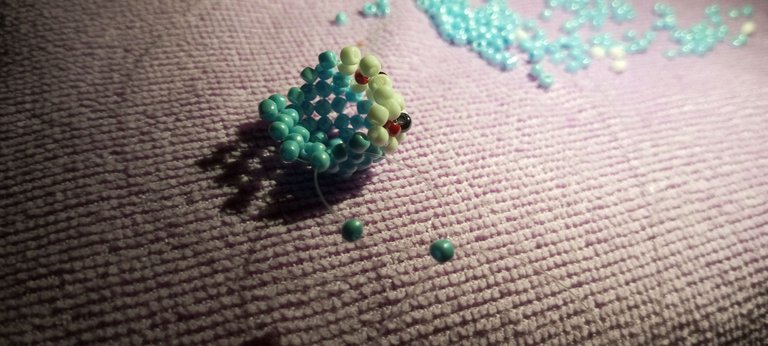
Step 33:
This is the part where I created the first hand of the bird. I put three blue beads on the left fishline and then passed the same fishline through the bead at its base, then put one blue and one white bead on the left fishline and crossed both fishlines with the second bead.
Step 34:
I put two white beads on the left fishing line and crossed both fishing lines with the second bead.
Step 35:
I passed my right fishing line through the next bead, put two white beads on the left, and crossed both fishing lines with the second bead.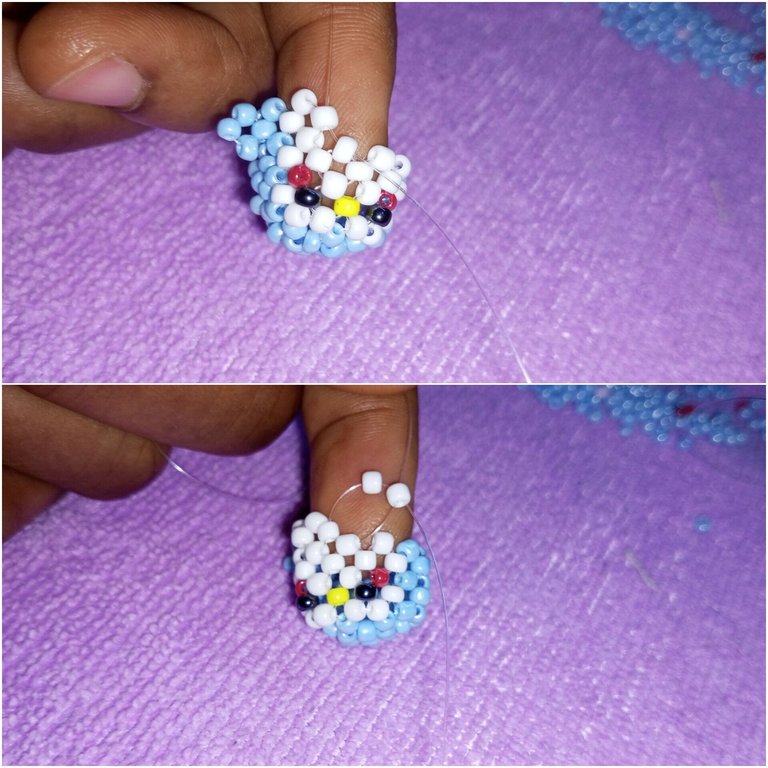
Step 36:
I passed my right fishing line through the next bead, put two white beads on the left, and crossed both fishing lines with the second bead.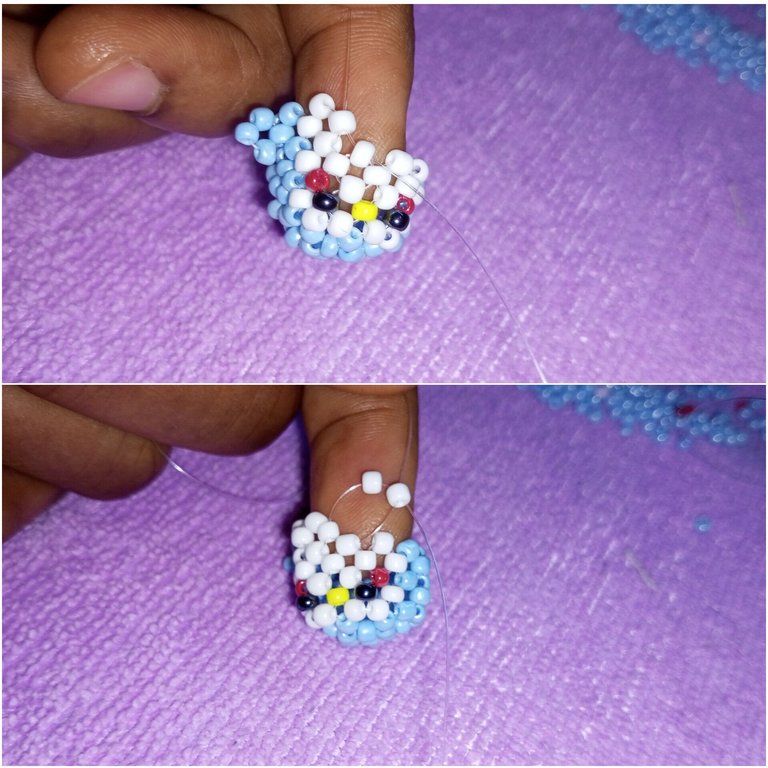
Step 37:
I passed my right fishing line through the next bead, put two white beads on the left, and crossed both fishing lines with the second bead.
Step 38:
I passed my right fishing line through the next bead, put two blue beads on the left fishing line, and crossed both fishing lines with the second bead.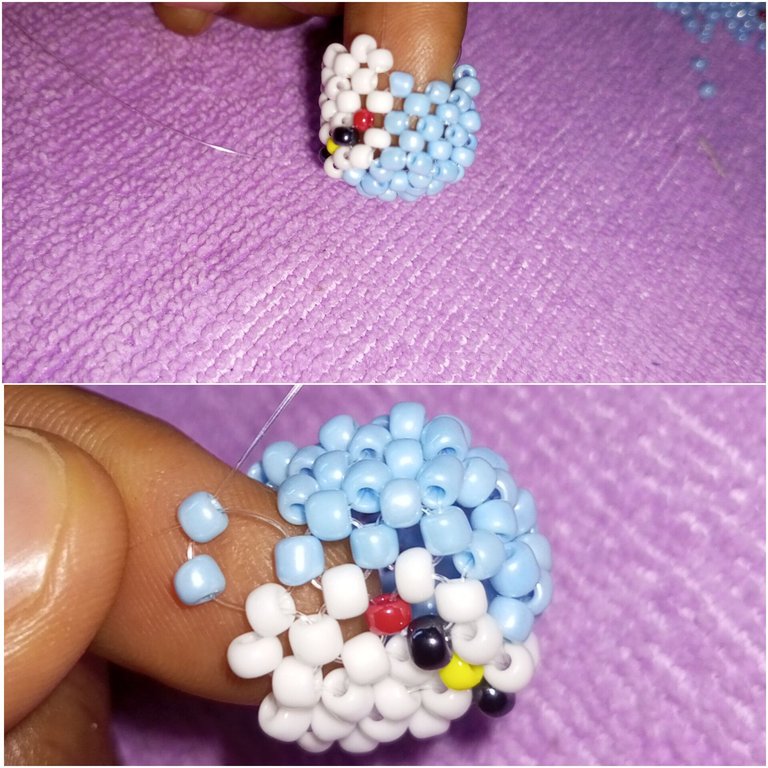
Step 39:
To create the second hand of the bird, I put three blue beads on the left fishing line and passed the same fishing line through the bead at the base, then put two blue beads on the left fishing line and crossed both fishing lines with the second bead.
Step 40:
I end this row by putting my right fishing line through the next two beads and crossing both fishing lines with one blue bead.
Step 41:
In this step, I started a new row, which happens to be the last one. I passed my right fishing line through the next bead, put three beads on the left fishing line, and crossed both fishing lines with the third bead.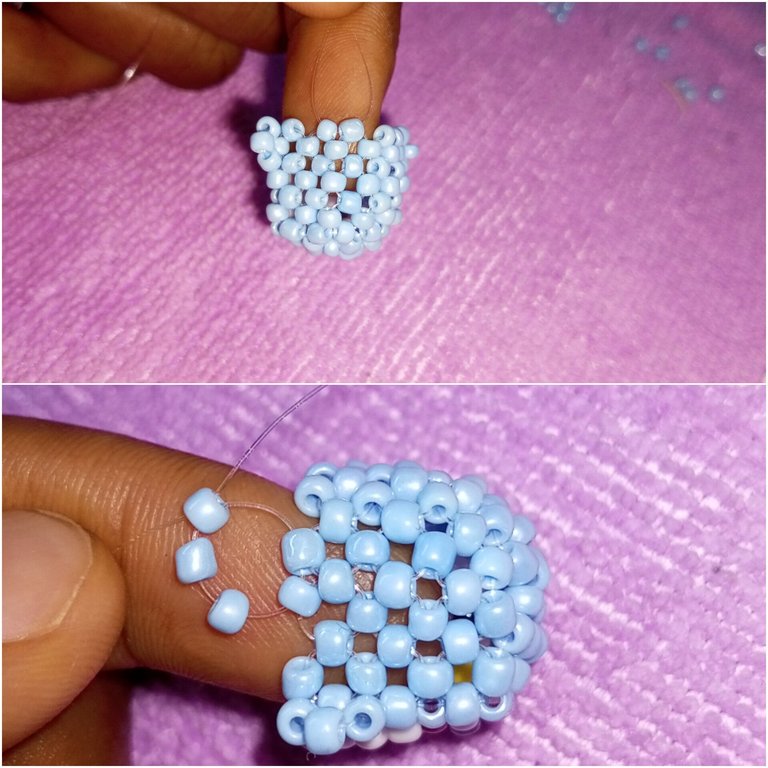
Step 42:
I passed my right fishing line through the next two beads, put two blue beads on the left fishing line, and crossed both fishing lines with the second bead. 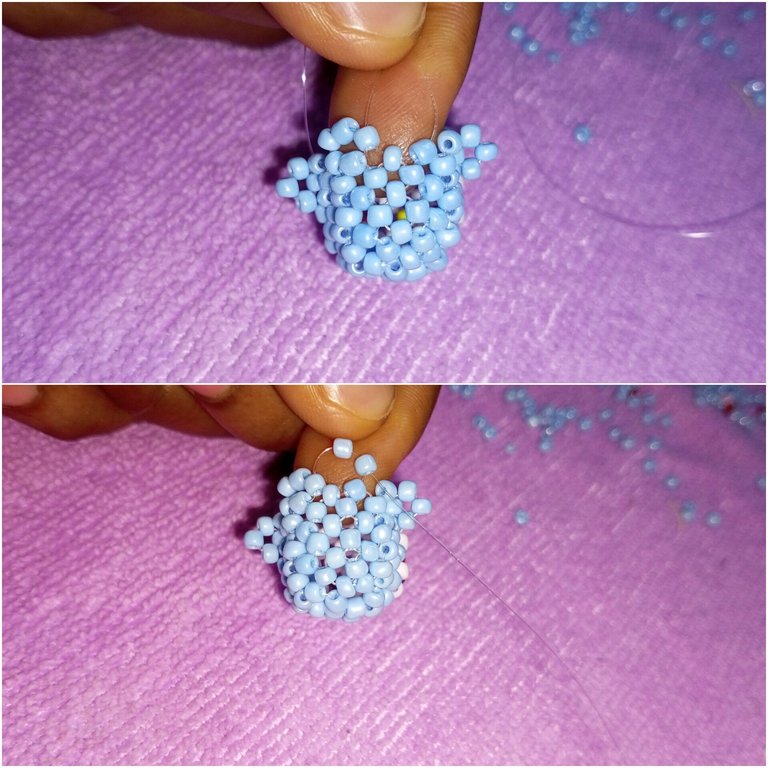
Step 43:
I passed my right fishing line through the next two beads, put two blue beads on the left fishing line, and crossed both fishing lines with the second bead.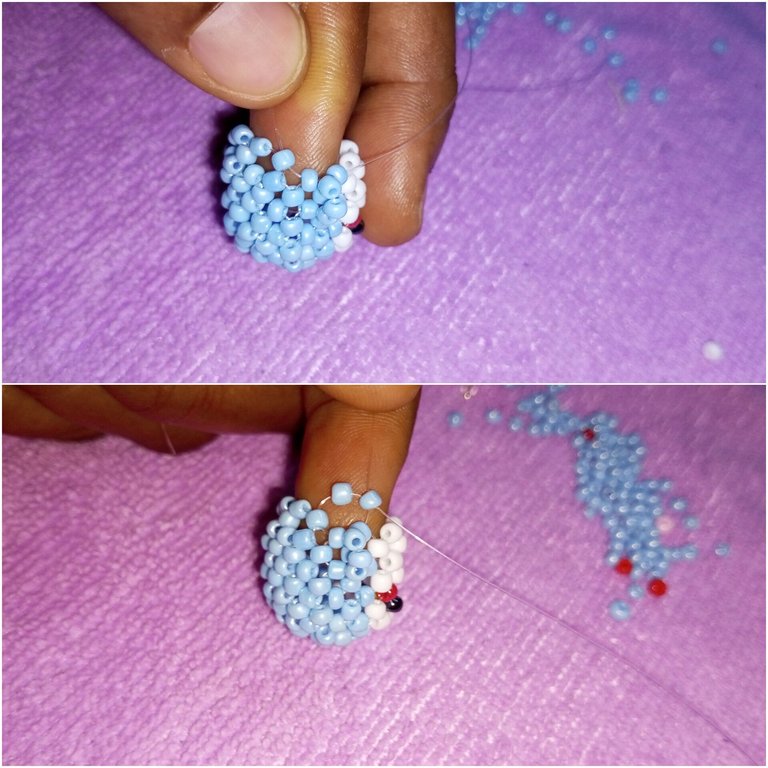
Step 44:
Here I added the first leg by putting two yellow beads on the left fishing line and then passing the same fishing line through the bead at the base. 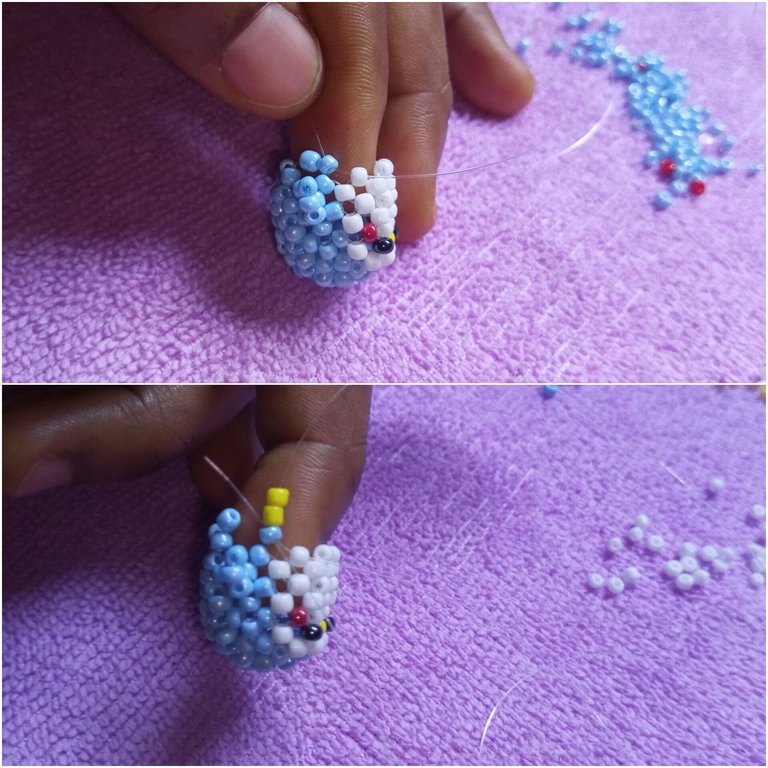
Step 45:
Here, I simply stuffed in some nylon to make the work secure.
Step 46:
I passed my right fishing line through the next two beads, put two white beads on the left fishing line, and crossed both fishing lines with the second bead.
Step 47:
I passed my right fishing line through the next two beads, put two white beads on the left fishing line, and crossed both fishing lines with the second bead.
Step 48:
Here I added the second leg by putting two yellow beads on the left fishing line and then passing the same fishing line through the bead at the base.
Step 49:
Here is the final part: I passed my right fishing line through the next three beads, crossed both fishing lines with one blue bead, tied the knots, passed around left fishing lines, and trimmed off the excess fishing lines.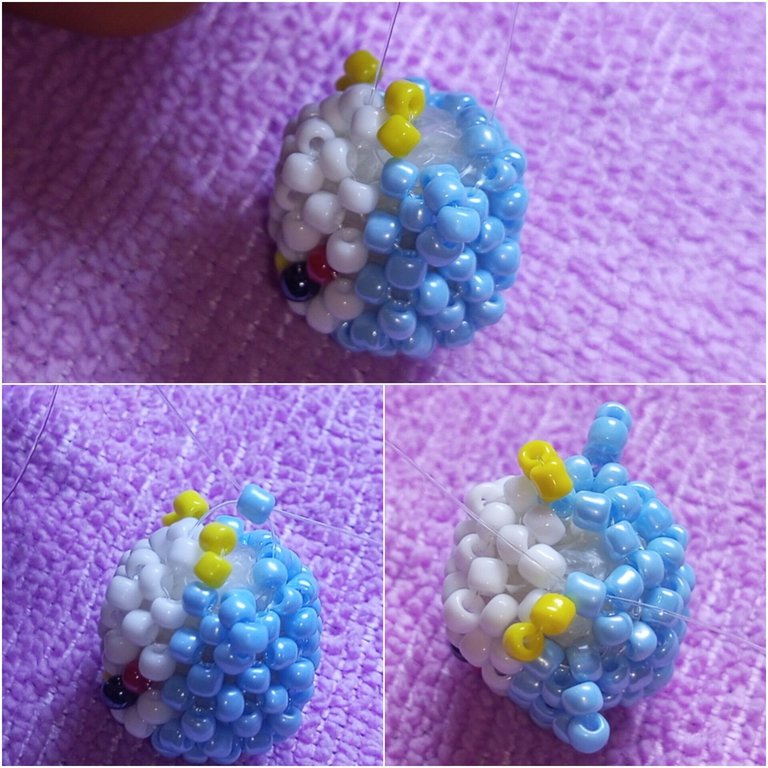 Here is the final look. I guess when you can't catch a live bird, a beaded bird might do.
 What do you think, guys? I hope that you love it.
The End
Thank you very much 🥰🙏 for your attention and support.
All images are mine @funshee❣️
!LOLZ
!PIZZA
!BEER
@apoloo1, sorry! You need more to stake more $PIZZA to use this command.
The minimum requirement is 20.0 PIZZA staked.
More $PIZZA is available from Hive-Engine or Tribaldex
🙏🥰 !LUV
@apoloo1, @funshee(4/5) sent you LUV. | tools | discord | community | HiveWiki | <>< daily
That's so thoughtful of you, I am sure he loved his present. Happy children's day to him and God bless you mummy ❤️
Thank you very much 🙏🥰 and amen to your prayers.
He loved it very much as well. !LUV
@ozd, @funshee(5/5) sent you LUV. | tools | discord | community | HiveWiki | <>< daily
Very thoughtful and cute. The things we do for people we love. Great job lady and keep up the good work.
selected by @ibbtammy
Thank you very much 🥰🙏 for your encouraging words always.
quedo genial, buen trabajo!
Great job, nice work!
Gracias mi Amiga🙏🥰
Delegate to Ecency and earn 100% daily curation rewards in $Hive!
Thank you very much for your support 🙏😊 !LUV
@seckorama, @funshee(1/5) sent you LUV. | tools | discord | community | HiveWiki | <>< daily
Greetings @funshee!
This is a great resource for anyone looking to learn beading or even make it a hobby. Upvoted this!
We appreciate the effort and time you put into this and want you to keep up the DIY spirit! Maybe on your next craft, try using #build-it or #buidl tag so we can spot you and reward your valued #DIY craft.
Thank you so much, I really appreciate your support and I will remember to use the tag. !LUV
@build-it, @funshee(2/5) sent you LUV. | tools | discord | community | HiveWiki | <>< daily
A very beautiful gift, your design is incredible, I like how you have detailed all the steps to follow.
Thank you always, I appreciate your support 😊🙏
A beautiful and very touching story about your love and care for your son, and turning that love into a special handmade gift like the beaded parrot adds a very special value.
Thank you very much, my son's curious mind inspired me a lot.
You are welcome
What an extraordinary gift, I'm sure the child who receives it will be very happy to get the bird he dreamed of.
He is thrilled to receive this; thank you very much 🥰🙏 for your words.
Yes, you're welcome dear♥️
@funshee, I paid out 0.259 HIVE and 0.056 HBD to reward 7 comments in this discussion thread.
Congratulations @funshee! You received a personal badge!
Wait until the end of Power Up Day to find out the size of your Power-Bee.
May the Hive Power be with you!
You can view your badges on your board and compare yourself to others in the Ranking
Check out our last posts:
Congratulations @funshee! You received a personal badge!
Participate in the next Power Up Day and try to power-up more HIVE to get a bigger Power-Bee.
May the Hive Power be with you!
You can view your badges on your board and compare yourself to others in the Ranking
Check out our last posts: